
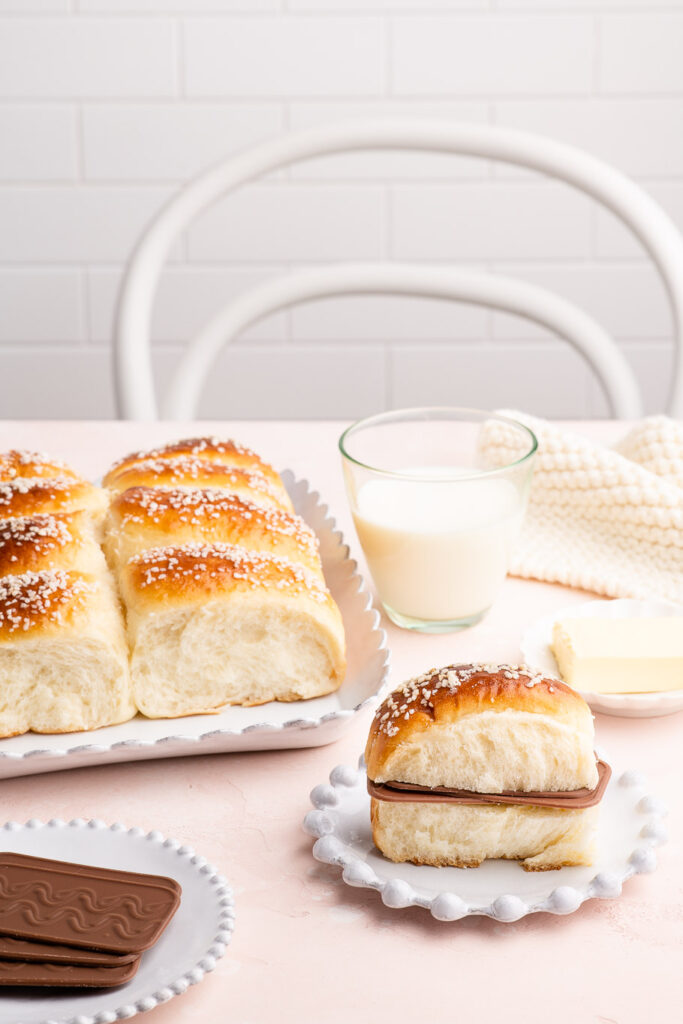
French Milk Bread
We all know about Japanese Milk Bread, and we know about French Brioche. But something which is perhaps a little less known outside of France is French Milk Bread, or Pains au Lait. French Milk Bread is hugely popular within France, but it is primarily marketed for children, especially for snacks and afternoon tea. But we big kids love them too!
What are Pains au Lait?
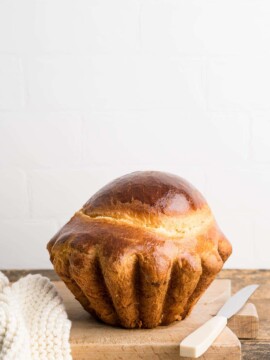
Pains au Lait, or Petit Pains au Lait, translates as milk bread in French. They are a sweet bun made from an enriched dough, and taste very similar to a French brioche bun, but they are made with less butter. This is quite obvious when you look at the colour of the dough; the dough of a Pain au Lait bun will be much whiter in colour than a brioche bun, which are always yellow in colour.
Pains au Lait
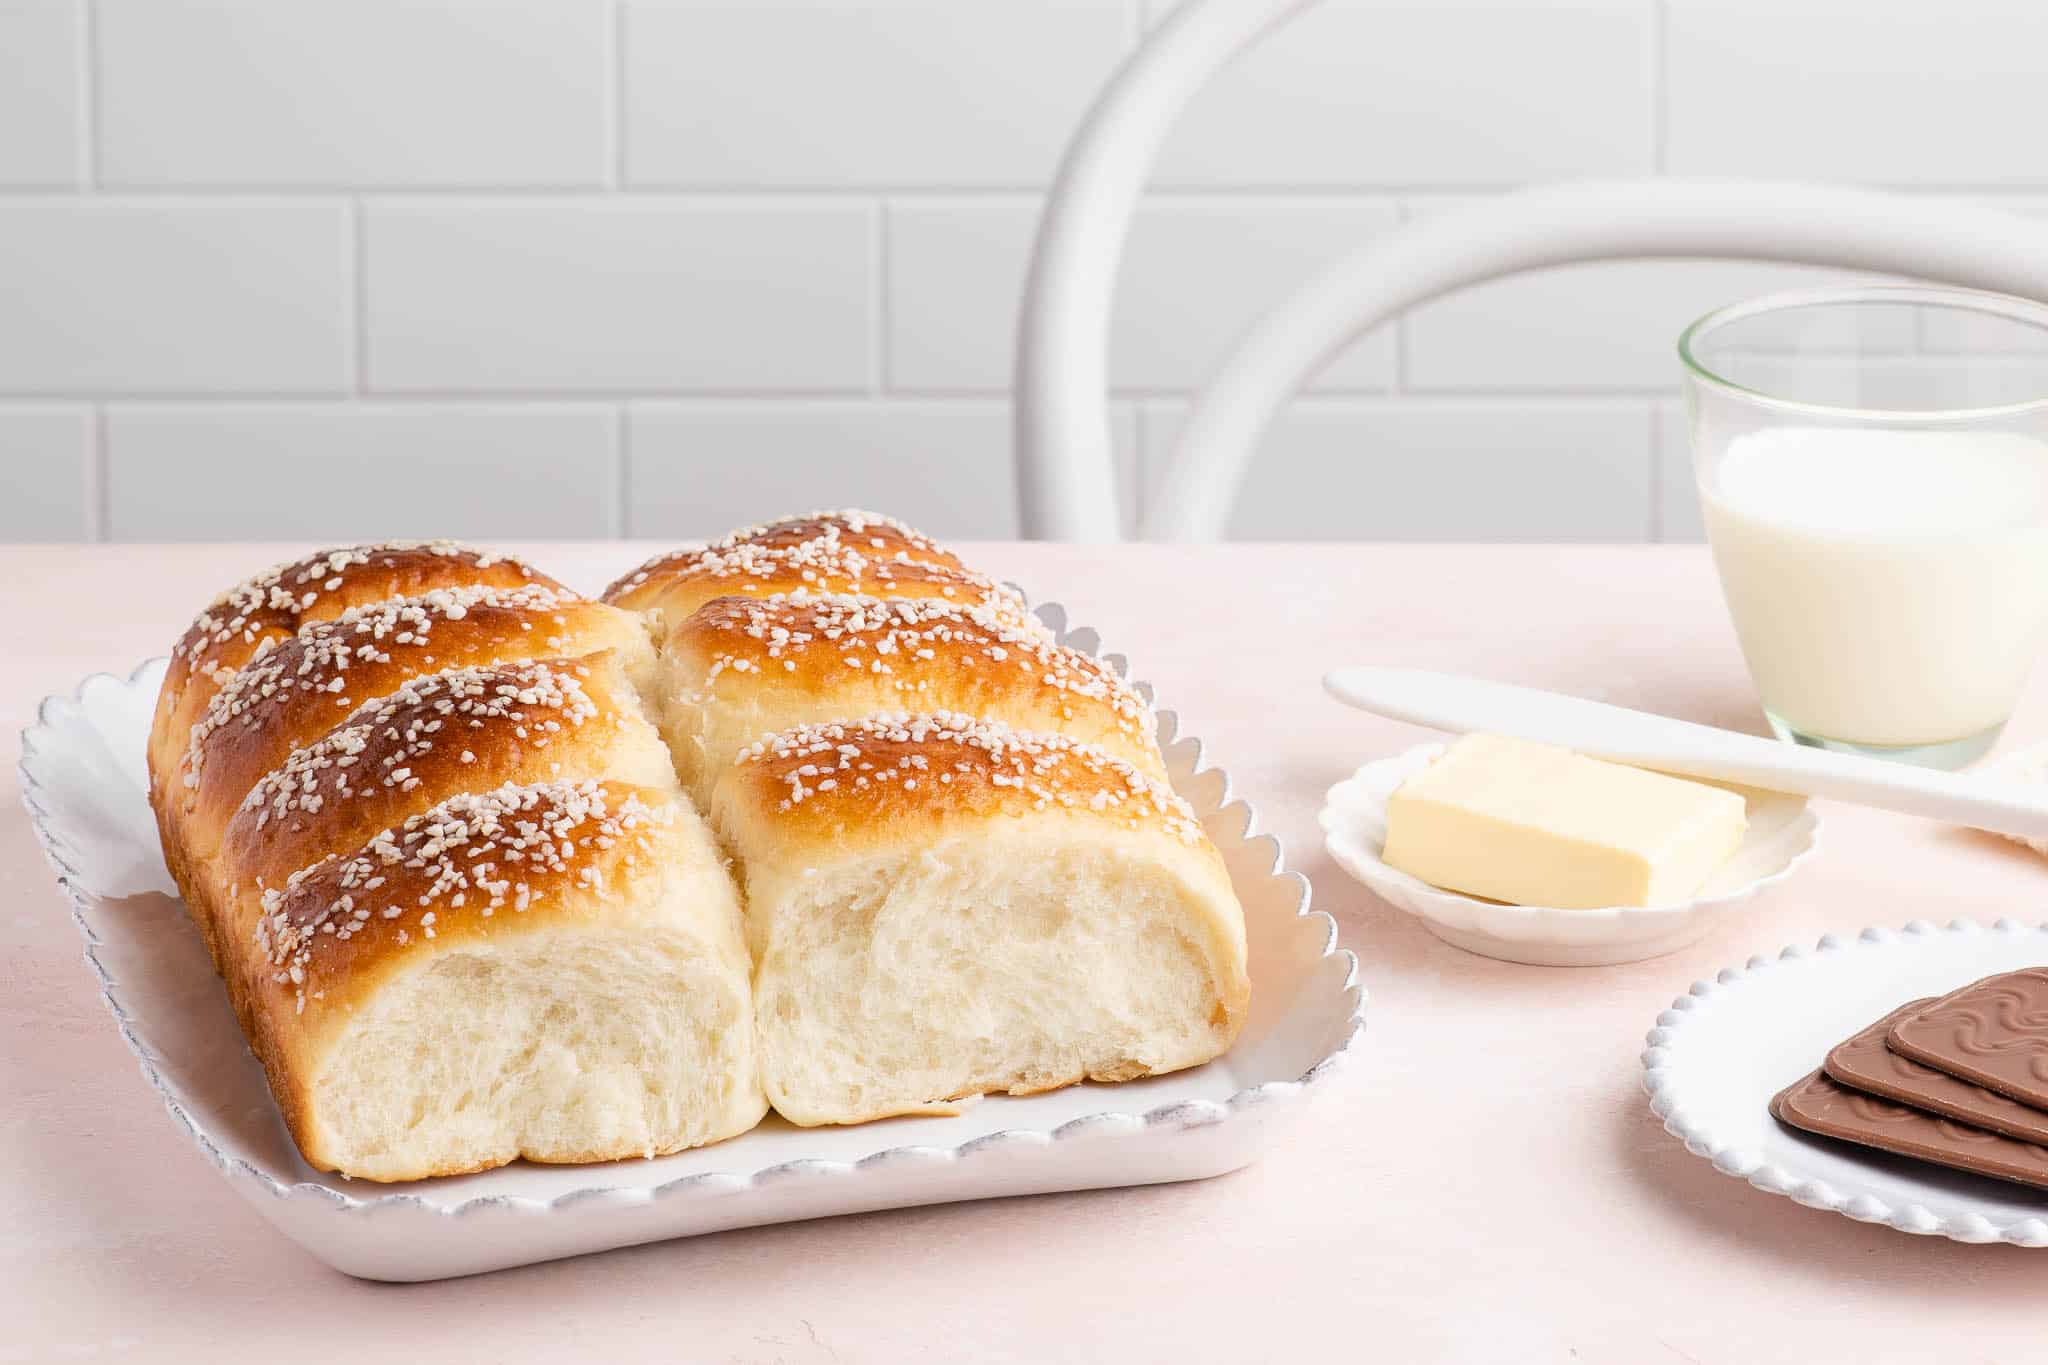
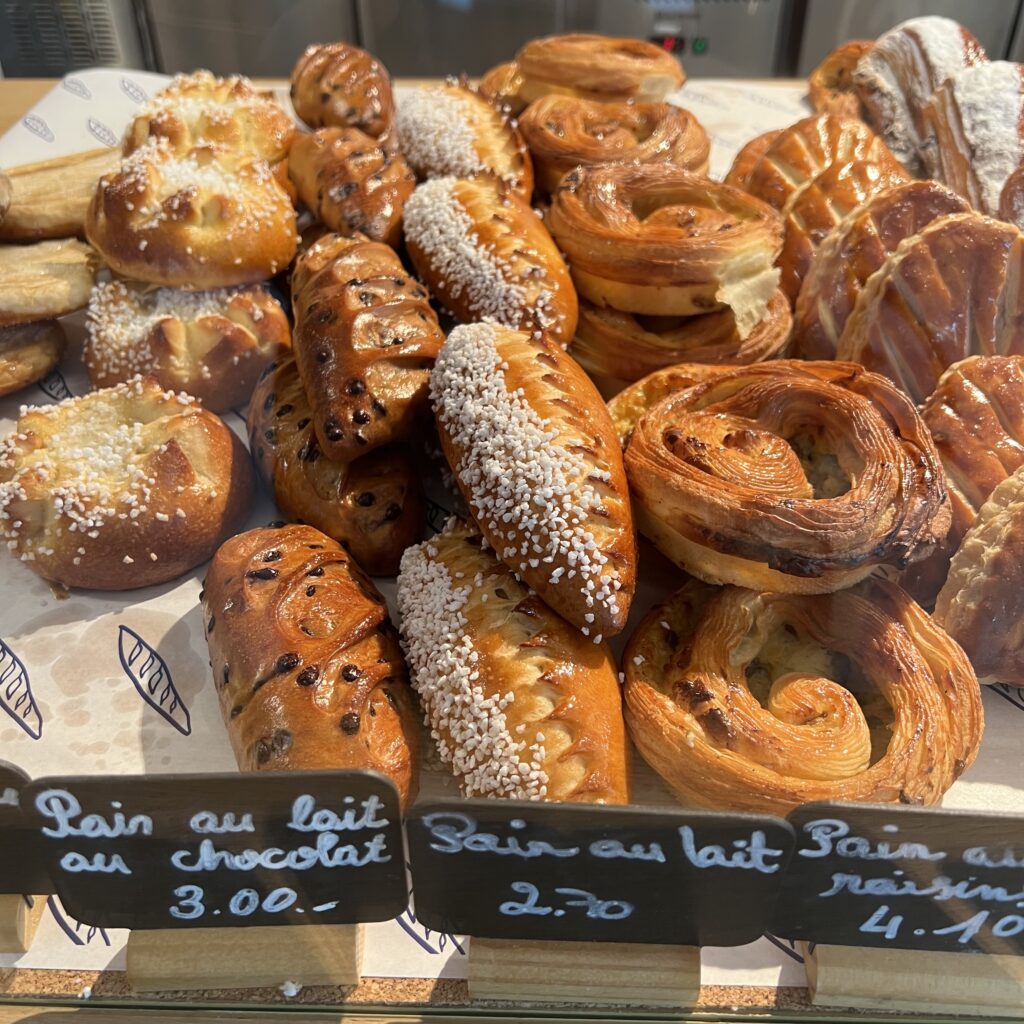
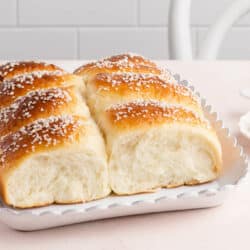
You can find Pains au Lait at many French bakeries, and they are often shaped in a long oval bun with an exposed seam down the middle.
They are sometimes sold plain, or sprinkled with pearl sugar, or even contain chocolate chips throughout.
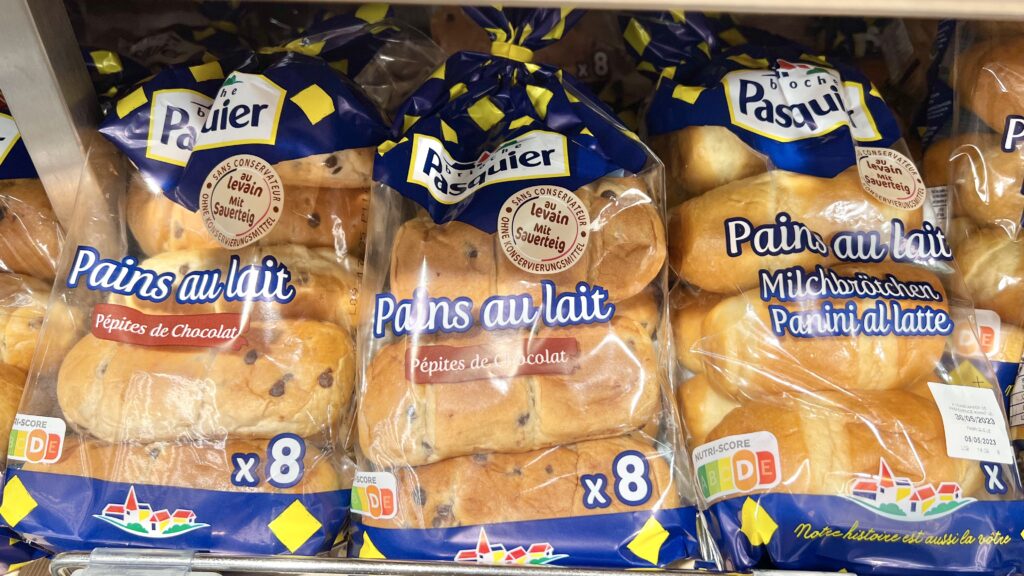
Pains au Lait are so popular in France, especially as a goûter or afternoon tea snack for children, that you can find an entire supermarket aisle filled with different varieties of these buns. The industrially produced buns are very soft and squishy, and they therefore appeal more to children than most homemade or bakery versions.
These buns are also quite popular in Switzerland, where they are called Milchbrötchen in the German-speaking parts. My kids love it when they are served these buns at Hort (after-school care) in the afternoons.
Pains au Lait Recipe
I happen to love the mass-produced Pains au Lait 🙂 In the same way that I love plastic white bread for making toast, there is something about the unnaturally soft and bouncy supermarket versions of Pains au Lait that is very comforting and satisfying to eat.
So my recipe for Pains au Lait attempts to replicate the mass-produced version in shape and texture, rather than the shape you will more commonly find in French bakeries. This means that the buns are shaped in small logs and baked close together, so that they rise more, which will give them a softer and fluffier texture.
I use my recipe for Finger Buns to make Pains au Lait, which is my go-to enriched dough recipe that I use for many different types of buns, such as Cream Buns, Cinnamon Rolls, Cardamom Buns, Chinese Coconut Buns … the list is endless!
You can make the buns as big or as small as you like. I make them on the small side so that my kids can pack them in their lunch box for morning tea at school.
How to Make Pains au Lait
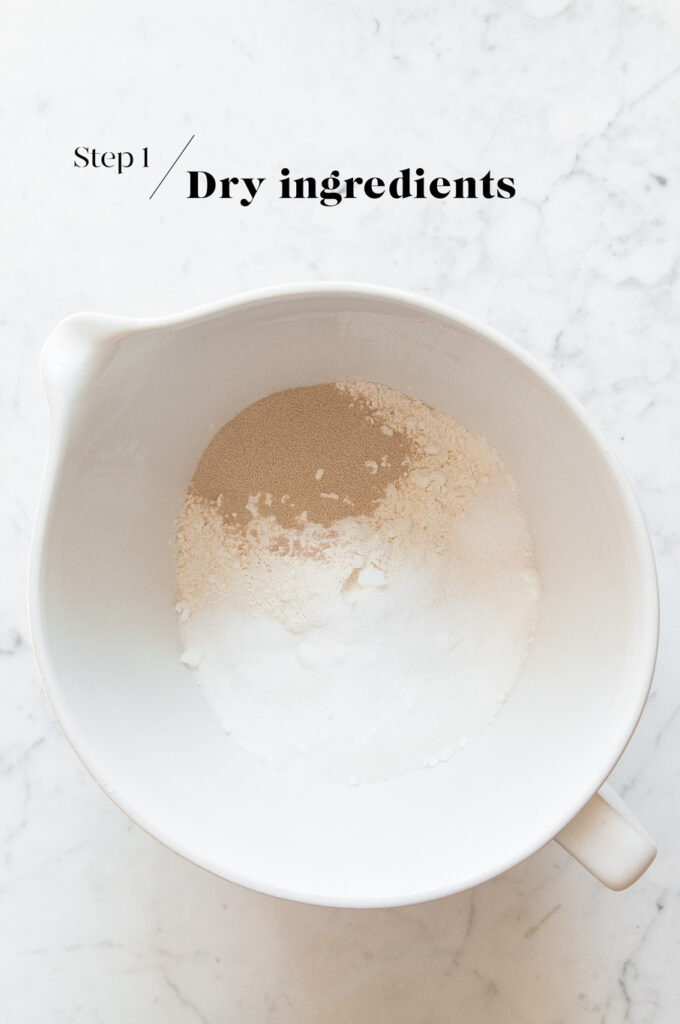
Step 1
Measure the flour, sugar, yeast and salt into the bowl of an electric stand mixer. Lightly mix the ingredients together.
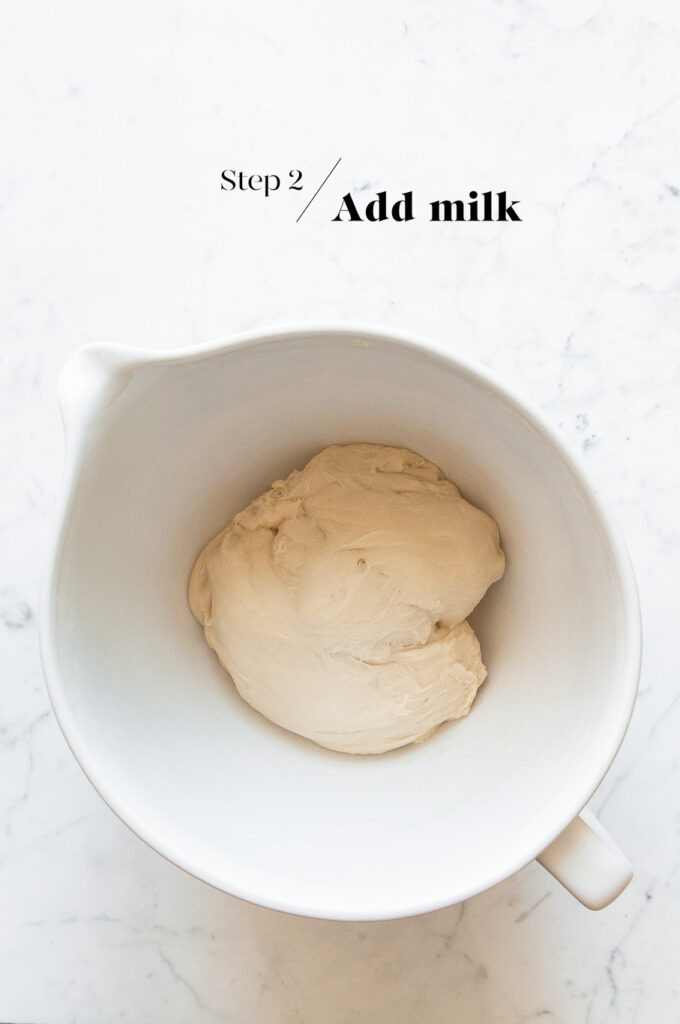
Step 2
Slowly add the warm milk (you may not need all of it), and lightly beat everything with the dough hook until it comes together into a large ball of dough. Only add as much milk as you need to bring the ingredients together into a dough.
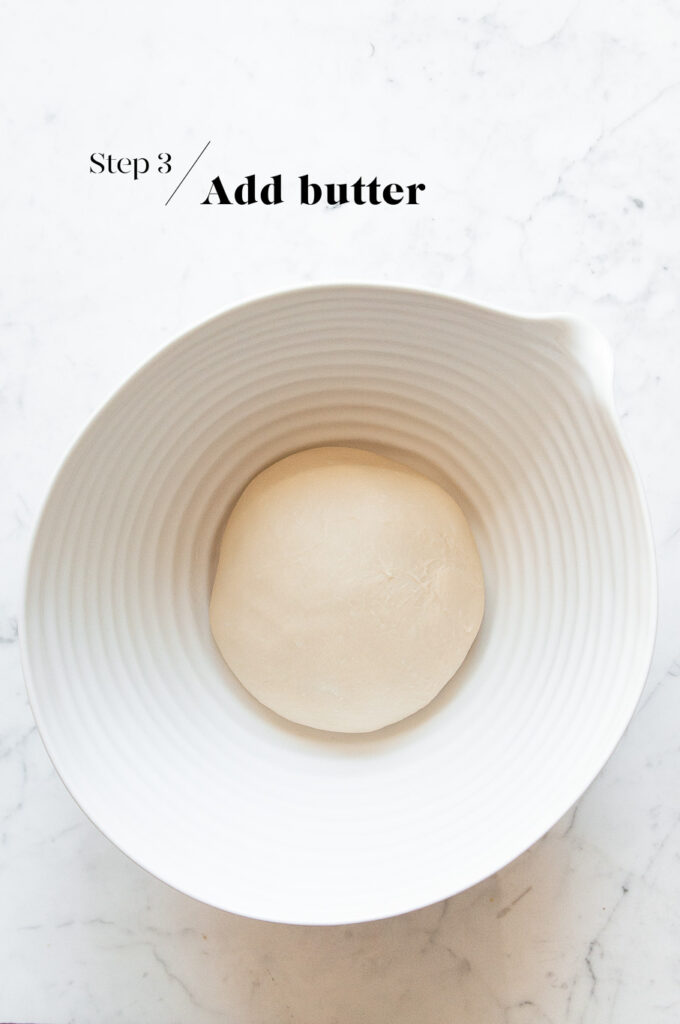
Step 3
Slowly incorporate the butter, one tablespoon at a time, until all of the butter has been used.
Then increase the speed to medium and continue kneading with the dough hook for 15 to 20 minutes, or until the dough is smooth and elastic.
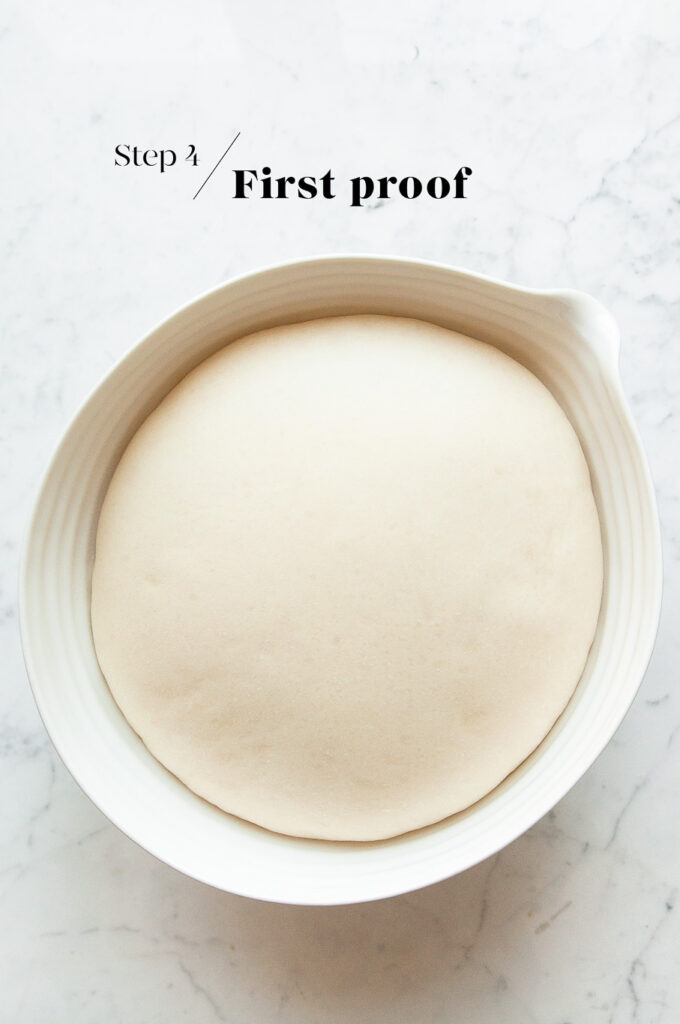
Step 4
Lightly oil a large mixing bowl, and place the dough into the bowl. Cover the bowl with a clean tea towel and leave it somewhere warm for 1 to 1.5 hours, or until the dough has doubled in size.
Step 5
Once the dough has doubled in size, gently remove the dough from the bowl. The dough will deflate as you handle it.
Divide the dough into 16 equal portions. If you have time, use a digital scale so that each bun is the same size. On this occasion, I didn’t use a scale, so you can see below that my buns vary in size slightly, but that’s not a bad thing 😉
Roll each piece of dough into a ball by pulling the edges towards the centre, and then rolling into a smooth ball.
Then flatten each ball of dough into a small log. The log should be roughly half the width of your baking pan. What you are aiming to do is fill up your baking pan with two rows of logs.
Repeat until you have 16 logs of dough.
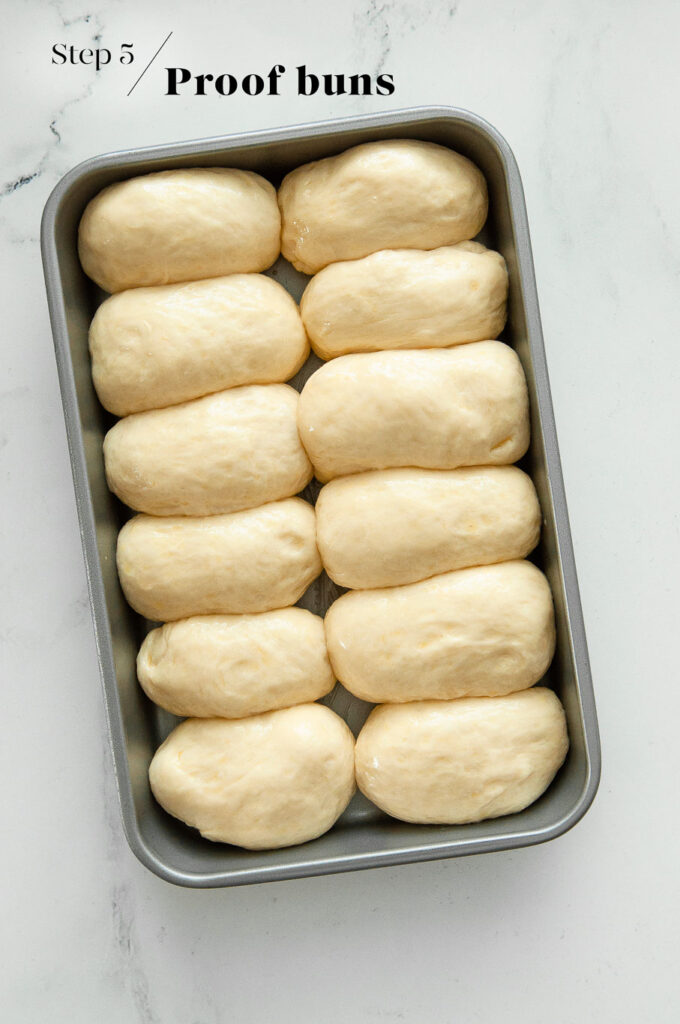
Butter a baking pan and place the logs of dough side-by-side, leaving a bit of room for them to prove and puff up.
I use two baking pans which measure 17 x 27 x 4 cm (7 x 11 x 1.5 inch), with a cake pan divider for the second pan. Ideally, you want a high-sided baking pan so that the buns can rise; it is the height which makes the buns soft and fluffy.
Once you have filled the baking pans with the logs of dough, leave them somewhere warm for about 30 minutes, or until they have puffed up slightly and are touching one another.
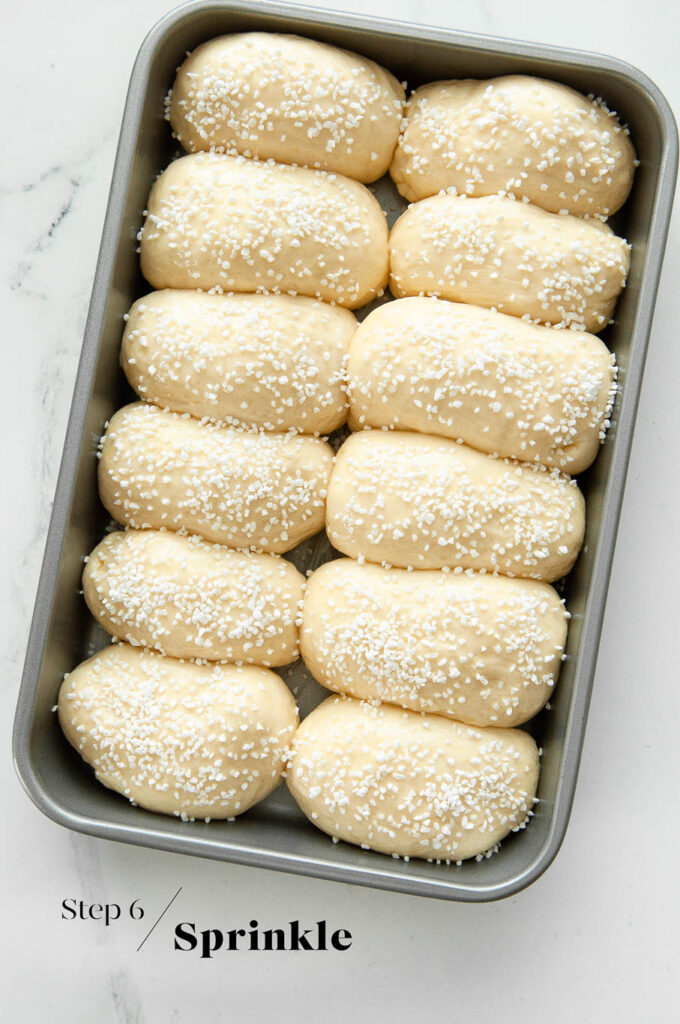
Step 6
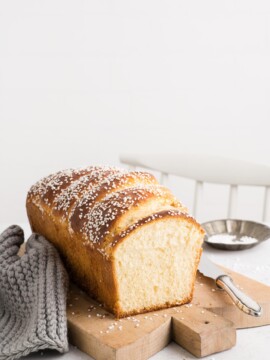
Once the dough has puffed up nicely, lightly brush with egg wash, and generously sprinkle with pearl sugar.
Bake in a preheated oven at 220°C/428°F for about 25 minutes.
Check the buns at about 10 minutes, and if they are browning too quickly, cover them with a loose sheet of foil for the rest of the baking time. The buns are cooked if an internal thermometer reads 85°C/185°F.
How to Serve Pains au Lait
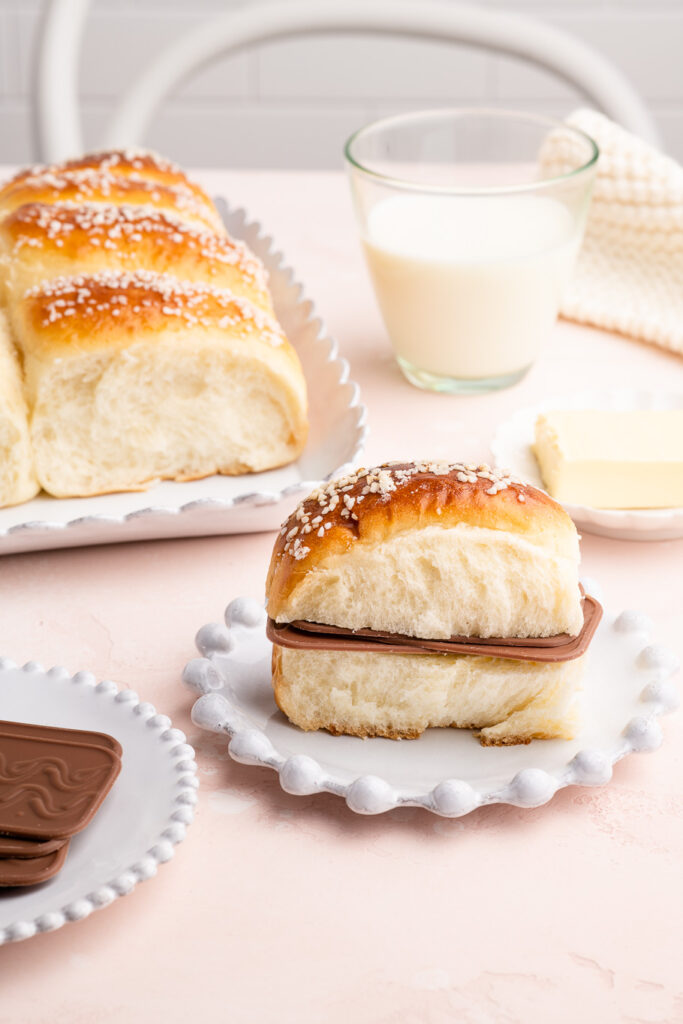
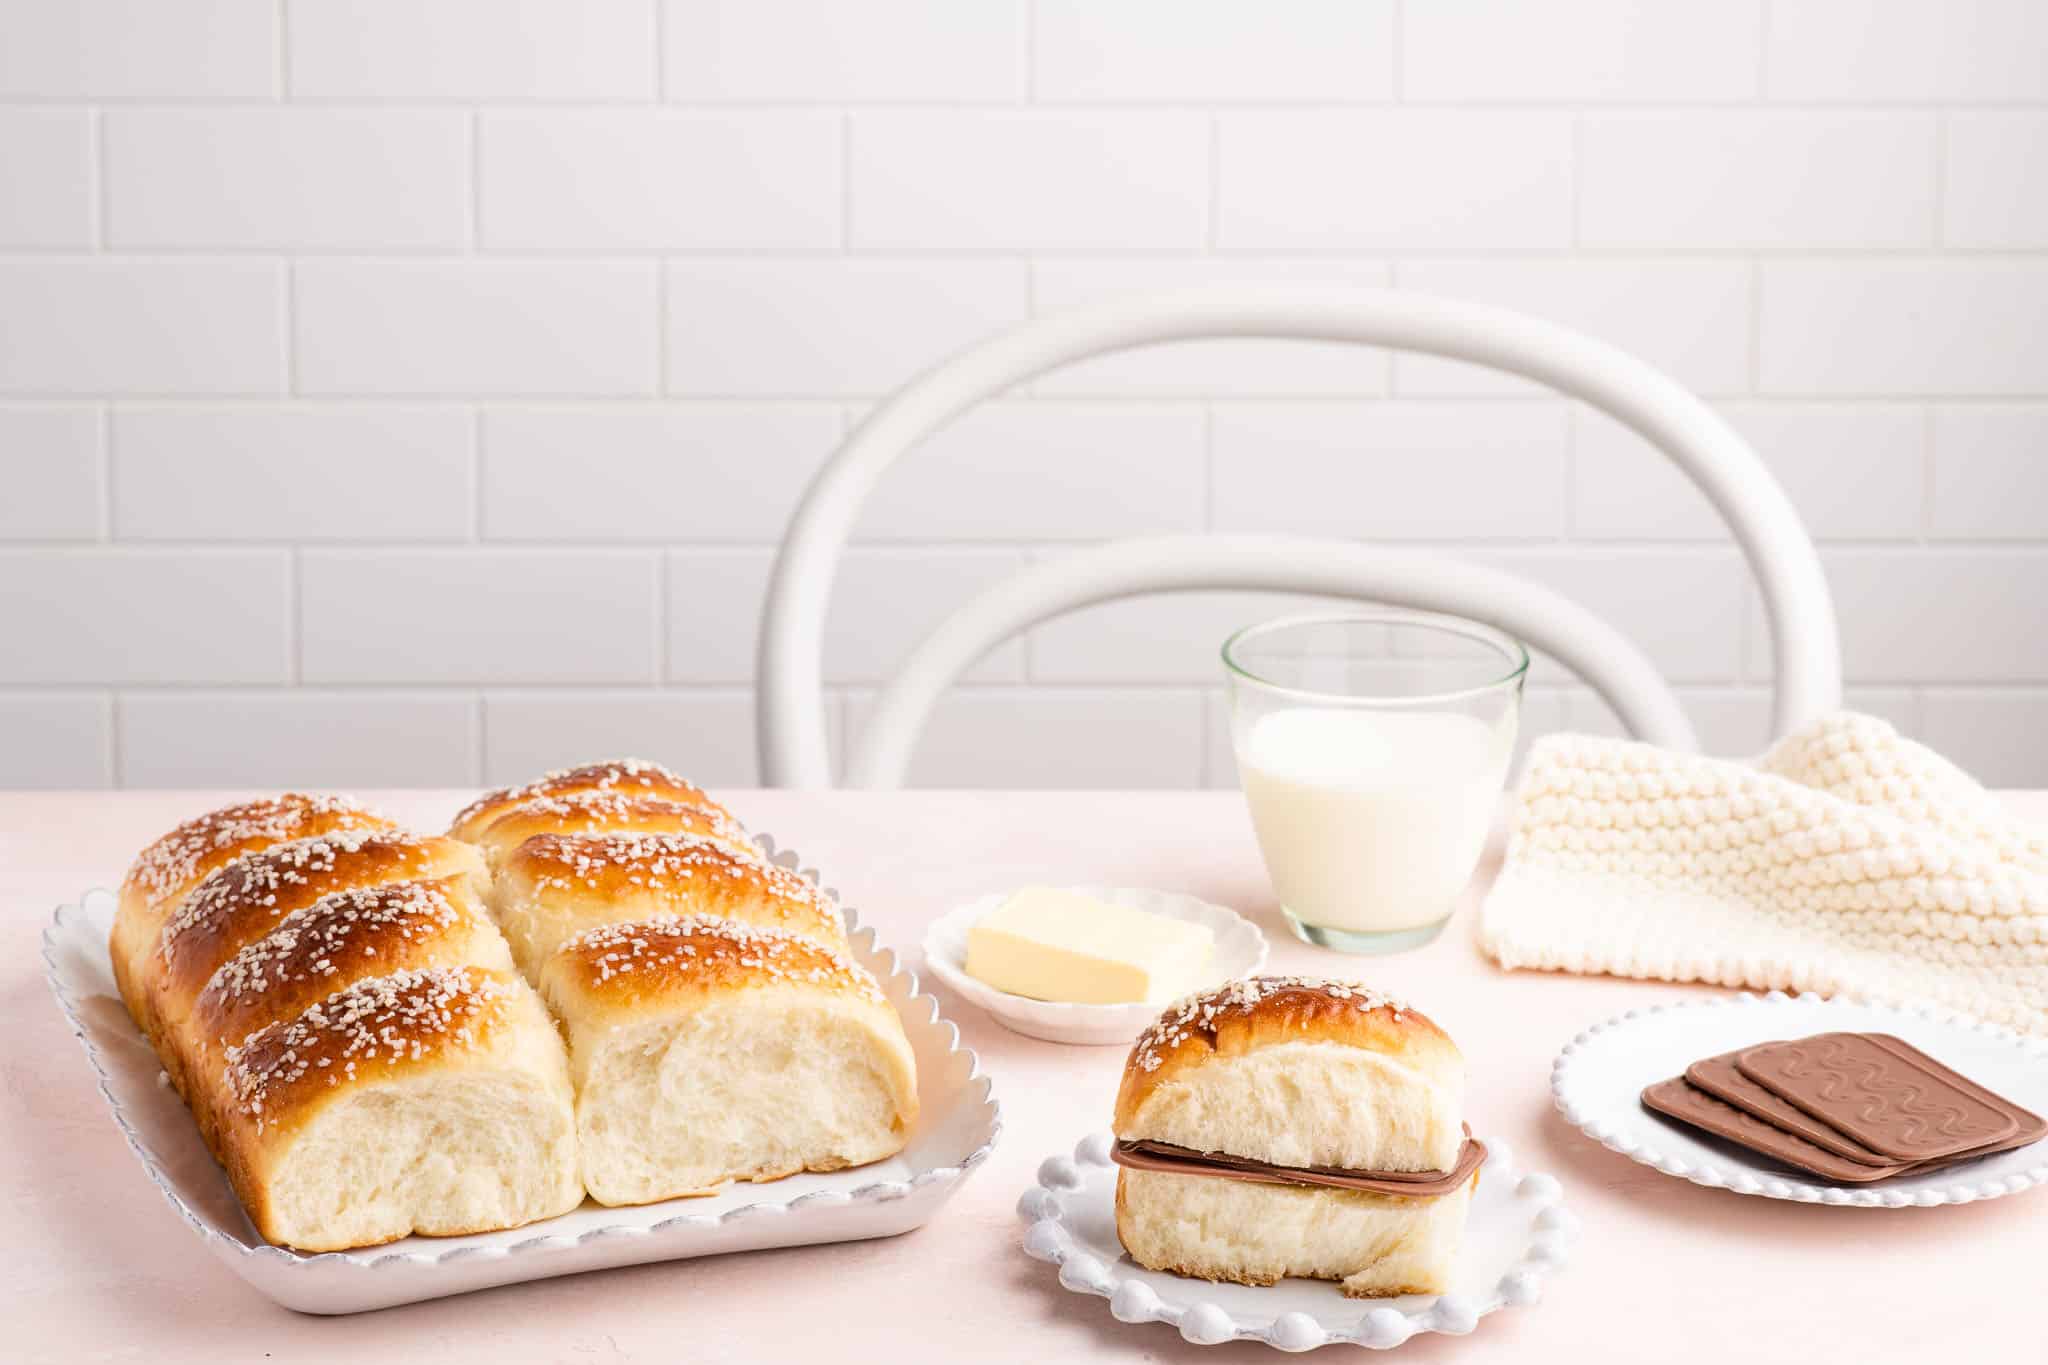
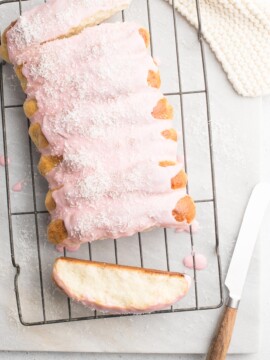
Pains au Lait can be eaten just as they are. They are typically sprinkled with pearl sugar for a bit of sweetness, or you can also find varieties filled with chocolate chips.
But my favourite way of serving and eating Pains au Lait is a French/Danish hybrid: you split the bun in half, slather generously with salted butter, and then place a piece of chocolate in the middle of the bun to create – in effect – a chocolate sandwich.
In France, a large piece broken from a tablet of chocolate is often used as a sandwich filling, whether wedged in a Pain au Lait or piece of baguette.
But in Denmark, they use chocolate sheets (or Pålægschokolade) which are made specifically for sandwiches. The chocolate is wafer-thin, so it is much easier to bite into in a sandwich, even if you add several layers of them. These chocolate thins come in milk and dark chocolate, and they also come in a few shapes and sizes. I love to stock up on them whenever we are in Denmark.
Obviously, if you can’t find Danish sandwich chocolate, you can use any good-quality chocolate that you like. My tip is to choose a thin, wafer-like chocolate which will be easy to bite into.
Tips for Making Bread Dough Ahead of Time
I love baking bread, but I don’t love getting up extra early to get started on the dough. So I typically make the dough the night before and allow it to rise slowly in the fridge overnight. The longer proofing time has the added benefit of allowing the dough to develop more flavour and a better texture. Come the morning, the dough will have at least doubled in size, and it will be ready for shaping as per the recipe.
To make the dough the night before:
- Make the dough as per the recipe.
- Place the dough into a large oiled bowl.
- Cover the bowl with plastic wrap or a reusable bowl cover.
- Place the bowl into the fridge.
- Let the dough rise overnight, or for at least 8-10 hours.
- The next morning, the dough should have at least doubled in size.
- Gently remove the dough from the bowl.
- The dough is ready for shaping and the second proof as per the recipe.
- As the dough will be cold from the fridge, the second proof may take slightly longer.
Pains au Lait (French Milk Bread)
Ingredients
For the Pains au Lait
- 600 g (4 cups) white bread flour
- 110 g (½ cup) caster sugar, (superfine sugar)
- 6 g (1 teaspoon) fine salt
- 14 g (4 teaspoons) instant dried yeast, see Kitchen Notes
- 375 ml (1 ½ cups) milk, warmed to 37°C/98°F
- 60 g (4 tablespoons) unsalted butter, softened
For the Egg Wash
- 1 egg, lightly beaten
- 15 ml (1 tablespoon) milk
To Decorate
Instructions
- To Make the Dough
- Measure the flour, sugar, salt and yeast into the bowl of an electric stand mixer.
- Lightly mix the ingredients together using the dough hook.
- Slowly pour in the warm milk, and continue mixing until everything comes together into a rough dough.
- Add the butter, one tablespoon at a time. Once the butter has been fully incorporated into the dough, add the next tablespoon of butter.
- Once all of the butter has been added, continue kneading the dough on medium speed for about 15 to 20 minutes.
- The dough is ready when it is soft and smooth, and also slightly elastic in texture when you try to stretch it. If you poke the dough softly, it should bounce back right away.
First Proofing Period
- Lightly oil a large mixing bowl.
- Place the dough inside the bowl.
- Cover the dough with a clean tea towel, cling film, or a reusable bowl cover.
- Leave the dough somewhere warm for 1 to 1.5 hours, or until the dough has doubled in size (see Kitchen Notes below).
To Portion the Dough
- Once the dough has doubled in size, gently remove the dough from the bowl. The dough will deflate as you handle it.
- Gently pat the dough into a round shape.
- Portion your dough into 16 equal pieces. If you have some kitchen scales, weigh the dough and then divide this number by 16. This will be the weight of each bun dough.
- Lightly grease two rectangular pans measuring 17 x 27 x 4 cm (7 x 11 x 1.5 inch) or similar.
To Shape the Dough
- Gently roll each piece of dough into a ball by pulling the edges towards the centre.
- Then flatten each ball of dough into a small log. The log should be about half the width of your baking pan.
- Repeat with the remaining pieces of dough.
- Arrange the pieces of dough in the baking pan, allowing for a bit of space between them to rise and puff up. As only half of the second pan will be used, I use a cake pan divider to keep the buns snug.
Second Proofing Period
- Cover the pans with a clean tea towel, and place the pans somewhere warm for about 30 minutes, or until the buns have risen and puffed up slightly.
- During this time, preheat the oven to 200°C/390°F (without fan) with a metal baking tray on the middle shelf.
- Make the egg wash by lightly whisking together the egg and milk.
To Bake the Pains au Lait
- Brush the buns with some egg wash.
- Sprinkle the buns generously with pearl sugar.
- Bake for about 25 minutes, or until the buns are lightly golden. Check the buns at about 10 minutes, and if they are browning too quickly, cover them with a loose sheet of foil for the rest of the baking time. The buns are cooked if an internal thermometer reads 85°C (185°F).
- Gently remove the buns (intact) to a wire rack, and leave them to cool completely.
Kitchen Notes
- MAKE AHEAD TIPS
To start the dough the night before:
* Make the dough as per the recipe.
* Place the bowl of dough (covered) in the fridge to proof overnight, or for at least 8 to 10 hours. During this time, it should have at least doubled in size.
* The next day, proceed with the rest of the recipe. As the dough will be cold, it may require a bit more time for the second proofing period. - DIFFERENT TYPES OF FLOUR
* This recipe works well with plain flour (all-purpose flour) or strong white bread flour.
* For Swiss readers: I use Zopfmehl (or farine pour tresse) when making bread and enriched dough. - DIFFERENT TYPES OF YEAST
Please note that there is a difference between instant yeast (also called instant dried yeast or fast-action dried yeast) and dried yeast (also called active dry yeast). If you are not sure what type of yeast you have, please check the packaging for instructions on how to use the yeast.
* With instant yeast, you can add it directly to the flour mixture without having to activate it first.
* With dried yeast, you will need to activate it first (usually in some warm liquid).
* If you are using fresh yeast, you will need about one block (40 g fresh yeast = 14 g instant dried yeast). Crumble the fresh yeast into the warm milk, and stir to dissolve the yeast. - PROOFING THE DOUGH
Dough needs a warm environment for the yeast to activate and cause the dough to rise. If you don’t have a warm place in your home, try one of the following ideas:
* In the oven with the oven light switched on (works only for some ovens).
* In the oven with a tray of boiling water on the bottom shelf.
* In the oven or a steamer oven at a low temperature of about 25-40°C (77-104°F). - OVEN & STOVE TEMPERATURES
All recipes on this website have been tested on an induction stove and/or with a conventional oven (i.e. an oven without fan). All recipes on this website use temperatures for a conventional oven, unless otherwise mentioned. Convection ovens (i.e. fan-forced ovens) are typically 20°C/70°F hotter than conventional ovens, but please check your manufacturer’s handbook. - CONVERSIONS
To convert from cups to grams, and vice-versa, please see this handy Conversion Chart for Basic Ingredients.

These buns were absolutely delicious, way better than the supermarket pains au lait 🙂 Love your website!
I love this recipe so much! The buns were so soft and fluffy, absolutely delicious. Merci!
Made these today for my kids as an after school snack and they adored them. Very simple to make and an easy dough to work with. I also folded in some mini chocolate chips and they were a huge hit. Thank you!
Hi Jocelyn,
I’m happy to hear that the kids loved these buns! The choc chip version is guaranteed to be a hit 🙂
I made this for a second time and oh boy the first time was an absolute fail! I didn’t check it at 10 minute mark and waited until oven beeped at 25 minutes and they burnt! Second time perfect! I added chocolate chips for the Trader Joe’s version of French milk rolls that my son loves. Question.. I’m not sure if I’m storing it right so what is the best way to store these to keep them fresh?
Hi Stephanie,
I’m so glad you enjoyed this recipe 🙂 Definitely keep a check after 10-15 minutes in case the bread is browning too quickly 😉 I keep these buns in a ziplock freezer bag and they keep nice and soft for several days. Hope this works for you too!
Hiya id like to know if I can freeze these and pull out when needed?
Hi Lia,
You can freeze these buns in ziplock freezer bags, and defrost them overnight in the fridge. However, I don’t think the pearl sugar will freeze very well, so just keep that in mind 😉 Hope you will enjoy this recipe!
This is a weekly bake staple in our house! My kids love to tweak the base recipe- one adds tiny choc chips to it and another adds little apricot bits.
This week I rolled them into little crescent rolls for their lunchboxes 🙂
Hi Kim,
That’s so wonderful to hear! I love how creative you are with this recipe 🙂 The dough is indeed a great base recipe which I also use in many different ways. I love the sound of the crescent rolls!
The instructions above the recipe mention adding an egg to the dough before the milk. The instructions under the recipie do not and there is no egg in the ingredients in the dough section of the recipe only the egg wash.
With the egg in the dough the recipe is great but that might need to be fixed to avoid confusion.
Thank you for pointing out this error! I have amended the instructions.
The recipe works with or without an egg added to the dough. I tend to add an egg when I want the dough to be richer in flavour and have more colour. But for these Pains au Lait, I prefer them without the egg. Hence, this is why the dough recipe can vary a bit. Hope you enjoyed this recipe 😊