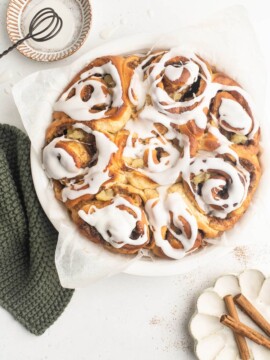
Cinnamon Rolls
As a child, I loved anything which was slathered in icing. And it was a good thing that my parents ran a bakery because there was no shortage of cakes and buns generously decorated with a frosting of some sort. Iced Finger Buns remain a firm favourite from my childhood, but something I was only introduced to as an adult are Cinnamon Rolls.
Living and working in the US was one of the most enjoyable periods in my former life as a lawyer. And I’m still so thankful to my American colleagues who were always eager to introduce me to their favourite local cafés, restaurants and drive-thru.
I fondly recall a breakfast meeting at a nearby food court over a plate of Cinnamon Rolls at Cinnabon. They were sticky and messy, probably a bit too sweet to classify as breakfast, but they were a great distraction from the actual work we had to discuss!
Homemade Cinnamon Rolls
If you are a seasoned bread baker, Cinnamon Rolls are very easy to make; it’s a bit like making a brioche with a few extra (but easy) steps added to make the scrolls. But even if you are new to bread baking, my Cinnamon Rolls recipe with step-by-step photos will help you to make these delicious treats with easy-to-follow instructions.
What are Cinnamon Rolls?
Cinnamon Rolls are very much an American treat, albeit with a slight nod to Scandinavia.
Sweden is famous (culinarily speaking) for its Cinnamon Buns (or Kanelbullar), which are yeasted buns, heavily spiced with cinnamon.
The American-style Cinnamon Rolls are quite similar, but I find them to be much more lightly spiced, much softer in texture, and much sweeter thanks to the addition of a generous glaze or even a cream cheese frosting.
Having travelled many times to both Sweden and the US, and having sampled many cinnamon rolls in both countries, I find it a tough call to decide which I like more … There is a time and place for both 😉
Why This Recipe Works
- These Cinnamon Rolls are soft and fluffy with the right amount of sweetness from the icing.
- This recipe makes a fairly small batch of Cinnamon Rolls, which is perfect as they are best eaten on the same day they are made.
- You can prepare most of this recipe the night before, if you wish, so you can serve them still warm at brunch or breakfast the next day.
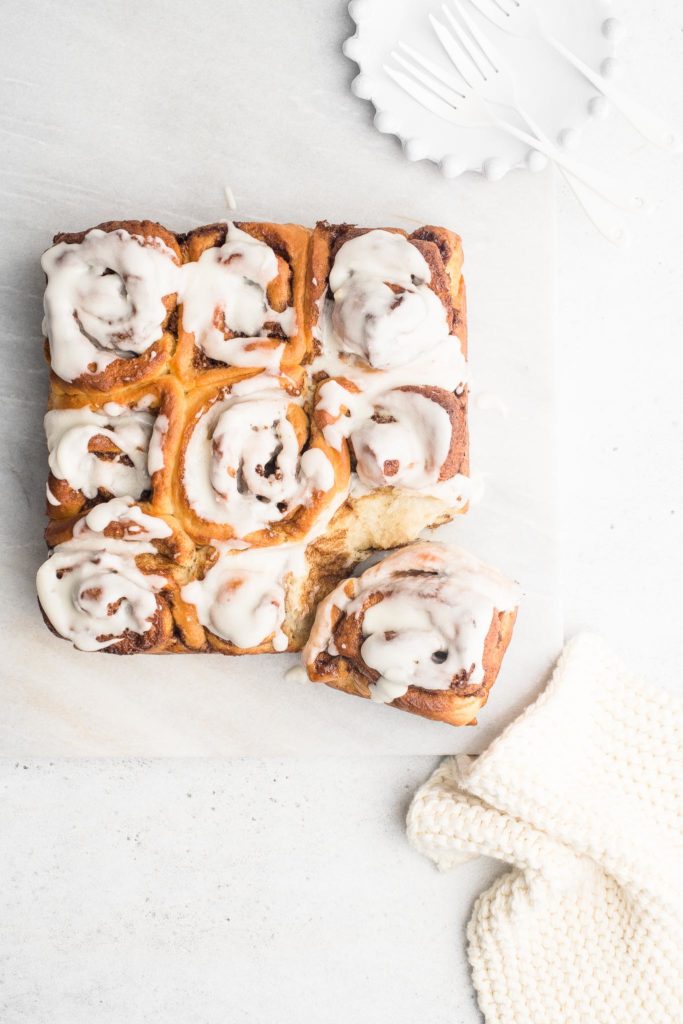
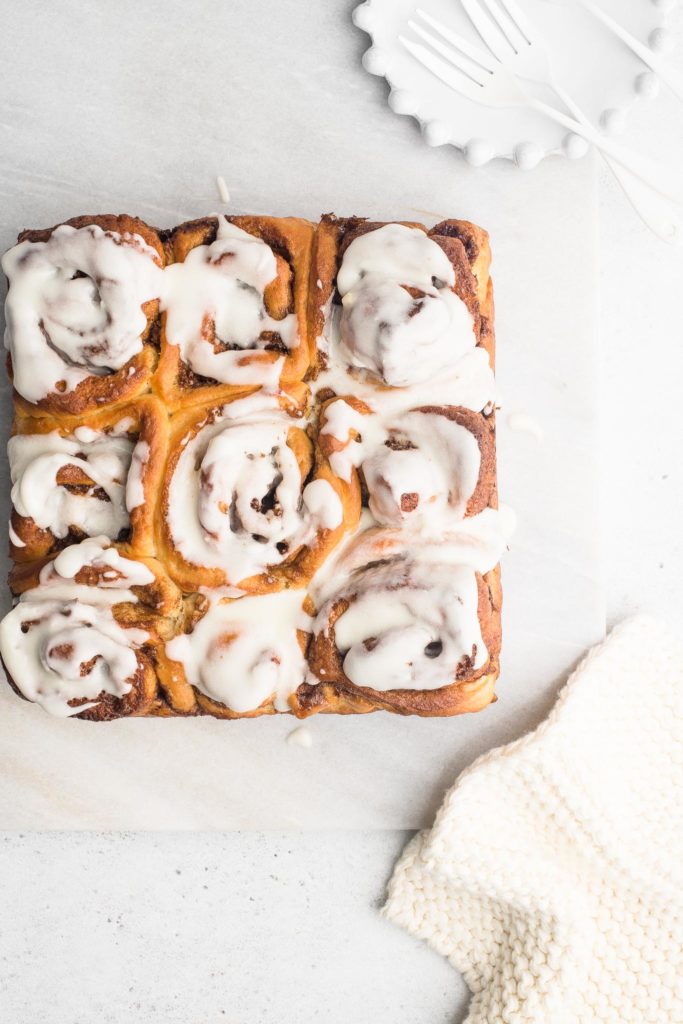
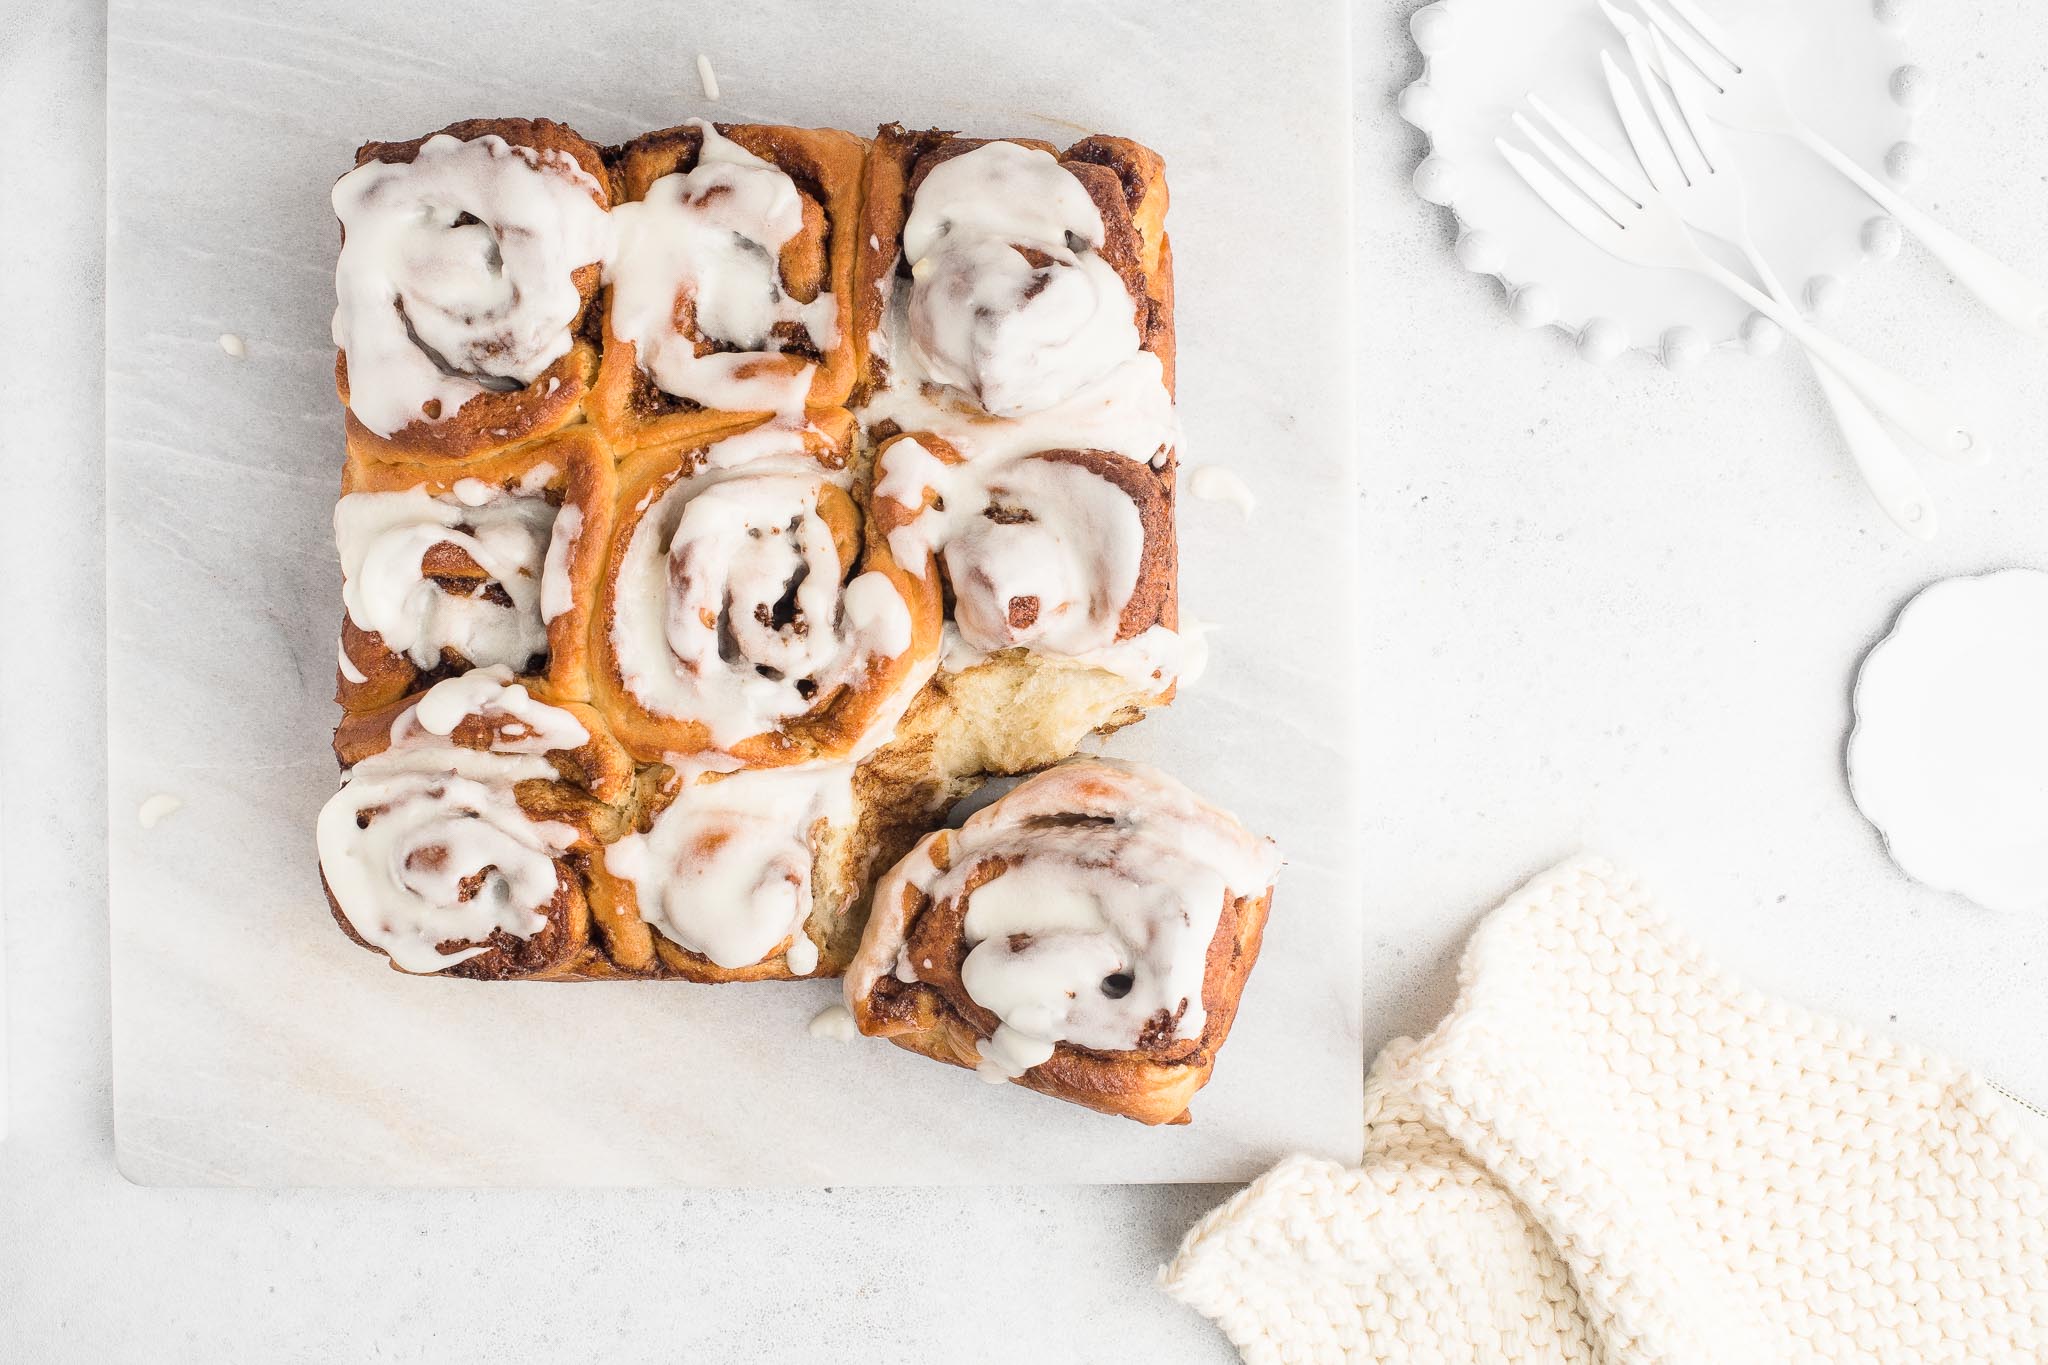
Cinnamon Rolls Recipe
My recipe for Cinnamon Rolls uses my favourite and trusty recipe for enriched dough, i.e. a yeasted dough which has been enriched with eggs, milk and butter. It is almost the same dough which I use for Finger Buns and Cream Buns, but with the addition of an egg for extra richness and colour.
The resulting dough has a very similar taste and texture to a brioche.
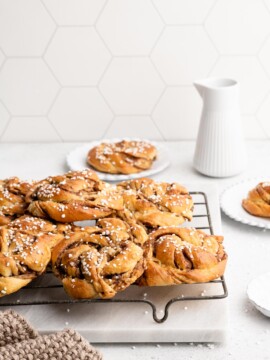
Here, the brioche-like dough is rolled out thinly, spread with a mixture of butter, cinnamon and sugar, and then rolled up to form coils (or snails).
You could stop there if you prefer to keep things minimalist and Swedish. Or you add a simple glaze to turn these Cinnamon Rolls into a scrumptious tea-time treat.
How to Make Cinnamon Rolls
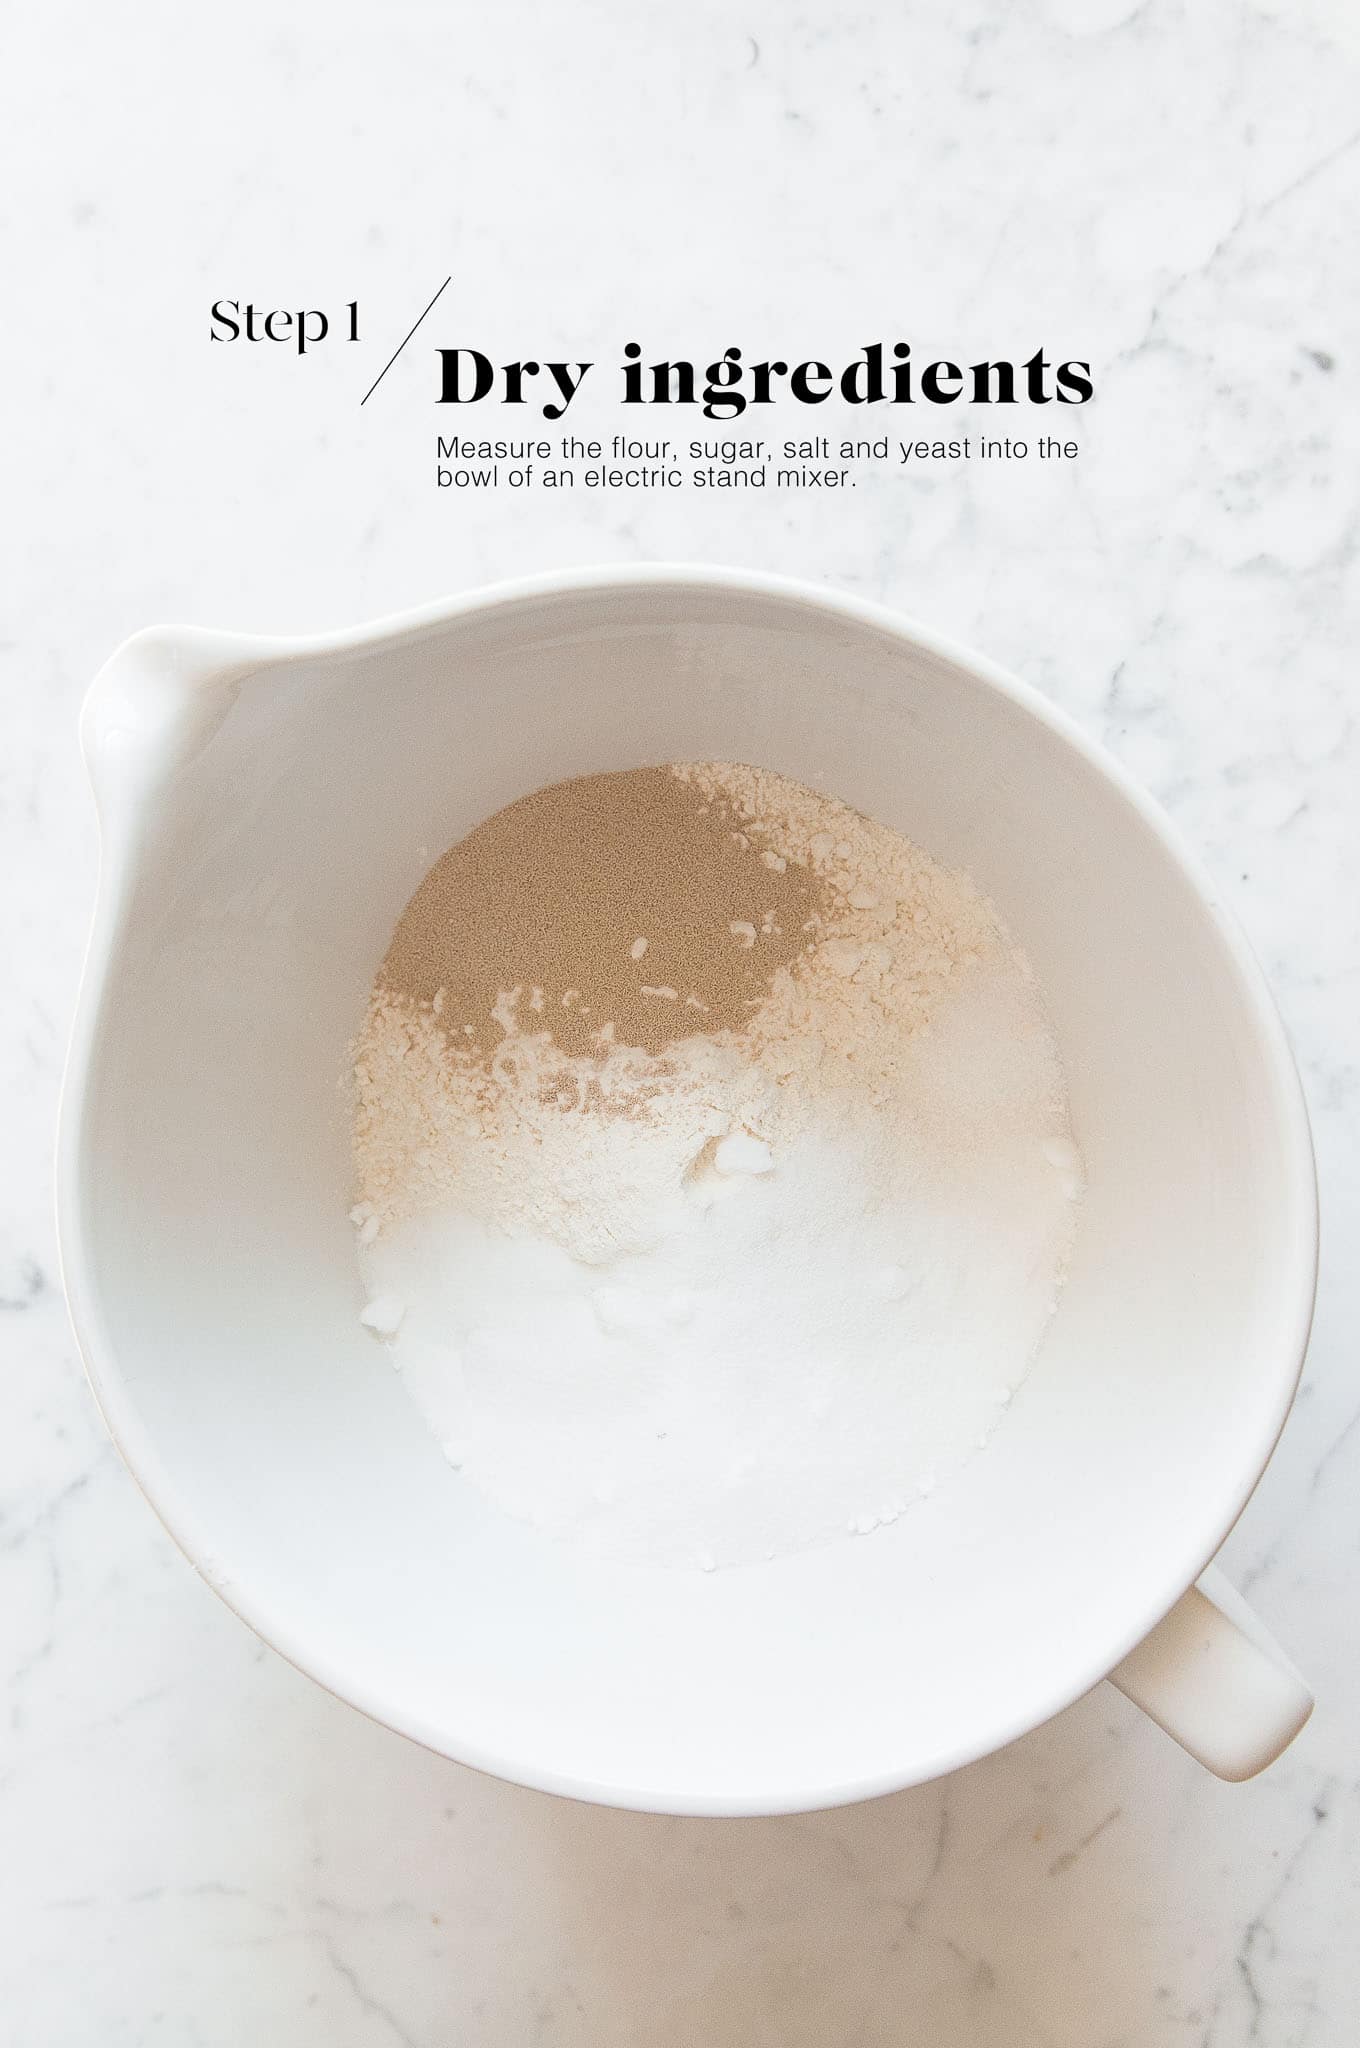
Step 1
Measure the flour, sugar, yeast and salt into the bowl of an electric stand mixer. Lightly mix the ingredients together.
Step 2
Add the egg to the bowl. Slowly add the warm milk (you may not need all of it), and lightly beat everything with the dough hook until it comes together into a large ball of dough. Only add as much milk as you need to bring the ingredients together into a dough.

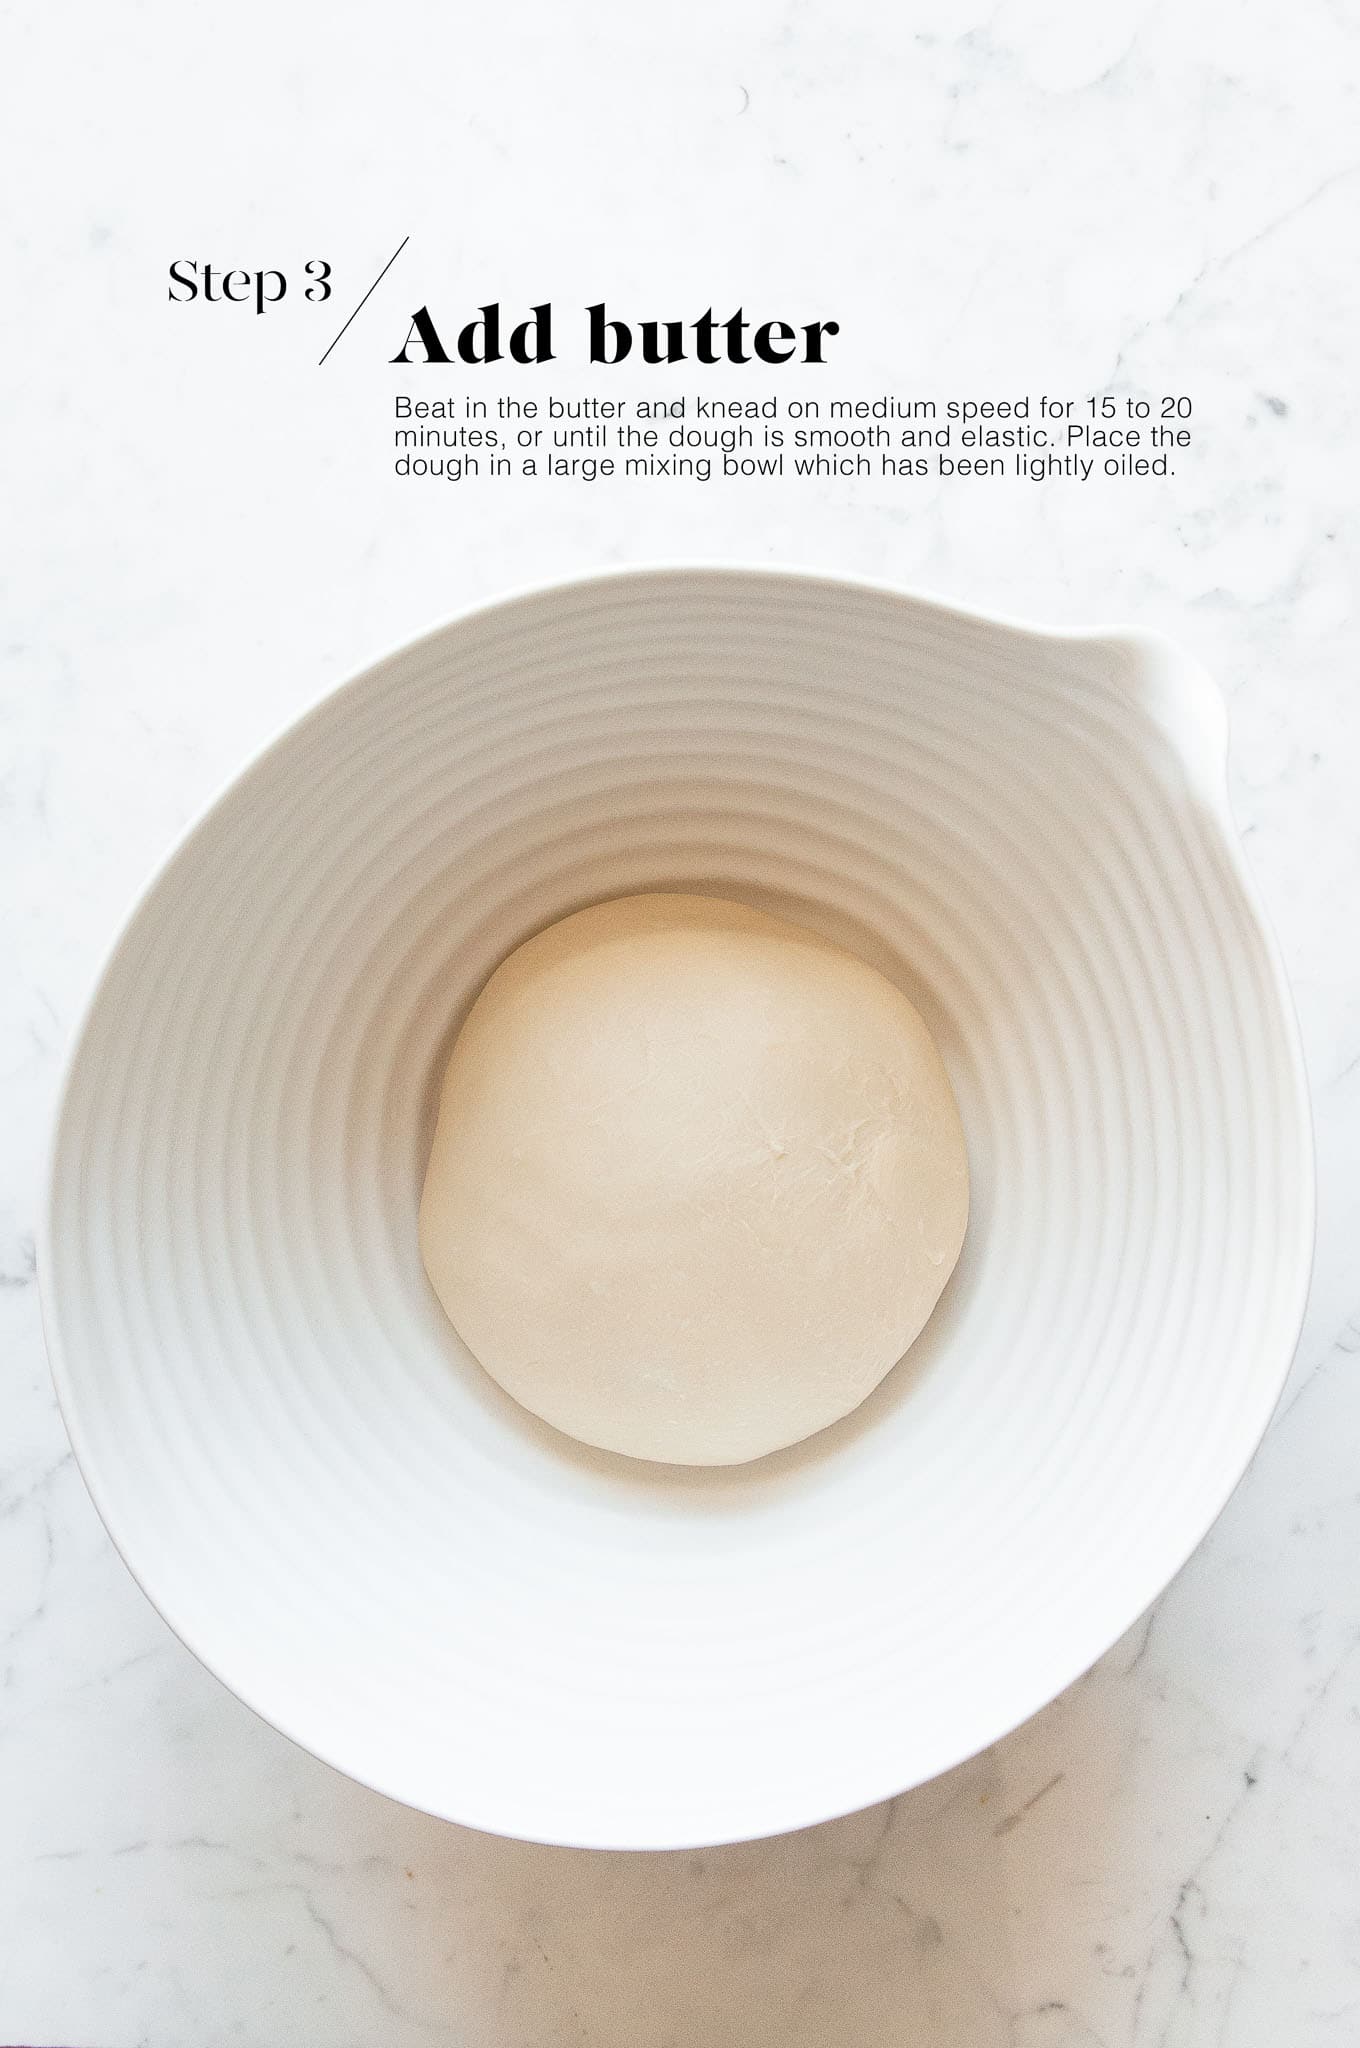
Step 3
Slowly incorporate the butter, one tablespoon at a time, until all of the butter has been used.
Then increase the speed to medium and continue kneading with the dough hook for 15 to 20 minutes, or until the dough is smooth and elastic.
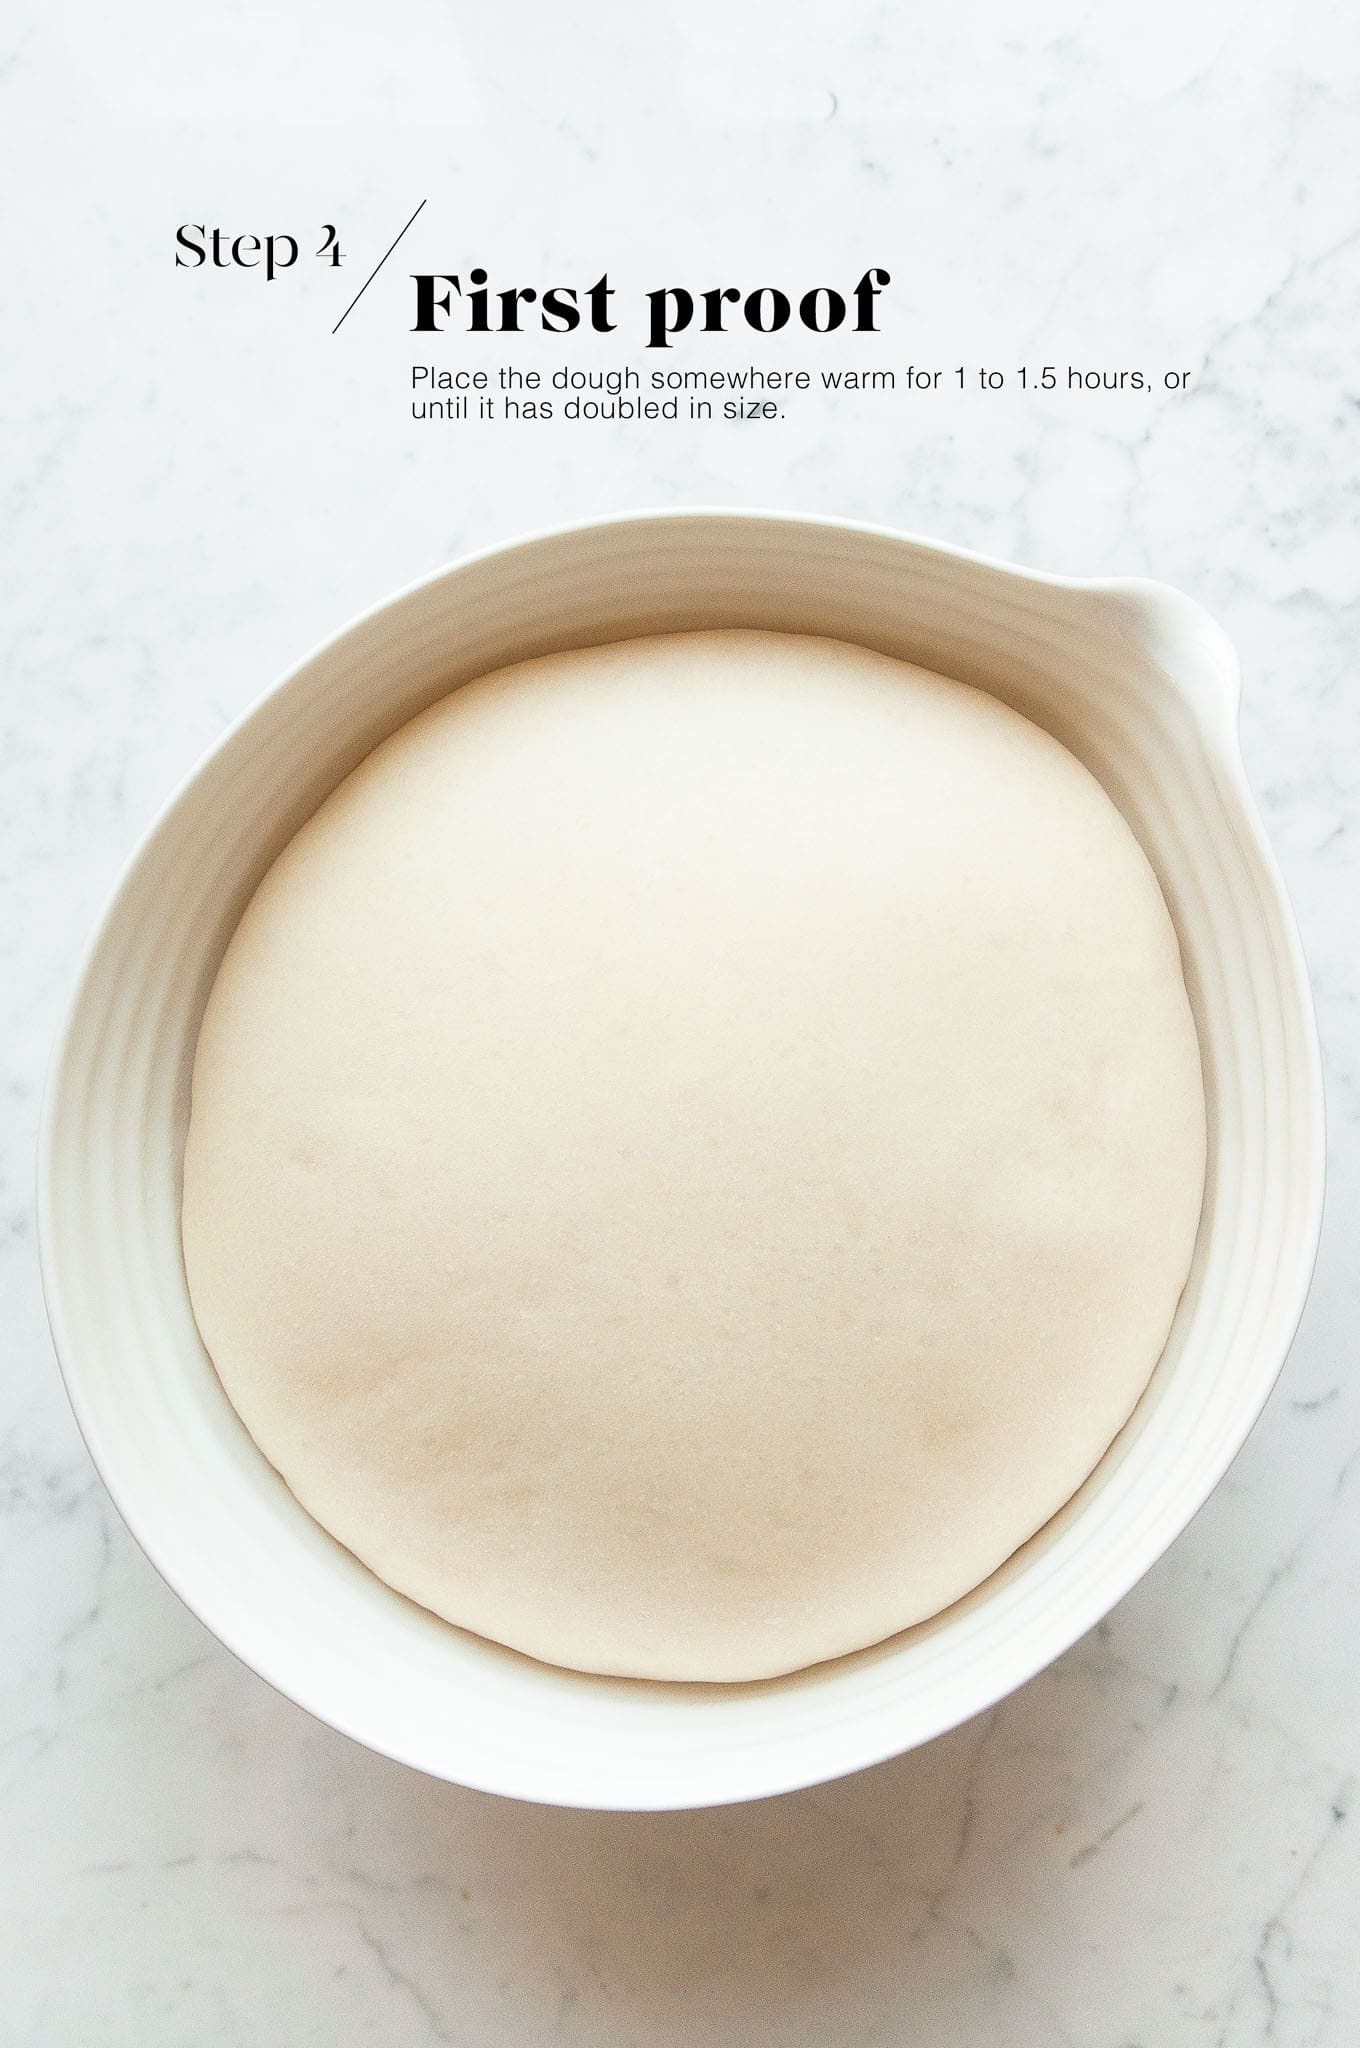
Step 4
Lightly oil a large mixing bowl, and place the dough into the bowl. Cover the bowl with a clean tea towel and leave it somewhere warm for 1 to 1.5 hours, or until the dough has doubled in size.
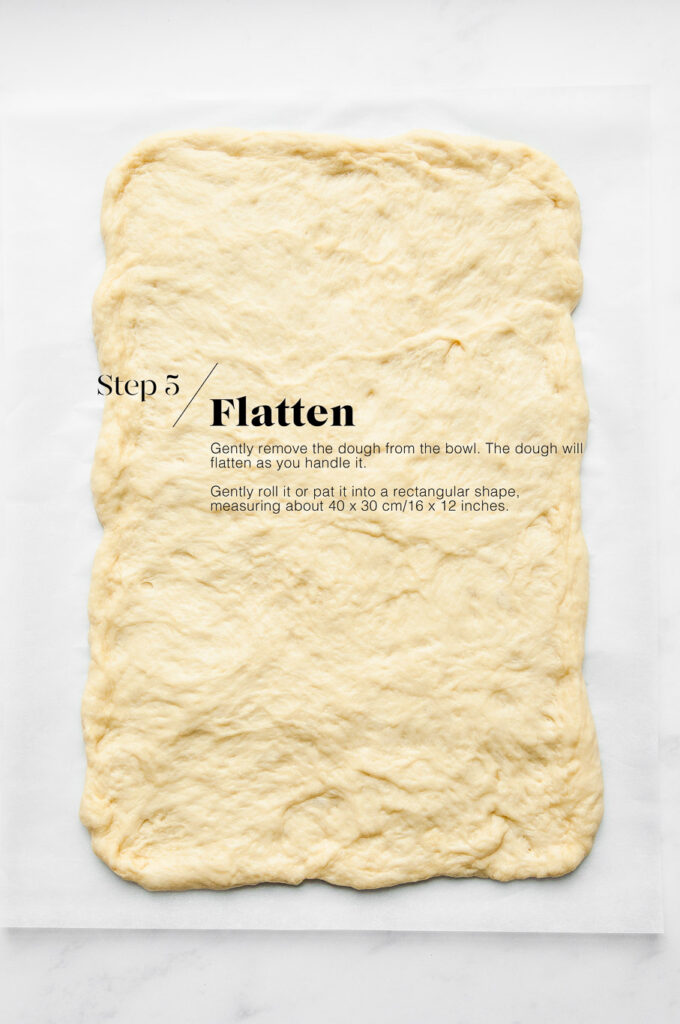
Step 5
Once the dough has doubled in size, gently remove the dough from the bowl. The dough will deflate as you handle it.
Roll out the dough into a rectangle shape measuring approximately 40 x 30 cm/16 x 12 inches.
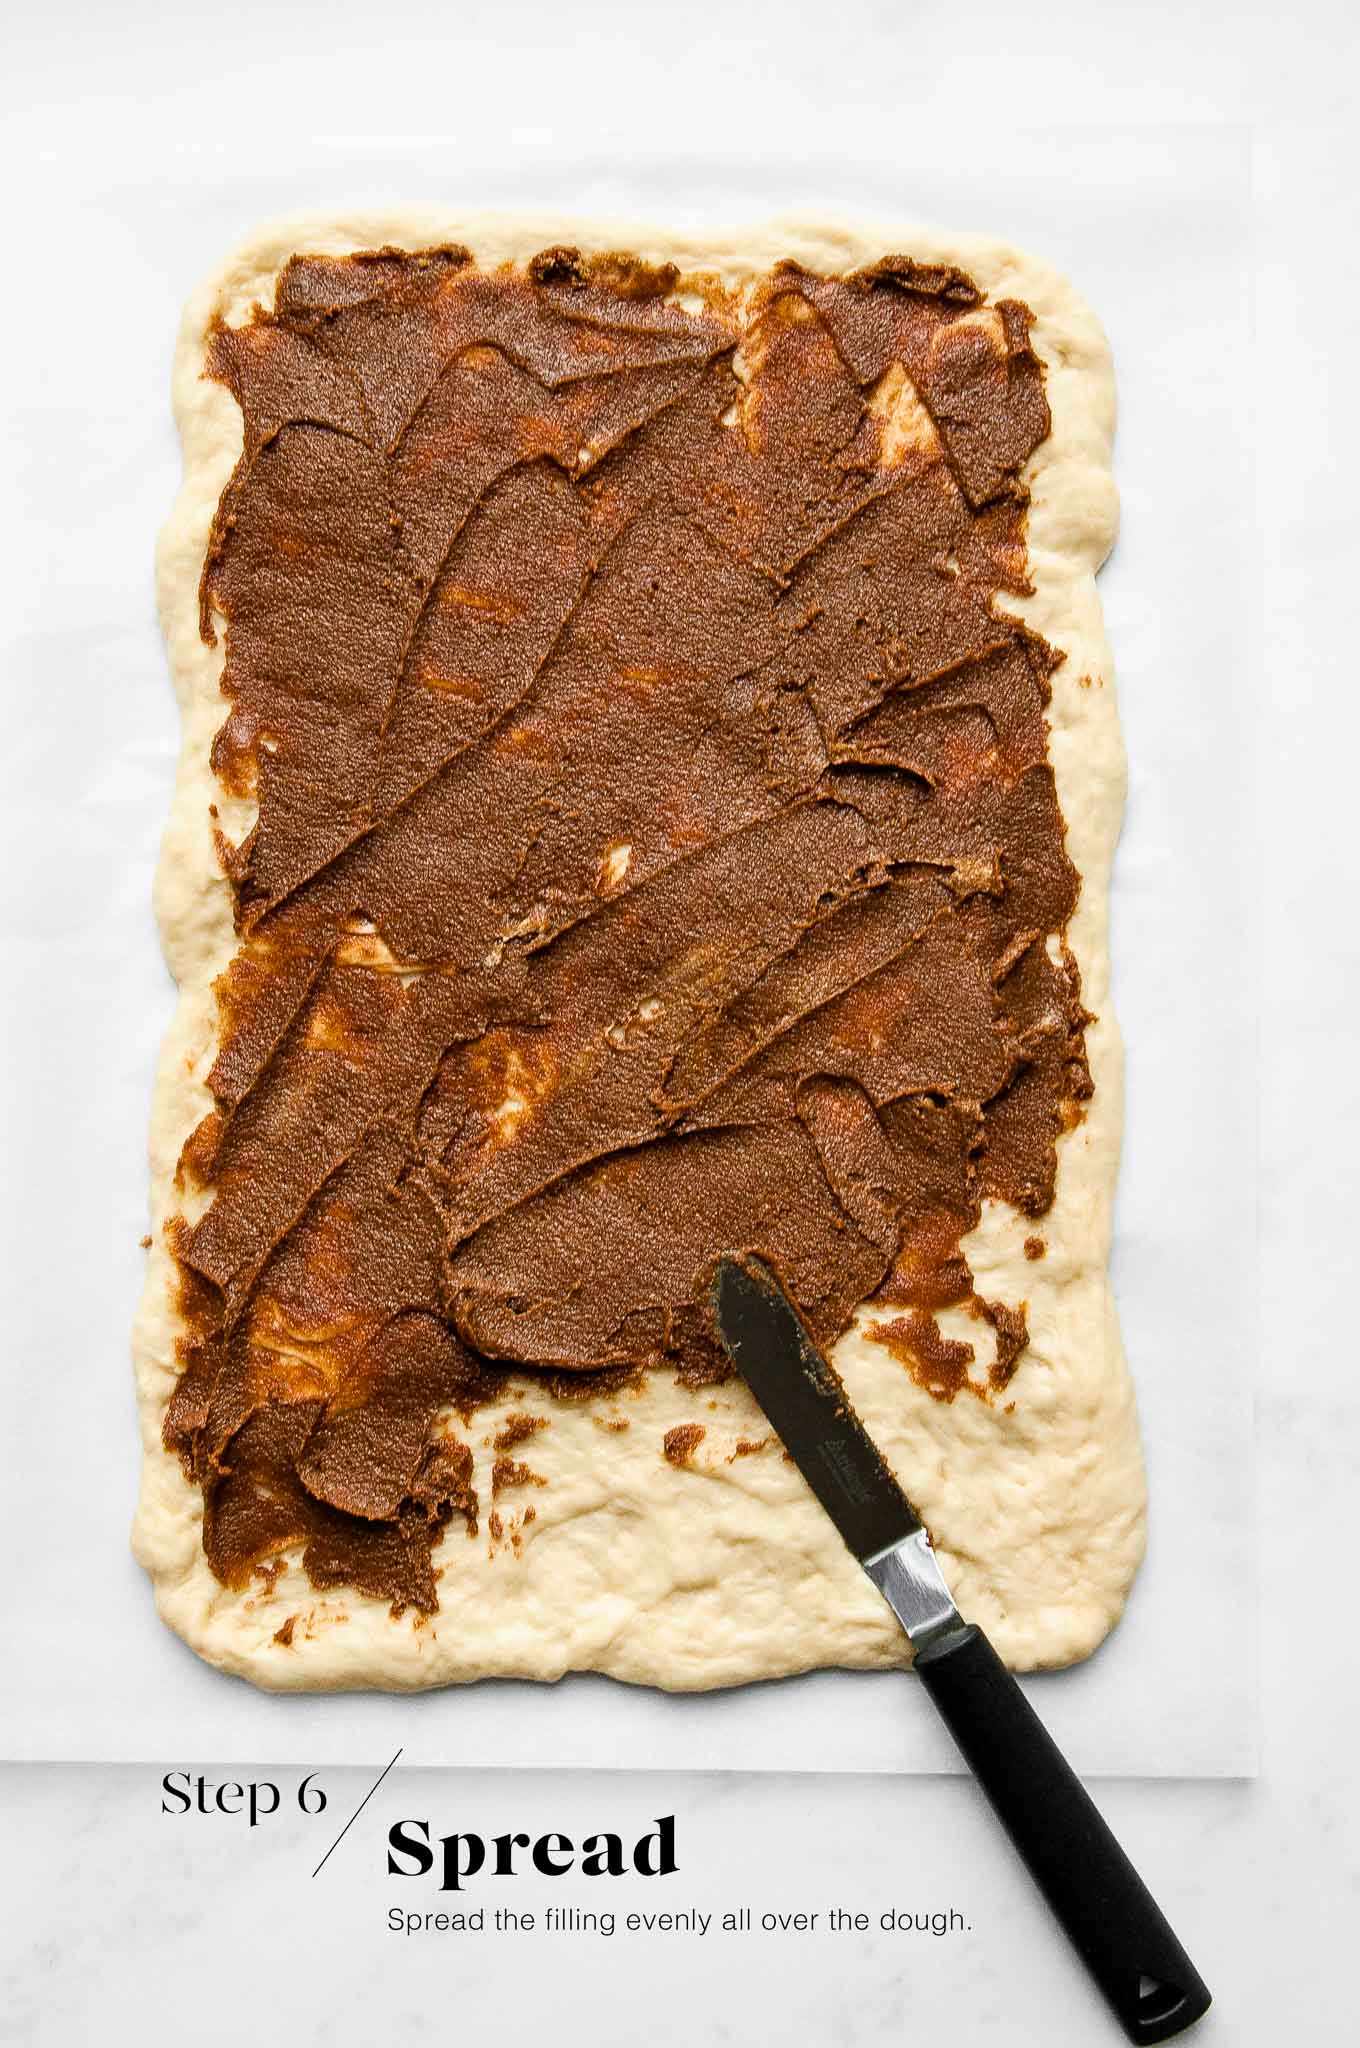
Step 6
Make the filling by beating together the ingredients. Use a small palette knife to evenly spread the filling all over the dough. Be sure to spread the filling right to the edges of the dough so that you have maximum cinnamon-sugar in each bun.
Step 7
Roll up the dough tightly from the short end.
Cut the dough into 9 even pieces. I find it easiest to do so using a long piece of unflavoured dental floss, which will allow you to slice through the dough cleanly and sharply, and without flattening the dough. Simply slide the floss under the dough, then pull both ends of the floss across each other, which will cut through the dough as you pull.
Line a 20 cm/8 inch square baking pan with baking paper.
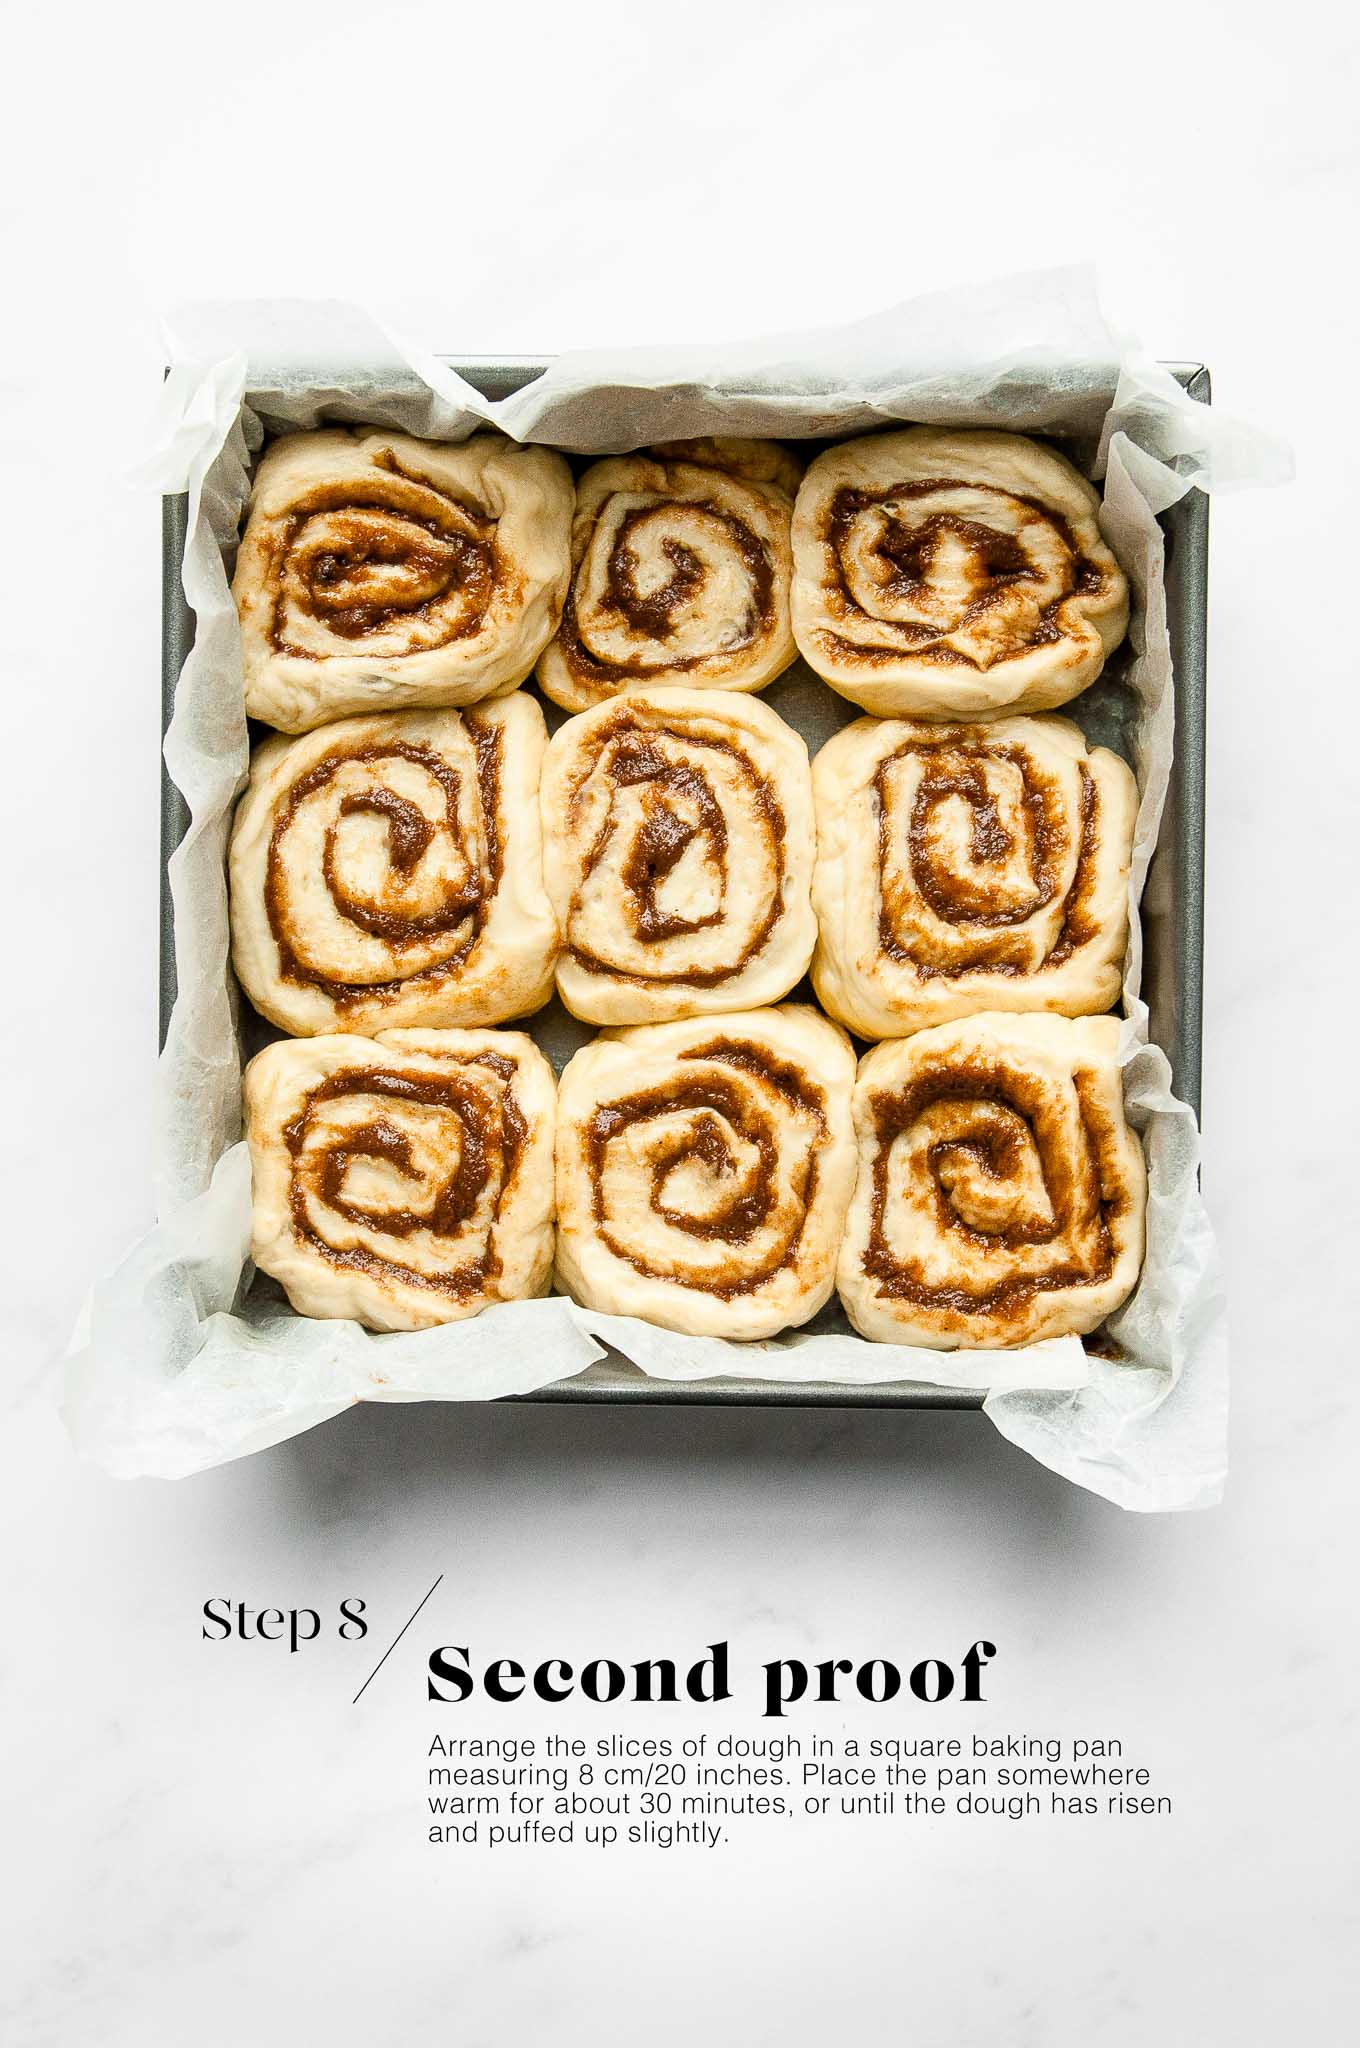
Step 8
Arrange the slices of dough in the baking pan. I sometimes find it easier to arrange the slices of dough directly on the baking paper on the kitchen bench, and then transferring the baking paper with the buns into the baking pan. This is especially if the dough has already started to puff and rise.
If you plan to make these Cinnamon Rolls the night before, stop here, cover the pan with some plastic wrap, and leave the pan overnight in the fridge.
Otherwise, place the pan somewhere warm for about 30 minutes, or until the buns have risen and puffed up slightly.

Step 9
Preheat the oven to 200°C/390°F with a metal baking tray on the middle shelf. Bake the buns for 10 minutes.
Reduce the heat to 180°C/356°F and bake for another 20 minutes, or until the buns are lightly golden. Check the buns at about 10 minutes, and if they are browning too quickly, cover them with a loose sheet of foil for the rest of the baking time. The buns are cooked if an internal thermometer reads 85°C (185°F).
Gently remove the buns (intact) to a wire rack, and leave them to cool completely.
Step 10
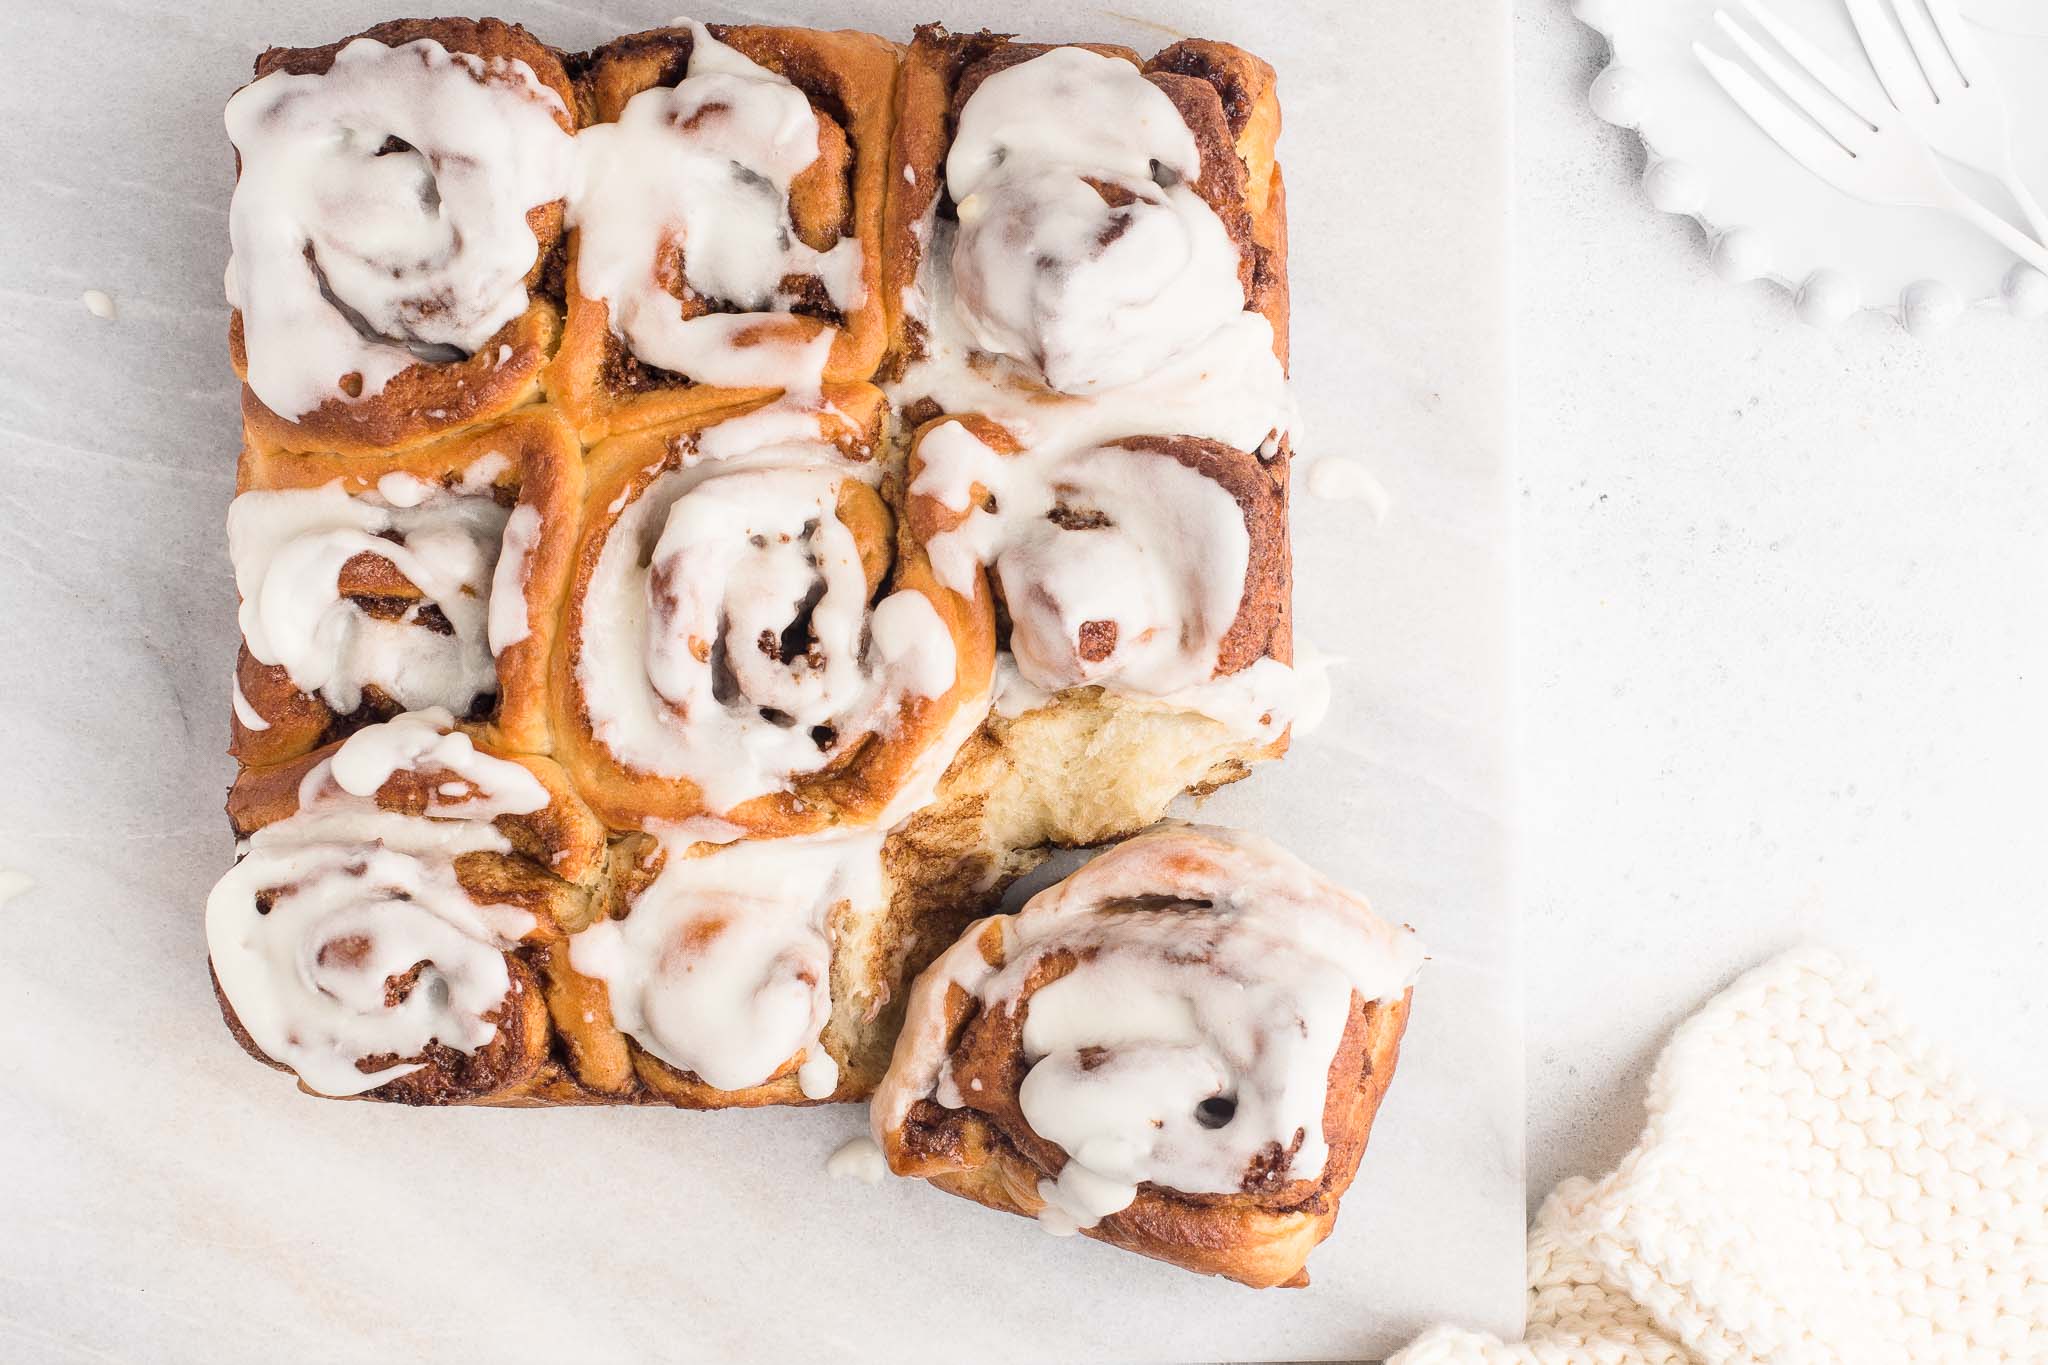
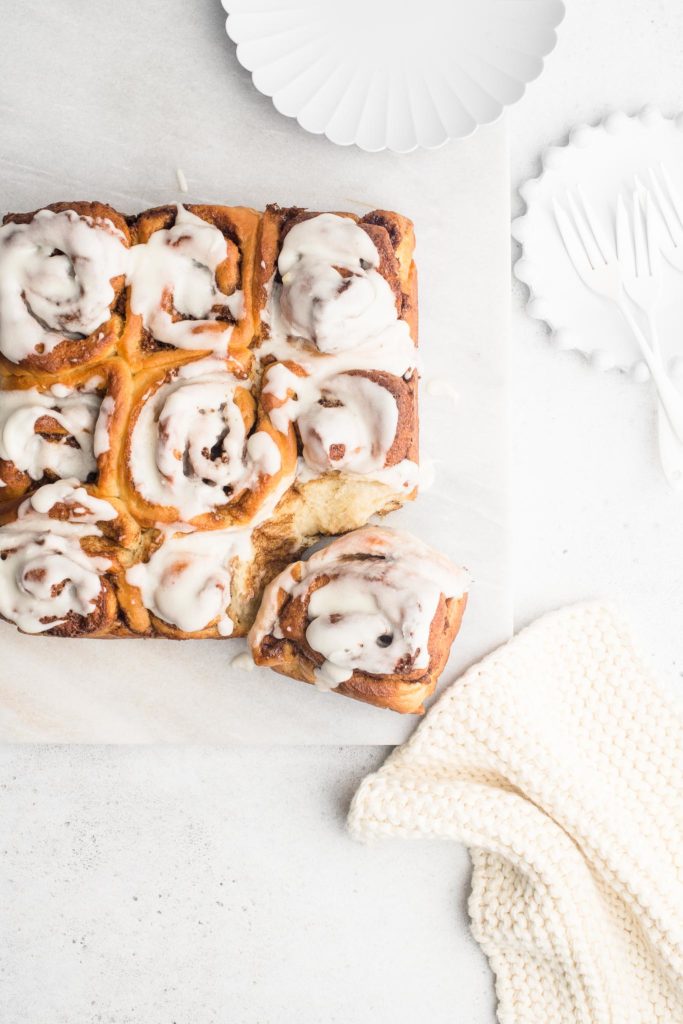
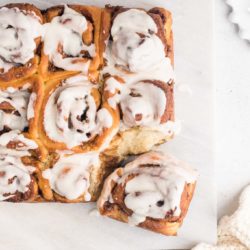
Make the icing by whisking together the ingredients until you have a thick, but runny, consistency.
Generously drizzle the icing over the buns, as much or as little as you like.
Tips for Making Bread Dough Ahead of Time
I love baking bread, but I don’t love getting up extra early to get started on the dough. So I typically make the dough the night before and allow it to rise slowly in the fridge overnight. The longer proofing time has the added benefit of allowing the dough to develop more flavour and a better texture. Come the morning, the dough will have at least doubled in size, and it will be ready for shaping as per the recipe.
To make the dough the night before:
- Make the dough as per the recipe.
- Place the dough into a large oiled bowl.
- Cover the bowl with plastic wrap or a reusable bowl cover.
- Place the bowl into the fridge.
- Let the dough rise overnight, or for at least 8-10 hours.
- The next morning, the dough should have at least doubled in size.
- Gently remove the dough from the bowl.
- The dough is ready for shaping and the second proof as per the recipe.
- As the dough will be cold from the fridge, the second proof may take slightly longer.
Cinnamon Rolls
Ingredients
For the Dough
- 400 g (2 ⅔ cup) white bread flour
- 75 g (⅓ cup) caster sugar, (superfine sugar)
- 3 g (½ teaspoon) fine salt
- 9 g (2 ½ teaspoons) instant dried yeast, see Kitchen Notes
- 1 egg, at room temperature
- 250 ml (1 cup) milk, warmed to 37°C/98°F
- 45 g (3 tablespoons) unsalted butter, softened
For the Cinnamon-Sugar Filling
- 100 g (1 stick) unsalted butter, softened
- 100 g (½ cup plus 1 tablespoon) light muscovado sugar, or light brown sugar
- 2 teaspoons ground cinnamon
- 1/4 teaspoon fine salt
For the Icing
- 135 g (1 cup) icing sugar, (powdered sugar)
- 2 tablespoons milk
- 1 tablespoon unsalted butter, softened
Instructions
For the Dough
- Measure the flour, sugar, salt and yeast into the bowl of an electric stand mixer.
- Lightly mix the ingredients together using the dough hook.
- Add the egg to the bowl.
- Slowly pour in the warm milk, and continue mixing until everything comes together into a rough dough.
- Add the butter, one tablespoon at a time. Once the butter has been fully incorporated into the dough, add the next tablespoon of butter.
- Once all of the butter has been added, continue kneading the dough on medium speed for about 15 to 20 minutes.
- The dough is ready when it is soft and smooth, and no longer sticks to the side of the bowl. The dough will be somewhat sticky from the butter and egg.
For the First Proofing Session
- Lightly oil a large mixing bowl.
- Place the dough inside the bowl.
- Cover the dough with a clean tea towel, plastic wrap, or a reusable bowl cover.
- Leave the dough somewhere warm for 1 to 1.5 hours, or until the dough has doubled in size (see Kitchen Notes below).
For the Cinnamon-Sugar Filling
- Just before the dough is ready, make the filling by beating together the ingredients.
To Shape the Cinnamon Rolls
- Line a 20 cm/8 inch square baking pan with baking paper.
- Once the dough has doubled in size, gently remove the dough from the bowl. The dough will deflate as you handle it.
- Roll out the dough into a rectangle shape measuring approximately 40 x 30 cm/16 x 12 inches.
- Use a small palette knife to evenly spread the filling all over the dough.
- Roll up the dough tightly from the short end, i.e. to produce a log that is 30 cm/12 inches long.
- Cut the dough into 9 even pieces. I find it easiest to do so using a long piece of unflavoured dental floss, which will allow you to slice through the dough cleanly and sharply, and without flattening the dough. Simply slide the floss under the dough, then pull both ends of the floss across each other, which will cut through the dough as you pull.
- Arrange the slices of dough in the baking pan.
For the Second Proofing Session
- Place the pan somewhere warm for about 30 minutes, or until the buns have risen and puffed up slightly.
To Bake the Cinnamon Rolls
- Preheat the oven to 200°C/390°F (without fan) with a metal baking tray on the middle shelf.
- Place the pan of buns on the preheated baking tray.
- Bake the buns for 10 minutes.
- Reduce the heat to 180°C/356°F and bake for another 20 minutes, or until the buns are lightly golden. Check the buns at about 10 minutes, and if they are browning too quickly, cover them with a loose sheet of foil for the rest of the baking time.
- The buns are cooked if an internal thermometer reads 85°C/185°F.
- Gently remove the buns (intact) to a wire rack, and leave them to cool completely.
To Ice the Cinnamon Rolls
- Make the icing by whisking together the ingredients. Add the milk gradually until the icing is a thick, but runny, consistency.
- Drizzle the icing all over the cooled Cinnamon Rolls.
- The Cinnamon Rolls can be served immediately or once the icing has set. They are best eaten the same day they are baked.
Kitchen Notes
- MAKE AHEAD TIPS
To make the Cinnamon Rolls the night before:
* Make the dough as per the recipe.
* Place the bowl of dough (covered) in the fridge to proof overnight, or for at least 8 to 10 hours. During this time, it should have at least doubled in size.
* The next day, proceed with the rest of the recipe. As the dough will be cold, it may require a bit more time for the second proofing period. - MAKE A LARGER BATCH
To adjust the recipe to make 12 buns, use the following quantities:
For the Dough:
600 g (4 cups) strong white bread flour
110 g (1/2 cup) caster sugar
1 teaspoon fine salt
14 g (4 teaspoons) instant dried yeast
1 egg
375 ml (1 1/2 cup) milk
60 g (4 tablespoons) unsalted butter
For the Cinnamon-Sugar Filling:
125 g (1 1/4 stick) unsalted butter
125 g (3/4 cup) light brown sugar
3 teaspoons ground cinnamon
1/4 teaspoon fine salt
Instructions
Roll the dough into a rectangle shape, measuring approx 50 x 30 cm/20 x 12 inches. Roll up the dough tightly from the long end, i.e. to produce a log that is 50 cm/20 inches long. Cut the dough into 12 even pieces. - BAKE IN A ROUND DISH
To bake the Cinnamon Rolls in a 25cm/10 inch round baking dish or cake pan, cut 8 slices from the dough. - DIFFERENT TYPES OF FLOUR
For Swiss readers: I use Zopfmehl (or farine pour tresse) when making bread and enriched dough. - DIFFERENT TYPES OF YEAST
* Please note that there is a difference between instant yeast (also called instant dried yeast or fast-action dried yeast) and dried yeast (also called active dry yeast). If you are not sure what type of yeast you have, please check the packaging for instructions on how to use the yeast.
* With instant yeast, you can add it directly to the flour mixture without having to activate it first.
* With dried yeast, you will need to activate it first (usually in some warm liquid).
* If you are using fresh yeast, you will need about half a block (40 g fresh yeast = 14 g instant dried yeast). Crumble the fresh yeast into the warm milk, and stir to dissolve the yeast. - PROOFING THE DOUGH
Dough needs a warm environment for the yeast to activate and cause the dough to rise. If you don’t have a warm place in your home, try one of the following ideas:
* In the oven with the oven light switched on (works only for some ovens).
* In the oven with a tray of boiling water on the bottom shelf.
* In the oven or a steamer oven at a low temperature of about 25-40°C (77-104°F). - OVEN TEMPERATURES
All recipes on this website state temperatures for a regular oven (i.e. a conventional oven without fan). If you have a convection oven with a fan, please consult the manufacturer’s handbook on how to adjust the temperature and baking time accordingly. - CONVERSIONS
To convert from cups to grams, and vice-versa, please see this handy Conversion Chart for Basic Ingredients.


Absolutely delicious! I followed your instructions to make 12 buns. They were so light and fluffy, everyone loved them! I’ve made your brioche several times so I knew this recipe would turn out great too. Love your recipes!
Wow these are amazing tasting cinnamon rolls! The buns were soft and fluffy, and the filling was not too sweet. Very delicious!
These cinnamon rolls are so good!! Thank you for the helpful instructions and amazing recipe. Can’t wait to try your other recipes now!
Very delicious cinnamon rolls! I followed your steps to make them overnight, which made baking and serving them for brunch a breeze. Thank you for the great recipe!
Excellent recipe! In fact, I will make them again for brunch this weekend 🙂
Really liked this recipe. The cinnamon rolls were nice and soft and had a good amount of spice. I’m not a fan of cream cheese frosting so this recipe worked well for me.
Wonderful recipe! I’ve tried several cinnamon roll recipes and this one has been the best so far! The buns were very soft and fluffy.
These cinnamon rolls are to die for! They were so delicious. Pretty easy to make too.
Wonderful recipe
I made these cinnamon rolls to take to work yesterday and they were just divine. Thanks for your tips on starting the recipe the night before. Next time, I have been asked to bake a double batch!
Very yummy recipe
Delicious cinnamon rolls! They were very soft and tasty.
This is the best recipe I have come across. Thank you.
I thought that salt and yeast should not go together, I don’t understand why all dry ingredients are put together. Can you advise, has everyone try using the actual methods
Hi Aries,
You are right – salt and yeast do not like each other. But when you are mixing the dry ingredients together first before adding the wet ingredients, it is generally fine. This is especially if you are using instant dried yeast like in this recipe.
The advice to not mix salt and yeast is more for dried yeast, i.e. the variety which you have to bloom first in warm liquid. In that case, if you add salt to the yeast in the liquid, the salt may hinder the activation of the yeast.
Heavenly! better than the bakery!
This was very delicious. I was happy to find a recipe for just 9 buns because there are only 3 of us, but they were so tasty that now I wish I had made 12 buns, ha ha!
The recipe is very good and I love it. I put all of the steps in practice and make a delicious cinnamon rolls for my family
Hi Jestina,
So glad you enjoyed this recipe!