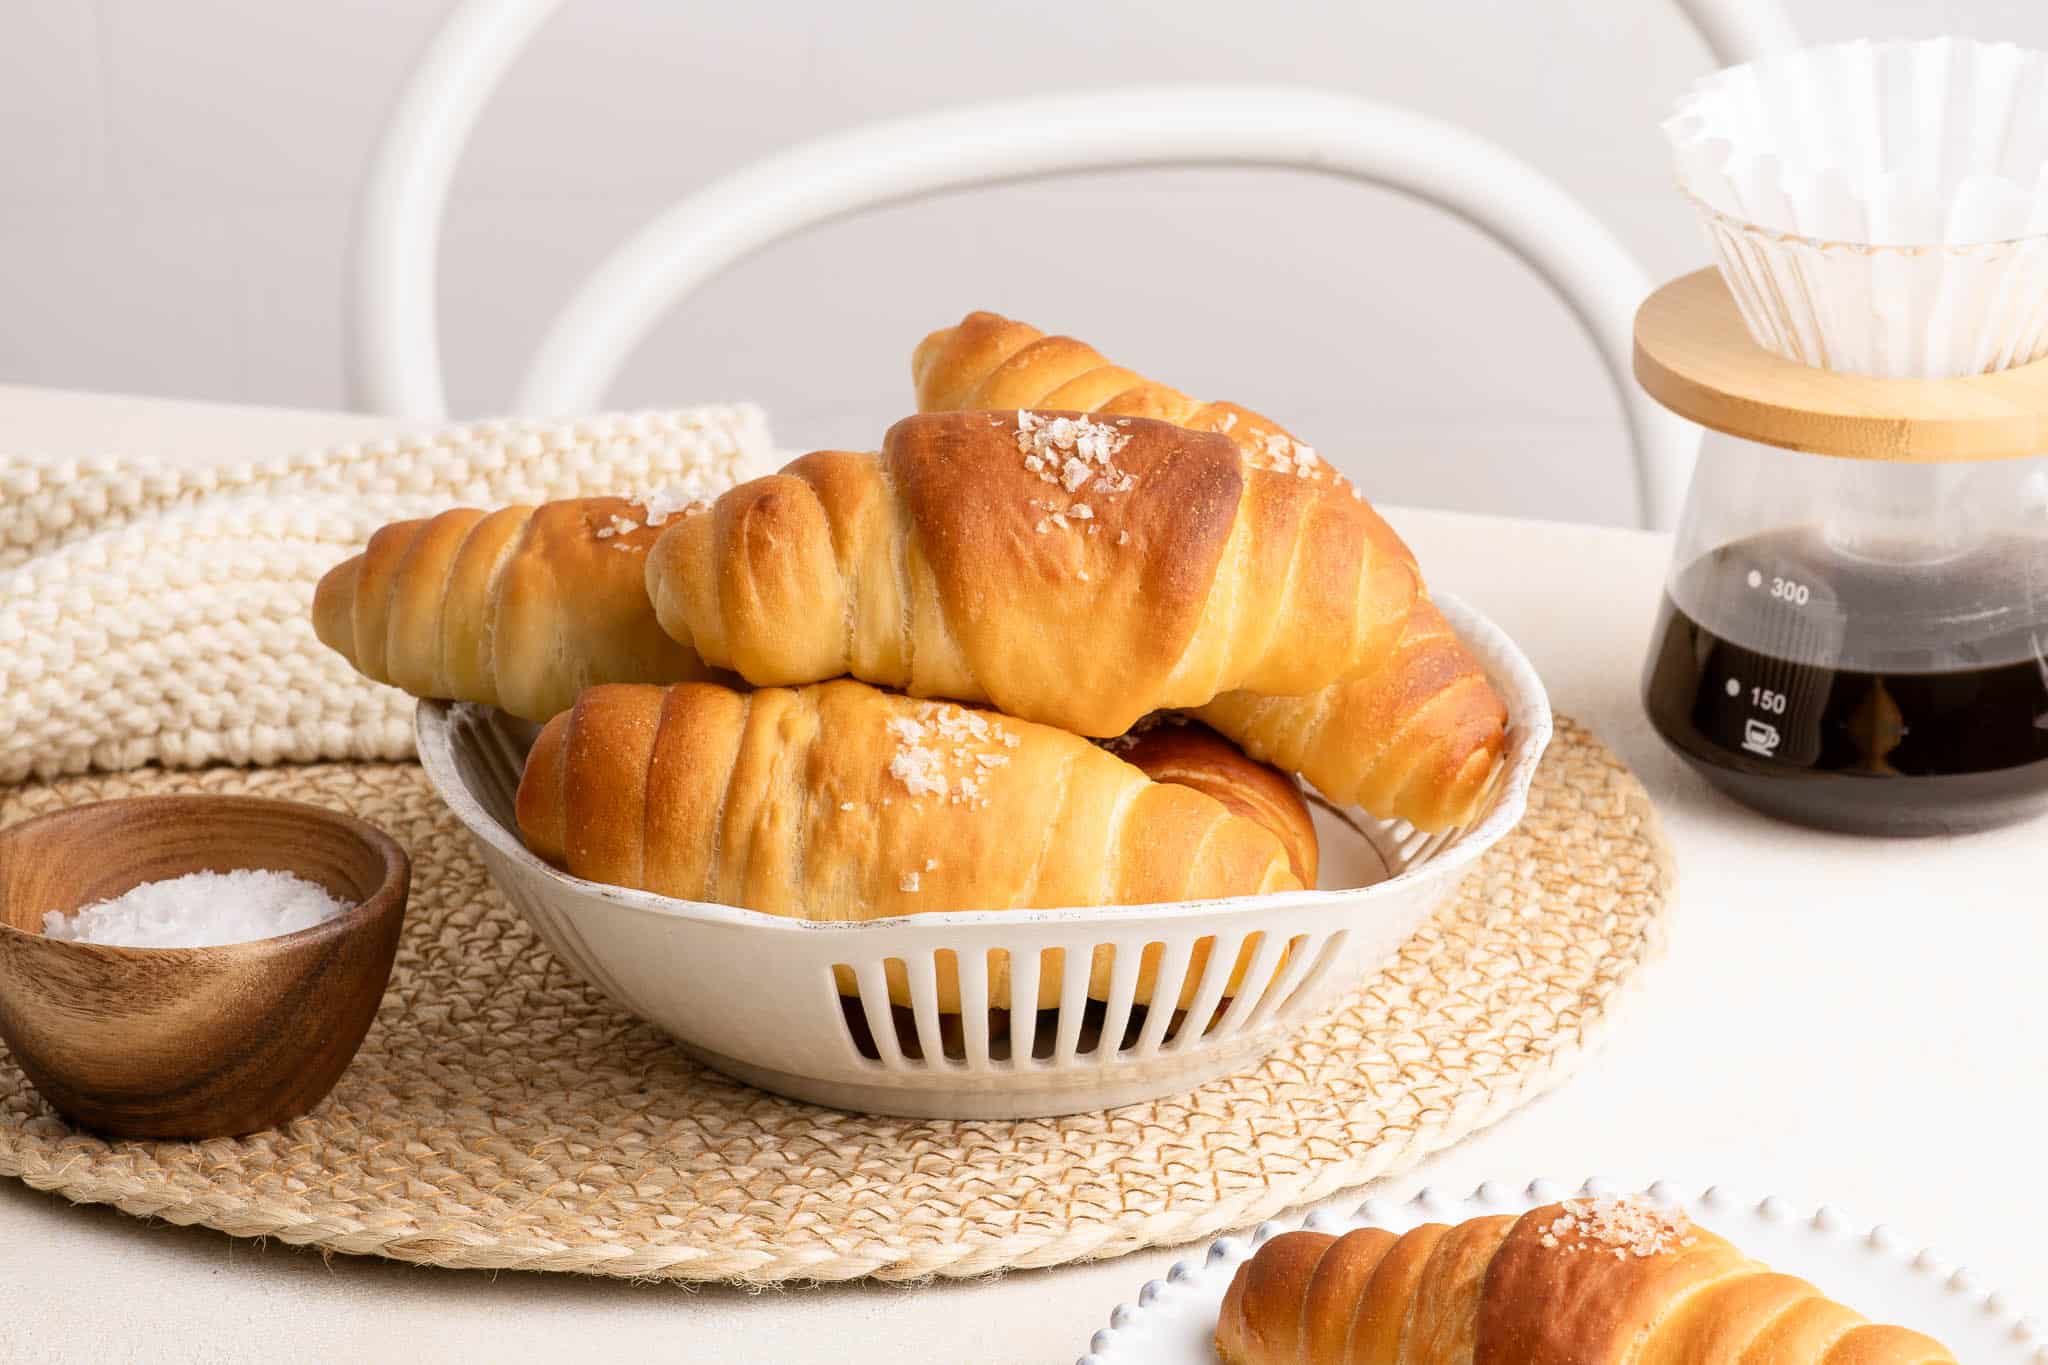
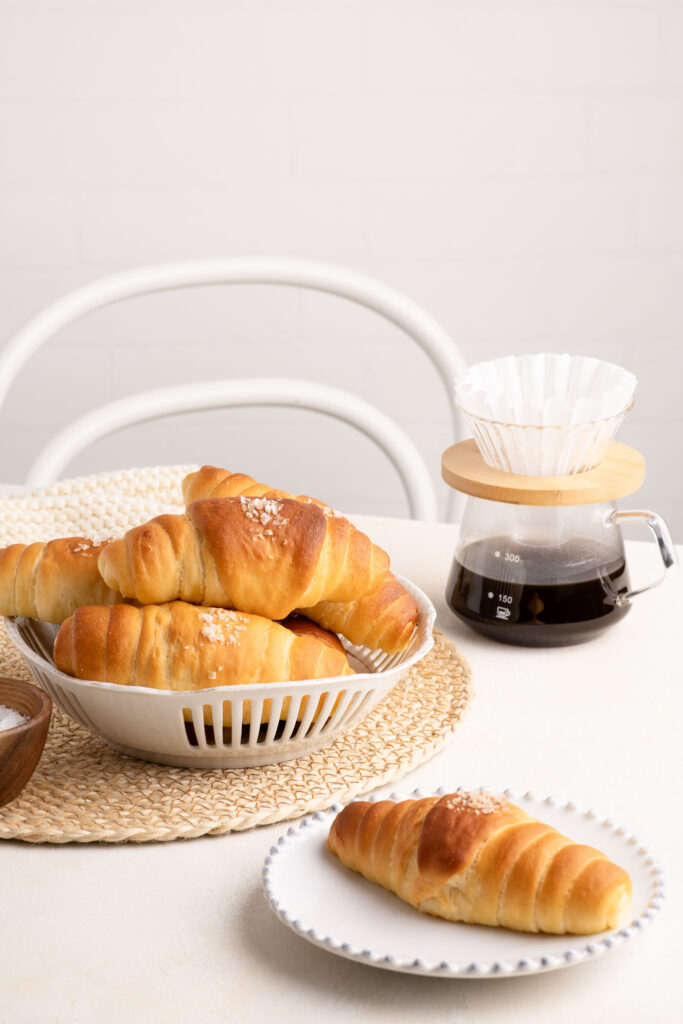
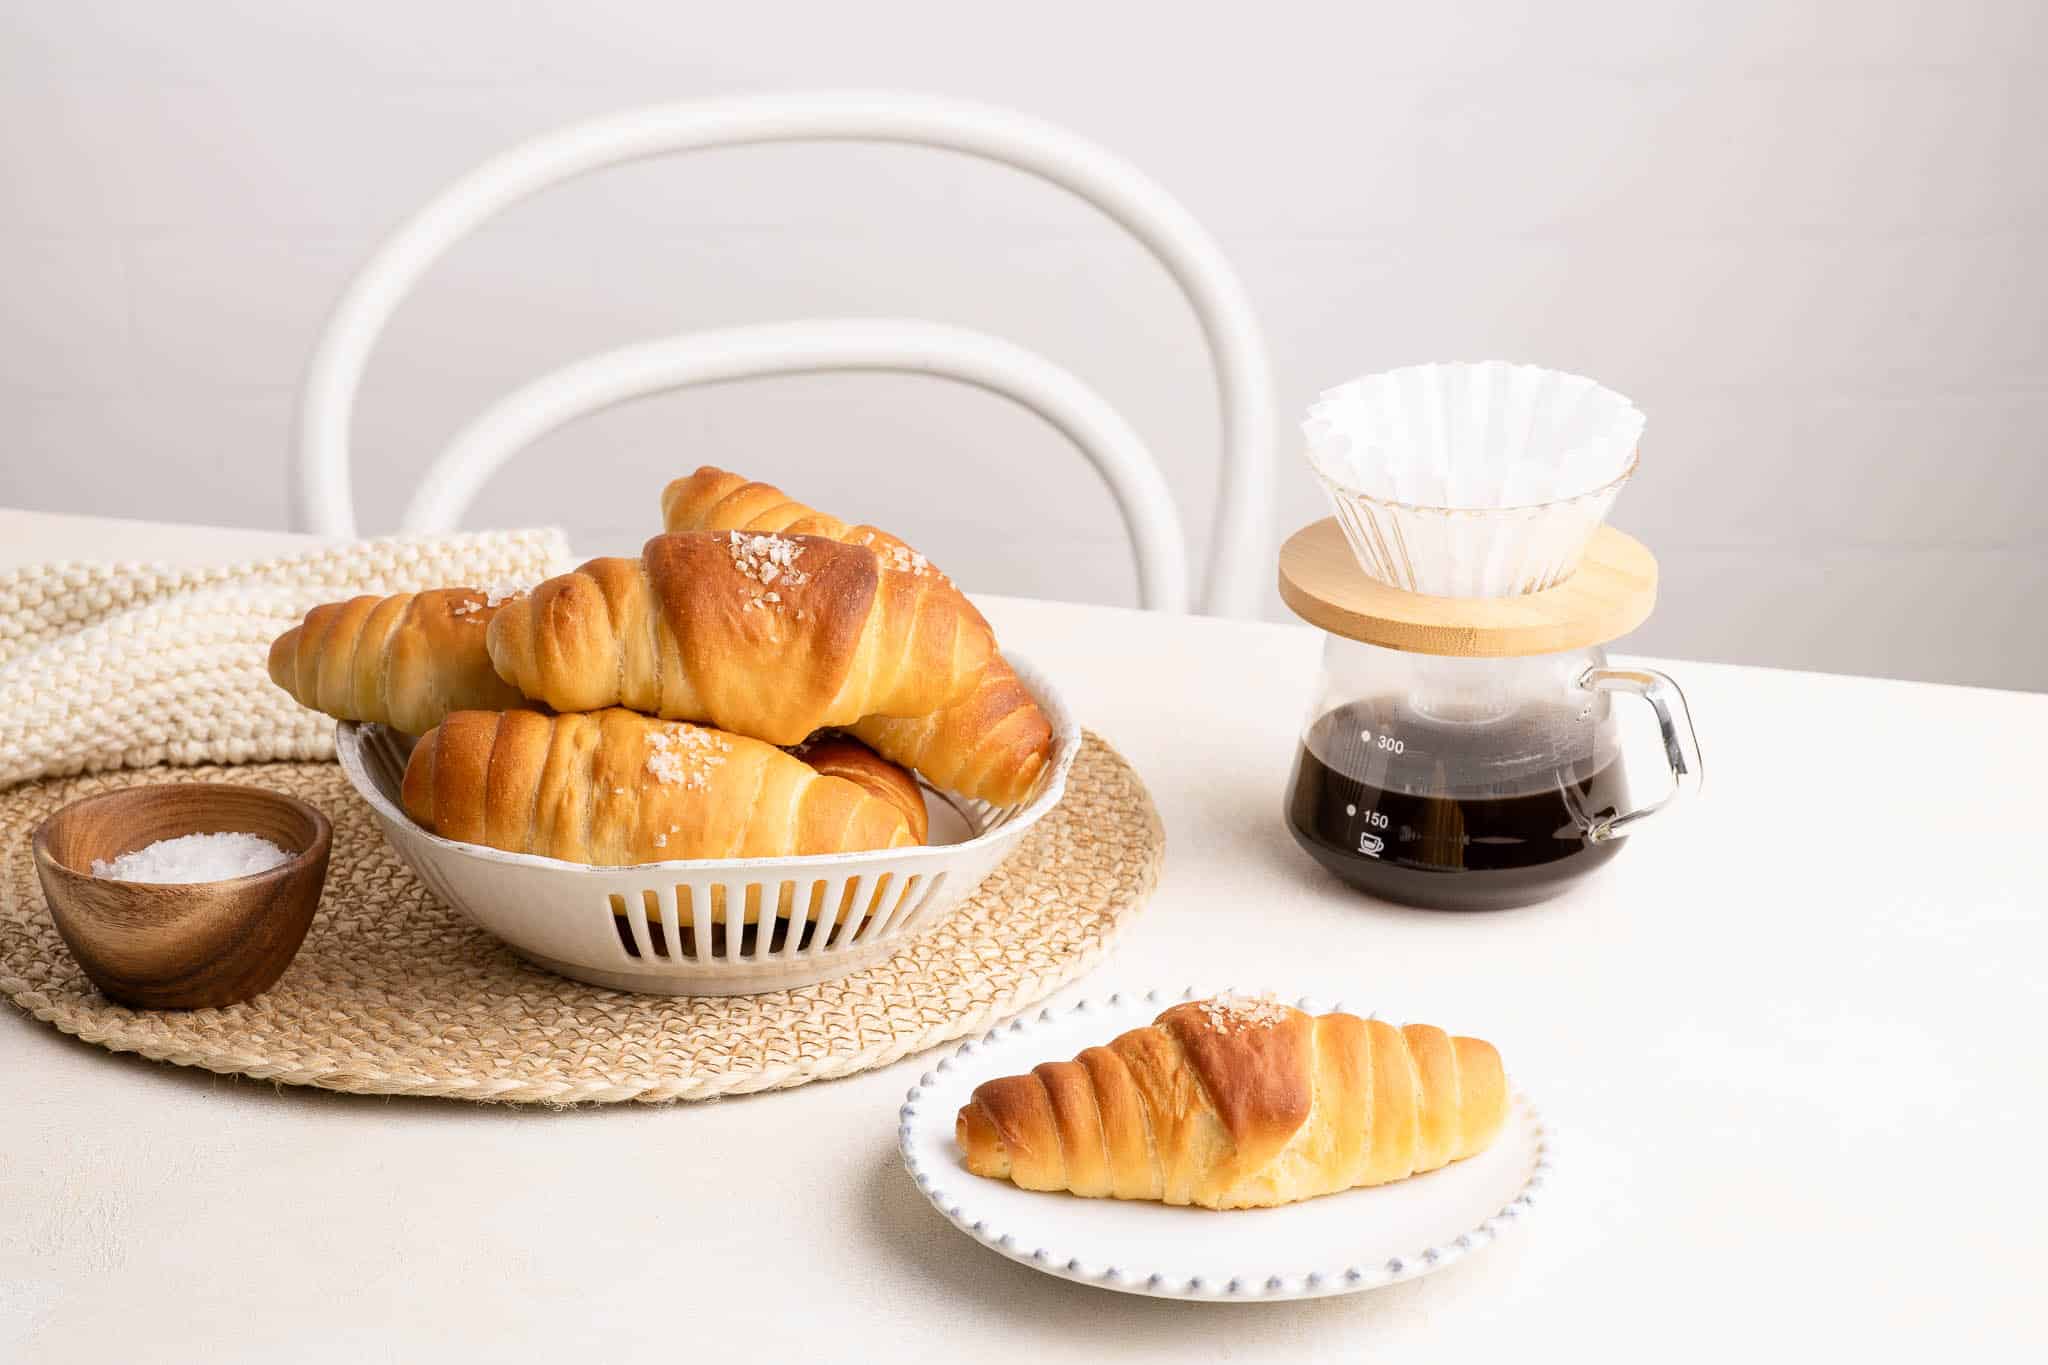
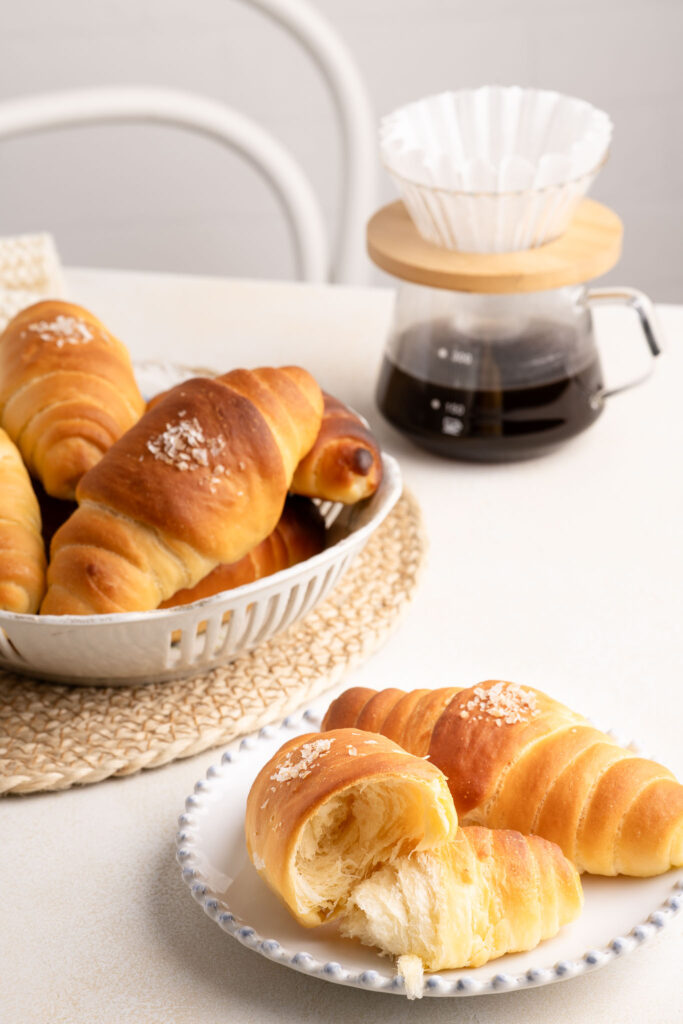
Salted Butter Rolls
The moment I started making Japanese milk bread, I knew I was hooked on Japanese bread making. I love how soft and fluffy the bread is, and the endless variety of shapes and fillings that you can combine. One shape I am particulary fond of are these croissant-shaped buns, called Salted Butter Rolls (or shio pan in Japanese) because the whole bun is wrapped around a piece of salted butter. As the buns bake, the butter melts into the bread rolls, giving the buns are buttery flavour from within, as well as a crispy bottom from the caramelised butter. They are utterly delicious!
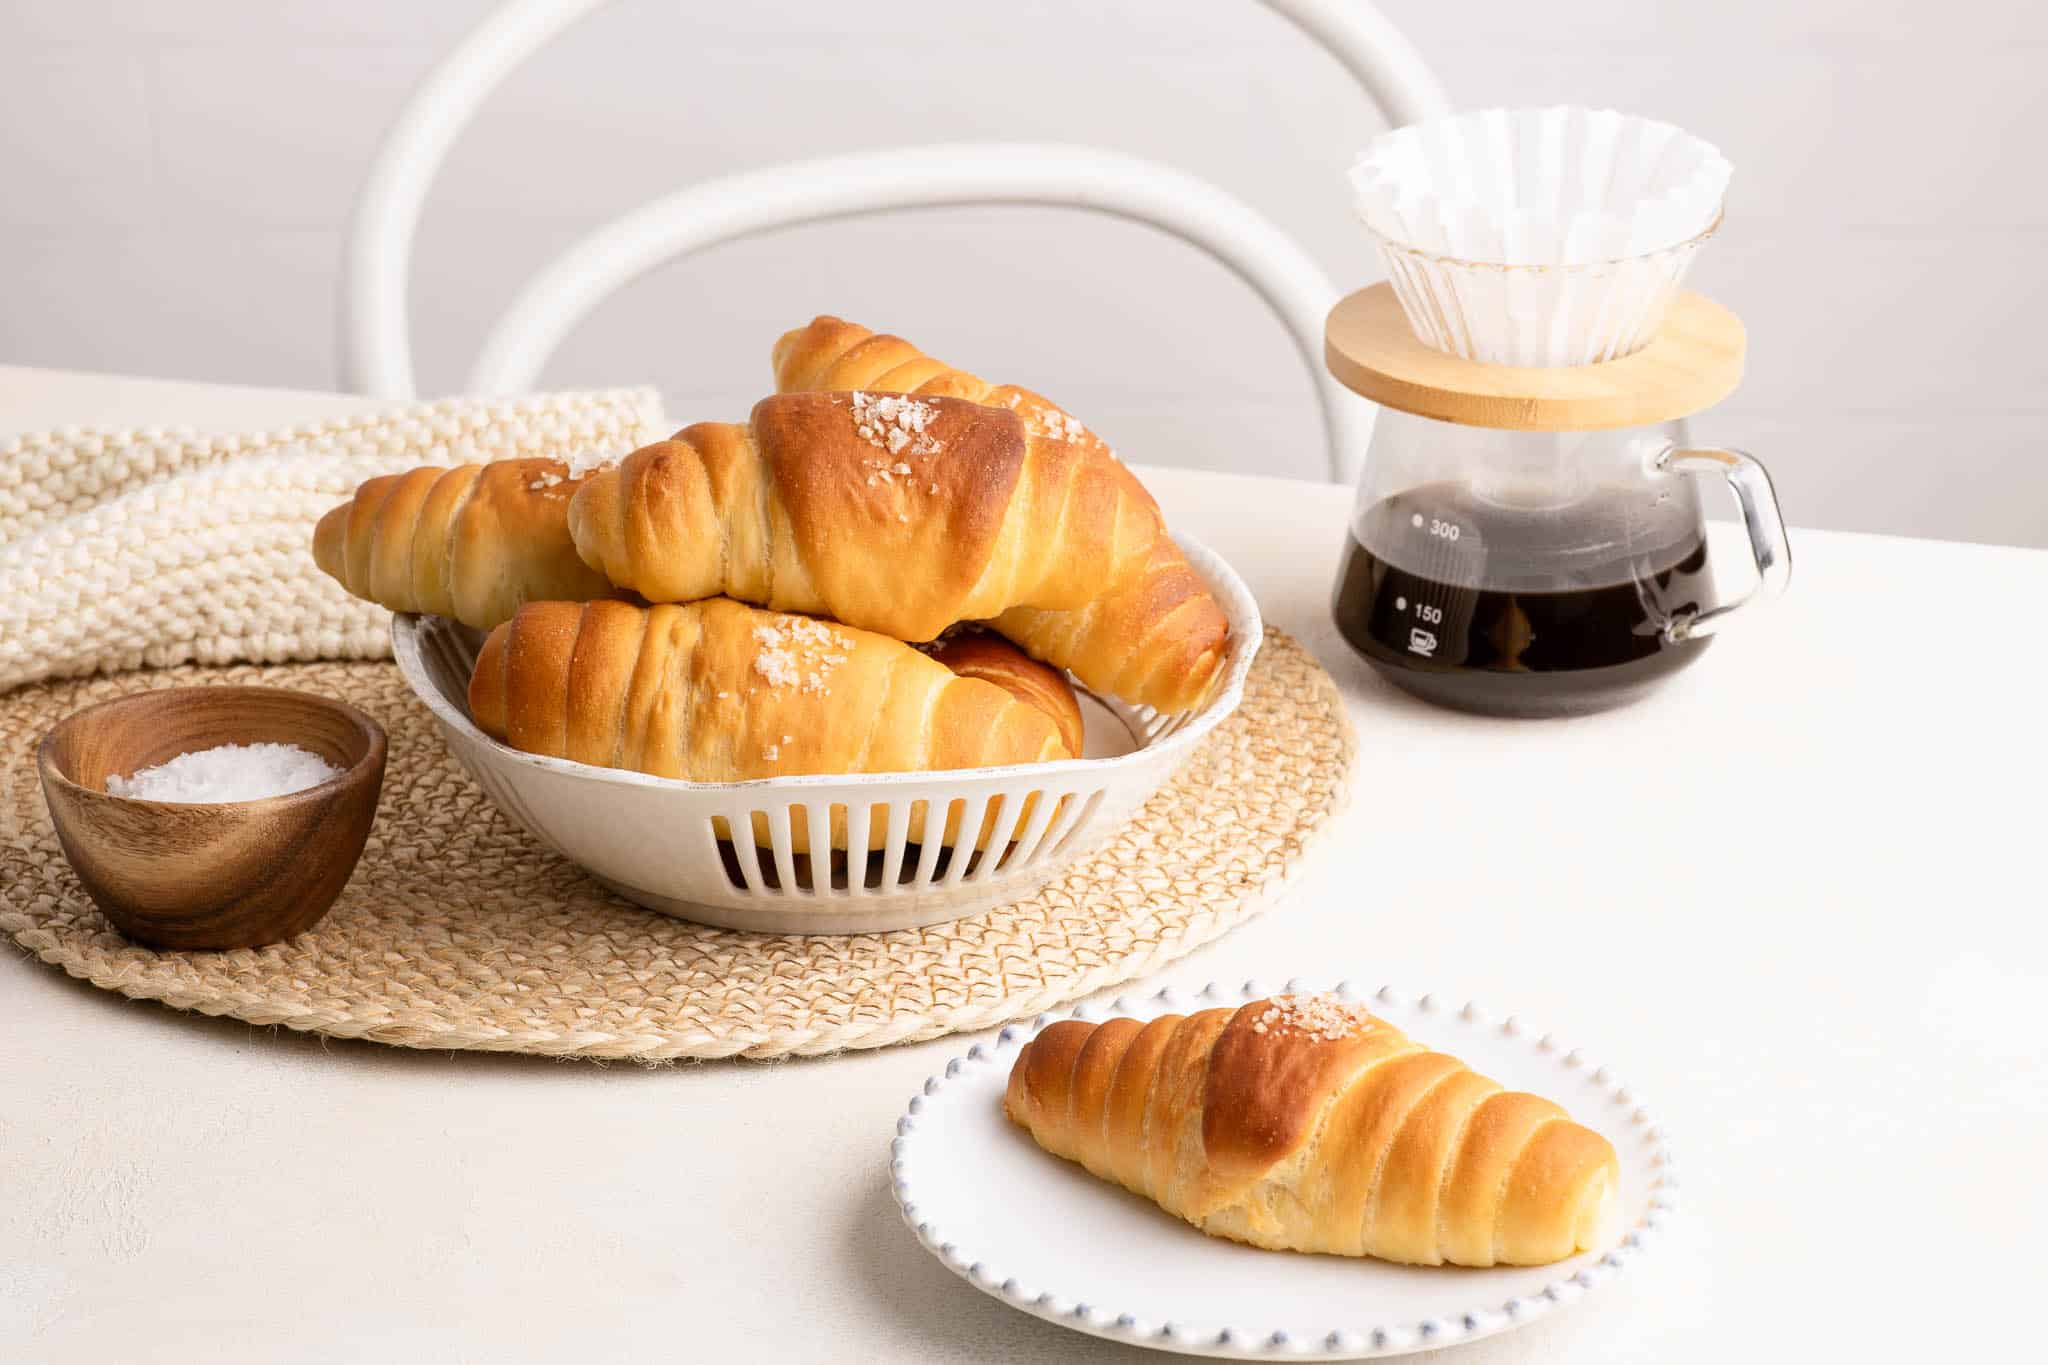
These Salted Butter Rolls might look like croissants, but they are in fact soft and squishy bread rolls with a slightly crusty exterior. And as these rolls have a somewhat savoury taste due to the use of salted butter, they are great served at breakfast or alongside a soup or main meal.
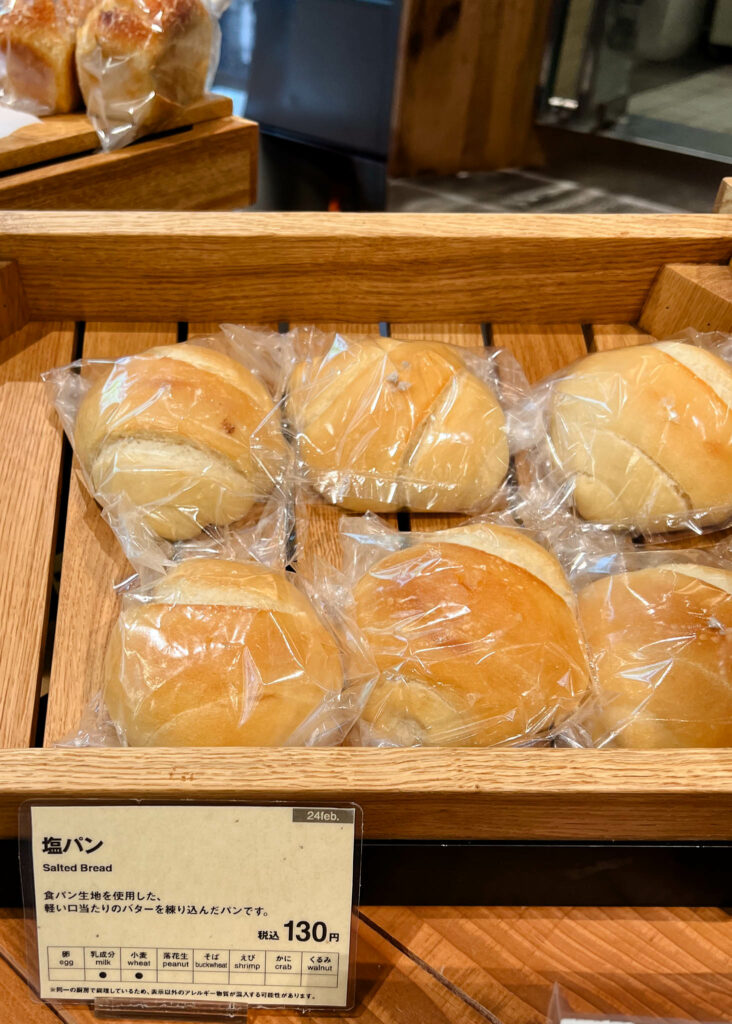
Muji Ginza Bakery
On a recent trip to Tokyo, we visited the Muji Flagship store in Ginza where they have a bakery on the ground level selling freshly-baked bread. I love visiting bakeries anywhere we travel, and I found the bakeries in Japan to be particularly interesting because they are very influenced by French pâtisseries.
The Muji Bakery in Ginza sells mostly bread and baked goods, and the variety is so vast that it’s worth making several visits during your trip so that you can try everything. I really enjoyed their Condensed Milk Cream Bread, White Bread Stuffed with Butter Chicken Curry, as well as their salted butter rolls which they call “Salted Bread”. The latter tasted exactly as I had imagined!
Salted Butter Rolls Recipe
I have experimented with a few recipes and techniques for making Salted Butter Rolls, and I think the best place to start is with my basic recipe for Japanese Milk Bread. In fact, the recipe below is very similar to one I use to make Japanese Milk Buns, except I have made the dough less enriched by reducing the butter content and omitting the egg.
My recipe also attempts to create a crisp and crusty exterior by using a method which I normally employ when making baguettes (especially Vietnamese-style baguettes). That is, immediately after you place the buns in the oven, you add some boiling water to a hot pan in the oven to create some steam.
The science behind creating crispy bread rolls is that, the more moisture that is on the surface of the dough, the more crispy the crust will be.
What Type of Salted Butter To Use
As a general rule, I only use unsalted butter when baking so that I can better control the amount of salt in the recipe. But I also keep salted butter on hand for my breakfast spread, or to have with a nice loaf of French baguette.
Different brands of salted butter have varying levels of saltiness, so you generally have to shop around until you find a brand which suits your tastes.
My favourite brand of salted butter is Grand Fermage Noirmoutier Sea Salt Butter from France, which has large salt flakes throughout the butter to give a wonderful burst of saltiness as you eat it. I love this butter so much that I stock up on them whenever we are in France and keep them in the freezer.
How to Make Salted Butter Rolls
Salted Butter Rolls are made using a Japanese milk bread recipe. Making a Japanese milk bread is very similar to making any other loaf of bread, except that you also add a floury paste to the dough. This paste, called a Yudane or Tangzhong, takes only a few minutes to make, but it makes all the difference to the finished loaf of bread.
Once you get started, you will quickly see that this milk bread recipe is quite similar to a brioche recipe, both in terms of ingredients, as well as texture of the dough.
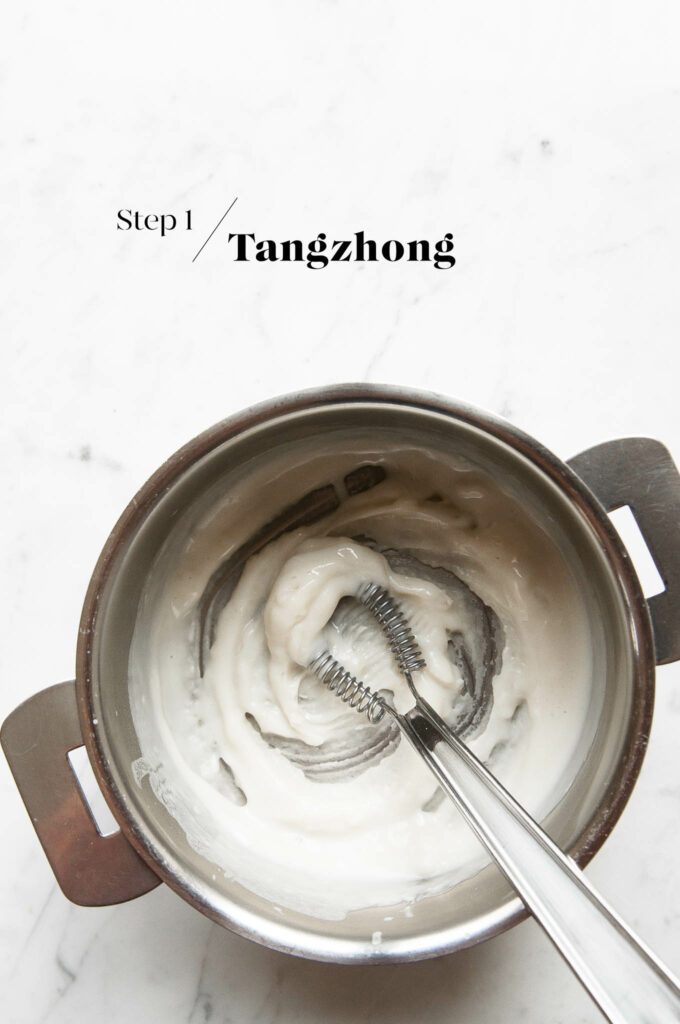
Step 1
Make the Tangzhong by whisking together the ingredients in a small saucepan. Place the saucepan over low heat, and continue whisking until the mixture forms a thick paste. You want a thick enough consistency so that, as you whisk the mixture, the whisk leaves lines which do not move.
Scrape the Tangzhong into a small bowl and set it aside to cool. Once cooled, cover the bowl with clingfilm and place it in the fridge overnight.
If you are in a hurry, you can use the Tangzhong as soon as it has cooled to room temperature. But leaving the Tangzhong overnight allows it to develop more flavour.
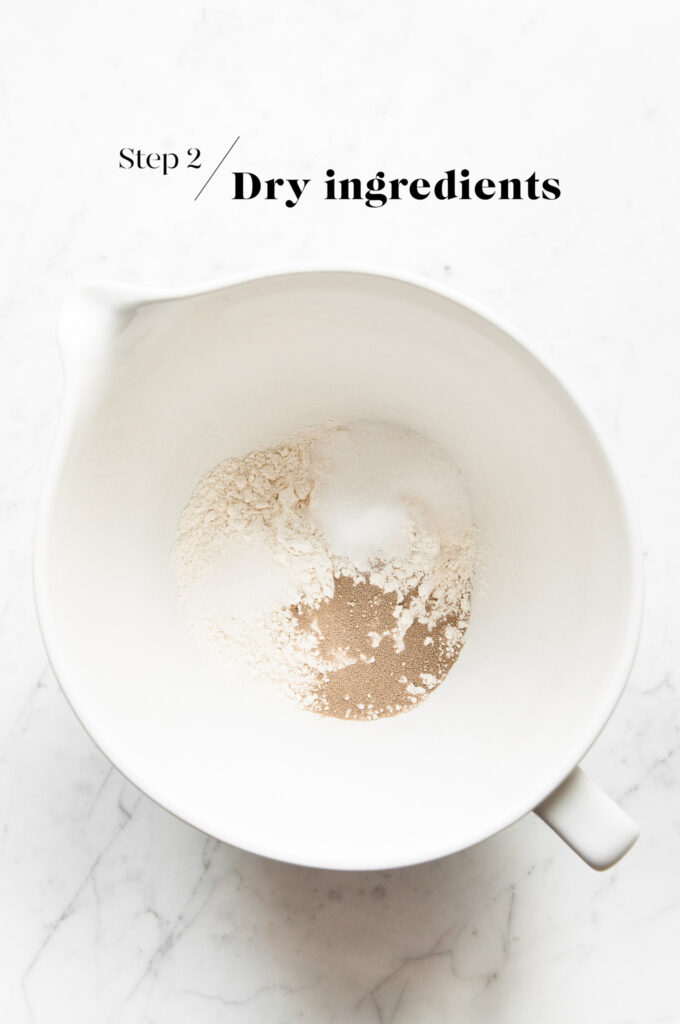
Step 2
Measure the flour, yeast, salt and sugar into the bowl of an electric stand mixer. Lightly mix the ingredients together.
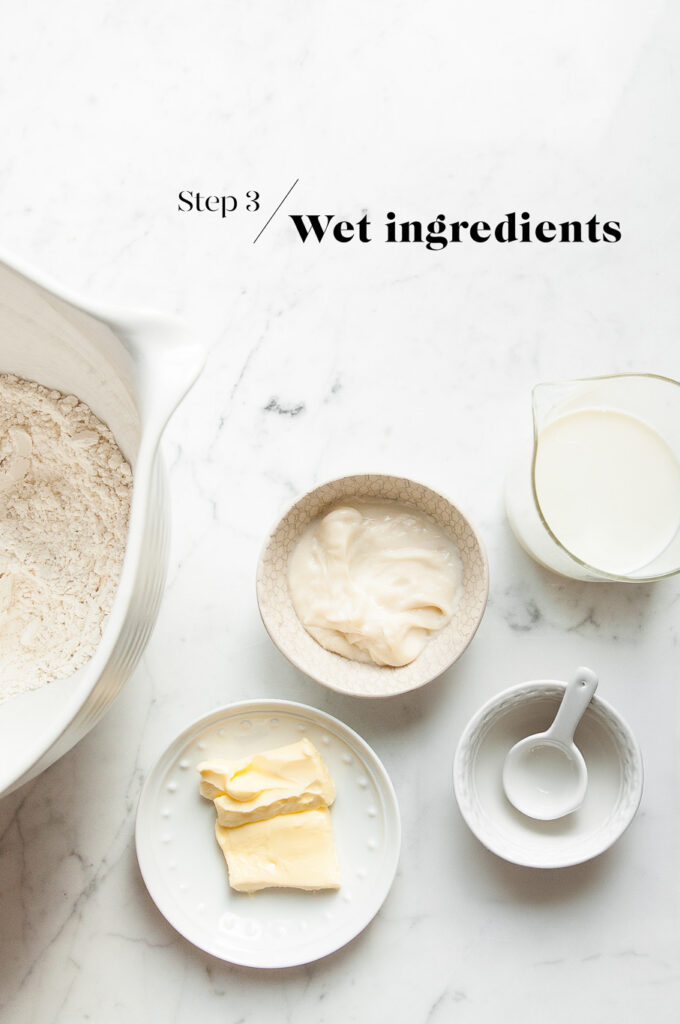
Step 3
Add the Tangzhong. Use the dough hook to start to incorporate everything together. Slowly add the milk until a sticky dough starts to form. Then add the butter, one tablespoon at a time.
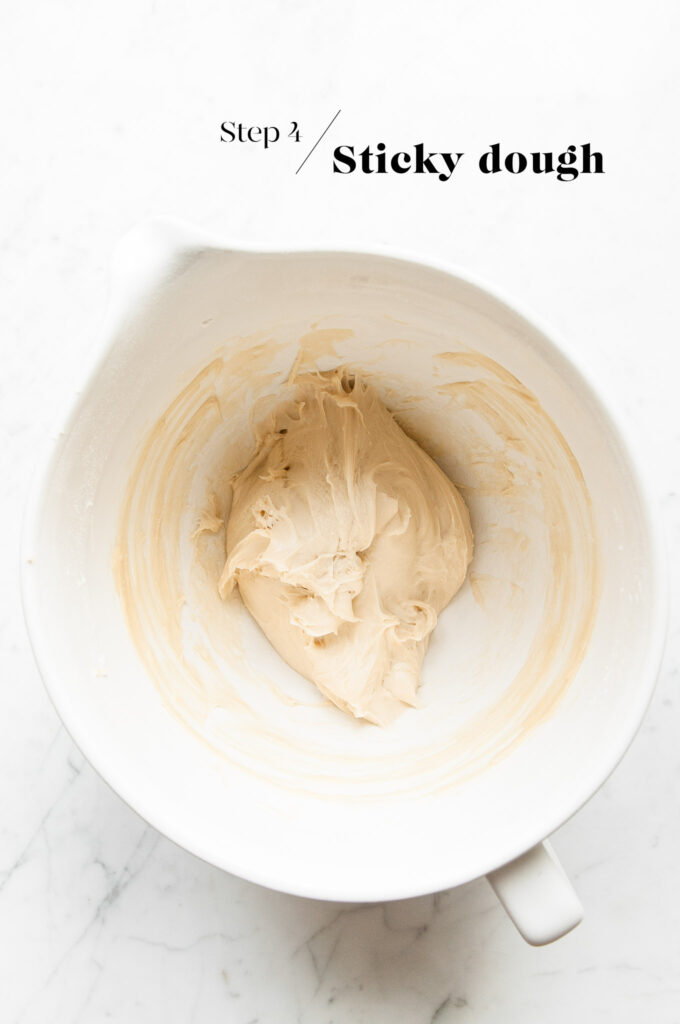
Step 4
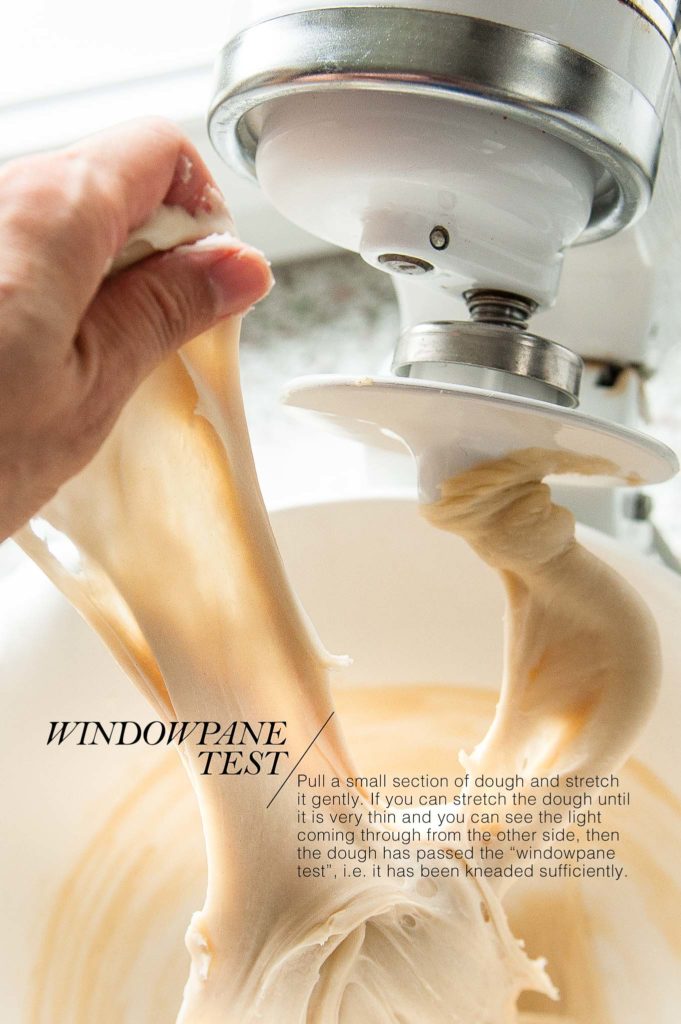
Knead the dough on medium speed for 10-15 minutes until you have a dough which passes the windowpane test.
To perform the “windowpane test”, pinch off a small piece of dough, roll it into a ball and use your hands to gently stretch the dough. If the dough can stretch to form a thin sheet and be almost translucent so that you can see the light through it, your dough has passed the “windowpane test”. This means that you have kneaded the dough sufficiently and that the dough is ready to be proofed.
At this stage, the dough will be somewhat sticky and tacky, mostly because of the butter and high liquid content. But the dough should be coming away from the sides of the bowl during the mixing. Once the dough has had its first proofing, it will be less sticky to the touch and easier to handle. If the dough is too sticky and impossible to handle, knead in a tablespoon of flour at a time until the dough is easier to handle.
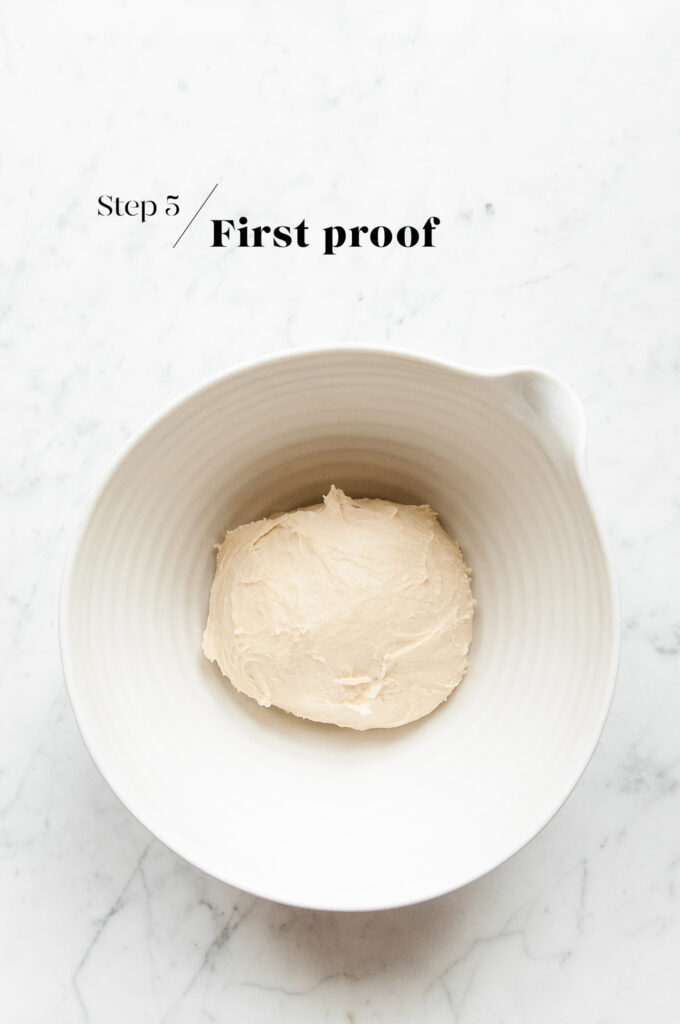
Step 5
Lightly oil a large mixing bowl. Roll the dough into a smooth-ish ball and place it inside the bowl.
Cover with a clean tea towel, and set it aside somewhere warm for about 1 to 1.5 hours, or until it has doubled in size.
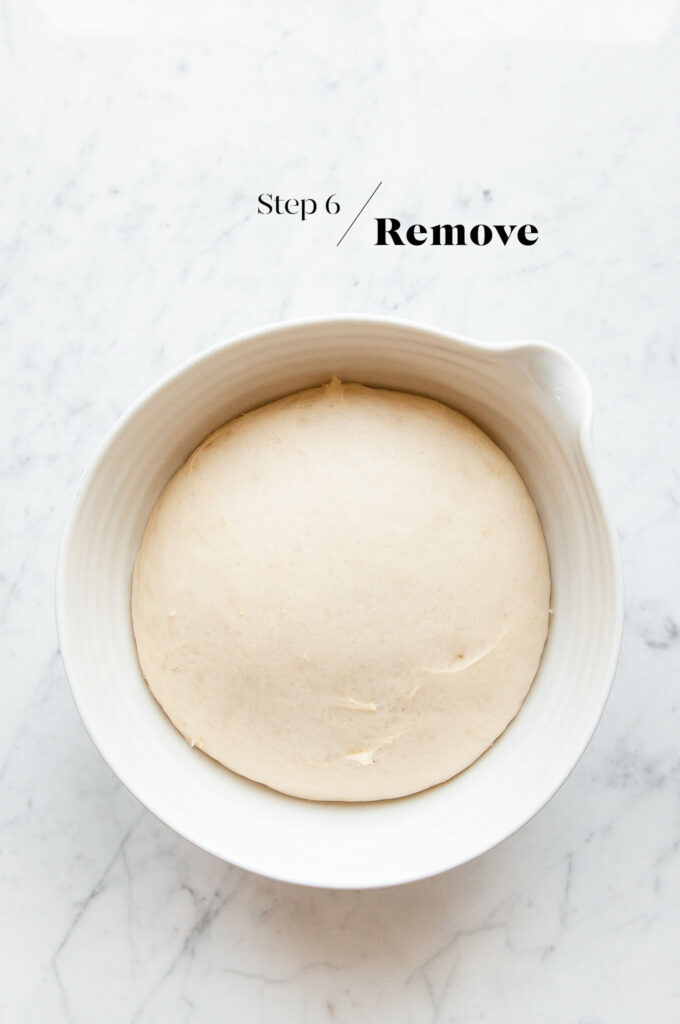
Step 6
Once the dough has doubled in size, gently remove the dough from the bowl. The dough will deflate as you handle it.
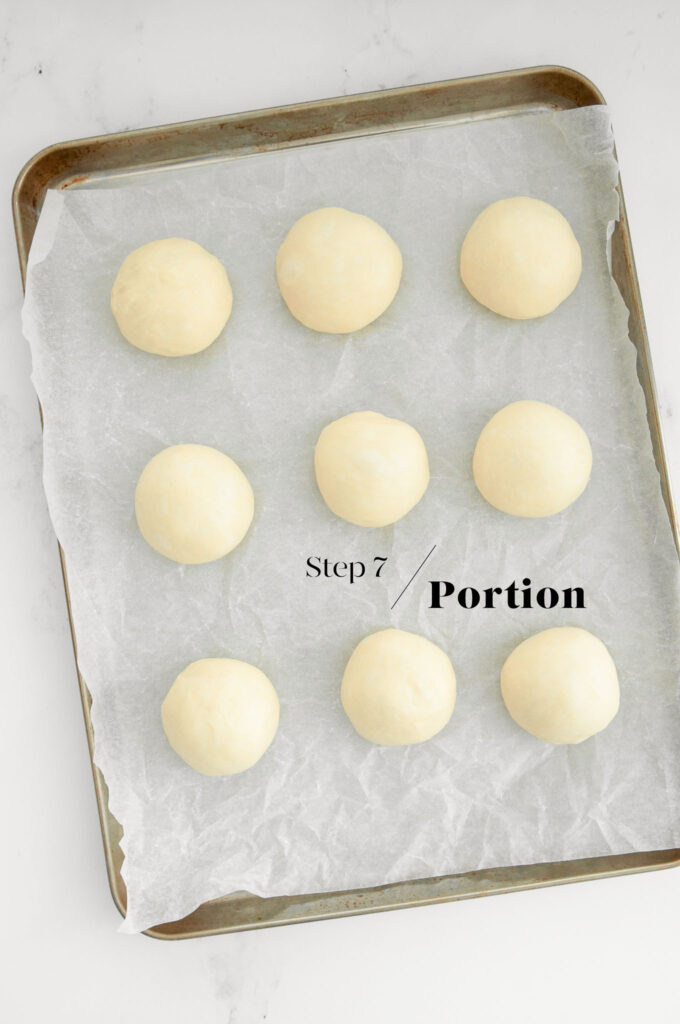
Step 7
Divide the dough into 9 equal portions (I recommend using a digital kitchen scale). Roll each portion into a smooth ball. You can do this by pinching the seams together to form a ball, and then roll the ball on the kitchen counter while cupping it with your hands to ensure smooth sides all over.
Place the balls of dough onto a large baking tray lined with baking paper.
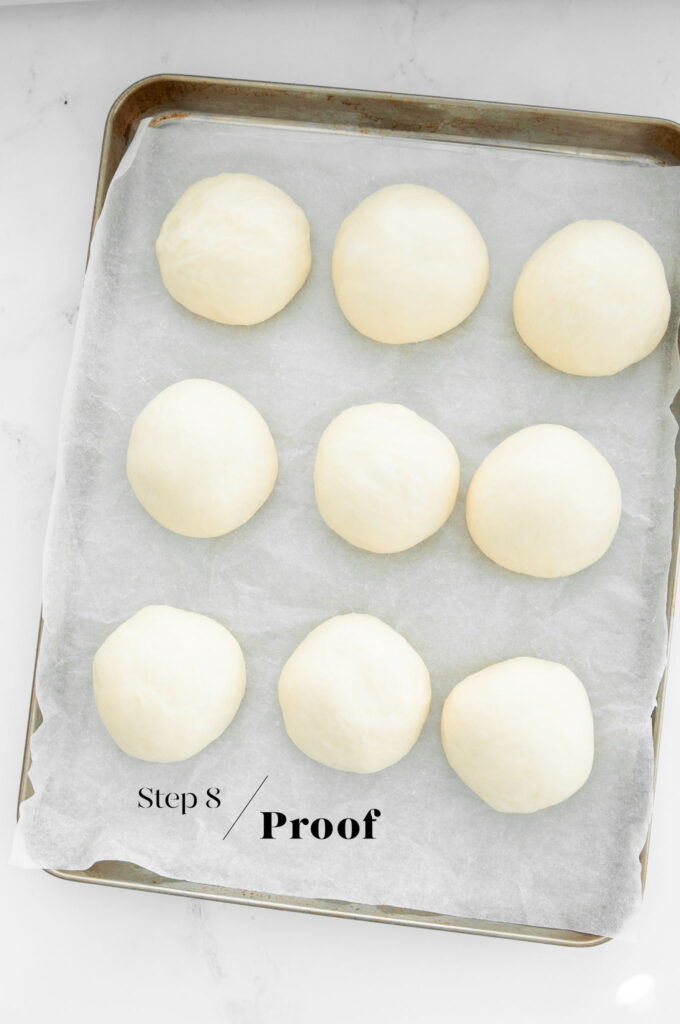
Step 8
Place the pan somewhere warm for about 20 minutes, or until the buns have puffed up slightly.
Meanwhile, cut the butter into small logs, about 5 cm/2 inches long.
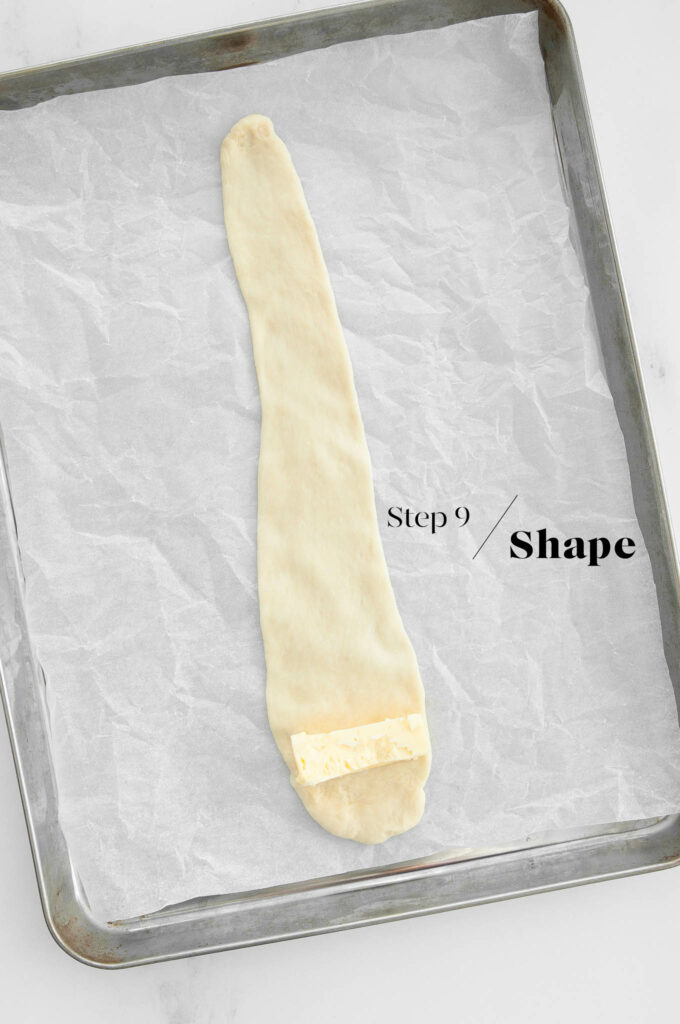
Step 9
Take a piece of dough and gently roll it into a long log. Use a small rolling pin to roll the dough out into a long, skinny triangle. The length of the dough should be approximately 50 cm/20 inches long. In fact, the longer and thinner you can roll the dough, the more layers your buns will have, which will result in a softer and fluffier bun.
The wider end of the dough should be about 6 cm/2.5 inches wide. Place a piece of butter on the wide end of the dough, and roll up the dough. Just as you have encased the butter, pinch the sides to seal the butter inside the dough. Then continue rolling the dough until you reach the end. The dough should now look like a croissant.
Place the croissant-shaped dough onto a large baking tray lined with baking paper.
Repeat with the remaining balls of dough.
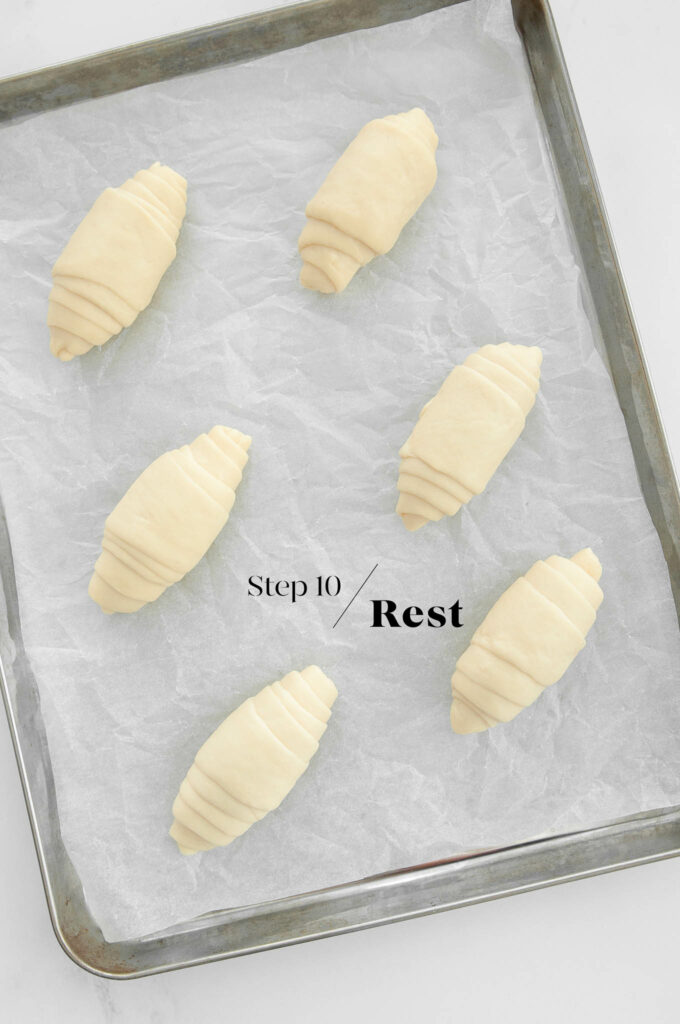
Step 10
Place the croissant-shaped dough somewhere warm for 20-30 minutes, or until the buns have puffed up slightly.
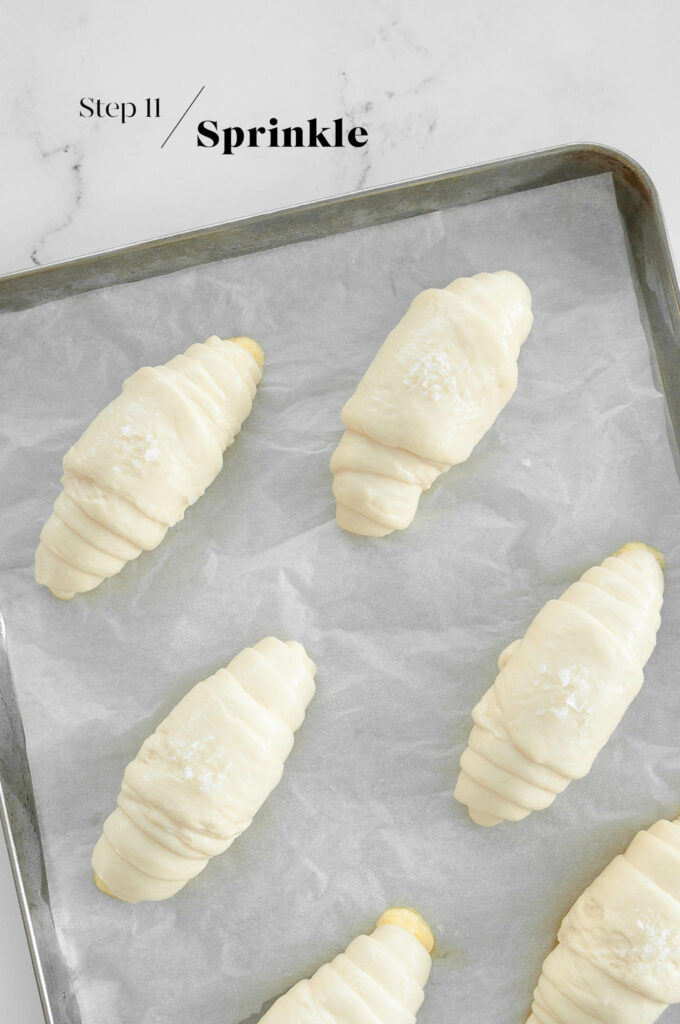
Step 11
Meanwhile, preheat the oven to 200°C/392°F. Place a metal tray on the middle shelf of the oven, and a small roasting tray or cast iron pan on the lower shelf.
Also put the kettle on to boil some water.
Once the buns have puffed up nicely, spray them with some water, and sprinkle the middle of the buns with some coarse sea salt.
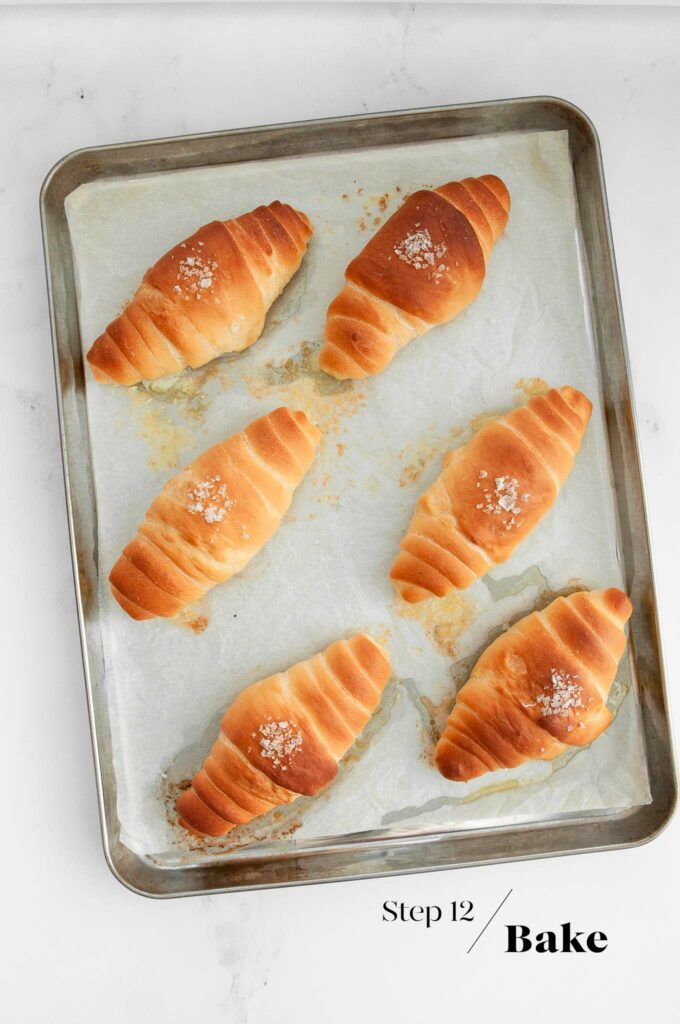
Step 12
Place the tray of buns into the oven.
Then quickly pour the boiling water into the tray or pan on the lower shelf. This will immediately create a lot of steam, which you want to trap in the oven, so quickly close the oven door.
Bake the buns for 10 minutes. Then lower the temperature to 180°C/356°F, and bake for another 10 minutes. If the buns are browning too quickly, cover them with a loose sheet of foil for the rest of the baking time.
The buns are cooked when they are nicely golden all over, and a digital thermometer reveals an internal temperature of at least 85°C/185°F.
How to Serve Salted Butter Rolls
Salted Butter Rolls are delicious at breakfast, whether served plain or with some jam. They are also delicious served as an accompaniment to a soup or even as a dinner roll alongside a main dish. I have happily added Salted Butter Rolls to my brunch menu whenever we have friends over 🙂
Tips for Making Salted Butter Rolls
- Time management. This recipe requires 3 sessions of proofing to achieve a light and airy texture. I recommend making the dough the night before (see below my tips for making bread dough ahead of time), and shaping the dough the morning after.
- Cold butter. When rolling the salted butter in the dough, make sure the butter is as cold as possible so that it is easier to handle, but also so it does not start melting as the dough is resting.
- Spray with water. Many bread recipes require you to brush with egg wash or milk before baking. Here, I have used water to create a greater contrast in colour between the folds. If you use egg wash or milk, the whole surface of the buns will become golden in colour, and the folds on the surface will be less noticesable.
- Baking with steam. You can skip my instructions below for using steam if you want just regular soft buns. But if you want your Salted Butter Rolls to have a more crispy-dinner-roll-texture, I recommend giving the steaming technique a try. You won’t achieve the same results as in a commercial oven with an in-built steamer, but you will definitely notice a more crispy surface on the rolls.
Tips for Making Bread Dough Ahead of Time
I love baking bread, but I don’t love getting up extra early to get started on the dough. So I typically make the dough the night before and allow it to rise slowly in the fridge overnight. The longer proofing time has the added benefit of allowing the dough to develop more flavour and a better texture. Come the morning, the dough will have at least doubled in size, and it will be ready for shaping as per the recipe.
To make the dough the night before:
- Make the dough as per the recipe.
- Place the dough into a large oiled bowl.
- Cover the bowl with plastic wrap or a reusable bowl cover.
- Place the bowl into the fridge.
- Let the dough rise overnight, or for at least 8-10 hours.
- The next morning, the dough should have at least doubled in size.
- Gently remove the dough from the bowl.
- The dough is ready for shaping and the second proof as per the recipe.
- As the dough will be cold from the fridge, the second proof may take slightly longer.

Salted Butter Rolls
Ingredients
For the Tangzhong
- 14 g (2 tablespoons) white bread flour
- 100 ml (⅓ cup plus 1 tablespoon) milk
For the Japanese Milk Bread Dough
- 350 g (2 ⅓ cups) white bread flour
- 3 ½ g (1 teaspoon) instant dried yeast, see Kitchen Notes
- 6 g (1 teaspoon) fine salt
- 55 g (¼ cup) caster sugar, (superfine sugar)
- 125 ml (½ cup) milk, warmed to 37°C/98°F
- 30 g (2 tablespoons) unsalted butter, softened
For the Filling
- 90 g (1 stick) salted butter, good quality, cold
For decorating
- water, to spray
- sea salt, to sprinkle
For baking
- boiling water
Instructions
To Make the Tangzhong
- Whisk the ingredients together in a small saucepan.
- Place the saucepan over low heat.
- Keep whisking until the ingredients form a thick paste. The consistency should be thick enough so that as you whisk the mixture, the whisk leaves lines in the mixture which remains.
- Remove the paste to a small bowl, and set it aside to cool down.
To Make the Dough
- Measure the flour, yeast, salt and sugar into the bowl of an electric stand mixer.
- Mix the dry ingredients together using a dough hook.
- Add the cooled Tangzhong.
- Slowly add the milk until the mixture comes together into a sticky dough.
- Add the butter, one tablespoon at a time. Wait for each tablespoon of butter to be fully incorporated into the dough before adding the next.
- Continue kneading the dough on medium speed for about 10-15 minutes, or until the dough passes the windowpane test. (See Kitchen Notes below). By this stage, the dough should also be coming away from the sides of the bowl.
- Lightly oil a large, clean mixing bowl.
- Roll the dough into a smooth ball and place it into the mixing bowl.
- Cover the dough with a clean tea towel or bowl cover, and place it somewhere warm for about 1.5 hours, or until it has doubled in size.
To Portion the Dough
- Gently remove the dough from the bowl. The dough will deflate as you handle it.
- Divide the dough into 9 equal portions. Use a digital scale for even-sized buns.
- Roll each piece of dough into a smooth ball. I do this by pinching the seams together into a ball, and then rolling the dough on the kitchen bench while cupping it with your hand to ensure that the dough is smooth on all sides.
- Place the smooth balls of dough onto a large baking pan lined with baking paper.
- Place the baking pan somewhere warm for about 20 minutes, or until the buns have puffed up slightly.
To Prepare the Filling
- The filling is simply the salted butter.
- Cut small blocks of cold salted butter, about 10 g/0.35 oz each. The length of the butter should be about 5 cm/2 inches, small enough to wrap inside the dough later.
To Shape the Dough
- Take one piece of dough.
- Gently roll the dough into a long log.
- Use a small rolling pin to flatten the dough, trying to form a very long triangle as you do so. The length of the dough should be about 50 cm/20 inches. The wider end of the dough should be wide enough to fit a small piece of butter, about 6 cm/2.5 inches wide.
- Place the piece of butter at the wide end of the dough, and slowly wrap the butter in the dough, pinching the sides to secure the piece of butter. Keep rolling until you reach the end of the dough.
- Once the dough is all rolled up, it should look like a croissant.
- Place the dough with the seam facing down on a large baking tray lined with baking paper.
- Repeat the above steps with the remaining pieces of dough.
To Prove the Shaped Dough
- Place the pan somewhere warm, covered with a clean tea towel, for about 20-30 minutes, or until the buns have puffed up slightly.
To Bake the Salted Butter Rolls
- Place a metal baking tray on the middle shelf.
- Place a small roasting pan or cast iron pan on the lowest shelf.
- Preheat the oven to 200°C/392°F (without fan).
- Put the kettle on to boil some water.
- Spray the buns with some water.
- Sprinkle the middle of the buns with some coarse sea salt.
- Place the tray of buns onto the middle shelf.
- Quickly pour the boiling water into the tray or pan on the lowest shelf. This will immediately create some steam, which you want to trap in the oven, so close the oven door ASAP.
- Bake the buns for about 10 minutes.
- Reduce the heat to 180°C/356°F.
- Bake the buns for another 10 minutes. If the buns are browning too quickly, cover the buns with a loose sheet of foil for the remaining baking time.
- The buns are cooked if an internal thermometer reads 85°C/185°F.
- Some butter will have melted from the buns onto the baking tray, and this is completely normal. The melted butter will help to crisp up the bottom of the buns.
- Leave the buns in the pan for about 5 minutes, before carefully removing the buns to a wire rack to cool completely.
Kitchen Notes
- WINDOWPANE TEST
Pinch off a small piece of dough, roll it into a ball and use your hands to gently stretch the dough. If the dough can stretch to form a thin sheet and be almost translucent so that you can see the light through it, your dough has passed the “windowpane test”. This means that you have kneaded the dough sufficiently and that the dough is ready to be proofed. - MAKE AHEAD TIPS
To start the Milk Bread dough the night before:
* Make the dough as per the recipe.
* Place the bowl of dough (covered) in the fridge to proof overnight, or for at least 8 to 10 hours. During this time, it should have at least doubled in size.
* The next day, proceed with the rest of the recipe. As the dough will be cold, it may require a bit more time for the second proofing period. - DIFFERENT TYPES OF FLOUR
For Swiss readers: I use Zopfmehl (or farine pour tresse) when making bread and enriched dough. - DIFFERENT TYPES OF YEAST
* Please note that there is a difference between instant yeast (also called instant dried yeast or fast-action dried yeast) and dried yeast (also called active dry yeast). If you are not sure what type of yeast you have, please check the packaging for instructions on how to use the yeast.
* With instant yeast, you can add it directly to the flour mixture without having to activate it first.
* With dried yeast, you will need to activate it first (usually in some warm liquid). - PROOFING THE DOUGH
Dough needs a warm environment for the yeast to activate and cause the dough to rise. If you don’t have a warm place in your home, try one of the following ideas:
* In the oven with the oven light switched on (works only for some ovens).
* In the oven with a tray of boiling water on the bottom shelf.
* In the oven at a low temperature of about 25-30°C (77-86°F). - OVEN TEMPERATURES
All recipes on this website state temperatures for a regular oven (i.e. a conventional oven without fan). If you have a convection oven with a fan, please consult the manufacturer’s handbook on how to adjust the temperature and baking time accordingly. - CONVERSIONS
To convert from cups to grams, and vice-versa, please see this handy Conversion Chart for Basic Ingredients.


I made these rolls today and they were perfection. The rolls were soft, fluffy and delicious. Love your easy to follow recipe. Thank you!
Done this recipe a few times, turns out beautiful everytime! I tried an egg wash on this third try and it turned out nice, but the water spray method is also good! Love doing this as a snack 🙂
Hi Sam,
Oh that’s great to hear! So glad you enjoy this recipe. Thanks also for your tips!