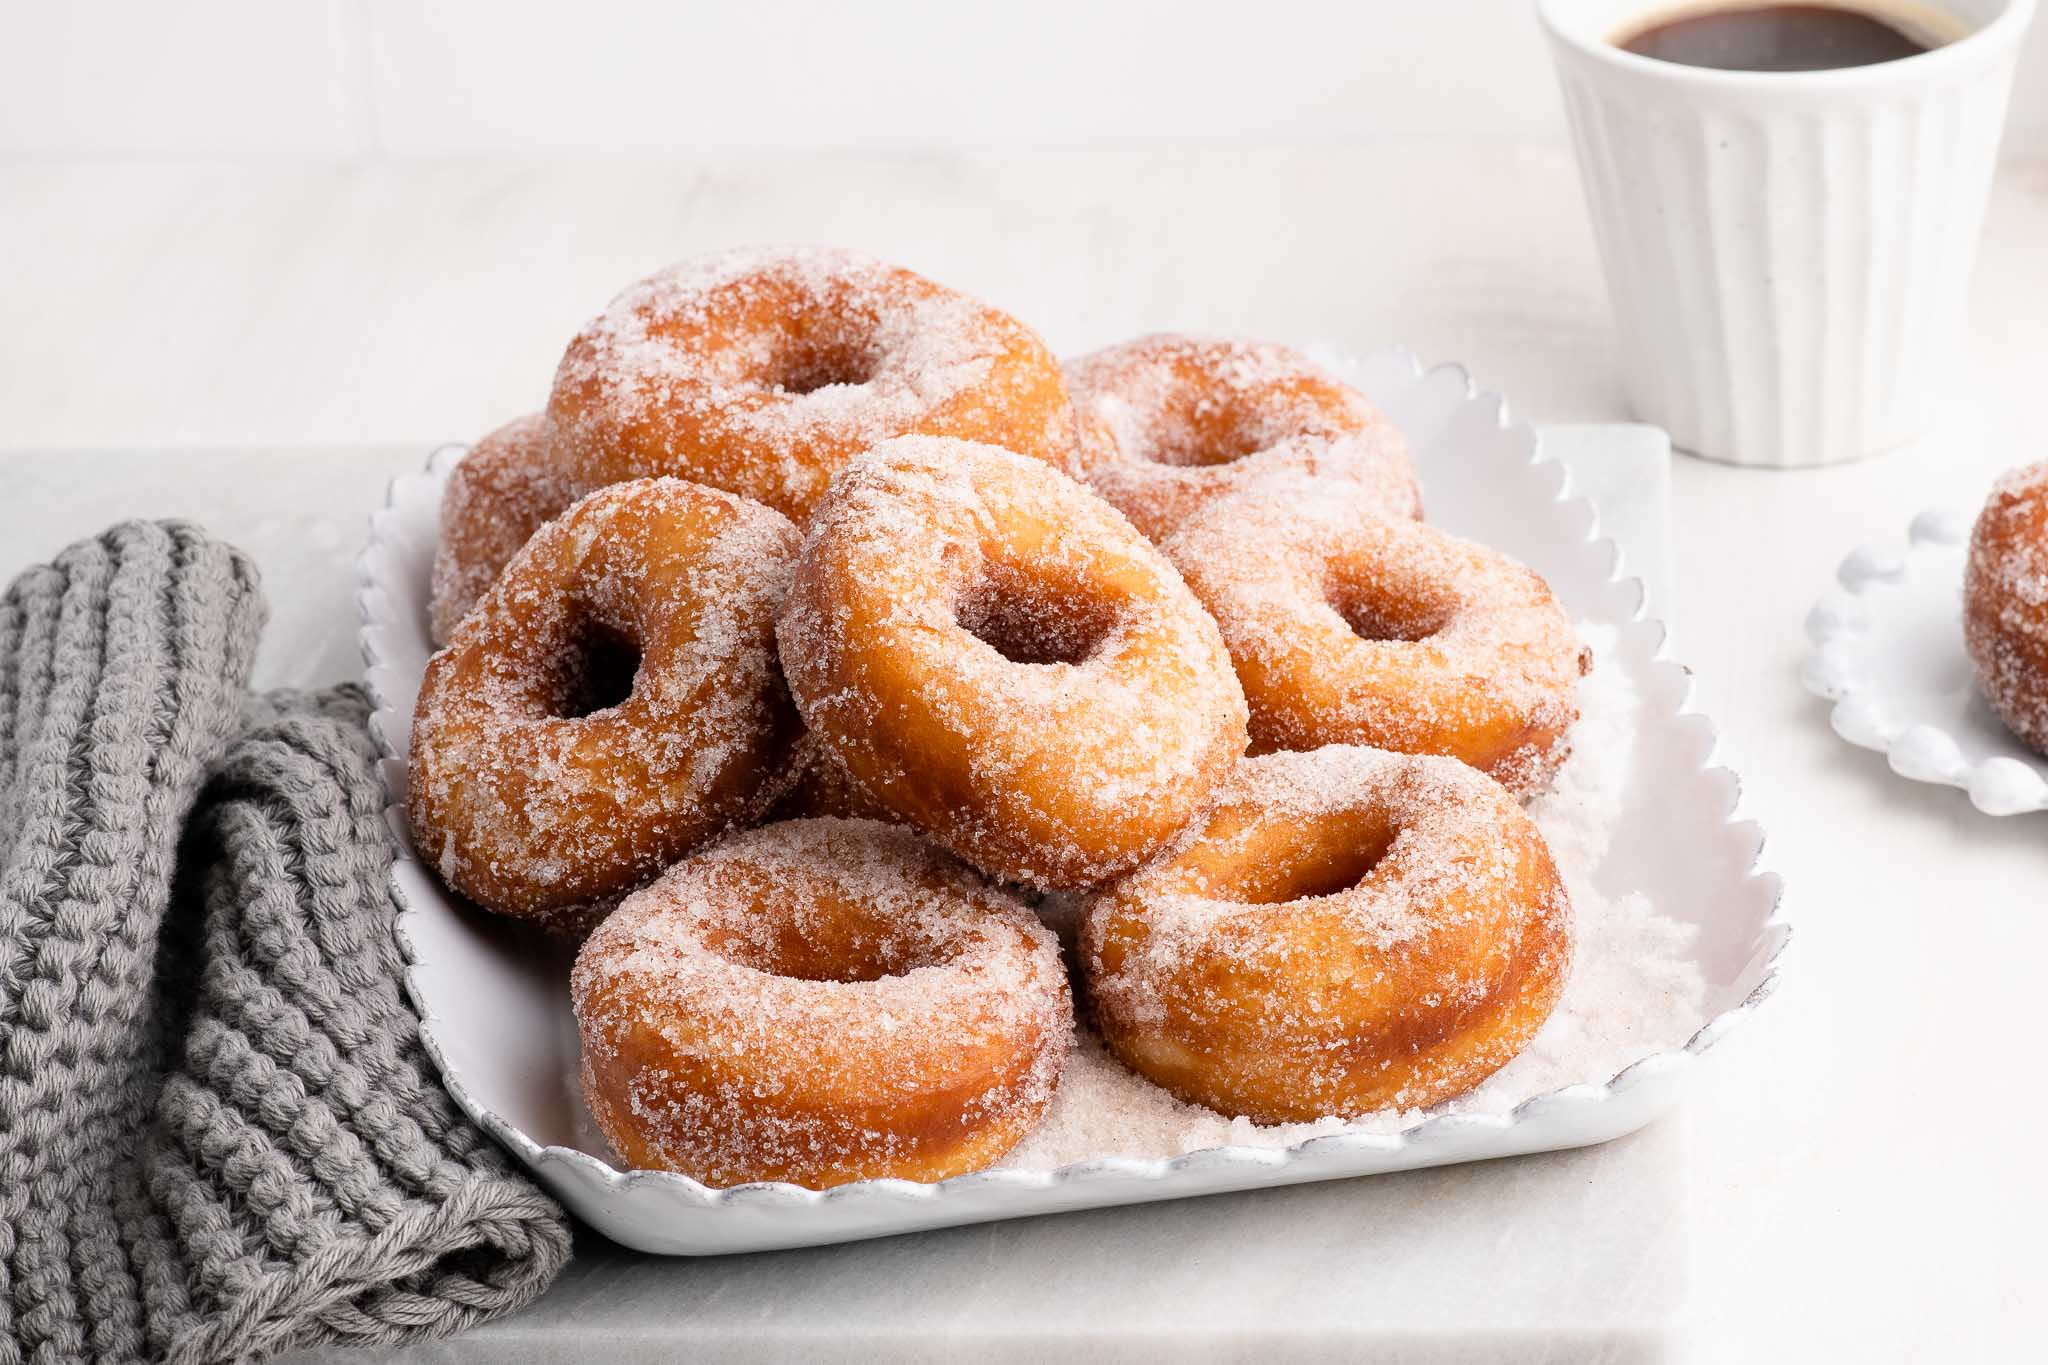
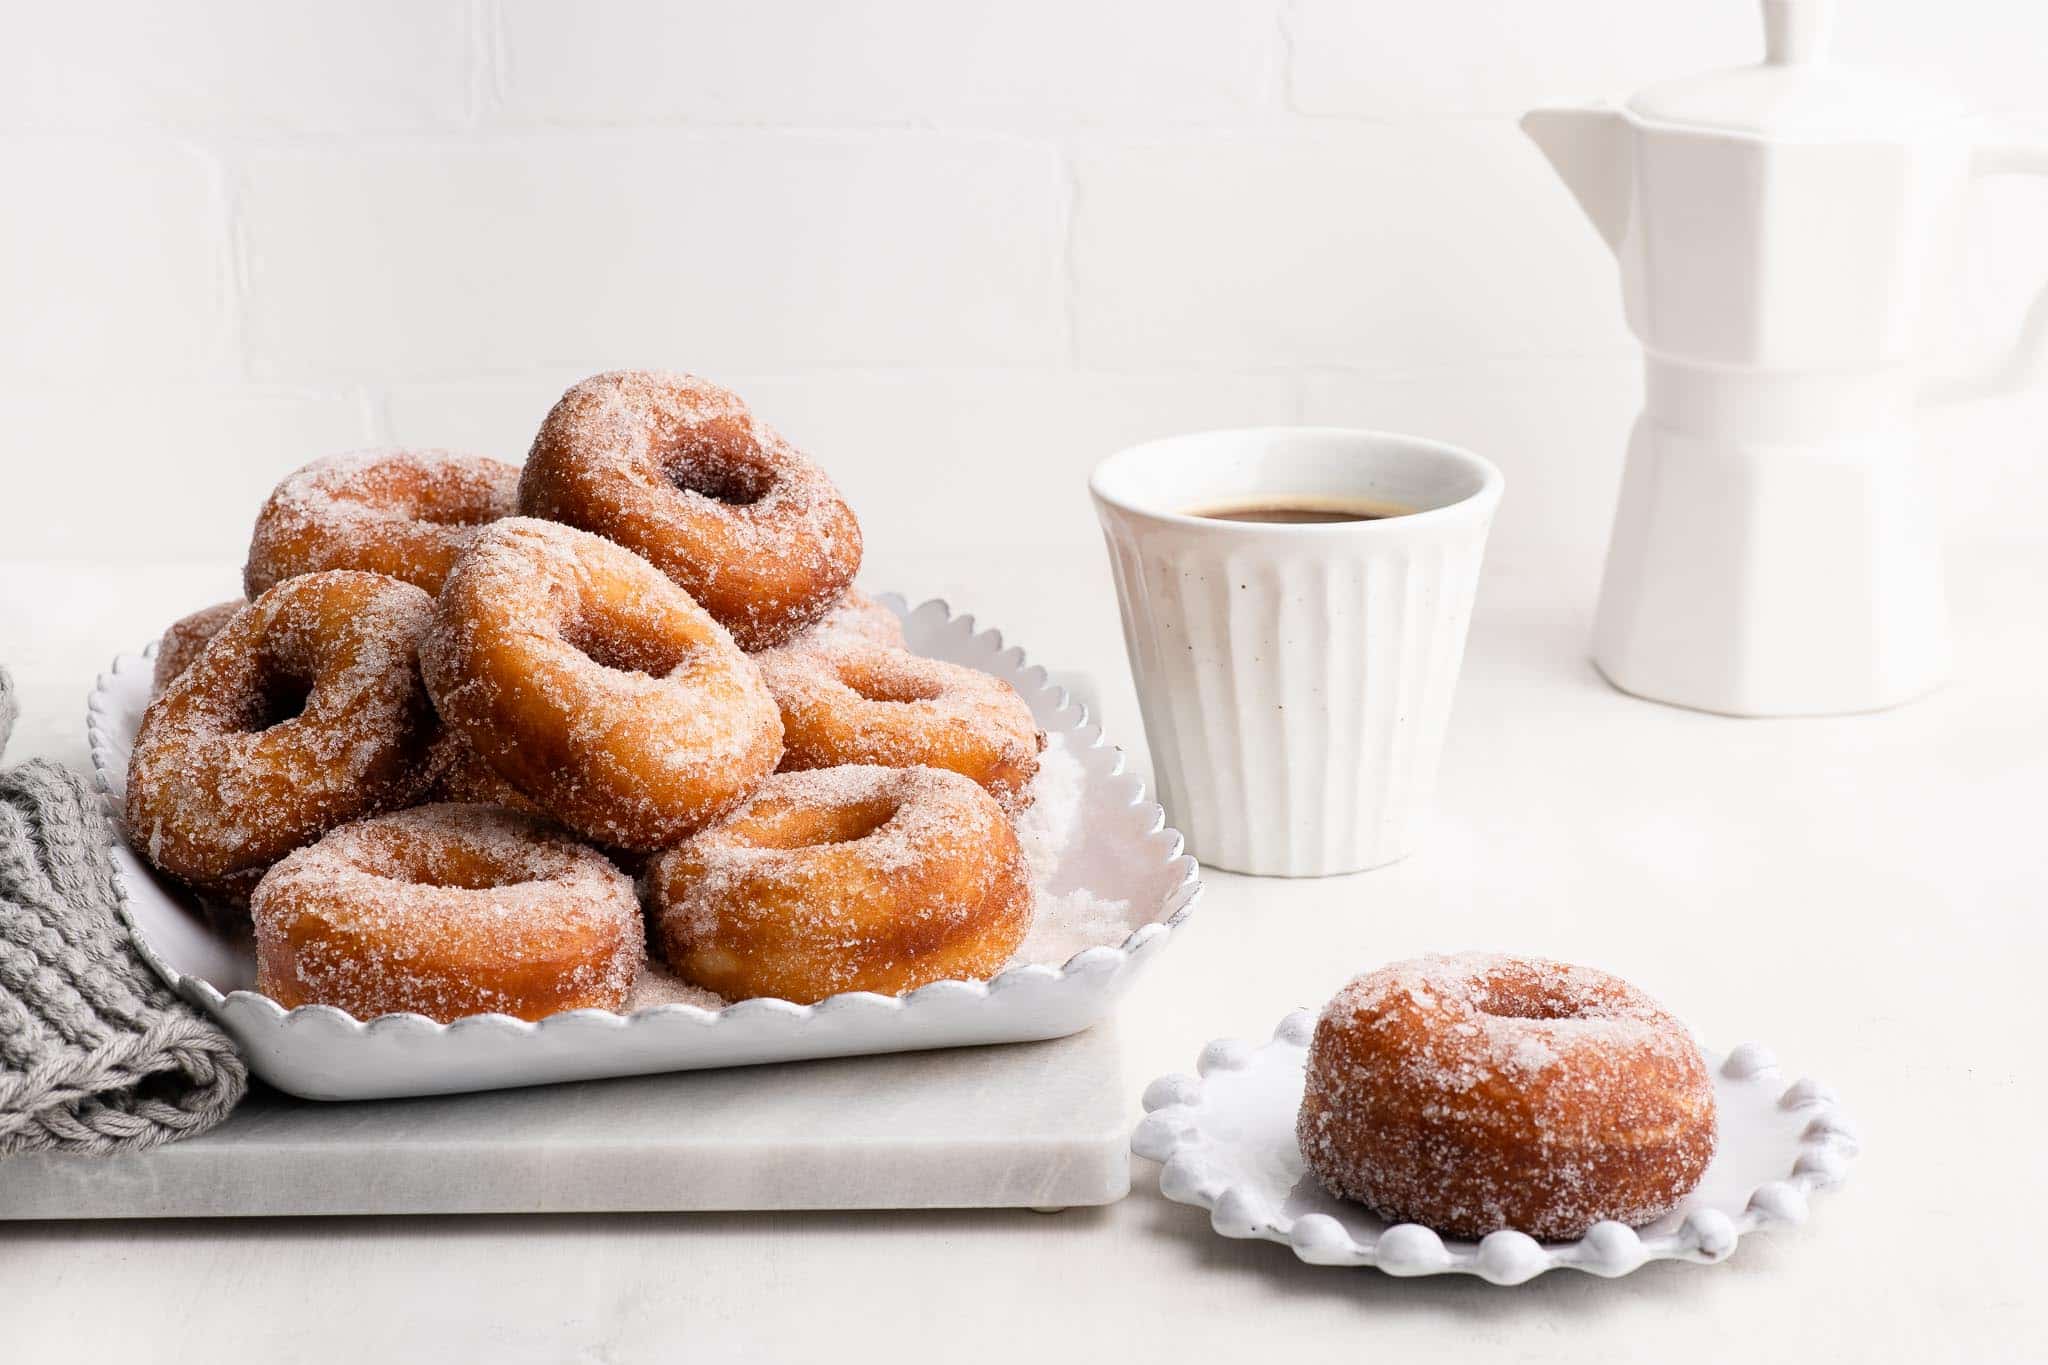
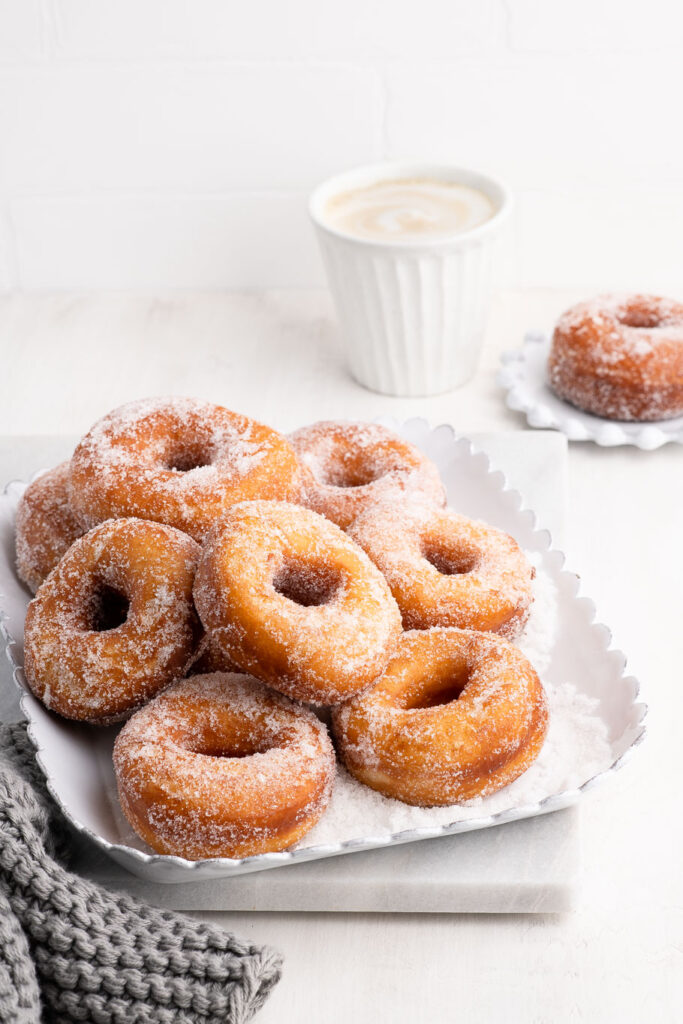
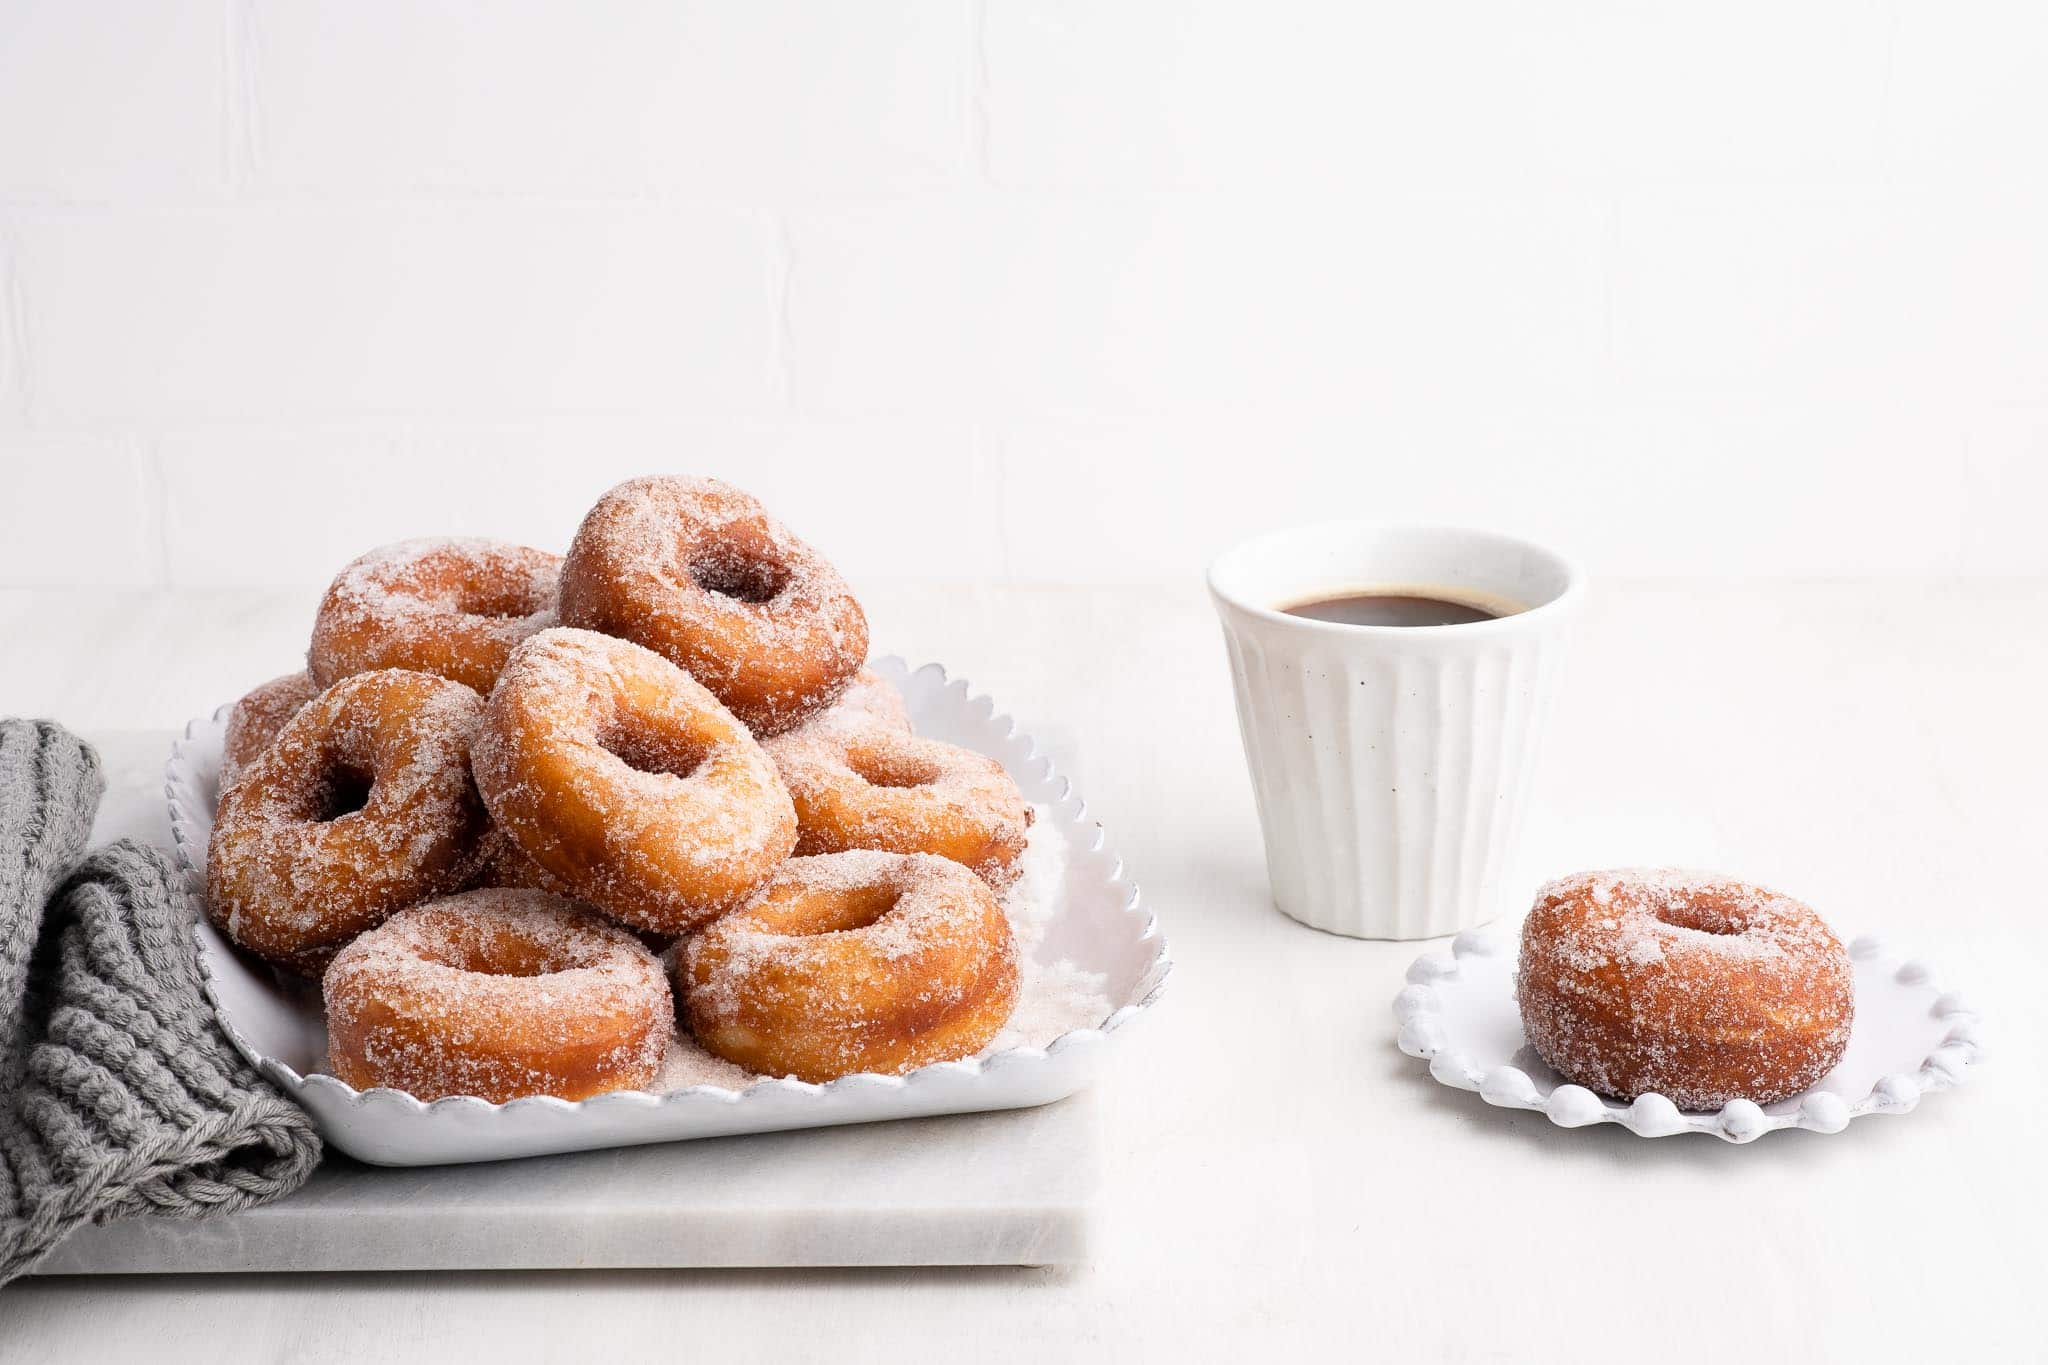
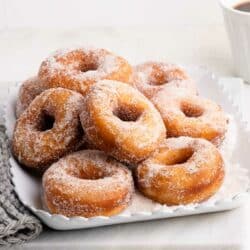
Cinnamon Sugar Donuts
One of the things I miss most about Australia are the hot cinnamon donuts that you can get almost everywhere. Growing up in Brisbane, our local shopping centre had a Donut King where you could watch the donuts being made and cooked as you waited for your order. Even if I wasn’t planning on buying cinnamon donuts, just the smell of the hot cinnamon wafting through the air was usually enough to make me join the queue.
My mum was also a fan of hot cinnamon donuts, and regularly enjoyed them with a cup of coffee for her breakfast. My parents ran a bakery when I was younger, so it was funny that she would sometimes go out to buy donuts for her breakfast, whilst the bakers would be pulling out freshly baked bread and croissants from the oven! I guess, sometimes she just wanted something a bit different to what she was selling all day, every day 😉

Berliners vs Donuts
Here in Switzerland, the bakeries sell Berliners, which are jam-filled donuts, often dusted with icing sugar (powdered sugar). In winter, especially in the Alps, some bakeries set up stands outside to sell freshly-cooked Berliners, which are truly a joyous treat when you are trying to warm up in the chilly snow.
Whilst there is a time and place for Berliners, they are not quite the same as the Cinnamon Sugar Donuts of my childhood. You really need the contrast between the soft, fluffy dough and the crunchy granulated sugar. And you really need the donuts to be fresh and hot to enjoy them at their best.
Homemade Donuts
Once in a while, when the craving calls, I like to make a batch of homemade Cinnamon Sugar Donuts. Much like my mum, I am rather partial to a hot donut with my coffee at breakfast, or any time of the day really!
If you are familiar with making bread, making donuts is very similar to making bread, except you deep-fry the dough instead of baking them in the oven.
I recently introduced my kids to these delights, and they love to help me make them because it means they get to eat them as soon as I cook them! I do all of the deep-frying (of course), and as soon as the donuts are nicely golden, my kids are ready to quickly toss them in the cinnamon sugar whilst I get on with the next batch.
Milk Bread Donuts
My recent obsession is milk bread, which is a Japanese-style brioche bread. Milk bread is very similar to French-style brioche, but it contains the addition of a Tangzong or Yudane, which is a roux to make the dough extra soft and fluffy. Once you try making milk bread, it is hard to make any other sort of dough!
Cinnamon Sugar Donut Recipe
Which is how this particular recipe for Cinnamon Sugar Donuts came about. For this donut recipe, I used my milk bread recipe to produce the softest, fluffiest donuts I have ever tasted!
As milk bread dough has extra liquid content from the Tangzong or Yudane, frying the dough will make them expand and cook quicker than other types of dough. Once the dough hits the oil, they will expand to double or triple the size. The result is an extra soft and extra tender donut which is like biting into a soft pillow.
And the best part is that, because milk bread keeps longer than most of other types of bread, these donuts even taste great after 1-2 days! This is a huge advantage over most other donut recipes which typically harden and go dry by the next day.
How to Make Cinnamon Sugar Donuts
This recipe for Cinnamon Sugar Donuts uses a milk bread dough. Making milk bread is very similar to making any other type of bread, except that you also add a floury paste to the dough. This paste, called a Tangzhong or Yudane, takes only a few minutes to make, but it makes all the difference to the finished product.
Once you get started, you will quickly see that this milk bread recipe is quite similar to a brioche recipe, both in terms of ingredients, as well as texture of the dough.
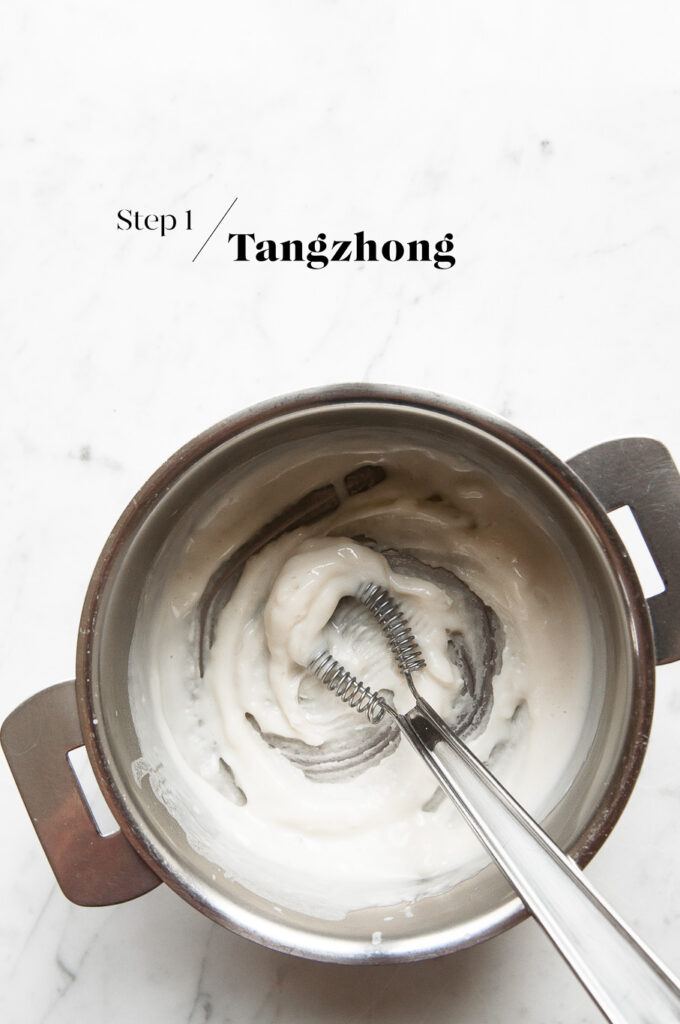
Step 1
Make the Tangzhong by whisking together the ingredients in a small saucepan. Place the saucepan over low heat, and continue whisking until the mixture forms a thick paste. You want a thick enough consistency so that, as you whisk the mixture, the whisk leaves lines which do not move.
Scrape the Tangzhong into a small bowl and set it aside to cool. Once cooled, cover the bowl with clingfilm and place it in the fridge overnight.
If you are in a hurry, you can use the Tangzhong as soon as it has cooled to room temperature. But leaving the Tangzhong overnight allows it to develop more flavour.
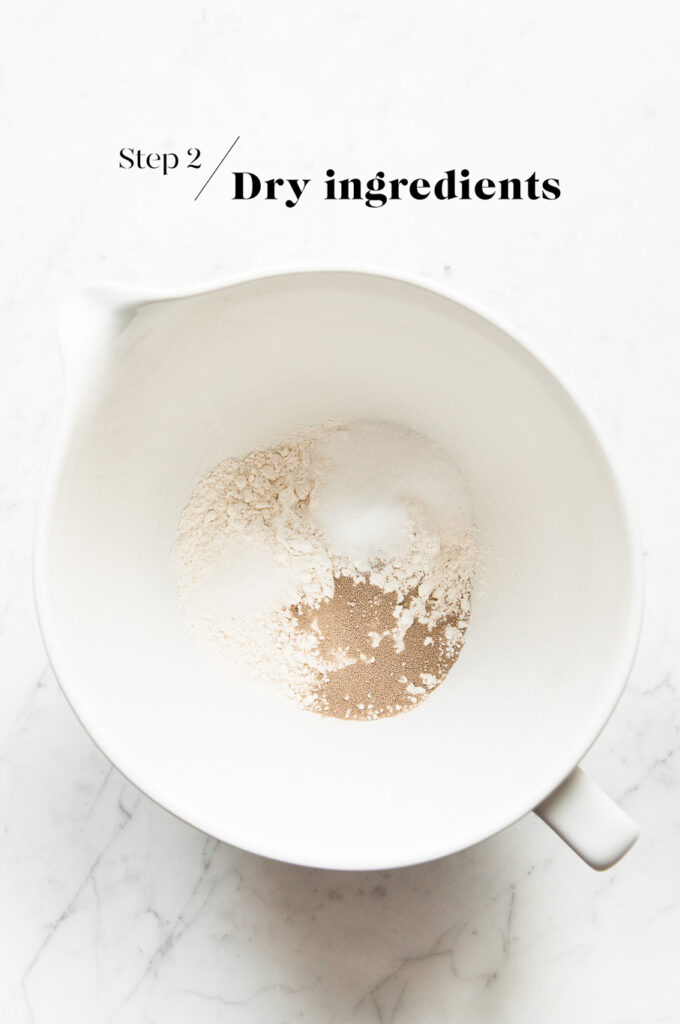
Step 2
Measure the flour, yeast, salt and sugar into the bowl of an electric stand mixer. Lightly mix the ingredients together.
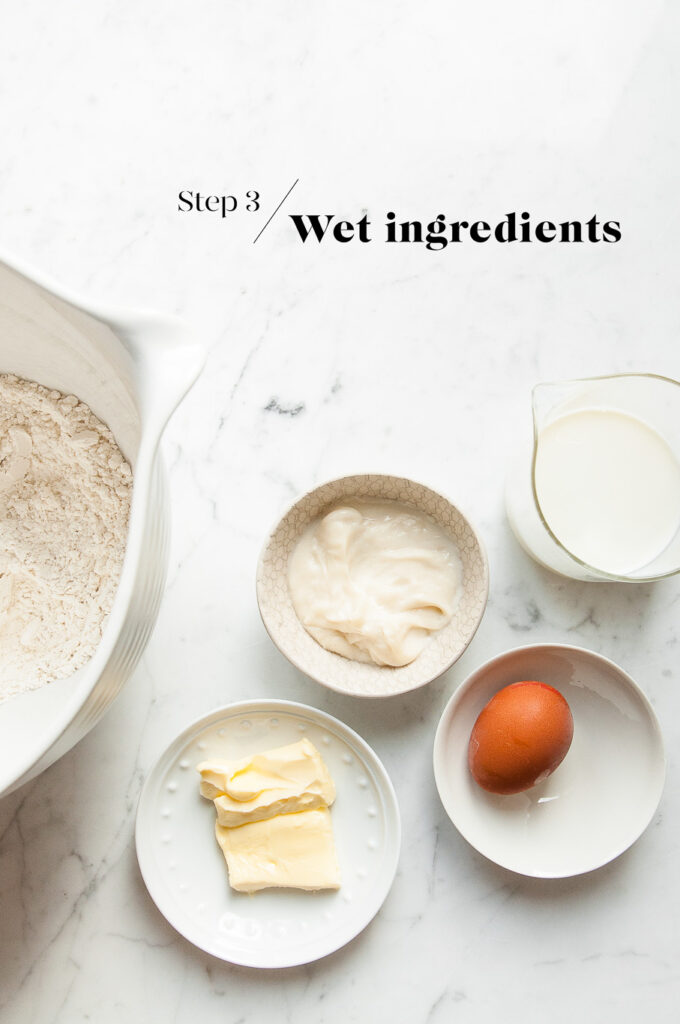
Step 3
Add the egg and Tangzhong. Use the dough hook to start to incorporate everything together. Slowly add the milk until a sticky dough starts to form. Then add the butter, one tablespoon at a time.
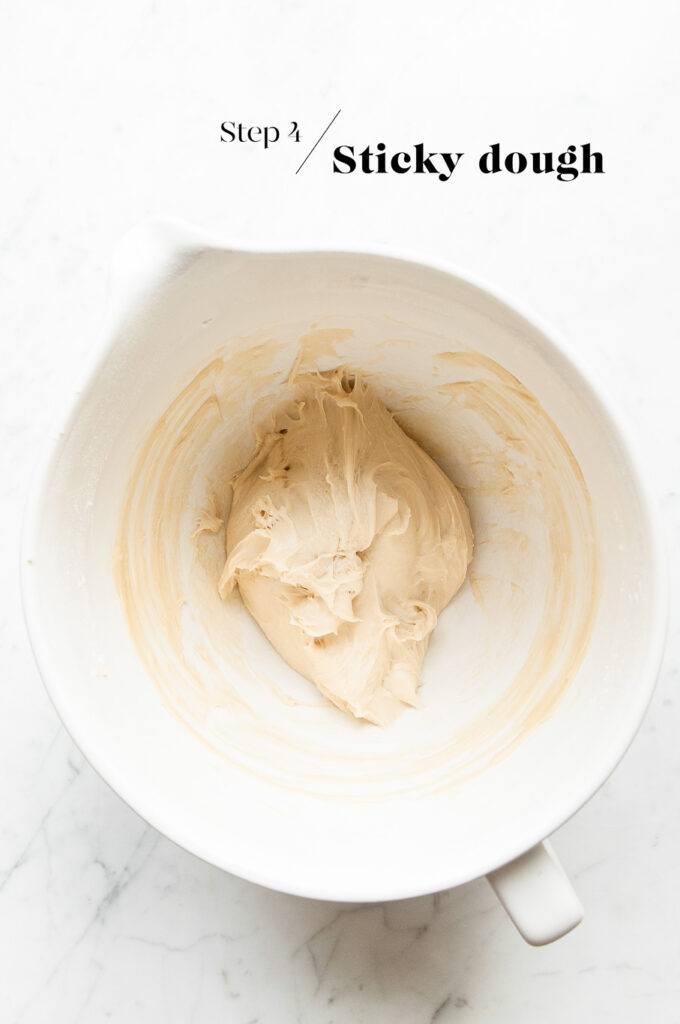
Step 4
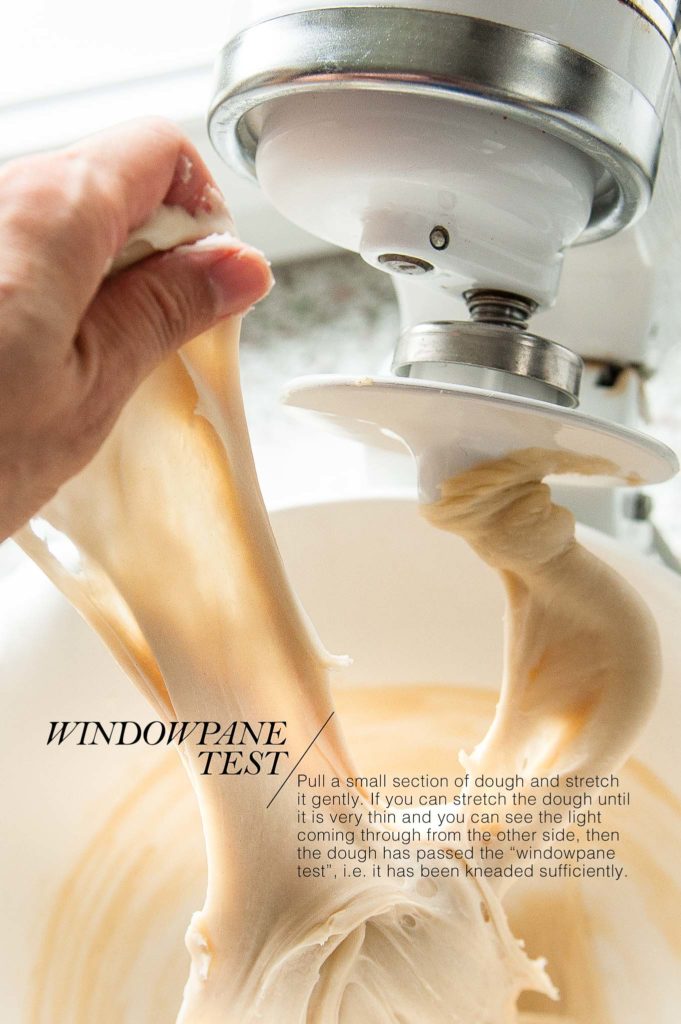
Knead the dough on medium speed for 10-15 minutes until you have a dough which passes the windowpane test.
To perform the “windowpane test”, pinch off a small piece of dough, roll it into a ball and use your hands to gently stretch the dough. If the dough can stretch to form a thin sheet and be almost translucent so that you can see the light through it, your dough has passed the “windowpane test”. This means that you have kneaded the dough sufficiently and that the dough is ready to be proofed.
At this stage, the dough will be somewhat sticky and tacky, mostly because of the butter and high liquid content. But the dough should be coming away from the sides of the bowl during the mixing. Once the dough has had its first proofing, it will be less sticky to the touch and easier to handle.
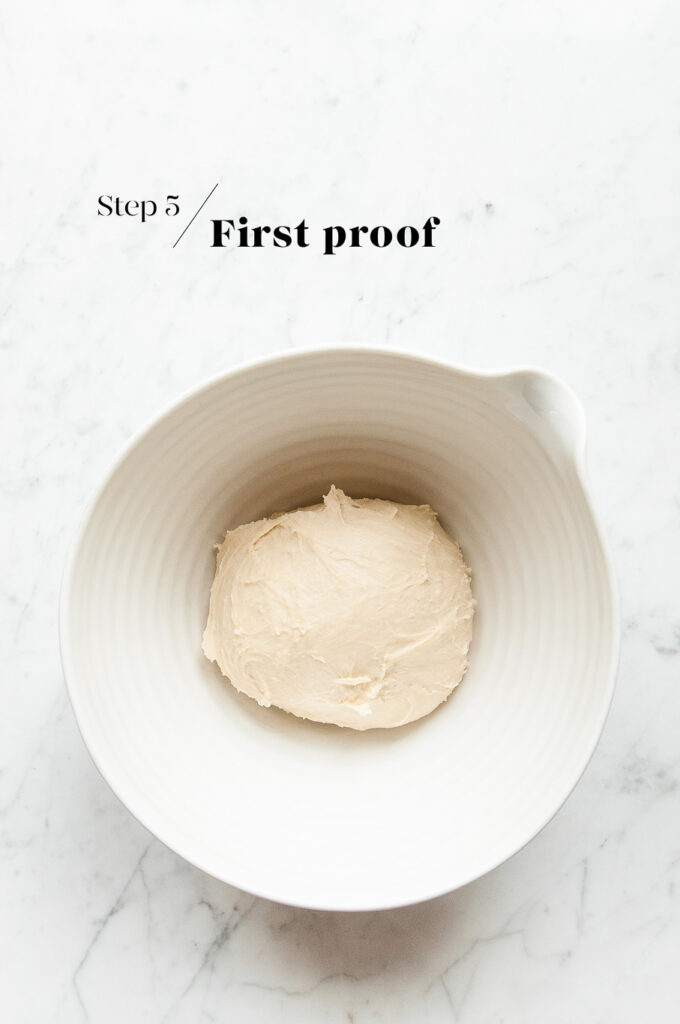
Step 5
Lightly oil a large mixing bowl. Roll the dough into a smooth-ish ball and place it inside the bowl.
Cover with a clean tea towel, and set it aside somewhere warm for about 1.5 hours, or until it has doubled in size.
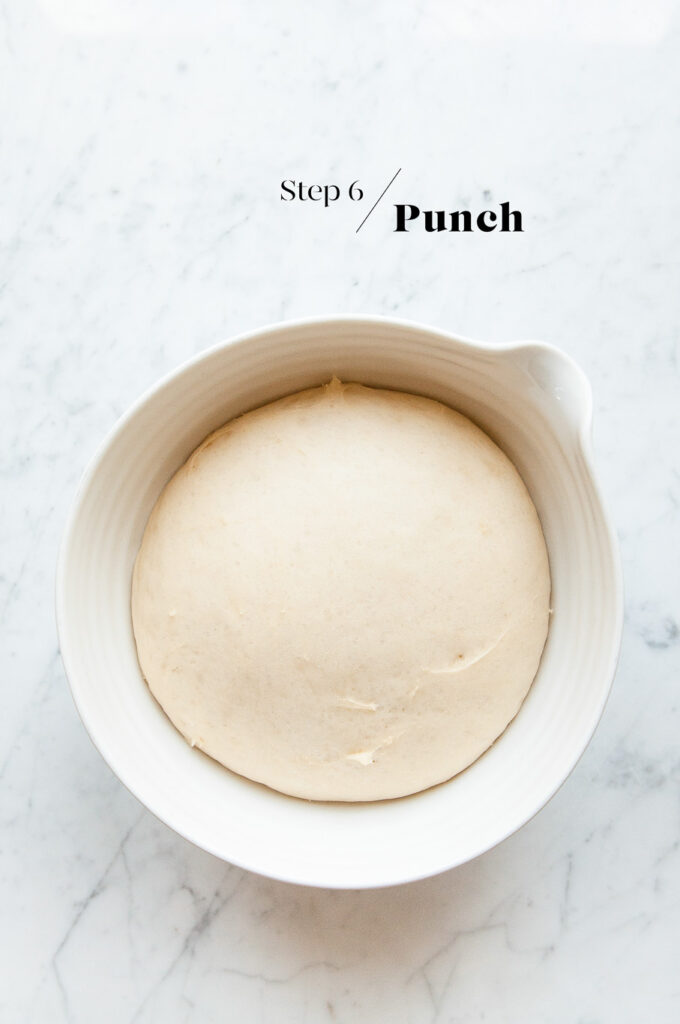
Step 6
Punch the dough back to release the air. Knead the dough gently a few times until it is soft and smooth again.
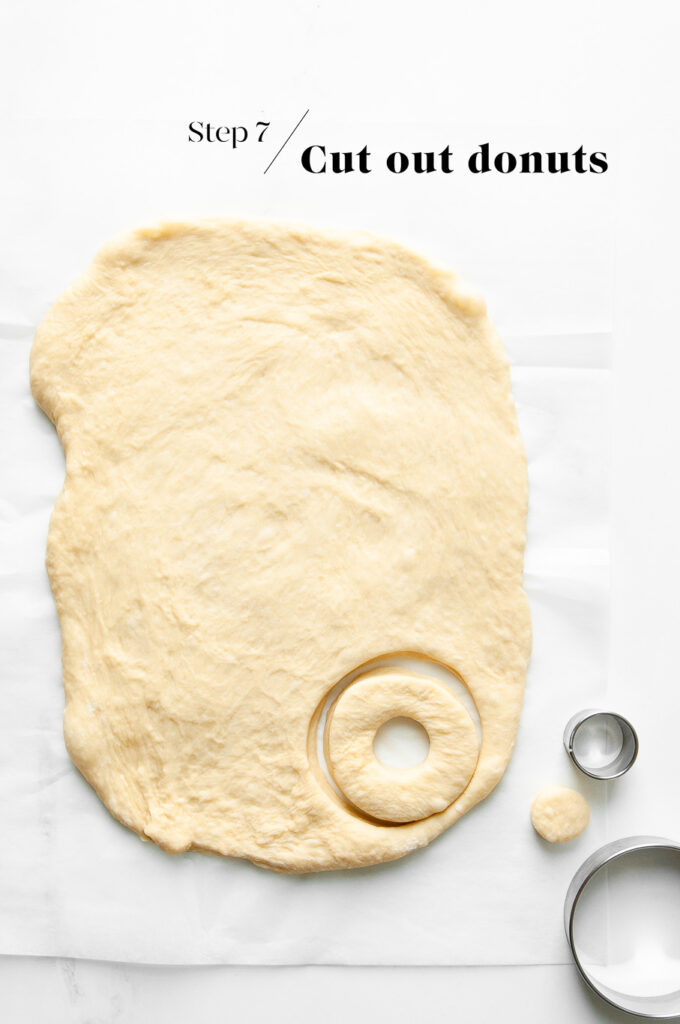
Step 7
Roll out the dough into a large rectangle which is about 1 cm/0.5 inch thick.
Use an 8 cm/3 inch round cookie cutter to cut out rounds from the dough.
Then use a 3 cm/1 inch cookie cutter to cut out holes from the centre.
Transfer the dough pieces, as well as the donut holes, onto individual pieces of baking paper on a large sheet pan. The baking paper needs to be cut into squares large enough to hold the dough pieces.
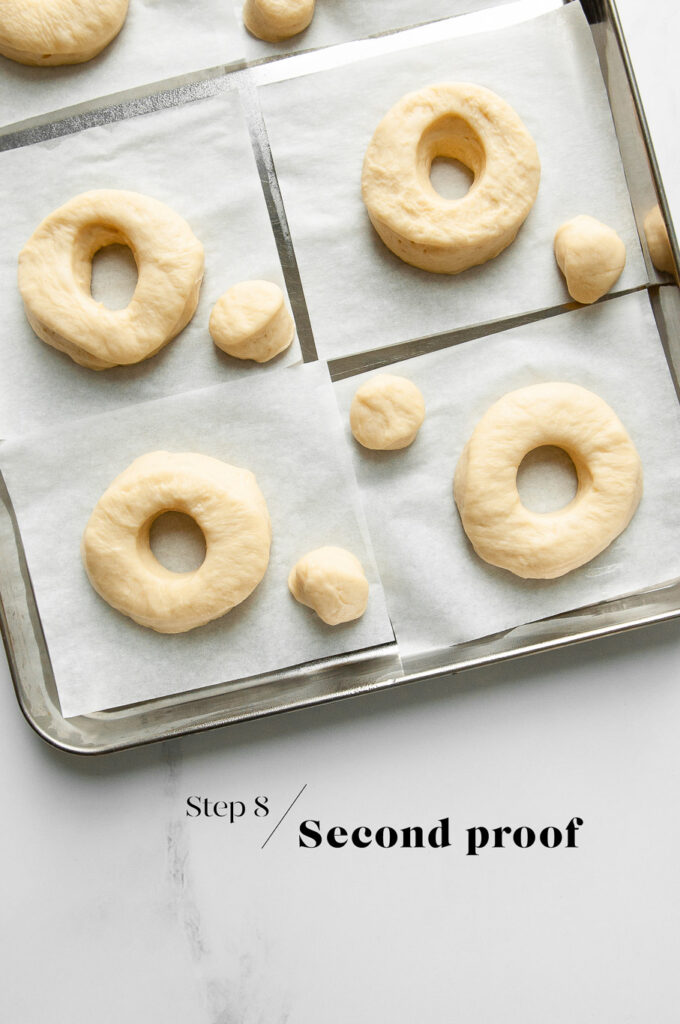
Step 8
Place the pan somewhere warm for about 30 minutes, or until the dough pieces have puffed up slightly.
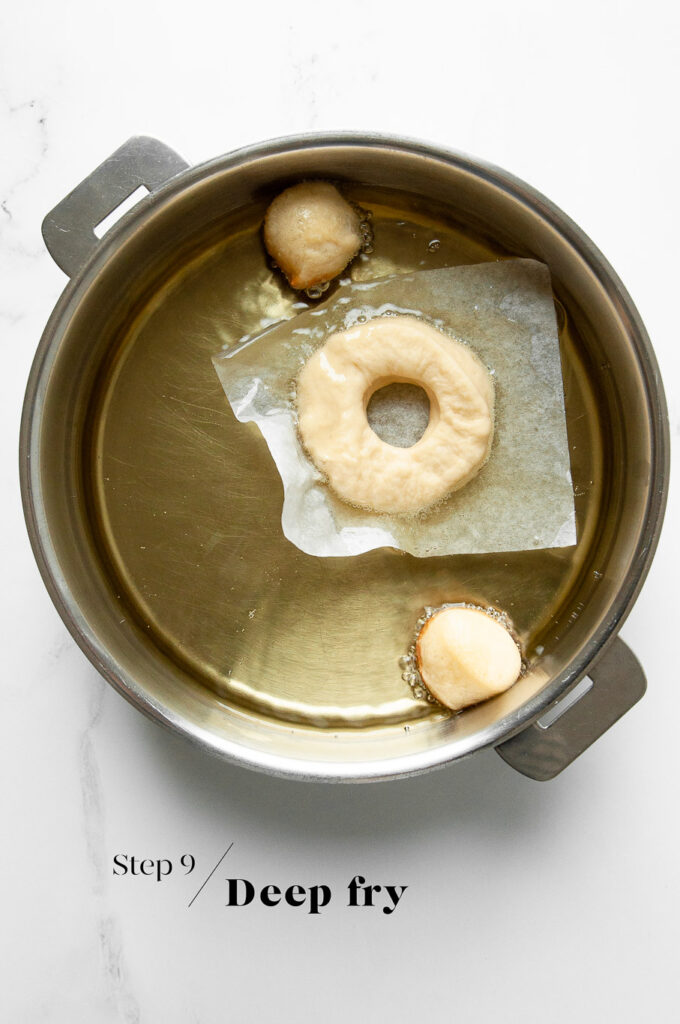
Step 9
Fill a large saucepan with about 5 cm/2 inches depth of vegetable oil (or any other neutral oil suitable for deep-frying). Heat the oil until it reaches of temperature of about 180°C/360°F.
Carefully place a dough piece into the oil, together with the baking paper. Leave it to sizzle in the oil for 1-2 seconds, and then carefully flip the donut over. The baking paper should separate easily from the donut as you do so. Remove and discard the baking paper.
Repeat the above step with the remaining dough pieces, but cook only 2-3 donuts at a time, so that you are not over-crowding the pan and bringing the temperature of the oil down too quickly.
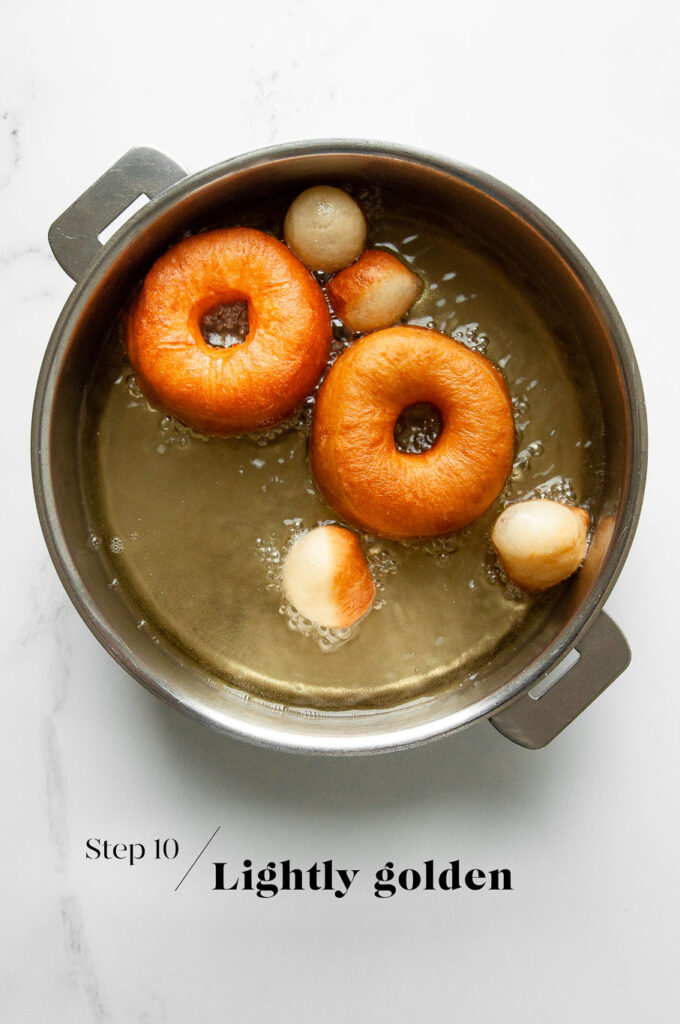
Step 10
Cook the donuts for about 2-3 minutes on each side, or until they are lightly golden. Make sure the temperature of the oil remains constant so that the donuts do not brown too quickly.
As the donuts cook, they will expand in size, about double or triple the height of the initial piece of dough.
For the donut holes, I find that they generally turn themselves over once they have browned or cooked sufficiently on one side. But you may have to coax them to turn over.
When cooking donuts, I like to use chopsticks, but you can also use metal tongs.
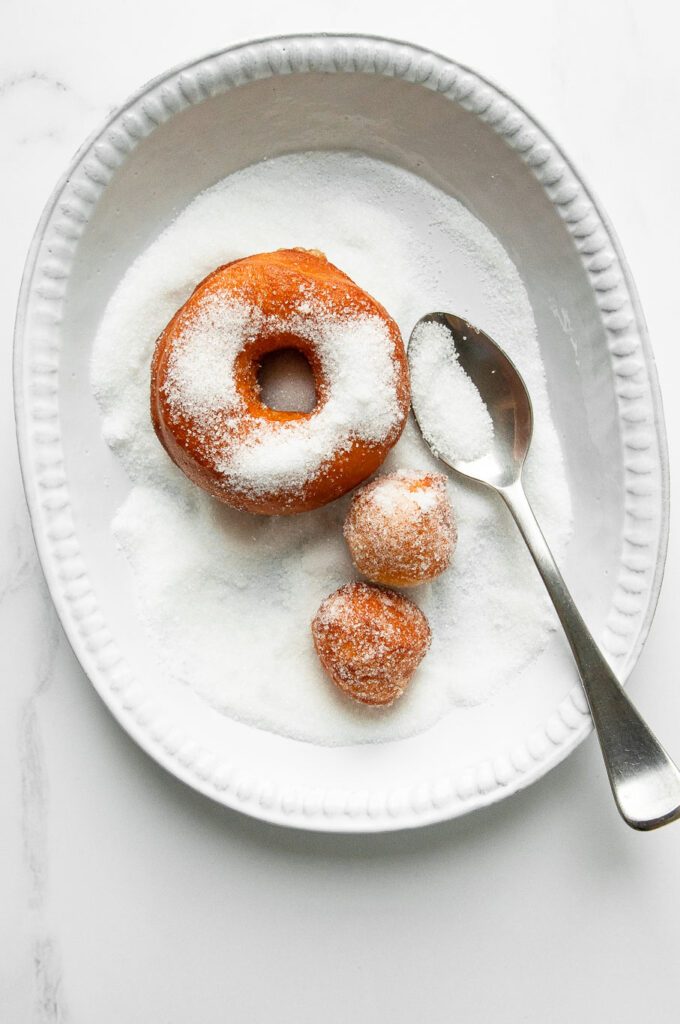
Step 11
One the donuts are lightly golden (which generally indicate that they are cooked through), remove them to a wire rack to cool and drain for about 5 minutes. Then transfer the donuts to a large plate of cinnamon sugar, and toss the donuts to cover completely.
If you transfer the donuts directly from the oil into the sugar, the heat of the donuts will melt some of the sugar, and the excess oil will also make the sugar go clumpy. It’s not a bad thing, but the clumpy sugar will not adhere as well to the donuts.
Tips for Making Homemade Donuts
Dough can be quite sensitive when it has proofed; if you accidentally poke it, it will deflate.
For these donuts, I like to follow a tip which I learnt in Sweet by Yotan Ottolenghi and Helen Goh. That is, to cut the donut shapes from the dough, and then place them onto a square of baking paper to let them proof. When you are ready to cook, simply transfer the dough, together with the baking paper, into the oil.
As the donuts start cooking, the baking paper will separate from the dough and you can remove the paper easily.
The advantage of this method is that you won’t have to handle the fragile donut dough as you transfer them to the oil.
Tips for Making Bread Dough Ahead of Time
I love baking bread, but I don’t love getting up extra early to get started on the dough. So I typically make the dough the night before and allow it to rise slowly in the fridge overnight. The longer proofing time has the added benefit of allowing the dough to develop more flavour and a better texture. Come the morning, the dough will have at least doubled in size, and it will be ready for shaping as per the recipe.
To make the dough the night before:
- Make the dough as per the recipe.
- Place the dough into a large oiled bowl.
- Cover the bowl with plastic wrap or a reusable bowl cover.
- Place the bowl into the fridge.
- Let the dough rise overnight, or for at least 8-10 hours.
- The next morning, the dough should have at least doubled in size.
- Gently remove the dough from the bowl.
- The dough is ready for shaping and the second proof as per the recipe.
- As the dough will be cold from the fridge, the second proof may take slightly longer.
Cinnamon Sugar Donuts
Ingredients
For the Tangzhong
- 14 g (2 tablespoons) white bread flour
- 100 ml (⅓ cup plus 1 tablespoon) milk
For the Milk Bread Dough
- 350 g (2 ⅓ cups) white bread flour
- 3 ½ g (1 teaspoon) instant dried yeast
- 6 g (1 teaspoon) fine salt
- 55 g (¼ cup) caster sugar, (superfine sugar)
- 1 egg
- 125 ml (½ cup) milk, warmed to 37°C/98°F
- 50 g (½ stick) unsalted butter, softened
To Assemble the Donuts
- vegetable oil, or other neutral oil suitable for deep-frying
- 1-2 cups granulated sugar
- 1 teaspoon ground cinnamon, or to taste
Instructions
For the Tangzhong
- Whisk the ingredients together in a small saucepan.
- Place the saucepan over low heat.
- Keep whisking until the ingredients form a thick paste. The consistency should be thick enough so that as you whisk the mixture, the whisk leaves lines in the mixture which remains.
- Remove the paste to a small bowl, and set it aside to cool down.
To Make the Dough
- Measure the flour, yeast, salt and sugar into the bowl of an electric stand mixer.
- Mix the dry ingredients together using a dough hook.
- Add the egg and the cooled Tangzhong.
- Slowly add the milk until the mixture comes together into a sticky dough.
- Add the butter, one tablespoon at a time. Wait for each tablespoon of butter to be fully incorporated into the dough before adding the next.
- Continue kneading the dough on medium speed for about 10-15 minutes, or until the dough passes the windowpane test. (See Kitchen Notes below). By this stage, the dough should also be coming away from the sides of the bowl.
- Lightly oil a large, clean mixing bowl.
- Roll the dough into a smooth ball and place it into the mixing bowl.
- Cover the dough with a clean tea towel or bowl cover, and place it somewhere warm for about 1.5 hours, or until it has doubled in size.
Shaping the Dough
- Punch back the dough to release the air.
- Gently knead the dough a few times until it is smooth again.
- Roll out the dough into a large rectangle shape which is about 1 cm/0.5 inch thick.
Shaping the Donuts
- Use an 8 cm/3 inch round cookie cutter to cut out rounds from the dough.
- Use a 3 cm/1 inch round cookie cutter to cut out the centre from each piece of dough.
- Cut out squares of baking paper which are large enough to hold each piece of donut.
- Transfer each dough piece to an individual piece of baking paper, and place them on a large sheet pan.
Proving the Donuts
- Place the pan somewhere warm for about 30 minutes, or until the dough pieces have puffed up slightly.
Frying the Donuts
- Fill a large saucepan with a depth of about 5 cm/2 inches of oil.
- Heat the oil to 180°C/360°F.
- Carefully place a piece of dough into the oil, together with the baking paper. Cook for 1-2 seconds and then carefully flip the donut over. The baking paper should separate easily from the donut as you do so. Remove and discard the baking paper. Repeat this step with the other pieces of dough, but cook only 2-3 donuts at a time.
- Cook the donuts for 2-3 minutes on each side, or until lightly golden.
- Remove the cooked donuts to a wire rack and leave them to cool and drain for about 5 minutes.
- Transfer the donuts to a large plate with the cinnamon sugar, and toss to coat completely.
- Serve immediately.
Kitchen Notes
- WINDOWPANE TEST
Pinch off a small piece of dough, roll it into a ball and use your hands to gently stretch the dough. If the dough can stretch to form a thin sheet and be almost translucent so that you can see the light through it, your dough has passed the “windowpane test”. This means that you have kneaded the dough sufficiently and that the dough is ready to be proofed. - MAKE AHEAD TIPS
To start the Milk Bread dough the night before:
* Make the dough as per the recipe.
* Place the bowl of dough (covered) in the fridge to proof overnight, or for at least 8 to 10 hours. During this time, it should have at least doubled in size.
* The next day, proceed with the rest of the recipe. As the dough will be cold, it may require a bit more time for the second proofing period. - DIFFERENT TYPES OF FLOUR
For Swiss readers: I use Zopfmehl (or farine pour tresse) when making bread and enriched dough. - DIFFERENT TYPES OF YEAST
Please note that there is a difference between instant yeast (also called instant dried yeast or fast-action dried yeast) and dried yeast (also called active dry yeast). If you are not sure what type of yeast you have, please check the packaging for instructions on how to use the yeast.
* With instant yeast, you can add it directly to the flour mixture without having to activate it first.
* With dried yeast, you will need to activate it first (usually in some warm liquid). - PROOFING THE DOUGH
Dough needs a warm environment for the yeast to activate and cause the dough to rise. If you don’t have a warm place in your home, try one of the following ideas:
* In the oven with the oven light switched on (works only for some ovens).
* In the oven with a tray of boiling water on the bottom shelf.
* In the oven at a low temperature of about 25-30°C (77-86°F). - OVEN & STOVE TEMPERATURES
All recipes on this website have been tested on an induction stove and/or with a conventional oven (i.e. an oven without fan). All recipes on this website state temperatures for a conventional oven. If you have a convection oven (i.e. an oven with a fan), please consult the manufacturer’s handbook on how to adjust the temperature and baking time accordingly. - CONVERSIONS
To convert from cups to grams, and vice-versa, please see this handy Conversion Chart for Basic Ingredients.


Just made your milk bun recipe and the buns were so soft and delicious! I can’t wait to try this donut recipe using the same dough!
I know I should be baking Christmas cookies right now but I had a craving for donuts so I tried this recipe. Omg wow!! They were incredible! Excellent recipe which I will be using again and again!
Simply delicious!