Japanese Milk Bread
While the rest of the world has been busy baking sourdough bread, I have been busy perfecting my milk bread recipes. Of course, there are days when a crusty loaf of sourdough is exactly what I want (especially for my toast with avocado!), but most days, it’s the soft and squishy milk bread that I crave the most.
Japanese Milk Bread is one of my favourite bread recipes, not least because there are so many different ways you can shape and use the dough. Japanese Milk Bread forms the basis of many Asian breads and buns, so once you have mastered the basic milk bread recipe, you can use the same recipe to make many different shapes.
Milk Bread Loaf
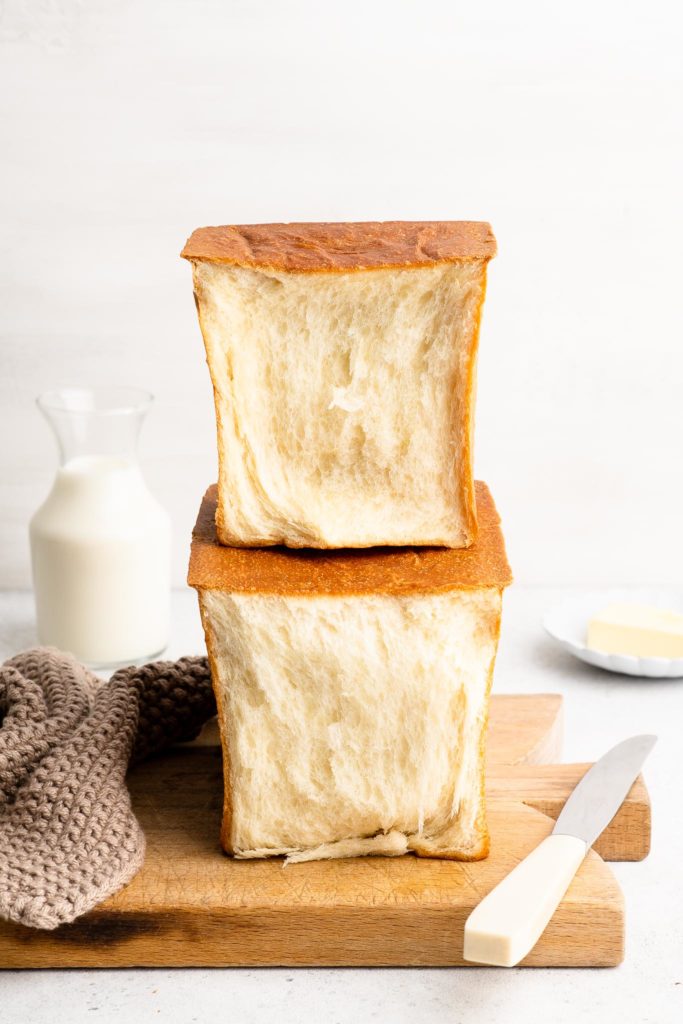
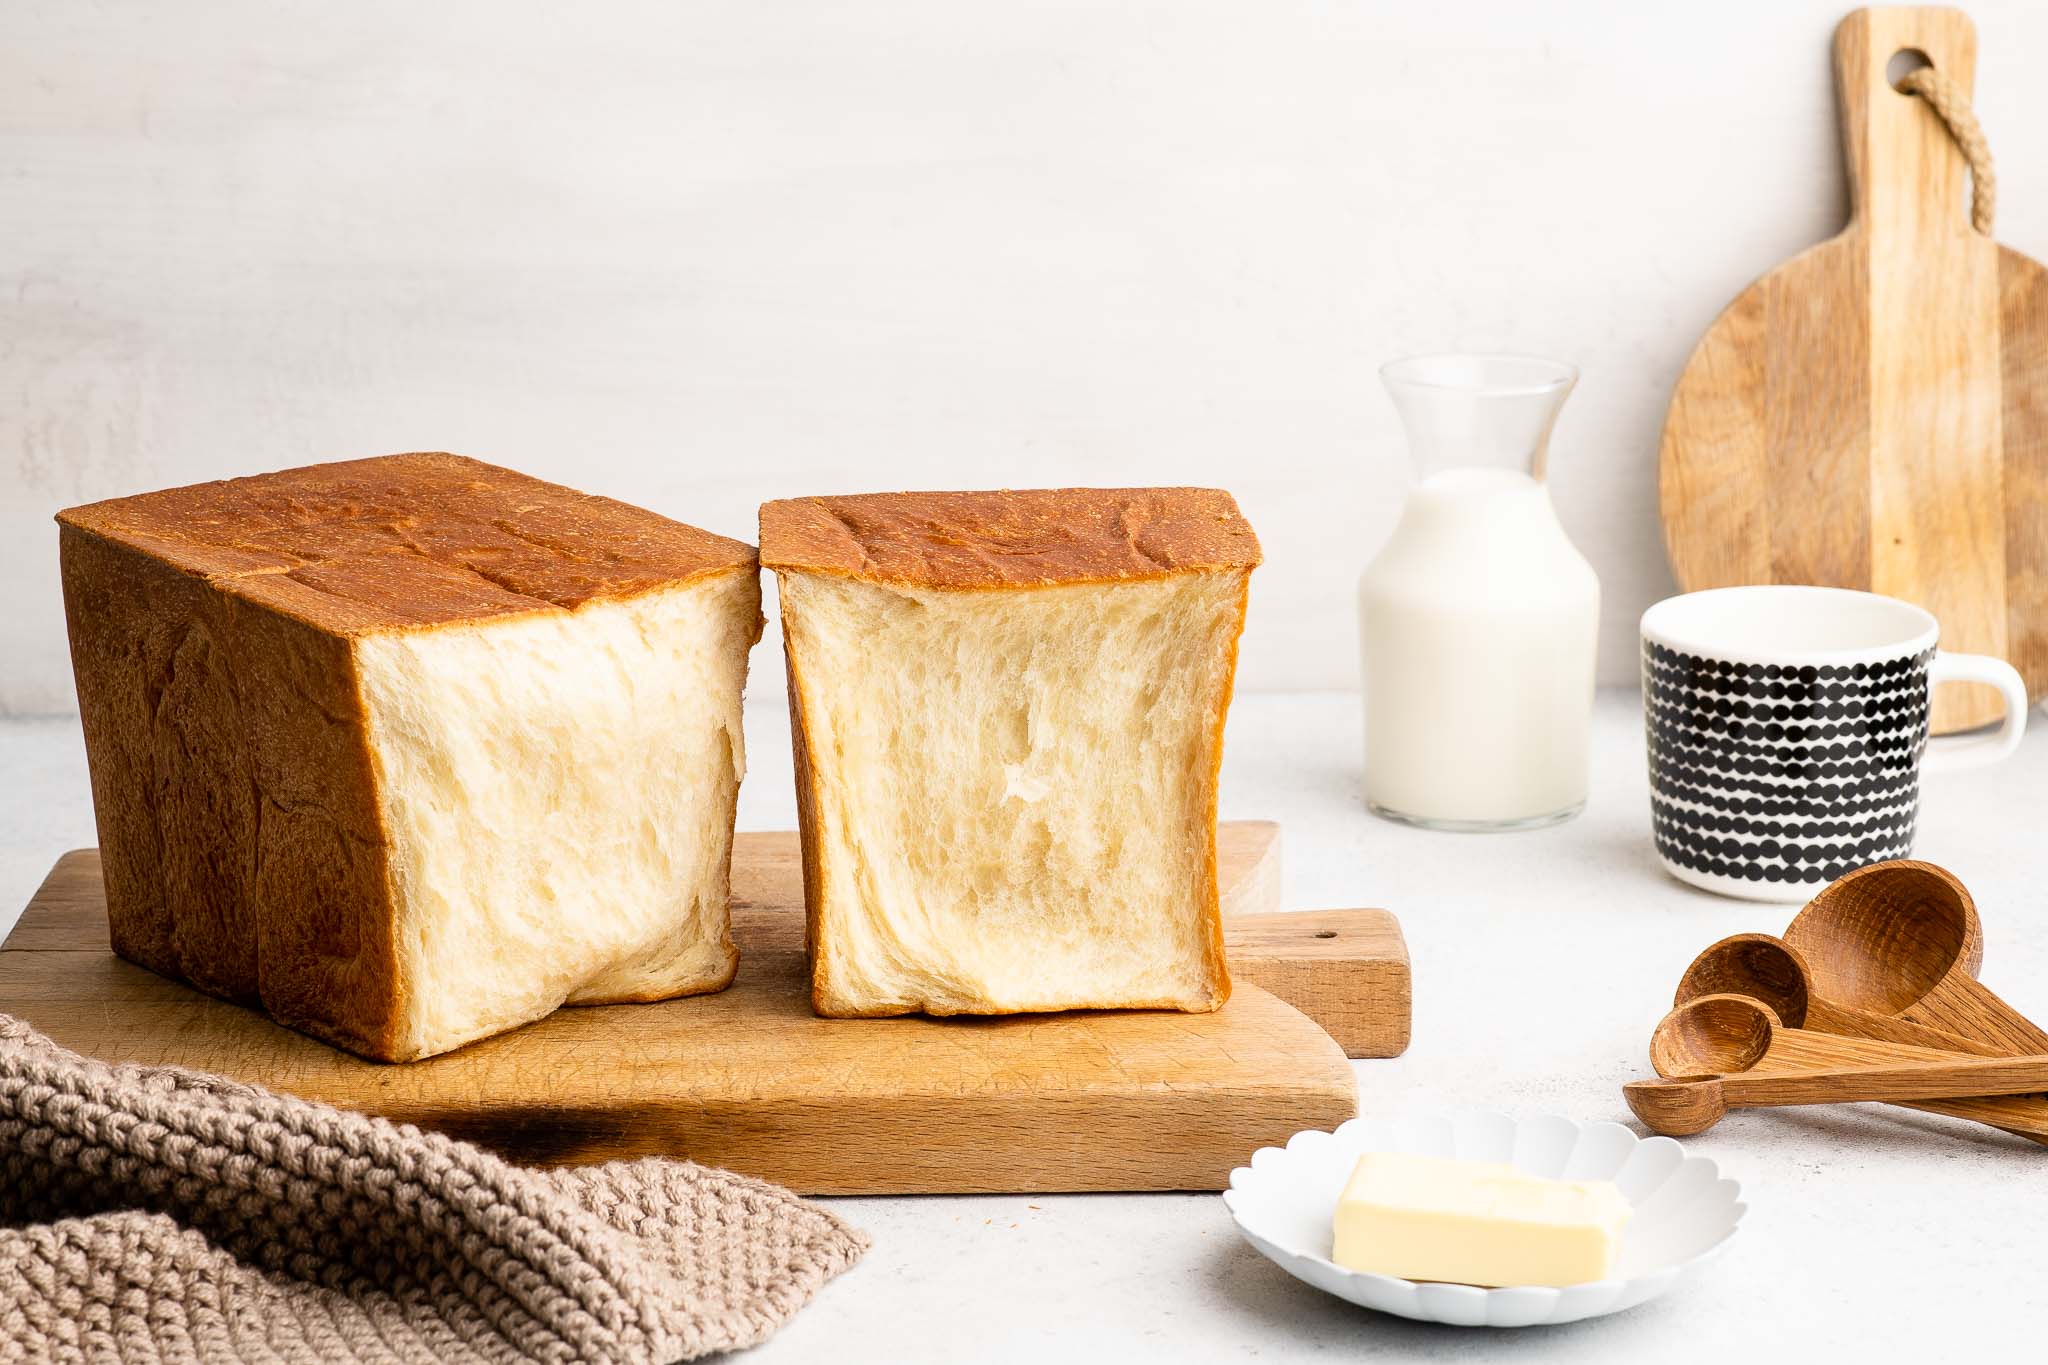
The classic way of baking Japanese Milk Bread is in a regular loaf pan to make Shokupan, which is essentially a loaf which you can pull apart in 2 or more segments.
Another popular method is to bake the Milk Bread as a sandwich bread, also called a Pullman’s loaf or pain de mie. This is the shape I make when I plan to make Japanese-style French Toast, although I generally have to make 2 loaves because there is never such a thing as leftover Milk Bread in my home!
What is Milk Bread?
- Milk Bread is a Japanese-style bread which contains milk to add a bit of sweetness and richness to the dough.
- The taste and texture is quite similar to a French brioche, but with less eggs and butter, and slightly more structure.
- Making a Japanese Milk Bread is like making an enriched dough, but with the addition of a paste or starter called a Yudane or Tangzhong.

Yudane or Tangzhong
When making Milk Bread, you need to make a Yudane or Tangzhong. Both names refer to a paste or roux made from flour and a hot liquid (either water and/or milk).
The cooled paste is mixed into an otherwise common enriched bread dough, but because the paste has a high liquid content, it adds moisture to the dough, which creates more air pockets in the dough, which in turn results in a soft and fluffy bread.
Once you have tried making bread with a Tangzhong, you might possibly never try another bread recipe again!
Milk Bread Recipe
This Milk Bread recipe is the same as that which I use for Japanese Milk Bread or Shokupan. In fact, it is a recipe I turn to very frequently whenever I want to make very moist, soft and fluffy bread, whatever the form.
There are various ways in which you can shape your Milk Bread, and one way is to make a classic sandwich bread. There is something strangely satisfying about making a homemade version of an industrially-produced loaf of bread 😉
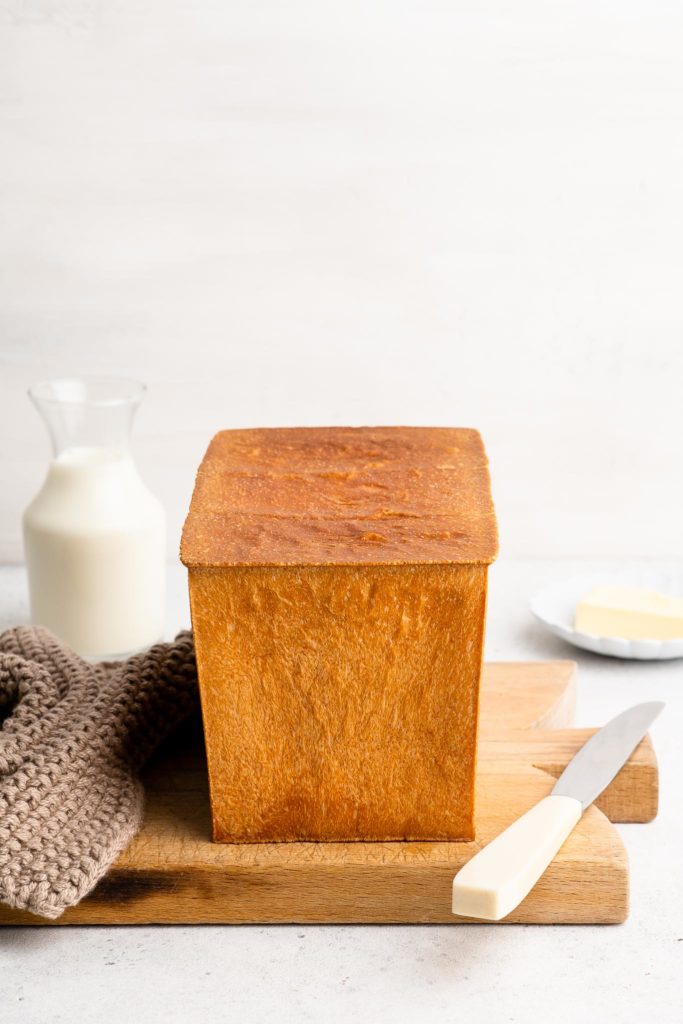
Pullman Loaf
To make a classic sandwich bread, you can use a regular loaf pan (to make classic Shokupan), or a special Pullman loaf pan.
A Pullman loaf pan is shaped like most regular loaf pans, but it also comes with a lid to create a flat top surface. During baking, as the bread rises, the lid will prevent the bread from rising to form a domed surface; the bread will instead fill the enclosed loaf pan completely.
Pullman Loaf Pan Substitute
If you don’t own a Pullman loaf pan, you can still achieve the same end result with some creativity in the kitchen.
One tip I found in Mastering the Art of French Cooking Volume 2 by Julia Child and Simone Beck is that, as a substitute for a Pullman loaf pan or a pain de mie pan, you can use an ordinary loaf pan, cover the pan with a sheet of baking paper (Julia Child suggests foil) followed by a metal sheet pan, and top that with an oven-proof weight (such as a brick, cast-iron skillet or cast-iron lid) to hold the sheet pan down like the lid on a Pullman loaf pan.

How to Make Milk Bread
Making Milk Bread is very similar to making any other loaf of bread, except that you also add a floury paste to the dough. This paste, called a Yudane or Tangzhong, takes only a few minutes to make, but it makes all the difference to the finished loaf of bread.
Once you get started, you will quickly see that this milk bread recipe is quite similar to a brioche recipe, both in terms of ingredients, as well as texture of the dough.
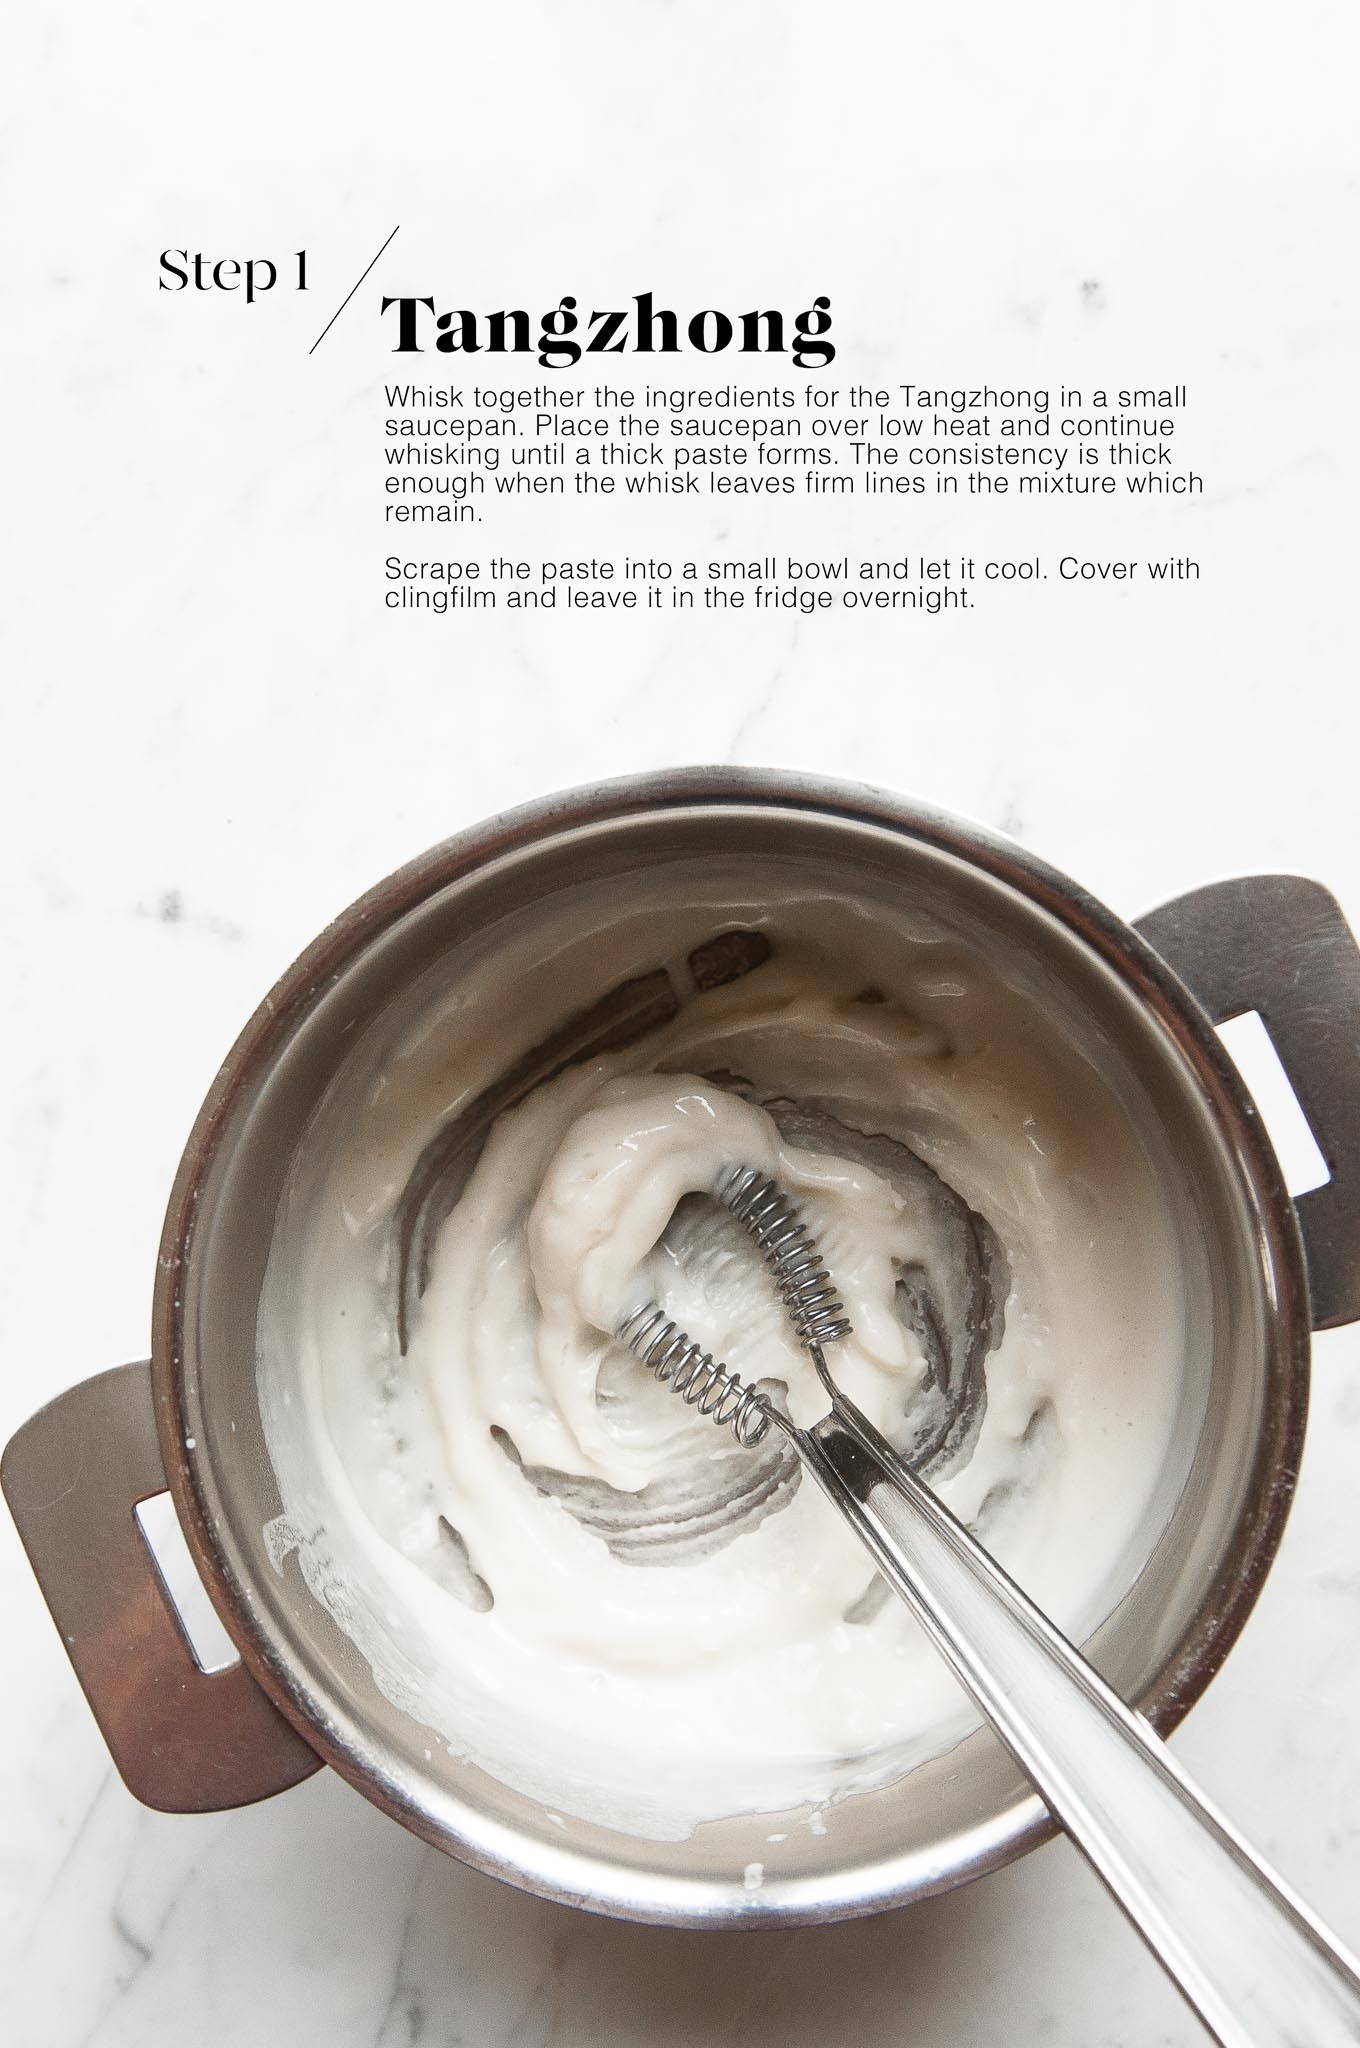
Step 1
Make the Tangzhong by whisking together the ingredients in a small saucepan. Place the saucepan over low heat, and continue whisking until the mixture forms a thick paste. You want a thick enough consistency so that, as you whisk the mixture, the whisk leaves lines which do not move.
Scrape the Tangzhong into a small bowl and set it aside to cool. Once cooled, cover the bowl with clingfilm and place it in the fridge overnight.
If you are in a hurry, you can use the Tangzhong as soon as it has cooled to room temperature. But leaving the Tangzhong overnight allows it to develop more flavour.
Step 2
Measure the flour, yeast, salt and sugar into the bowl of an electric stand mixer. Lightly mix the ingredients together.

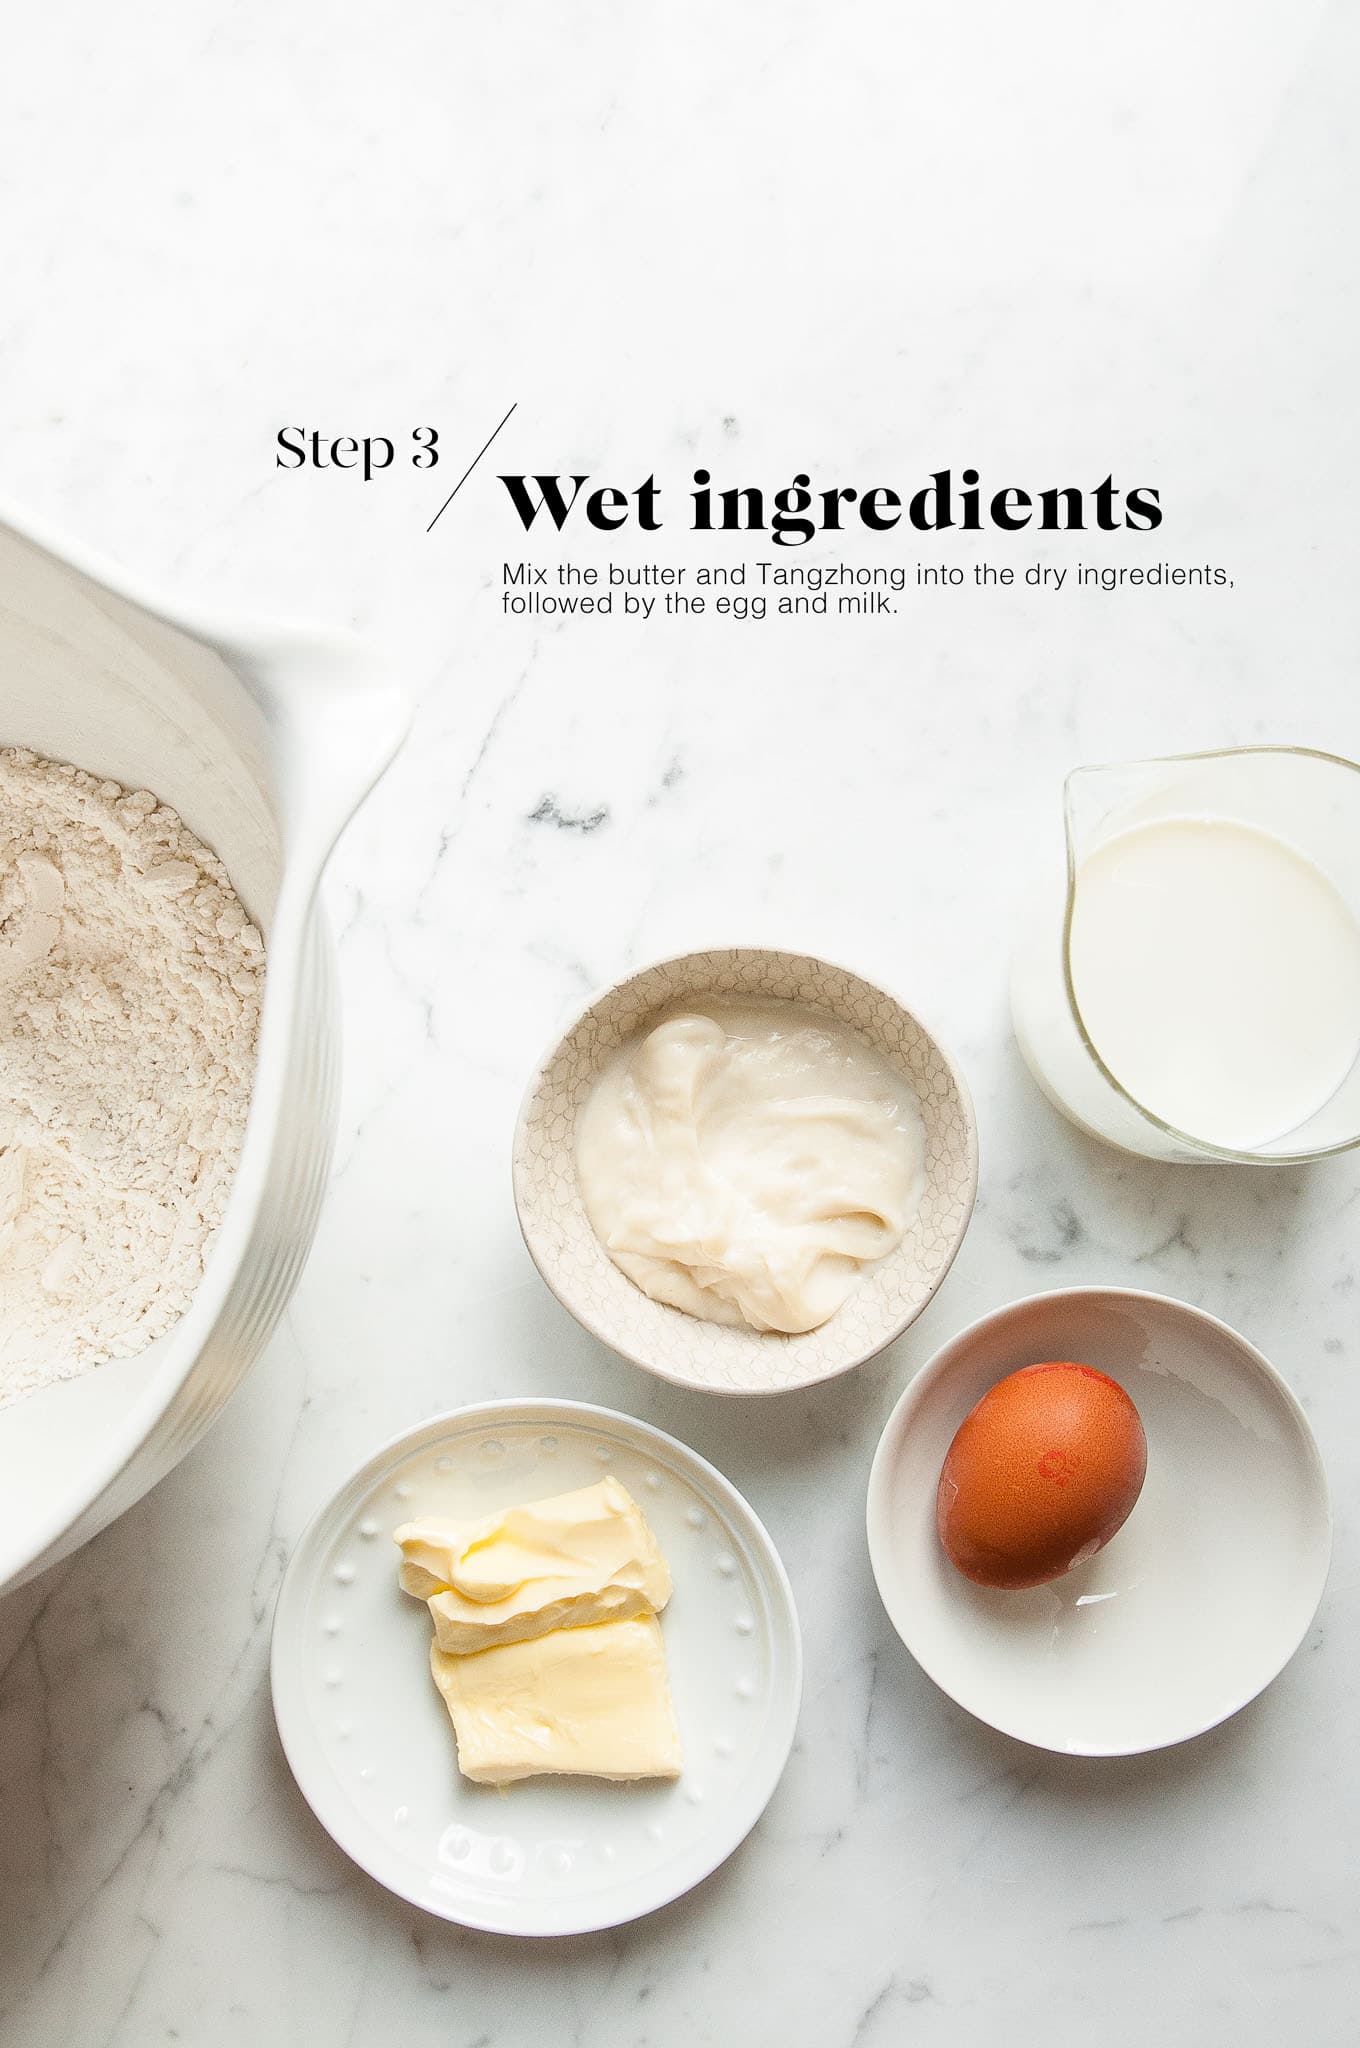
Step 3
Add the egg and Tangzhong. Use the dough hook to start to incorporate everything together. Slowly add the milk until a sticky dough starts to form. Then add the butter, one tablespoon at a time.
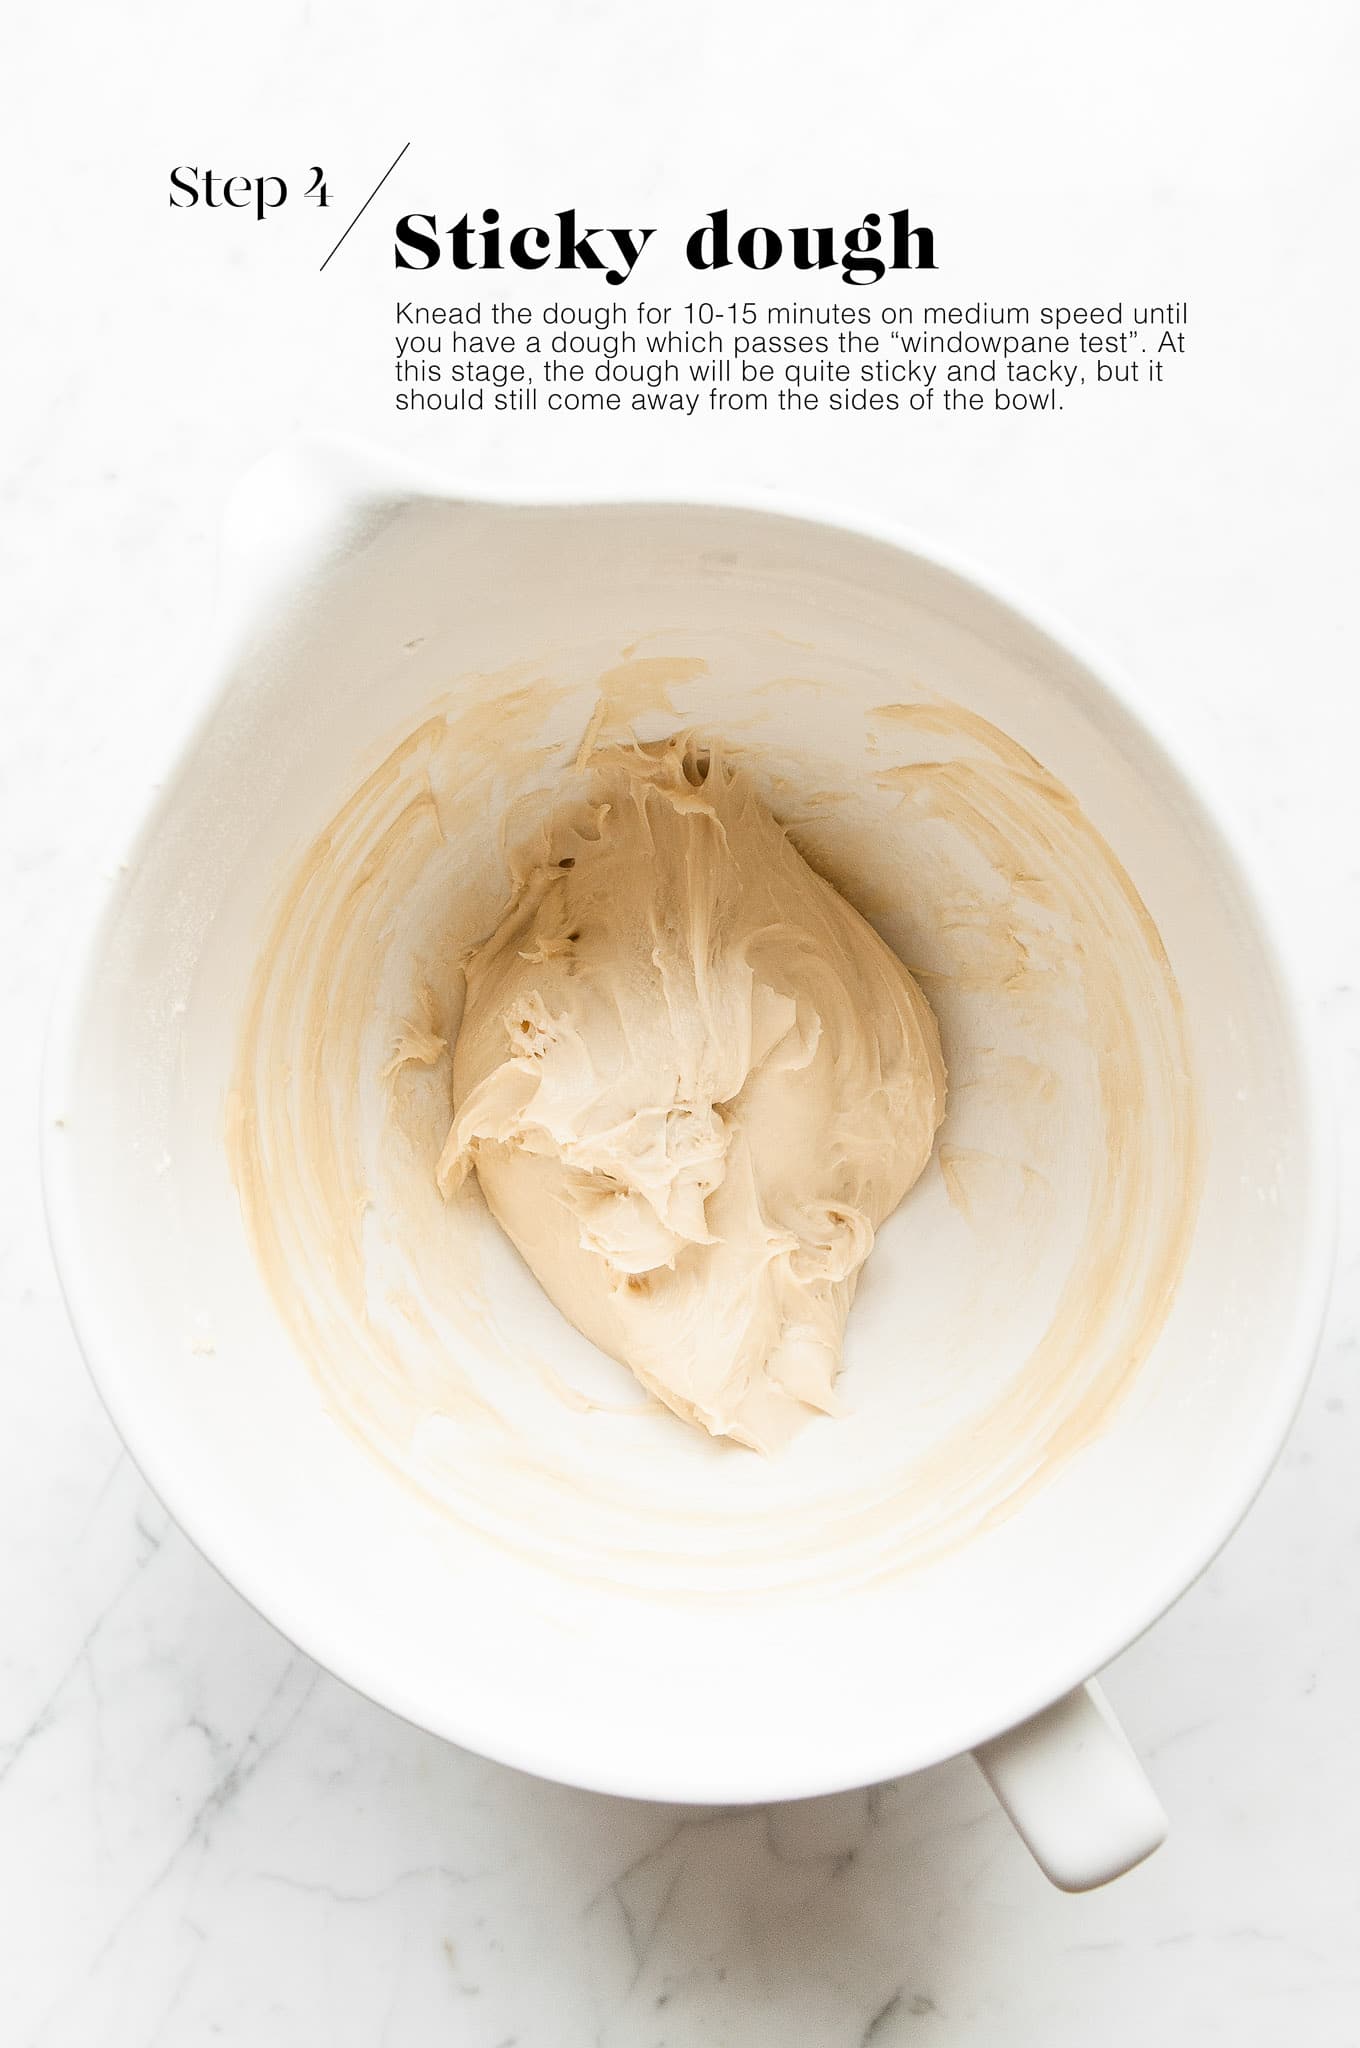
Step 4
Knead the dough on medium speed for 10-15 minutes until you have a dough which passes the windowpane test.
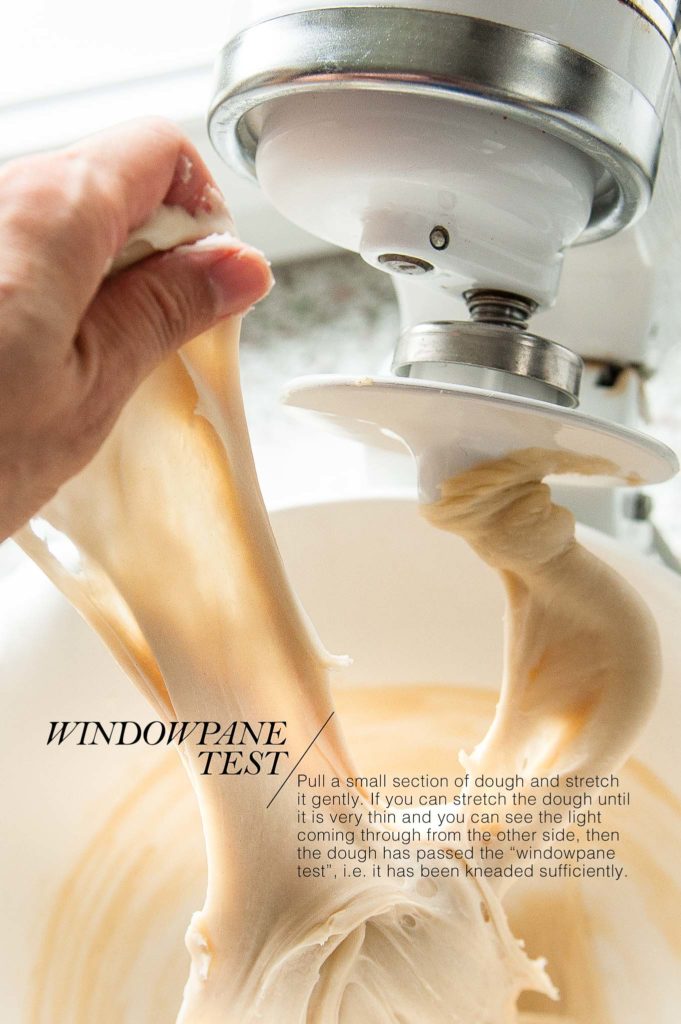
To perform the “windowpane test”, pinch off a small piece of dough, roll it into a ball and use your hands to gently stretch the dough. If the dough can stretch to form a thin sheet and be almost translucent so that you can see the light through it, your dough has passed the “windowpane test”. This means that you have kneaded the dough sufficiently and that the dough is ready to be proofed.
At this stage, the dough will be somewhat sticky and tacky, mostly because of the butter and high liquid content. However, once the dough has had its first proofing, it will be less sticky to the touch and easier to handle.
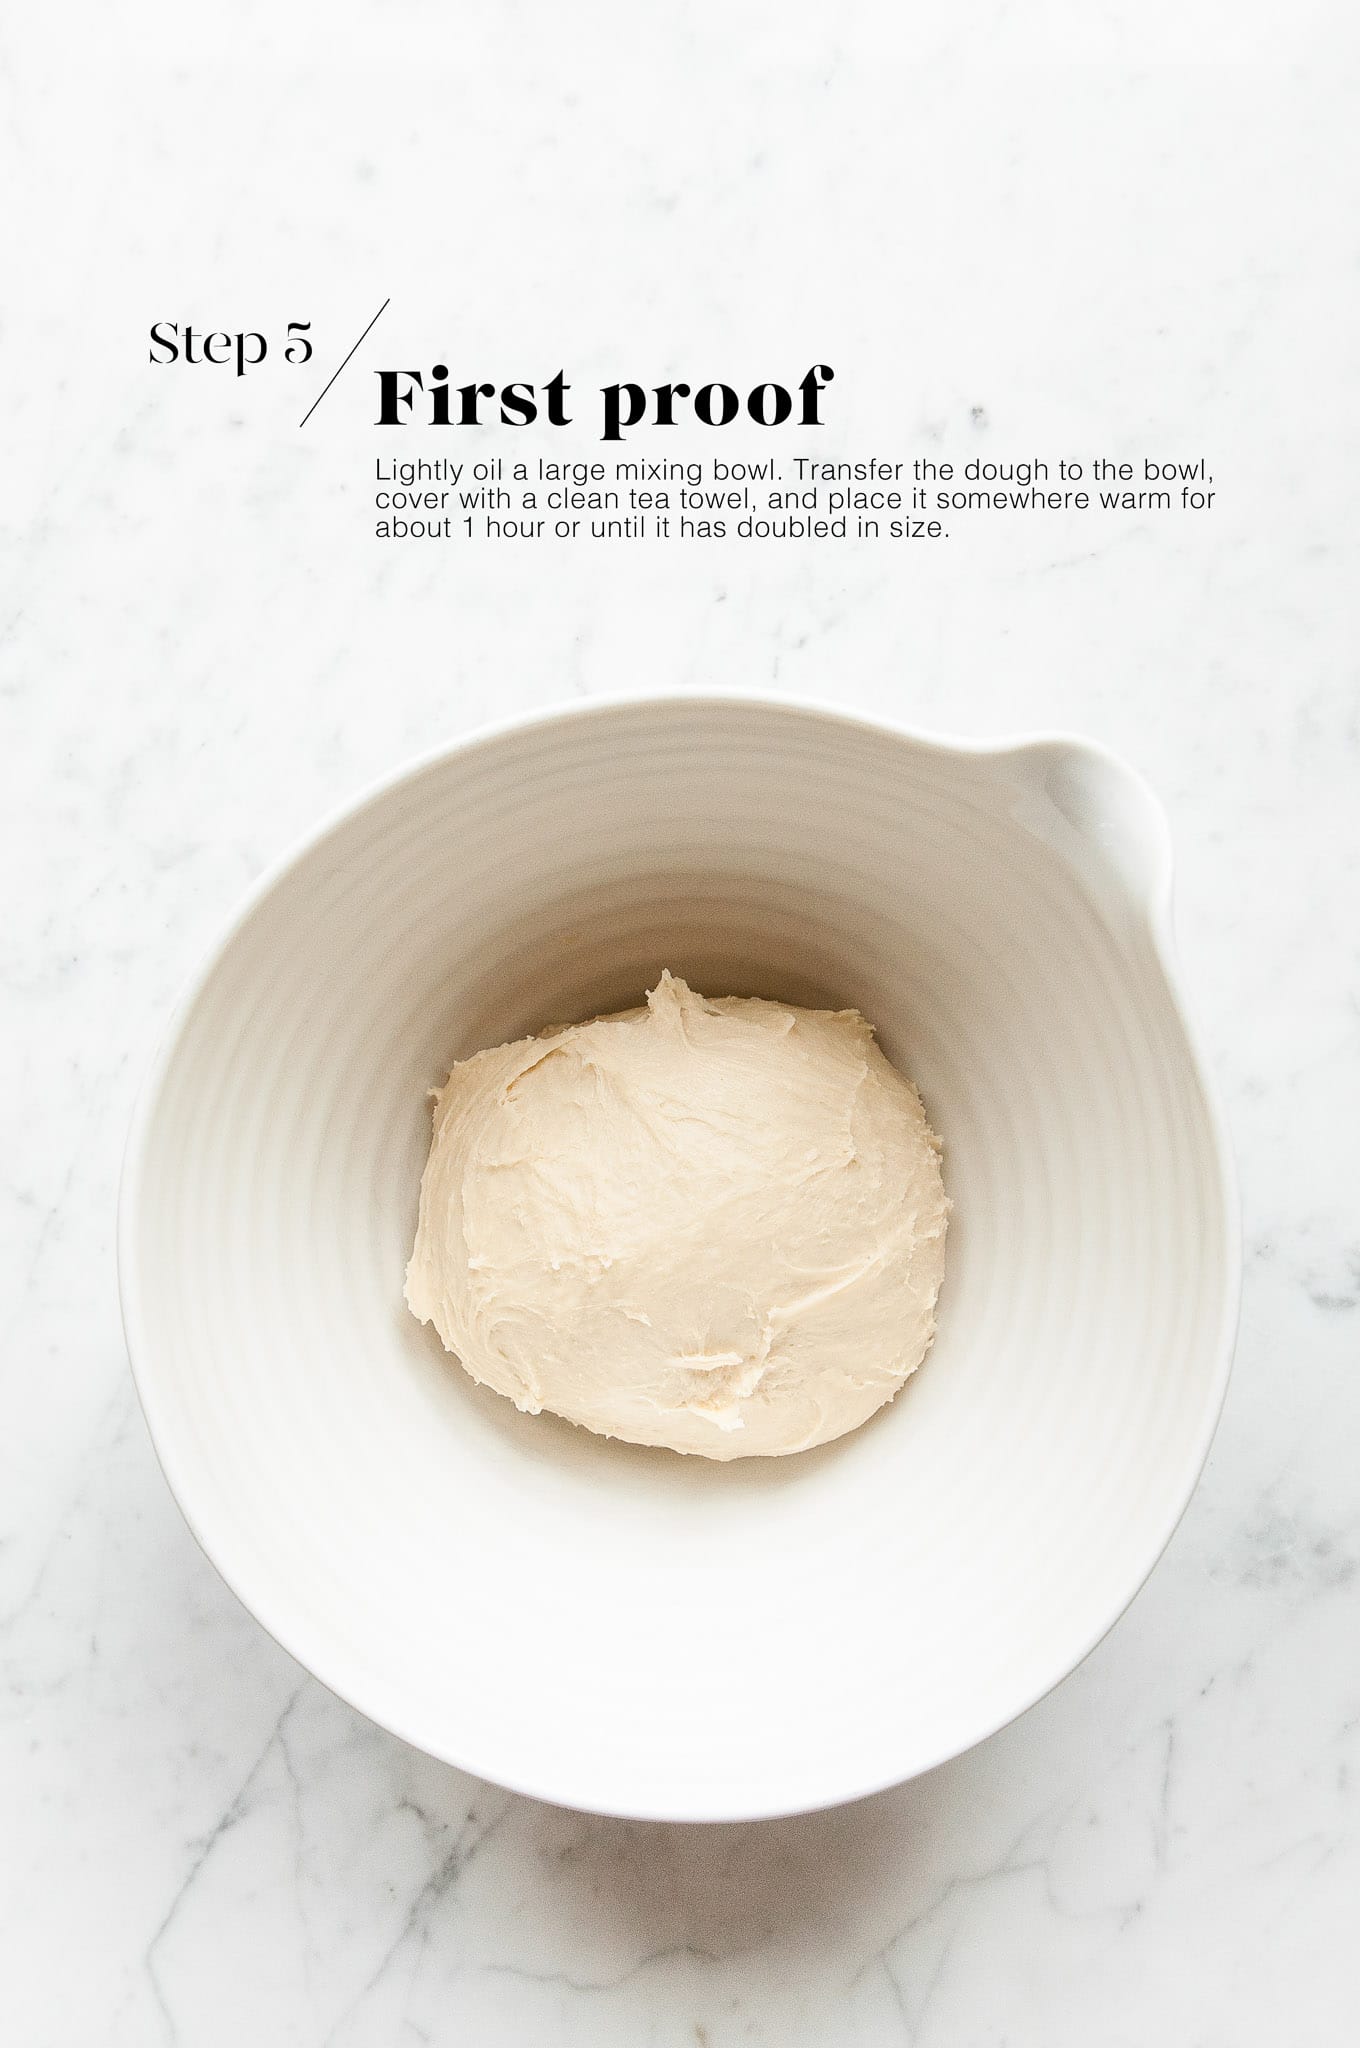
Step 5
Lightly oil a large mixing bowl. Roll the dough into a smooth-ish ball and place it inside the bowl.
Cover with a clean tea towel or bowl cover, and set it aside somewhere warm for about 1.5 hours, or until it has doubled in size.
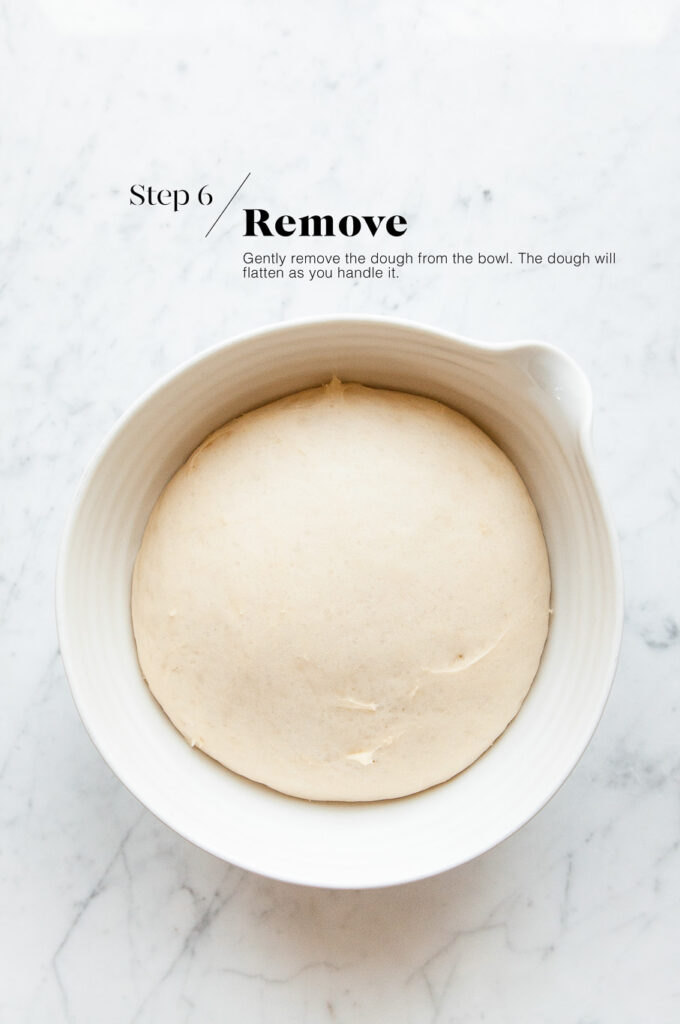
Step 6
Once the dough has doubled in size, gently remove the dough from the bowl. The dough will deflate as you handle it.
Step 7
Divide the dough into 3 equal portions. Use a digital scale for even-sized buns.
Lightly grease a Pullman loaf pan and its lid.
Roll each piece of dough into a ball, then roll it into an oval shape measuring approximately 20 x 13 cm/8 x 5 inches. Roll up the dough from the short end so that you have a log about 5 inches long. Repeat with the remaining pieces of dough.
Place the logs of dough into the prepared Pullman loaf pan.
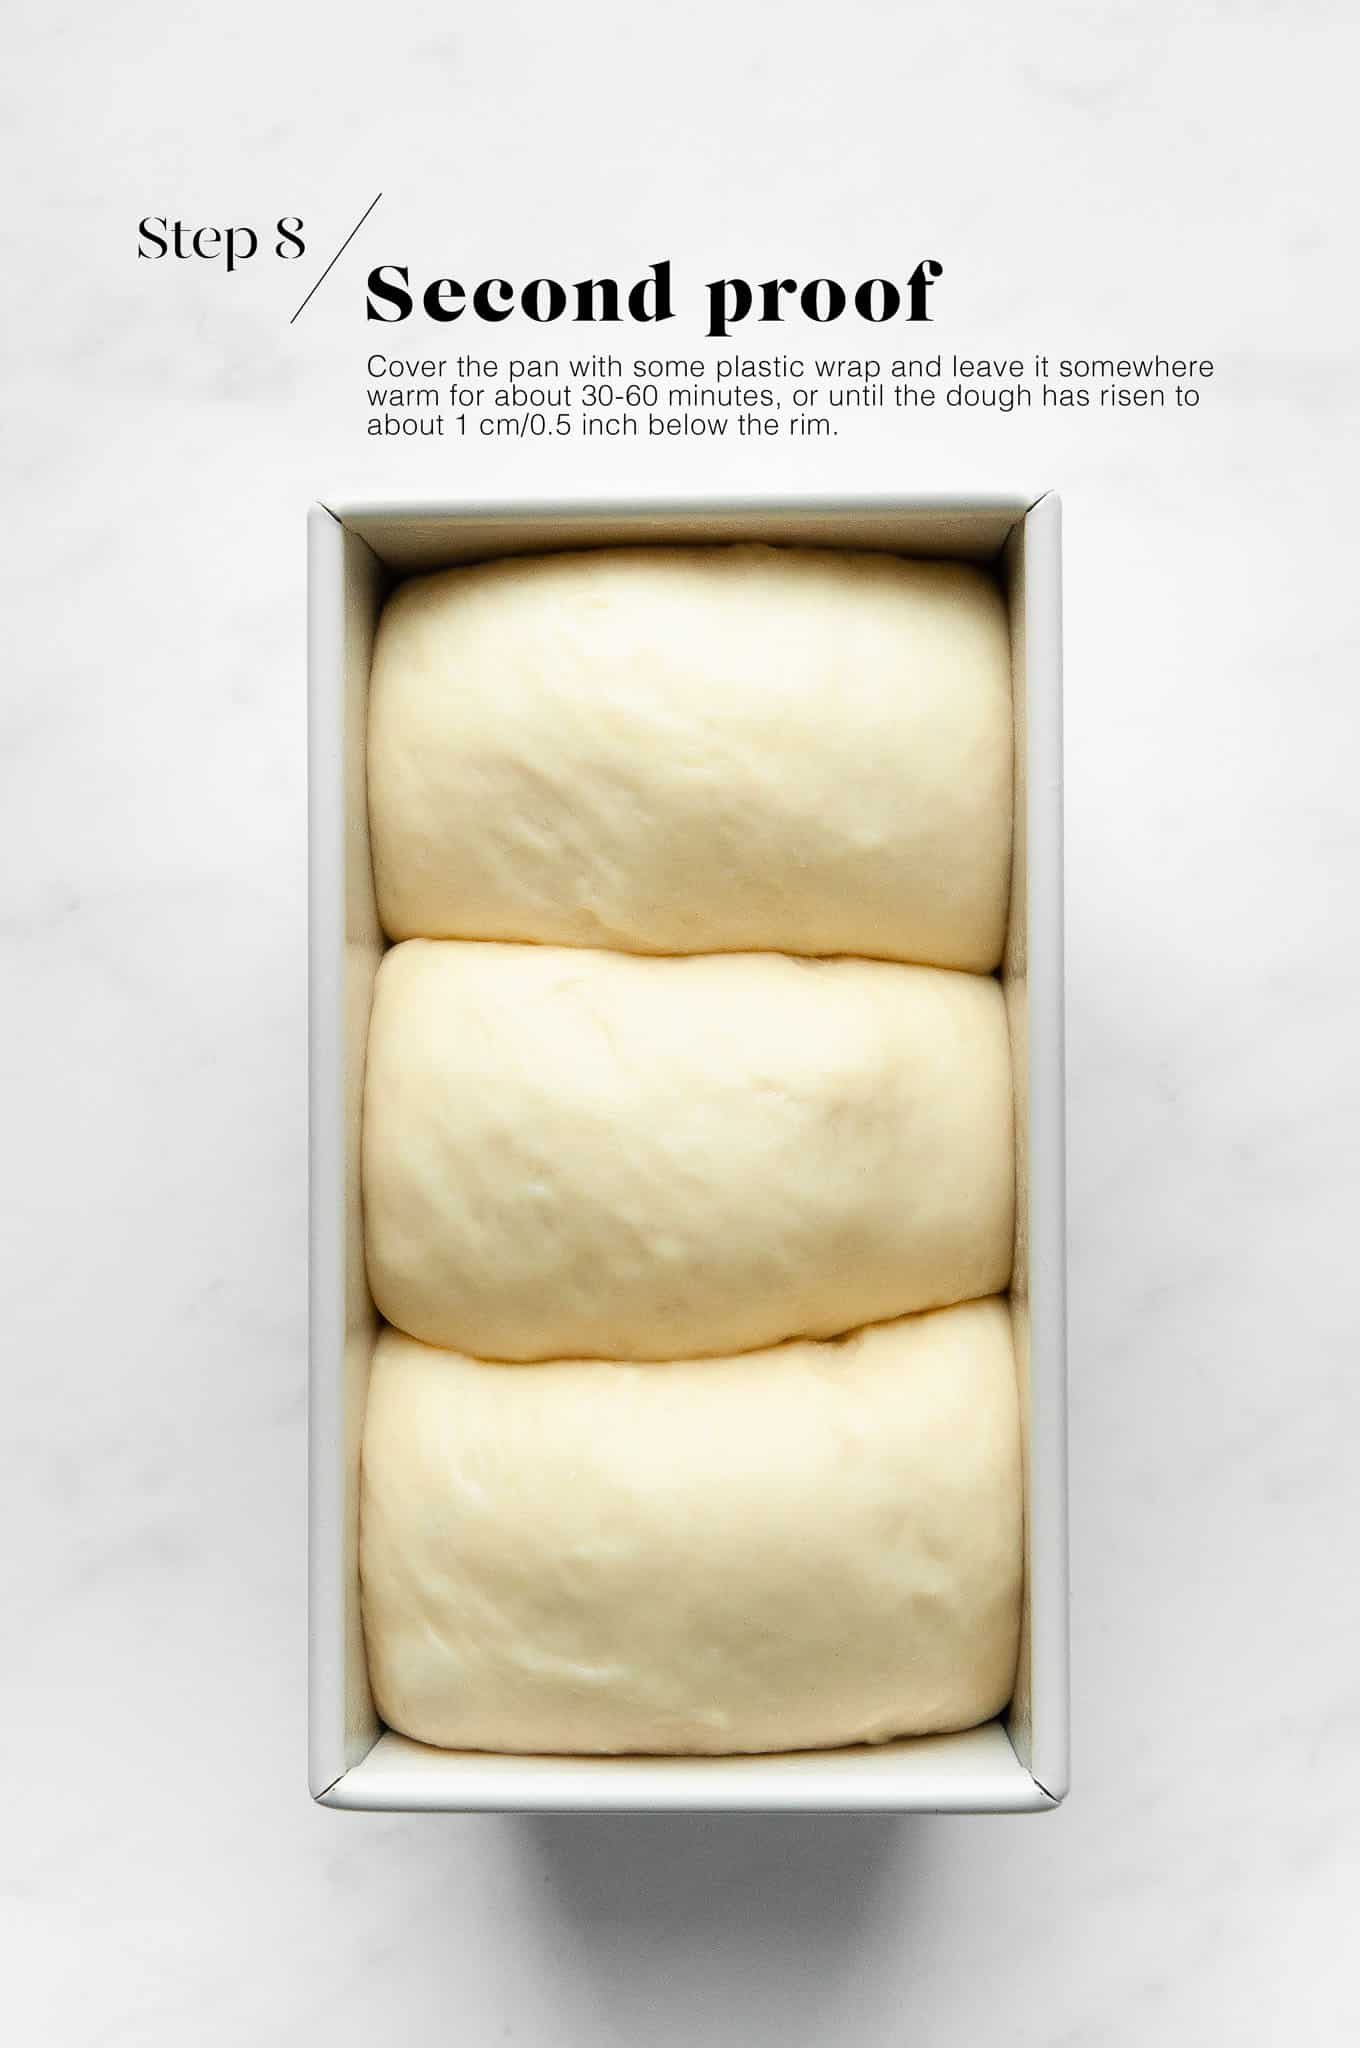
Step 8
Place the pan somewhere warm, covered with plastic wrap, for about 30-60 minutes, or until the dough has risen to about 1 cm/0.5 inch below the rim of the loaf pan.

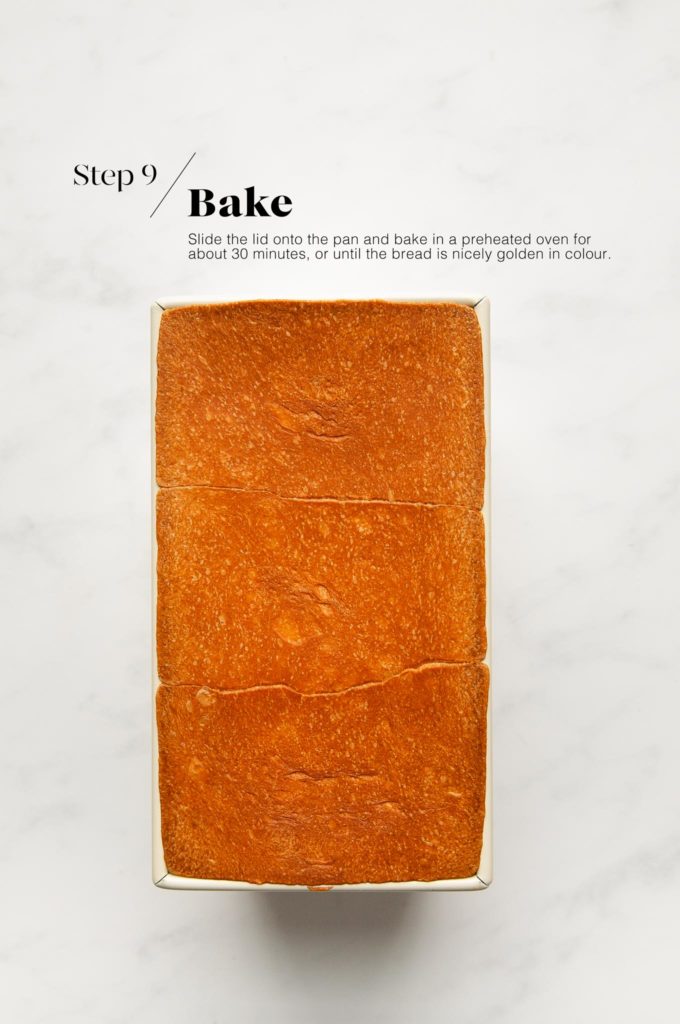
Step 9
Slide the lid onto the loaf pan, and bake in a preheated oven for about 30 minutes, or until nicely golden. To check if the bread has coloured nicely, simply slide the lid off to have a peek.
Tips for Making Milk Bread
- When making bread, even Milk Bread, I prefer to use bread flour. Bread flour contains more protein than plain flour (all-purpose flour), which will help create more gluten, which will result in a chewier, nicer-tasting texture.
- Although it is possible to make Milk Bread by hand and with an upper-body workout, an electric stand-mixer will be your best friend whenever making any enriched dough.
Tips for Making Bread Dough Ahead of Time
I love baking bread, but I don’t love getting up extra early to get started on the dough. So I typically make the dough the night before and allow it to rise slowly in the fridge overnight. The longer proofing time has the added benefit of allowing the dough to develop more flavour and a better texture. Come the morning, the dough will have at least doubled in size, and it will be ready for shaping as per the recipe.
To make the dough the night before:
- Make the dough as per the recipe.
- Place the dough into a large oiled bowl.
- Cover the bowl with plastic wrap or a reusable bowl cover.
- Place the bowl into the fridge.
- Let the dough rise overnight, or for at least 8-10 hours.
- The next morning, the dough should have at least doubled in size.
- Gently remove the dough from the bowl.
- The dough is ready for shaping and the second proof as per the recipe.
- As the dough will be cold from the fridge, the second proof may take slightly longer.

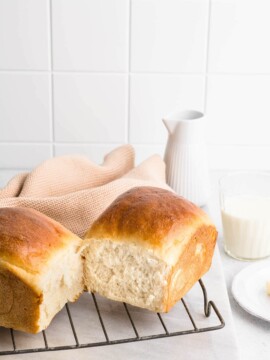
Japanese Milk Bread Loaf
Ingredients
For the Tangzhong
- 14 g (2 tablespoons) white bread flour
- 100 ml (⅓ cup plus 1 tablespoon) milk
For the Japanese Milk Bread Dough
- 350 g (2 ⅓ cups) white bread flour
- 3 ½ g (1 teaspoon) instant dried yeast, see Kitchen Notes
- 6 g (1 teaspoon) fine salt
- 55 g (¼ cup) caster sugar, (superfine sugar)
- 1 egg
- 125 ml (½ cup) milk, warmed to 37°C/98°F
- 50 g (½ stick) unsalted butter, softened
Instructions
For the Tangzhong
- Whisk the ingredients together in a small saucepan.
- Place the saucepan over low heat.
- Keep whisking until the ingredients form a thick paste. The consistency should be thick enough so that as you whisk the mixture, the whisk leaves lines in the mixture which remains.
- Remove the paste to a small bowl, and set it aside to cool down completely.
To Make the Dough
- Measure the flour, yeast, salt and sugar into the bowl of an electric stand mixer.
- Mix the dry ingredients together using a dough hook.
- Add the egg and the cooled Tangzhong.
- Slowly add the milk until the mixture comes together into a sticky dough.
- Add the butter, one tablespoon at a time. Wait for each tablespoon of butter to be fully incorporated into the dough before adding the next.
- Continue kneading the dough on medium speed for about 10-15 minutes, or until the dough passes the windowpane test. (See Kitchen Notes below). By this stage, the dough should also be coming away from the sides of the bowl.
- Lightly oil a large, clean mixing bowl.
- Roll the dough into a smooth ball and place it into the mixing bowl.
- Cover the dough with a clean tea towel or bowl cover, and place it somewhere warm for about 1.5 hours, or until it has doubled in size.
Portion the Dough
- Gently remove the dough from the bowl. The dough will deflate as you handle it.
- Divide the dough into 3 equal portions. Use a digital scale for even-sized buns.
Shaping the Dough
- Lightly grease a Pullman loaf pan and its lid with butter or non-stick baking spray. Even if your loaf pan is non-stick, I still recommend greasing it. For this recipe, I use a Pullman loaf pan which measures 23 x 13 cm/9 x 5 inches.
- Roll a piece of dough into a smooth ball.
- Then roll the dough into an oval shape, about 20 x 13 cm/8 x 5 inches.
- Roll up the piece of dough from the short end so that you have a log which is about 5 inches long.
- Repeat the above steps with the remaining pieces of dough.
- Place the shaped pieces of dough into the loaf pan with the seam facing down.
Proving the Shaped Dough
- Place the pan somewhere warm, covered with some plastic wrap, for about 30 – 60 minutes, or until the dough has risen until about 1 cm/0.5 inch below the rim of the loaf pan.
- If you are using a Pullman loaf pan with a lid, be careful that the dough does not rise too high, otherwise you will not be able to slide the lid on.
Baking the Milk Bread
- Preheat the oven to 180°C/356°F (without fan).
- Place a metal baking tray on the middle shelf.
- Bake the loaf for about 30 minutes, or until the bread is nicely golden all over. You can check the colour of the bread by sliding the lid off the pan.
- The bread is cooked if an internal thermometer reads 85°C/185°F.
- Leave the bread in the pan for about 5 minutes, before carefully inverting the bread onto a wire rack to cool completely.
Kitchen Notes
- WINDOWPANE TEST
Pinch off a small piece of dough, roll it into a ball and use your hands to gently stretch the dough. If the dough can stretch to form a thin sheet and be almost translucent so that you can see the light through it, your dough has passed the “windowpane test”. This means that you have kneaded the dough sufficiently and that the dough is ready to be proofed. - PULLMAN LOAF PAN DIMENSIONS
The Pullman loaf pan I have used for this recipe measures 23 x 13 cm/9 x 5 inches. - PULLMAN LOAF PAN SUBSTITUTE
If you don’t own a Pullman loaf pan, simply use an ordinary loaf pan, cover it with a sheet of baking paper, followed by a metal sheet pan, and top with an oven-proof weight such as a brick, cast-iron skillet or cast-iron lid. - MAKE AHEAD TIPS
To start the Milk Bread dough the night before:
* Make the dough as per the recipe.
* Place the bowl of dough (covered) in the fridge to proof overnight, or for at least 8 to 10 hours. During this time, it should have at least doubled in size.
* The next day, proceed with the rest of the recipe. As the dough will be cold, it may require a bit more time for the second proofing period. - DIFFERENT TYPES OF FLOUR
For Swiss readers: I use Zopfmehl (or farine pour tresse) when making bread and enriched dough. - DIFFERENT TYPES OF YEAST
* Please note that there is a difference between instant yeast (also called instant dried yeast or fast-action dried yeast) and dried yeast (also called active dry yeast). If you are not sure what type of yeast you have, please check the packaging for instructions on how to use the yeast.
* With instant yeast, you can add it directly to the flour mixture without having to activate it first.
* With dried yeast, you will need to activate it first (usually in some warm liquid). - PROOFING THE DOUGH
Dough needs a warm environment for the yeast to activate and cause the dough to rise. If you don’t have a warm place in your home, try one of the following ideas:
* In the oven with the oven light switched on (works only for some ovens).
* In the oven with a tray of boiling water on the bottom shelf.
* In the oven at a low temperature of about 25-30°C (77-86°F). - OVEN TEMPERATURES
All recipes on this website state temperatures for a regular oven (i.e. a conventional oven without fan). If you have a convection oven with a fan, please consult the manufacturer’s handbook on how to adjust the temperature and baking time accordingly. - CONVERSIONS
To convert from cups to grams, and vice-versa, please see this handy Conversion Chart for Basic Ingredients.


This milk bread is amazing! Wow the texture is just so soft and fluffy, and it tastes so delicious too. Thank you so much!
I tried this milk bread recipe today and it was absolutely fantastic. I’ve tried some other recipes before which also produced a fairly soft loaf, but this one was both extremely soft AND it tasted amazing. In fact, it tasted even better than the ones I sometimes buy from the Japanese bakery. Winning recipe!!!
Absolutely delicious recipe. The texture of the milk bread was amazingly soft and the taste was just beautiful. I’ve made milk bread before but I appreciated the careful instructions in your recipe. Thank you!
Brilliant recipe with easy to follow instructions and photos. I need to make two loaves next time as my family only left me one skinny slice!
Thanks for the tip on using a weighted sheet pan over a normal loaf pan. This worked perfectly! My loaf also turned out perfectly! Really great recipe, thank you.
Brilliant taste and texture. I’ve never made such a good looking loaf of bread. Thanks!
I made this loaf as soon as I saw you post it on Instagram. I am also obsessed with milk bread!! Your recipe is just perfect. The texture of this milk bread is just amazing.
I made this milk bread loaf today and it turned out amazing! We didn’t even have any leftover to make french toast, ha ha! I’m gonna make it again soon.
Great instructions and really delicious loaf. Definitely one of the best milk bread recipes I have tried.
Definitely knead the dough for the time stated in the recipe – I think this made a huge difference to all the other recipes I have tried. My loaf was super soft and so fluffy! I will try to make your milk buns next 🙂
How do I change the recipe for a 13 x 4 Pullman load pan?
Hi Amy,
I would suggest that you portion the dough into 4 pieces (instead of 3), and proceed with the recipe as usual. Hope you will enjoy this recipe!
Amazing recipe! I’ve made this twice now and the bread is so soft and fluffy!
Excellent!
This was my first time making bread and your recipe was so so helpful!
This recipe has really helpful photos and instructions. Thank you so much! My loaf turned out beautifully thanks to you. I can’t wait to try making the buns next.
Highly recommend this recipe!
Easy to follow recipe and the results are 10/10 amazing!
Love your website and all your step by step photos. They are always really helpful. I’ve made this recipe several times now and today I bought a second pullman loaf pan so I can make 2 at a time.
Came out perfect in my pullman pan. Extremely soft and fluffy. I got a lot of compliments on it!
Hi Sarah,
That’s great to hear!
Why divide into three portions???
Hi David, I think it is so the loaves can be pulled apart, but also to give the loaf its distinct shape and fluffy interior. You could make one large loaf instead. Hope this helps!
Excellent recipe!! I have been making bread for a long time. I love crusty loaves and sandwich loaves. I love anything bread really. I’ve been wanting to try this one for a long time and so glad I did! I ordered some pans but they didn’t come in time so I went ahead and used my U.S. 9×5 bread pan. The first time I made it (yes, twice in one day!) I made one loaf in my KitchenAid mixer. I used 6 on the mixer to get it to the right knead. I screwed up and didn’t heat the milk because I was distracted talking. It didn’t make a difference. I baked and then put melted butter on top (sorry, but I couldn’t help myself). I had just made this white bread recipe a few days ago and it was good. This was over the top good! I turned around and made two more loaves. It was that good!
Hi Chris,
That’s great to hear! I’m so glad you have enjoyed this recipe. It’s also my favourite bread to bake at home too 🙂 The melted butter sounds like a nice touch – I will try that next time too!
I just baked this Japanese Milk Bread, exactly as you wrote the recipe…I came out absolutely perfect!! As I did an overnite proof #1, the second proofing took about 2.5 hours, but finally rose beautifully and baked up even nicer!! Thanks for making this easy!! I’m now your biggest fan, Thanh!! 🙂
Hi Jack,
I’m so glad you enjoyed this recipe!
I made this recipe for the first time and it tasted amazing! I kneaded it by hand and that was a lot of work so I understand why it’s best to use a stand mixer which I do have… I just didn’t want to use it. I did something different by rolling out the dough into one large rectangle and spreading it with a seedless strawberry compote I made before rolling it up into one large roll.
I messed up big time by using the wrong pan size. The. Pan. Size. Matters. I used a Pullman pan that was much longer than 8×5 and the loaf spread out into a long, short loaf. That also affected the swirl inside, causing a large gap between the top swirl and the crust of the loaf. The pan being longer also didn’t provide enough constraint to force the loaf to rise upward into that tall, flat, bakery style loaf.
Other than all of that, it tasted great and my family enjoyed it. I’ll definitely be making it again but use the correct pan size and maybe leave out the strawberry swirl!
Hi Cam,
I’m glad you enjoyed this recipe! Yes, the pan size does indeed matter. Next time, depending on your pan size, you could make 1.5 times or double the recipe so that you have enough dough to fill your pan.
The strawberry swirl sounds delicious! You could definitely add different flavourings to this dough and experiment 🙂
Hi.
I’m back again. I made this same recipe but as dinner rolls for my mom to enjoy with turkey and cheese. I also plan on making this recipe again to make pineapple buns for my Chinese class at school. And then I’ll make this recipe again but double it as you mentioned I could try so it fits in my pan. I do have the right size pan to make this recipe but… it just looked too small. I should have known better.
Anyway,
This is my favorite, go to, milk bread recipe!
Hi Cam,
I’m so glad you enjoy this recipe! It is indeed very versatile and you can use the dough to make many different shapes. I have recipes on this website where I have used the same milk bread dough to make buns, filled buns, also pineapple buns. The options are endless! 😊