Aebleskivers
On a recent trip to Copenhagen, I spent a quiet morning on my lonesome cycling around the city, visiting various kitchenware stores where I filled up my bike basket with fragile Scandinavian-designed teacups, Nordic bundt pans, and chunky crochet dish cloths.
One item I was determined to return home with was a cast-iron aebleskiver pan, even if it meant tipping the scale on the flight home.
What are Aebleskivers?
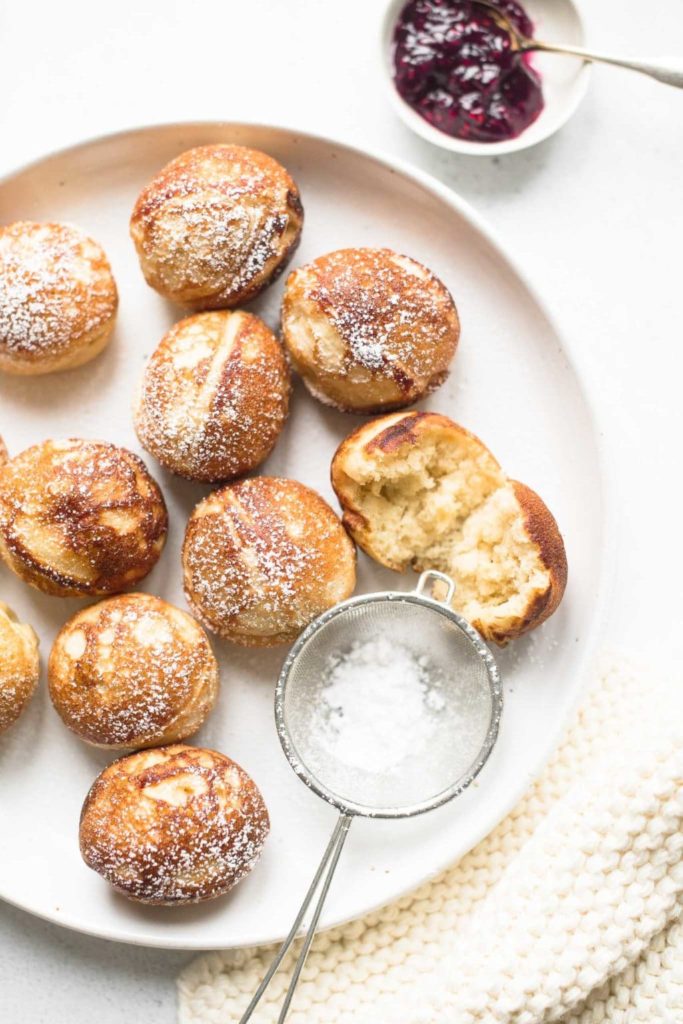
If you are not familiar with aebleskivers (also spelt ebelskivers), pronounced “eh-bull-skewers“, they are often described as Danish pancake balls or Danish doughnuts.
Aebleskivers are traditionally made from a yeasted dough, which makes them lovely and chewy, so they have a texture very similar to fried doughnuts.
But unlike fried doughnuts, aebleskivers are cooked in a special cast-iron pan with round indents. Which means that aebleskivers are healthier than doughnuts because they are not deep-fried!
There are also many aebleskiver recipes which use baking powder instead of yeast as the raising agent. These aebleskivers have a taste and texture more similar to American pancakes, but they are quicker to prepare and taste just as delicious.
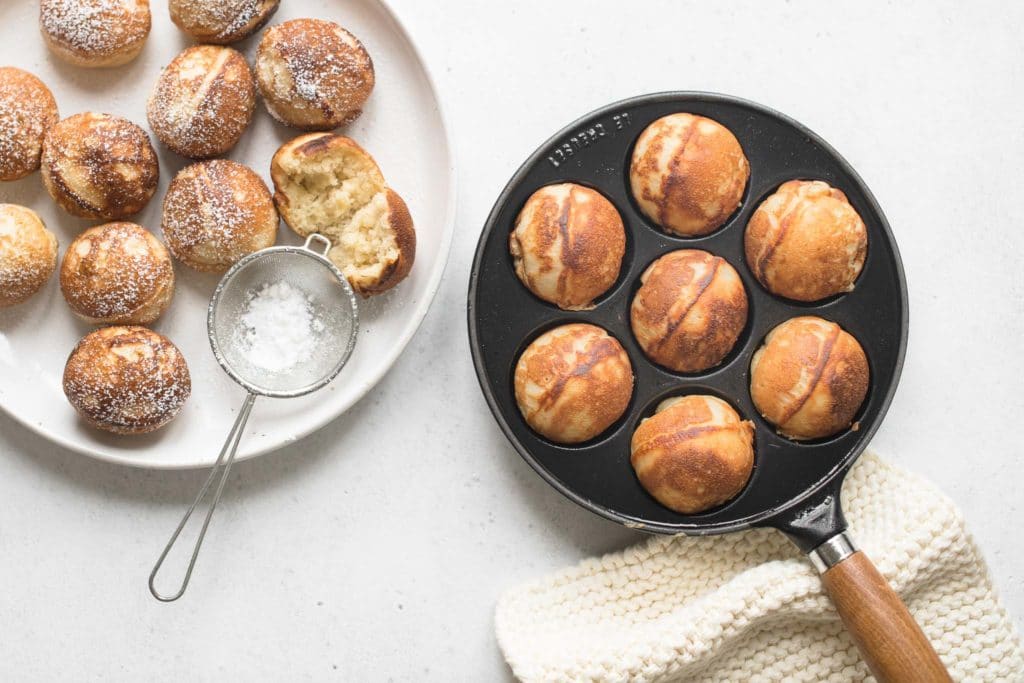
Aebleskiver Pan
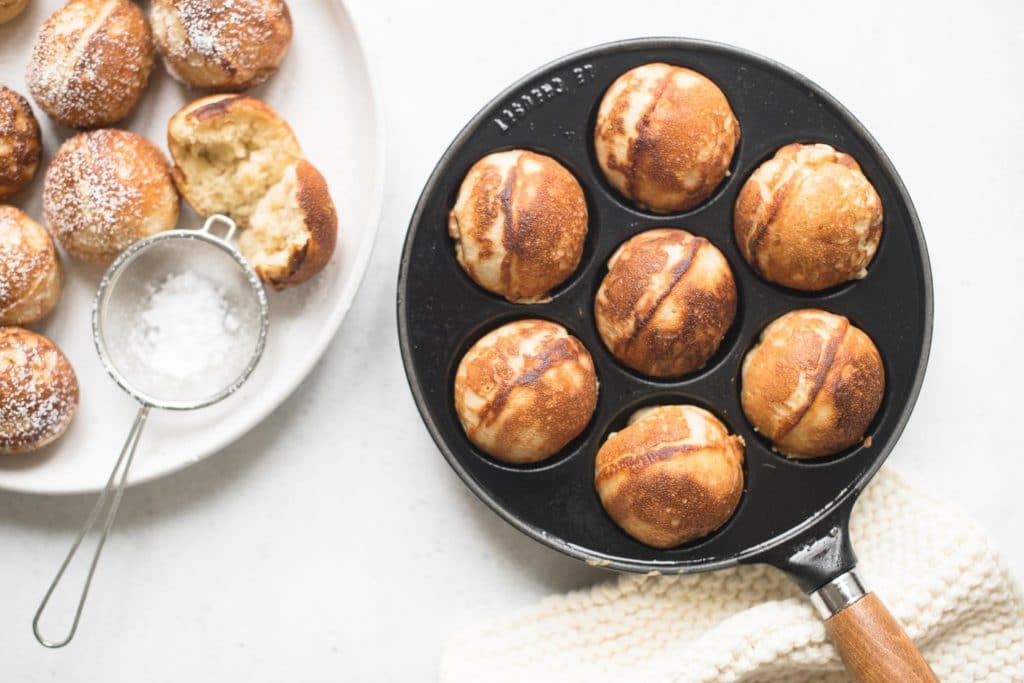
Traditional aebleskiver pans are made from heavy cast-iron with seven round indents.
You can also find non-stick aebleskiver pans, and even electric versions.
Aebleskiver pans vary in size, meaning that some produce larger aebleskivers than others. For example, my aebleskiver pan is made by Le Creuset and it produces slightly larger aebleskivers than other pans I have seen.
You may have also seen similar pans in some Asian cuisines. The Japanese make takoyaki using a very similar pan, and the Vietnamese make mini savoury pancakes called Banh Khot. The Dutch also use the same pan to make Poffertjes. So from one pan, so many options!
Aebleskiver Recipe
This aebleskiver recipe is adapted from Scandinavian Baking by Trine Hahnemann.
Trine Hahnemann is an authority on Danish cuisine, and her books can be found in many Danish homes. In fact, when my Danish neighbour invited me over to show me how she makes aebleskivers at home, she was using the very same recipe from her own battered copy of Trine Hahnemann’s cookbook.
But I was particularly grateful to have a Dane show me in person how to make aebleskivers because most recipes don’t go into detail about how to form the aebleskivers as perfectly round balls.
Low Sugar Dessert
What surprised me about this aebleskiver recipe is that it contains very little sugar.
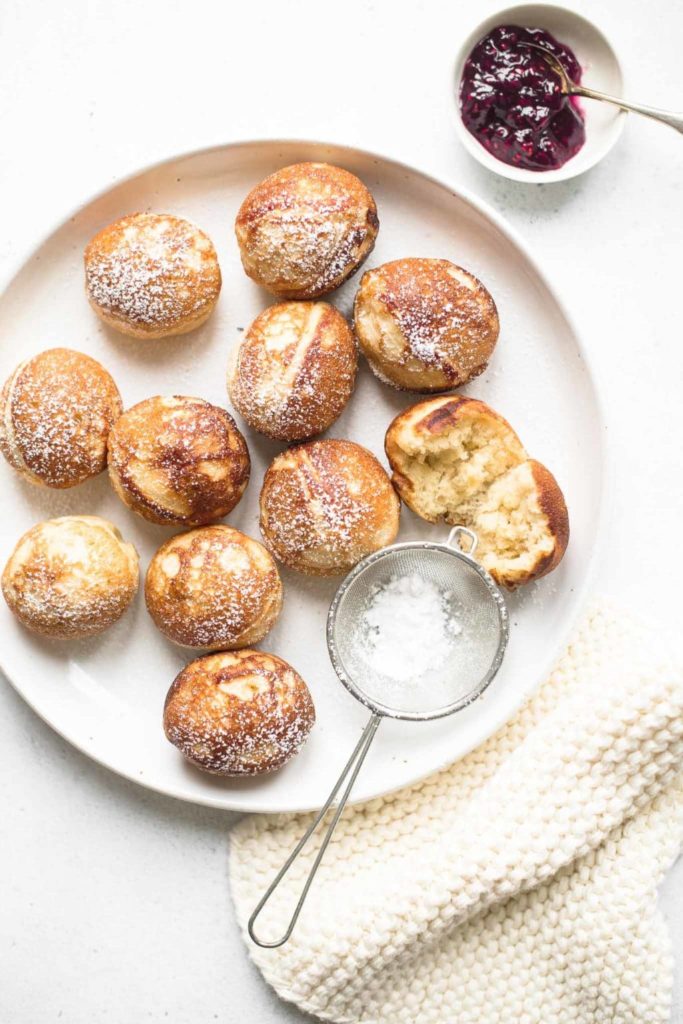
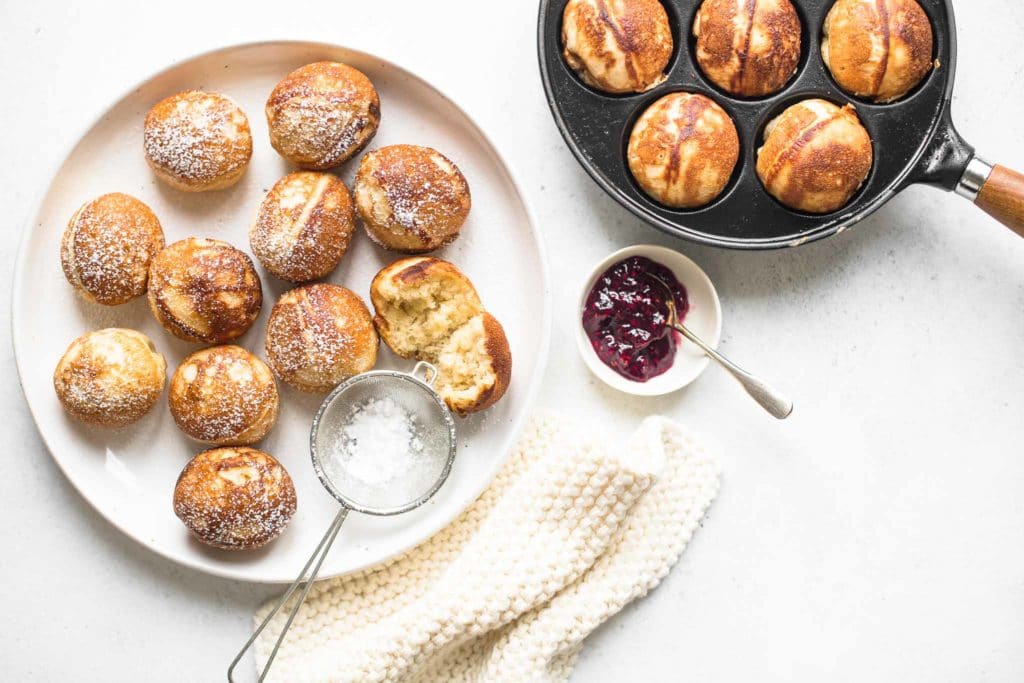
This recipe makes about 40 aebleskivers with only 3 tablespoons of sugar. You can add more sugar to suit your taste, but aebleskivers are commonly served with icing sugar (powdered sugar), and with something sweet on the side, such as jam or even Nutella.
My kids happen to love them plain with just a light dusting of icing sugar (powdered sugar), which means they are great for lunch boxes 🙂
When to Eat Aebleskivers
In Denmark, aebleskivers are traditionally eaten at Christmas time, and which is generally why most aebleskiver recipes make such large quantities.
Outside of Denmark, it is not uncommon to see stands at food markets or food festivals throughout the year serving a wide variety of aebleskivers as a dessert or snack. Here, you are likely to find aebleskivers filled with Nutella, apple, raspberry jam … my Danish friend shudders at the thought of such non-pure aebleskivers but I can confirm that they are very delicious!
For any Dane, eating aebleskivers in summer is a bit like eating Christmas pudding in July, but I think these are too delicious to eat just once a year!
How to Make Aebleskivers
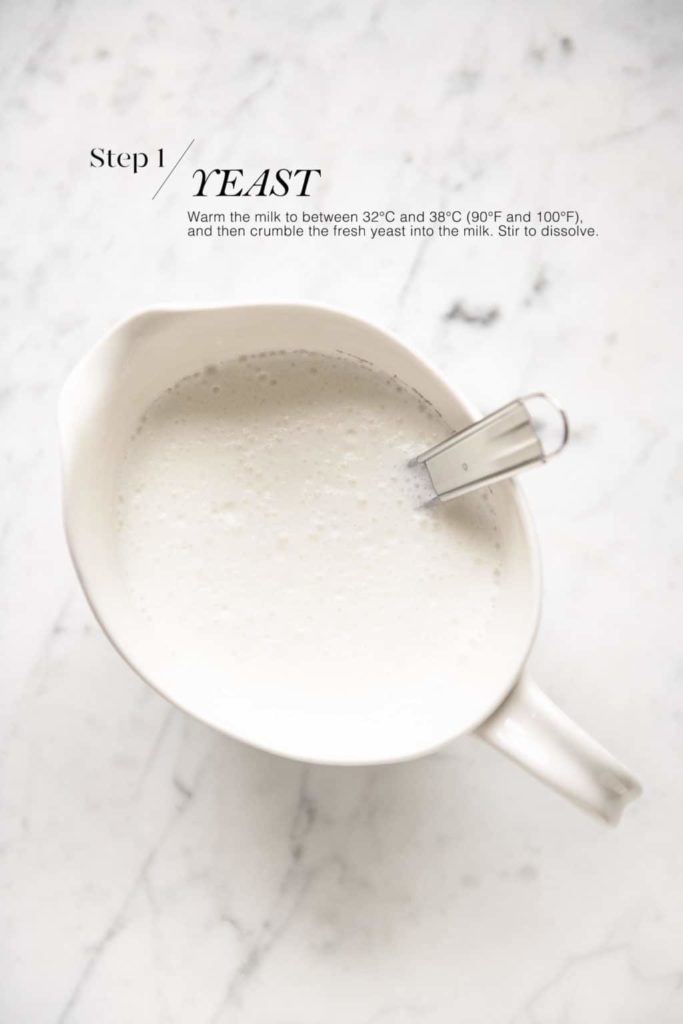
Step 1
This recipe uses fresh yeast which needs to be activated with some milk at room temperature.
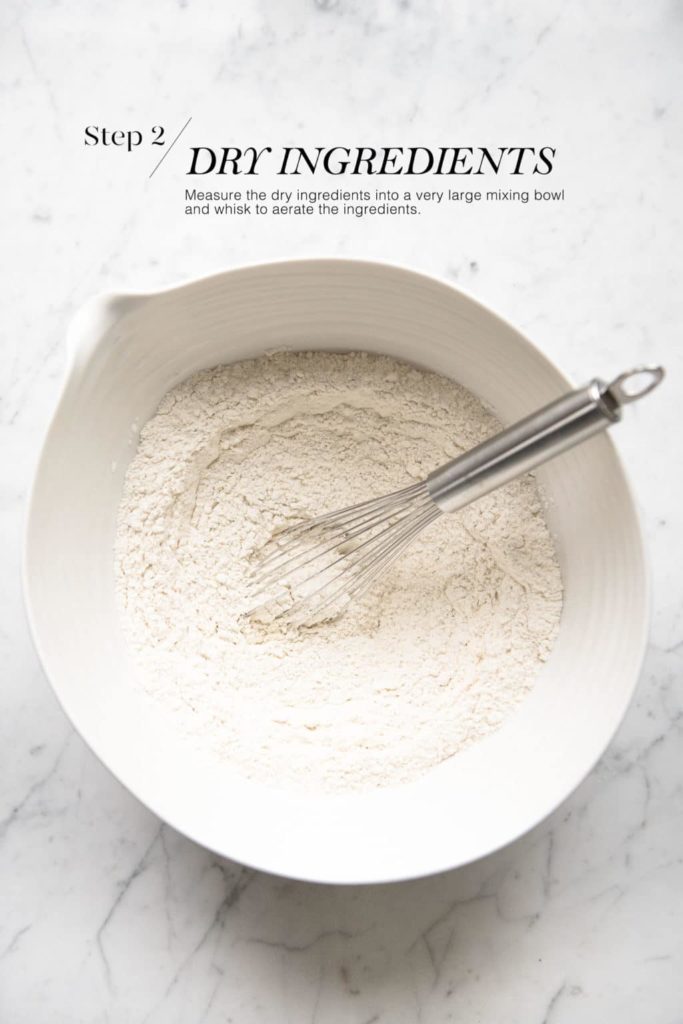
Step 2
While the yeast is activating, measure the dry ingredients into a large mixing bowl – the bowl should be large enough to take all of the ingredients later, with room for the batter to rise.
You can sift the dry ingredients into the bowl, but I prefer to simply whisk the ingredients together to aerate them gently (sifting takes too long!).
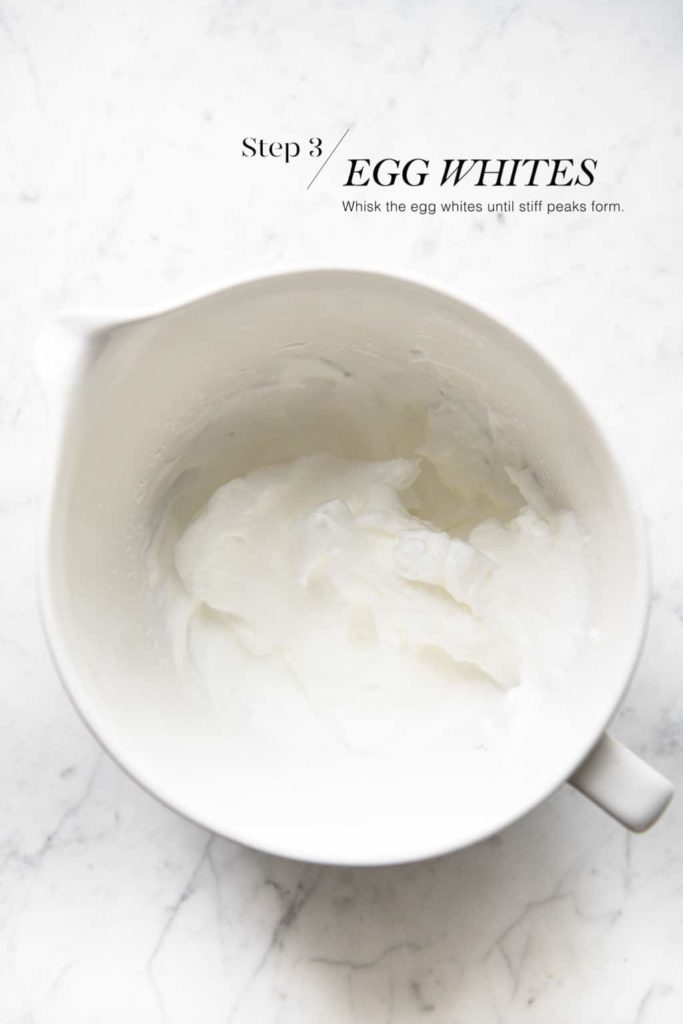
Step 3
Separate the eggs – place the egg whites into the bowl of an electric stand-mixer, and place the egg yolks into the milk mixture with the vanilla extract.
Whisk the egg whites until they have tripled in volume and stiff peaks form.
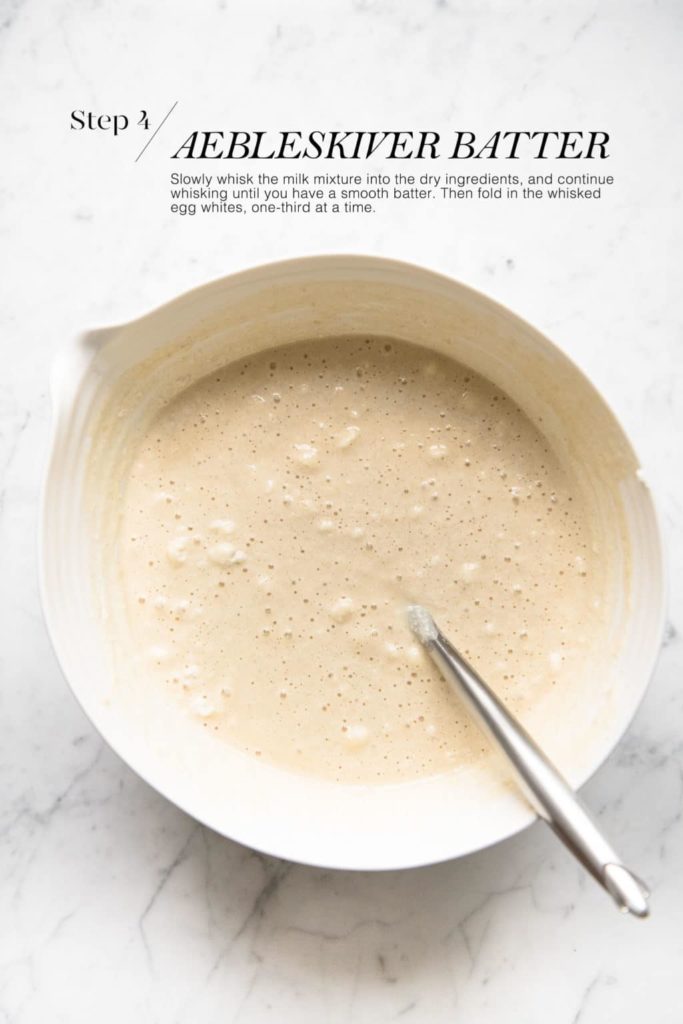
Step 4
Using a whisk, slowly mix the milk mixture into the dry ingredients. Keep whisking until you have a smooth batter.
Then fold through the beaten egg whites, one-third at a time. You should have a fairly liquid batter.
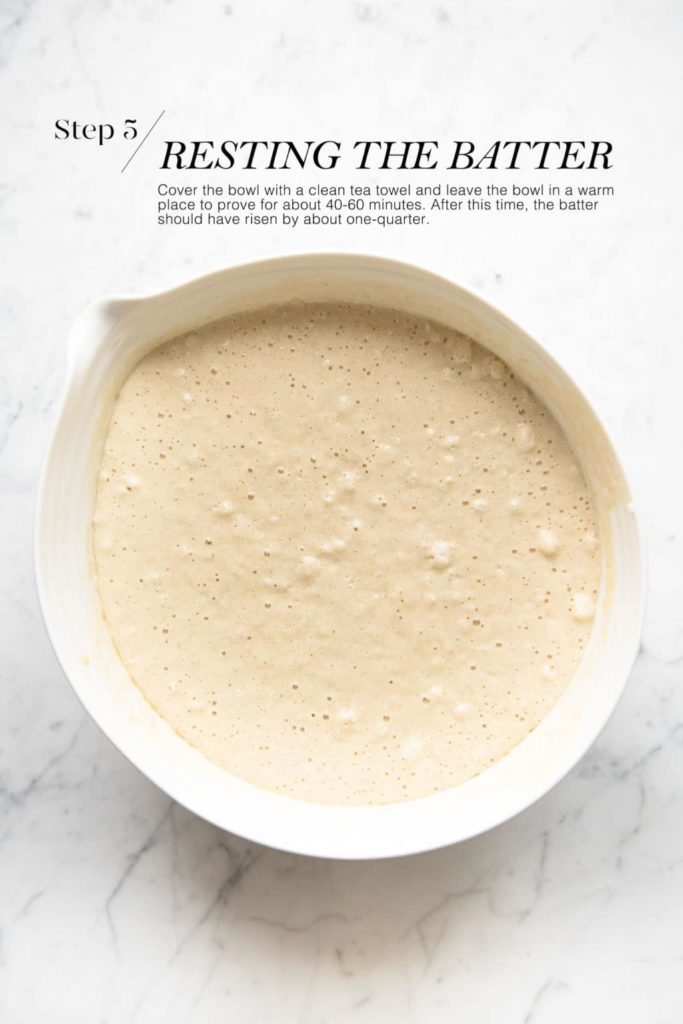
Step 5
Cover the mixing bowl with a clean tea towel, and leave the bowl in a warm place for about 40-60 minutes for the batter to rise. After this time, the batter should have risen by about one-quarter, and there should be lots of air bubbles.
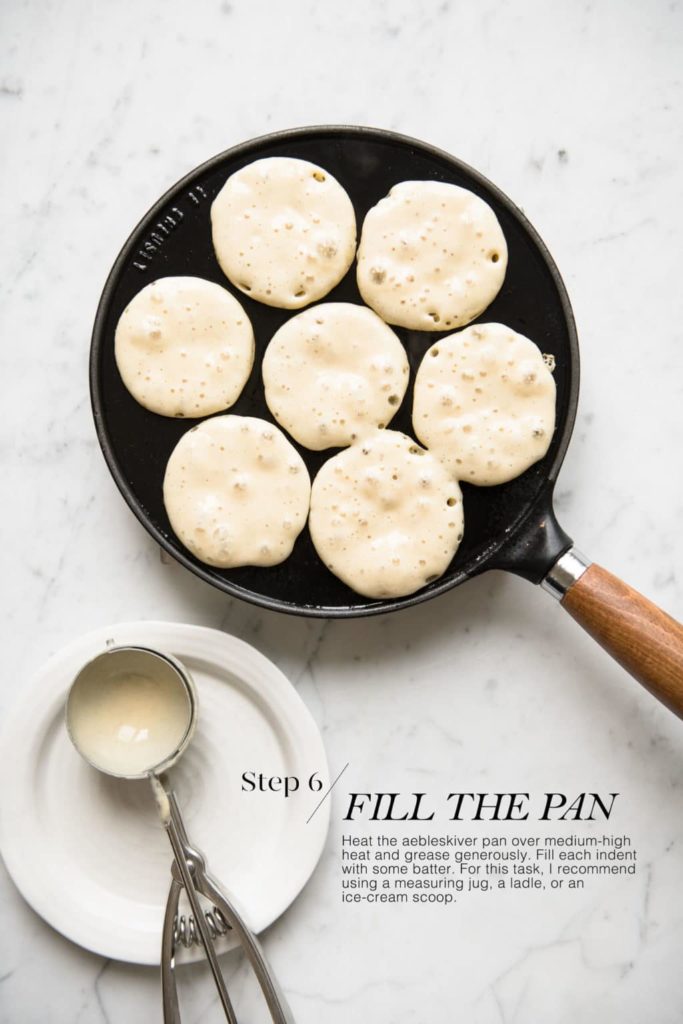
Step 6
To start cooking, preheat the oven to 100°C (212°F) and place a large roasting tray in the oven. I like to serve my aebleskivers warm, so I recommend placing the aebleskivers in the oven while you are cooking them in batches.
Heat the aebleskiver pan on medium-high heat. Once you are ready to cook, dot a small amount of butter into each indent of the aebleskiver pan.
Once the pan is ready, fill each indent with some batter. Depending on the size of your pan, you may have to play around with the quantities. For my aebleskiver pan, I use an ice-cream scoop with 60 ml (1/4 cup) capacity, but you could also use a measuring jug or ladle.
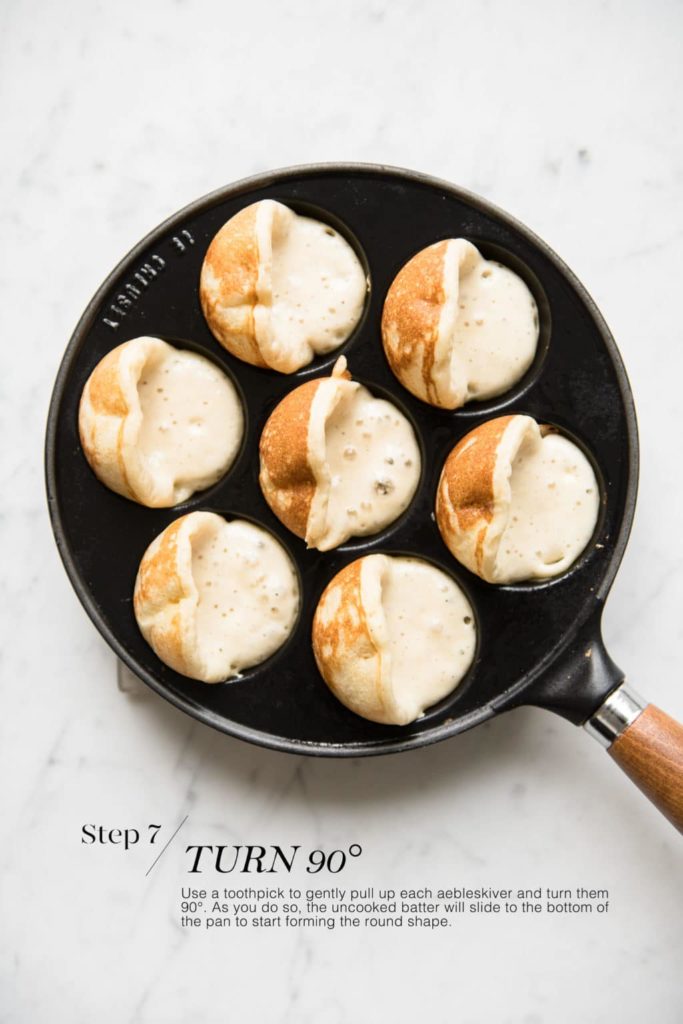
Step 7
Once you have filled each cavity, it is usually time to start turning the aebleskivers. Use a toothpick to check if the ebelskivers have browned nicely and if they are ready to turn.
Use two toothpicks to gently pull the aebleskivers up, and turn each aebleskiver 90°. As you do so, the uncooked batter will slide to the bottom of the pan to start forming the round ball shape.
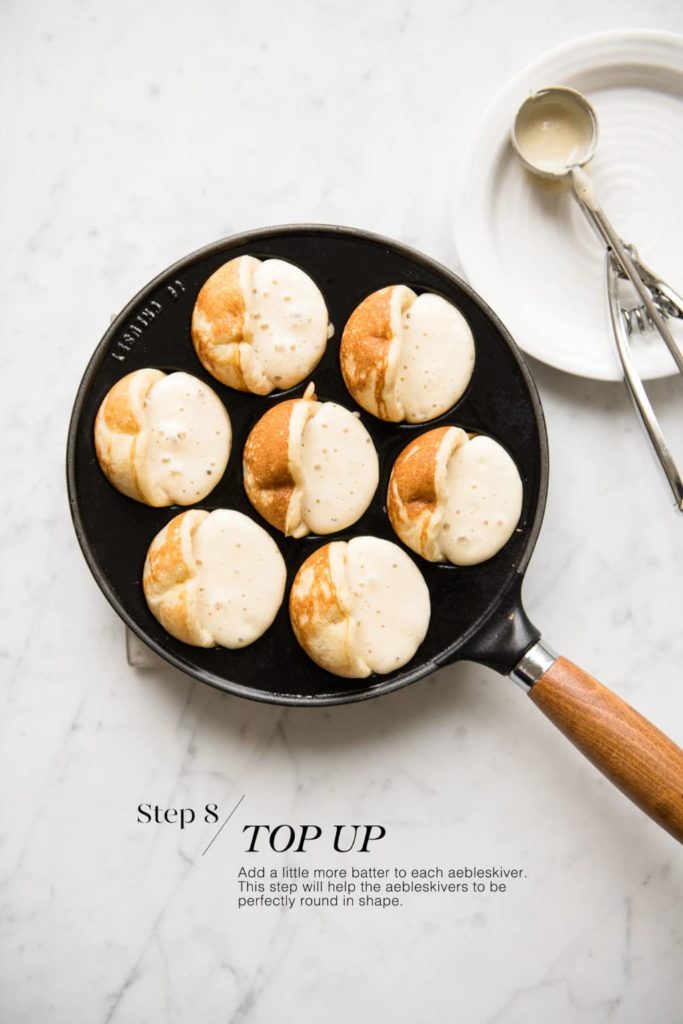
Step 8
Once all of the aebleskivers have been turned 90°, top up with a little extra batter. This step ensures that your aebleskivers will be perfectly round in shape.
For this task, I use an ice-cream scoop with a 15 ml (1 tablespoon) capacity, but you could also use a plastic squeeze bottle which has been filled with some of the batter.
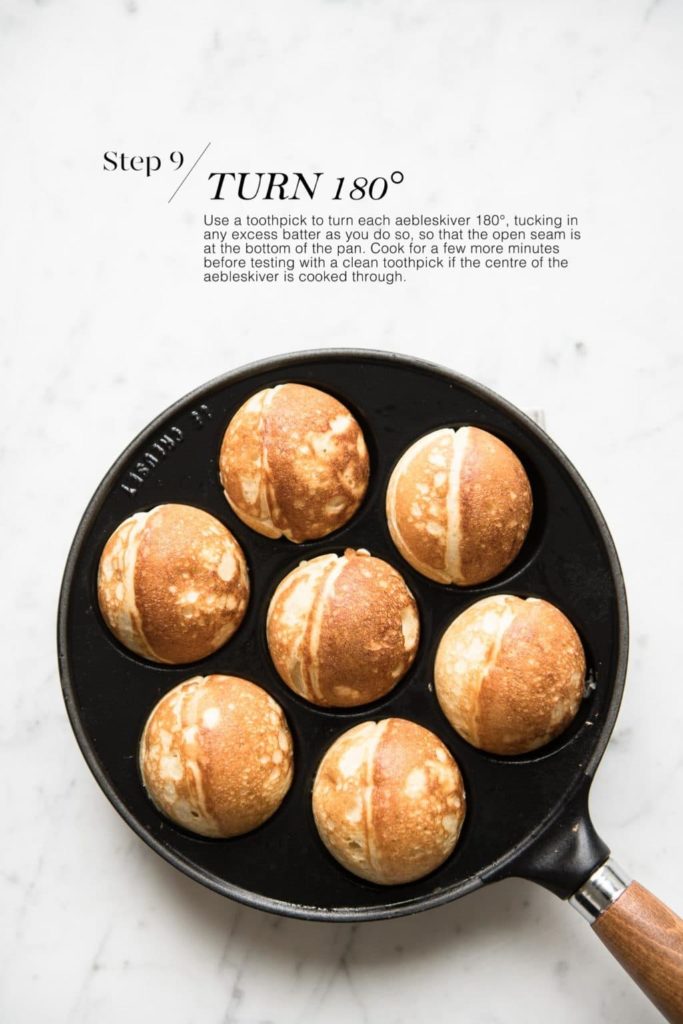
Step 9
Next, it is time to turn the aebleskivers again. Again, using two toothpicks, turn each aebleskiver 180°, tucking in any excess batter as you do so. At this point, the open seam should be on the bottom so that the remaining raw batter can cook through.
Once the aebleskivers have browned nicely, test with a clean toothpick to see if the centre of the aebleskivers are cooked. If they are slightly undercooked, they will continue to cook a little as they warm in the oven while you carry on with the rest of the batter.
Tips For Making Aebleskivers
- Have a set of toothpicks handy to help you cook the aebleskivers. Use them to gently loosen the sides of the aebleskivers from the pan, and also to turn the aebleskivers.
- Use an ice-cream scoop to make evenly-sized aebleskivers.
- The secret to achieving perfectly round aebleskivers is to add extra batter after you have turned them 90° in the pan.
- Remember the order of how you fill the aebleskiver pan, and repeat each step with the aebleskivers in that order, so that they all brown uniformly.
- Once the aebleskivers have browned nicely all over, transfer them to a tray in an oven at 100°C (212°F) to keep them warm. If the aebleskivers are slightly undercooked in the centre, the low oven heat will continue to cook the aebleskivers a little more.

Aebleskivers (Danish Pancakes)
Ingredients
For the Aebleskivers
- 800 ml (3 cups plus 3 tablespoons) milk, warmed to 37°C/98°F
- 40 g (1 ½ oz) fresh yeast, see Kitchen Notes
- 600 g (4 cups) plain flour , (all-purpose flour)
- 6 g (1 teaspoon) fine salt
- 1 teaspoon cardamom seeds, freshly ground, or 1 ½ teaspoons ground cardamom
- 3-5 tablespoons caster sugar, (superfine sugar), to taste
- 4 eggs, separated
- 2 teaspoons vanilla extract
To Cook the Aebleskivers
- 100 g (1 stick) unsalted butter
To Serve
- icing sugar, (powdered sugar) for dusting
- Raspberry Jam
Instructions
To Make the Aebleskiver Batter
- Crumble the fresh yeast into the milk, and stir to dissolve the yeast.
- In a very large bowl which will later take all of the ingredients, measure the flour, salt, ground cardamom, and sugar.
- Whisk the dry ingredients together to aerate them.
- In a medium-sized bowl, or using the bowl of an electric stand-mixer, whisk the egg whites until they have tripled in volume and stiff peaks form.
- Add the egg yolks to the milk mixture, together with the vanilla extract.
- Slowly pour the milk mixture into the bowl of dry ingredients, whisking as you do so to remove any lumps.
- Keep whisking until you have a smooth batter.
- Fold the beaten egg whites into the batter, one third at a time.
- Cover the mixing bowl with a clean tea towel and leave the batter to rest for about 40-60 minutes in a warm place. I like to do this in an oven at 50°C (120°F) (without fan).
- After the resting period, the batter should have risen by about a quarter, and there should be lots of air bubbles present.
To Cook the Aebleskivers
- Preheat the oven to 100°C (212°F) (without fan) and place a large roasting tray in the oven. This tray will be used to keep the aebleskivers warm while you are cooking them in batches.
- Heat an aebleskiver pan on medium-high heat.
- Dot the indents of the aebleskiver pan with some butter (about 1/4 teaspoon).
- Fill each of the indents of the aebleskiver pan. For my pan, I like to use an ice-cream scoop with a 60 ml (1/4 cup) capacity but a large jug also works as well.
- After a 1-2 minutes, use some toothpicks to check the colour of the aebleskivers.
- Once the ebelskivers are a nice and golden colour, turn all of the aebleskivers 90° by using two toothpicks to pull the aebleskivers up. As you do so, the uncooked batter will slide to the bottom of each indent.
- Quickly add a small amount of extra batter to each aebleskiver, on top of the existing uncooked batter. For my aebleskiver pan, I use an ice-cream scoop with a 15 ml (1 tablespoon) capacity (see also Kitchen Notes).
- Then turn all of the aebleskivers 180° so that the open seam is facing the bottom. As you do so, the aebleskivers should turn easily in the pan, and any excess batter around the pan can be gently tucked under each aebleskivers.
- Once the aebleskivers are nicely golden, check with a clean toothpick to make sure that they have cooked through completely in the centre (but see next step).
- Remove the cooked aebleskivers to the roasting tray in the heated oven where they can be kept warm while you repeat the above steps. It is fine if the aebleskivers are slightly undercooked in the centre because they will continue to cook a little in the oven.
- Repeat with the remaining batter.
- After the first few batches, you may have to adjust the heat so that the pan is not too hot.
- To serve, sprinkle with icing sugar (powdered sugar) and dip in raspberry jam.
Kitchen Notes
- VARIATIONS
The traditional Danish recipe for aebleskivers contains only ground cardamom for a gentle spice and aroma, and which is common in many Scandinavian baking recipes. Some variations which I recommend include:
* omitting the ground cardamom for plain-flavoured aebleskivers
* adding 1 teaspoon each of ground cinnamon and ground cardamom
* adding 1 teaspoon of Nutella to each aebleskiver just before turning them the first time in the pan - AEBLESKIVER PAN
Aebleskiver pans come in different sizes, so you may have to play with the quantities when filling the pan, and also adjust your cooking time accordingly. - FILLING THE AEBLESKIVER PAN
To fill the aebleskiver pans, I like to use ice-cream scoops so that each aebleskiver is the same size, but you can also use a measuring jug or ladle. My Danish friend uses a plastic squeeze bottle to easily top up the batter. - DIFFERENT TYPES OF YEAST
* If you are using fresh yeast, you will need about one block (40 g fresh yeast = 14 g instant dried yeast = 4 teaspoons instant dried yeast).
* Please note that there is a difference between instant yeast (also called instant dried yeast or fast-action dried yeast) and dried yeast (also called active dry yeast). If you are not sure what type of yeast you have, please check the packaging for instructions on how to use the yeast.
* With instant yeast, you can add it directly to the flour mixture without having to activate it first.
* With dried yeast, you will need to activate it first (usually in some warm liquid). - OVEN TEMPERATURES
All recipes on this website state temperatures for a regular oven (i.e. a conventional oven without fan). If you have a convection oven with a fan, please consult the manufacturer’s handbook on how to adjust the temperature and baking time accordingly. - CONVERSIONS
To convert from cups to grams, and vice-versa, please see this handy Conversion Chart for Basic Ingredients.
Did you make this recipe?
Please leave a comment below and share your photos by tagging @eatlittlebird on social media and using #eatlittlebirdUpdate
This recipe was first published on 7 May 2019. It has been updated with more comprehensive recipe notes.


I grew up in Denmark as a child and remember eating aebleskivers at Christmas time. I only recently started making them at home and also use the same recipe from Trine Hahnemann. But her recipe does not mention the steps about turning the aebleskivers and adding more batter, so my cakes look much flatter. I can’t wait to try this recipe with your tips – I love how round and full they look. You have a lovely website.
I learnt my tips and tricks for making aebleskivers from my Danish neighbour. I suppose they are a bit difficult to put in writing and maybe that is why most cookbooks have less instructions? I hope you will enjoy this recipe 🙂
Oh my goodness! Thanks so much for this! I could not figure out how to make them perfectly round, and I can’t wait to try this!
I hope you will enjoy this recipe! I know they are traditionally eaten at Christmas time, but I plan to make them in the next few weeks, especially since it is already getting cold where we are 🙂
Such a smart idea to use a takoyaki pan for these pancakes! They look so cute and delicious!
I love this recipe! The use of cardamon is phenomenal. However, I was wondering if you had a recommendation for how to substitute fresh yeast. You cannot find it easily where I live, and I’ve been using baking powder as recommended in other recipes, but the result is a bit dense.
Hi Thea,
As a general rule, 40 g fresh yeast = 14 g instant dried yeast = 4 teaspoons instant dried yeast.
If you are using instant dried yeast, you can add it directly to the dry ingredients. Otherwise, if you are using dried yeast, you will need to activate it first in a similar way to fresh yeast in this recipe.
Aebleskivers definitely have a nicer texture when made with yeast. Hope this helps!
Hello. Thank you for the detailed instructions! I am using my Danish grandma’s aebleskiver pan to make these in her memory. <3 I've read that many traditional aebleskiver recipes call for buttermilk. Would you recommend?
Hi Jana,
How lucky of you to have your grandmother’s aebleskiver pan! What a lovely treasure to receive.
There are two types of aebleskiver recipes – one that uses yeast, and one that uses baking powder.
The recipes which use yeast take longer to prepare because you have to wait for the yeast to activate and rise.
The recipes which use baking powder typically also use buttermilk (as well as baking soda) to help create bubbles in the mixture to make the aebleskivers fluffy.
Both types of recipes produce delicious aebleskivers, but the texture will be slightly different. I find the recipes using yeast produce a chewier and more satisfying aebleskiver, whereas those using baking powder create a softer, cake-like aebleskiver.
If you are making the aebleskivers as per this recipe with yeast, don’t substitute the milk for buttermilk.
I hope this helps 🙂
My family loves this recipe! However, they are not huge eaters…can you store the batter in the fridge? How long can it be stored?
Hi Laura,
I’ve never tried storing the batter in the fridge. I think it would ferment too much, which would alter the flavour of the aebleskivers. You are possible better off making the full batch (or halve the recipe), and freeze the cooked the aebleskivers.
Where is the stick of butter called for? I only see dotting butter into the pan?
Hi Val,
Yes, that is correct. You need about 1/4 teaspoon of butter in each indent of the aebleskiver pan. Depending on the size of your pan, the recipe makes about 40 aebleskivers. You will need more or less a stick of butter to make all of the aebleskivers. Hope this helps!
Many years ago I bought an Aebleskiver pan and made some Aebełskivers. Only once!!
Now I know how to make them properly!! Thankyou. :))