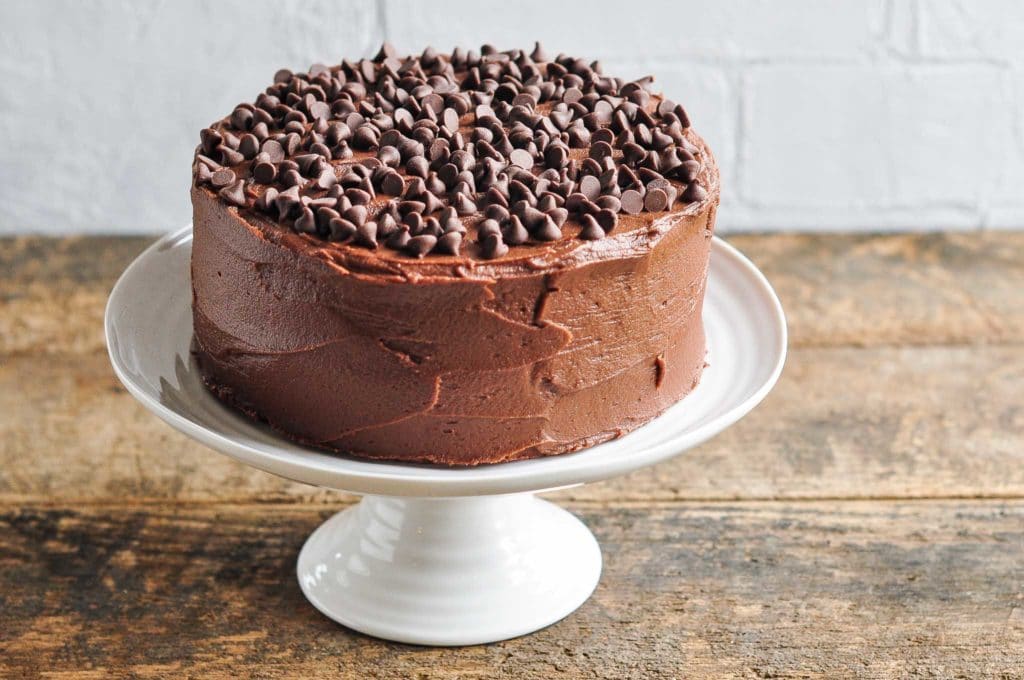
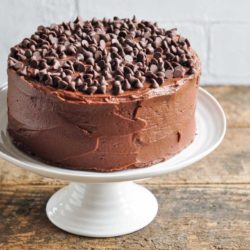
Epic Chocolate Cake
In deciding how to celebrate Eat, Little Bird’s first blog anniversary, chocolate cake instantly came to my mind, but I knew that it had to be a special one.
For quite some years now, my online foodie friends have been raving about what has become known as the “Epic Cake”, so-called because it started out life as a chocolate cake on the Epicurious website, and which was later lovingly adapted by a good online friend who calls herself SamIam.
Ultimate Chocolate Cake
And considering it was her who recommended the Chocolate Pound Cake which was to be my first ever post here on Eat, Little Bird, I thought it was only fitting to go with her recommendations to celebrate my blog’s first anniversary.
This Epic Cake came to be well-known amongst the online foodie community because there was a debate as to what was the best chocolate cake recipe – was it Nigella Lawson’s Old-Fashioned Chocolate Cake or was there a better recipe?
For a long time, I was a faithful follower of Nigella’s Old-Fashioned Chocolate Cake from Feast, a recipe which has been fail-proof in my kitchen and which hits the spot whenever a craving for chocolate cake ensues. It might sound strange, but Nigella’s Old-Fashioned Chocolate Cake tastes like a packet-cake mix, but in a good way.
The Ultimate Chocolate Cake Recipe
But presented with the perfect opportunity to try a new celebration cake, I proceeded to make SamIam’s Epic Cake. One look at the ingredients and I couldn’t help but notice how fitting the name was; the cake could be described as epic simply for the quantities of the ingredients.

The recipe calls for 2 x 26 cm (10 inch) cake tins, a sign of how massive this cake is intended to be. But not wanting to buy new cake tins just for this occasion (nevermind that this size is nowhere to be found in the shops in Zurich), I proceeded to make the cake in 2 x 20 cm (8 inch) cake tins, meaning that I had enough batter leftover for a third cake in a 20 cm cake tin, plus some muffins. So from one recipe, many cakes!
Due to the large quantities of ingredients required for this cake, especially the quantities of cocoa powder, I felt it was necessary to use some more budget-conscious brands for this cake.

When it comes to cocoa powder, I used to reach for the Bensdorp Cocoa which I would loyally buy from Dean & Deluca every time I was in New York. But as this cake recipe required 1 ½ cups, that would have quickly depleted my existing supply.
One brand of cocoa which I like to use in baking is from Cailler, a Swiss company which owns the oldest chocolate factory in Switzerland, located in the idyllic town of Broc in the Gruyère region which is famous for the cheese of the same name. Whilst this cocoa powder is not necessarily cheap, it is definitely cheaper than a flight to New York.
Chocolate cakes which are rich in cocoa powder tend to be on the dry side, but this one happens to be quite moist, thanks to the high liquid content. The addition of coffee also intensifies the chocolate flavour, making it a somewhat rich and deeply flavoured chocolate cake.

The chocolate ganache frosting is something which I have only previously used to ice cup-cakes, but it works quite well on a large tiered cake like this. The main consideration is that you need to let it set in the fridge until it reaches a spreadable consistency, and once you have spread it all over the cake, it does set well after a few hours.
Overall, I felt it was a really good chocolate cake recipe. If an occasion called for a super-large chocolate cake, I think this recipe could be worth turning to. It was certainly worth making to celebrate this particular special occasion 🙂

Ultimate Chocolate Cake
Ingredients
For the Chocolate Cake
- 2 teaspoons instant coffee
- 375 ml (1 ½ cups) hot water
- 75 g (3 oz) dark chocolate
- 660 g (3 cups) caster sugar, (superfine sugar)
- 375 g (2 ½ cups) plain flour, (all-purpose flour)
- 190 g (1 ½ cups) unsweetened cocoa powder
- 2 teaspoons baking soda
- 1 teaspoon baking powder
- 1 ¼ teaspoon fine salt
- 3 eggs
- 195 ml (¾ cup) vegetable oil
- 375 ml (1 ½ cups) natural yoghurt
- 1 teaspoon vanilla extract
For the Chocolate Ganache Frosting
- 375 ml (1 ½ cups) double cream, (heavy cream)
- 3 tablespoons caster sugar, (superfine sugar)
- 3 tablespoons golden syrup, or light corn syrup or honey
- 325 g (11 oz) dark chocolate, 60-70% cocoa
- 170 g (1 ½ sticks) unsalted butter, cubed
To Decorate
- ½ cup dark chocolate chips
Instructions
For the Chocolate Cake
MAKE SURE ALL OF THE INGREDIENTS ARE AT ROOM TEMPERATURE BEFORE STARTING.
- Preheat the oven to 150°C (300°F) (without fan).
- Grease and line 2 x 26 cm (10 inch) round cake tins. (I made 3 x 20 cm (8 inch) cakes plus 2 muffins and gave the extra cake to my neighbours, but you could also make a 3 tiered cake, if you wish.)
- Dissolve the instant coffee in the hot water in a small saucepan over high heat.
- Add the chocolate and stir until the chocolate has melted.
- Take the saucepan off the heat and leave it to cool slightly.
- Sift the sugar, flour, cocoa powder, baking soda and baking powder into a large bowl.
- In the bowl of a food mixer, beat the eggs with the whisk attachment until they are thick and pale yellow in colour.
- Slowly whisk in the oil, natural yoghurt, vanilla extract and chocolate mixture.
- Add the wet ingredients to the bowl of dry ingredients and beat until everything is well incorporated. I have two bowls for my KitchenAid and used the smaller bowl for the wet ingredients, and the larger bowl for the dry ingredients, mixing everything together at the end with the flat paddle attachment.
- Divide the mixture between the cake tins.
- Bake for about 50-65 minutes if using 26 cm (10 inch) cake tins, or about 40-45 minutes for 20 cm (8 inch) cake tins.
- The cakes should be ready when the sides of the cake start to come away from the tin and a skewer inserted in the middle of the cake comes out clean.
- Invert the cakes onto a cooling rack and leave for about 5 minutes before removing the tins, and let the cakes completely cool down.
For the Chocolate Frosting
- In a small saucepan over medium heat, mix together the cream, sugar and golden syrup (or light corn syrup).
- Take the pan off the heat and mix in the chocolate until it has melted.
- Stir in the butter and mix until the butter has melted and everything is well combined.
- Pour the mixture into a bowl, cover with plastic wrap.
- Leave in the fridge for at least 1-2 hours until it is a spreadable consistency. It should be thick and not too runny.
To Assemble the Cake
- Place one cake layer on the cake stand upside down (i.e. the bottom of the cake should be facing up).
- Take about one-third of the frosting and spread it evenly across the cake.
- Place the second cake layer on top of the bottom layer, right-side up.
- Take another one-third of the frosting to evenly cover the top of the cake, and the remaining third to cover the sides.
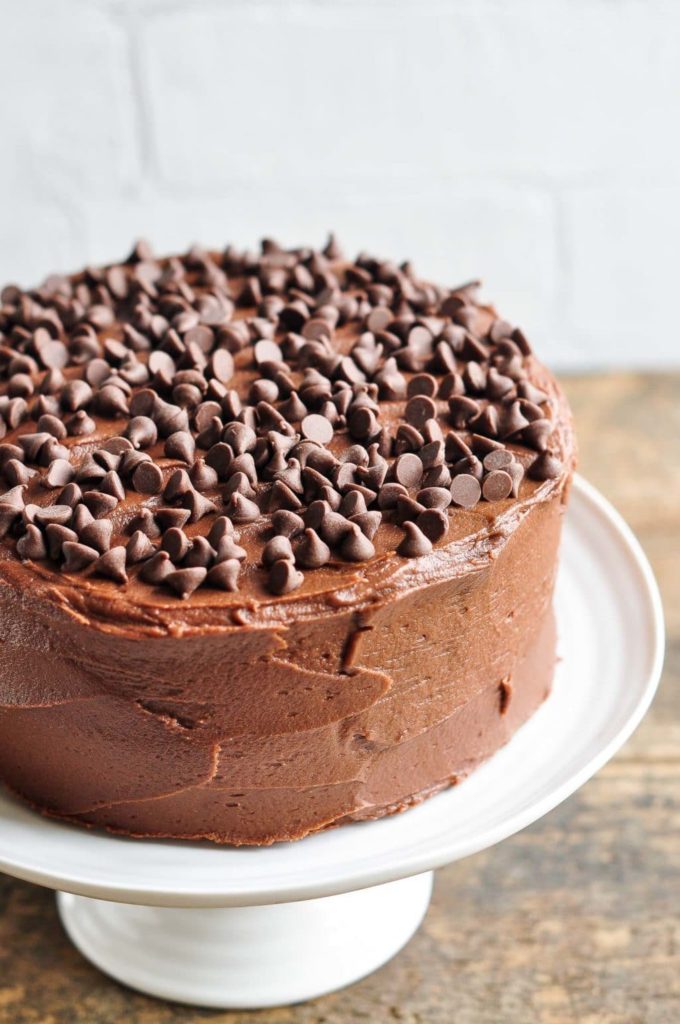
- Sprinkle the cake generously with chocolate chips.
- Allow the cake to set for about 30-60 minutes before serving.
Kitchen Notes
- RECIPE QUANTITY
Please note that the above instructions are for cakes which are 26 cm in diameter. If you are making smaller cakes, you will not need all of the frosting. - STORAGE
The cake keeps well at room-temperature, covered with either clingfilm or a glass lid on a cake stand. I made the cake the night before frosting it and found that it kept well overnight, uncovered on the kitchen bench, and remained very moist during this time. Even a few days after making and frosting the cake, the remaining slices of the cake are remarkably moist and the frosting has set very nicely. This is definitely a cake which improves with time. - MAKE-AHEAD TIPS
The cakes can be baked the night before serving, but the frosting should be made at the last minute. - RECIPE CREDIT
Recipe adapted from Samia’s Epic Chocolate Cake. - OVEN & STOVE TEMPERATURES
All recipes on this website have been tested on an induction stove and/or with a conventional oven (i.e. an oven without fan). All recipes on this website state temperatures for a conventional oven, unless otherwise mentioned. If you have a convection oven (i.e. an oven with a fan), please consult the manufacturer’s handbook on how to adjust the temperature and baking time accordingly.
- CONVERSIONS
To convert from cups to grams, and vice-versa, please see this handy Conversion Chart for Basic Ingredients.
Did you make this recipe?
Please leave a comment below and share your photos by tagging @eatlittlebird on social media and using #eatlittlebirdUpdate
This recipe was first published on 20 June 2012. It has been updated with new photos and more comprehensive recipe notes.

What a STUNNING cake! It looks so moist and rich, everything I want in a chocolate cake! I’m a fan of Nigella’s chocolate fudge cake..but next time I’ll try this recipe. I must be the only one who hasn’t tried it yet. Congratulations on your 1st blog Anniversary! I love your blog, you have a reader for life in me! Here’s to many more years! xxx
Thank you, Nicola! That means a lot to me, coming from a wonderful baker and blogger as yourself. This recipe has always been in the back of my mind and I am so happy to have finally tried it. The results were definitely worth the wait! I think it is quite different to Nigella’s Old-Fashioned Chocolate Cake from Feast, as well as the Chocolate Fudge Cake from Bites. Of the three, I think this Epic Cake is more moist than the others, but perhaps less chocolatey, more grown-up in flavour. But I think there is an occasion for each cake 🙂
Congratulations!! Believe me Thanh, Your photos are cut above the professional food photographers/bloggers ,if not the same. The cake looks yum, want to dig into it right now!!
Oh, thank you! You are too kind. Sending a virtual slice of chocolate cake your way!
HinThan, I have to say that I am awestruck by your blog! Congrats on achieving so much in a year!
Thank you! I can’t believe how quickly the last 12 months have flown by, but we certainly ate well during that time!
Hi Thanh,
Congratulations on your one year anniversary! Your blog is so visually, verbally, and culinarily appealing–I just love it. Looking forward to all your future posts!
Stacey
Thank you, Stacey! I’m glad you enjoy it here 🙂
Happy blogging birthday – and a very fitting cake for the occasion. Love your work! Keep it up.
Thanks, Rachel! Happy to be following your wonderful work also.
Happy Blogaversary!! I am so happy to have found your blog – every post is a pleasure to read and a feast for my eyes. I look forward to what you have to show us in the future 🙂
Ah, that was the term I was looking for! 😉 It has been wonderful to have discovered your blog also and I look forward to sharing more recipes down the road.
Congratulations Thanh! Can’t believe it’s a year already and it has been such a busy, filled one, with so many changes and that too, for the better 🙂 ELB is certainly a great, inspiring place to be and it wouldn’t if it weren’t for the care you put into it. I can say hands down, that I enjoy your space in the cyber world for it’s own merit, irrespective of the fact that I know you behind the scenes, so to speak.
All the very best for the future, for you and your blog. I always, ALWAYS look forward to seeing what you have posted, drooling at your pictures and admiring your taste 🙂
That cake, wow! Beautiful 🙂
I know! Remember our pact to give each other nudge if our blogging duties fell by the wayside? Luckily, neither of us had to be called into action 😉 The last year has certainly been a big year, and thank you for being there with all of your wonderful support and advice (and not just on the topics of food and cooking!). It has been such an enjoyable experience, not least because I’ve been able to share the journey with another wonderful foodie friend 🙂 xxx
Oh yes! I remember that pact lol! And isn’t it a good sign that we didn’t have to fulfil it? And awww, you’ve got me a bit choked up! It is my pleasure and from my heart, likewise :-).
Félicitations ! Ton blog est super et ce gâteau MMMM !!!!!! Je te suis depuis le début, même si quelquefois la traduction en français est un peu difficile .
Merci pour ton intérêt envers mon blog. J’ignore le nombre de mes lecteurs français mais j’espère être en mesure de pouvoir fournir plus de traductions en français à l’avenir. Je te remercie pour ton commentaire!
Happy Blog Birthday Thanh!
I’ve been wondering when your “Blog Day” was as I remember you actually set your blog up just before I returned to the foodie online community having banished myself from FaceBook to do my exams. I remember you’d posted perhaps two or three posts by then and. I was gobsmacked at how beautiful your corner of cyberspace was and after that, when I set my own blog up, I’ve enjoyed getting to know you (and Carrie) so much better as we had the shared bond of being bloggers :).
I adore Sam’s pound cake (which was my first post too!) and as you know, have eyed up the Epic cake many a time but the quantities made me shy away. I don’t think we ever need to decide for sure which choccie cake is the Ne Plus Ultra one, as there’s a recipe for all occasions in my book 😉
So here’s to many more years of blog beauty from you Thanh and maybe one day soon, your own glossy food mag (just as long as you will sell it internationally so I can have a subscription to that as well as your blog!) xxxxx
Aww thanks, Jodie! I agree that we don’t really need to decide which is the better chocolate cake – this Epic Cake was pretty good and I’m very happy to have tried it.
Here’s to many more fun years of blogging and, if I ever have my own glossy food magazine, I will gift you a life-long subscription 😉 xxx
Woo hoo! I’ll hold you to that Thanh, bet it wont be half as long as you think it will be! Xx
Happy blog-birthday!!!!!!!!
It’s incredible, only a year, but so cute photos, so nice blog, so delicious recipes!!
I haven’t been here for the entire year, but I hope I’ll see all the years that are going to come 😉 😉 And you can be sure I have visited your recipe index, so I have seen lots of “old” recipes, and I simply love what’s happening here in the past 12 months.
Thanks for the cake!! 😉
Thank you, Paula! I’m so happy that we have found each other’s blogs and I hope you will enjoy the recipes here, both new and old 🙂
Congratulations ! I’d be more than happy to see your photos in a glossy magazine ! And I MUST make Sam’s cake sometime: all I need is an excuse…
All I needed was an excuse too and my blog anniversary was certainly a fitting occasion. We can all fantasise about my own glossy but it sure would be fun 🙂 Thank you for your visits to eat, little bird as it is really lovely to see familiar faces here.
Happy 1st blog birthday! I’m so glad you decided to take the plunge into the food blogging world, I love to visit yours – and your photography is gorgeous! I love your style and your recipes and I look forward to more in your second year! x
Many thanks, Kristin! I hope you will enjoy your future visits here. You also have a very inspiring blog yourself 🙂
This post is just SO beautiful!! Your blog and food photography are such a huge inspiration to me!!! x
Aww thank you! Coming from a fabulous photographer as yourself, that is a huge compliment! 🙂
Happy 1st blog birthday Thanh!
Such a beautiful cake too….I am exceedingly devoted to Nigella’s old-fashioned chocolate cake though. Can this cake really knock it of it’s perch? I guess there’s only one way to find out!
Thank you so much for posting this epic cake.
Xx
Thanks, Anna! Indeed, the best way to find out is to try it for yourself! I do really love Nigella’s OFCC, though, and think it is a better “everyday” kind of cake, even though I try to avoid that description. This Epic Cake is richer and has a deeper flavour, but still pretty good. Like the OFCC, this one keeps really well.
Ohhhhhh……augurissimi ElB! I must admit that I enjoy coming here, oggling at your photos and reading about your little adventures and giving myself a little nosy 🙂 You have created a beautiful and interesting, and creative and warm “little” blog space that is a wonderful cyber space to visit.
I wish you the best for the future and the many blog adventures ahead of you. I also must add with a bit of a gloat that I get such a wonderful feeling when I read and oggle about you and all of the incredible foodie friends that came together so spontaneously. Always puts a large grin on my face when I read about the recipes that we have shared or heard about from our little foodie world … Lol, keep up the lovely work. 😉
Grazie mille!! As I have mentioned to others, it is really lovely to see familiar faces here, especially considering that we all met online and bonded instantly over recipes and cooking (and gardening!). I gather so many ideas from you and the others, and am eternally grateful for our friendship. Here’s to many more years 🙂 xxx
You’ve accomplished a lot in one year, and have put together something beautiful. I look forward to following your journey!
Cheers,
*heather*
Many thanks, Heather! I hope to continue to provide inspiration in your kitchen 🙂
Congratulations on the blogiversary! This cake looks divine. It’s the perfect way to celebrate!
Thanks, Jen! I think a chocolate cake fits all occasions and I have been anxious to try this recipe for a long time. Thank you for your visit!
Happy blogiversary! So happy you’re still around, and making these wonderful things. Your blog and pictures are just stunning!
Thank you for your lovely comment! I’m also happy to still be around 🙂 But that’s mainly because of you and other readers, so thank you for coming here 🙂
Happy blog-birthday, angel! Calm, classic, feminine and warm; that’s how this lovely blog feels to me and it’s all your creation! I hope you enjoy putting it together as much as we enjoy dipping into it x
Oh that’s lovely to hear, Jean! I love every minute that I spend on this blog (which is probably a fair few too many!) but I’m glad that you enjoy the outcome 🙂 Many thanks to you for your visits here.
Looks delicious! Congrats on your 1 year blog anniversary!
Thank you, Amber! Hopefully there will be further celebrations down the road 🙂
Congratulations Thanh. As far as I’m concerned your photography is always Donna Hay & Gourmet Traveller worthy! You might be inspired by the ‘ pro-bloggers’ but we are inspired by you clever girl. Especially love your 12 month wrap-up in-pics collage, so very beautiful. Happy Blog Birthday! and we hope many more to come xx
Many thanks, Susie! Considering that you are probably very familiar with Donna Hay and Gourmet Traveller, that is a wonderful compliment 🙂 I am very happy to have discovered your lovely blog also, as well as your Jam Club! The first delivery was very well-received!
Congrats and wishing you many, many years of such beautiful blogging. Your pictures and your creations are just mind numbing. I loooooooooove to visit your space sometimes even when you don’t have a new post, just to feel its elegance and simplicity.
The cake looks fabulous- rich- moist and everything that a chocolate cake should be.
Anita, you must be among my early readers and I am so grateful for your regular visits here. Thank you so much for your lovely words, as always 🙂
Happy 1st Blog Birthday Thanh!!!!! Wishing you many more years! I love your blog, it’s warm, cozy, I love the writing and the stunning pics – in one word it’s amazing!!!! I usually try to avoid cakes that use vegetable oil thanks to a bad experience (the cake didn’t turn out well and tasted funny) and I guess I’m scared to fail but seeing this beauty I’m going to put my inhibitions aside and make it and enjoy itsimply because it’s one cake that looks so sinfully delish and that wouldn’t take no as an answer :).
Thank you, Rushi! I’m very happy that you have found my blog 🙂
You know, I find it common with American cake recipes to use vegetable oil, whereas UK and Australian recipes will use softened or melted butter. If you are not comfortable with using oil, I would replace it with equal quantities of melted butter. And you know the saying – everything tastes better with butter 😉
There’s no better treat than chocolate cake!
Congrats on your first *blogaversary*!! I cant wait to try this recipe, I’m ALWAYS looking for a good chocolate cake!
Many thanks, Natalie! I don’t think anyone would complain about experimenting to find the roght chocolate cake recipe 🙂
Thanh, Happy 1st Blog Birthday!!! You’re such an inspiration! It’s so nice to find another Vietnamese blogger! Keep on doing what you’re doing!
Thank you, Vy! It’s also lovely for me to know of another Vietnamese blogger 🙂 Thanks for popping by.
Happy birthday ! Dream cake, I have to make one of these for my sister, chocolate addicted !
Merci, Mathilda! Your sister will love you for it 🙂
Congratulations. What a big accomplishment. Keep up the amazing work. Your writing style and photographs are so beautiful.
Thanks, Heather. Your photography is also really beautiful and inspirational. Hope you are eating well in Paris 🙂
Happy blog birthday! This cake looks like the perfect way to celebrate – sticky and squidgy and full of chocolate 🙂
Absolutely – I think chocolate cake is the perfect way to celebrate. In fact, we also had chocolate cake at our wedding!
What’s all this!!!!! WOW! Already a year Than? Shows you home much we enjoy your blog and look forward to every installment that time just flew by! CONGRATULATIONS! There is definitely a style to your writing, photography and choice of recipes, all of them of the highest order! And how happy am I that you finally got round to making the EPIC CAKE????!!!! And what a wonderful occasion to make it on! I must admit I LOVE LOVE LOVE this cake and your gorgeous pics do it justice! I want to grab that cut piece and stuff it in my mouth, but your blog is so refined and calm, I force myself to be a good girl with perfect manners! 😀
Hasn’t the past year just flown by?? Thank you so much for your recipe recommendations which are wonderful as always. For someone who is the queen of the dinner party, I know I can always count of your suggestions. I’m so happy to have finally tried the Epic Cake. It is certainly a very beautiful cake. We had about a quarter of the cake leftover before we went away for a few days, and upon coming back, I was surprised to find that the cake was not only still fresh and good to eat a week after making it, but it remained beautifully moist during this whole time. The cake was kept on a cake stand under a glass lid the whole time. It’s great to know that it keeps really, really well!
Happy blogiversary Thanh!! You’ve had a wonderful year and your blog has grown alot over that time. I’m so pleased that I found your blog when I did. I can’t think of a better way to celebrate than with chocolate cake. By the way, have you tried Ina Garten’s Beatties Chocolate cake? It’s my all time favourite.
Thanks Jennifer! I have indeed had a wonderful year with eat, little bird and can’t think of a better way to spend my spare time 🙂 I am also very happy to have found your blog, especially at a time when I am being requested to make more and more vegetarian food at home. Someone has previously mentioned Ina Garten’s cake to me … I must look it up if it is your favourite! Thanks for the tip!
OMG! This cake looks absolutely divine!!! And super chocolate! I def have to bake this!!!
A Very Happy 1st Blog Birthday!!!
Wishing you loads n loads of success!!
This cake looks so divine and perfect for the occasion… Chocolatey and Guey…Yum!!
Thank you, Reem! I really appreciate the support you have given this past year 🙂
Congrats! My blog is not even a year (only in september), so I guess we’re both pretty “new” in this world. You can be very proud of your success and I love your stories and pictures every time. What better way to celebrate than with such a gorgeous chocolate cake, love it!
Thanks, Denise! Ooh, have fun planning your blog’s celebrations later this year. Even after a year, I still feel quite new to this and trying to wrap my head around all of the complicated coding and html stuff. Thank you for your visits here 🙂
Congratulations my dear on your 1 year anniversary. I am salivating just looking at the chocolate cake and reminiscing of the times when we were all living back in Brisbane and you made this for my birthday or something very similar! I am so proud of you and “Eat Little Bird” and you are an inspiration to the foodies all over the world. Sadly, I do not have the patience or the discipline to bake the magnificent creations you come up with but I am constantly inspired by your blog and fantastic photographs. I am waiting for the “Eat Little Bird” book to be published and will put in an order for several copies when it comes out! xoxoxo
Hi Pammy!
Thank you so much for your sweet message. It means a lot to me when old friends like you visit my blog 🙂 This cake is very similar to what I used to make for you back in Brissy … I guess I have you and the other girls to thank for letting me experiment back in those days! It would be my dream to publish a book one day but we’ll see … you will certainly be amongst the first to hear 😉 Hugs to N, xxx
Congratulations on your first blogiversary! I truly hope that you are proud of how you have developed over the past year. :] I must say, the Epic Cake is the most fitting form of celebration. It looks absolutely scrumptious and it reminds me ever so much of Miss Trunchbull’s cake from ‘Matilda’. I think I know what will be main feature of the my next birthday baking ventures! Thank you for all the inspirational food, pictures and foodie words of wisdom. I look forward to your new posts. :]
Thank you so much, Bene! Ah, Matilda happens to be one of my favourite books from Roald Dahl. You have spurred my interest in reading it again to find out more about Miss Trunchbull’s cake. I am happy to hear that you can find some helpful information and inspiration from my blog 🙂 After a few weeks away on vacation, I now have a long list of recipes to post and hope you will enjoy them.
hey we love your blog and everything always works great… we were sooo looking forward to this cake it looks amazing, the icing was great however the cake did not work at all- no idea where we went wrong! we were gutted 🙁 we were just wondering if you could maybe put the measurements in ounces or grams as the cup system might have been where we went wrong? we used good ingrediants so it wasn’t that…. the mix ended up too runny and the cake came out rubbery…. we love your blog though! its no reflection on you we think your awesome, but we would love to attempt this again xxx
Oh dear! I’m so sorry to hear that this cake didn’t work out for you 🙁 I also hate it when good ingredients go to waste. From memory, the batter is quite liquid, which is what helps to make it so moist. But if the cake turned out rubbery, I’m wondering if the batter was over-worked?
The recipe I followed came from this online forum: http://www.throughtheovendoor.com/viewtopic.php?f=19&t=799&hilit=epic+cake
As you can see, the recipe has been adapted from one on the Epicurious website. It is a cake which has been raved about by many in the online community, prompting me to try it for my blog anniversary. I will contact the author of the recipe and see if she can provide the measurments in ounces or grams but, as her recipe is an adaptation of an American recipe, I have a feeling that cups and spoons were used in the original Epicurious recipe.
Thanks for giving this recipe a try though 🙂 Failures in the kitchen are sometimes unavoidable (it happens to me quite often too!) and I hope this recipe will work out better next time. And thank you for your feedback. It’s always nice to hear when people have tried a recipe I have posted, whether the results were a success or not. Everyone can learn from other’s experiences in the kitchen. Hopefully SamIam will be able to provide some feedback shortly … xx
Hi Tiff, Fleur and lovely Tahn!
Indeed I am the criminal behind this recipe….;)
This recipe originally appeared on the Epicurious.com website which is the on line edition of both Gourmet magazine and Bon Apetit magazine. The cake is called ‘Double Chocolate Layer Cake’ and has a massive following (the reviews have reached the 1500 mark!):
http://www.epicurious.com/recipes/food/views/Double-Chocolate-Layer-Cake-101275
When I tried it, the reviews were in the 500 mark and I thought this can’t be too bad…And it wasn’t! The only initial change I made was substitute the Buttermilk suggested with natural yoghurt as we don’t have any buttermilk where I live. Then I found that the proportions given for the icing were not enough for such a cake and fixed that as I hate very thin icing that masks the fact that there simply is not enough to go round… Another thing that made me give it a go was the inclusion of coffee as experience in baking has taught me that that enhances the chocolate taste considerably.
When I posted the recipe with my changes on the old Nigella.com, Sevilleorange, a fellow contributor and baker par excellence pointed out that by omitting the Buttermilk and adding the Natural Yogurt I did the right thing without knowing. According to her, Buttermilk which is quite oily works best with butter based cakes whereas Yogurt is made for oil based batters. She said that Buttermilk and oil together lead to very oily cakes.
The cake should be shinny but not rubbery, the batter is indeed very runny, but it should lead to a beautifully moist chocolate cake.
Yay! How lovely to discover your blog this morning. My blog turned the big 1 year old in September! Can’t wait to start making some of your beautiful treats.
I made this cake for my best friend’s birthday! Everybody went mad about it, it was PERFECT! The batter came out moist and completely delicious and the ganache was one of the best I have ever tried! The only thing i changed was that i used honey instead of syrup since I didn’t have any and added a bit more coffee to the batter cause it smelled so good I wanted the taste to be stronger! Honestly it may be one of the best desserts I have ever had in terms of flavor and texture (and I am not even a cake-person, my favorite dessert is ice cream!!). Plus, it looks beautiful! Finally you should know that my friend’s boyfriend ate half of it standing next to the buffet because he could not stop =) Anyway thank you for the recipe, you re awesome.
Thank you so much for your lovely feedback! That’s so wonderful to hear that you and your friends really enjoyed this recipe. Your best friend is so lucky to have someone like you to bake her something so special for her birthday 🙂 That’s good to know that honey works well as a substitute for the golden syrup – I always have honey at home, but not always golden syrup. Thank you again for taking the time to come back and comment on this recipe!
Est-il possible de reprendre certaines paragraphes pour un blog ?
I made this cake and I absolutely loved it! It was one of the best cakes i’ve made!
That’s great to hear! Glad you enjoyed this recipe 🙂
Happy Blog Birthday!!
I know I am wishing very late. But I recently came across this cake and finally made a decision to make it ( after looking out for many chocolate cakes recipes). I liked this recipe because of the ingredients u have used ( coffee+ chocolate+ coco powder) and the final look or the appearance (dark and dense ).
My only question to you is that I have only two 20cm round loose bottom sandwich tins and the quantity of the cake batter is more or it make require more than 2 cake tins.
So until these two tins are baked and cooled and then ready to be filled with the remaining batter, where should I keep this remaining batter ? In the fridge or just on the work top ?
Please guide me. I am ok with making 4 layers instead of using cupcake trays for the remaining batter.
Hello! It was fun to read over such an old blog post 🙂
I haven’t made this cake in a while but, from memory, I think there is enough batter to fill 2 x 20 cm cake tins. But you should fill the cake tins to about 2 cm from the top, and if you find that you have leftover batter, depending on how much you have, you can maybe make a cupcake or two. I would bake these at the same time. In any event, any unused cake batter should be kept in the fridge, but it is best to bake it right away while the ingredients (especially the baking powder) are still active.
You are likely to have leftover frosting, and you can keep this covered in the fridge to use in a different recipe.
Wow, this looks so DELICIOUS!!! Sounds perfect! Beautiful presentation. Can’t wait to try this one!
Amazing Article with Amazing Images . i want to eat each cake one by one
This recipe looks wonderful and I love that the recipe seems to have such a history and a following. You know that way it will be reliable. Pinning!
Hi Tranh, I can’t believe that i only found your blog today. It’s incredible! Reminds me of my old blog that I maintained from 2005-2017. I will enjoy looking through your archives. Keep up the good work and continue to be inspired.
Hi there! This cake looks STUNNING! I’d like to make a smaller version – would halving the recipe exactly work? X
Hi Rebecca,
I have not tried halving this recipe to bake it in a smaller tin. If you would like to make a smaller cake (20cm/8 inch in width), I recommend that you try instead the Sour Cream Chocolate Cake. You could also decorate that with chocolate chips like in the photos above 🙂
seeing chocolate no one can deny … great recipe to try on .
Just made this delicious looking cake and i have to say it was mouth watering. It amazed everyone in my family. Thanks for the amazing recipe.
Hi Peter,
So glad everyone enjoyed this cake!
Wow! very delicious cake
Thank you!
This Chocolate cake is really Awesome.
Hi…I Like The Chocolate Cake Buy How To Use Chocolate in Cake.
Thanks For Sharing information.!!…………………..
Very interesting
Hey, Thanks for writing this kinda content. i loved to reading your content. it’s smooth content .
Hii,
This is Great Post for me. now, i’m Learned from your article. thanks for sharing this kinda information’s for me. i glad with your Article!.
This is an very amazing ultimate chocolate cake recipe. I will really try this recipe at my bakery.
nice chocolate cake
It looks delicious. Thank you for sharing this recipe.
Thanks a lot for sharing this information, this will help us to grow my content also. Really impressed with writer.
Get online cake delivery in Noida within 3 hours for a birthday and other occasions. Fresh, eggless cakes with free delivery service.
You just rose the temptation inside me. That’s a delicious cake an the choco chips on the top, omg I just loved it!
Doorstep Cake offers the best adult cake in Gurgaon, Delhi, Noida, and Faridabad. Order Bachelor party cake for bride and groom at the best price.
Superb!
Thank you!
Very nice Chocolate cake recipe
Recipe is really looking Ultimate!????
Thank you for sharing such valuable insights in this blog. It was both informative and engaging. I truly appreciate the effort you put into creating this content. Looking forward to more posts like this!
That ultimate chocolate cake looks absolutely decadent — ready to dive in!
Thank you!
Hi – are you able to share the original version of this recipe please too? Thanks
Hi Emma,
I have restored the original recipe 🙂 Happy baking!