
What is No-Knead Bread?
A No-Knead Bread is exactly as the name implies: a bread which does not require any kneading.
In fact, this No-Knead Bread recipe is rather hands-off when compared to most traditional bread recipes.
This No-Knead Bread recipe is perfect for beginners because it is a very forgiving recipe, but seasoned bread bakers would also enjoy the complex flavours and texture of this bread.
No-Knead Bread Basics
- The dough ingredients need to be mixed together lightly with a wooden spoon.
- The dough requires a first proofing at room temperature for between 12 to 24 hours.
- After the first proofing, the dough needs a gentle mix before a second proofing of about 2 hours.
- The dough is then baked in a pre-heated cast-iron pot or Dutch oven to produce a firm and crispy crust all over.
Why Make No-Knead Bread?
When making a traditional bread loaf, the dough needs to be kneaded for a small amount of time to activate the gluten in the flour, and it is the gluten which gives the bread a nice, chewy texture.
As any baker will tell you, kneading bread takes time and muscle power; even if you are using a machine to do the kneading for you, it takes a bit of time and experience to know how long you should knead the dough before it is ready to proof.
With a No-Knead Bread, all that is required is an initial light stirring of the ingredients, and that is most of the hard work done!
The slow initial proofing of the dough, between 12 and 24 hours, allows the gluten to slowly develop which, in turn, allows the dough to ferment and develop flavour.
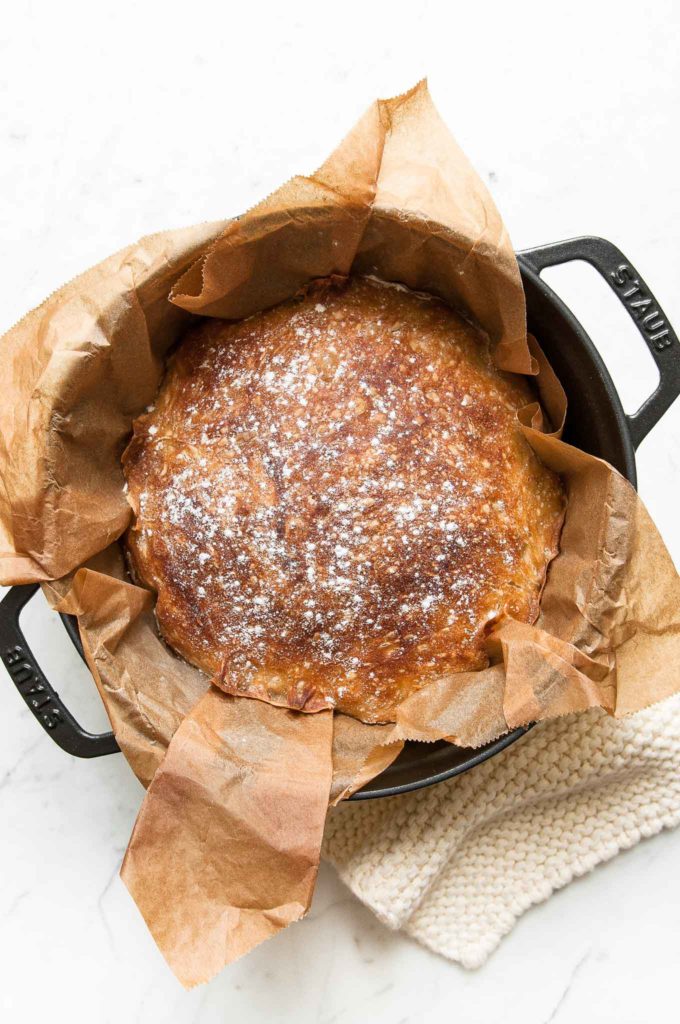
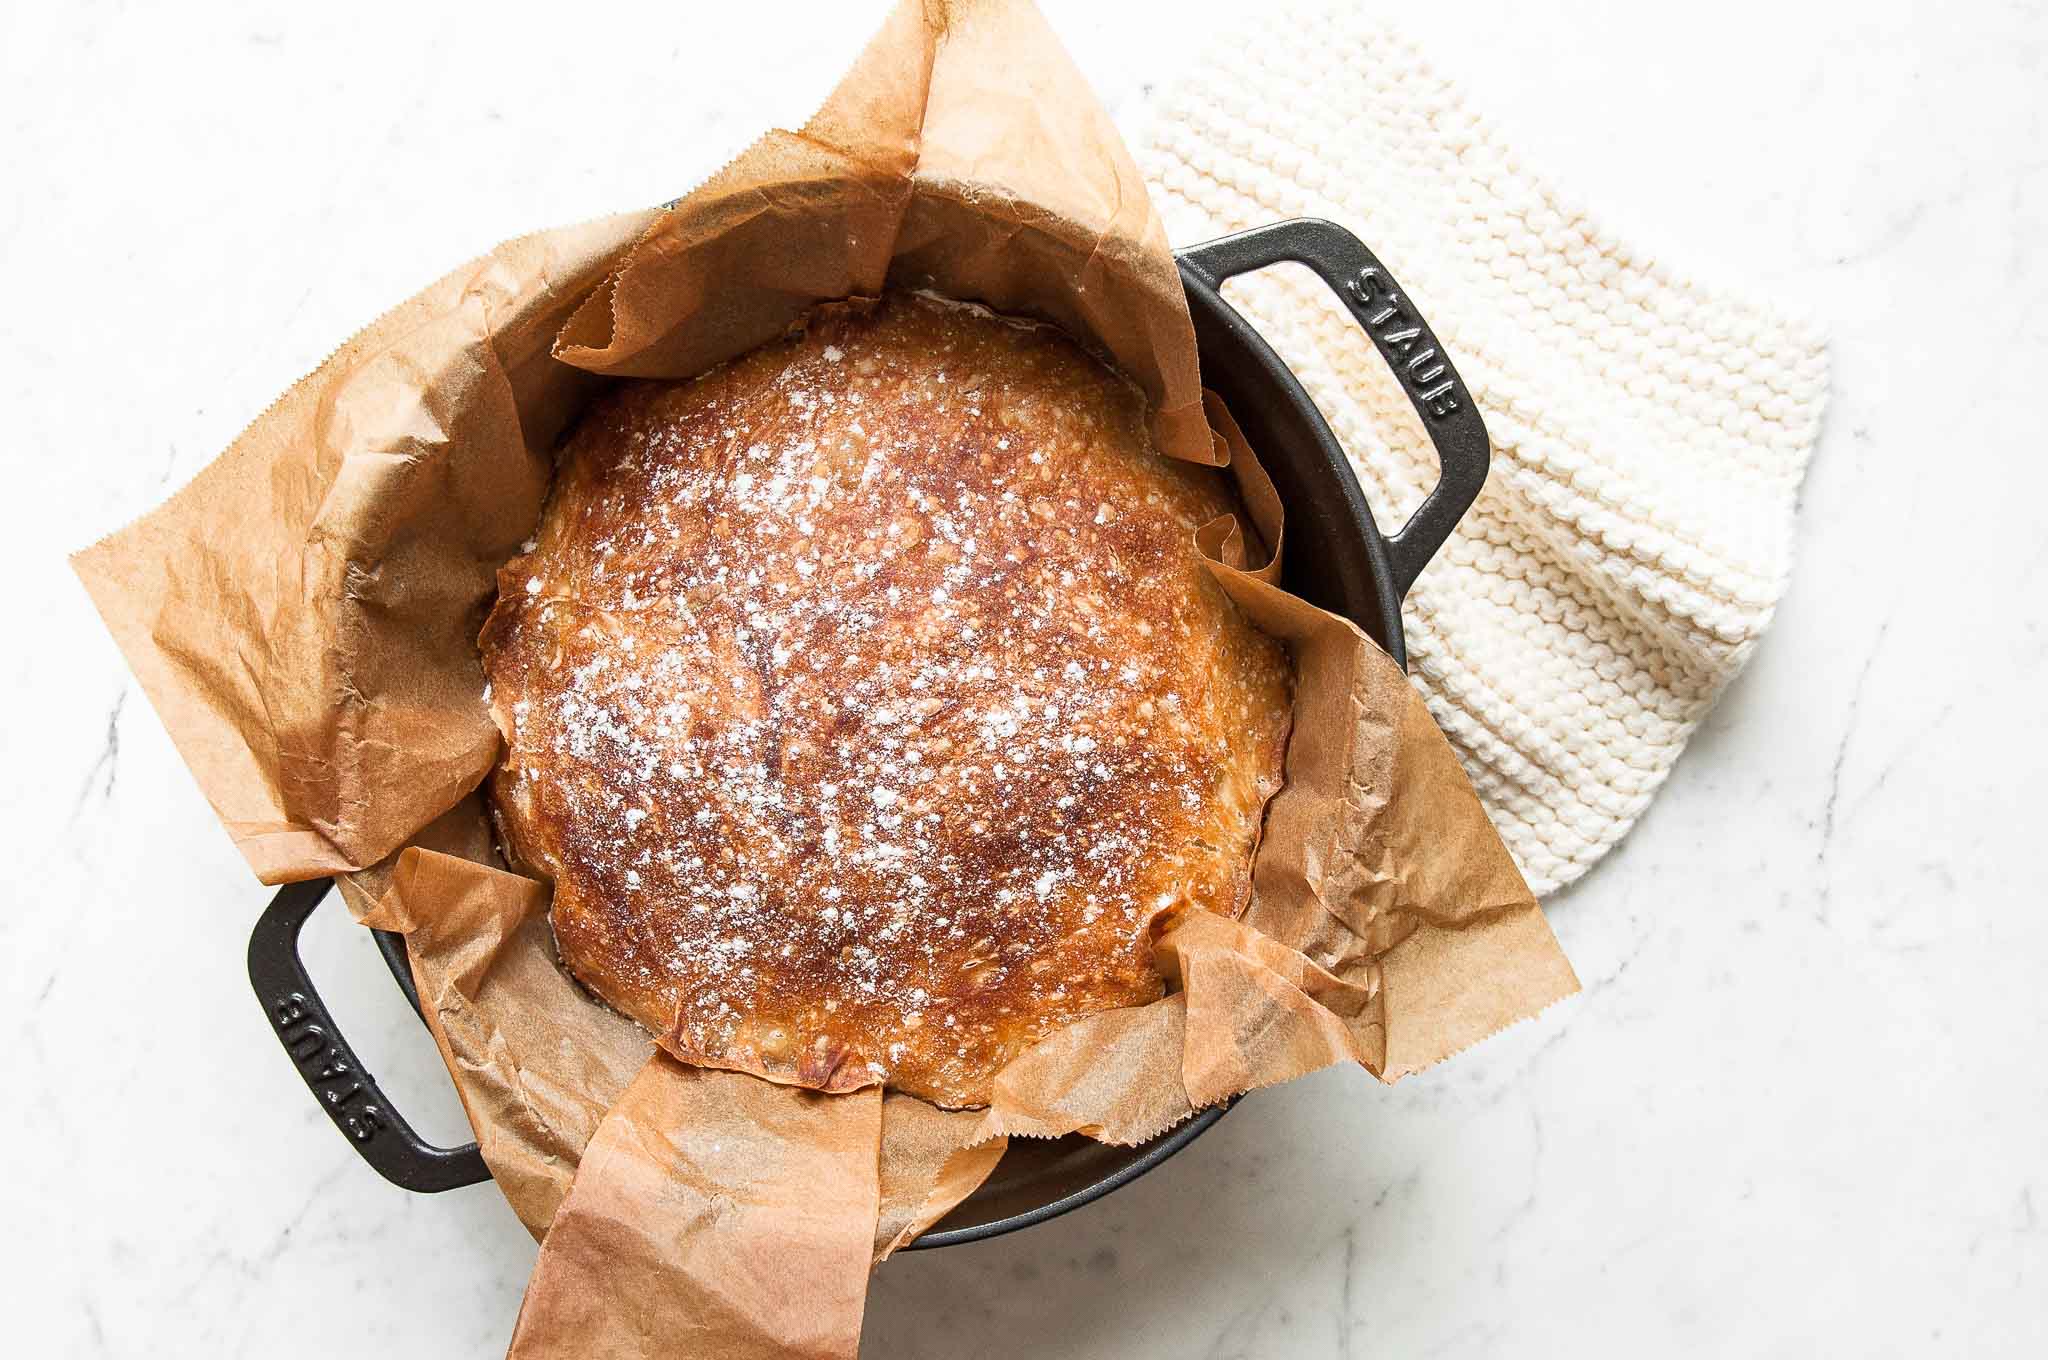
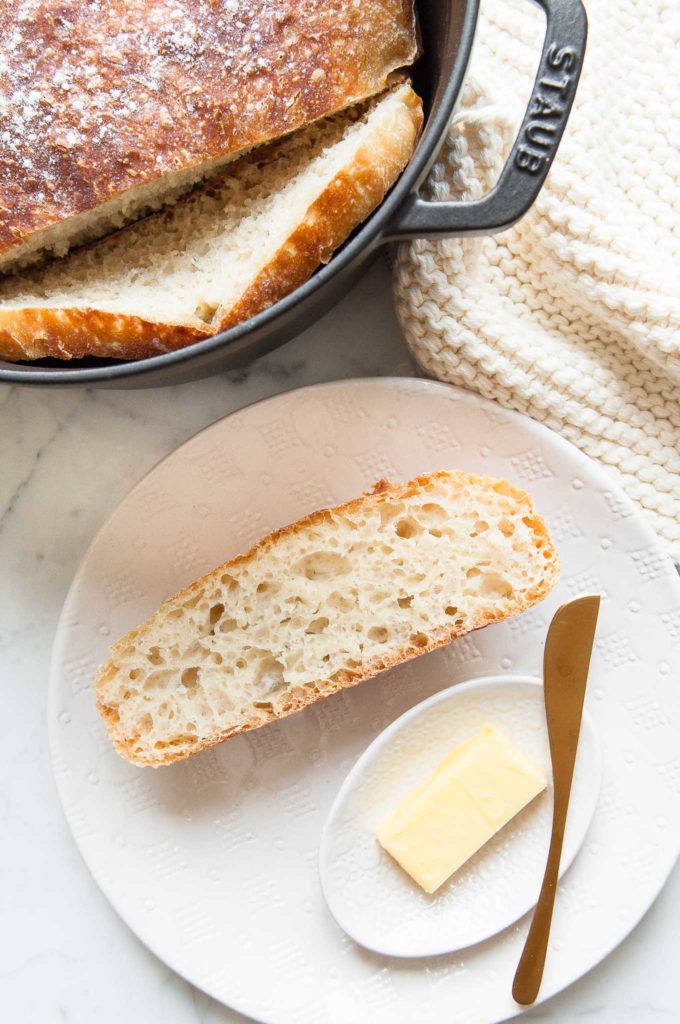
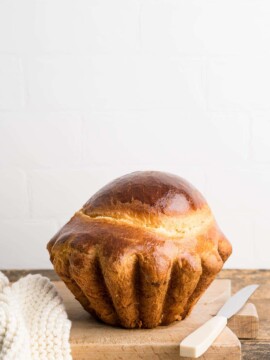
The result is an artisan-style loaf of bread with a thick, crispy crust all over, an open and tender crumb, and with the subtle flavour of sourdough.
Using a Cast-Iron Pot or Dutch Oven
In addition to the long initial proofing period for the dough, what makes this No-Knead Bread recipe work is baking the dough in a pre-heated cast-iron pot or Dutch oven. This recipe is sometimes referred to as Dutch oven bread.
The cast-iron pot acts as an oven within an oven. Once heated to 230°C (450°F), the cast-iron pot becomes super hot, and this helps the bread to rise and crisp up all over.
The bread is initially baked in the cast-iron pot with the lid on, so as the water evaporates from the dough, it becomes trapped inside the pot, thereby creating steam which gives the bread a delicious, thick crust.
How to Make No-Knead Bread
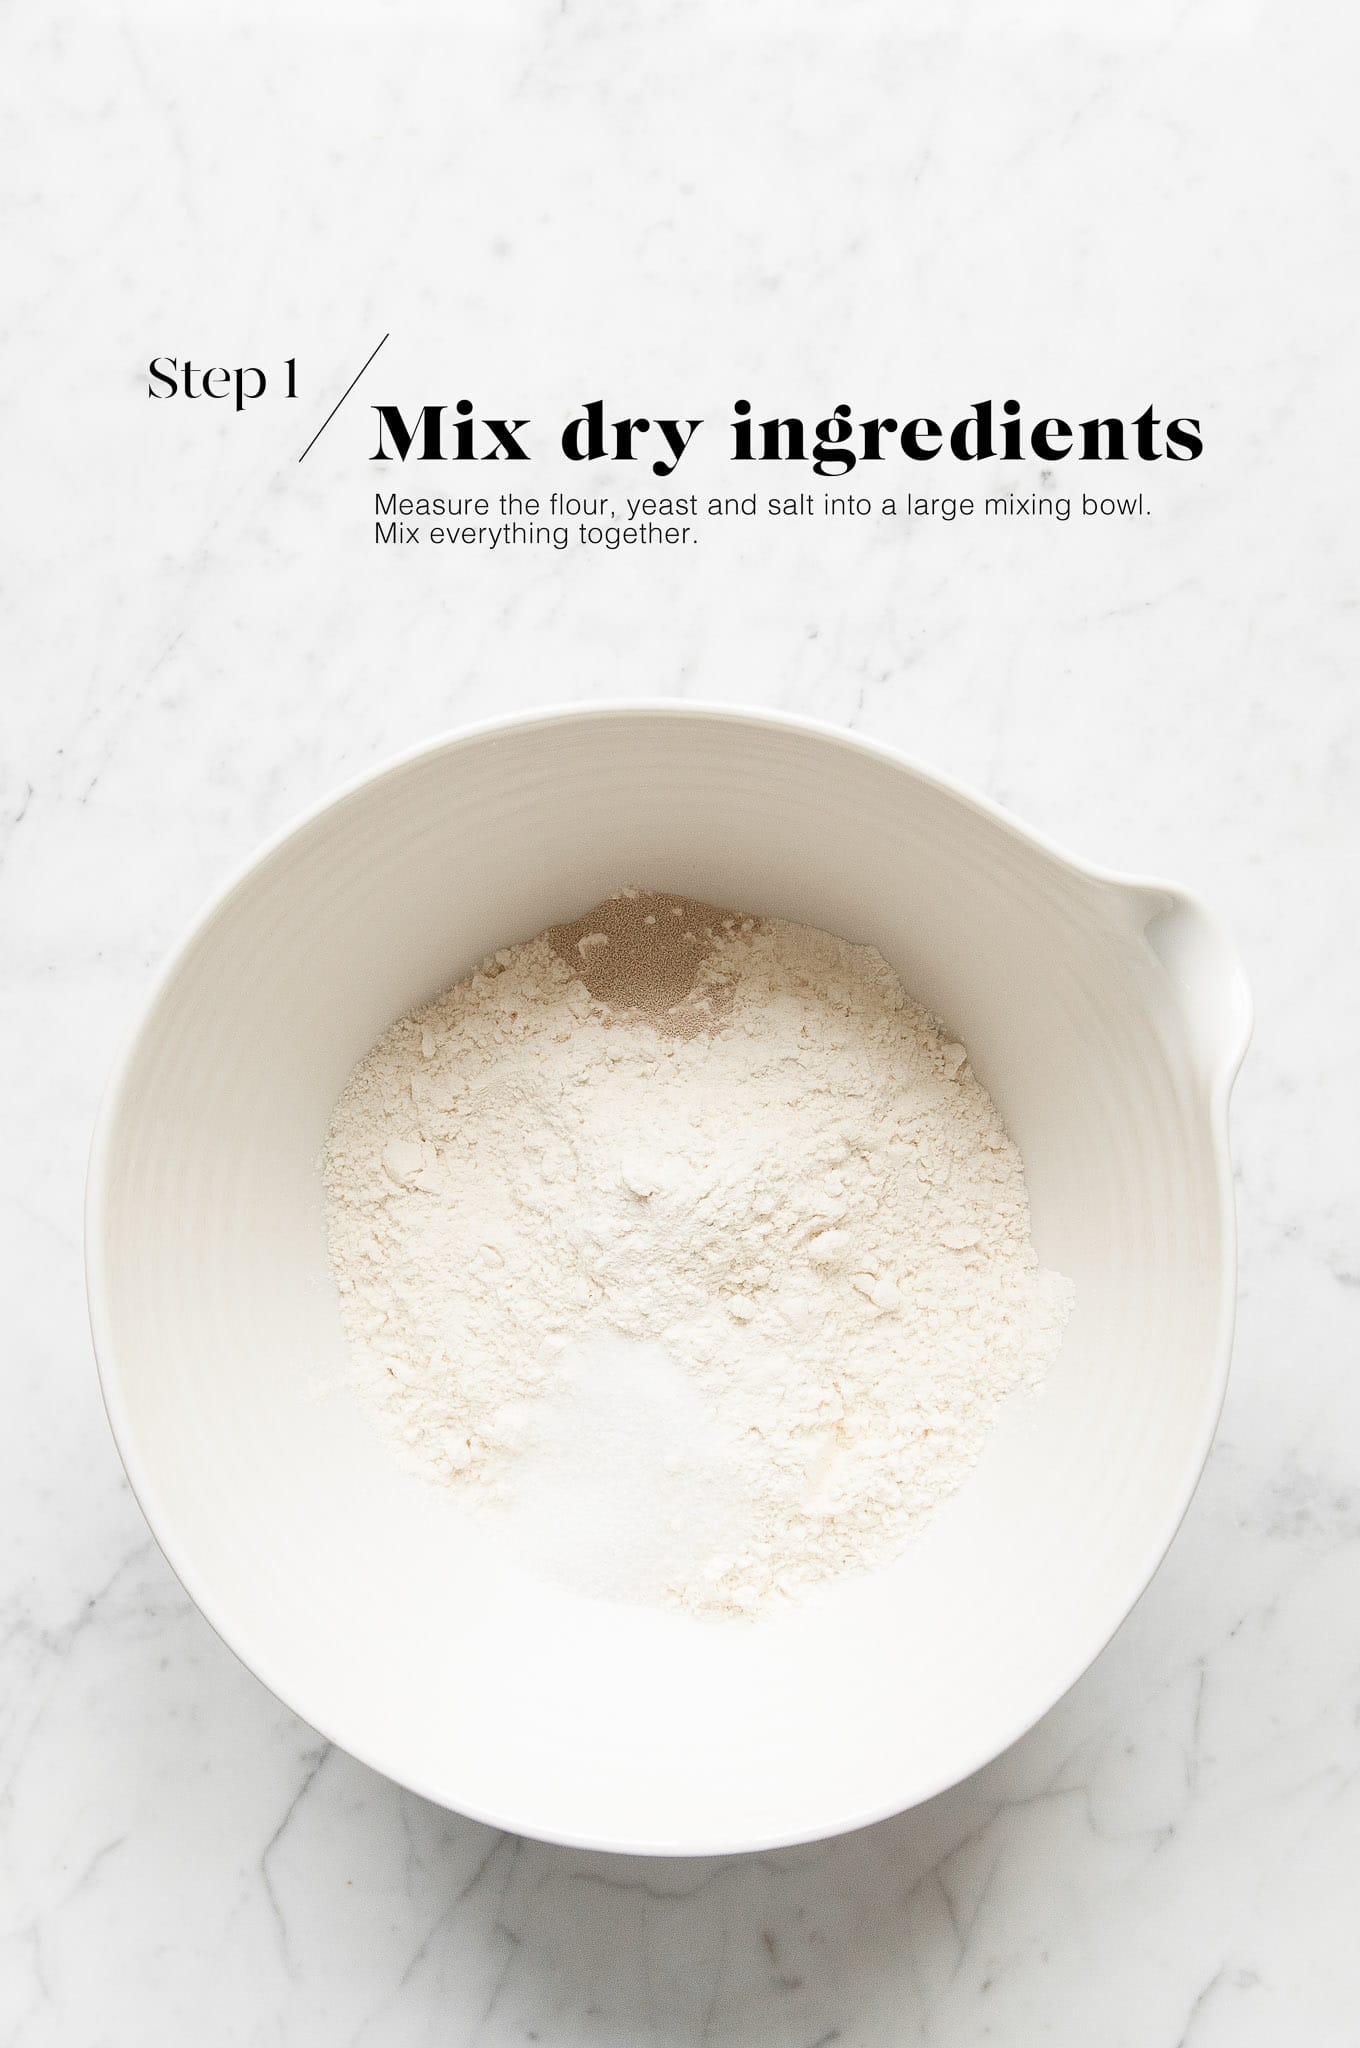
Step 1
Place the flour, yeast and salt into a large mixing bowl. Give the ingredients a quick mix.
Step 2
Add the water. Use your hands or a wooden spoon to mix everything together.
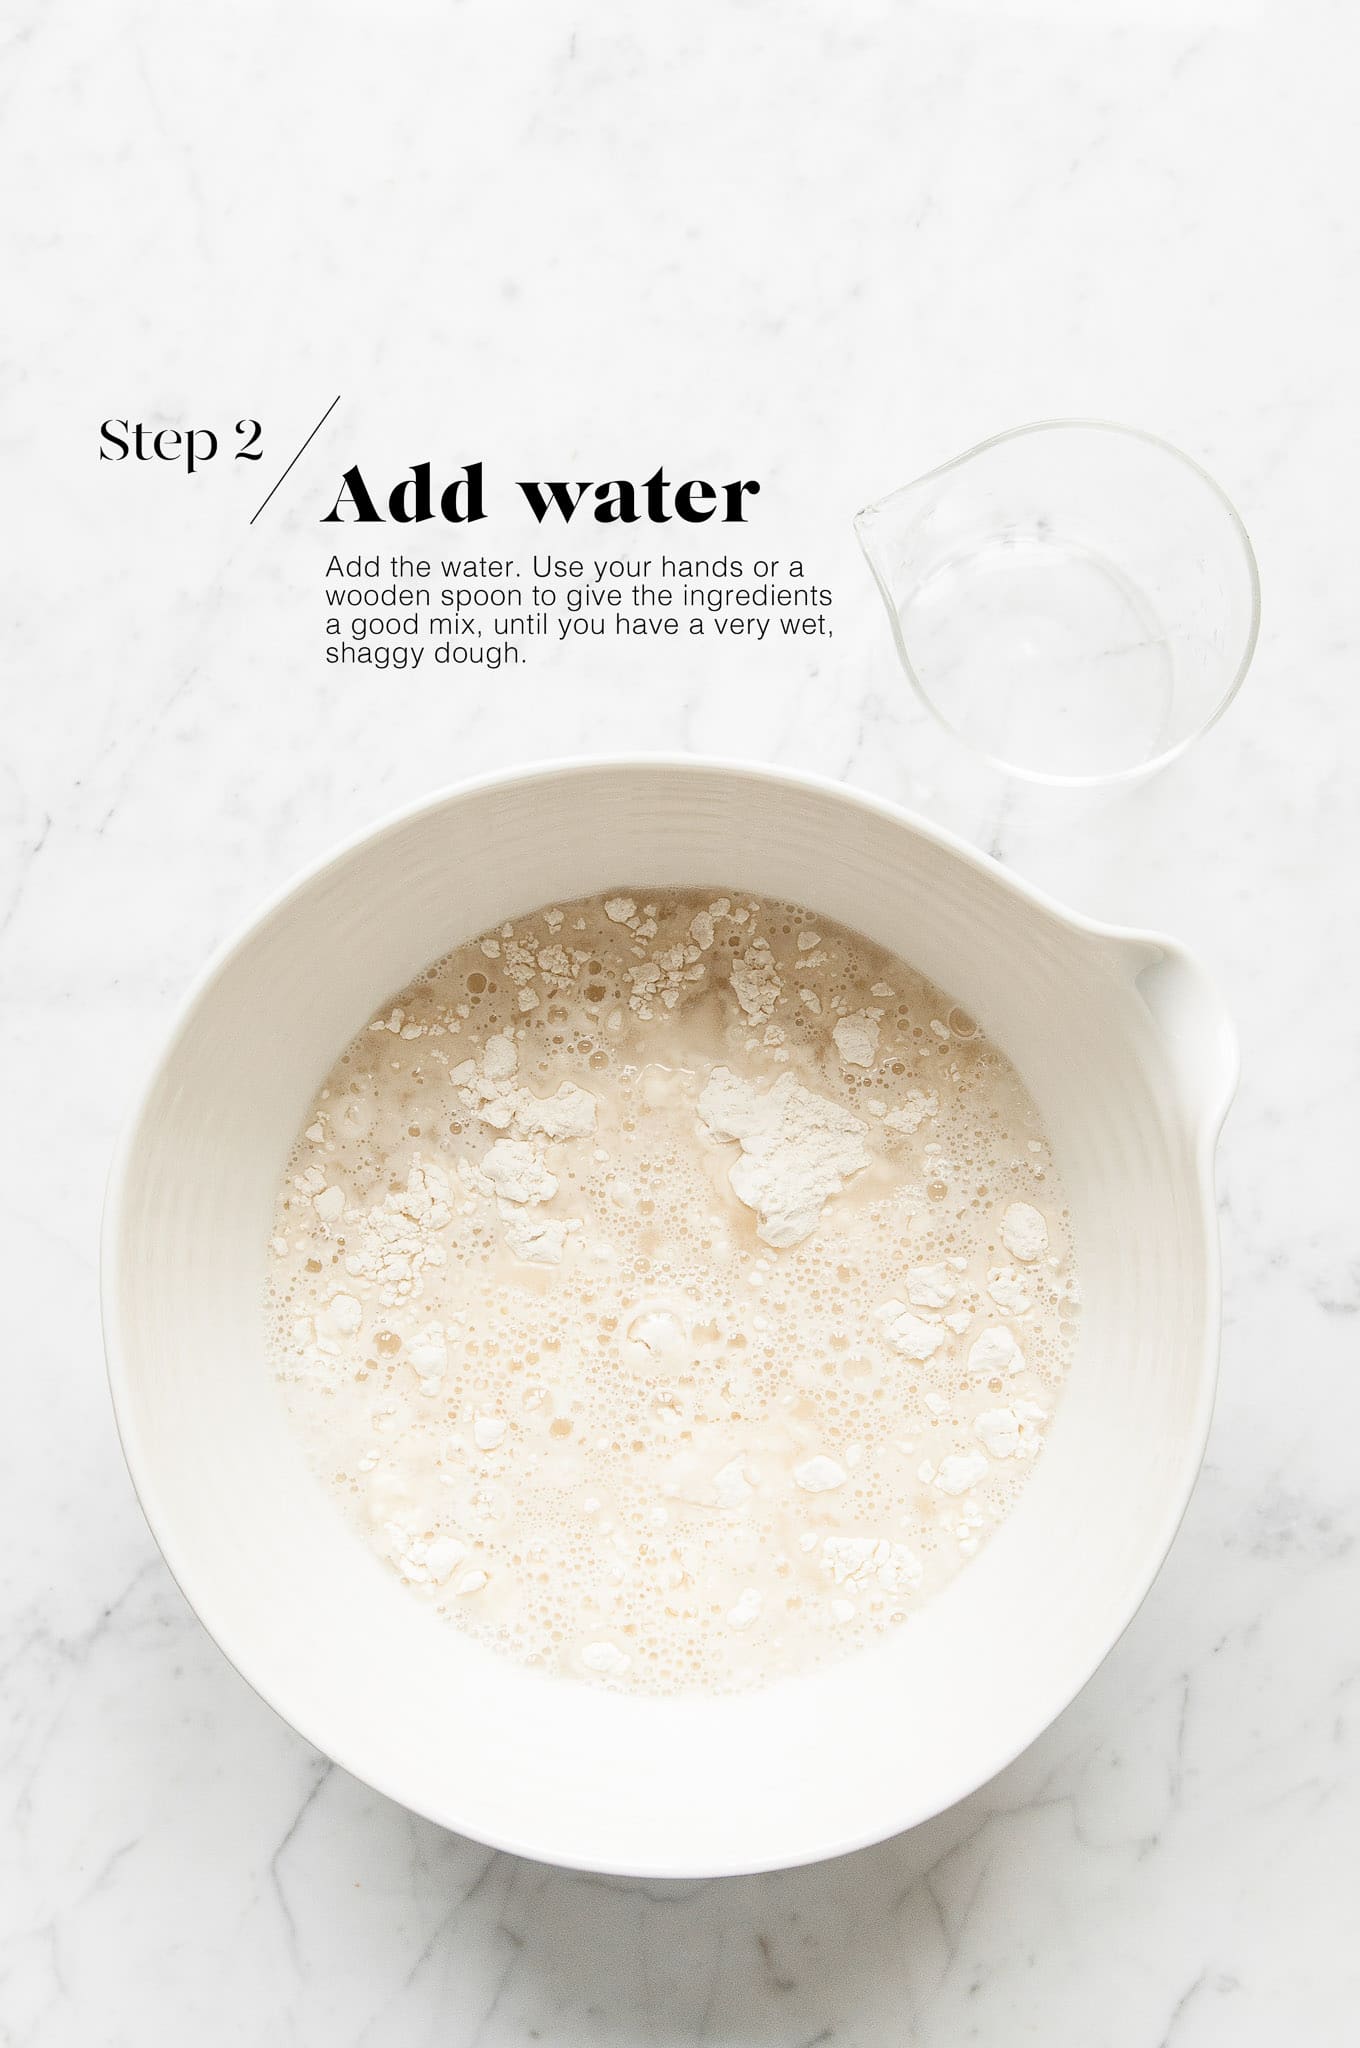
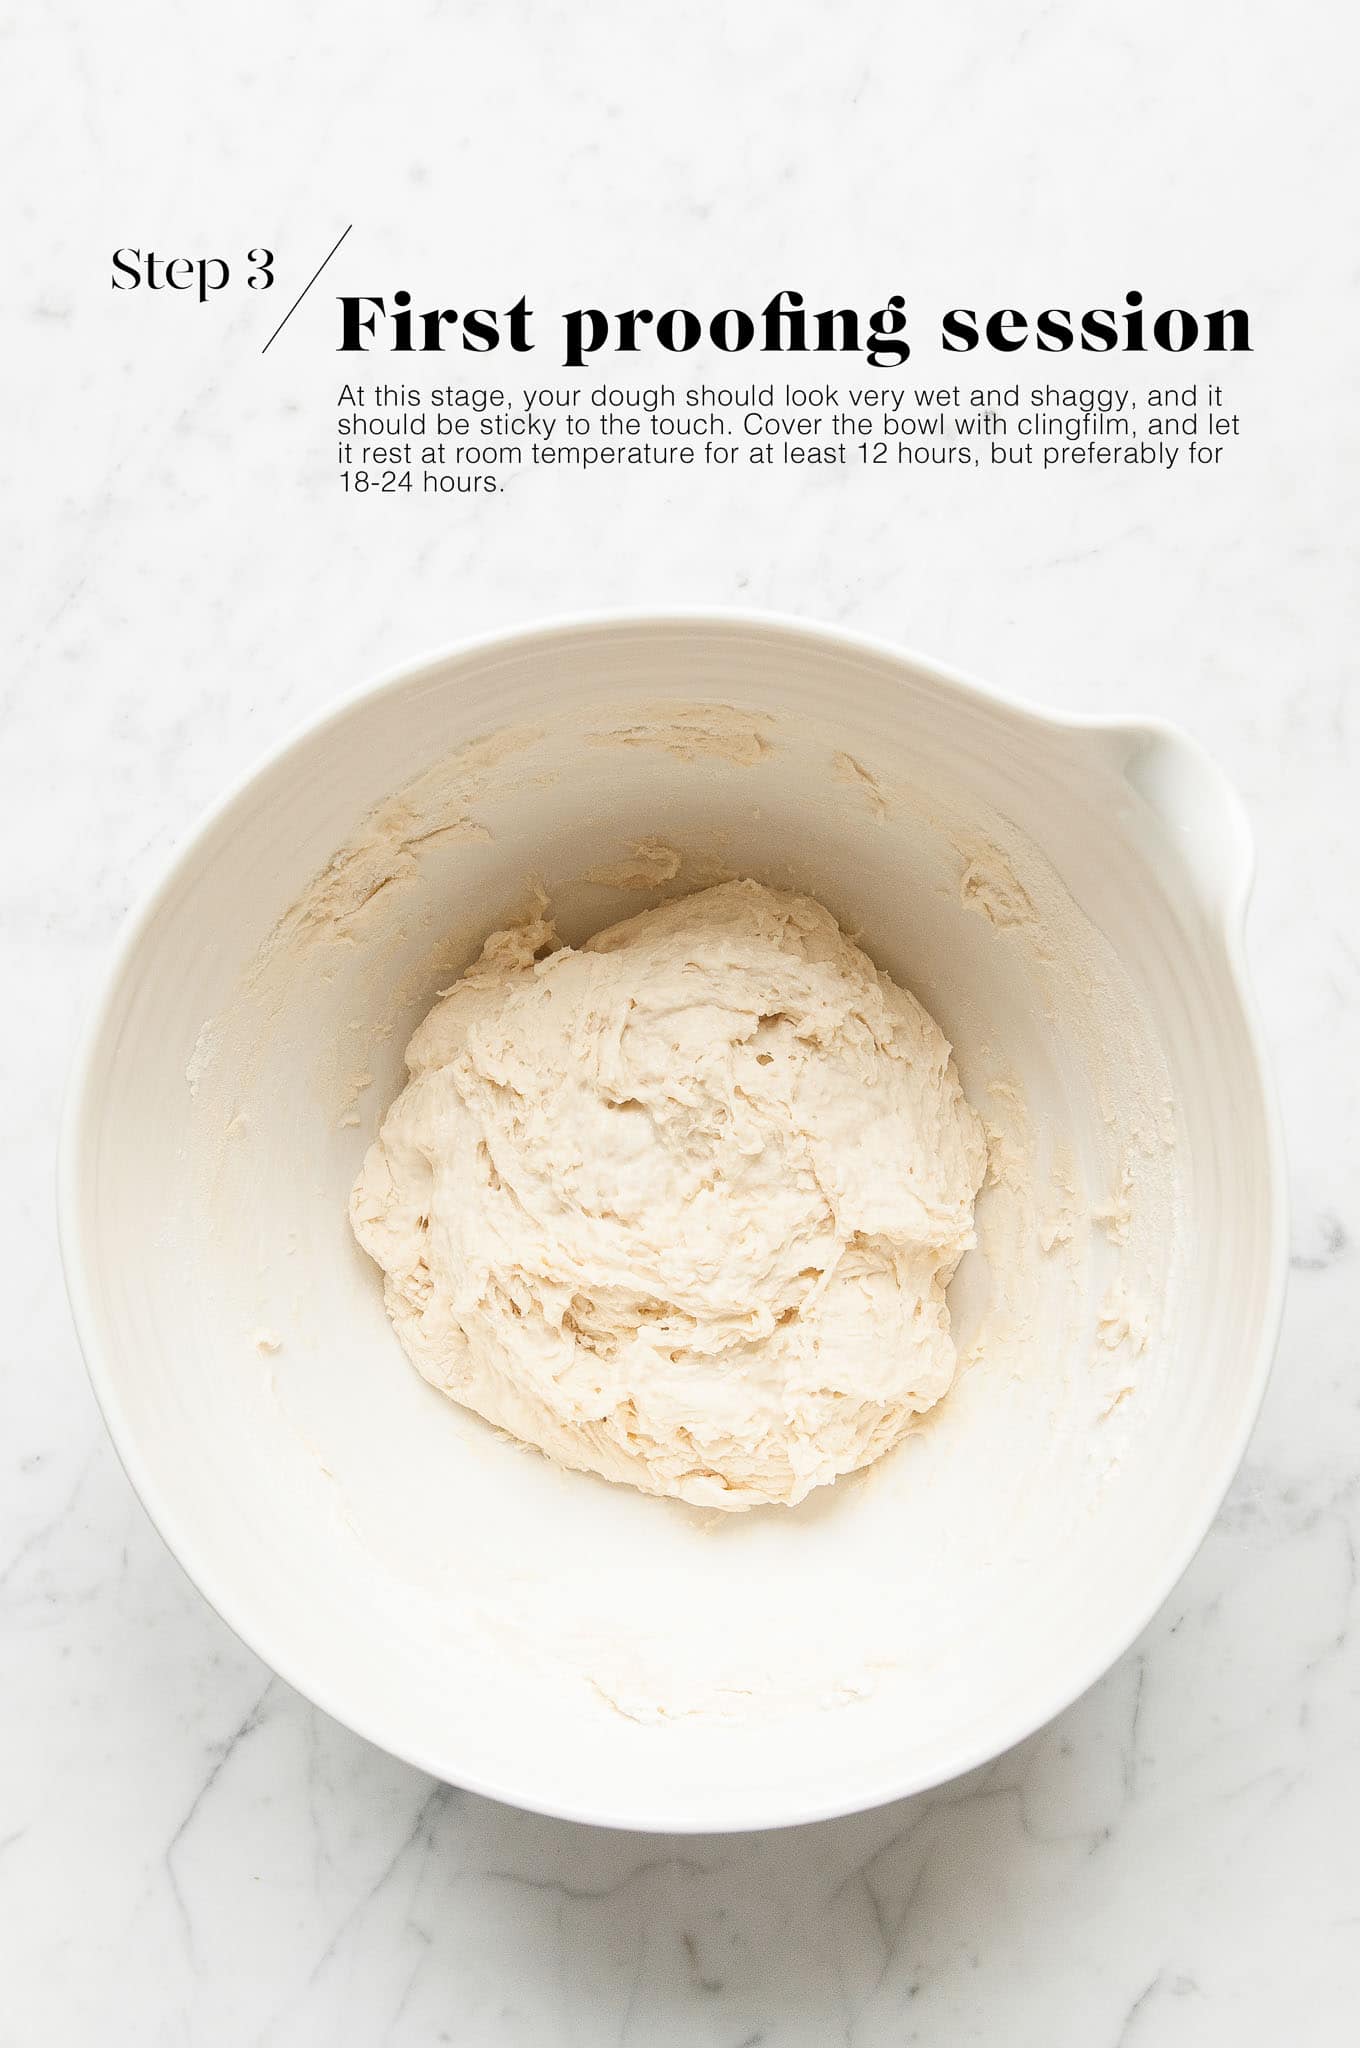
Step 3
At this stage, you should have a very wet and shaggy dough.
Cover the bowl with clingfilm. For the first proofing session, leave the dough to rest at room temperature for at least 12 hours, but preferably 18 to 24 hours.
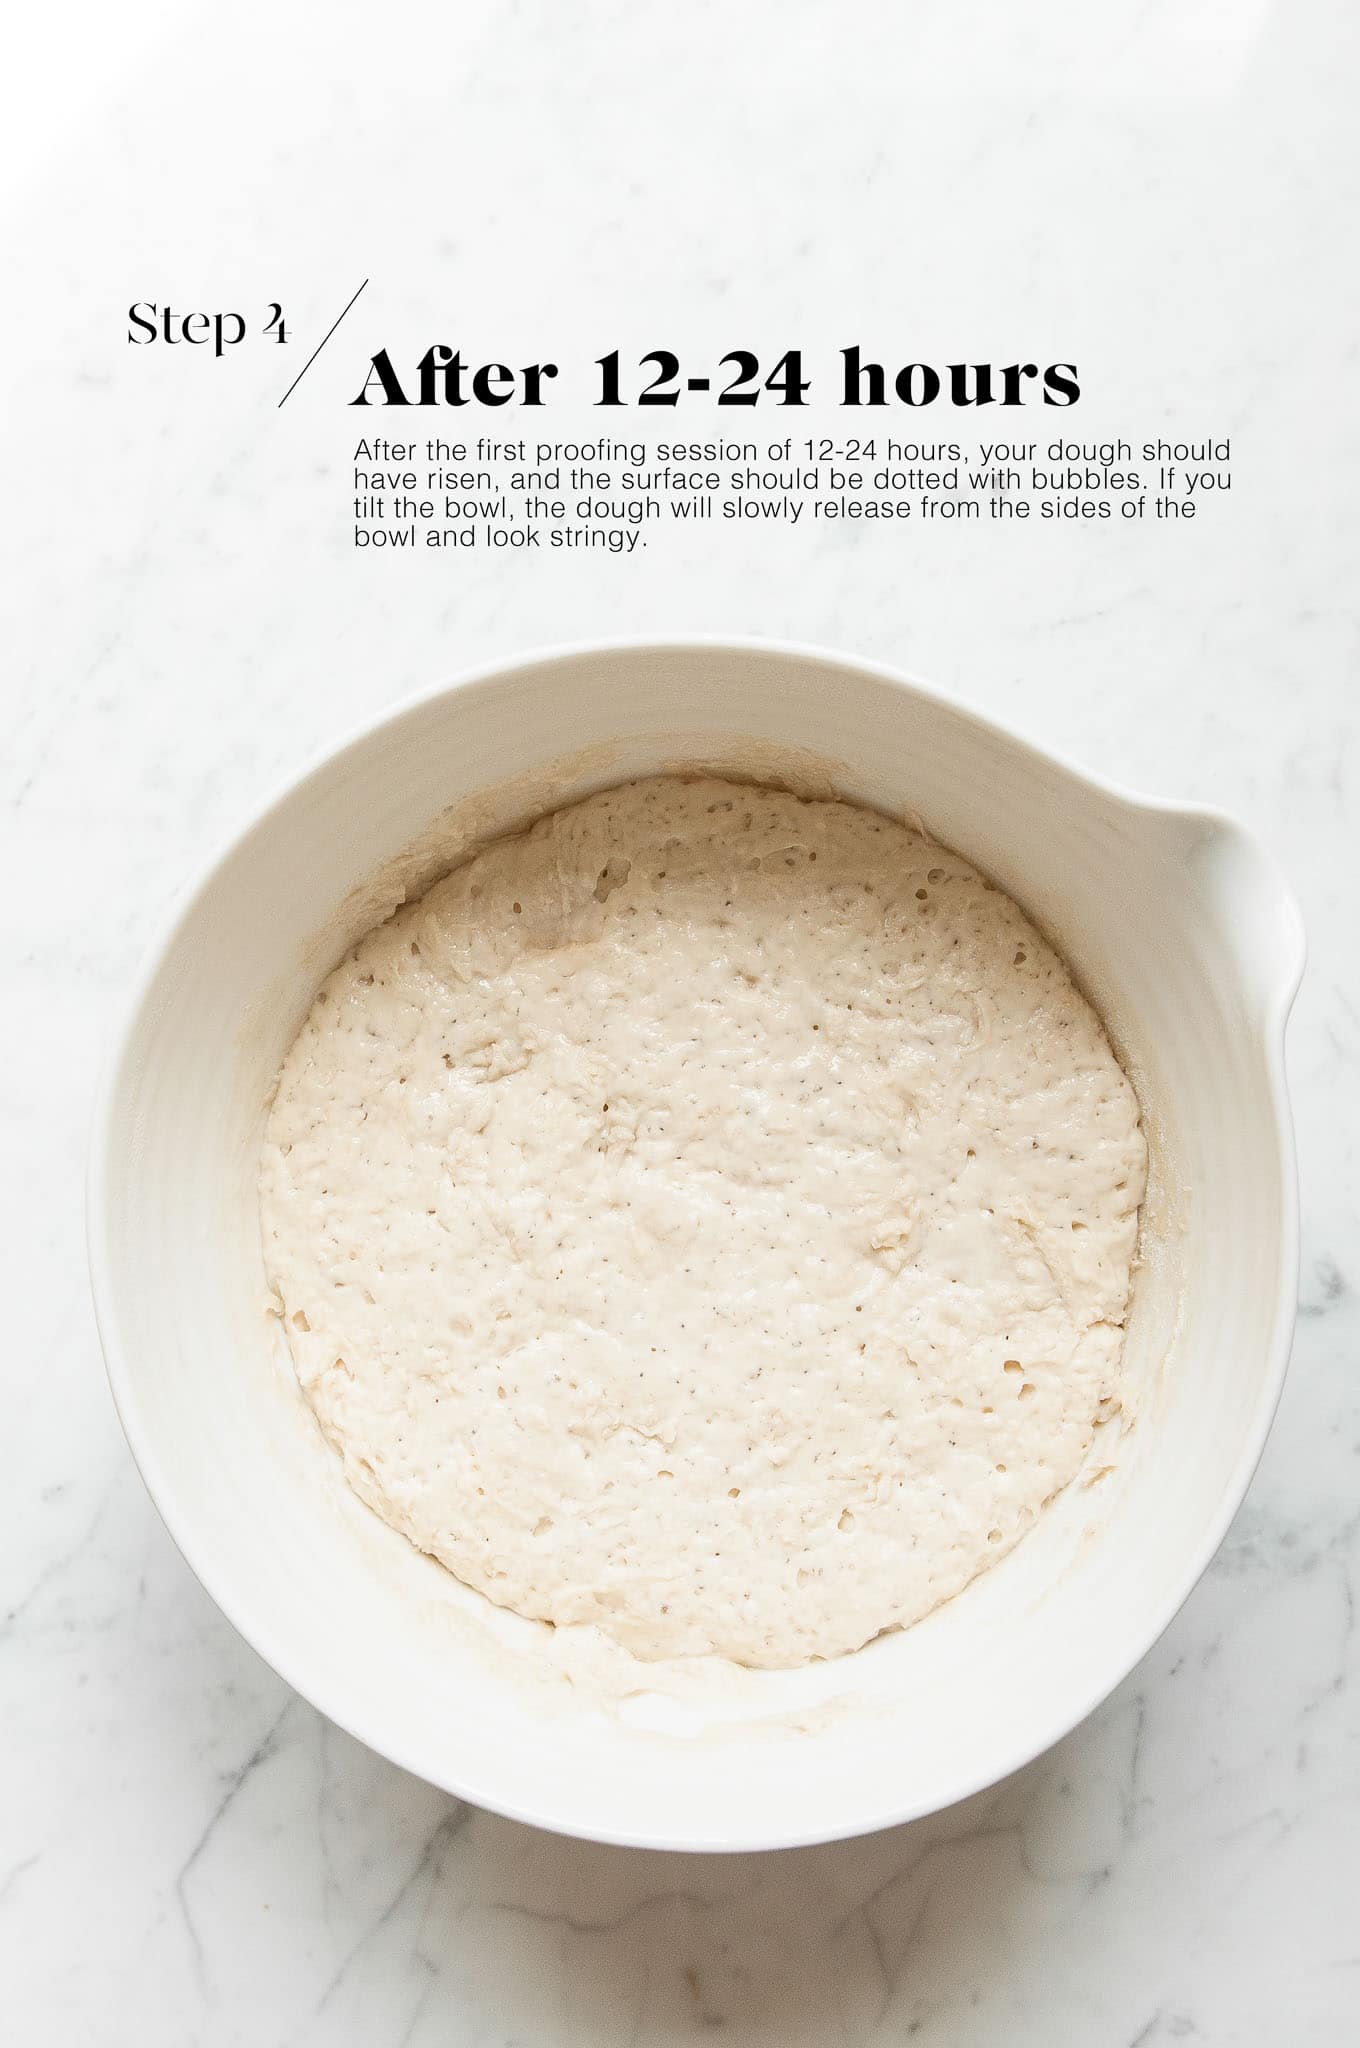
Step 4
After the first proofing session, the dough should have risen, and the surface should be dotted with bubbles. If you tilt the bowl, the dough should slowly move from the sides of the bowl and look stringy.
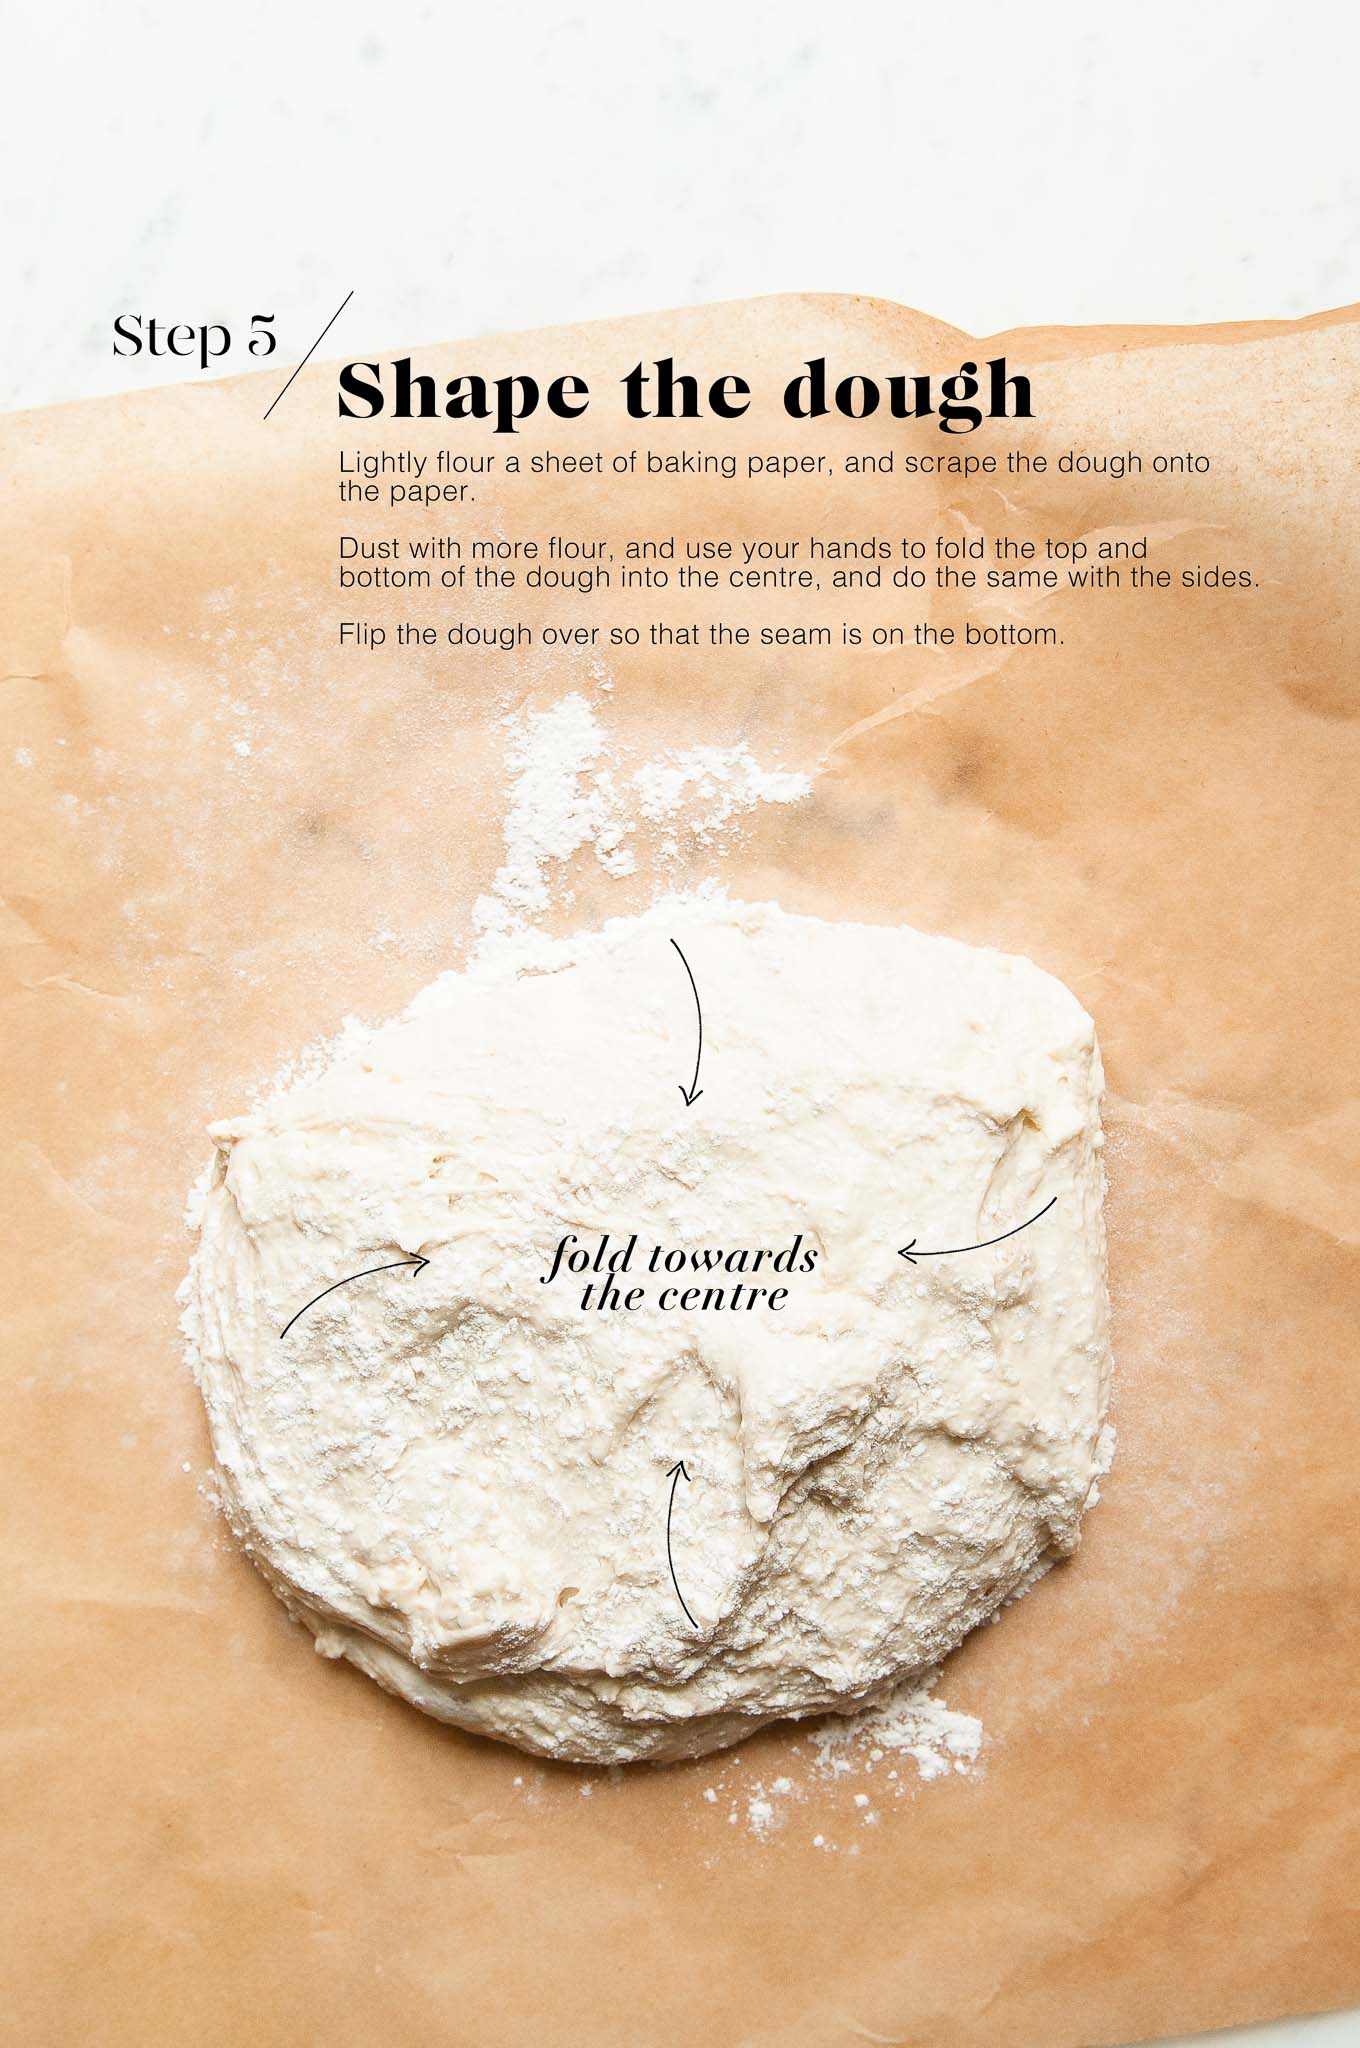
Step 5
Place a sheet of baking paper onto your work surface. Dust the baking paper lightly with some flour.
Use a dough scraper to remove the dough from the bowl and onto the baking paper.
Dust the top of the dough with some more flour.
Use your hands to gently work the extra flour into the dough and to gently release some of the air bubbles. I try to do an “envelope fold“, which is to pull the top and bottom of the dough into the centre, and then do the same with the sides.
But you will probably feel that the dough is too wet to work with, and that is completely fine – for this step, you just want to prod the dough a few times.
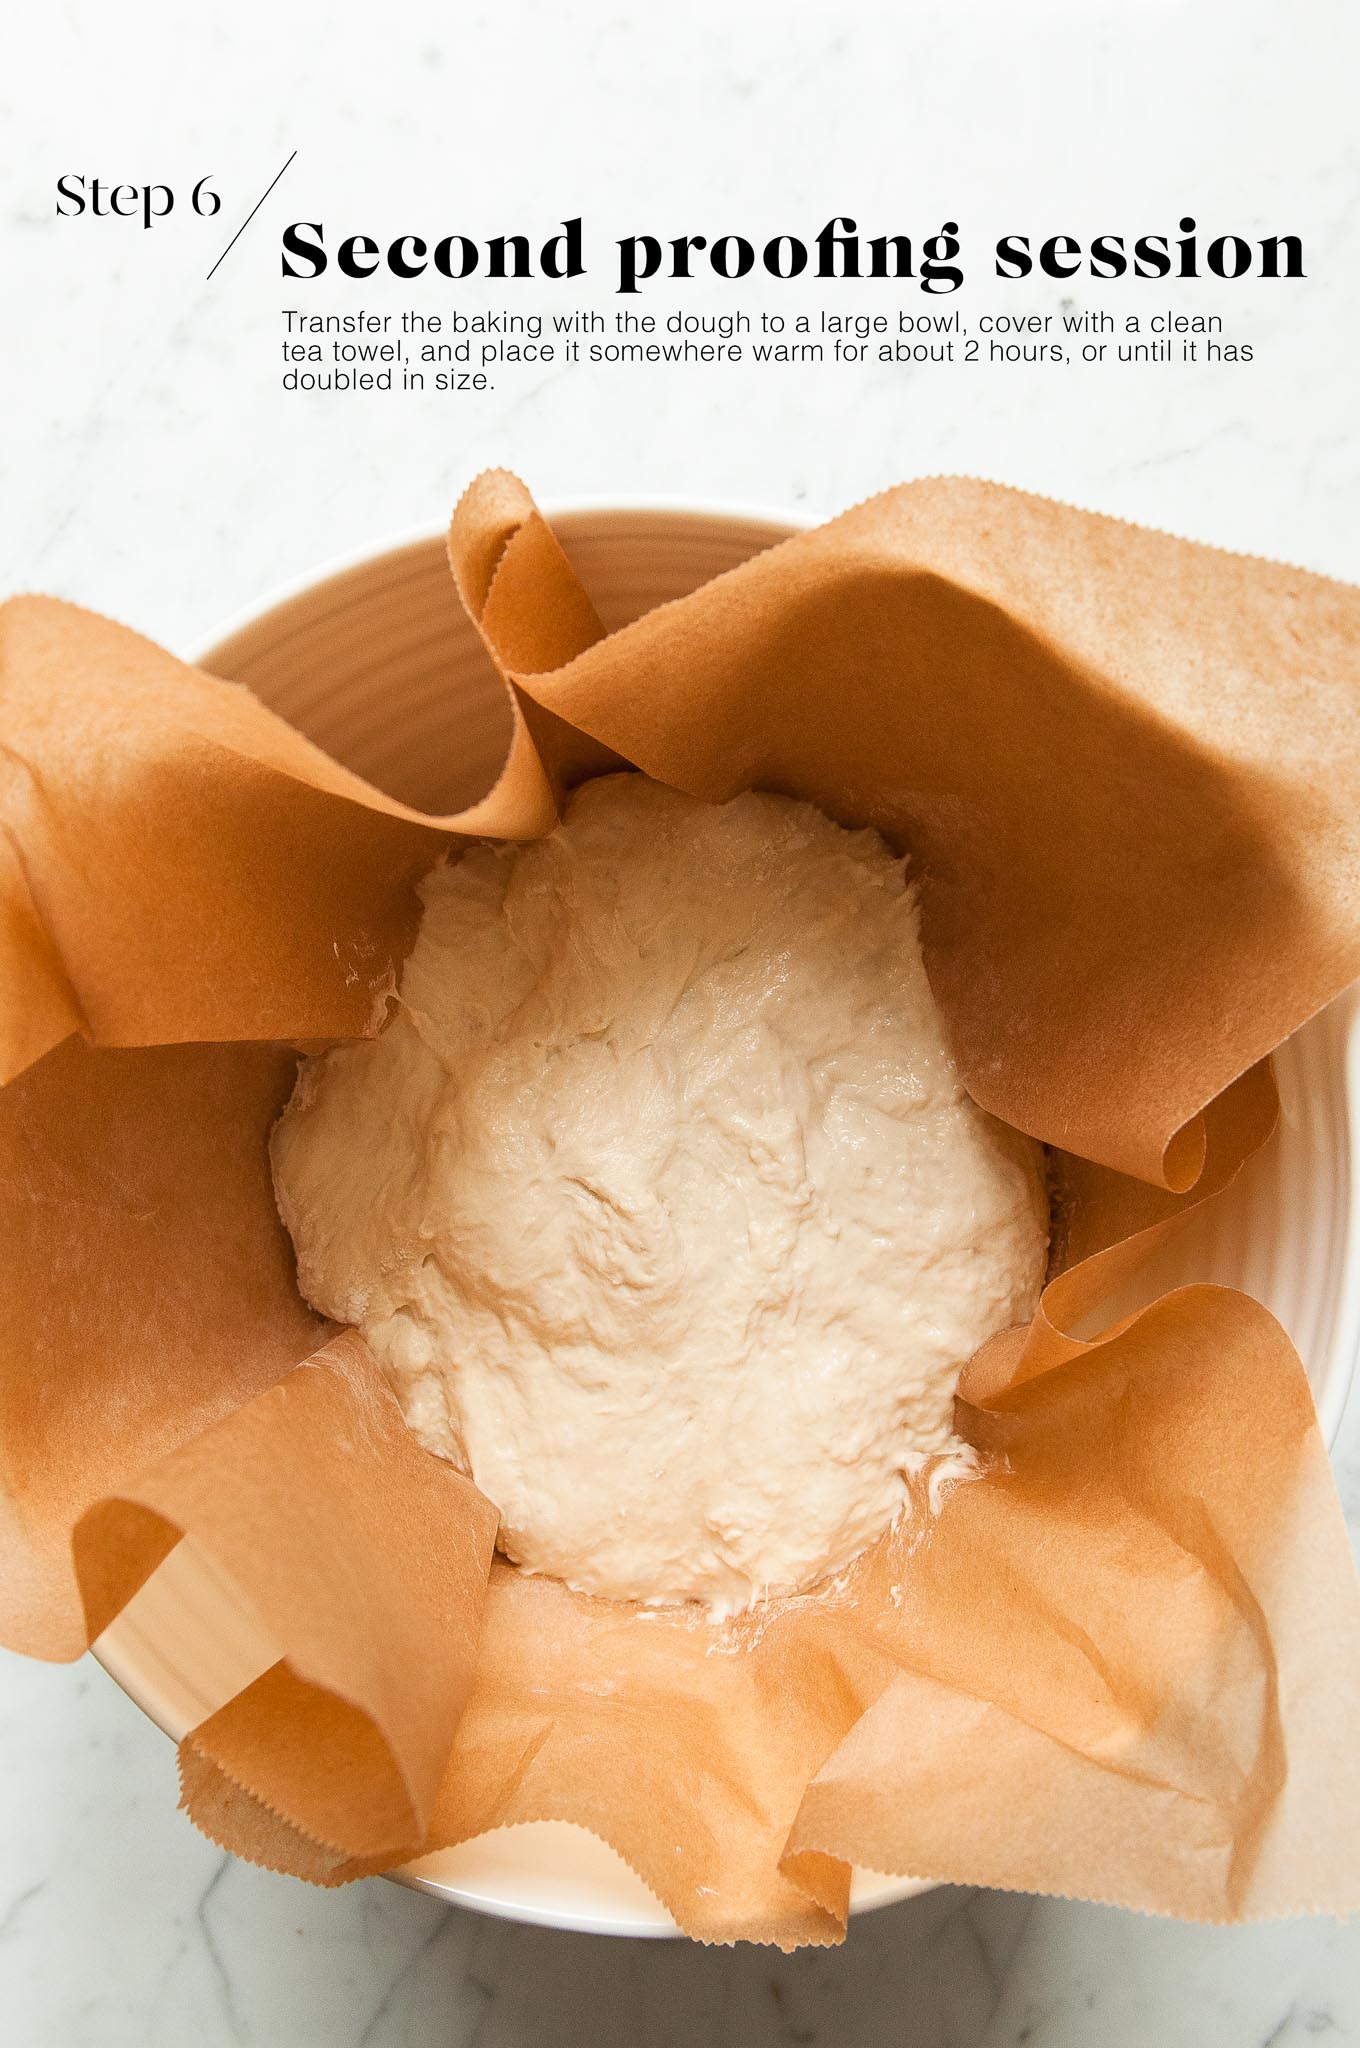
Step 6
Transfer the baking paper with the dough into a large bowl. For this step, I like to use a bowl which is roughly the same size as the cast-iron pot or Dutch oven.
Cover the bowl with a clean tea towel, and place it somewhere warm for about 2 hours, or until the dough has doubled in size.
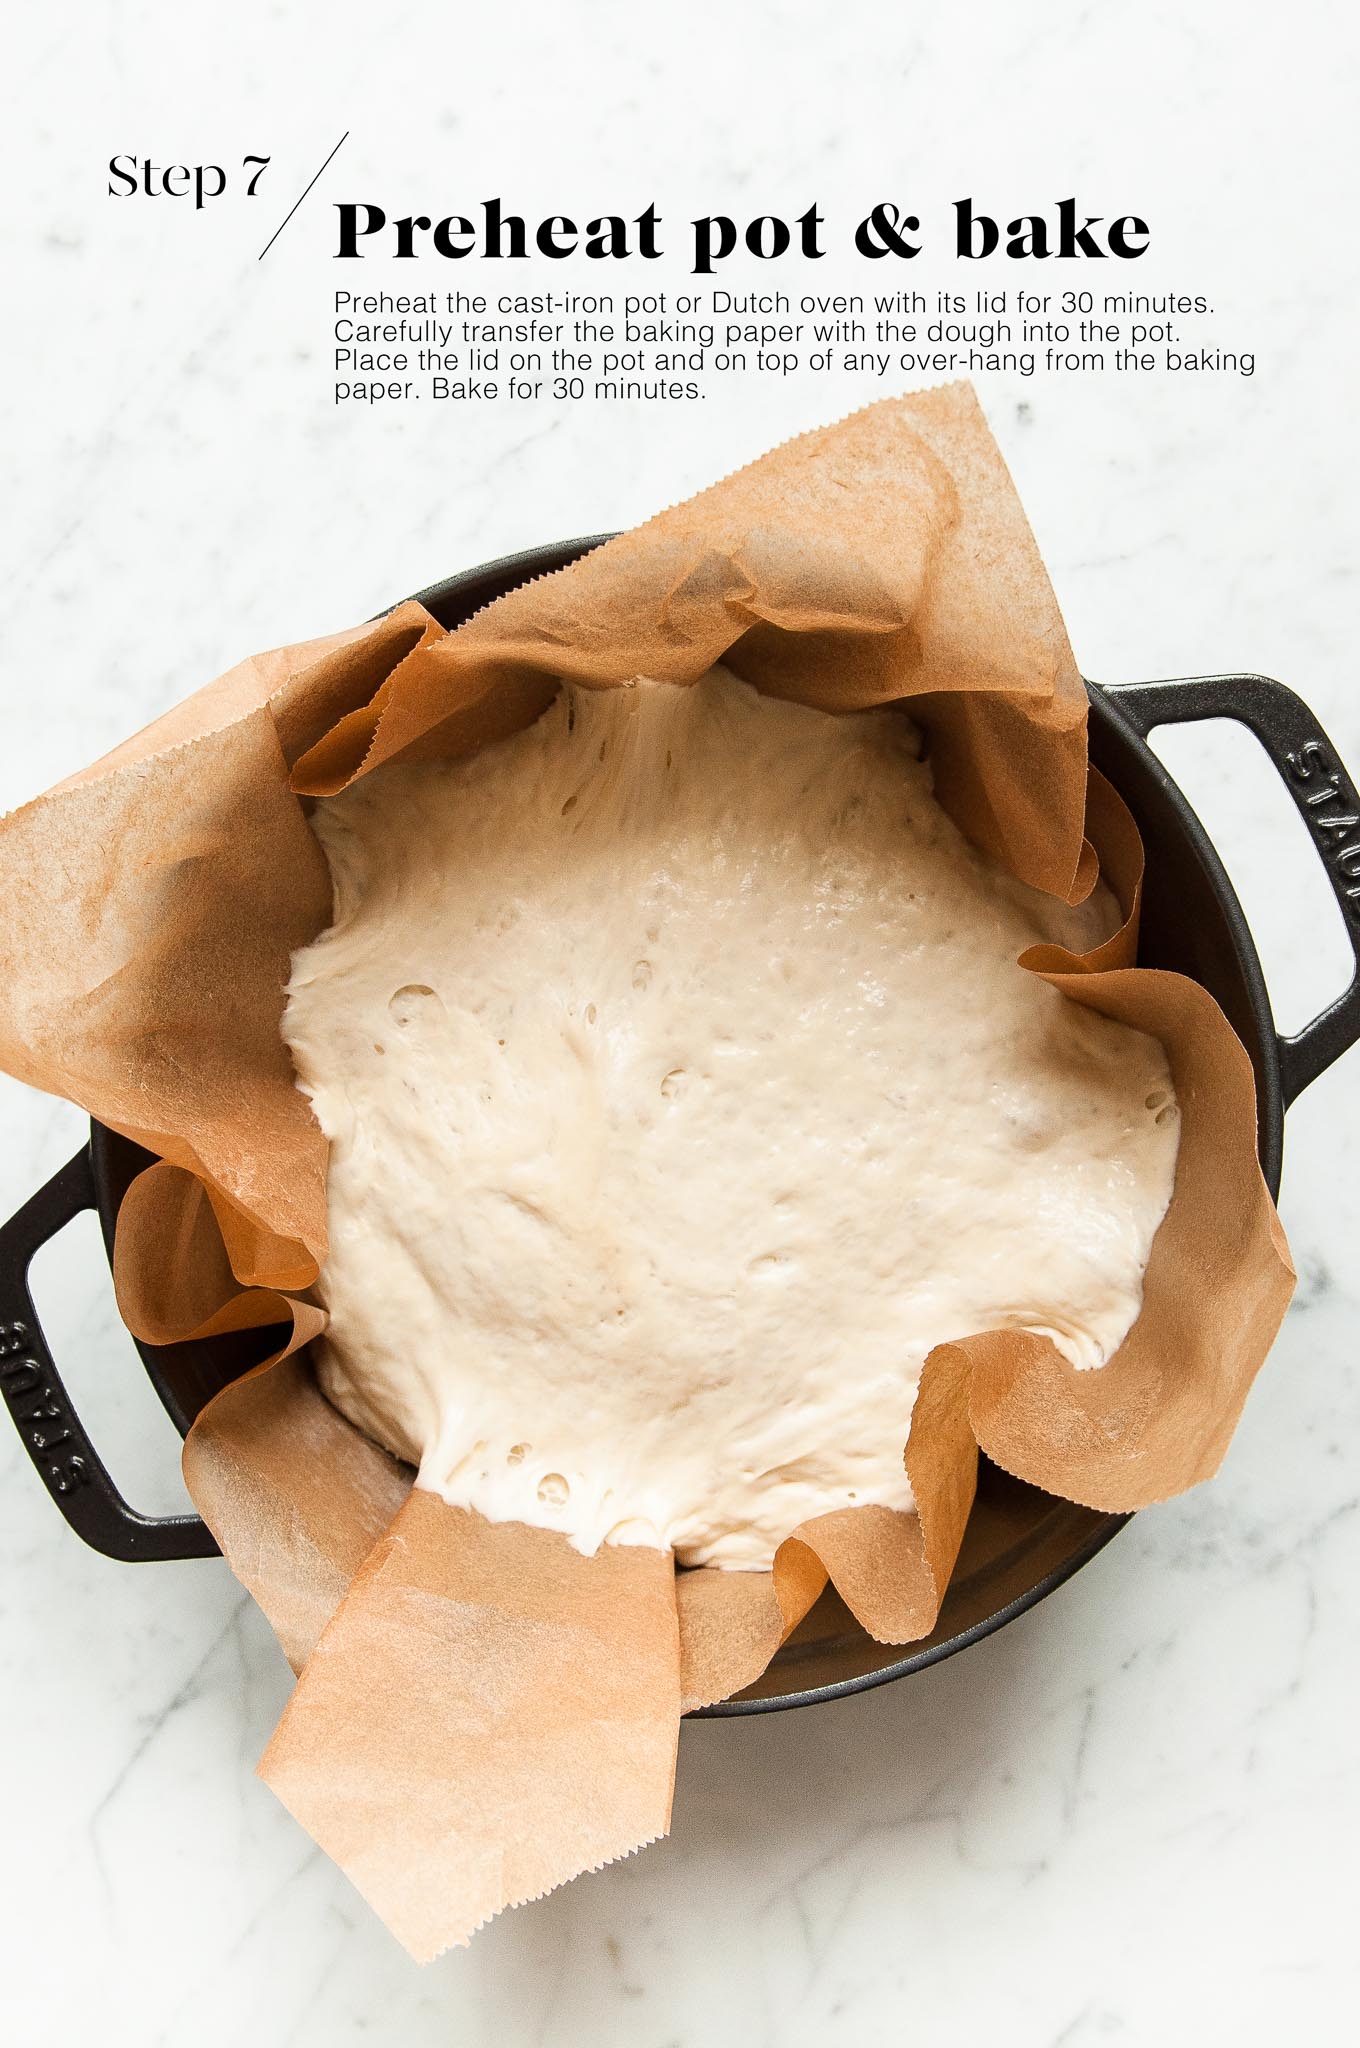
Step 7
About 30 minutes before you are ready to bake, place your cast-iron pot or Dutch oven with its lid into the oven. Preheat the oven to 230°C (450°F).
Once the cast-iron pot is ready, remove the lid. Quickly transfer the baking paper with the dough into the pot. But be super careful – the pot will be ragingly hot!
Place the lid on the pot and on top of any over-hang from the baking paper.
Bake for 30 minutes.
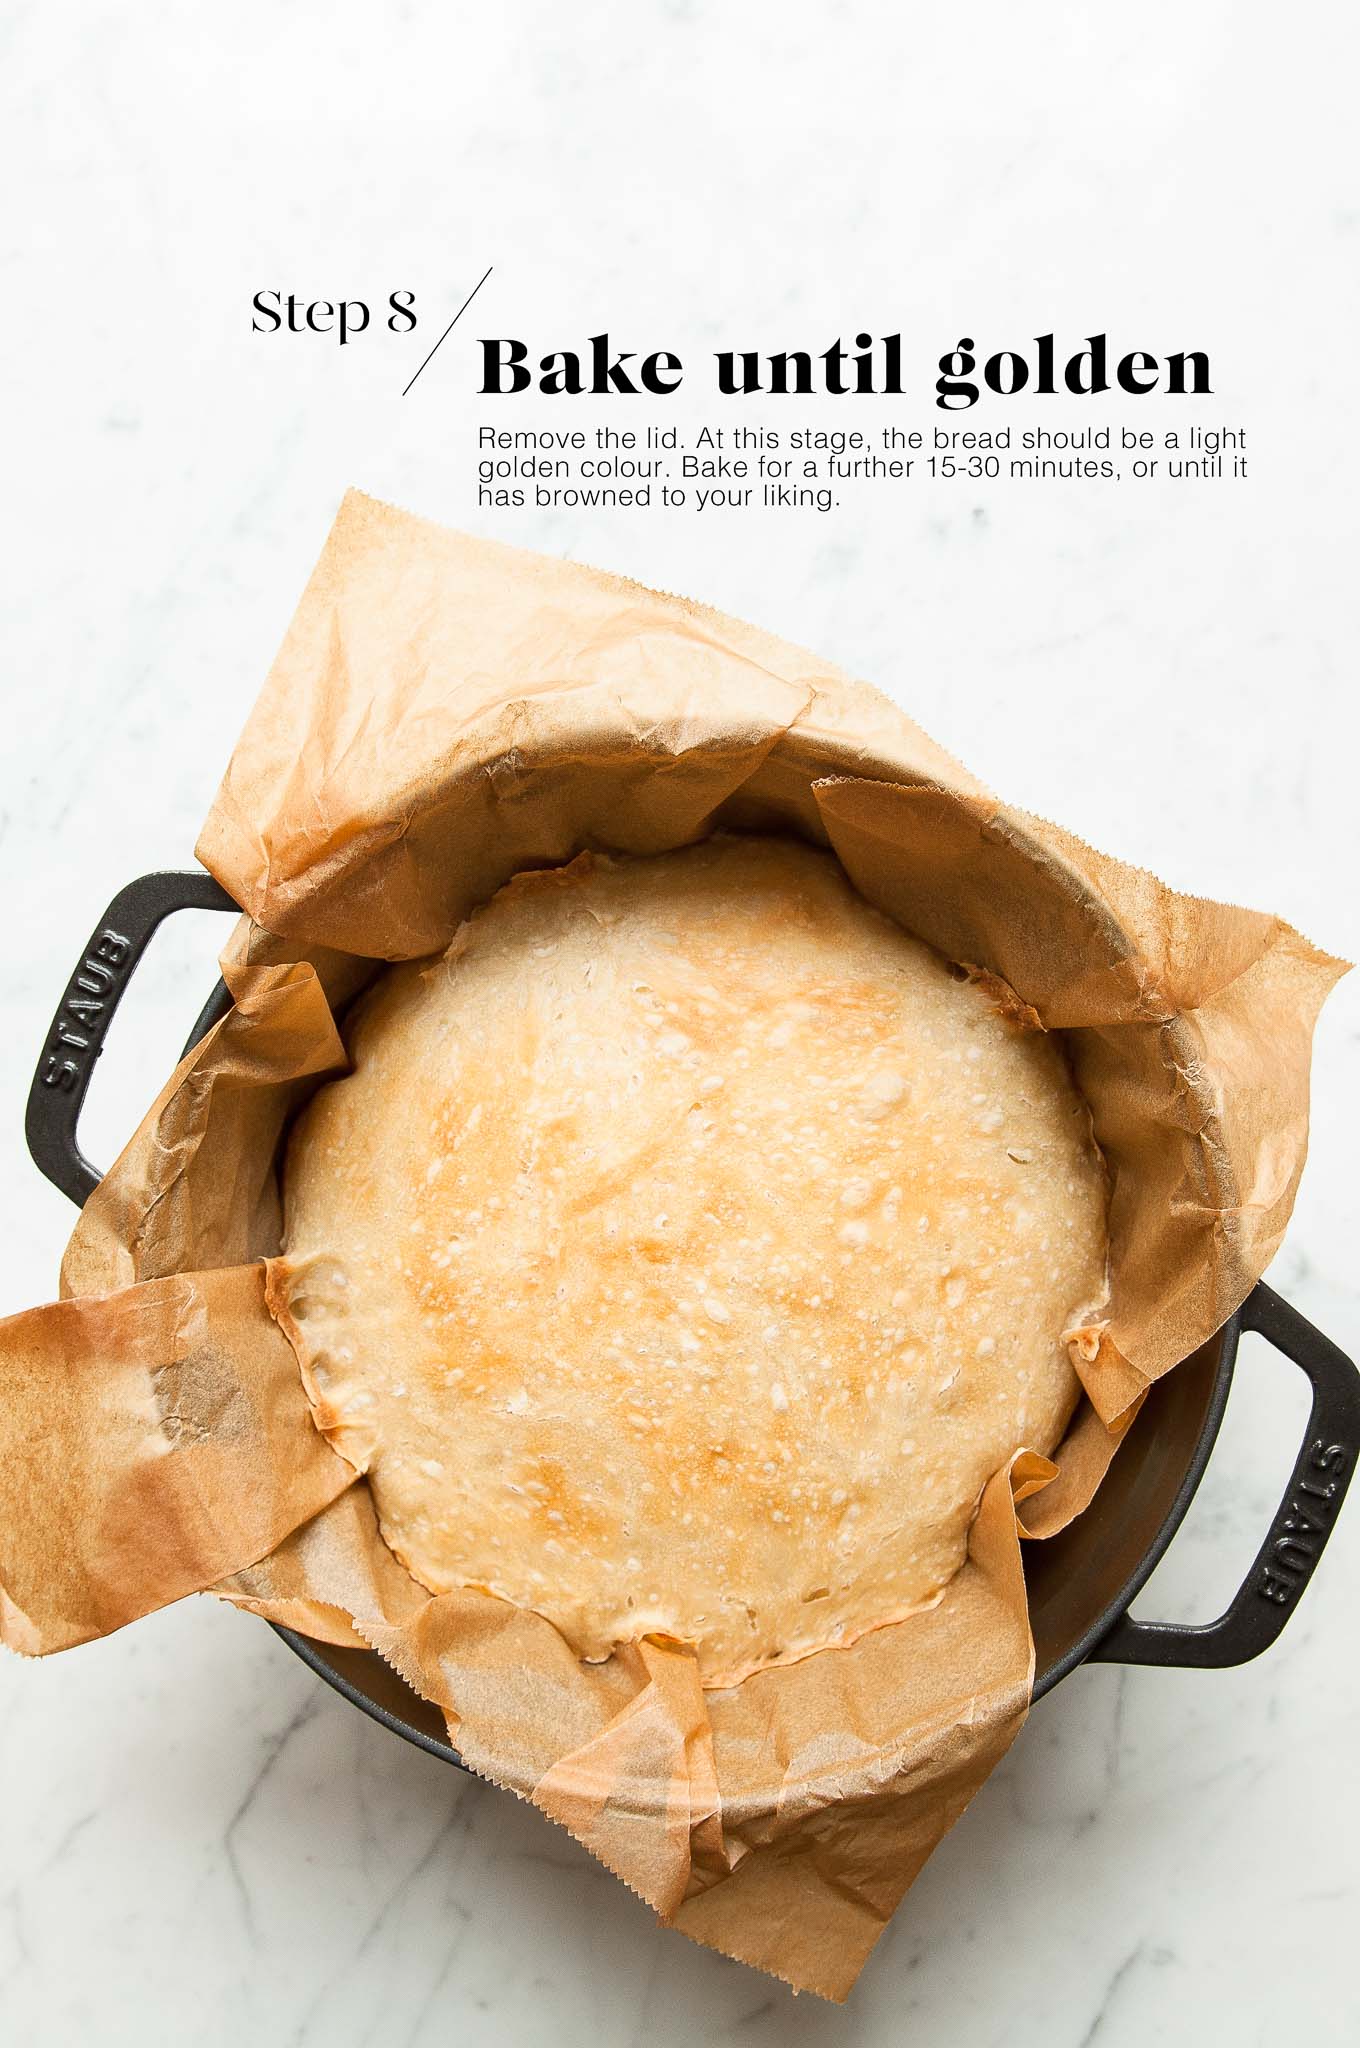
Step 8
After 30 minutes, remove the lid. At this stage, the bread should have risen beautifully, but it will be very light in colour.
Bake the bread, without the lid, for a further 15 to 30 minutes, or until it has browned to your liking.
The bread is cooked if it makes a hollow sound when you tap it underneath. Or, if you are like me and can’t always tell the difference between a hollow and dull tap, a digital thermometer inserted into the centre of the bread should read about 99°C (210°F).
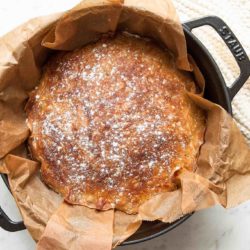
Let the bread cool on a wire rack for at least 20 minutes before slicing.
Tips for Making No-Knead Bread
- Use oven-mitts!: Remember that the cast-iron pot or Dutch oven will be searingly hot, so use a good pair of oven-mitts or silicon mitts.
- Use weight measure: Although I have given both weight and cup measures in the recipe below, I always recommend using weights when baking for the best results.
- Choose the size of your pot wisely: Use a cast-iron pot, Dutch oven or similar pot with 2.75 to 3.8 litre capacity (3 to 4 quarts) to produce a nice, tall loaf. You can use a larger pot, or even an oval-shaped pot, but your bread will spread more, resulting in a wider and more shallow loaf.
Easy No-Knead Bread
Ingredients
- 450 g (3 cups) white bread flour, or plain flour (all-purpose flour), see Kitchen Notes
- 1/4 teaspoon instant dried yeast, see Kitchen Notes
- 1 1/4 teaspoon fine salt
- 390 ml (1 ½ cups plus 2 tablespoons) water, warmed to 37°C (99°F)
Instructions
Begin this recipe the day before.
Day 1
Make the Dough & First Proof
- In a large mixing bowl, measure the flour, yeast and salt.
- Add the water.
- Use your hands or a wooden spoon to mix the ingredients together until you have a sticky, wet dough.
- Cover the bowl with clingfilm.
- Leave the bowl to rest at room temperature, about 21°C (70°F), for at least 12 hours, but preferably 18-24 hours.
Day 2
Prepare the Dough & Second Proof
- The dough should have risen, and the surface should be dotted with bubbles.
- For this recipe, I use a cast-iron pot or Dutch oven which is 24 cm (9.5 inches) in width with a 3.8 litre (4 quarts) capacity. (See Kitchen Notes below)
- Place a sheet of baking paper onto your work surface.
- Dust some flour onto the baking paper.
- Scrape the dough from the bowl onto the baking paper.
- Sprinkle the dough with some flour.
- Gently pat the dough into a rough ball. I like to do an “envelope fold”, that is, pull the top and bottom into the centre, and then pull both sides into the centre. But the dough might feel too wet to work with. You are just trying to incorporate a little bit of flour and to knock out some of the air bubbles.
- Transfer the baking paper with the dough to a large, clean bowl. For this step, I like to use a bowl which is about the same size as the cast-iron pot or Dutch oven.
- Cover the bowl with a clean tea towel.
- Let the dough rest for about 2 hours in a warm place, or until it has doubled in size.
To Bake the Bread
- About 30 minutes before the dough is ready, place a cast-iron pot or Dutch oven with its lid into the oven and preheat it to 230°C (450°F) (without fan) for about 30 minutes.
- When the dough is ready and you are ready to bake, carefully remove the pot from the oven. It will be ragingly hot at this point, so be careful.
- Quickly transfer the baking paper with the dough into the hot cast-iron pot. I do this by using the four corners of the baking paper as a sling.
- If you wish, you can use a very sharp knife to score the top of the dough and/or dust the dough with some flour.
- Place the lid on the pot, and on top of any overhang from the baking paper.
- Bake for 30 minutes.
- Remove the lid and bake for a further 15 to 30 minutes, or until the loaf has browned to your liking.
- To check if the bread is fully cooked, it should make a hollow sound when you tap it underneath. A digital thermometer inserted into the centre of the loaf should read about 99°C (210°F).
- Cool the loaf on a wire rack for at least 20 minutes before slicing. This cooling time will allow the crust to develop.
Kitchen Notes
- DIFFERENT TYPES OF FLOUR
* This recipe works well with plain flour (all-purpose flour) or strong white bread flour.
* You can also use wholemeal flour which will produce a slightly denser bread. I would recommend a mix of white flour and wholemeal flour for better results.
* For Swiss readers: I use Zopfmehl (or farine pour tresse) when making bread. - DIFFERENT TYPES OF YEAST
* Please note that there is a difference between instant yeast (also called instant dried yeast or fast-action dried yeast) and dried yeast (also called active dry yeast). If you are not sure what type of yeast you have, please check the packaging for instructions on how to use the yeast.
* With instant yeast, you can add it directly to the flour mixture without having to activate it first.
* With dried yeast, you will need to activate it first (usually in some warm liquid). - WHAT TYPE OF POT TO USE
* For this recipe, I use a cast-iron pot or Dutch oven which is 24 cm (9.5 inches) in width with a 3.8 litre (4 quarts) capacity. You can use a larger cast-iron pot, but the finished bread will not be as tall.
* You can also use a Pyrex glass dish with a lid with similar results.
* If you don’t have a cast-iron pot or an ovenproof glass dish, you can also use a metal baking sheet with a large stainless steel bowl as a lid.
* Check that your cast-iron pot is ovenproof and suitable for use in the oven at 230°C (450°F). I use a Staub pot which can withstand temperatures up to 250°C (482°F).
* Make sure that the handles and lids are all ovenproof. Otherwise, due to the very high temperatures, they can melt in the oven. Some cast-iron lids have a plastic knob which cannot withstand the high temperatures in this recipe (most Le Creuset models have a plastic knob). So either remove the knob or wrap it in aluminium foil to protect it. - RECIPE CREDIT
This recipe is adapted from Jim Lahey and Mark Bittman’s recipe for No-Knead Bread from the New York Times. - OVEN TEMPERATURES
All recipes on this website state temperatures for a regular oven (i.e. a conventional oven without fan). If you have a convection oven with a fan, please consult the manufacturer’s handbook on how to adjust the temperature and baking time accordingly. - CONVERSIONS
To convert from cups to grams, and vice-versa, please see this handy Conversion Chart for Basic Ingredients.
Did you make this recipe?
Please leave a comment below and share your photos by tagging @eatlittlebird on social media and using #eatlittlebirdUpdate
This recipe was first published on 8 June 2020. It has been updated with new photos and more comprehensive recipe notes.


Thank you so much for your photos and helpful tips! I’ve been wanting to try this New York Times bread for ages but could never find out what size Dutch oven to use. I finally tried this recipe yesterday and baked the most beautiful loaf of bread for breakfast this morning! I tagged you on Instagram so you can also see. I love the layout of your recipes – very helpful!!
Finally got around to seeing what all the fuss was about with this no-knead bread. The end result was definitely delicious. Not sure if it is necessarily easier than other bread recipes. Taste is good and the crust is definitely very good.
Hi how long do I leave on counter to rise first proof if climate in Singapore humid climate . Temperature 30 C.?
Hi Nancy,
Do you have a cooler place in your home where you can do the first proof? If not, 30 degrees Celsius should be fine for proving the dough, but it will rise more quickly, so you might only need about 3-4 hours for the first proof.
I missed the bread-making craze of 2020 but am making up for it now. I tried your recipe because it was the only one with decent step by step photos. Perfect for a beginner like me. Plus I never understood the other recipes which told you to put the wet dough onto a tea towel? Thanks for your tips. The resulting bread was very good, great crumb and delicious crust.
Your recipe was very helpful – thank you! I looked at so many recipes for no-knead bread but the instructions were never always clear, like what size cast iron pan to use?? You recipe was perfect.
Excellent recipe and very clear instructions.
Would it be possible to add seeds for a savoury loaf or dried fruit for a sweet loaf? And if so, what amount would you suggest and when to add into the recipe?
Hi Vanessa,
Yes, of course! How much you want to add is up to you. I would add 1/4 to 1/2 cup of seeds or dried fruit, or more if you like your bread more dense with other ingredients.
I would add the seeds or dried fruit when you are shaping the dough before the second proof. Try to lightly mix the ingredients through the dough so that they are evenly dispersed. I hope this helps!