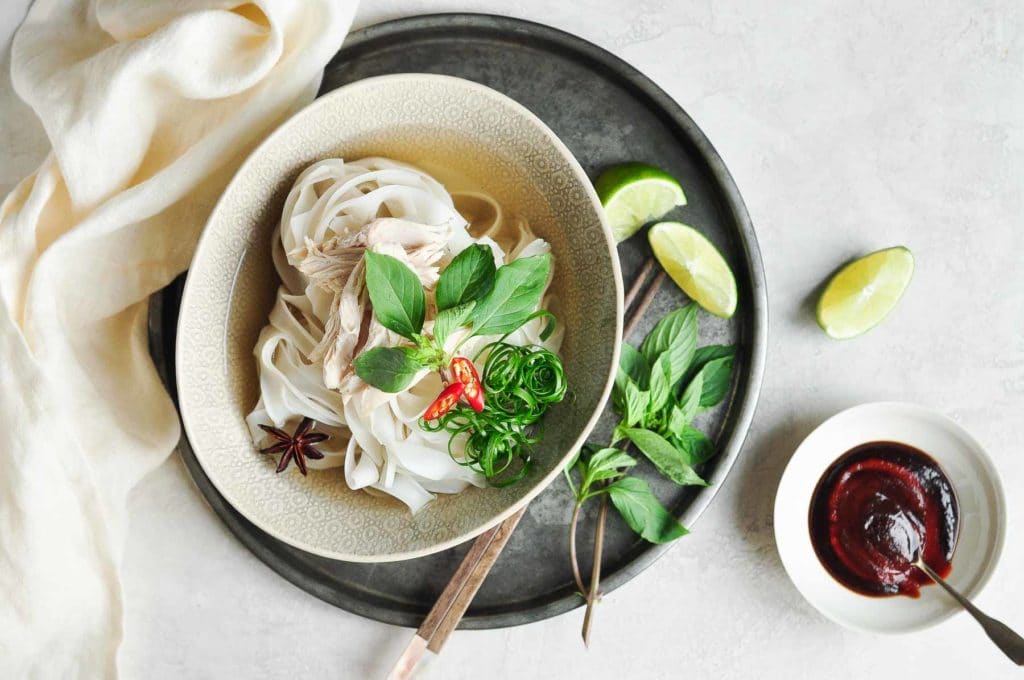
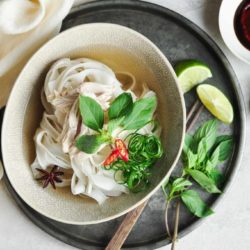
Pho Noodle Soup
A fragrant and soul-soothing Beef Pho Noodle Soup is often what I crave when only a steaming bowl of noodle soup will do. But when time is sparse and I don’t have 3 hours to potter about in the kitchen, a Chicken Pho is a rather wonderful alternative.
For that reason, this Chicken Pho recipe (called Pho Ga in Vietnamese) is a handy one to have in your repertoire.

What is Chicken Pho?
According to Tracey Lister and Andreas Pohl in their delightful cookbook on Vietnamese cuisine, Real Vietnamese Cooking, Chicken Pho was invented during the Japanese occupation of Vietnam in the 1940s when beef was in short supply.
The broth is lighter and sweeter, but with a familiar nod to the traditional beef version, thanks to the use of the same fresh herbs and spices.
Easy Chicken Pho Recipe
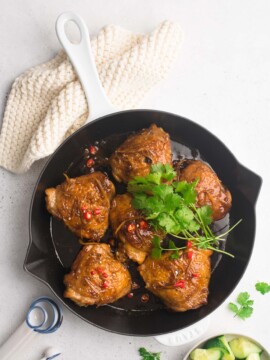
I make chicken soup at home quite frequently; it’s almost my default menu when I don’t have a lot of time to cook because I can just let the chicken simmer gently on the stove while I’m tending to something else. At other times, I simply stick the chicken in the oven to roast.
But if you are in the habit of frequently making your own chicken soup or stock, turning it into a Chicken Pho soup is a nice way of varying the menu a little. While it’s hard to beat a chicken noodle soup in any form, I’m rather impartial to a chicken pho soup.
How to Make Chicken Pho
Chicken Pho uses similar spices and aromatics as a Beef Pho. But unlike a beef pho broth recipe which uses beef bones and oxtails, a Chicken Pho is much quicker to cook because it takes much less time for the chicken to work its magic on the broth.
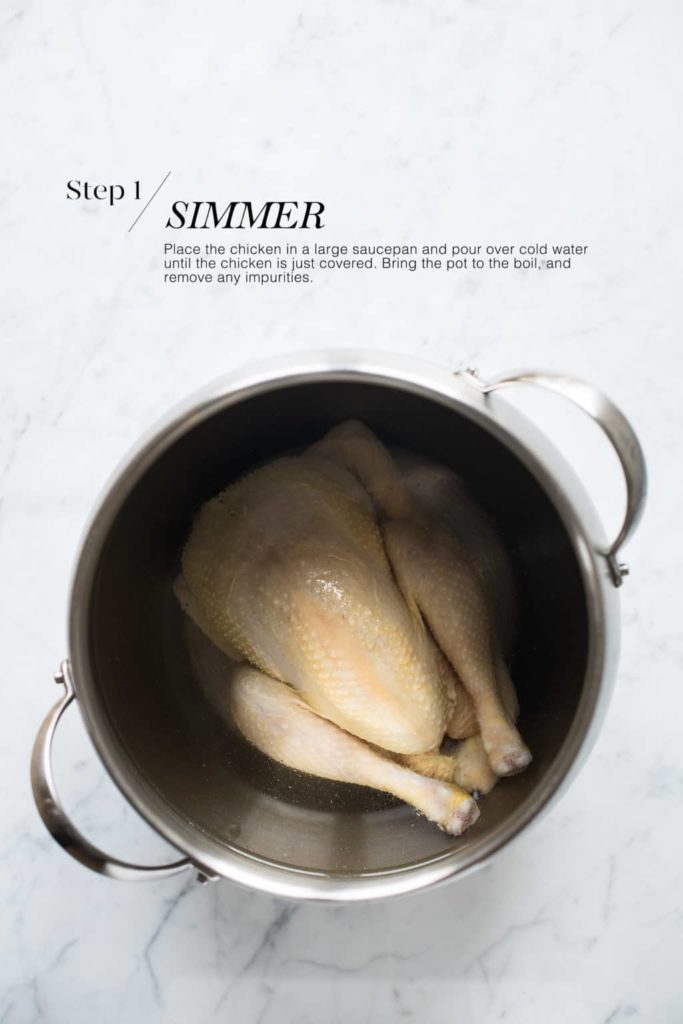
Step 1
To make the Chicken Pho broth, place a whole chicken (preferably organic) into a large pot, and fill it with cold water until it barely covers the chicken.
When making soups and stocks, I like to use a tall and narrow pot so that the chicken sits snugly inside.
The secret to making a flavourful broth is to start with only enough water to cover the ingredients in the pot. This is likely to produce a broth with a concentrated flavour, but you can dilute it later with more water until you have the right balance. If you start with too much water, you might create a broth which is too diluted in flavour.
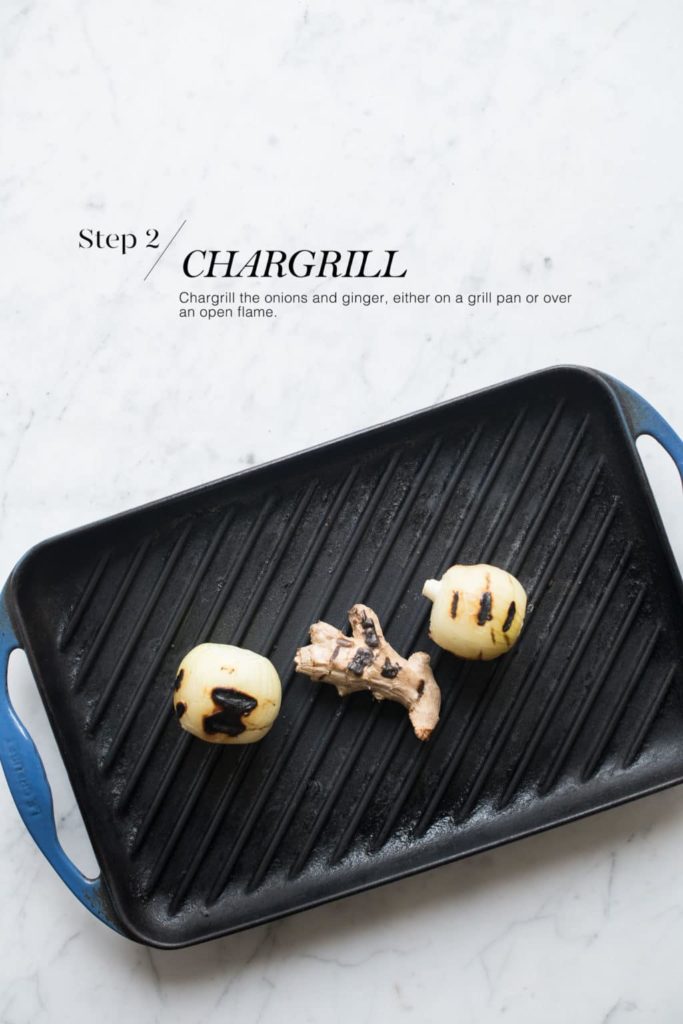
Step 2
While the chicken is simmering, chargrill the onions and ginger on a grill pan or over an open flame.
You can chargrill the onions unpeeled; the skins will give the broth a lovely, rich colour. However, I prefer to peel my onions to get more “chargrilled” flavour. Also, I find that most onions have a lot of dirt under the skins, so I find it better to peel them first.
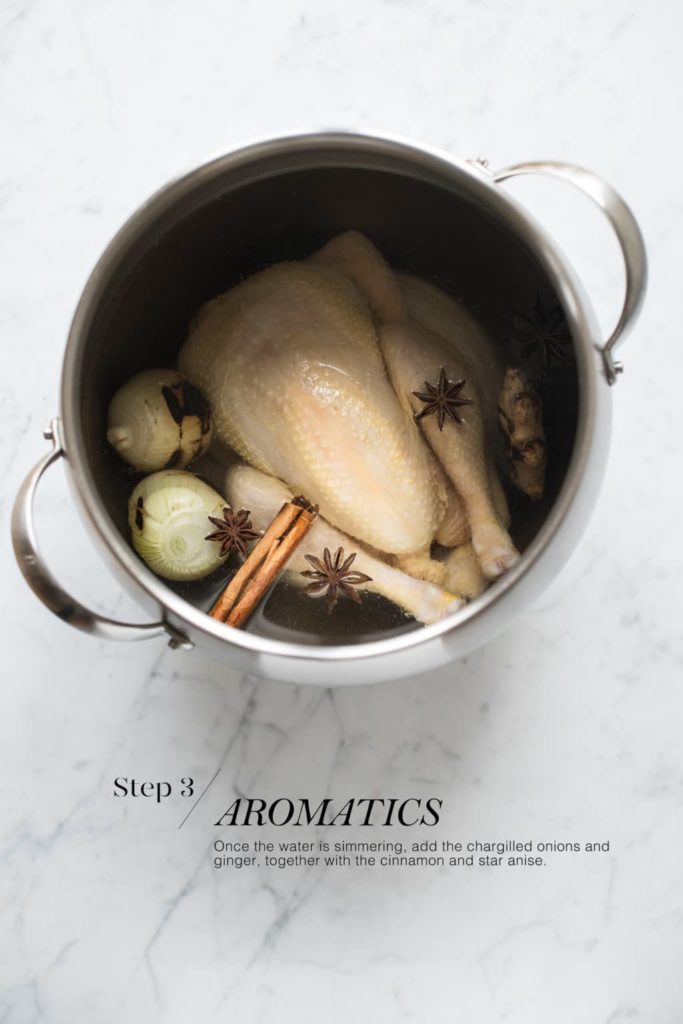
Step 3
Once the water has come to a simmer, add the chargrilled onions and ginger to the pot, together with the cinnamon and star anise.
Allow everything to simmer together for about 1 to 1.5 hours, or until the chicken is tender and the meat falls away easily from the bones. The duration of cooking depends on the the size of your chicken.
During this time, skim off any impurities which come to the surface.
I also like to maintain the same water level throughout the cooking, so I recommend topping up with boiling water when necessary.
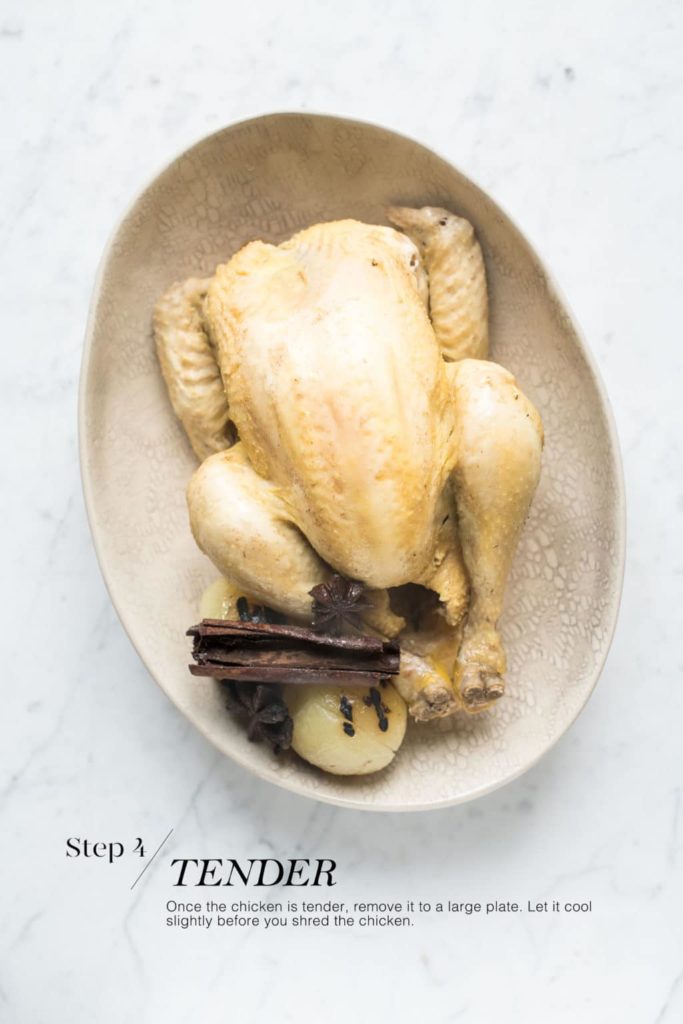
Step 4
Carefully remove the chicken to a large bowl or plate, and let it cool for a few minutes before using your hands or two forks to shred the meat.
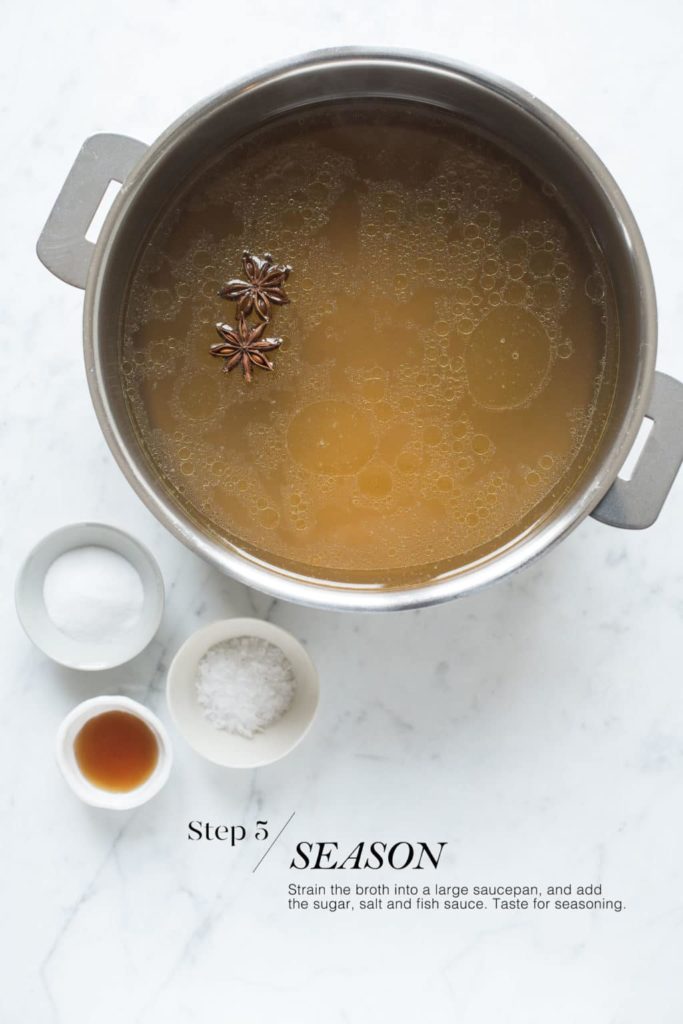
Step 5
Strain the broth through a fine sieve into another large pot. Add the sugar, salt and fish sauce, and taste for seasoning.
If the broth is too concentrated, add some boiling water until you have the right balance.
Let the broth simmer gently for about 10 minutes before serving as per the recipe.
Using An Instant Pot or Pressure Cooker
Most Chicken Pho recipes take at least an hour for the broth to be ready.
But if you own an Instant Pot or pressure cooker, making Instant Pot Chicken Pho is super quick! You can have dinner on the table in about 30 minutes, which is pretty impressive for a mid-week dinner.
In fact, I love that the broth can be ready in the time it takes me to cook the noodles and prepare the garnishes. Also, the chicken becomes incredibly tender and succulent, and you know that the broth is just full of golden goodness.
Once you have tried making Chicken Pho in the Instant Pot or pressure cooker, it is hard to go back!
The only “drawback” to making Chicken Pho in an Instant Pot or pressure cooker is that the broth will be a bit cloudy compared to one made on the stovetop. But the taste should still be just as delicious.
Ingredients for Chicken Pho
When making any Asian dish, I always like to make a trip to my local Asian grocer. Not only is the produce often cheaper than the main supermarkets, but the brands they stock are often better quality.
I like to use Squid brand fish sauce in my cooking. I find it to be a fairly mild fish sauce which is not too pungent. It’s also what my mother always cooked with when I grew up, so I just use what she does!
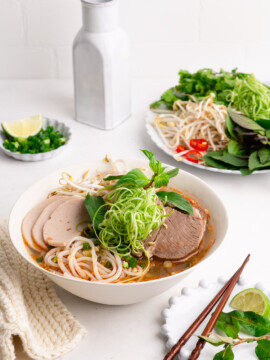
Fresh pho noodles are always best, if you can get your hands on some. Otherwise, there is nothing wrong with dried pho noodles. These days, even my local supermarket (in Switzerland!) stocks dried flat noodles which I think is a handy alternative when there is an unexpected craving for pho.
Pho noodles come in varying sizes and my preference are for the wider noodles. Whatever size you buy, just make sure they are the flat rice noodles (not round).
The classic sauce accompaniments to pho always include hoisin sauce and Sriracha sauce.
In my family, we never added these directly to the broth; it was always served on the side to dip the meat into. But I’ve seen friends mix the sauce directly into their soup – do as you please!
Vietnamese Chicken Pho (Pho Ga)
Ingredients
For the broth
- 8 shallots, or 2 small onions, peeled and left whole
- 4 cm (1 ½ inch) ginger, unpeeled and sliced in half lengthwise
- 1 ½ kg (3 ½ lb) whole chicken
- 1 cinnamon stick
- 4 star anise
- 1 tablespoon sea salt
- 1 tablespoon sugar
- 2 teaspoons MSG, optional
- 1 tablespoon fish sauce, plus more to taste
To serve
- 200 g (7 oz) flat rice noodles, per person
- onion, thinly sliced in half moons (optional)
- spring onions, (scallions) finely sliced
- coriander, (cilantro) finely chopped
- Thai basil, roughly torn
- bean sprouts
- red chillies, finely chopped
- lemon or lime, cut into wedges
- hoisin sauce
- Sriracha
Instructions
Instructions for Stove Top
- Place the chicken in a large pot.
- Add just enough cold water to barely cover the chicken.
- Bring the pot to the boil and then reduce to medium heat or a gentle simmer.
- Meanwhile, chargrill the shallots (or onions) and ginger in a grill pan on high heat until they are slightly charred. You could also char the vegetables over an open flame if you have a gas stove, or under the grill (broiler) in the oven.
- Add the chargrilled onions and ginger to the pot, as well as the cinnamon stick and star anise.
- Simmer for about 1 to 1.5 hours, or until the chicken is tender and the meat falls away easily from the bones. The cooking time depends on the size of your chicken.
- During this time, regularly skim off any impurities which come to the surface of the stock, and top up with boiling water if the broth has reduced a lot. I try to maintain the same water level from start to finish.
- Once the chicken is tender, remove the chicken to a large bowl, and let it cool a little before shredding the meat.
- Strain the broth through a fine sieve into a clean pot and return to the heat.
- Season the broth with the salt, sugar and fish sauce. Add the MSG, if using.
- Simmer gently for about 10 minutes.
- Taste for seasoning. If the broth is too strong or concentrated, add some boiling water. I generally make the broth quite concentrated at the start because it is easier to dilute the broth than to add flavour to a weak broth.
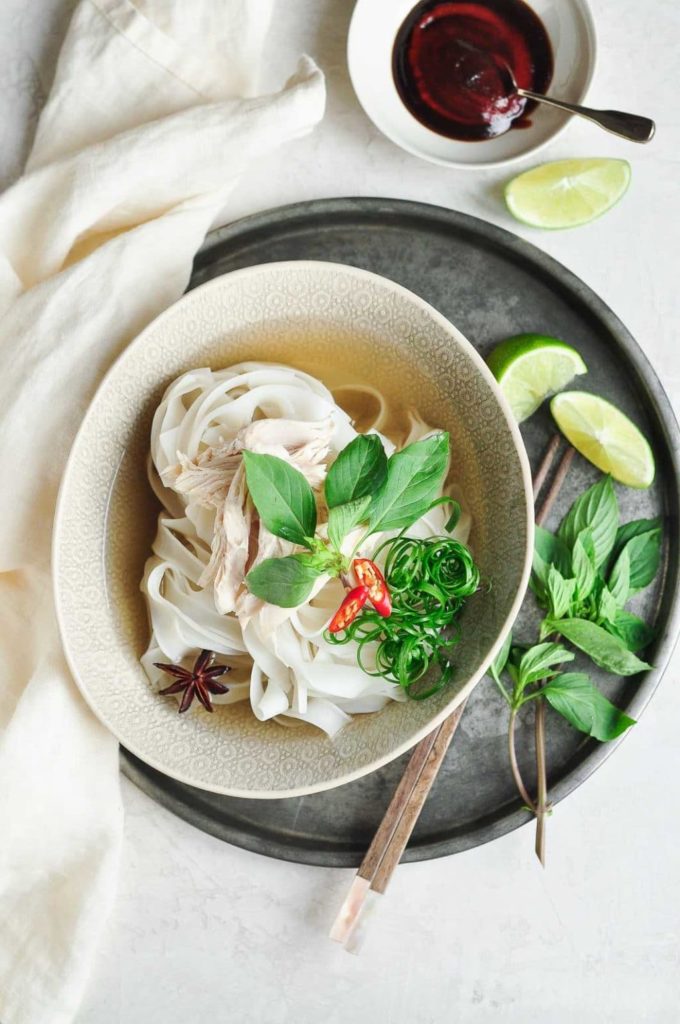
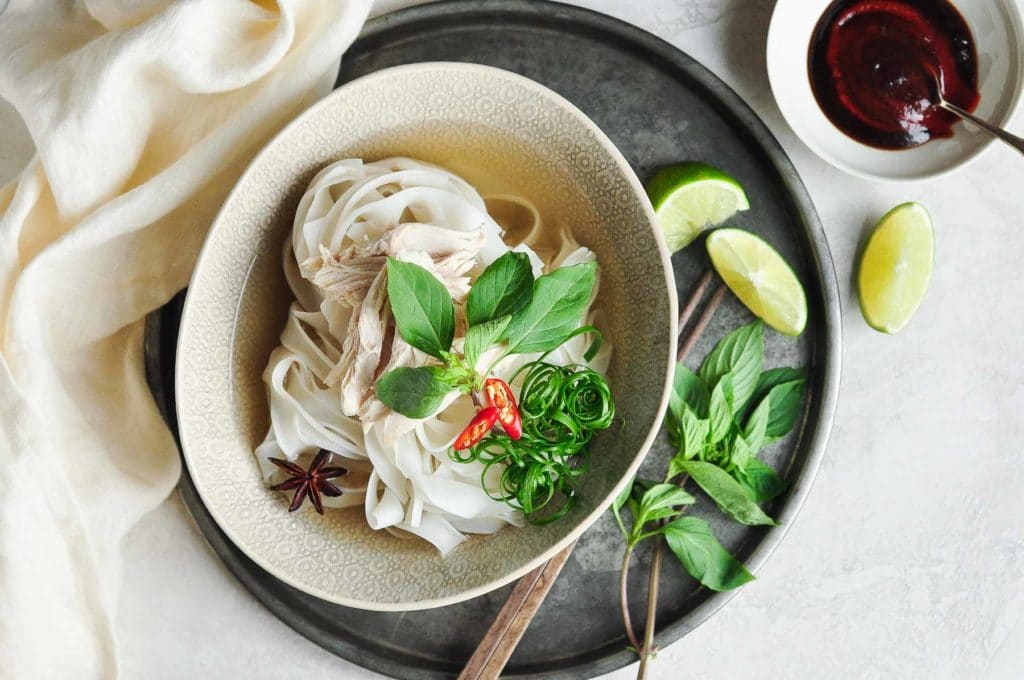
- Divide the noodles between 4 large bowls with a handful of shredded chicken on top of each.
- Ladle the hot broth into each bowl and serve with the fresh herbs and accompaniments.
Instructions for Instant Pot
- Follow the instructions as for the stove top until Step 5.
- Press the Manual button and cook under high pressure for 15 minutes.
- Turn off the Instant Pot and let the pressure decrease naturally for 10 to 15 minutes. If the pressure hasn’t been completely released after this time, turn the valve at the top to release any remaining pressure.
- Skim off any excess fat.
- Follow Steps 8 to Step 14 as for the stove top.
Instructions for Pressure Cooker
- Follow the instructions as for the stove top until Step 5.
- Make sure that there is enough water to just cover the chicken, but that the liquid not does reach the 2/3 level mark, i.e. the pot should not be more than 2/3 full.
- Cook according to the manufacturer’s instructions, but it should take about 15 minutes at high pressure.
- After this time, carefully release the pressure before removing the lid.
- Skim off any excess fat.
- Follow Steps 8 to Step 14 as for the stove top.
Kitchen Notes
- PHO NOODLES
Pho is traditionally served with flat rice noodles. They come in various widths, and the size used depends on personal preference. Thin flat rice noodles are perhaps more common in restaurants, but I personally prefer the wider noodles (about 1 cm width) because they have a softer, silkier texture when cooked. - HOW TO COOK RICE NOODLES
The instructions will vary from brand to brand, but I generally soak my dried rice noodles first in a large bowl of cold water for about 30 minutes. Bring a large pot of water to the boil. Using a noodle strainer or large slotted spoon, cook one portion of noodles at a time in the boiling water. The timing will vary depending on the type of noodles that you have used, but anywhere between 30 to 60 seconds should be sufficient. The noodles should be soft but still have a bit of bite. Strain the noodles and place them in the serving bowl. The noodles will continue to cook once you pour over the soup broth. - HOW MUCH BROTH PER PERSON
For a generous serving, I like to give each person approximately 600 ml (about 2½ cups or 3 large ladles) of broth. This should give the cook an idea of how many noodles per serving, keeping in mind that the noodles will absorb some of the broth once added, and you want enough broth in the bowl for some slurping action. - MAKE IT WITH MORE VEGETABLES
For a non-traditional, yet a frequent variation of this recipe in my home, I like to add vegetables to the finished broth, such as:
* carrots, thinly sliced
* bok choy or pak choy, sliced if large
* broccoli, cut into small florets
* baby corn, sliced - FOOD STORAGE
All of the components of this dish should be kept separately in the fridge. - OVEN & STOVE TEMPERATURES
All recipes on this website have been tested on an induction stove and/or with a conventional oven (i.e. an oven without fan). All recipes on this website use temperatures for a conventional oven, unless otherwise mentioned. Convection ovens (i.e. fan-forced ovens) are typically 20°C/70°F hotter than conventional ovens, but please check your manufacturer’s handbook. - CONVERSIONS
To convert from cups to grams, and vice-versa, please see this handy Conversion Chart for Basic Ingredients.
Did you make this recipe?
Please leave a comment below and share your photos by tagging @eatlittlebird on social media and using #eatlittlebirdUpdate
This recipe was first published on 13 May 2014. It has been updated with new photos and more comprehensive recipe instructions.


Simply irresistible! I like the way you photographed this dish and the manner the recipe was scribbled.They say hot noodles are best for the cold weather. Well, hot or cold, I’m gonna make my bowl out of this great recipe. Thank you!
Julie
Gourmet Getaways
Thank you, Julie! I often crave a bowl of noodle soup when the weather is cold, but I eat noodle soups just as often in hot weather too! I always find it so nourishing. Hope you will enjoy this recipe.
I do love Vietnamese food, although I don’t cook it so often. It is a little difficult to find all the ingredients here in rural France. When I lived in San Francisco, my favourite place was a little Vietnamese cafe not far from our home and they made great pho. The best ‘pick-me-up’ food, I know. As always, a terrific and inspiring post. Thank you!
Ooh I agree – pho is such great “pick-me-up” food! But then, I have a soft spot for any type of chicken noodle soup. It used to also be a bit difficult to find Asian ingredients in Zurich, but I think the Swiss have become more adventurous or there is now more demand, so I can now easily find most items. However, where my family live in Brittany and Normandy, it’s virtually impossible to find coriander, chillies, fish sauce, soy sauce … anything Asian!
This really looks wonderful Thanh. And so light and fresh. I’ve just put the ingredients on our shopping list – it looks just the ticket to help us get back on course with healthy eating having ever so slightly derailed in the past couple of weeks. Beautiful post 🙂
Thanks Jo! This dish is 100% healthy 🙂 But maybe not if you eat as much as I do in one serve … 😉
Even if it’s not my favorite type of food, I really like this dish!!!! So great flavors, and I want to try rice noodles!!
I’ve never tried them, my mother has told me that they’re delicious. But I thinks her recipes with them are not as adventurous as yours 😛
Have a nice week, Thanh!!! 😀
I need to somehow convert you to noodle soups … I think I need to cook for you one day! 😉
Oooooh chicken pho. I love chicken based soup and this seems so appealing. A no fuss dish that’s bang on flavour 🙂 These are the times I wish that you lived next door…..
xx
Almost next door … 😉 Hope you are well and that someone is making chicken soup for you!
Hi. Yes, the addition of lime leaf is new. It started appearing in Hanoi about 6 years ago and I’ve become quite addicted to it. I have a Pho Ga for lunch most days. The lime leaf in Vietnam is a little different to kaffir lime leaf, but a very similar perfume and taste, so kaffir can be used.
Loving the blog and the photos. Best Tracey
Hi Tracey,
So lovely of you to pop by and leave a message! That’s very interesting to hear that the use of lime leaves have become more popular in Vietnamese cooking, especially in the north. I suppose it makes sense, considering that the neighbouring countries use it quite frequently in their cooking. Here in Switzerland, lemongrass can sometimes be tricky to find, so I sometimes substitute with kaffir lime leaves from a little plant which I have been nurturing at home for a few years. Of course, it’s not the same, but I love the fragrance and citrus flavour from the kaffir lime leaves and can see how it would work well with pho. I’m looking forward to sharing more recipes from your lovely book 🙂
Pho is my all time favourite and I never get bored of eating it!
I’m so happy to see you pop by my blog! I never get bored of eating Pho either … I really wish I could have a bowl for dinner tonight! P.S. I love your cookbook 🙂 I have the French version and love the recipes.
Hi! I love your blog. I just discovered it today and have been pouring over your posts and photos. Everything is so beautiful. I do have one question, though. Is there a specific type of chicken you use in this recipe. I remembered that my mom would use a ga di bo or “walking” chicken to make Pho Ga. I wasn’t sure if you have any thoughts on that?
Hi Danielle,
Thanks for popping by my blog 🙂 I know what you mean … my mum uses a similar chicken when making Vietnamese chicken soups, and especially chicken congee. I think she calls the chicken something else, but it is essentially an older, free-range chicken which gives the broth a stronger flavour. It also has tougher meat than “normal chicken”. Here in Zurich, it’s possible to buy something similar called a “boiling chicken” which is an older chicken which comes with the neck and feet attached. While I prefer the flavour of the broth when using these chickens, I’m not a fan of their tough meat. So I would usually only use such chickens when making a plain chicken broth and when I don’t need to use the meat, although I do feel it is a waste to throw away the cooked meat.
As a compromise, I often use a good-quality organic chicken. I think they give a good flavour to the broth and the meat is firm but still tender. On the other hand, non-organic supermarket chicken will impart a much weaker flavour to the broth, and their meat is often very soft.
Whenever my mum couldn’t go to an Asian butcher for her preferred chicken, she then often had to resort to the supermarket variety (when I was growing up, supermarkets didn’t sell organic chicken), and would then always complain afterwards that her soup didn’t taste nice because the chicken was inferior. As a child, I couldn’t really tell the difference! But now the difference is much more noticeable to me. Sometimes you can’t avoid using non-organic supermarket chicken, but I always try to buy organic when I can.
So that’s my two-cents’ worth 😉
Hi,
I don’t know if you are still reading comments on this post, but I just want to add some sort of insight about the addition of lime leaves to pho ga. Tracey Lister said it’s a new trend that took place recently, but it’s not.
Lime leaves and chicken is the classic combo. You know those chickens sold in whole along with the head and feet? In special occasions, Hanoians cook them and set them on a plate in front of the altar. When it is done, the chicken will be chopped in pieces, arranged on a plate, sprinkled with thinly sliced lime leaves and dipped in a sauce made of salt, pepper and lime juice. It ‘s one very much traditional but boring dish that is always there during our Tet’s meal, which is why it’s quickly losing popularity and would now only and only be present in Tet, just because. I’m a bit surprised that Tracey didn’t know this.
And when we end up with a bunch of boiled chickens and really aren’t too thrilled about eating it the other way, we shred the chicken meat, throw the bones, the feet, the heads back into the broth pot and simmer it, fetch some banh pho and cook it up for the entire family, garnish the bowl with a generous pinch of lime leaves. Our family even has a lime plant sitting on the balcony just for this dish. So I can assure you it’s not a new invention. When you eat pho ga out, if there’s no lime leaves on top, it would be because the vendors are being cheap, not that it’s unheard of.
Just my two cent.
Hi Sofie,
Thank you so much for your comment and insights. It’s always very interesting to hear how dishes have evolved and why some ingredients are sometimes included or left out entirely. The Vietnamese are very resourceful people, so it doesn’t surprise me to read that food from one dish might be transformed into a different dish.
My family is predominantly from the south but I have some relatives from the north, and I think I know the dish you are talking about, although I can’t remember if I have eaten it with lime leaves. That said, I have never eaten this dish in Vietnam and that might explain some of the geographical changes.
I must admit that I rarely ever order Pho Ga when I go to a Vietnamese restaurant. When I was younger and went to Vietnamese restaurants with my mum, we sometimes ordered Pho Ga but were often disappointed because it was usually a Pho Bo broth with shredded chicken – you could taste that it wasn’t a chicken broth! My mum used to get really mad about this and complained that the restaurants were cheating! Since then, I only ever ate Pho Ga at home when she cooked it, or now when I try to make it myself.
Coincidentally, my husband and I were just discussing today about when we can visit Vietnam. I would love to try Pho Ga and so many other dishes in Vietnam! I have travelled there a few times but I haven’t been there in 14 years!
Thanks again for your comment and I hope to see you again on this blog 🙂 You sound like you know a lot about Vietnamese cuisine and I would love to hear more!
Hi,
I’m glad to be able to inform you about some regional culinary differences. Well, I can relate. If you compare common dishes in Tet meal among the three regions of Vietnam, you coming from the South would be surprised about what people eat, say, up North. I like that it’s different, that the diversity is thriving. It would be boring if everything is the same, which defeats part of the reasons why we travel: the food.
I agree with the part about eating Vietnamese food anywhere but in Vietnam. They have extensive menus, but it seems everything falls into ‘could be better’, compared to the one dish stands in Vietnam, where they perfect the art of crafting food. The one Vietnamese imbiss I used to work for did exactly what you said: they use the same broth for pho ga and pho bo! I resort to cooking it at home, but with other kind of noodles, like bun or mien, since I kinda have a high expectation for pho, the noodle itself, and am not really fond of the dry version.
Do plan a comeback, since 14 years is a long time, you will be surprised at how fast Vietnam changed. And if you ever decide to come up North to Hanoi and are clueless about what to do where to eat, I do recommend Hanoi Kids. They have raging reviews on tripadvisor, not because the service is great, it’s also free.
I will try to stop by this site often. I love the layout of the site and the photos are more than gorgeous.
What an absolutely stunning dish! I love that this sounds so simple to make and perfect for a chilly night as an alternative to the classic chicken noodle soup. I’ll be trying this soon!
Thank you! All chicken noodle soup is comforting, but I am somewhat partial to the Vietnamese version 😉 Hope you will enjoy this recipe!
Hi there, I am looking forward to trying this version. I am wondering, do you leave the lid on when simmering the chicken? Thanks, Eloise
Hi Eloise,
No, I don’t leave the lid on when simmering the chicken. I like to make sure that the pot is on a gentle simmer and I frequently check on the pot to skim off the impurities. Once the chicken has been removed from the pot and you have added the seasonings, taste for seasoning to see if you need to add a bit more of anything. At this point, I often find that the stock is a bit strong, so I add more boiling water to dilute it a bit. I prefer to make the chicken broth this way because if you add too much water at the beginning, it’s hard to fix an already diluted broth. Hope this helps!
Thank you 🙂
Oh, yummy. Yummy. Yummy. I stumbled on your website to make Char Sui tomorrow, but I have the ingredients to make the Chicken Pho. I love Pho, but Pho is a bit arduous so I am thrilled to try your Chicken recipe. Would you please clarify what you mean by leaving the shallot unpeeled? Do you mean leaving the skin on or peeling off the skin bUT leaving the shallot intact? Thank you. I also cannot wait to try the hot and sour soup. Actually, I cannot wait to try most of your recipes.
Hi Emerson,
Thank you for your lovely words! I am actually in the process of updating my recipe for Chicken Pho (just changing the format), so I will make the instructions a bit clearer in relation to the shallots. The shallots should be unpeeled and left whole. So you grill the shallots with the skin on until they are slightly charred. By leaving the skin on, it will give the broth a bit of colour. For the ginger, I also leave it unpeeled but I slice it in half so that you get a more intense flavour from the ginger. I hope this makes sense, but let me know if you have any other questions 🙂 And I hope you will enjoy my recipes! Thanks for popping by.
This is one of my favourite dishes when we go to a Vietnamese restaurant. I’m so glad to be able to make it at home now. Easy recipe to follow. Thanks!
very very delicious! Perfectly! Thanks for the recipe! I want to try it!
This sounds amazing and your photos are gorgeous! I love that you make it in the instant pot ? I make a beef pho in the IP and it’s so convenient! Thus sounds delicious!
You really can make just about everything in an Instant Pot! Such an easy way to make it!
I love Pho! It’s one of my favorite soups in the world – I still remember the first time I tried it in Vietnam almost 10 years ago and immediately fell in love. I have to try your recipe!
I would buy an instant pot just to make this pho! Your photos are lovely and this soup sounds like the best version of “chicken noodle” in the world!
Pho is something we make every so often at home and hubby and I love it! He is usually the one that prepares it and I look foward to it every time! Yours looks delicious! Extra sriracha on mine 😉
Oh, this chicken pho looks so yummy and delicious too!!! Thank you for the share.
Omg this chicken pho was amazing! I made it in the Instant Pot and couldn’t believe how quick and delicious it was. My kids want me to make this every week now!
Great recipe! Family loved it.
Very delicious pho! I used the Instant Pot to make the broth and it tasted perfect. I can’t believe that I made chicken pho on a weeknight but it was that quick! I think I prefer to have a clear broth for my pho but for a quick weeknight dinner, this was fantastic.
Delicious! So easy and quick with the Instant Pot. This is going to be a regular weeknight dish for us!
Lovely and nourishing broth. I found fresh rice noodles at the Asian grocery store and they worked perfectly in this dish. Definitely making this again soon!
Hi, I also use squid brand fish sauce, as it is one of the only ones that is gluten free. Not only that, but cheaper than lots of other brands! I have been cooking Vietnamese food for over 35 years, but I have yet to make pho, so thought I’d try this. It looks like I might not mess it up, lol. For the last few years I have been making what I call my “phake pho.” It is ramen with, usually shrimp, but sometimes chicken or beef, green onions, bean sprouts or snow peas, lime, cilantro and usually mint or some other green as well, topped with sesame seeds. It is actually a pretty good substitute, but I’m ready to move on to the real thing!
I have had MANY people tell me that my spring rolls are the best they’ve ever had, btw. I am not a shabby cook!
Fantastic recipe! I’ve made this chicken pho several times now, on the stove and with the Instant Pot. Both methods work great. Obviously the Instant Pot is quicker but it tastes just as delicious. I make extra to freeze the broth in portions. Makes for a satisfying and delicious mid-week dinner.
I’ve made this chicken pho several times now and each time has been amazing. Today I tried the recipe using the Instant Pot and couldn’t believe how fast and delicious it was. Awesome recipe. Thanks!
Love this recipe! I make it almost every week now, and the Instant Pot version is just as delicious.
So delicious and so easy to make! My family loved this chicken pho. I will try your Instant Pot instructions next time so I can make this during the week.
This chicken pho was so delicious. I didn’t think it would be so easy to make! Thank you for the great recipe.
This is such a delicious and nourishing noodle soup. The whole family loved it. I can see this recipe becoming a weekly dish in our home 🙂
So easy and delicious!
We love this recipe! It always tastes so delicious and nourishing. I’ve tried both methods- stove and Instant Pot. Both taste the same but the Instant Pot does make the broth go cloudy.The upside is that you can make it on a weeknight in 30 mins!
So yummy and delicious. Tastes like my mother’s pho 🙂
This pho was so yummy! I’ve never tried to cook Vietnamese food before although we go quite often to a nice Vietnamese restaurant near us. But I’m just so proud that I made this soup at home and it tasted so delicious. I will definitely make it again soon!
Such a lovely and restorative noodle soup. I am looking forward to the leftovers tomorrow!
I’ve made this pho several times and it tastes excellent each time. So good!
I love this recipe. It’s so comforting and nourishing, and the taste is very authentically Vietnamese.
This recipe was so easy and delicious. The flavors are exactly what they should be for a traditional chicken pho. I will try your method using the Instant Pot next time. My family could eat this soup every night!
Delicious! Thank you for the great recipe.
This soup was perfect! I will be making this regularly during the week now.
Very nice flavors and so easy to make. My family really enjoyed this chicken pho. Thanks for the recipe.
Hello! I made this soup yesterday and it was delicious! The broth was so flavorful and nourishing. Great recipe!
This was very nice. The fresh herbs make a big difference to this dish and I couldn’t find Thai or Vietnamese basil. But still tasted very good. I will make this again definitely.
Amazing article! Seems so delicious! Thanks for sharing with us 🙂
Absolutely wonderful recipe!