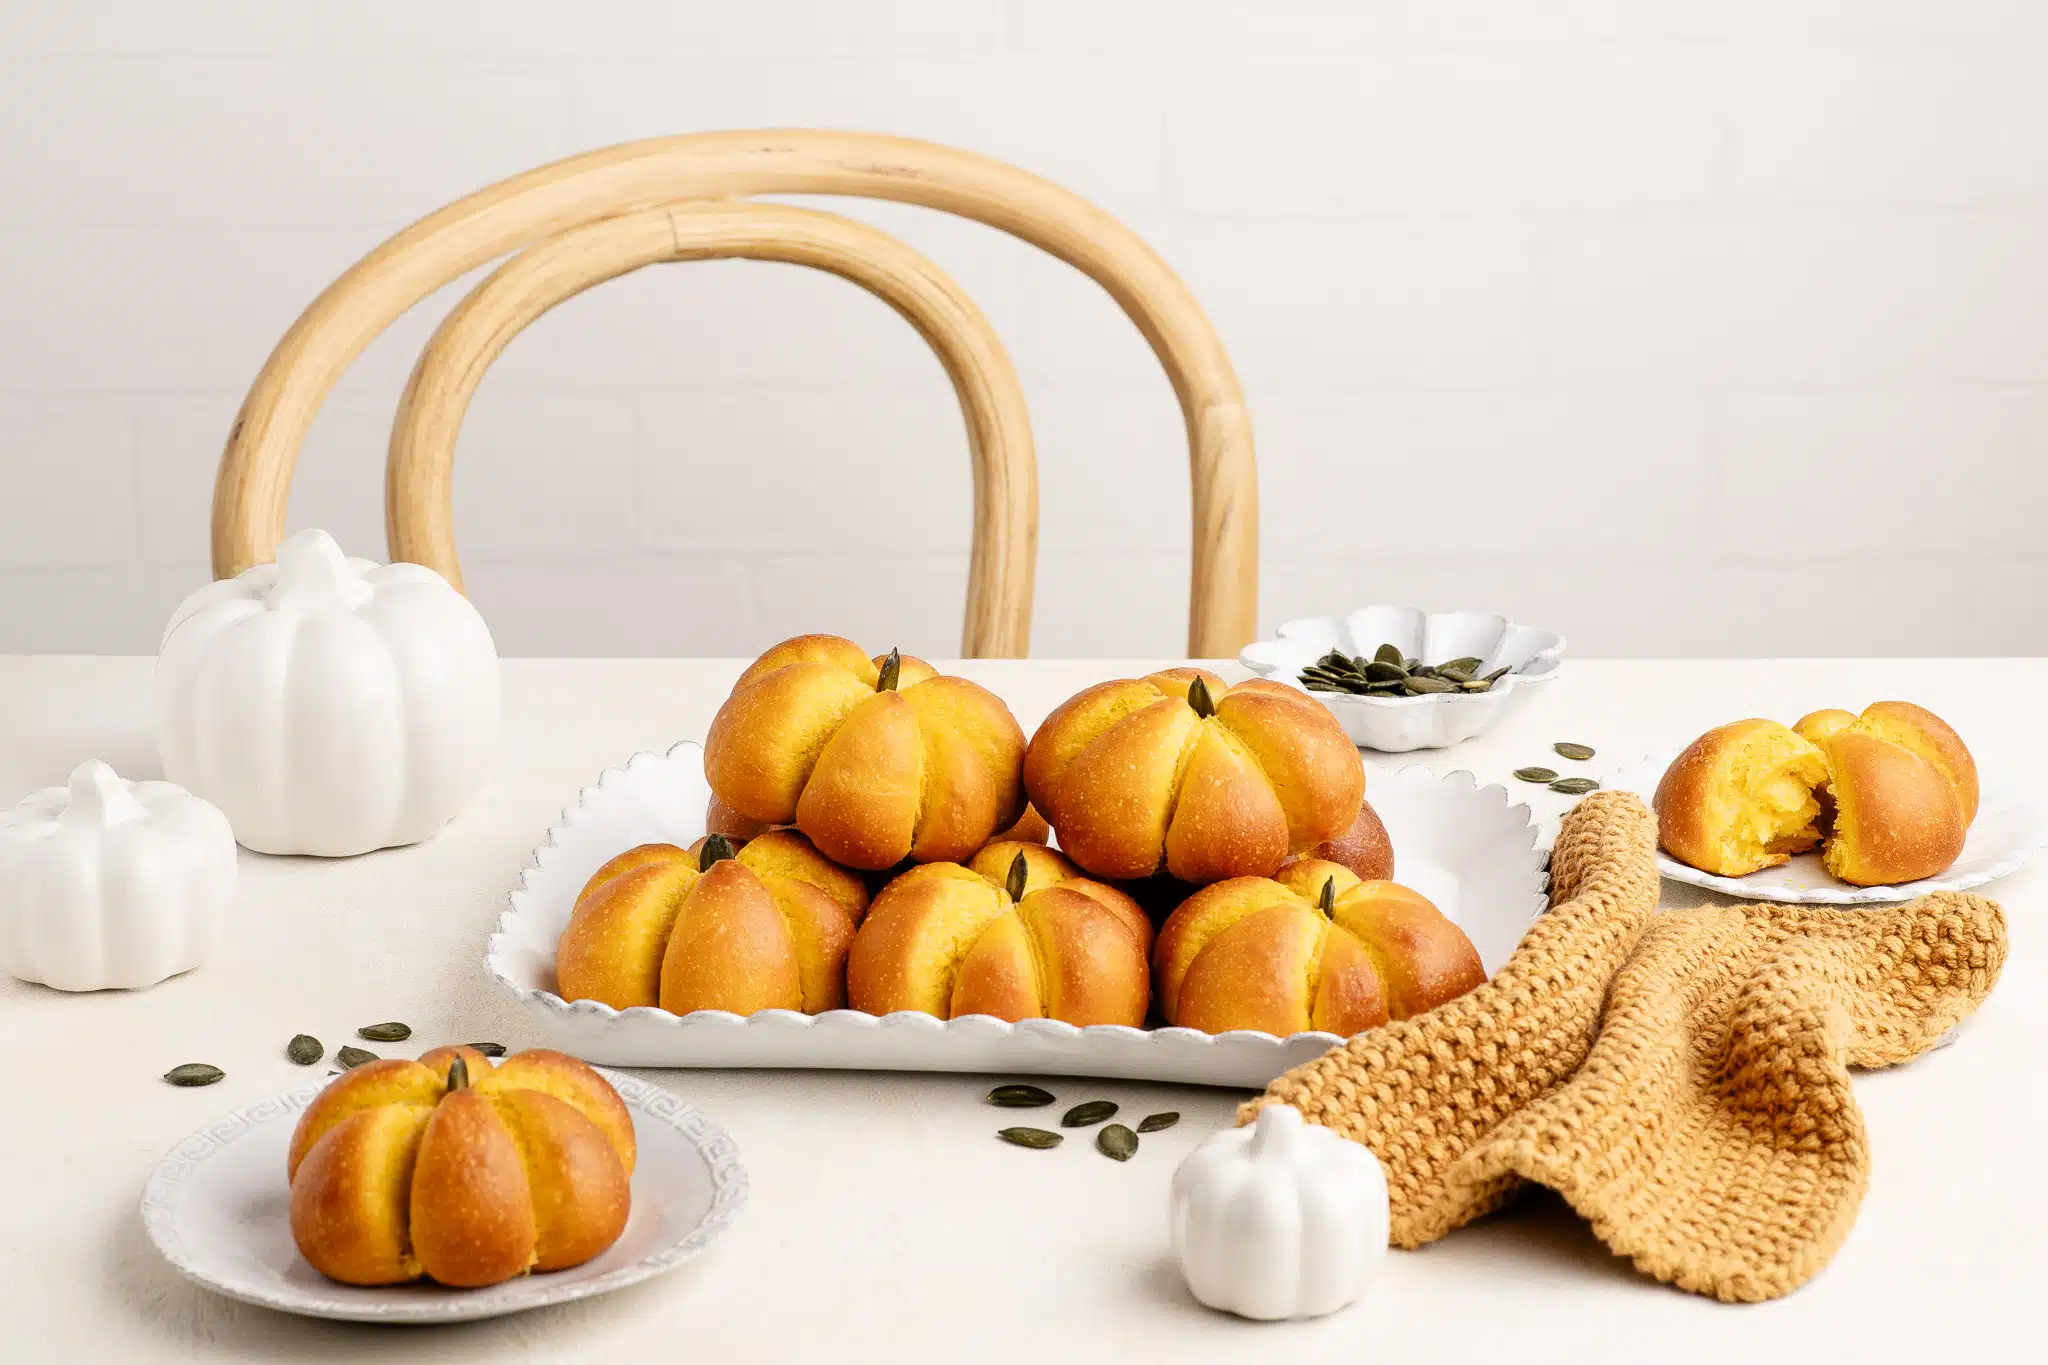
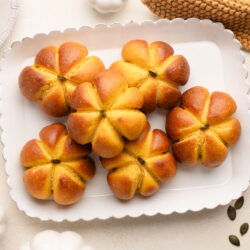
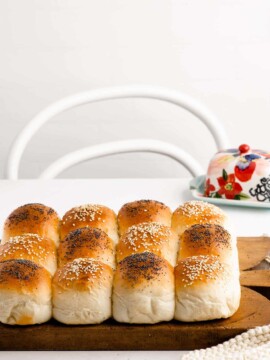
Pumpkin Bread Rolls
I’m very much into seasonal cooking and baking, both from a culinary and decorative perspective. In fact, as soon as autumn rolls around, my ceramic pumpkins are already dotted around the home, much to my husband’s dismay ???? And my Staub pumpkin cocotte is also on permanent display on my stove, ready for all sorts of delicious meals, whether they feature pumpkins or not.
As much as I love eating pumpkins, sometimes I go a bit overboard and buy more than we can eat, so I end up having to store chopped pumpkin pieces in the freezer (which I can easily add to soups and stews later), or I steam the pumpkin to use in various recipes at a later time. And one such recipe are these soft and pillowy Pumpkin Bread Rolls.
Pumpkin Milk Buns
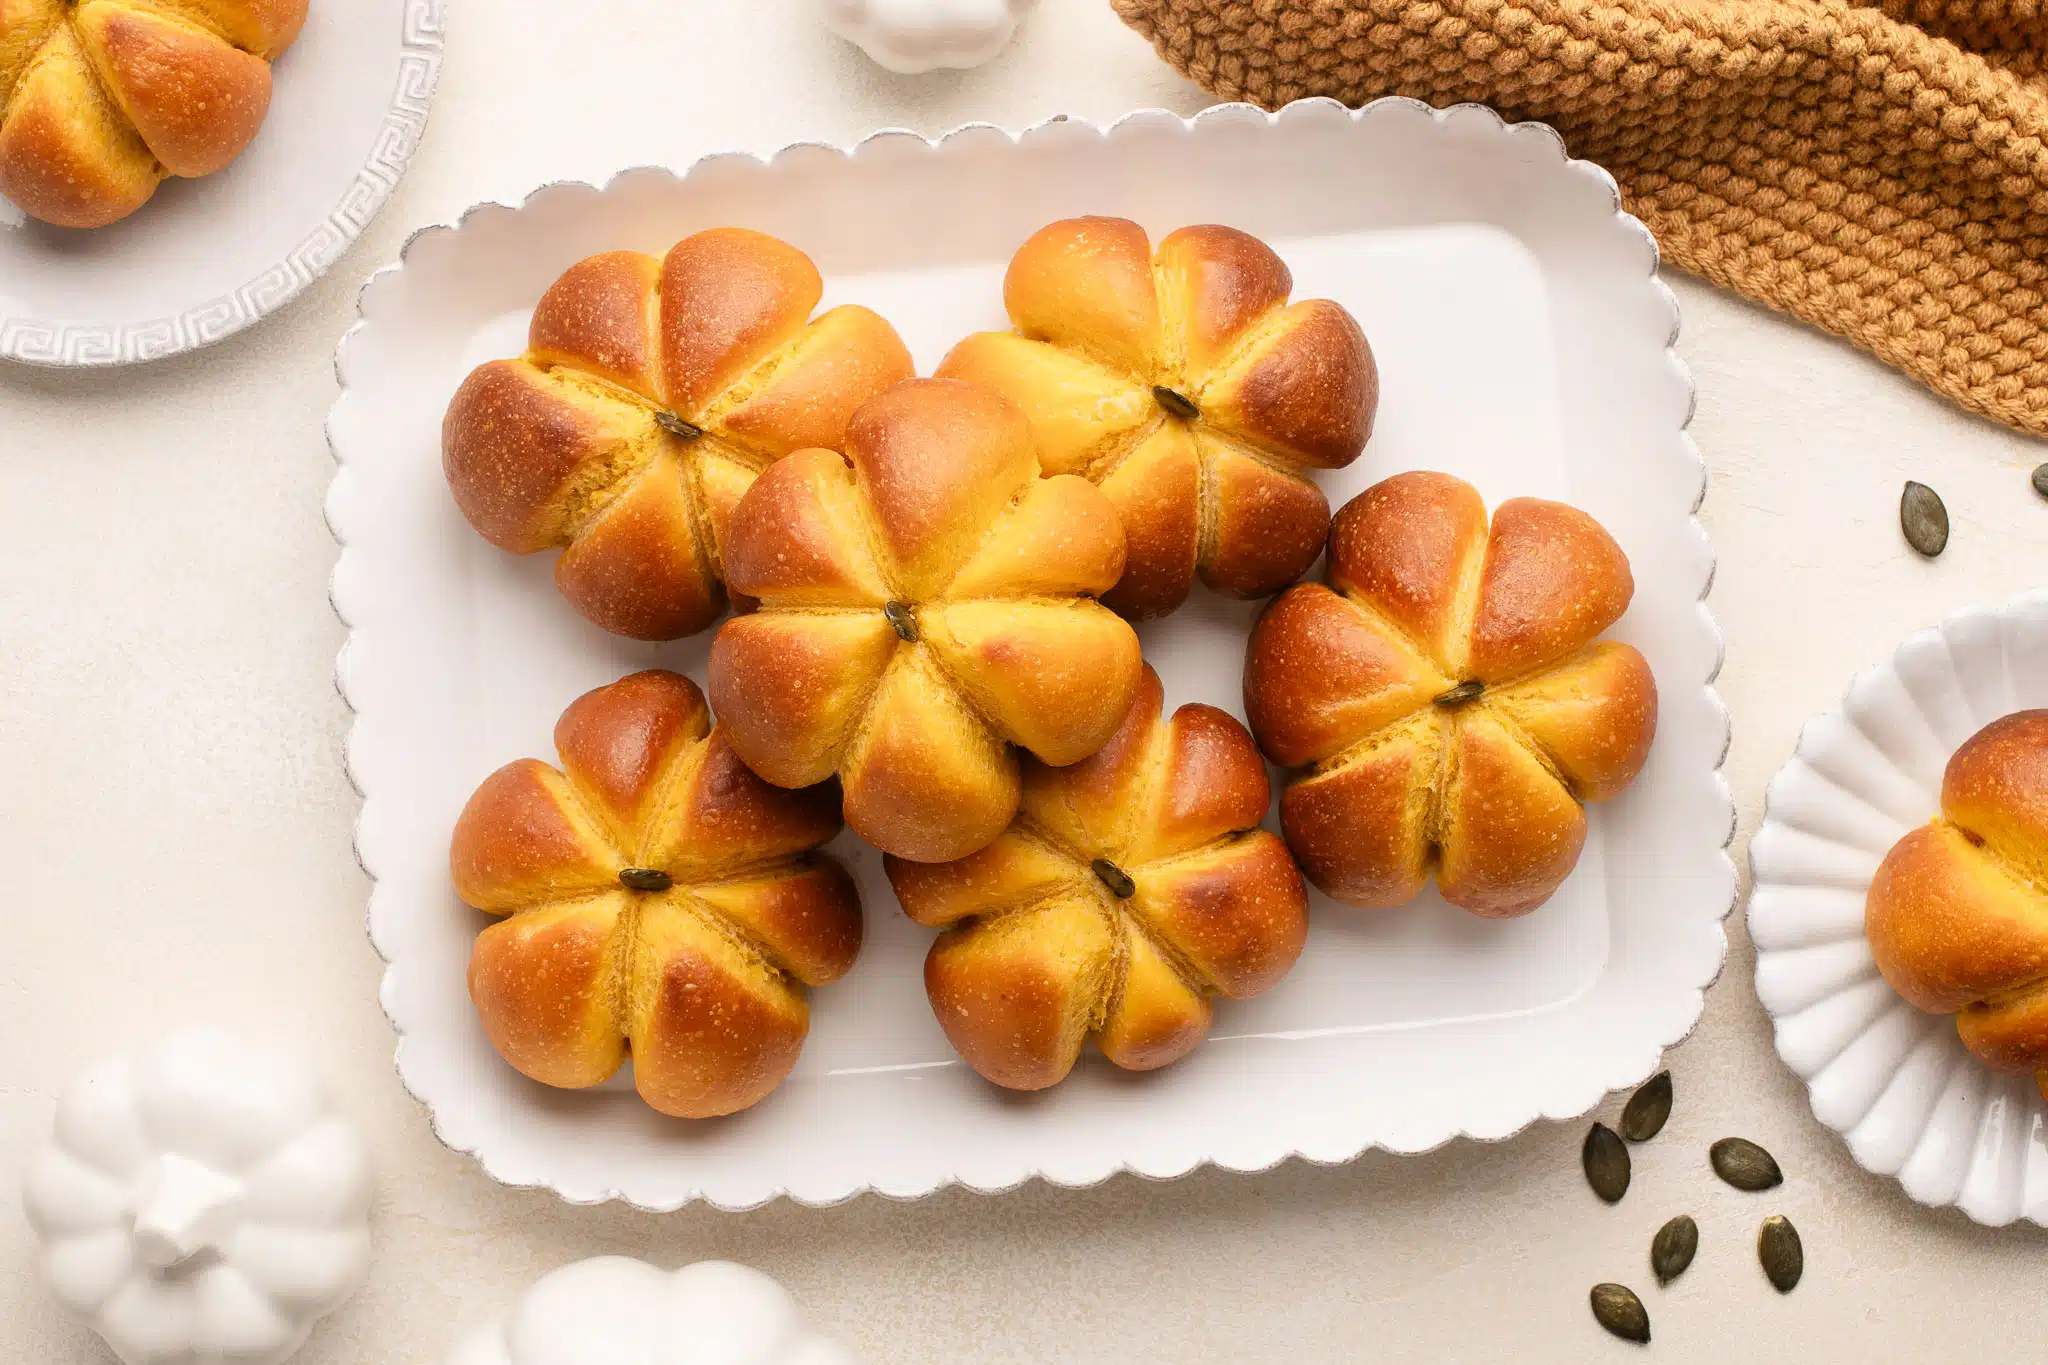
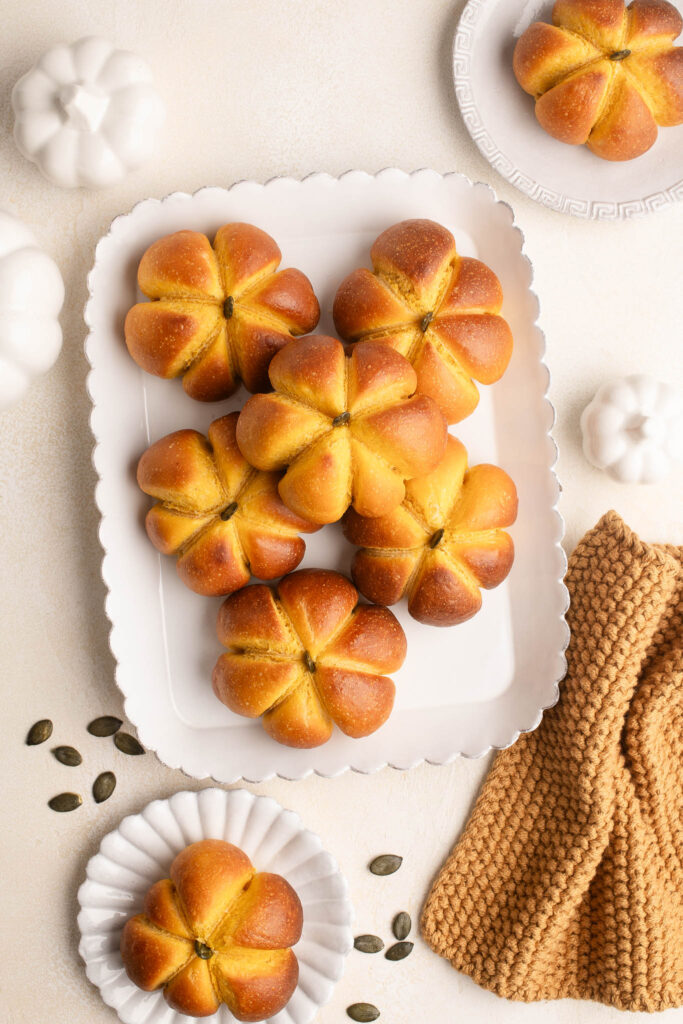
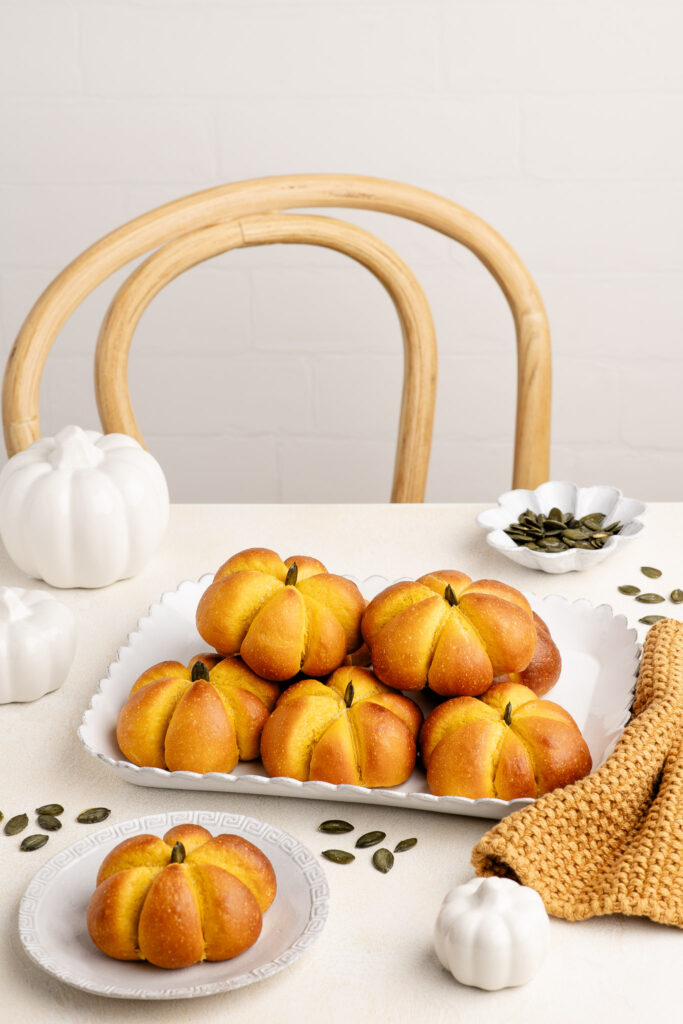
These Pumpkin Bread Rolls are made using my Japanese Milk Bun recipe, so they are soft and fluffy and the perfect accompaniment where you would use dinner rolls. Not only are the bread rolls shaped as pumpkins, but some pumpkin purée is added to the dough to give them a wonderful orange hue.
The buns themselves do not taste overly of pumpkin, but they certainly bring an autumnal charm to the table.

Pumpkin Bread Rolls Recipe
This Pumpkin Bread Roll recipe uses Japanese milk bread as a base, which makes the bread rolls very soft and tender. Most of the liquid in the recipe is replaced with homemade steamed pumpkin, but you can also use canned pumpkin purée.
You can make the Pumpkin Bread Rolls following my recipe for Japanese Milk Buns to make dinner roll-style buns, or you can transform them into these pretty pumpkin-shaped buns. I have kept these buns plain, i.e. they are not filled with anything, but these buns are inspired by Japanese Kabocha Buns which typically have a sweet filling.
Japanese Kabocha Buns
Japanese Kabocha Buns are pumpkin-shaped buns filled with a pumpkin paste or a Red Bean Paste. The buns are shaped into pretty pumpkin shapes simply using kitchen string. As the buns start to puff up, the strings form the lines to create the pumpkin shape.
To make these buns, I loosely followed the instructions from Shihoko at Chopstick Chronicles. She also provides an authentic recipe for Japanese Kabocha Buns, if you want to try that instead. Her website is actually a wealth of information for anyone interested in Japanese cuisine – I highly recommend you visit!
The recipe below uses my recipe for Japanese Milk Bread but shaped into unfilled pumpkin-shaped buns.
How to Make Pumpkin Bread Rolls
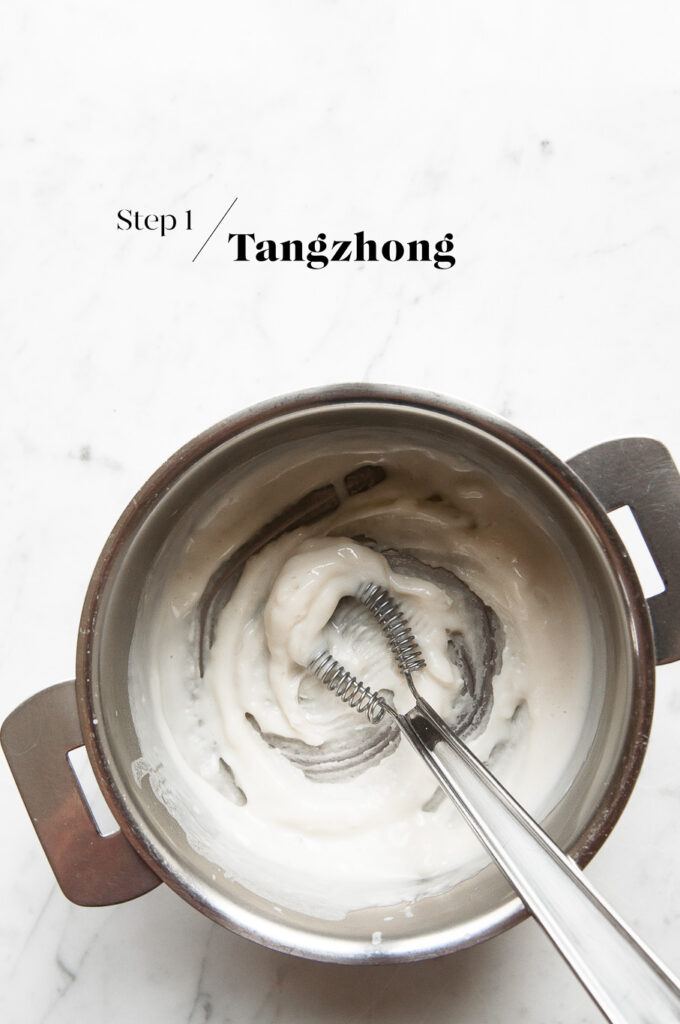
Step 1
Make the Tangzhong by whisking together the ingredients in a small saucepan. Place the saucepan over low heat, and continue whisking until the mixture forms a thick paste. You want a thick enough consistency so that, as you whisk the mixture, the whisk leaves lines which do not move.
Scrape the Tangzhong into a small bowl and set it aside to cool. Once cooled, cover the bowl with clingfilm and place it in the fridge overnight.
If you are in a hurry, you can use the Tangzhong as soon as it has cooled to room temperature. But leaving the Tangzhong overnight allows it to develop more flavour.
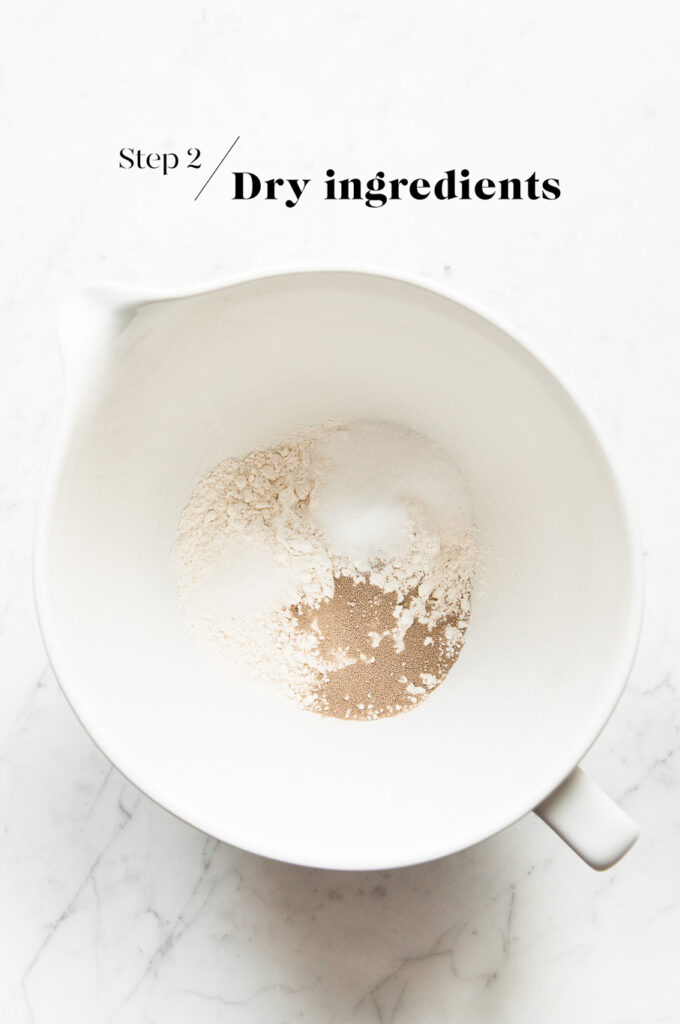
Step 2
Measure the flour, yeast, salt and sugar into the bowl of an electric stand mixer. Lightly mix the ingredients together.
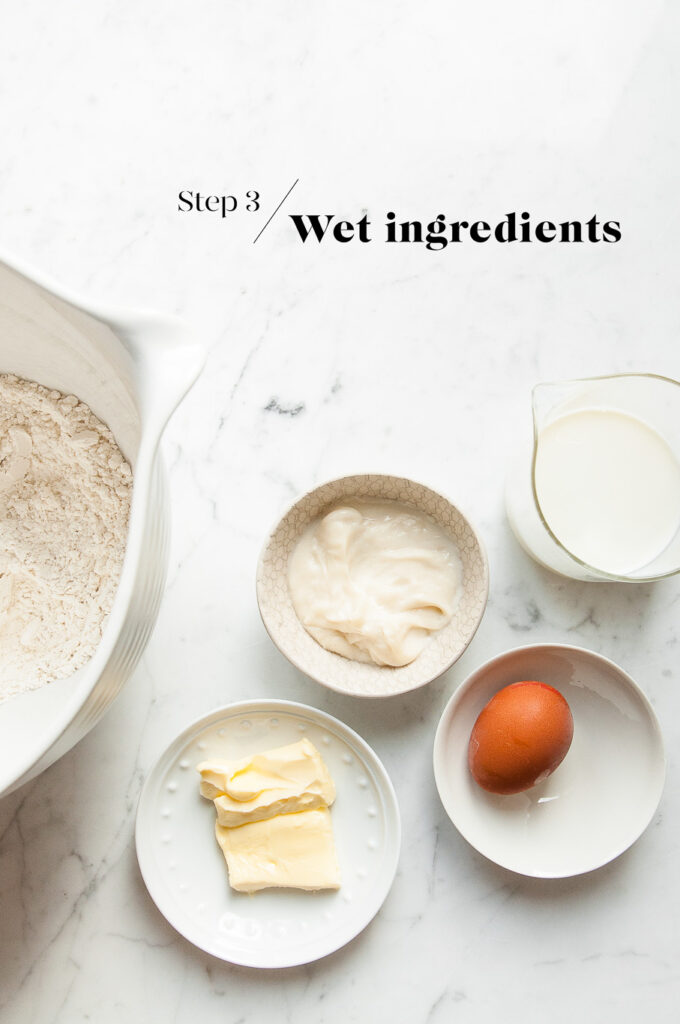
Step 3
Add the egg, Tangzhong and pumpkin purée. Use the dough hook to start to incorporate everything together. It may take some time for the dry ingredients to fully incorporate the wet ingredients and form a dough. If the mixture looks too dry, slowly add 1-2 tablespoons of milk until everything comes together in a ball of dough. Then add the butter, one tablespoon at a time.
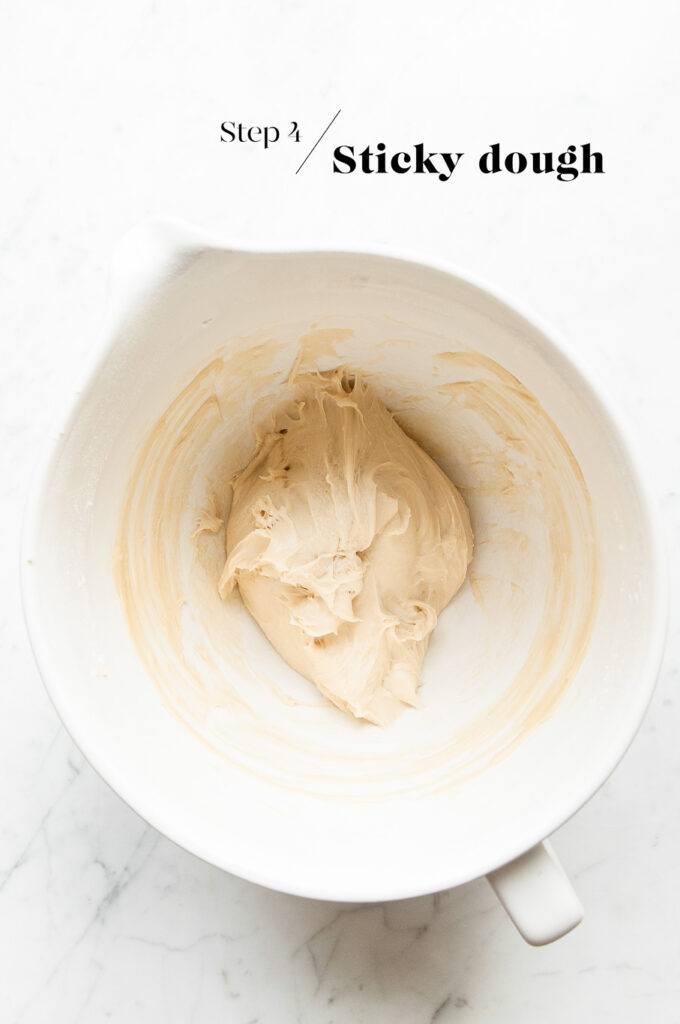
Step 4
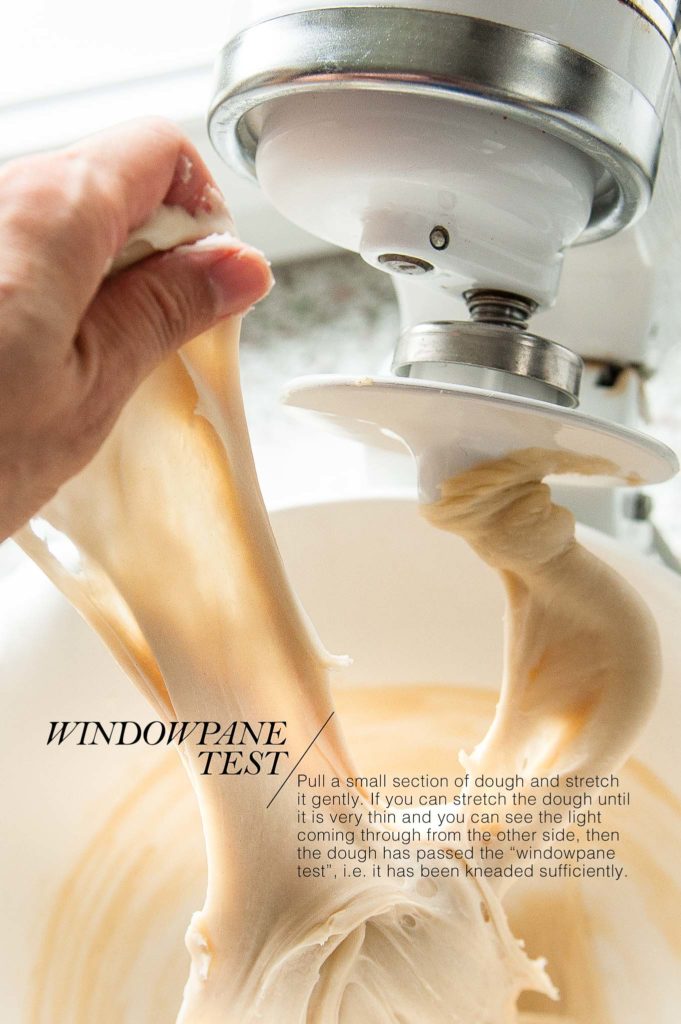
Knead the dough on medium speed for 10-15 minutes until you have a dough which passes the windowpane test.
To perform the “windowpane test”, pinch off a small piece of dough, roll it into a ball and use your hands to gently stretch the dough. If the dough can stretch to form a thin sheet and be almost translucent so that you can see the light through it, your dough has passed the “windowpane test”. This means that you have kneaded the dough sufficiently and that the dough is ready to be proofed.
At this stage, the dough will be somewhat sticky and tacky, mostly because of the butter and high liquid content. But the dough should be coming away from the sides of the bowl during the mixing. Once the dough has had its first proofing, it will be less sticky to the touch and easier to handle.
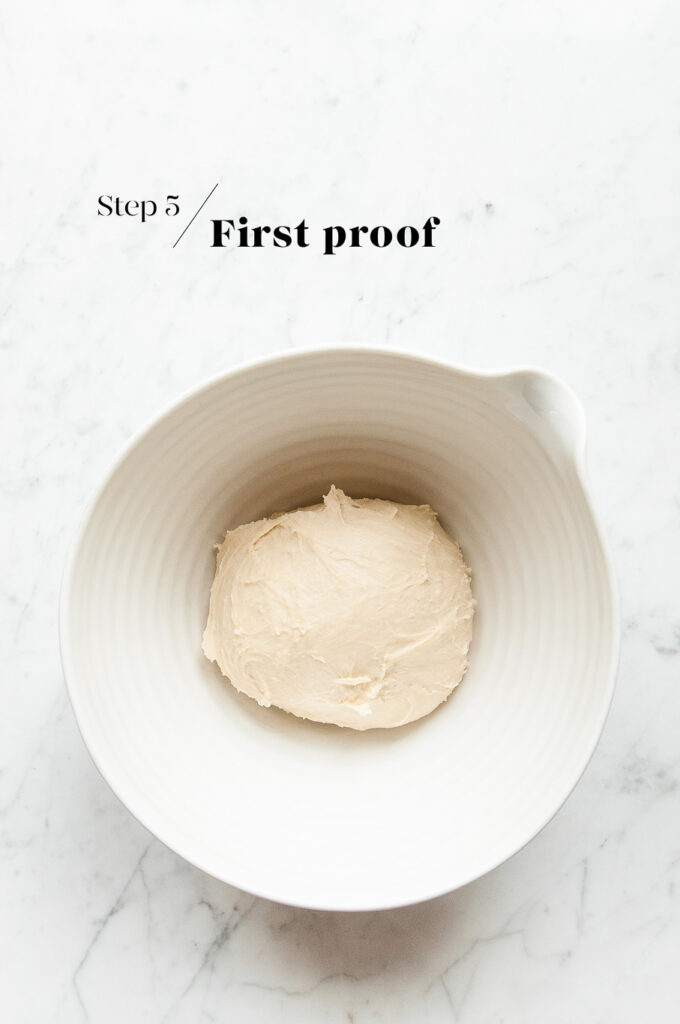
Step 5
Lightly oil a large mixing bowl. Roll the dough into a smooth-ish ball and place it inside the bowl.
Cover with a clean tea towel, and set it aside somewhere warm for about 1 hour, or until it has doubled in size.
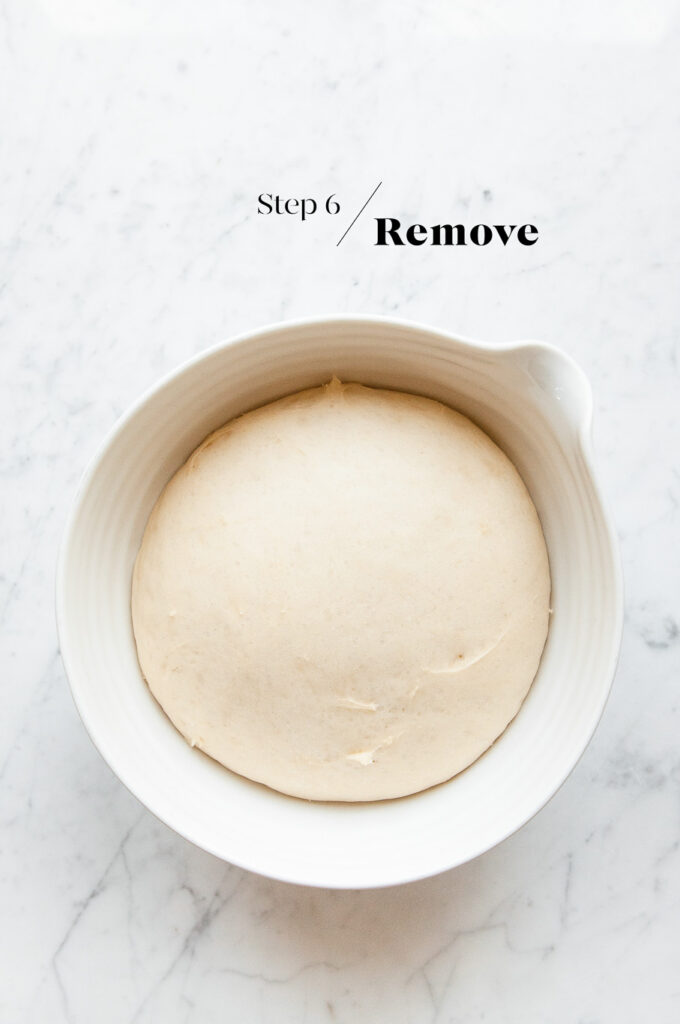
Step 6
Once the dough has doubled in size, gently remove the dough from the bowl. The dough will deflate as you handle it.
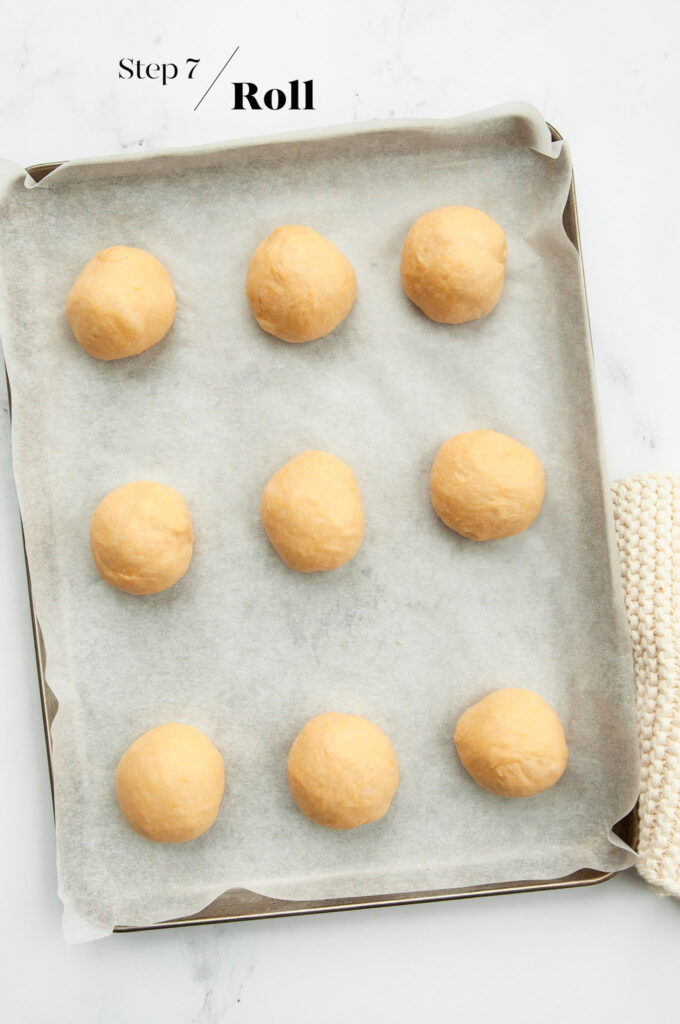
Step 7
Divide the dough into 9 equal portions (I recommend using a digital kitchen scale). Roll each portion into a smooth ball. Place the balls of dough into a square baking pan lined with baking paper.
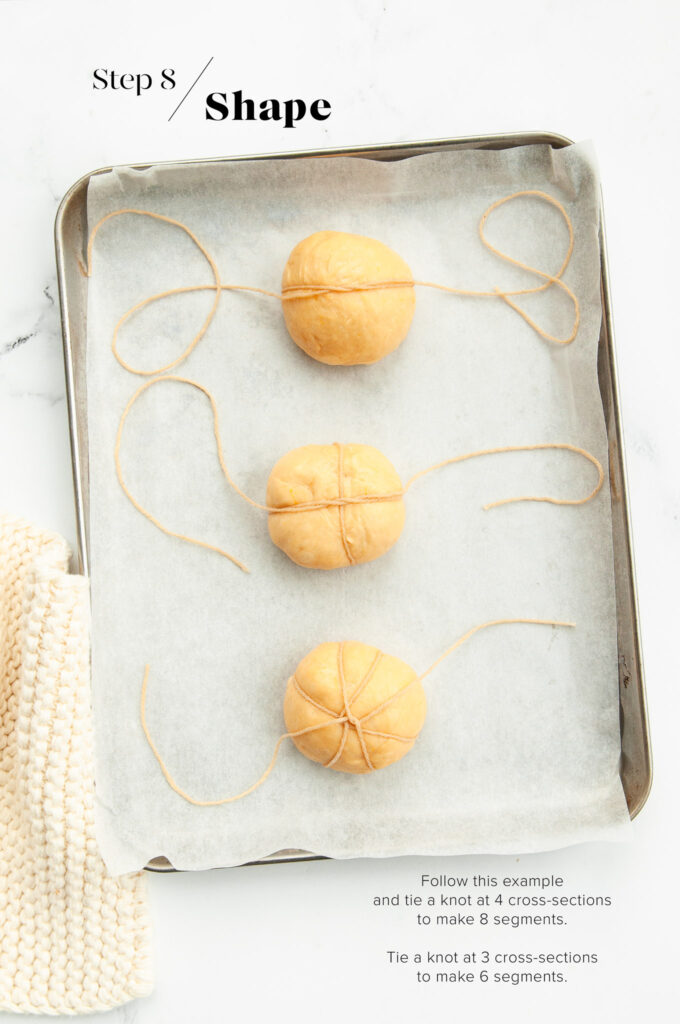
Step 8
Shape the buns to form little pumpkins.
Cut 9 pieces of kitchen string measuring 80 cm in length.
Fill a small bowl with some vegetable oil. Dip one piece of string into the oil, and then blot it between some sheets of kitchen paper.
Lay the string in front of you horizontally, and place a piece of dough in the middle (the top of the dough should be facing up). Bring the pieces of string together to loosely tie a knot in the centre of the dough.
Then angle the strings across the buns, flip them over, and loosely tie a knot on the other side.
To create buns with 8 segments, tie a knot at 4 cross-sections (this is easier for beginners).
To create buns with 6 segments, tie a knot at 3 cross-sections.
Repeat the above steps with the remaining pieces of dough.
Remember to only secure the string loosely to give the dough some space to expand. If the strings are too tight, the resulting buns will lose their shape.
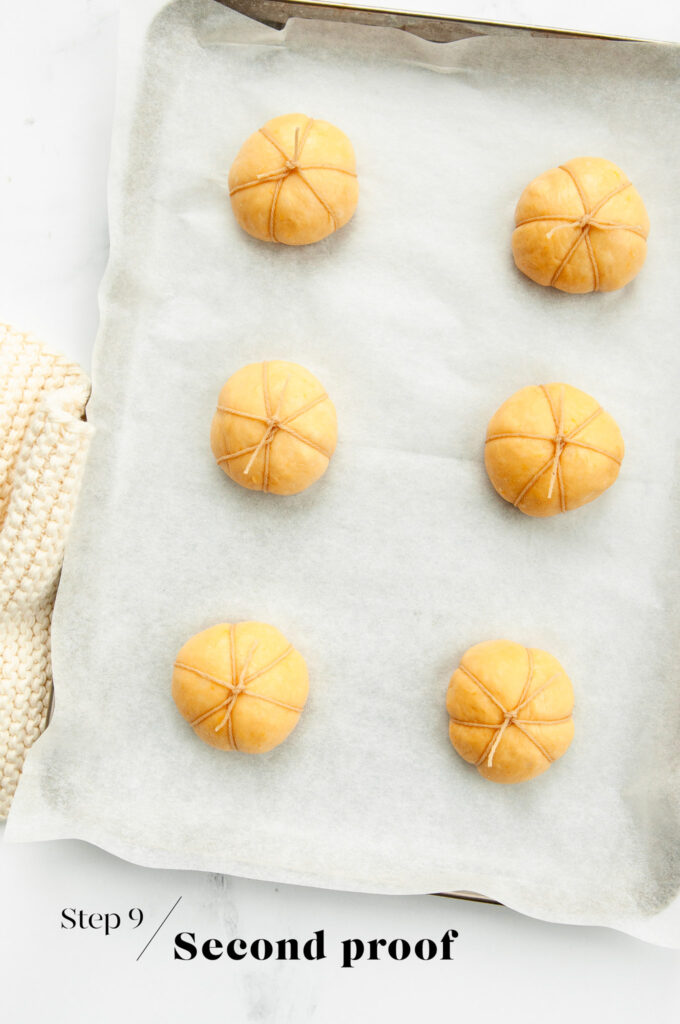
Step 9
Cover the pan with plastic wrap and leave it somewhere warm for about 30 minutes, or until the buns have puffed up slightly.
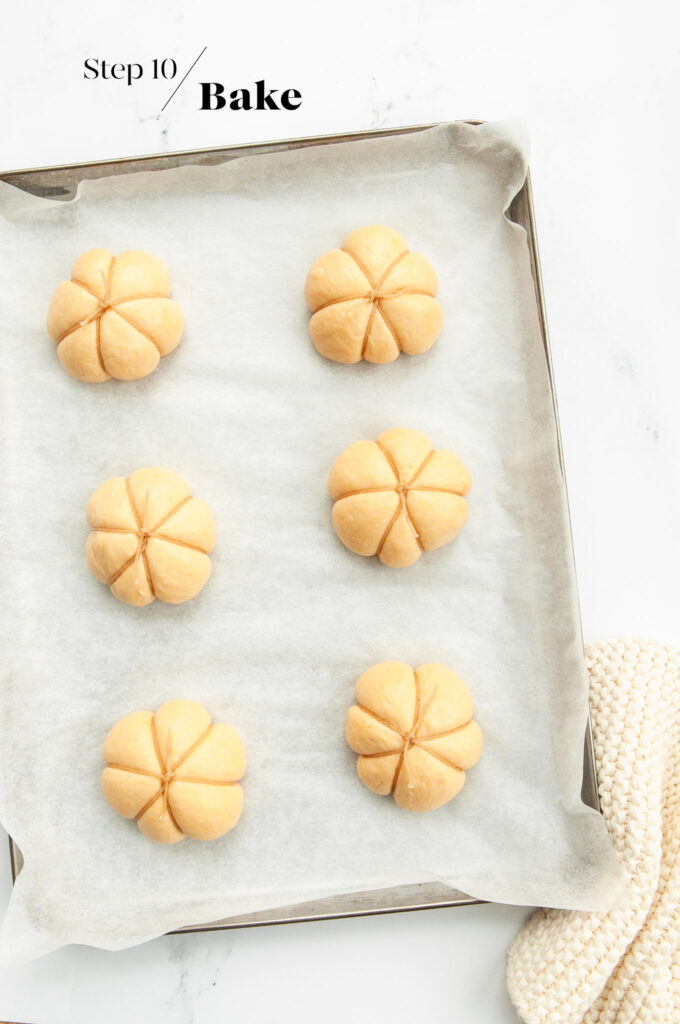
Step 10
Gently brush the buns with some milk, and bake for 20-25 minutes, or until the buns are lightly golden.
If the buns are browning too quickly (check at 10-15 minutes), loosely cover them with a sheet of foil for the rest of the baking time.
Tips for Making Bread Dough Ahead of Time
I love baking bread, but I don’t love getting up extra early to get started on the dough. So I typically make the dough the night before and allow it to rise slowly in the fridge overnight. The longer proofing time has the added benefit of allowing the dough to develop more flavour and a better texture. Come the morning, the dough will have at least doubled in size, and it will be ready for shaping as per the recipe.
To make the dough the night before:
- Make the dough as per the recipe.
- Place the dough into a large oiled bowl.
- Cover the bowl with plastic wrap or a reusable bowl cover.
- Place the bowl into the fridge.
- Let the dough rise overnight, or for at least 8-10 hours.
- The next morning, the dough should have at least doubled in size.
- Gently remove the dough from the bowl.
- The dough is ready for shaping and the second proof as per the recipe.
- As the dough will be cold from the fridge, the second proof may take slightly longer.
Pumpkin Bread Rolls
Ingredients
For the Tangzhong
- 14 g (2 tablespoons) white bread flour
- 100 ml (⅓ cup plus 1 tablespoon) milk
For the Japanese Milk Bread Dough
- 350 g (2 ⅓ cups) white bread flour
- 3 ½ g (1 teaspoon) instant dried yeast, see Kitchen Notes
- 6 g (1 teaspoon) fine salt
- 55 g (¼ cup) caster sugar, (superfine sugar)
- 1 egg
- 120 g (4 oz) pumpkin purée, homemade or canned
- 1-2 tablespoons milk
- 50 g (½ stick) unsalted butter, softened
For the Decoration
- vegetable oil
- kitchen string
- 1 tablespoon milk
- 9 pumpkin seeds, pistachio seeds or whole almonds
Instructions
For the Tangzhong
- Whisk the ingredients together in a small saucepan.
- Place the saucepan over low heat.
- Keep whisking until the ingredients form a thick paste. The consistency should be thick enough so that as you whisk the mixture, the whisk leaves lines in the mixture which remains.
- Remove the paste to a small bowl, and set it aside to cool down.
To Make the Dough
- Measure the flour, yeast, salt and sugar into the bowl of an electric stand mixer.
- Mix the dry ingredients together using a dough hook.
- Add the egg, cooled Tangzhong and pumpkin purée.
- Once everything is combined, add enough milk for the mixture to come together in a sticky dough.
- Add the butter, one tablespoon at a time. Wait for each tablespoon of butter to be fully incorporated into the dough before adding the next.
- Continue kneading the dough on medium speed for about 10-15 minutes, or until the dough passes the windowpane test. (See Kitchen Notes below). By this stage, the dough should also be coming away from the sides of the bowl.
- Lightly oil a large, clean mixing bowl.
- Roll the dough into a smooth ball and place it into the mixing bowl.
- Cover the dough with a clean tea towel or bowl cover, and place it somewhere warm for about 1.5 hours, or until it has doubled in size.
Portion the Dough
- Gently remove the dough from the bowl. The dough will deflate as you handle it.
- Divide the dough into 9 equal portions. Use a digital scale for even-sized buns.
Rolling the Dough
- Line a square baking pan with baking paper.
- Roll each piece of dough into a smooth ball. I do this by pulling the edges of the dough into the centre, and then pinching those edges together while shaping the dough into a smooth ball as you do so. The pinched edges form the bottom of the buns.
- Repeat the above steps with the remaining pieces of dough.
- Place the shaped buns into the lined baking pan.
Shaping the Dough into Pumpkins
- Cut 9 pieces of kitchen string measuring 80 cm in length.
- Fill a small bowl with some vegetable oil.
- Dip one piece of string into the oil, and then blot it between some sheets of kitchen paper.
- Lay the string in front of you horizontally.
- Place a piece of dough in the middle of the string (the top of the dough should be facing up).
- Bring the pieces of string together to loosely tie a knot in the centre of the dough.
- Then angle the strings, flip the dough over, and loosely tie a knot on the other side.
- To make buns with 8 segments, tie a knot at 4 cross-sections. To make buns with 6 segments, tie a knot at 3 cross-sections.
- Cut off the excess string (they will otherwise stick to the bun during baking).
- Repeat with the remaining pieces of dough.
Proving the Shaped Dough
- Place the pan somewhere warm, covered with a clean tea towel, for about 30 minutes, or until the buns have puffed up slightly.
Baking the Pumpkin Bread Rolls
- Preheat the oven to 180°C/356°F (without fan).
- Place a metal baking tray on the middle shelf.
- Lightly brush the buns with some milk.
- Bake the buns for about 20-25 minutes, or until they are lightly golden. Check the buns at about 10-15 minutes and, if they are browning too quickly, cover the buns with a loose sheet of foil for the remaining baking time.
- The buns are cooked if an internal thermometer reads 85°C/185°F.
- Leave the buns on the pan for about 5 minutes, before carefully removing the buns to a wire rack to cool completely.
- While the buns are still warm, cut off the strings and gently remove peel them away from the buns.
- Decorate the buns with a pumpkin seed or similar.
Kitchen Notes
- HOMEMADE PUMPKIN PURÉE
To make your own pumpkin purée, cut some fresh pumpkin into large chunks. Steam the pumpkin on medium-high heat for 15-30 minutes until the pumpkin is very tender. The cooking time will depend on how large your pumpkin pieces are. Transfer the cooked pumpkin to a bowl and mash until smooth. Leave to cool completely before using or storing in the fridge or freezer. - WINDOWPANE TEST
Pinch off a small piece of dough, roll it into a ball and use your hands to gently stretch the dough. If the dough can stretch to form a thin sheet and be almost translucent so that you can see the light through it, your dough has passed the “windowpane test”. This means that you have kneaded the dough sufficiently and that the dough is ready to be proofed. - MAKE AHEAD TIPS
To start the Milk Bread dough the night before:
* Make the dough as per the recipe.
* Place the bowl of dough (covered) in the fridge to proof overnight, or for at least 8 to 10 hours. During this time, it should have at least doubled in size.
* The next day, proceed with the rest of the recipe. As the dough will be cold, it may require a bit more time for the second proofing period. - DIFFERENT TYPES OF FLOUR
For Swiss readers: I use Zopfmehl (or farine pour tresse) when making bread and enriched dough. - DIFFERENT TYPES OF YEAST
* Please note that there is a difference between instant yeast (also called instant dried yeast or fast-action dried yeast) and dried yeast (also called active dry yeast). If you are not sure what type of yeast you have, please check the packaging for instructions on how to use the yeast.
* With instant yeast, you can add it directly to the flour mixture without having to activate it first.
* With dried yeast, you will need to activate it first (usually in some warm liquid). - PROOFING THE DOUGH
Dough needs a warm environment for the yeast to activate and cause the dough to rise. If you don’t have a warm place in your home, try one of the following ideas:
* In the oven with the oven light switched on (works only for some ovens).
* In the oven with a tray of boiling water on the bottom shelf.
* In the oven at a low temperature of about 25-30°C (77-86°F). - OVEN TEMPERATURES
All recipes on this website state temperatures for a regular oven (i.e. a conventional oven without fan). If you have a convection oven with a fan, please consult the manufacturer’s handbook on how to adjust the temperature and baking time accordingly. - CONVERSIONS
To convert from cups to grams, and vice-versa, please see this handy Conversion Chart for Basic Ingredients.


Excellent!
Hi Eleanor,
Glad you enjoyed this recipe!
Wonderful recipe! I made these rolls on the weekend and they were absolutely delicious served alongside vegetable soup. I will definitely be making these again later this week.
Hi Emma,
So glad you enjoyed this recipe! They are definitely perfect alongside a bowl of soup 🙂
How does only 3 grams of yeast for an enriched dough work? I thought it would at least need the standard 7grams if not 10?
Hello,
For this quantity of flour, 1 teaspoon (or 3.5 g) of instant dried yeast is sufficient. Don’t worry, I have tested this dough recipe many times 🙂
This pumpkin bread rolls is too much tasty and delicious so keep sharing this type of amazing recipes with us!