Red Bean Paste
If you are familiar with Asian cakes and desserts, you may have noticed that Red Bean Paste is a popular filling.
Red Bean Paste, also called anko in Japanese cuisine, is made from azuki beans and it has a sweet, nutty and earthy taste. It works really well against something plain and soft like Milk Bread or Steamed Bao Buns, and it is also a popular filling in Chinese Mooncakes.
Homemade Red Bean Paste
Some Asian grocers stock ready-made Red Bean Paste which you can use directly in your cooking and baking.
But making your own Red Bean Paste means that you can make it preservative-free and generally control the ingredients that you use and consume. The other advantage is that you can also control the sweetness; ready-made Red Bean Paste is usually very sweet, when I think you can get away with at least half the sugar content.
What Type of Red Beans to Use
There are many different types of dried red beans. When making an Asian-style Red Bean Paste, you need to use azuki beans or adzuki beans. When cooked and puréed, the paste is a deep, earthy red in colour.

How to Make Red Bean Paste
Making Red Bean Paste uses the same instructions as for making Lotus Seed Paste, another filling which is very popular in Asian cakes and desserts. So if you are making a variety of fillings for, say, mooncakes, it helps to know that you can follow the same recipe and instructions for both pastes.
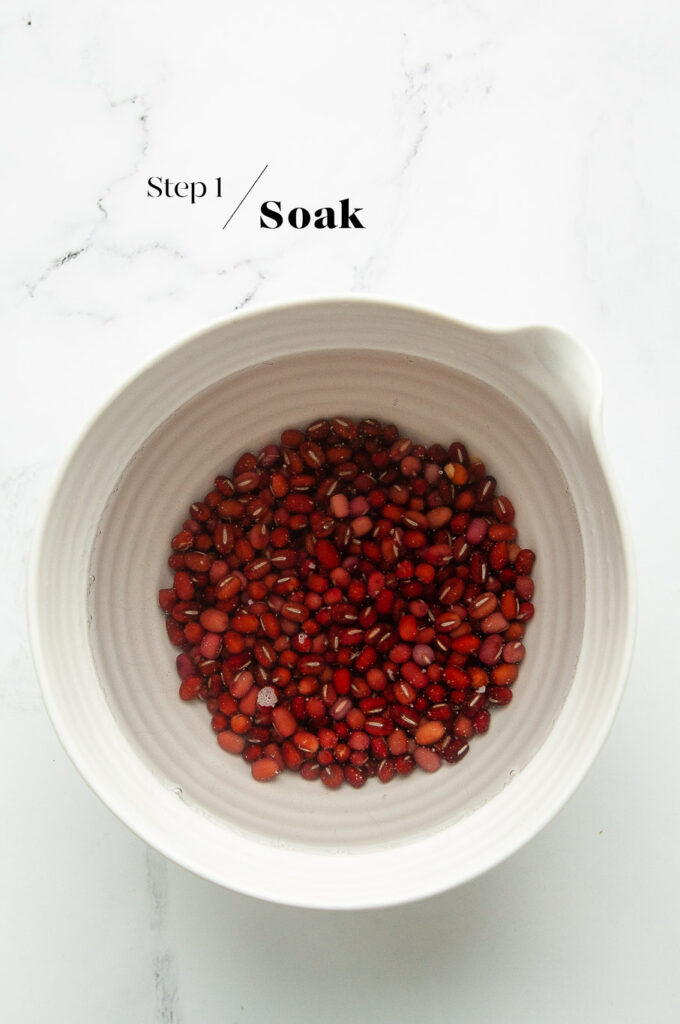
Step 1
Soak the azuki beans in a large bowl with a lot of water. Soak them for at least 8 hours or overnight.
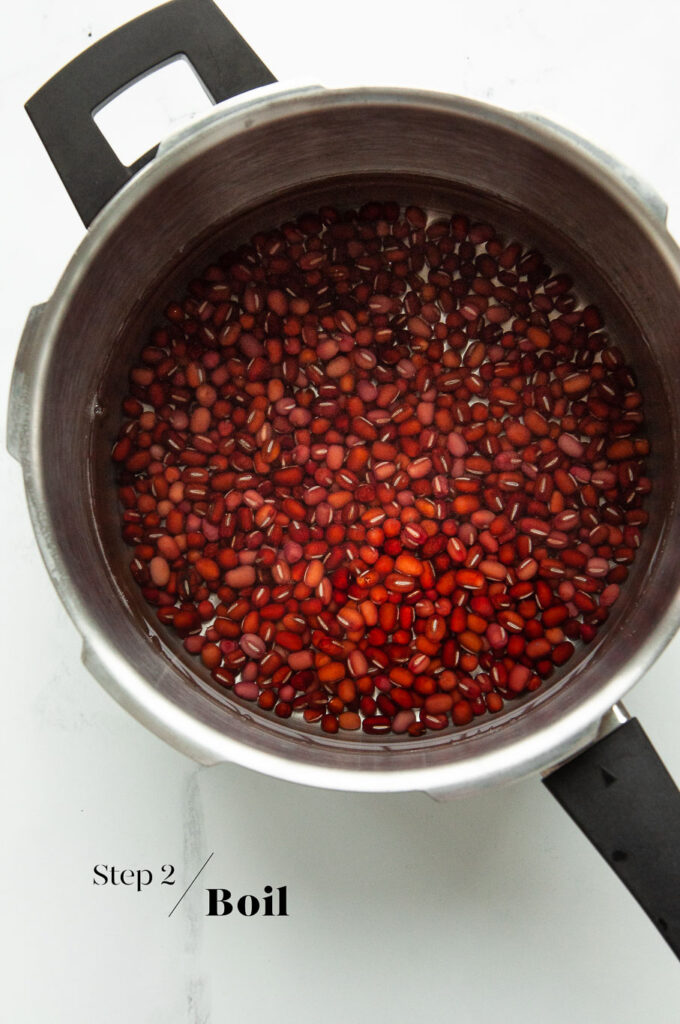
Step 2
Drain the soaked azuki beans and transfer them to a large pot. Cover with water and cook them for about 2 hours on medium-high heat on the stove, or for about 15-20 minutes using a pressure cooker or Instant Pot on high pressure.
The beans are cooked sufficiently when you can mash them easily with a fork. If you taste a bean, it should be very soft with no bite.
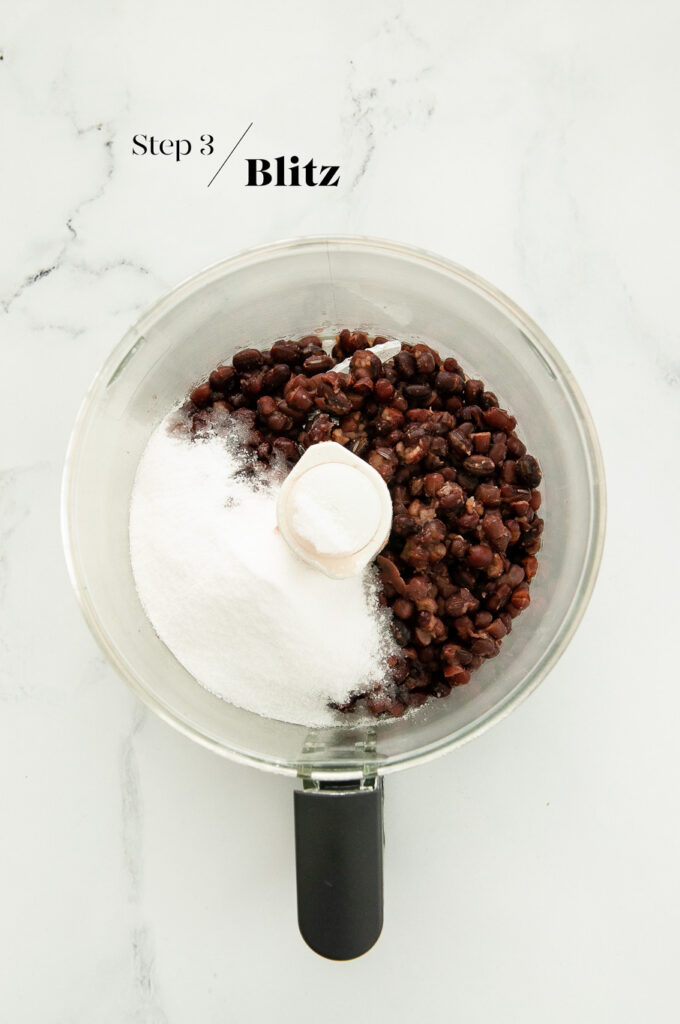
Step 3
Drain the cooked beans and place them into the bowl of a food processor. Add the sugar and salt.
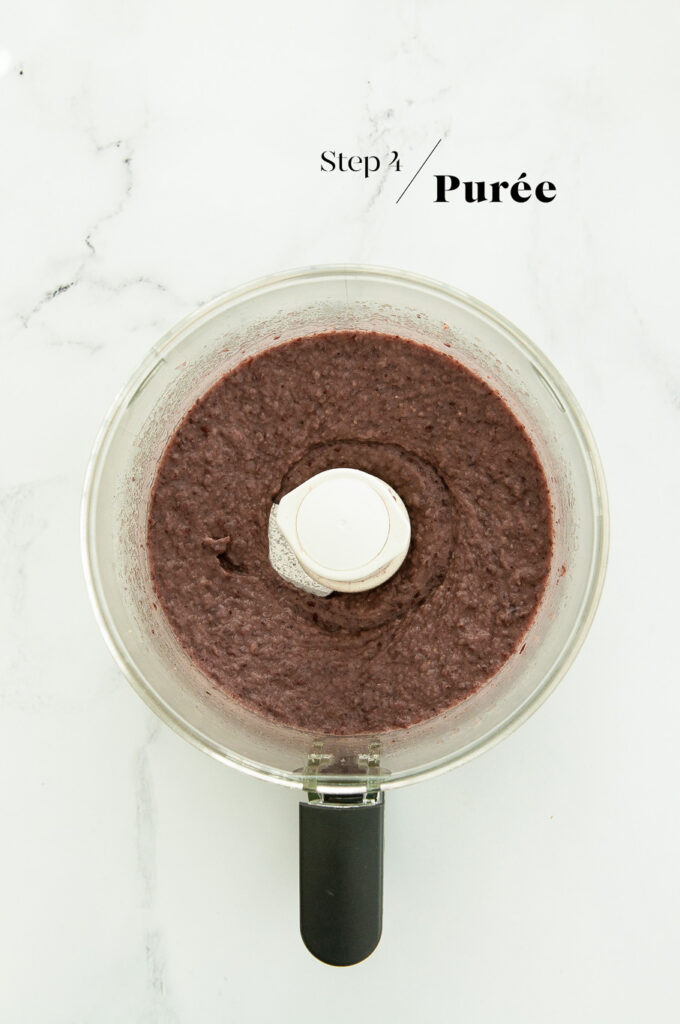
Step 4
Blitz everything together until you have a smooth purée. The consistency should be like a wet hummus.
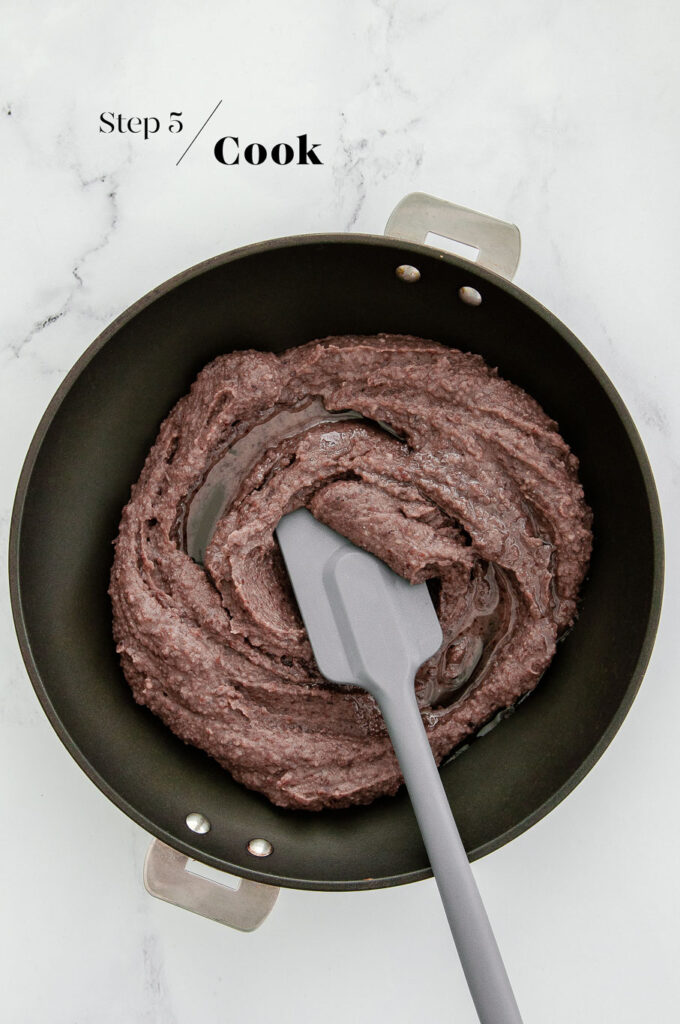
Step 5
Transfer the puréed beans to a large non-stick pan. Cook the paste over medium-heat, stirring with a firm spatula or wooden spoon to slowly dry out the paste.
Add a tablespoon of oil at a time, stirring it in the mixture to emulsify the paste.
As soon as one tablespoon of oil has been absorbed into the paste, add the next tablespoon of oil.
Keep stirring to ensure that the paste does not stick to the bottom of the pan and burn, and to ensure that the mixture is continually emulsified.
Step 6
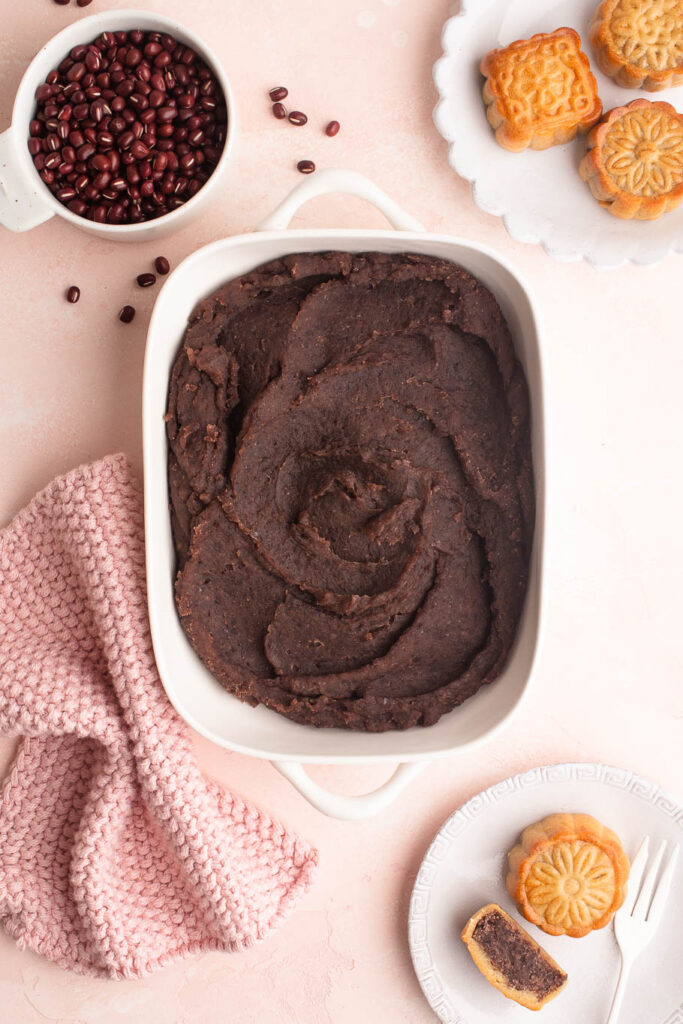
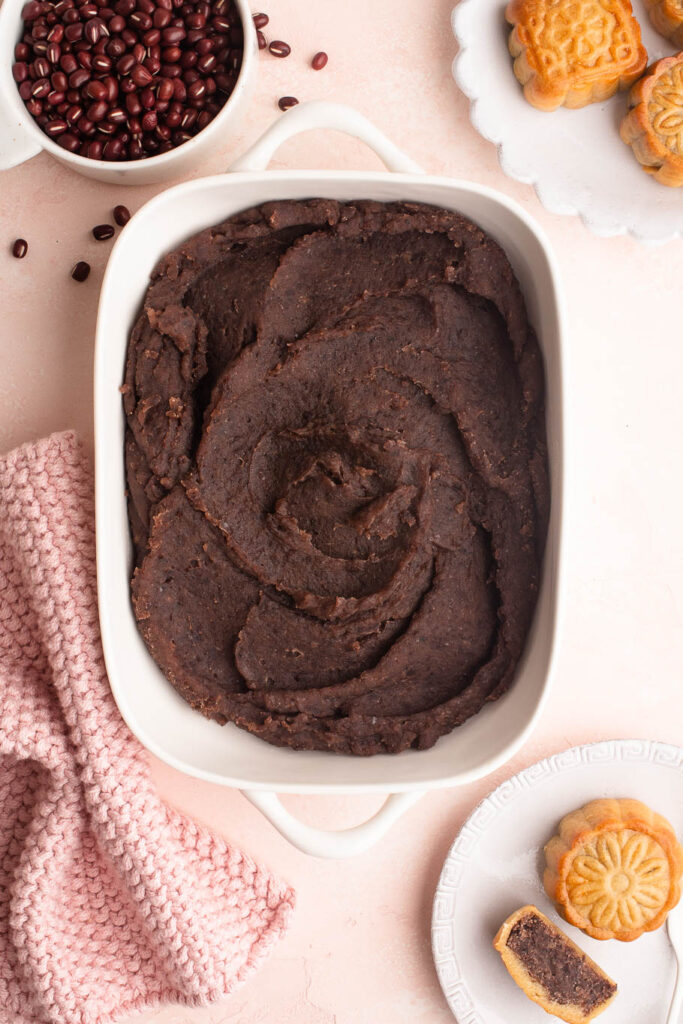
As the mixture starts to thicken, start folding the paste from the outer-edges towards the centre. Keep repeating until the mixture holds its shape as you do so and you can form a firm block.
The paste should still be quite smooth and soft, but it will firm up more as it cools.
Transfer the paste to a large bowl or container to let it cool completely before using.

Tips for Making Red Bean Paste
- Natural food colour. Homemade Red Bean Paste is more grey and earthy in colour than the deep red like many store-bought pastes. Also, as the paste cools, it will darken more in colour.
- Use a pressure cooker. If you own a pressure cooker or an Instant Pot, I highly recommend using it to cook the beans to reduce the cooking time significantly. You can also skip soaking the beans, but you will need to add another 5-10 minutes to your cooking time in the pressure cooker or Instant Pot.
- Firmness. You can make the Red Bean Paste soft or firm, depending on how you plan to use the paste later. For example, if you plan to use the paste in a Red Bean Mooncake, the filling needs to be somewhat firm to hold up to the dough. However, if you want to the use the paste in a mochi cake, the filling should be a bit softer. For a softer Red Bean Paste, simply cook it for less time in the final step of the recipe. Just keep in mind that, as the paste cools, it will firm up more.
- Store in the fridge or freezer. Any leftover Red Bean Paste can be kept in the fridge for a few days, or in the freezer. I use a vacuum-sealer to store food in the freezer.

Red Bean Paste
Ingredients
- 200 g (7 oz) dried azuki beans
- 150 g (⅔ cup) caster sugar, (superfine sugar), or to taste
- pinch fine salt
- 100 ml (⅓ cup plus 1 tablespoon) sunflower oil, or another flavourless oil
Instructions
To soak the azuki beans
- Place the dried azuki beans into a large bowl.
- Cover the beans generously with cold water.
- Leave the beans to soak for at least 8 hours, or overnight.
To cook the azuki beans
- Drain the azuki beans.
- Place the soaked beans into a large pot and fill it with cold water. I like to cook the beans in a lot of water, so I cover the beans with at least 5-10 cm depth of water.
- Bring the pot to the boil, and then turn it down to a medium simmer.
- Top up with boiling water every 30 minutes or so to keep the water level constant.
- Cook the beans for about 2 hours on the stove. Alternatively, if you have a pressure cooker or an Instant Pot, you can cook the beans on high pressure for about 15-20 minutes.
- The beans are cooked when they can be easily mashed with a fork. If you taste a cooked bean, it should be very soft with no bite.
To purée the azuki beans
- Drain the cooked beans.
- Place the cooked beans into the bowl of a food processor.
- Add the sugar and salt.
- Blitz until you have a very smooth purée. The texture should be like a wet hummus.
To cook the red bean paste
- Scrape the mixture into a large non-stick pan.
- Start cooking the paste over medium-high heat.
- Use a spatula or wooden spoon to stir the paste so that the moisture can evaporate from the mixture.
- As you stir, add about a tablespoon of the oil at a time.
- Keep stirring until the oil is well-incorporated into the paste.
- Once the mixture has emulsified, add some more oil.
- Continue until all of the oil has been added.
- Once all of the oil has been added, continue stirring the mixture so that it can thicken.
- Eventually, the goal is to be able to fold the paste from the outer-edges into the centre until the paste is a little firm and can hold its shape. By this stage, the paste will resemble a very soft cookie dough.
- Be careful to not over-cook the paste as it can burn, or it can split, i.e. the paste will separate and look grainy. If this happens, it’s probably too late to rescue the paste, but you can try by adding a splash of water and mixing everything together furiously.
- Transfer the paste to a large bowl and let it cool completely. The paste will firm up more as it cools.
- If you are making this paste ahead of time, you can keep it in an air-tight container in the fridge for several days.
Kitchen Notes
- OVEN & STOVE TEMPERATURES
All recipes on this website have been tested on an induction stove and/or with a conventional oven (i.e. an oven without fan). All recipes on this website use temperatures for a conventional oven, unless otherwise mentioned. Convection ovens (i.e. fan-forced ovens) are typically 20°C/70°F hotter than conventional ovens, but please check your manufacturer’s handbook. - CONVERSIONS
To convert from cups to grams, and vice-versa, please see this handy Conversion Chart for Basic Ingredients.


Great easy recipe. Thank you!
Very nice recipe. It was delicious! Now I don’t have to buy red bean paste anymore 🙂
Perfect for mooncakes!
Easy to make and tasted delicious
Thanks, Clara!
My first time making red bean paste and it turned out fantastic. I can’t wait to try your Anpan recipe next.
Hi Renee,
Thank you! Hope you will enjoy the Anpan recipe 🙂