Easy Pavlova Recipe
As an Australian, I am quite impartial to the pavlova. To me, nothing is more welcoming than the sight of a tall and magnificent pavlova adorned with lashings of cream and topped with fruit.
Quite often, and especially in summer, my go-to topping for pavlova is simply whipped cream and fresh passionfruit.
Gluten-Free Dessert
One reason why I make pavlova quite often is because it happens to be one of the easiest and tastiest gluten-free desserts I know of.
In fact, I make pavlova so often for my gluten-intolerant friends that I have had to come up with different ways of serving pavlova so that I am not always serving them the same thing.
And that is how I stumbled onto this delicious Lemon Curd Pavlova.
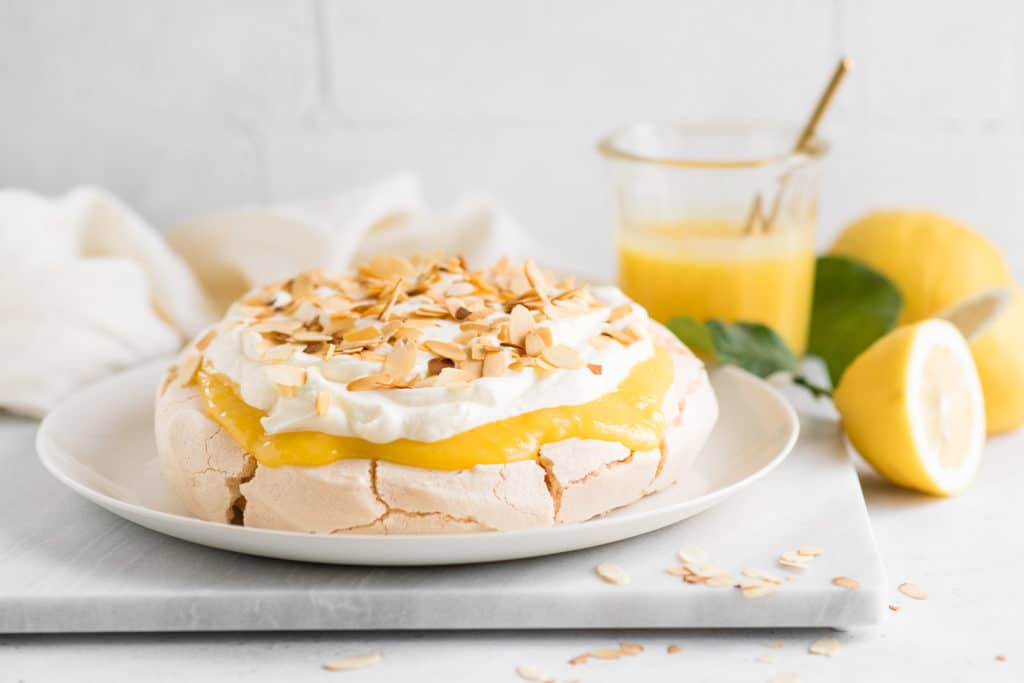
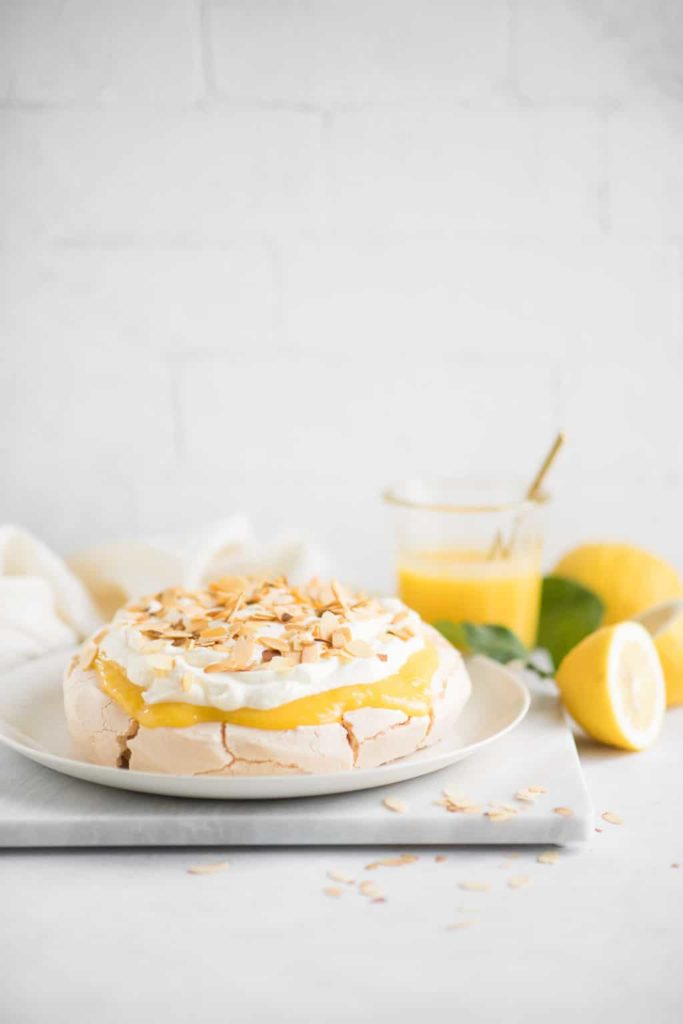
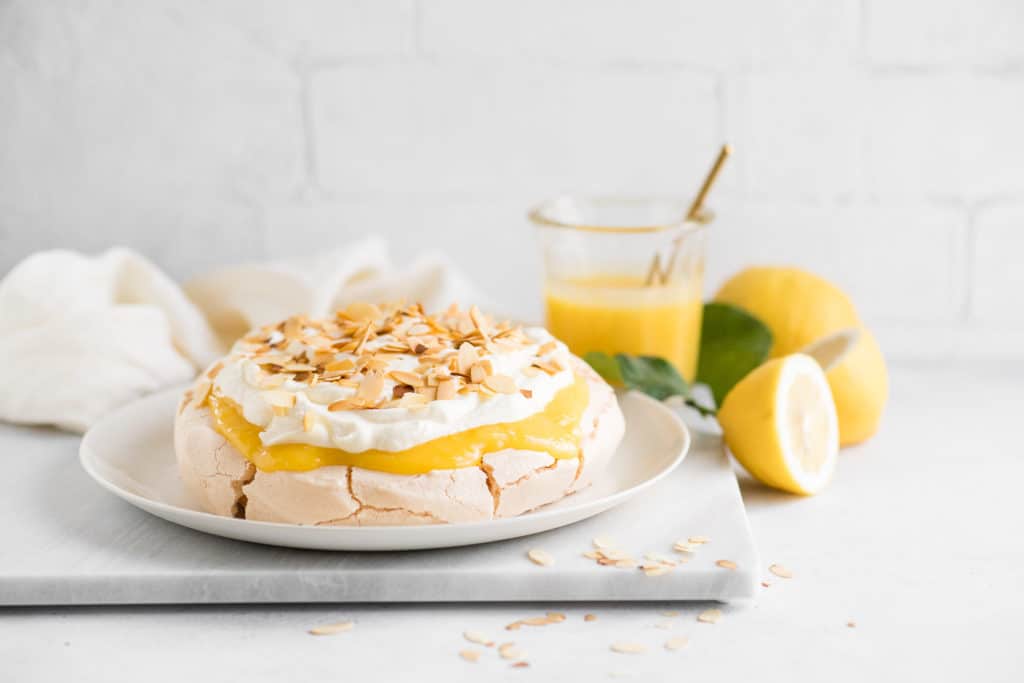
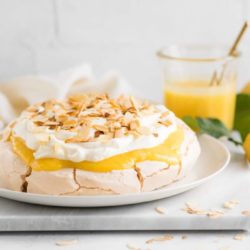
Lemon Curd Pavlova
The idea for this pavlova with lemon curd comes from one of my favourite cookbook authors, Nigella Lawson.
I had made a big batch of lemon curd one weekend for brunch and was looking for ways to serve it during the week, when I remembered that Nigella had the wonderful idea of pairing it with a pavlova.
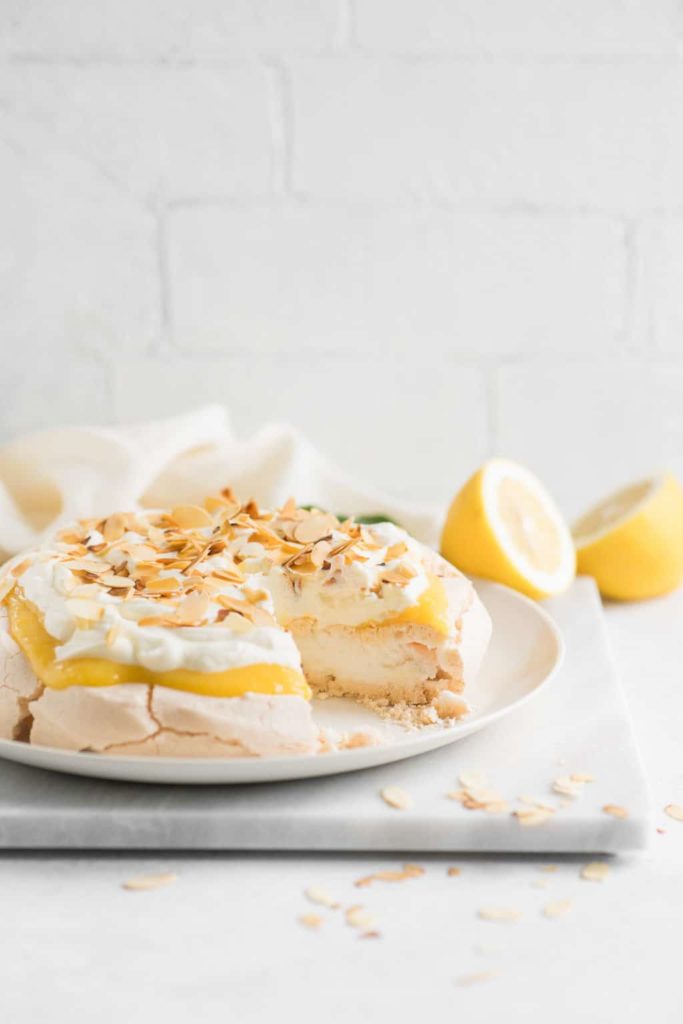
And it works so well because the sweetness of the meringue base (which is essentially what a pavlova is) is off-set by the tartness of the lemon curd.
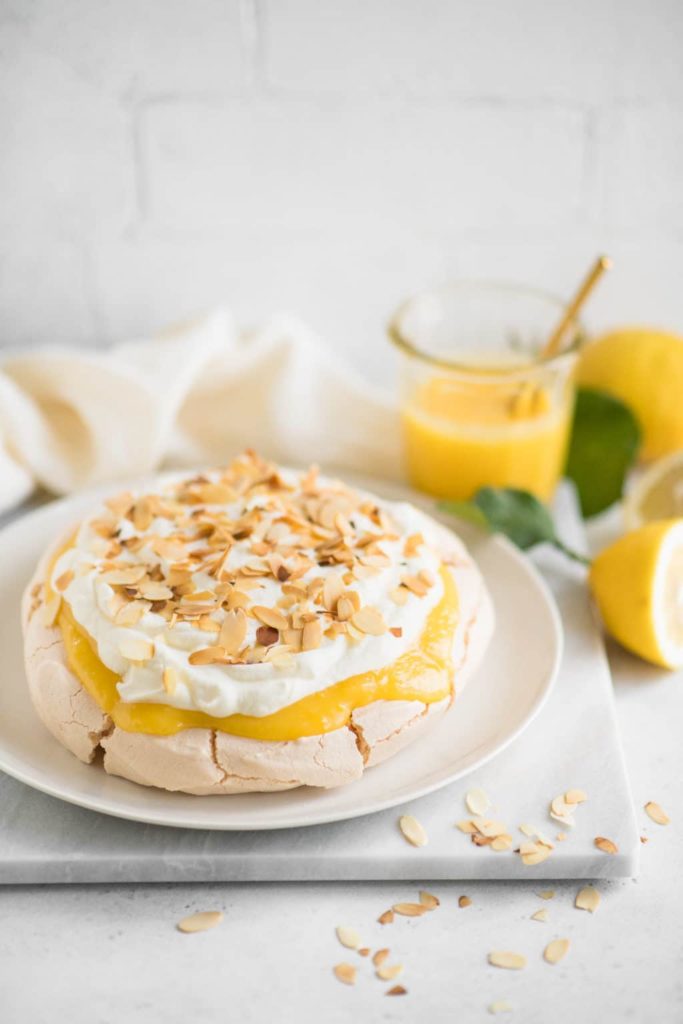
The toasted flaked almonds are also a must as they provide a nice contrast in texture to the cream and lemon curd.
How to Make Pavlova
Step 1
I recommend using an electric stand mixer or an electric hand-held beater for best results when making a pavlova.
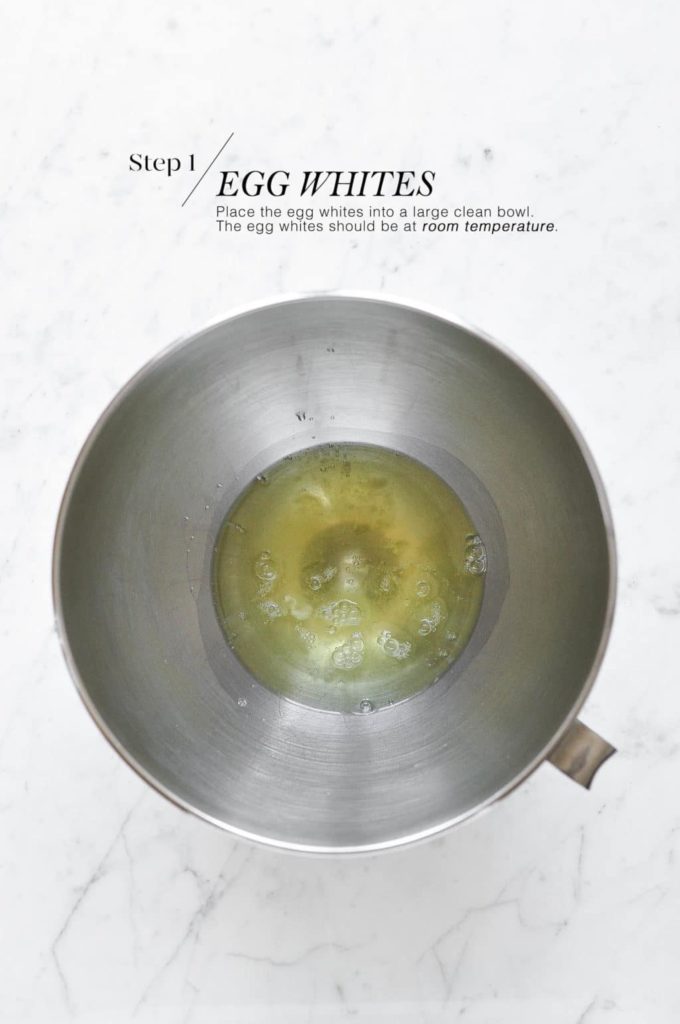
Make sure the egg whites are at room temperature before using, so that they whip up nicely.
Place the egg whites into a large, clean bowl that is free from any grease.
Step 2
Whisk the egg whites until they have tripled in volume and form soft peaks.
Soft peaks mean that, when you lift the beaters, the mixture forms a peak which falls over softly.
At this stage, the beaten egg whites should look very soft and foamy.

Step 3
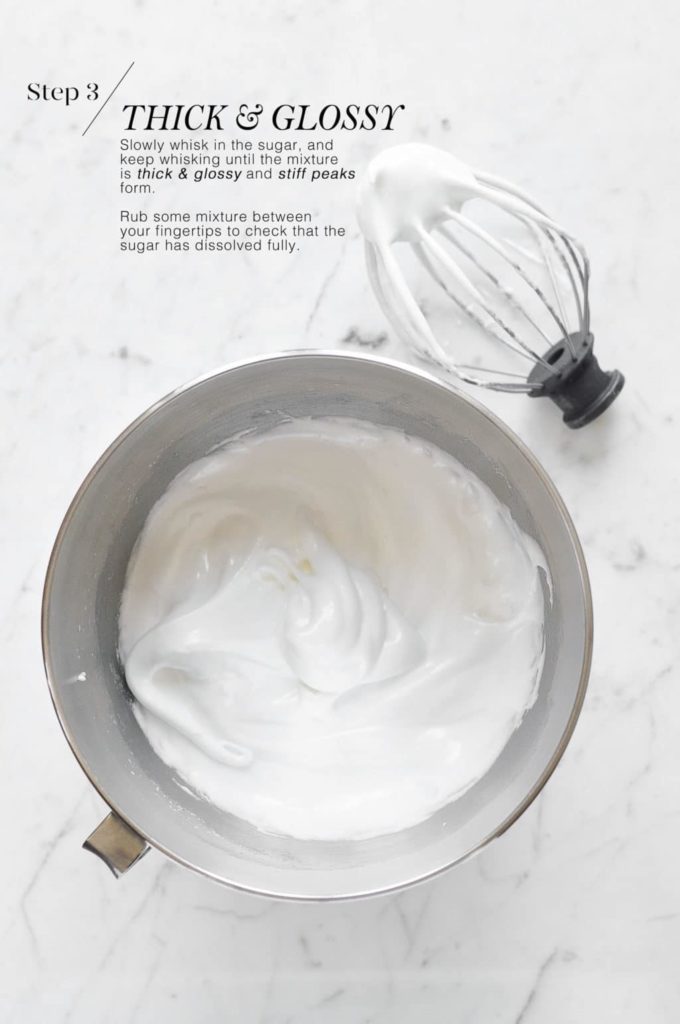
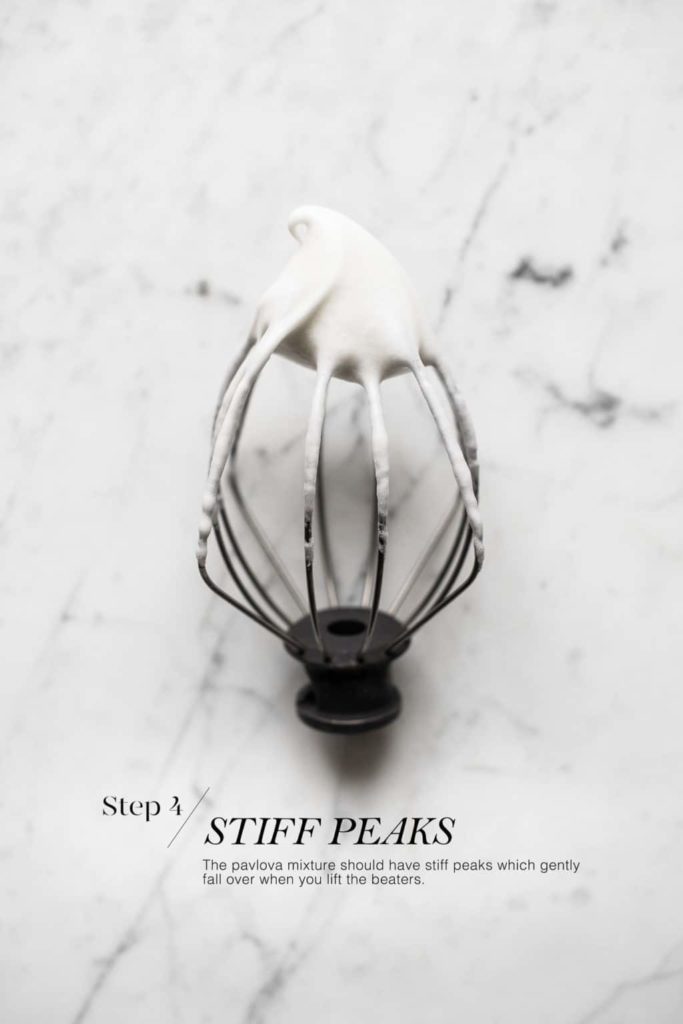
Add the sugar, one spoon at a time, until the egg whites transform into a thick and glossy mixture, and stiff peaks form.
Stiff peaks mean that, when you lift the beaters, the mixture forms a peak which holds its shape.
Make sure the sugar has been completely dissolved, and you can test this by simply rubbing a bit of mixture in between your finger tips.
Step 4
Add the cornflour, vinegar and vanilla. A few rotations of the stand mixer should be enough to mix in these ingredients.
The final pavlova mixture should be thick and firm, and it should hold its shape when you start piling it on the baking tray.
If the pavlova mixture is soft and runny, and you are unable to shape it into a high pavlova because the mixture keeps sliding, it means that you may have overbeaten the eggwhites or that you added the sugar too soon.
Step 5
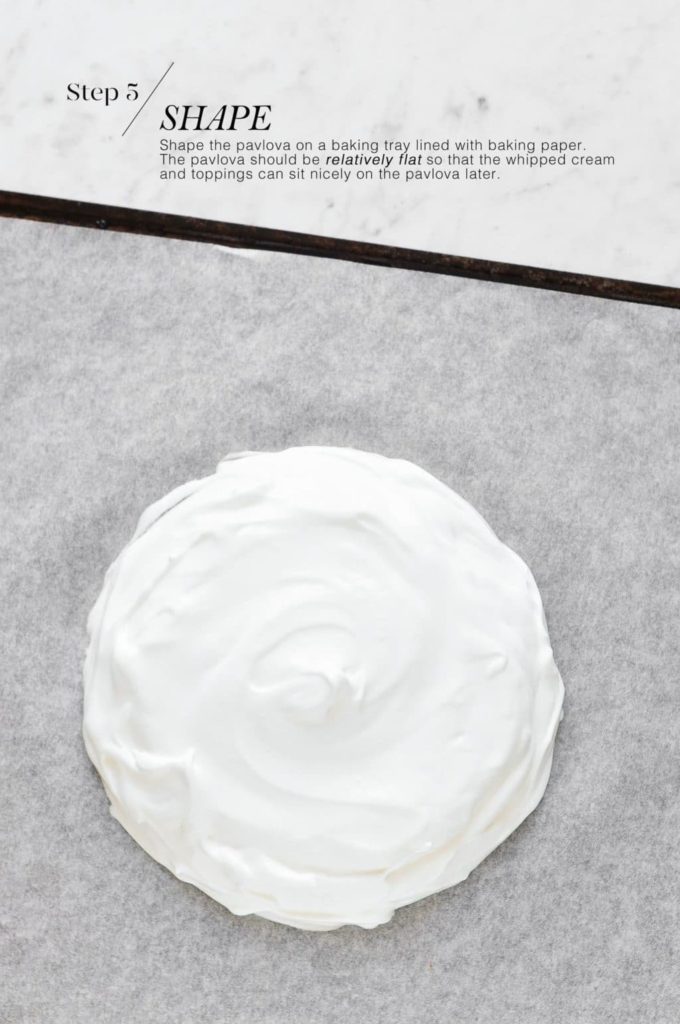
Shape the pavlova on a baking tray lined with baking paper.
I recommend that you smooth the top of the pavlova so that it is relatively flat. This is so the whipping cream and any toppings which you add later can sit nicely on top the pavlova.
If your pavlova is domed in shape, and cream and toppings which you add later will quickly slide off.
Step 6
Place the pavlova into the oven at 180°C/350°F.
Immediately turn down the temperature to 150°C/300°F.
Let the pavlova bake for 1 hour and 15 minutes, and do not open the oven door during this time.
After the baking time, turn off the oven, and leave the pavlova to cool inside the closed oven for at least 2-3 hours, or preferably overnight.
More Tips on Making Pavlova
For more tips on making pavlova, including troubleshooting, please see my post for Pavlova with Cream and Passionfruit.
How to Make Lemon Curd
Making lemon curd from scratch take about 10 minutes and it is so easy!
To make your own lemon curd, please see my recipe for lemon curd with step-by-step photos.

Lemon Curd Pavlova
Ingredients
For the Pavlova
- 3 egg whites
- 180 g (½ cup plus ⅓ cup) caster sugar, (superfine sugar)
- 1½ teaspoons cornflour, (US: cornstarch)
- 1 teaspoon white wine vinegar
- 1 teaspoon vanilla extract
For the Topping
- 250 ml (1 cup) double cream, (heavy whipping cream)
- 180 ml (¾ cup) Lemon Curd, or to taste, see Kitchen Notes
- 1/2 cup flaked almonds, lightly toasted
Instructions
To Make the Pavlova
- Preheat the oven to 180°C/350°F (without fan).
- Using a standmixer or electric beaters, whisk the egg whites in a large, clean bowl until they have tripled in volume and soft peaks form.
- Turn the speed down to low and slowly add the caster sugar, one spoon at a time until the sugar is well incorporated. As you add the sugar, the mixture will start to become thick and glossy, and stiff peaks will form when you lift the beaters.
- Remember to scrape down the sides of the bowl.
- Rub a bit of the mixture between your fingertips to test if the sugar has been fully dissolved; if you don’t feel any grains of sugar, move onto the next step.
- Add the cornflour, white wine vinegar, and vanilla extract. I do this on low speed with the stand mixer for only 2 to 3 rotations (about 1 second).
- Line a baking tray with baking paper and spoon the pavlova mixture onto the tray into a round shape. I like to dollop the mixture on top of each other into a high pile, and to then shape the pavlova from there – using this method ensures that your pavlova will have some height.
- Use a palette knife to shape the sides of the pavlova and to slightly flatten the top. The pavlova will expand and rise once cooked, so shape it to be on the slightly smaller side.
- Place the pavlova in the oven and immediately turn the temperature down to 150°C/300°F (without fan).
- Bake for 1 hour and 15 minutes. Do not open the oven door during this time.
- After 1 hour and 15 minutes, turn off the oven and leave the oven door closed so the pavlova can cool down completely. You should leave the pavlova in the oven for at least 2-3 hours, but overnight (12-18 hours) is best.
To Serve
- The pavlova should be decorated only just before serving.
- Place the pavlova onto a large plate or cake platter.
- Whip the double cream until it is thick and soft.
- Spread a generous layer of the lemon curd over the pavlova.
- Spread the cream over the lemon curd.
- Sprinkle generously with the toasted flaked almonds.
- Serve immediately.
Kitchen Notes
- LEMON CURD
* Making lemon curd is easy with this lemon curd recipe with step-by-step photos.
* But you could also use a good-quality store-bought lemon curd. In which case, I suggest tasting it first for sweetness and adding maybe a squeeze or two of fresh lemon juice. - PAVLOVA FOR 4 TO 6 PEOPLE
To make a slightly larger pavlova, I recommend the following recipe:
4 egg whites
240 g (1 cup plus 1 tablespoon) caster sugar (superfine sugar)
2 teaspoons cornflour (cornstarch)
1 1/4 teaspoon white wine vinegar
1 1/4 teaspoon vanilla extract - RECIPE CREDIT
This recipe is inspired by the Lemon Pavlova from Nigella Lawson. - OVEN TEMPERATURES
All recipes on this website state temperatures for a regular oven (i.e. a conventional oven without fan). If you have a convection oven with a fan, please consult the manufacturer’s handbook on how to adjust the temperature and baking time accordingly. - CONVERSIONS
To convert from cups to grams, and vice-versa, please see this handy Conversion Chart for Basic Ingredients.


Can’t wait until the rain stops and I can try this! Glad you’re back! I missed hearing from you!!!
Ah thank you!! I have lots of new recipes in the pipeline 🙂 Thanks for popping by!
Wow, this pavlova was amazing!! My family ate it up in seconds. I followed your tips and this was the tallest pavlova I had ever made! Love your site.
Thank you!! 🙂
I’m going to take it out of the oven in the morning, but then where should I leave it until the evening? Fridge or counter? Covered or not?
Hi Naomi,
You can leave the pavlova on the counter in a cool place, uncovered, until you are ready to decorate it. Hope you will enjoy this recipe!
I made this lemon pavlova for Mother’s Day and it was so beautiful and delicious. Easy to follow recipe and I have some leftover lemon curd for my breakfast tomorrow.
Great take on a fantastic KIWI dish 😀
I made this a few years ago and it was absolutely delicious. My daughter in law reminded me of this pavlova and asked me to make it again this weekend. I can’t wait!
This is such a beautiful recipe. I never tried to make my own lemon curd before but it was so easy with your recipe. It was perfect with this pavlova.
Fantastic recipe for pavlova and lemon curd. This went amazingly well with the roast lamb we had for lunch. I’ll definitely be making this pav again soon!
This is the most delicious pavlova I have eaten in a long time. Exquisite!
This is such a beautiful pavlova recipe! The meringue goes so well with the lemon curd and toasted almonds.
This was a beautiful recipe for Mother’s Day! My mother loves pavlova but we always serve it with whipped cream and fruit. This was something a bit different and we all loved the lemon curd topping. Absolutely delicious.
I have made pavlova before but your tips were such a help, my pavlova didn’t crack and it was crispy all over with a lovely chewy center. The combination with lemon curd was just divine.
Is there a change in baking time if you make the larger size for 4-6 people?
Hi Erin,
No, the baking time is the same for the larger pavlova for 4-6 people. Although it is a slightly larger pavlova, it doesn’t need a longer baking time. Hope you will enjoy this recipe!
Do you need to cut the baking time if you make individual pavlovas?
Hi Michelle,
Yes, you will need yo reduce the baking time if you wish to make individual pavlovas. The baking time will depend on the size of your mini pavlovas.
Showstopper dessert. I topped the layer of whipped cream with 3 cups of a mix of fresh strawberries, blueberries and blackberries. I added 2 Tbsp. of icing sugar and 1 tsp of vanilla extract to the whipped cream. Amazing combination of flavour. The slivered, toasted almonds elevated this dessert.
Next time make I will make half the amount of lemon curd (it overpowered the lightness of the dessert), and reduce 2Tbsp of sugar in the meringue. – it was a touch too sweet.
Overall, amazing! My guests decided that I should make this at every gathering from now on.
Hi Sarah,
Your dessert sounds amazing! I agree that the toasted almonds are wonderful in this recipe. You don’t need to use all of the lemon curd on this pavlova – just as much or as little as you like 🙂