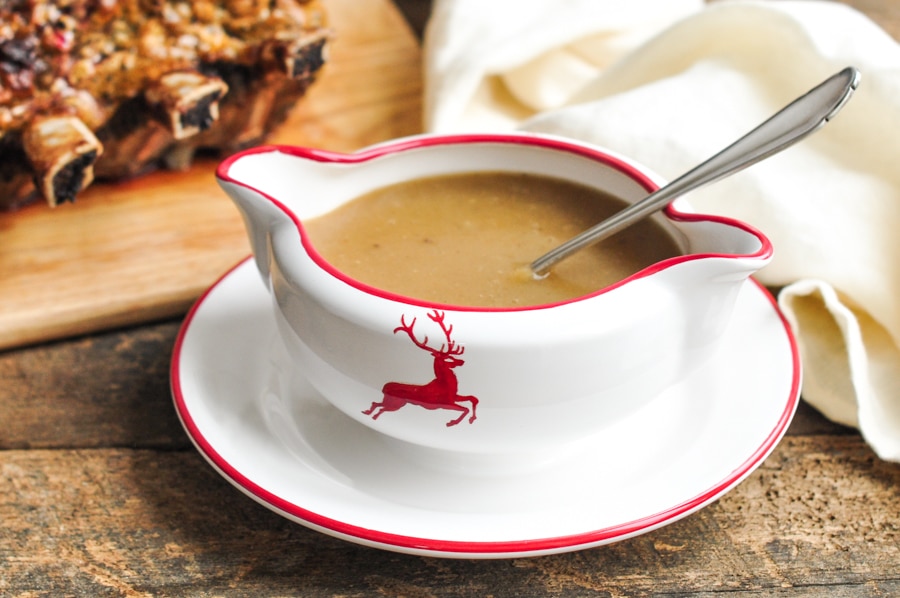
Christmas Gravy
When it comes to roast dinners, I think the gravy can make or break the meal. And as someone who needs lashings and lashings of hot gravy with her roast potatoes, I take no chances in this department and always try to make my gravy ahead of time.
I am definitely not one of those people who can make a quick gravy from the pan juices right before serving; more often than not, the jus is too strong in flavour and there is simply not enough to go around.

Jamie Oliver’s Get Ahead Gravy
In the lead up to Christmas, a good friend of mine (and who happens to be a fabulous cook) was telling me about her faithfulness to Jamie Oliver’s Get Ahead Gravy which uses chicken wings as the main ingredient, and I was instantly intrigued.
Why This Recipe Works
- Making the gravy ahead of time means less time in the kitchen on the big day.
- The chicken wings create a very flavourful gravy, and this is further enriched with the pan juices of whatever meat you are roasting.
- This gravy works perfectly with roast chicken, turkey, beef or pork.
How to Make Jamie Oliver’s Gravy
The idea is to start making the gravy the day before so that you have an ample supply of gravy for everyone at the table, and which can be enriched with the pan juices from whatever you happen to be roasting on the day of the big meal.
However, you could make this gravy well ahead of time and keep it in the freezer until you need it.
I’m guessing that Jamie Oliver had roast turkey in mind when he devised this recipe, but I can confirm that it also works beautifully with roast chicken, roast beef and roast pork.
Jamie Oliver’s Get Ahead Gravy does take some time to make, but it is not labour-intensive; you simply roast some vegetables and chicken wings in the oven for about an hour, before transferring the roasting tray to the stove and let everything simmer until it has reduced and thickened nicely into a gravy or thickened stock.
Now that I have tried this recipe a few times, this will definitely form part of my Christmas repertoire each year!
Gravy Recipe
*Although I call this “Jamie Oliver’s Get Ahead Gravy”, I have left out a few ingredients. The original recipe calls for star anise which I found too over-powering and out of place when I first tried the recipe, and the addition of redcurrant sauce or cranberry sauce made the gravy too sweet for my liking.
The recipe below is a blueprint of how I like to make gravy, my way. Feel free to swap out some of the herbs to make it more appropriate for what you plan to serve the gravy with. Enjoy!
Jamie Oliver’s Get Ahead Gravy
Ingredients
- 2 large brown onion, peeled and roughly chopped
- 2 large carrots, peeled and roughly chopped
- 2 celery stalks, roughly chopped
- 4 rashers streaky bacon, sliced thickly
- 2 fresh bay leaves
- 2 sprigs fresh sage
- 2 sprigs fresh rosemary
- 10-12 chicken wings
- olive oil
- 4 tablespoons plain flour, (all-purpose flour), omit for a gluten-free gravy
- 60 ml (¼ cup) dry sherry or white wine
- sea salt
- black pepper, freshly cracked
- 2 tablespoons cornflour, (US: cornstarch) mixed with some water
- parsley, finely chopped (optional)
- chives, finely chopped (optional)
Instructions
To make the gravy (ideally, start the day before)
- Preheat the oven to 200°C/392°F (without fan).
- Place the onions, carrots, celery, bacon, bay leaves, sage, and rosemary into a large, high-sided roasting dish. The roasting dish should be oven-proof and also suitable for using on the stove later.
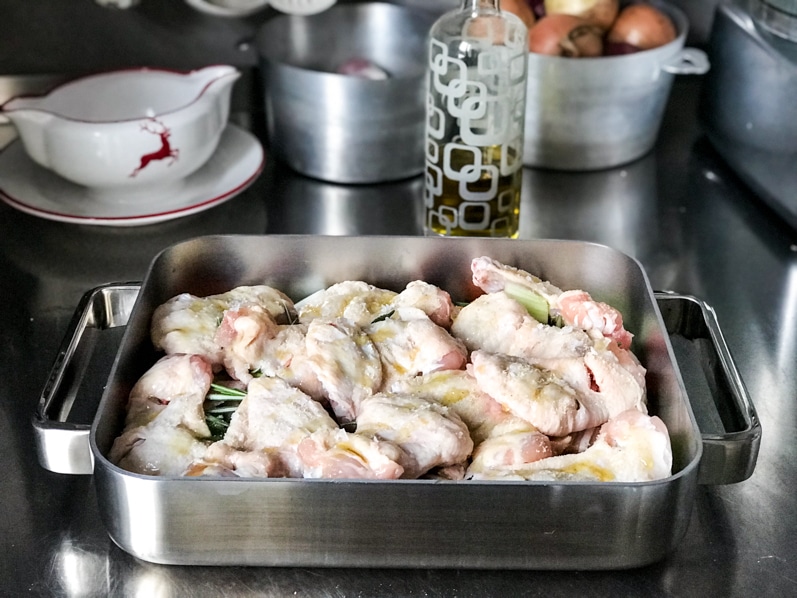
- Using a very sharp knife, break the chicken wings so that the bones are cracked in places, but the wings are still intact.
- Place the chicken wings on top of the other ingredients in the roasting dish.
- Drizzle with olive oil and season generously with sea salt and freshly ground pepper.
- Roast for 1 hour or until the chicken wings are golden and nicely browned. The more colour the chicken wings have, the more colour and flavour your gravy will have.
- Remove the roasting dish from the oven and place it on the stove over medium-high heat.
- Sprinkle over the flour and let it cook for several minutes.
- Add the sherry or white wine, and let it bubble away for a few minutes until most of it has evaporated.
- Add enough boiling water to just cover the ingredients (about 1.5-2 litres or 6-8 cups).
- Simmer over medium heat for about 30-45 minutes, topping up with boiling water as necessary to maintain the same level of liquid.
- During this time, use a potato masher to squash and mash everything together, and to extract as much flavour as you can from the ingredients. Towards the end of the cooking time, all of the vegetables will have broken down and the chicken wings will have also fallen apart.
- Once everything in the pan looks like mush, strain everything through a fine sieve into a large bowl or jug, extracting as much liquid as you can from the ingredients by pressing down with a wooden spoon. What you will have left is the gravy stock.
- If there is a lot of fat on the surface of the gravy stock, skim this off and discard.
- Let the gravy stock cool before storing in the fridge or freezer.
To finish and serve the gravy
- Bring the gravy stock to a simmer in a large saucepan over medium-high heat.
- Taste the gravy stock for seasoning, keeping in mind that you will be adding the pan juices from the roast later.
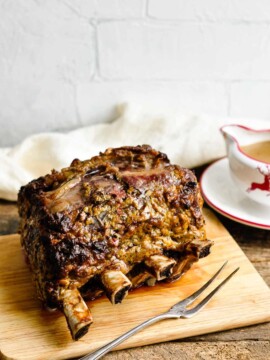
- Once you have roasted your meat (turkey, chicken, beef or pork), skim off and discard any excess fat from the pan juices.
- Pour the pan juices into the gravy.
- Taste the gravy for seasoning.
- If your gravy is too thin, add some cornflour slurry. Make the slurry by mixing together the cornflour with some water in a bowl. Slowly whisk the cornflour slurry into the gravy, adding enough until the gravy has thickened to your liking.
- I like to add fresh herbs to my gravy, such as parsley and or chives, to add some colour and freshness just before serving.
Kitchen Notes
- GRAVY COLOUR
Roasting the chicken wings until they are golden will help to give your gravy a nice, dark colour. But if you find that your gravy is too pale, or you want to make it a bit darker, I recommend adding a dash of soy sauce. Slowly add the soy sauce until you have the desired colour, but keep in mind that the soy sauce will also add additional salt (as well as umami flavour) to your gravy. - FREEZER TIPS
You can make the gravy stock or finished gravy well ahead of time and store it in the freezer. I typically freeze food in zip-lock freezer bags. Defrost the gravy in the microwave on a gentle setting until it has partially defrosted, before transferring the gravy to a saucepan to finish defrosting on the stove on low heat. Upon defrosting, the gravy may have a thicker consistency, which you can thin with some water. - GLUTEN-FREE GRAVY
Simply omit the flour from the recipe, and use cornflour (cornstarch) to thicken the gravy towards the end. The gravy will have slightly different consistency, but it will taste the same. - RECIPE CREDIT
This recipe is inspired by the Get Ahead Gravy recipe by Jamie Oliver. - OVEN & STOVE TEMPERATURES
All recipes on this website have been tested on an induction stove and/or with a conventional oven (i.e. an oven without fan). All recipes on this website use temperatures for a conventional oven, unless otherwise mentioned. Convection ovens (i.e. fan-forced ovens) are typically 20°C/70°F hotter than conventional ovens, but please check your manufacturer’s handbook. - CONVERSIONS
To convert from cups to grams, and vice-versa, please see this handy Conversion Chart for Basic Ingredients.

I also make this every year as part of my Xmas ritual. Certainly a keeper when cooking for a crowd. Make in advance and pop in the freezer!
Hi Robyn,
Oh another fan of this recipe! I’m so grateful to my friend who introduced me to this gravy recipe – it is so delicious and perfect when entertaining 🙂 I’ll be making it throughout the year, for sure!
Simple, fast and very tasty! I want to try it is immediately! Thank you for great recipes!
I’ve made this gravy several times now. It’s absolutely lush. A real stress free winner for our Sunday lunch and Christmas Day
So glad you are a fan of this gravy also!
What if i don’t have a gas stove? How do i finish the gravy off on the stove top
Hi Jacquie,
You don’t need a gas stove to make this gravy. Any stovetop surface should work fine for this recipe. Hope this helps!
My gravy wasn’t thick or brown ….help!
I made this last night. Didn’t have bacon or wine (or sherry) or fresh herbs. Dried herbs worked just fine. Used turkey wings instead of chicken wings. The result was a perfect gravy. Just the right amount of thickness and a beautiful, deep colour, with incredible flavour. This will serve to stretch the gravy I make on the big day. Will definitely make again and again!
Hi Pat,
Merry Christmas! Thank you for your notes here – they are so helpful! Great to know that this recipe also works great with turkey wings.
I followed Jamie’s recipe, but I feel the gravy spoiled dinner. The pungent taste of aniseed from the star anise was just wrong with Christmas dinner. Don’t get me wrong, I love star anise, but in Asian food. I will make it again next time, but without star anise
Hi Angela,
The original recipe from Jamie Oliver includes star anise, but I have omitted this from my own list of ingredients above for the same reasons you have mentioned. The first time I made this recipe, I also felt that the star anise was overwhelming and just didn’t work right in the gravy. The second and subsequent times I have made this gravy, I left out the star anise and pretty much followed the recipe as I have described them here. I prefer to add lots of fresh herbs, such as parsley and chives, to the finished gravy just before serving to give it some freshness and a good herbal hit. Definitely try it without the star anise next time – I’m sure you will enjoy it 🙂 And Merry Christmas to you!
Hi could you use chicken thighs instead of chicken wings? Thanks
Hi Fiona,
At a pinch, you could use chicken thighs as the bones will still give nice flavour to the gravy. But chicken wings would be my first choice as the cartilage in the chicken wings will give the gravy both richness and body. The cartilage creates gelatin when boiled, and this helps to thicken the gravy. Also, chicken wings have a lot of fat, and fat equals flavour 🙂 Hope this helps!
Hi there, can I make this gluten free at all
Hello,
Yes, you can make this gravy gluten-free by omitting the flour and thickening the gravy instead with a cornflour slurry. Simply mix a few tablespoons of cornflour with some cold water to form a paste. When the gravy is simmering on the stove, whisk in some of the cornflour slurry until it has thickened to your liking. Hope this helps!
Been making this gravy for Xmas day for several years now. Make in November. Put in two 2pint milk containers then freeze
That’s a great idea to make ahead of time!
Thank you for this great recipe. Once it is frozen what is the best way to defrost it on Christmas Day?
Hi Fiona,
I would simply defrost the gravy in the microwave until it is partially defrosted, and to then gently reheat it on the stove. If you don’t have a microwave, let it defrost at room temperature before gently reheating on the stove.
Upon defrosting and reheating, the gravy may be thicker than usual, so you should thin it with some boiling water until you have the desired consistency.
Have a Merry Christmas!
Hi there, I’ve just made the gravy to get ahead for Christmas Day and it tastes great! Just one question, I plan on serving it with beef which the recipe says it’s suited to but my partner has looked at it and thinks it’s the wrong colour to go with beef and will elicit comments to that effect! Obviously I am yet to add the roasting juices but is there anything you can recommend that I could add to darken the gravy without negatively impacting on the flavour? Many thanks in advance for any suggestions and thanks for the recipe!
Hi Tom,
I recommend that you first add the pan juices to the gravy, as this can sometimes darken the colour of the gravy.
But to make the gravy darker, I would recommend adding some soy sauce. Just add a dash at a time until you have the desired colour. The soy sauce will also add some additional flavour to the gravy. You can do this on the day once you have added the pan juices to the gravy and when you are tasting it for seasoning.
I regularly add soy sauce to my gravy for both colour and flavour, and it works with any meat you plan on serving.
Have a great Christmas!
I made the gravy today and it tastes fantastic! Do you think it will keep in the fridge for a week (for Christmas Day) or should I freeze it?
Hi Stella,
If you plan to serve the gravy after 7 days, I think it might be safer to freeze the gravy first and to defrost it the day or night before. Happy Christmas!
I made this gravy last year and it was excellent. I plan to make it again this Christmas. And I agree with your comment about leaving out the star anise. The first time I made this recipe, I used the recipe on Jamie Oliver’s website. The star anise flavour was so over-powering. But I like the slight changes you have made to this recipe – it’s perfect!
This is the perfect gravy recipe! Absolutely delicious.
I’m going to make this for Christmas dinner this year, thanks for sharing a version without the star anise. I noticed that Jamies recipe uses smoked bacon and yours does not specify, would I be better using smoked/unsmoked or does it not matter?
Hello,
I don’t think it would matter too much whether the bacon is smoked or not – the recipe does not use too much bacon. I suggest you use whichever bacon you normally buy. Happy Christmas!
Great, thanks for the quick reply! Have a great Christmas 🙂
Beautiful gravy! I made this last night and the sauce tastes delicious, even without the roasting juices yet. I also like that you have made this recipe gluten-free, most people don’t realise that you can thicken sauces with cornflour instead of normal flour.
Thanks Peter! Happy Christmas!
I made the gravy today and it tastes excellent! Do you think I could leave it as is or do I have to add the pan juices? I’m worried the pan juices might alter the flavour too much?
Hi David,
Yes, you could definitely leave the gravy as is 🙂 But the roasting pan juices will usually add more depth of flavour to the gravy. I suggest that you taste the pan juices first – it should taste somewhat concentrated in flavour and maybe a bit salty. If so, it should be good to add to your gravy.
But if the pan juices taste bitter or just not to your liking, it might be best to leave it out of the gravy.
Have a Merry Christmas!
Amazing cook, I love his recipes and technique. Along with his family values and love for his family.