Zopfhasen
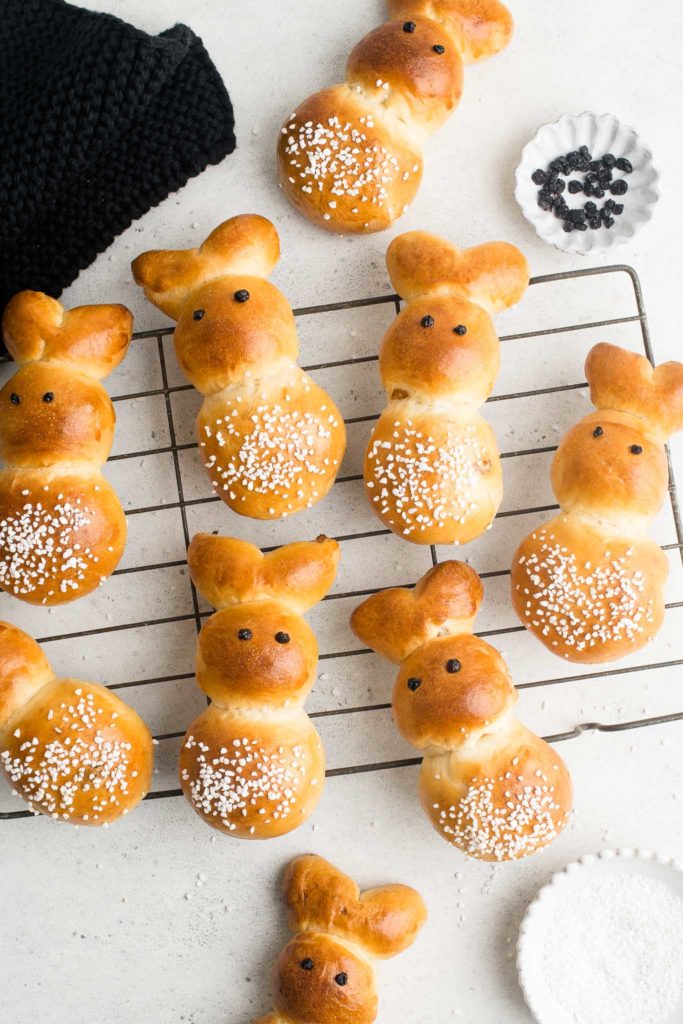
In the lead up to Easter, many bakeries in Switzerland start selling these delicious Zopfhasen, or Easter Bunny Rolls. Or, as my daughter likes to call them, Bunny Buns.
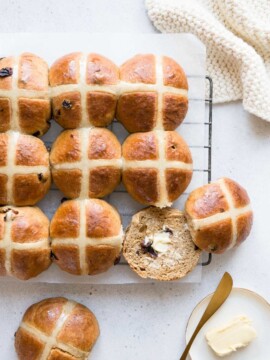
The Zopfhasen are made from a sweetened enriched dough, the same as that used for another Swiss treat but which appears at Christmas, the Grittibänz. Both buns are essentially made from the same recipe, but just shaped differently.
Zopfhasen Recipe
My Zopfhasen recipe is the same as that which I use for Grittibänz and Iced Finger Buns. It’s a very versatile recipe for sweetened enriched dough, and you can shape the dough however you like, and the dough will more or less keep its shape upon baking.
It also happens to be a very forgiving dough, which means it is perfect for the kids to knead and prod and mould into whatever shape they like.
Baking with Kids
This Zopfhasen recipe makes 12 buns, which is more than you and the kids will eat for afternoon tea, but the extra dough is helpful in case you want the kids to get involved (my kids add arms and legs to their bunnies), or if you want to give some away as gifts.
Aussie Easter Buns
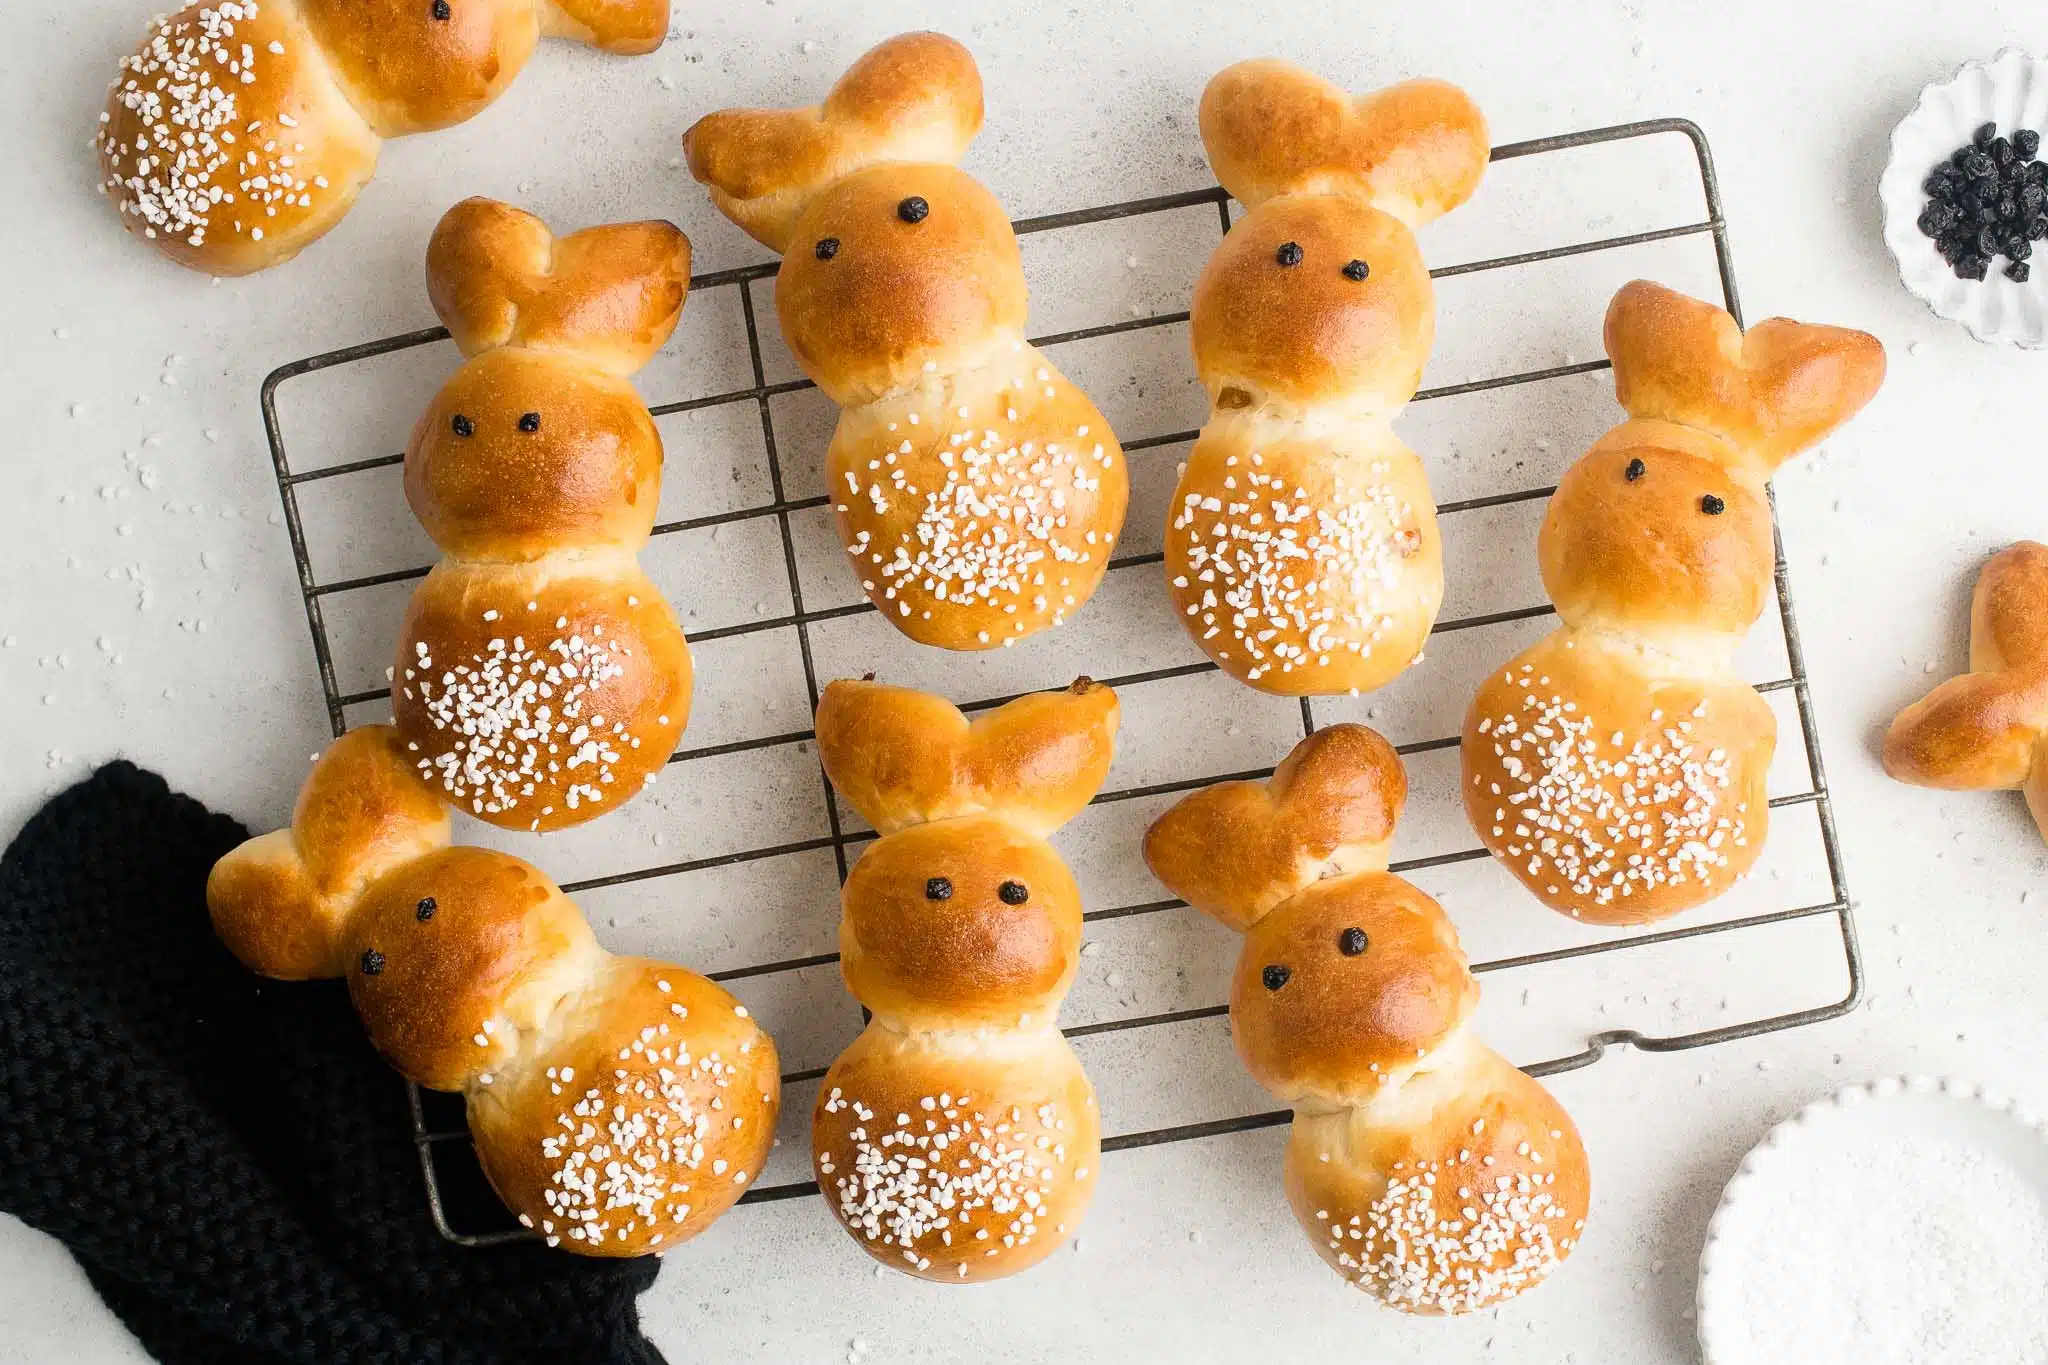
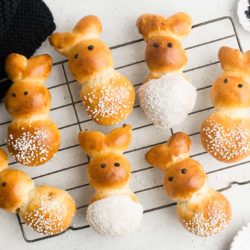
The Easter buns sold in bakeries in Switzerland are traditionally plain or sprinkled with pearl sugar for some added sweetness (and to make them more appealing to children).
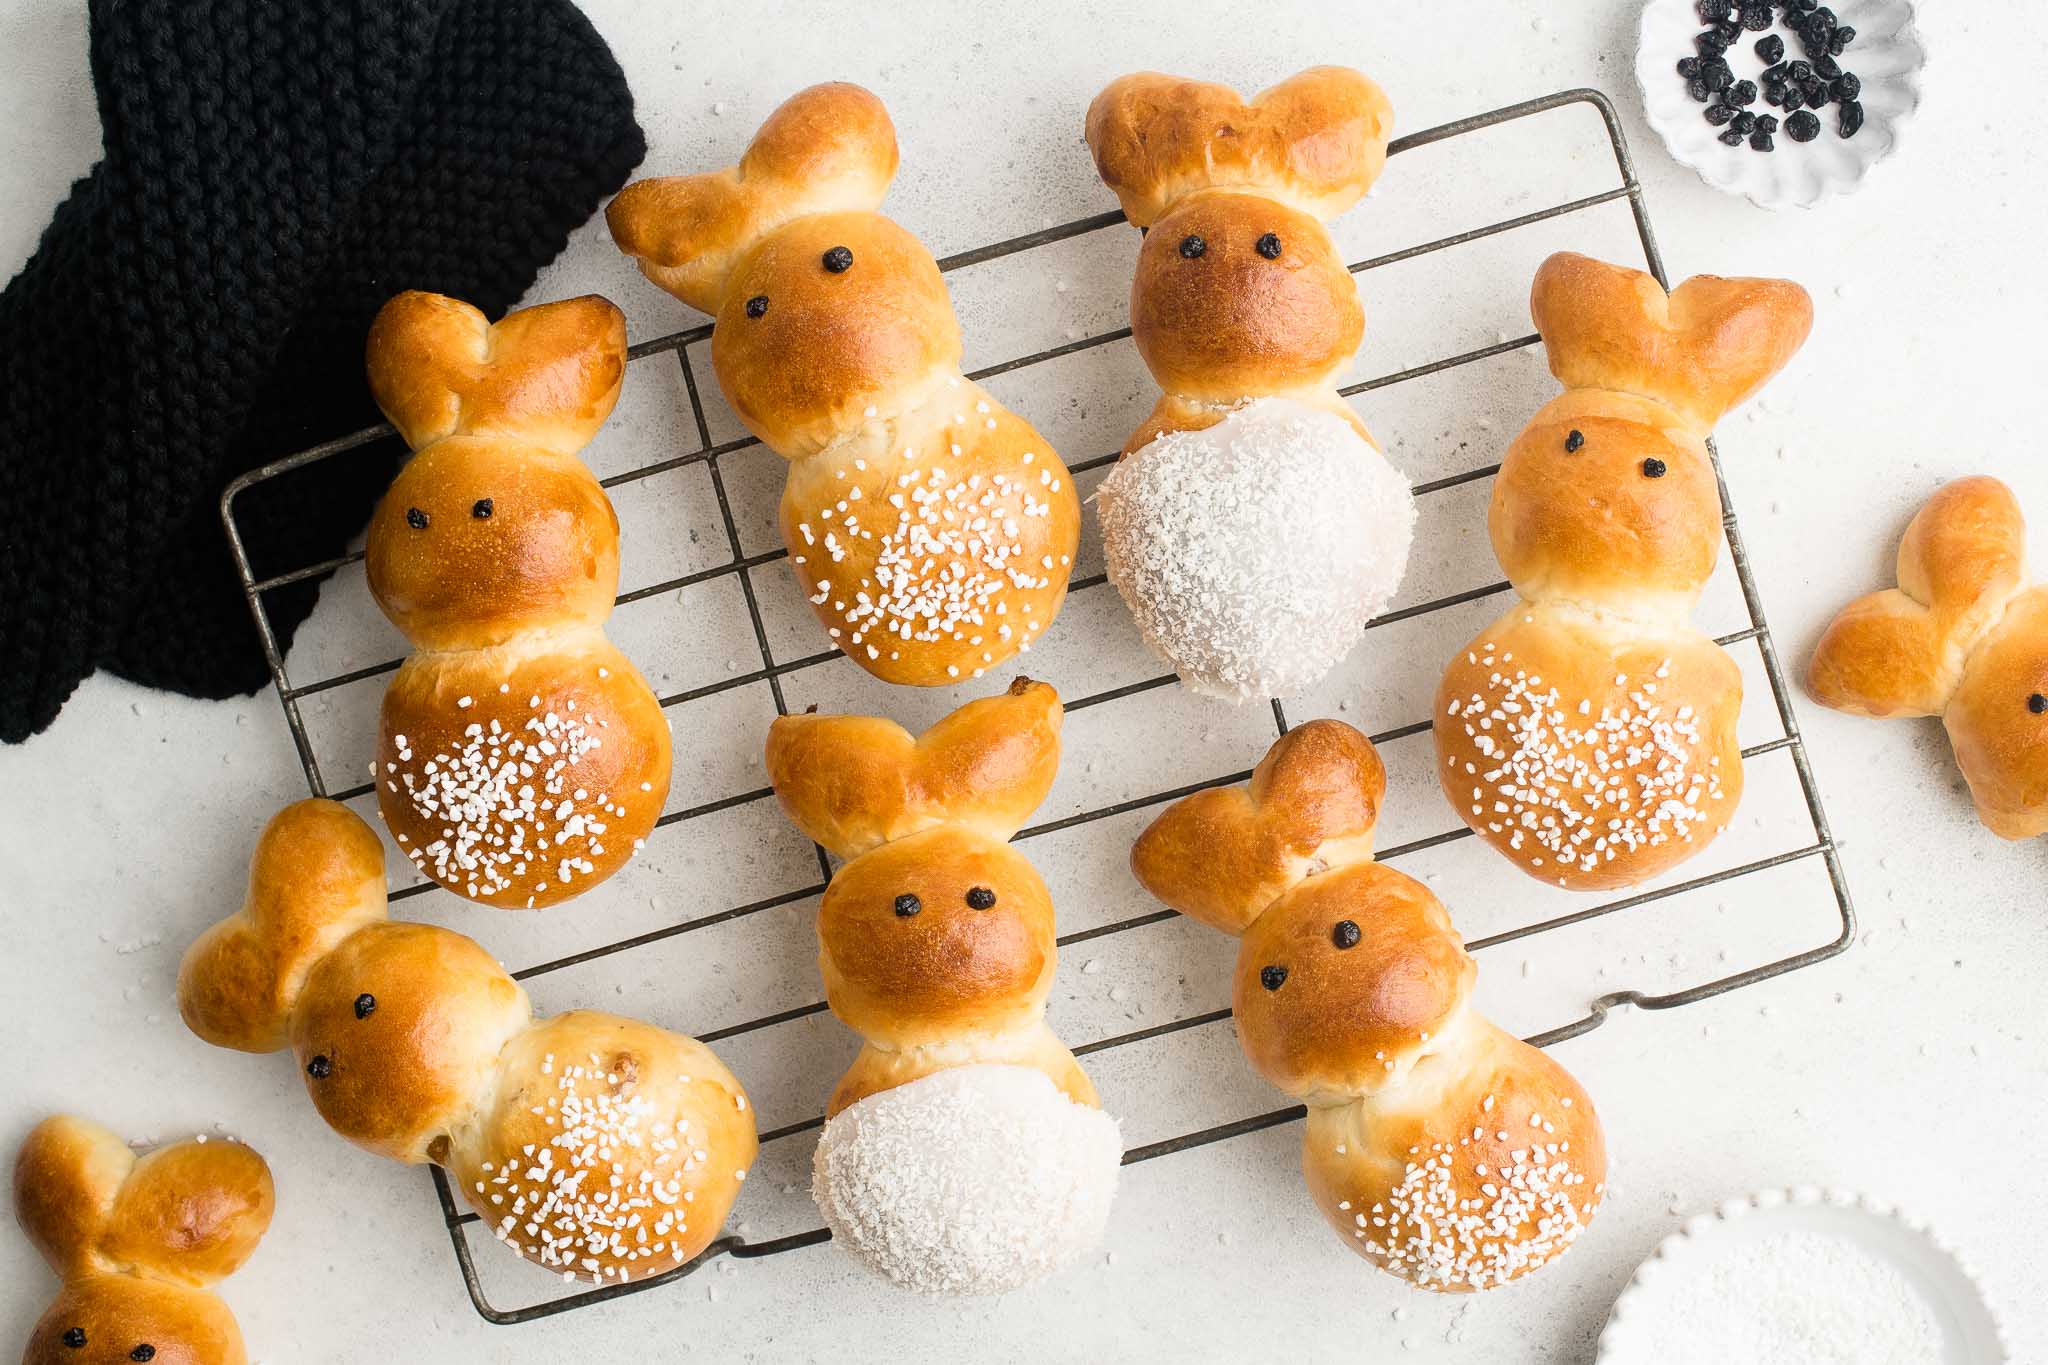
Whenever I eat a Zopfhase, I am always reminded of Iced Finger Buns (think iced buns or iced tea buns) which are commonly sold in bakeries in Australia and the UK, and I keep thinking that the Zopfhase (and also the Grittibänz) could benefit from a bit of icing and dessicated coconut.
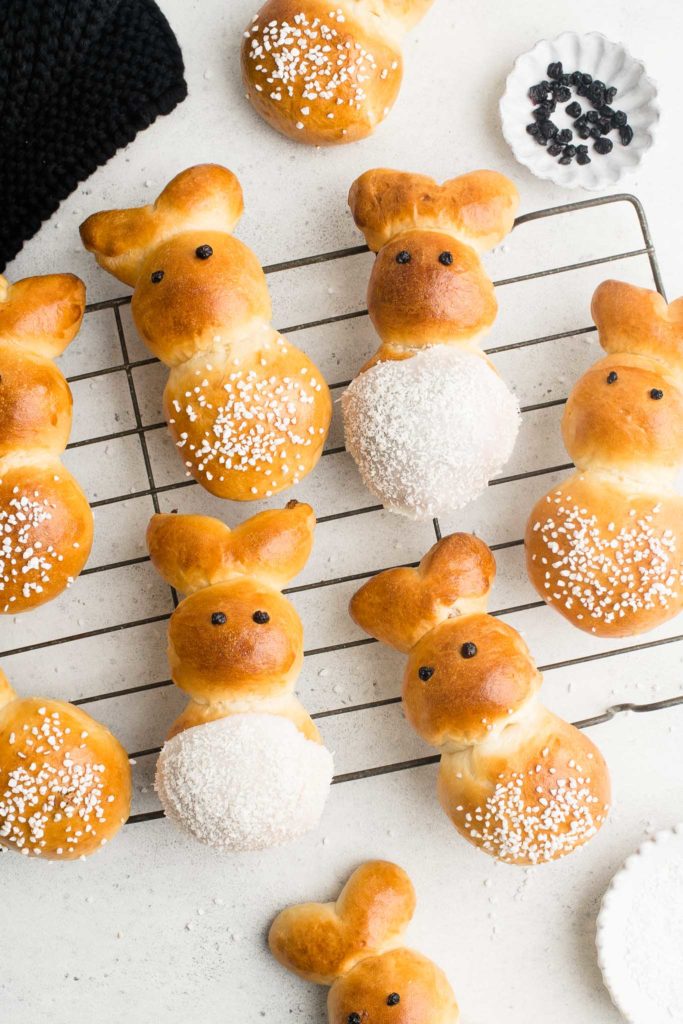
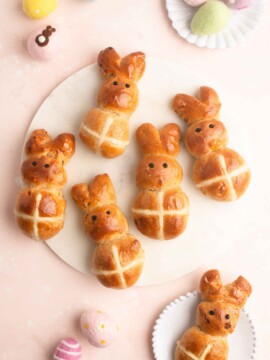
And so I tried it and, you know what? They are the best of both worlds! Last year, I iced the bellies of half the batch of Zopfhasen, and I was rather proud that my children preferred my Aussie-style Zopfhasen to those which just had pearl sugar sprinkled on them. The latter were still subtle and delicious, but you can never go wrong with an iced bun!
How to Make Easter Bunny Rolls
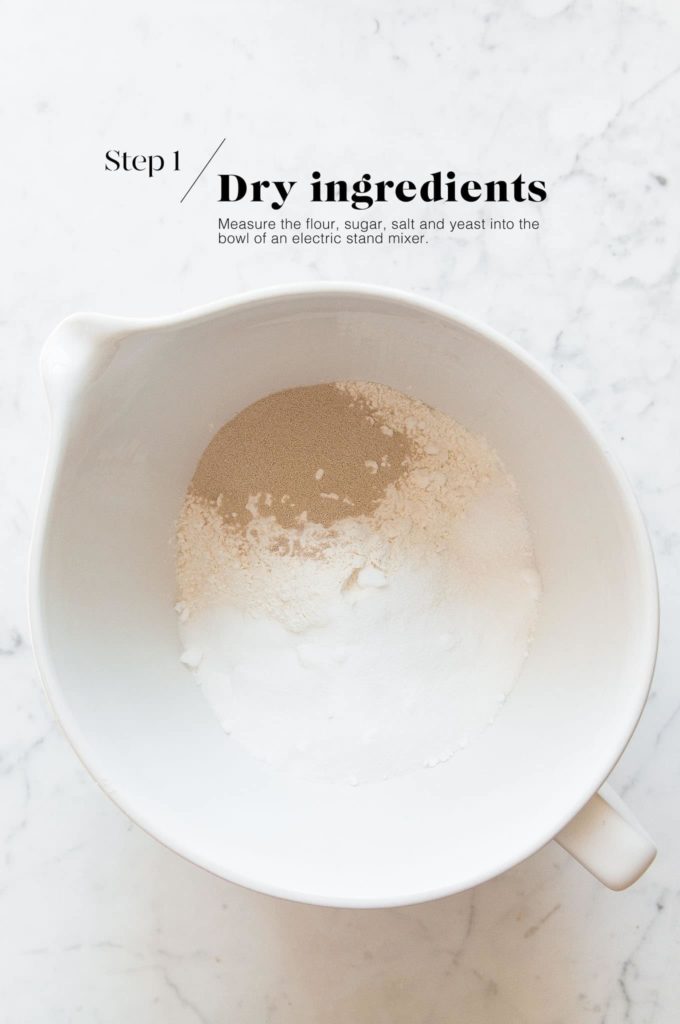
Step 1
Measure the flour, sugar, yeast and salt into the bowl of an electric stand mixer. Lightly mix the ingredients together.
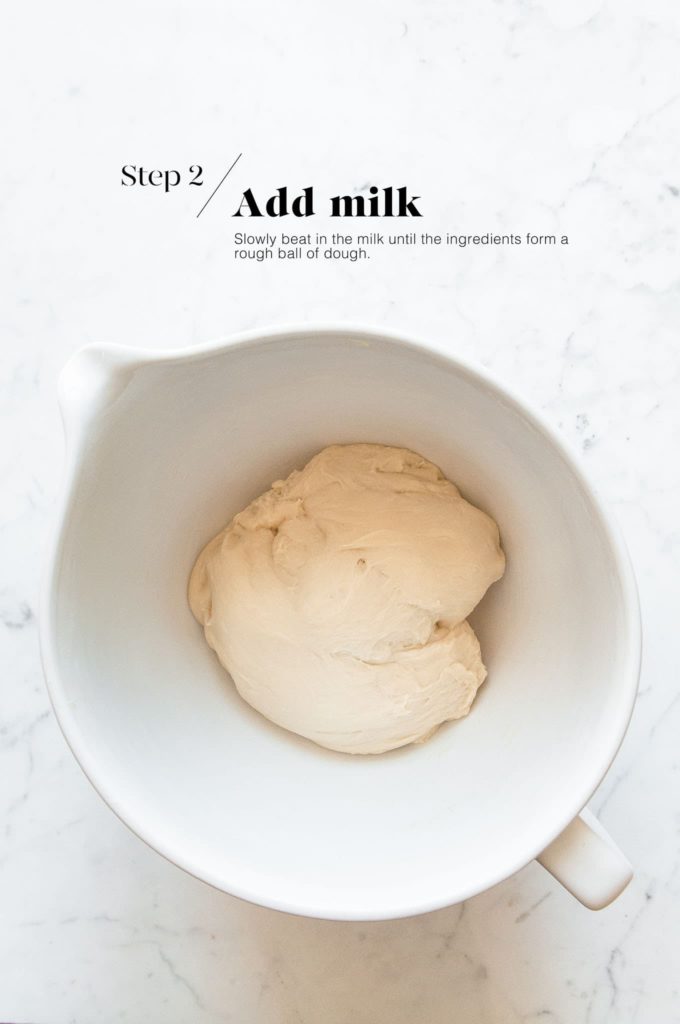
Step 2
Slowly add the warm milk (you may not need all of it), and lightly beat everything with the dough hook until it comes together into a large ball of dough. Only add as much milk as you need to bring the ingredients together into a dough.
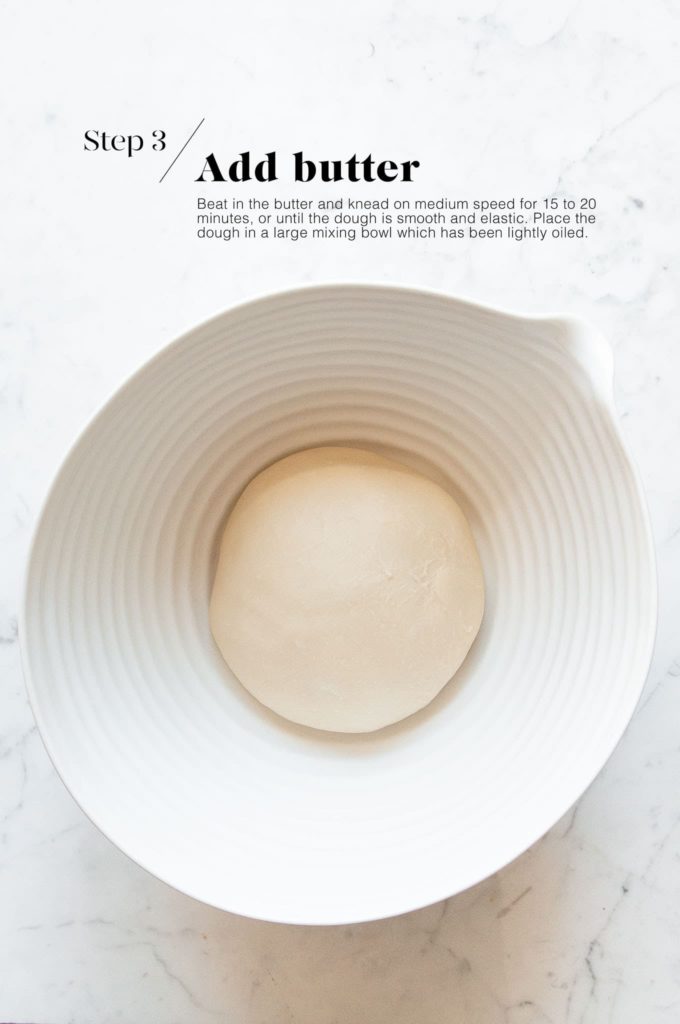
Step 3
Slowly incorporate the butter, one tablespoon at a time, until all of the butter has been used.
Then increase the speed to medium and continue kneading with the dough hook for 15 to 20 minutes, or until the dough is smooth and elastic.
Step 4
Lightly oil a large mixing bowl, and place the dough into the bowl. Cover the bowl with a clean tea towel and leave it somewhere warm for 1 to 1.5 hours, or until the dough has doubled in size.

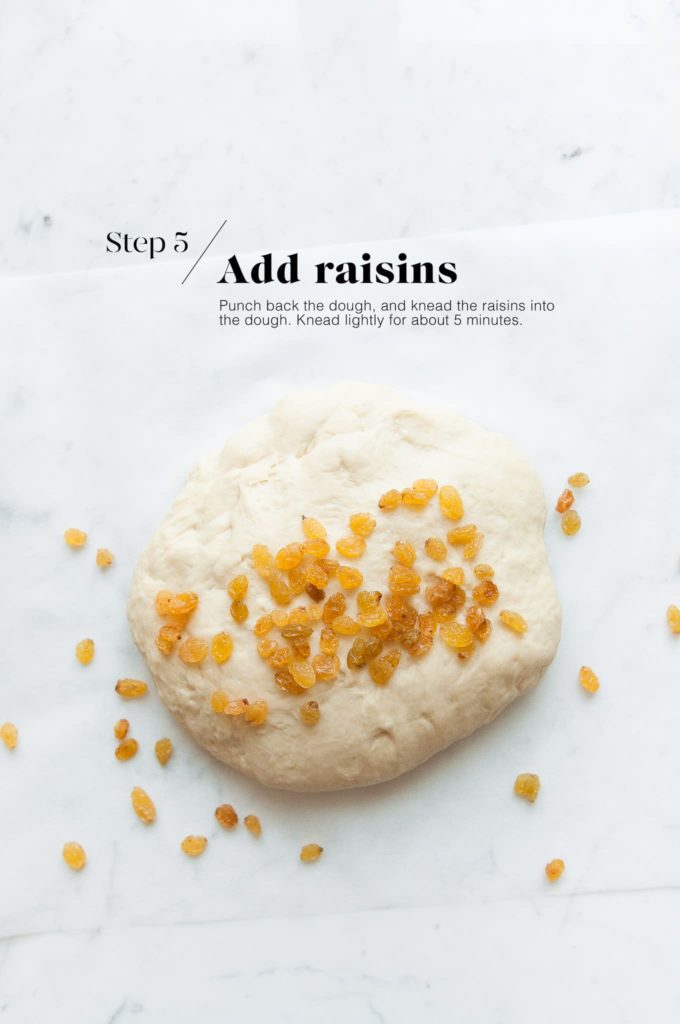
Step 5
Once the dough has doubled in size, punch it back and knead it gently into a smooth ball.
Add the raisins and knead the dough for about 5 minutes to incorporate the raisins.
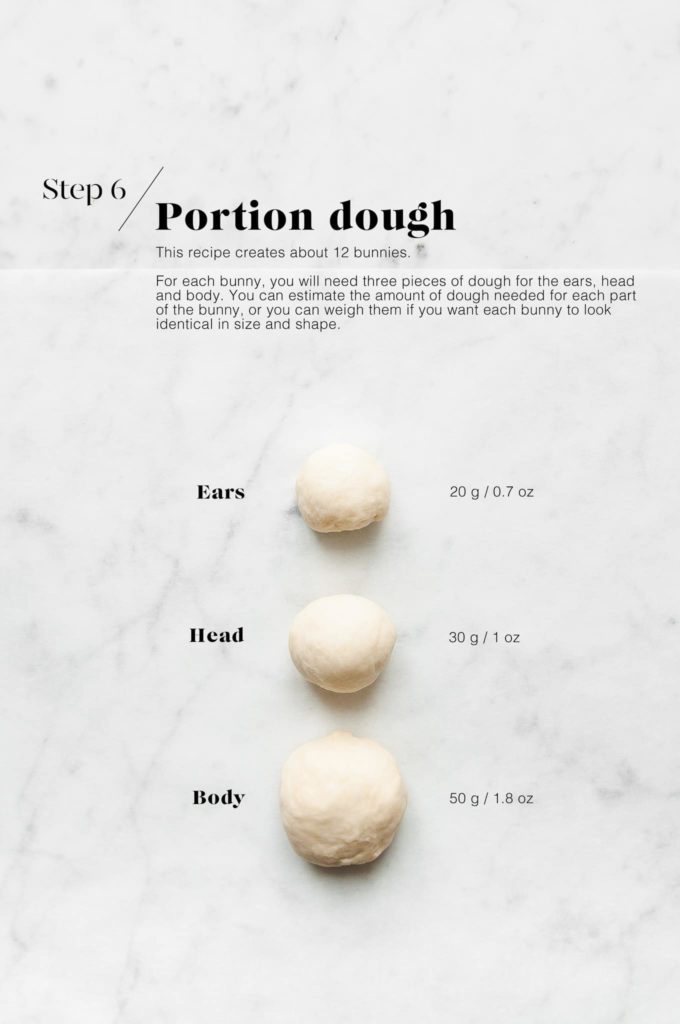
Step 6
From this recipe, you should have enough dough to make 12 bunnies. For each bunny, you will need 3 pieces as follows:
- Ears – 20 g/0.7 oz each
- Head – 30 g/1 oz each
- Body – 50 g /1.8 oz each
Weighing the pieces will help you to make nicely proportioned bunnies, but you can also just guess the weight and improvise as you go.
I recommend forming the each bunny as a whole before moving onto the next one, rather than forming all bodies at once, then all heads at once, etc.
Whenever you are working with yeasted dough, the dough will start to rise gently after you have handled it. So if you form the bunnies one at a time, each part of the bunny will start to puff up at the same time.
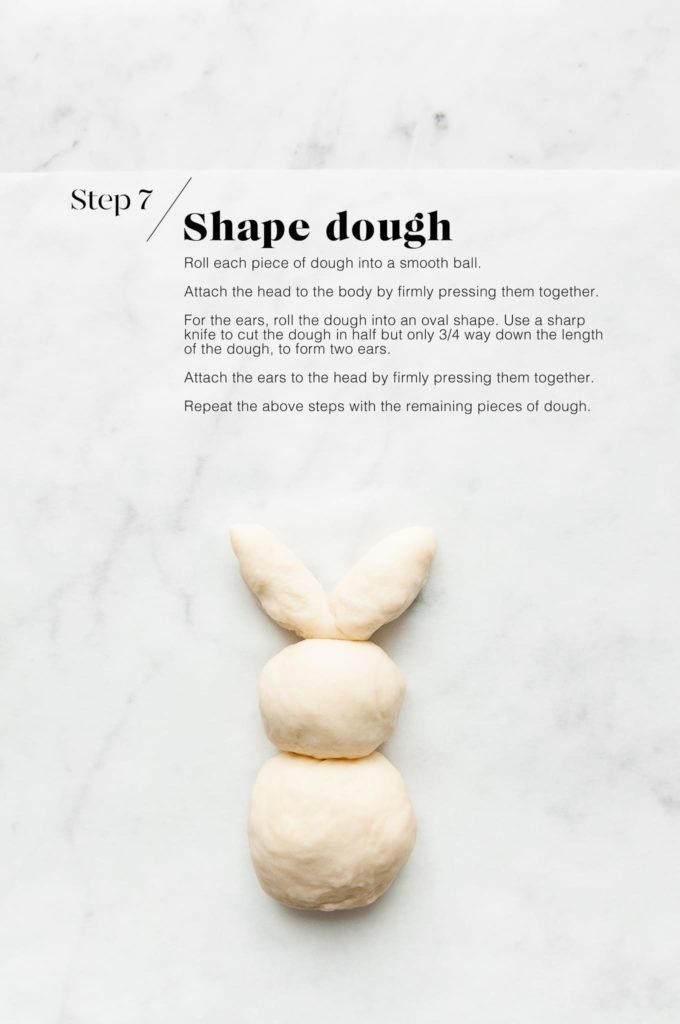
Step 7
Roll each piece of dough into a smooth ball.
To shape the bunnies, attach the heads to the bodies by firmly pressing them together.
For the ears, roll the dough into an oval shape. Use a sharp knife to cut the dough in half to form two ears. Attach the ears to the head.
Repeat the above steps with the remaining dough. I tend to make about 6 bunnies at a time, or enough to fill one baking sheet lined with baking paper.
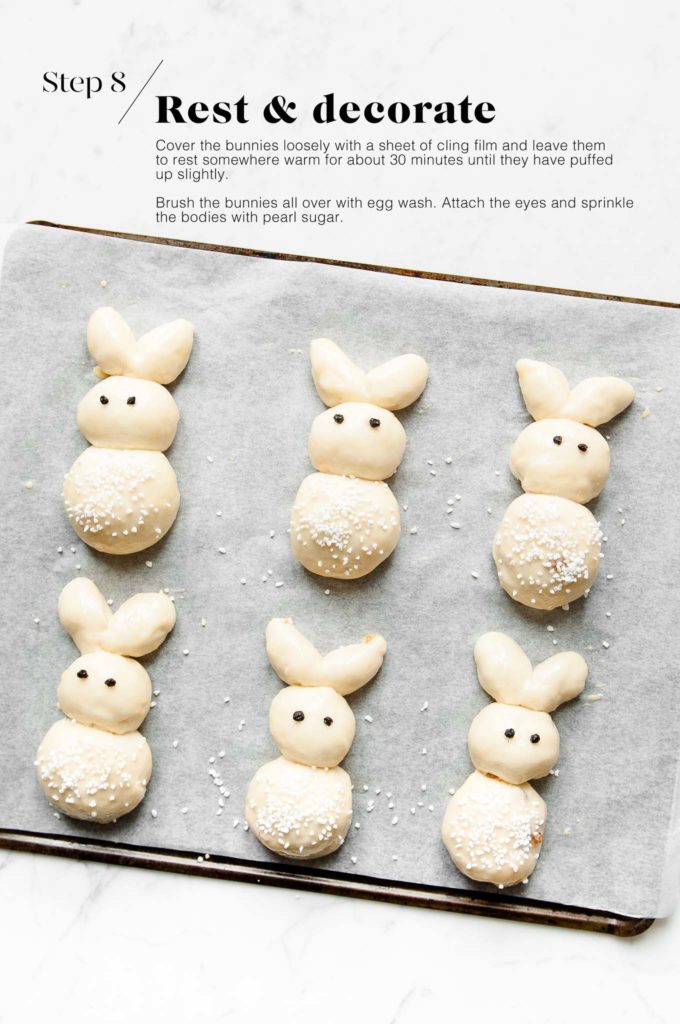
Step 8
Cover the bunnies loosely with a sheet of cling film, and place them somewhere warm for about 30 minutes to puff up slightly.
Brush the bunnies all over with egg wash. Attach the eyes and sprinkle the bodies generously with pearl sugar.
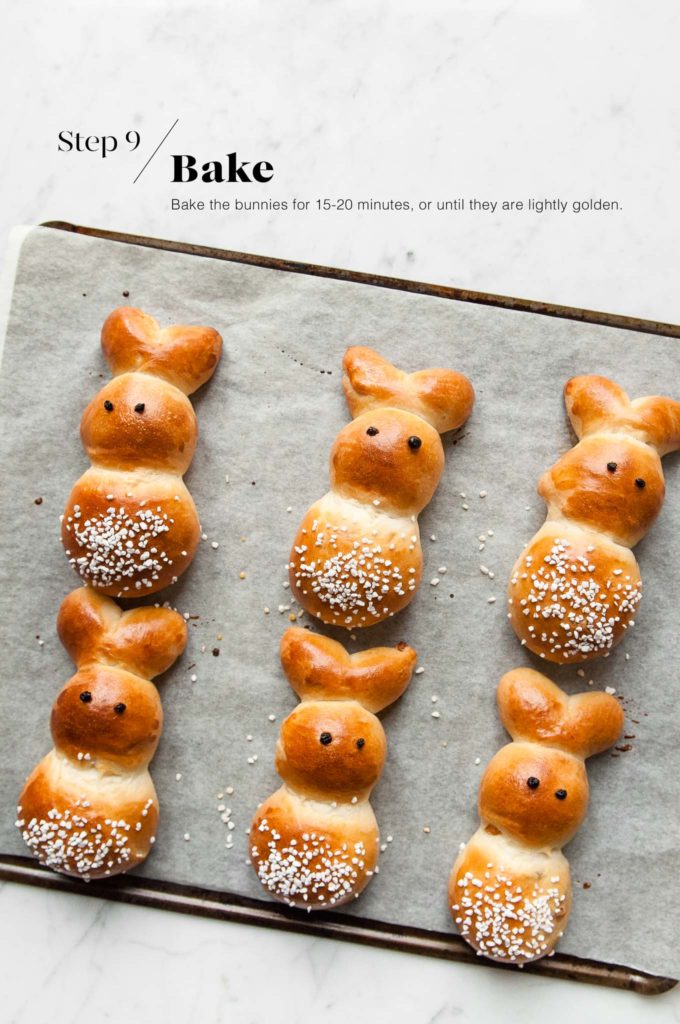
Step 9
Preheat the oven to 220°C/428°F (without fan).
Bake for 15-20 minutes, or until the bunnies are lightly golden. Check on the bunnies at about 10 minutes, and if they are browning too quickly, cover them loosely with a sheet of foil for the rest of the baking time.
Let the bunnies cool completely on a wire rack.
Tips for Making Bread Dough Ahead of Time
I love baking bread, but I don’t love getting up extra early to get started on the dough. So I typically make the dough the night before and allow it to rise slowly in the fridge overnight. The longer proofing time has the added benefit of allowing the dough to develop more flavour and a better texture. Come the morning, the dough will have at least doubled in size, and it will be ready for shaping as per the recipe.
To make the dough the night before:
- Make the dough as per the recipe.
- Place the dough into a large oiled bowl.
- Cover the bowl with plastic wrap or a reusable bowl cover.
- Place the bowl into the fridge.
- Let the dough rise overnight, or for at least 8-10 hours.
- The next morning, the dough should have at least doubled in size.
- Gently remove the dough from the bowl.
- The dough is ready for shaping and the second proof as per the recipe.
- As the dough will be cold from the fridge, the second proof may take slightly longer.
Zopfhasen (Easter Bunny Rolls)
Ingredients
For the dough
- 600 g (4 cups) white bread flour
- 110 g (½ cup) caster sugar, (superfine sugar)
- 6 g (1 teaspoon) fine salt
- 14 g (4 teaspoons) instant dried yeast, see Kitchen Notes
- 375 ml (1 ½ cups) milk, warmed to 37°C (98°F)
- 60 g (4 tablespoons) unsalted butter, softened
- 40 g (¼ cup) raisins, or sultanas, or to taste
For the face
- 1 small handful dried currants, dried blueberries or raisins
For the egg wash
- 1 egg, lightly beaten
- 1 tablespoon milk
To decorate
Instructions
To make the dough
- Measure the flour, sugar, salt and yeast into the bowl of an electric stand mixer.
- Lightly mix the ingredients together using the dough hook.
- Slowly pour in the warm milk, and continue mixing until everything comes together into a rough dough.
- Add the butter, one tablespoon at a time. Once the butter has been fully incorporated into the dough, add the next tablespoon of butter.
- Once all of the butter has been added, continue kneading the dough on medium speed for about 15 to 20 minutes.
- The dough is ready when it is soft and smooth, and also slightly elastic in texture when you try to stretch it. If you poke the dough softly, it should bounce back right away.
- Lightly oil a large mixing bowl.
- Place the dough inside the bowl.
- Cover the dough with a clean tea towel.
- Leave the dough somewhere warm for 1 to 1.5 hours, or until the dough has doubled in size (see Kitchen Notes below).
- Once the dough has doubled in size, punch back the dough to release all of the air.
- Gently knead the dough a few times, and then knead in all of the raisins.
To portion the dough
- Pat the dough into a long log.
- Portion the dough.
- For each bunny, you will need 3 pieces weighing 20 g/0.7 oz (ears), 30 g/1 oz (head) and 50 g/1.8 oz (body). From this recipe, you should have enough dough for 12 bunnies, with a bit leftover. Weighing the pieces will help you to make nicely proportioned bunnies, but you can also simply guess the weight and improvise as you go.
- Roll each piece of small dough into a smooth ball and set aside.
To shape the dough
- Attach the heads to the bodies of each bunny by firmly pressing them together.
- For the ears, roll the dough into an oval shape. Use a sharp knife to cut an incision in the middle of the dough, but only 3/4 down the length of the dough, to form the ears.
- Loosely cover the bunnies with a sheet of cling film, and place them somewhere warm for about 20 minutes, or until they have puffed up slightly.
- Repeat with the remaining dough. I tend to prepare 6 bunnies at a time, or enough to cover one baking tray.
To bake the Zopfhasen or Easter Bunny Rolls
- Preheat the oven to 220°C/428°F (without fan).
- Make the egg wash by lightly whisking together the egg and milk.
- Brush the bunnies with some egg wash.
- Insert the eyes on the bunnies.
- Sprinkle pearl sugar generously over the body of the bunnies.
- Bake for about 15-20 minutes, or until the bunnies are lightly golden. Check the bunnies at about 10 minutes, and if they are browning too quickly, cover them with a loose sheet of foil for the rest of the baking time.
- The bunnies are cooked if an internal thermometer reads 85°C (185°F).
- Gently remove the bunnies to a wire rack, and leave them to cool completely.
Kitchen Notes
- MAKE AHEAD TIPS
To start the dough the night before:
* Make the dough as per the recipe.
* Place the bowl of dough (covered) in the fridge to proof overnight, or for at least 8 to 10 hours. During this time, it should have at least doubled in size.
* The next day, proceed with the rest of the recipe. As the dough will be cold, it may require a bit more time for the second proofing period. - ALTERNATIVES TO PEARL SUGAR
If pearl sugar is not available, you could use sprinkles or mini chocolate chips. - VARIATIONS
* Instead of raisins, use the same quantity of chocolate chips.
* If you want to try my Aussie version, make a simple icing by mixing together 1 cup of icing sugar (powdered sugar) with a dash of milk until you have a thick icing. Spread the icing over the bodies of the bunnies, and sprinkle with dessicated coconut. - DIFFERENT TYPES OF FLOUR
* For Swiss readers: I use Zopfmehl (or farine pour tresse) when making bread and enriched dough. - DIFFERENT TYPES OF YEAST
* Please note that there is a difference between instant yeast (also called instant dried yeast or fast-action dried yeast) and dried yeast (also called active dry yeast). If you are not sure what type of yeast you have, please check the packaging for instructions on how to use the yeast.
* With instant yeast, you can add it directly to the flour mixture without having to activate it first.
* With dried yeast, you will need to activate it first (usually in some warm liquid).
* If you are using fresh yeast, you will need about one block (40 g fresh yeast = 14 g instant dried yeast). Crumble the fresh yeast into the warm milk, and stir to dissolve the yeast. - PROOFING THE DOUGH
Dough needs a warm environment for the yeast to activate and cause the dough to rise. If you don’t have a warm place in your home, try one of the following ideas:
* In the oven with the oven light switched on (works only for some ovens).
* In the oven with a tray of boiling water on the bottom shelf.
* In the oven at a low temperature of about 25-40°C (77-104°F). - OVEN TEMPERATURES
All recipes on this website state temperatures for a regular oven (i.e. a conventional oven without fan). If you have a fan-forced oven, reduce the temperature by about 20°C/35°F and possibly also the cooking time, but please consult your manufacturer’s instructions for best results. - CONVERSIONS
To convert from cups to grams, and vice-versa, please see this handy Conversion Chart for Basic Ingredients.


Great recipe! By far the easiest and cutest recipe for Zopfhasen I have seen. Tasted delicious.
Tolles Rezept! Perfekt fürs Osterfrühstück.
Die sehen toll aus!
We made your recipe this afternoon with the kids and their friends. By far the easiest Zopfhasen recipe I’ve seen and they are so cute as well. The kids ate everything! I’m going to try a version with chocolate chips but haven’t been able to find good ones here in Zurich. Where do you buy your chocolate chips from?
Hi Susie,
I buy my chocolate chips from the supermarket in France ???? I stock up whenever we go there, but I’ve had to ask my family to send me some supplies recently due to the current travel restrictions.
For baking, I generally prefer to use chocolate chips which are made specifically for baking, and which contain ingredients (usually wax) to help them keep their shape upon baking. Some chocolate chips melt upon baking. I’ve tried nearly all of the chocolate chips sold in Switzerland and they all seem to melt upon baking, unfortunately.
It’s a bit of trial and error. If you can get your hands on some chocolate chips which are made in the UK, US or Australia, they generally tend to be very good for baking.
I hope this helps ????
Mega Rezept. Ich habe sie gestern ausprobiert und es hat auf Anhieb geklappt. Danke fürs Rezept!
Oh je wie lecker, deine Zopfhasen habe ich schon zweimal gebacken. Tolles Rezept!
I am a teacher and we made these at school today with the children (Grade 1, Zug). Your step by step photos were very helpful! The children loved making the dough, shaping them and eating them. They were very delicious, and the children were so happy. I will email you some photos 🙂
Fantastic recipe! Such cute buns and so tasty too! Loved the easy to follow recipe.
I made your Grittibänz at Christmas so I knew that these Bunny Buns would taste wonderful too. They are very very cute. My children loved them.
Vielen Dank für das tolles Rezept!
Very delicious! Herzlichen Dank 🙂
Amazing recipe! Thanks for the great instructions. My kids loved them, and my husband and I enjoyed them too!
This is such a great recipe. The buns are very soft and tasty and the shape is very cute. I love your photos which made the recipe very easy to make.
Delightful recipe! The buns tasted wonderful and the kids loved the bunny shapes.
Fantastic recipe!
Great and easy to follow recipe – even used non dairy creamer instead of milk and made it in the dough string of the bread machine. It made 10 bunnies.
Hi Karin,
So glad you enjoyed this recipe!