
Asian Cakes and Desserts
So my kids are not the biggest fans of Asian cakes and desserts. Which I can somewhat understand because, when I was their age, it was hard to tempt me with a cake filled with durian paste too 😉 Plus, my parents ran a bakery selling French-style and Australian breads and pastries, so given the choice, I would always opt for a Cream Bun or Chocolate Eclair over something filled with red beans.
Fast forward a few decades and who knew that I would be craving all of those buns that my mum used to buy from the Chinese bakery across the street!
But I have some sympathy for my kids, and I think it’s mostly a matter of getting used to the flavours and textures of Asian cakes and desserts. In time, I hope they will love Asian baked goods just as much as I do.
Chocolate Fudge Mooncakes
In the weeks leading up to the Mid-Autumn Festival, I look forward to getting out my mooncake moulds and thinking about the different fillings I can make.
My favourite filling is a traditional one – Lotus Seed Paste with Salted Egg Yolks. My kids will try the Mooncakes with just Lotus Seed Paste, but they are not huge fans.
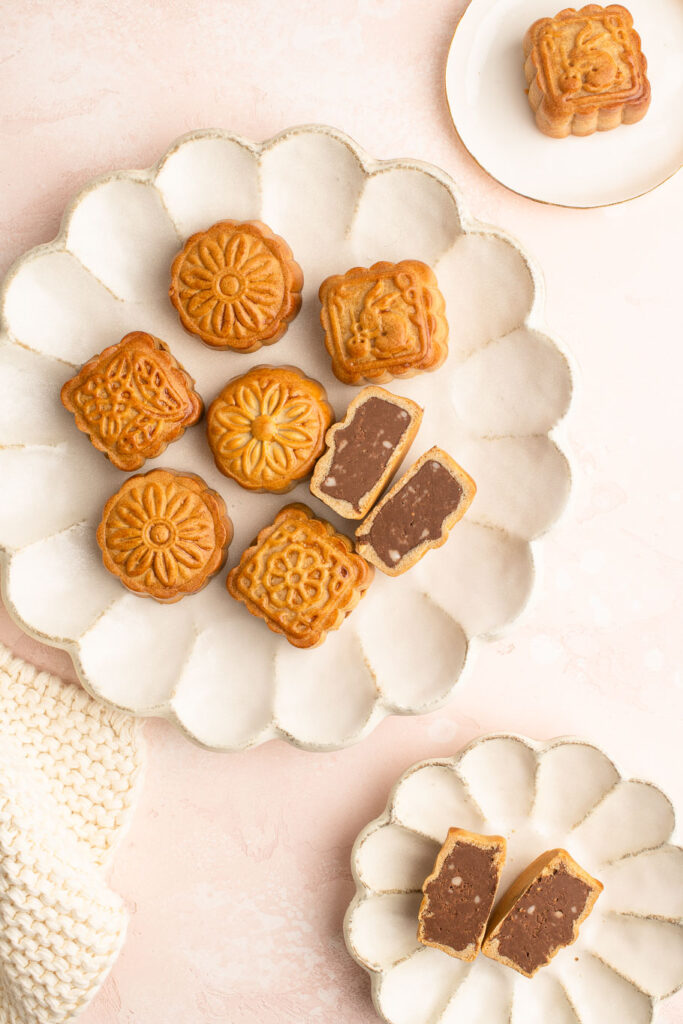
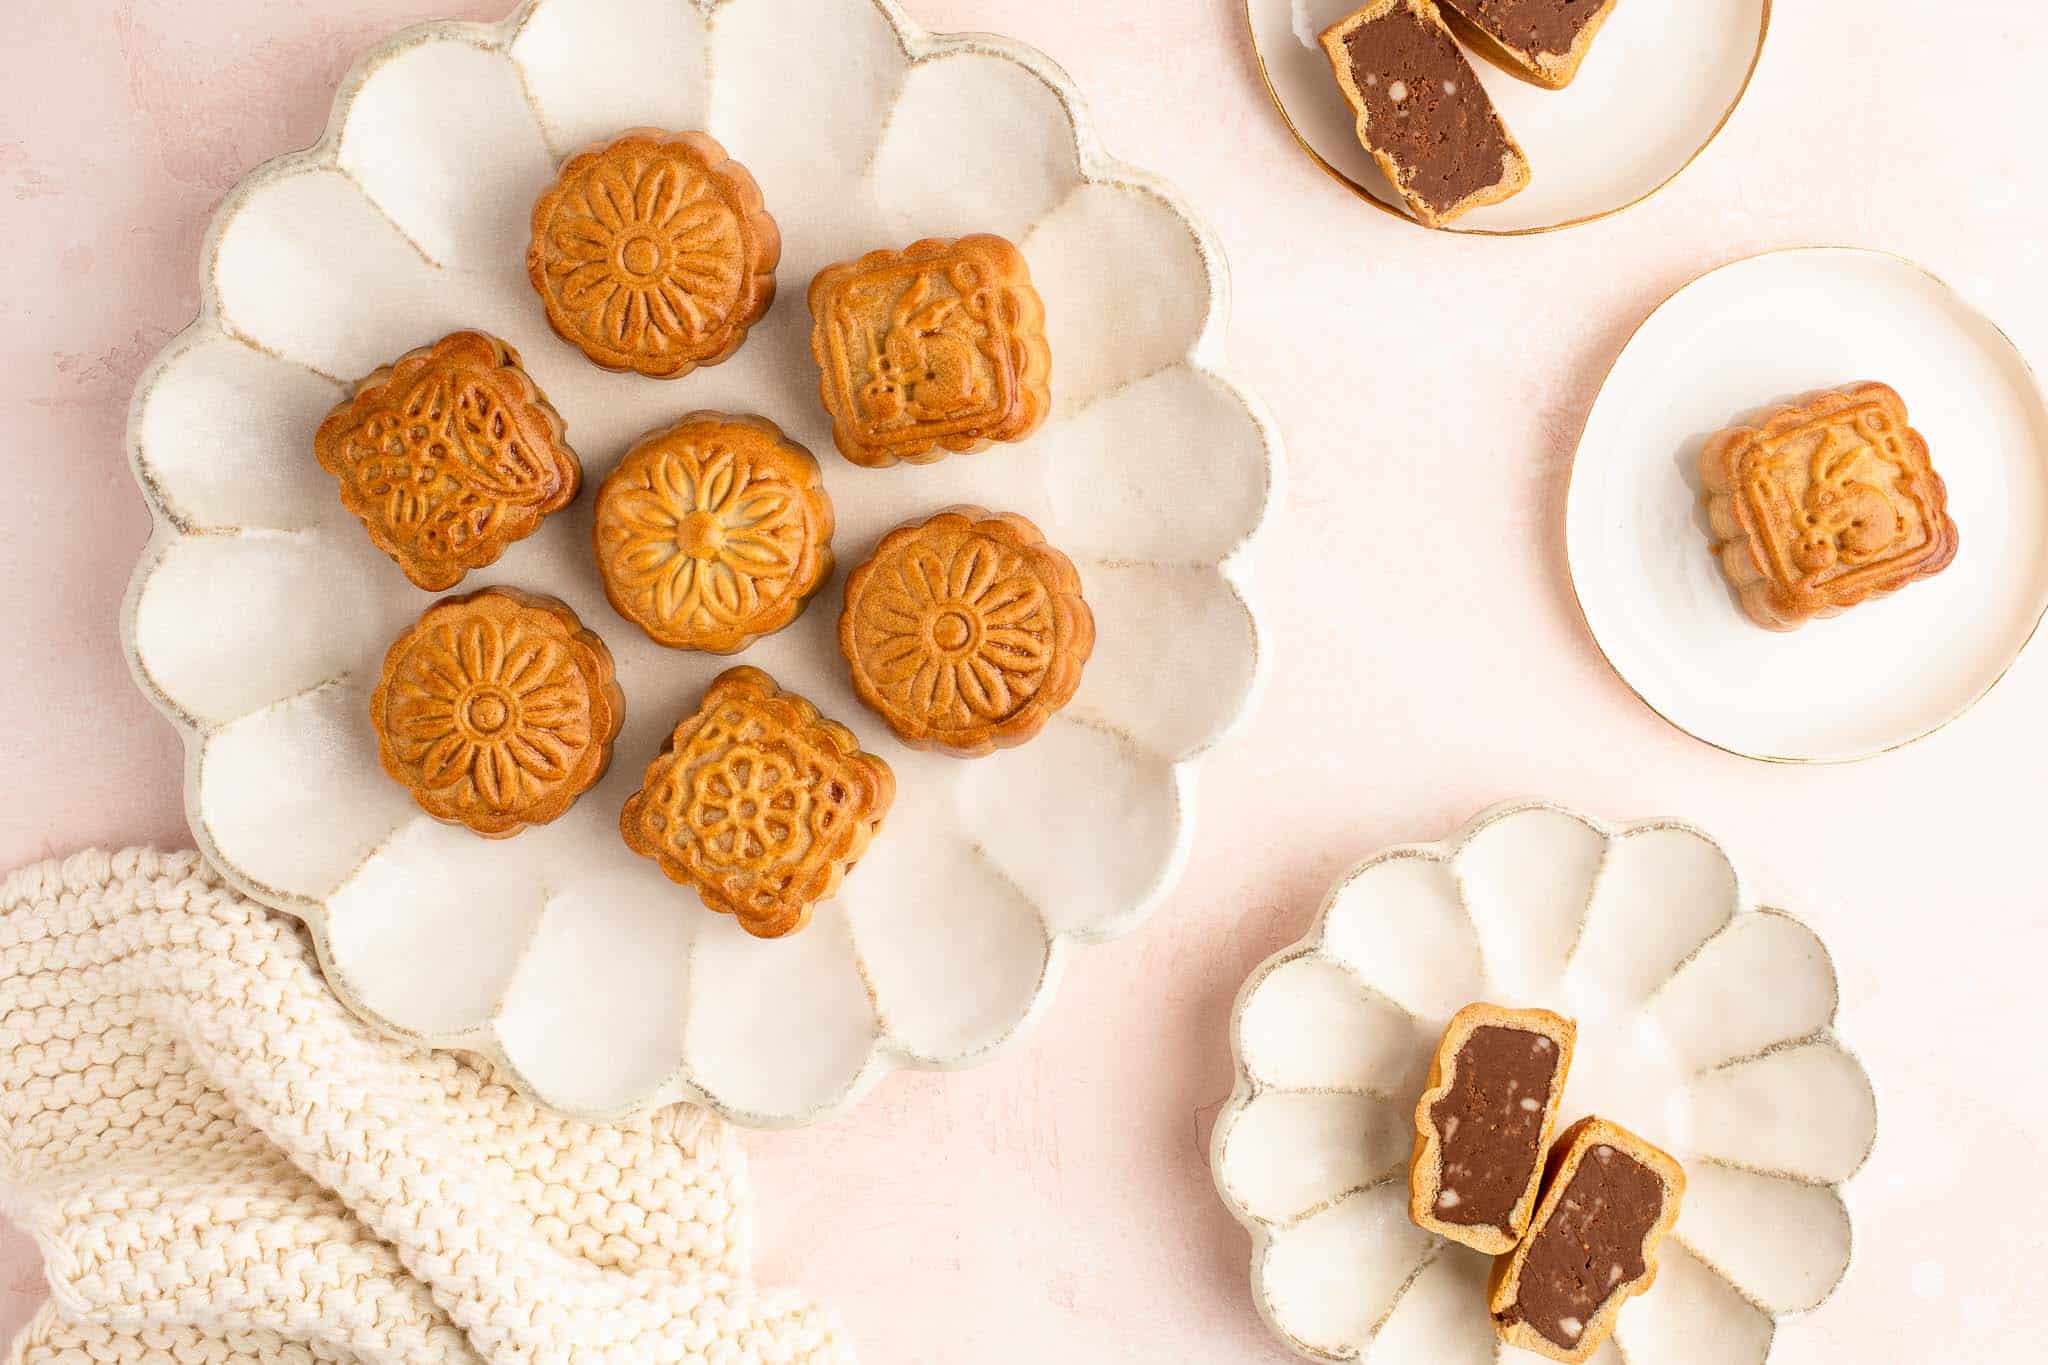
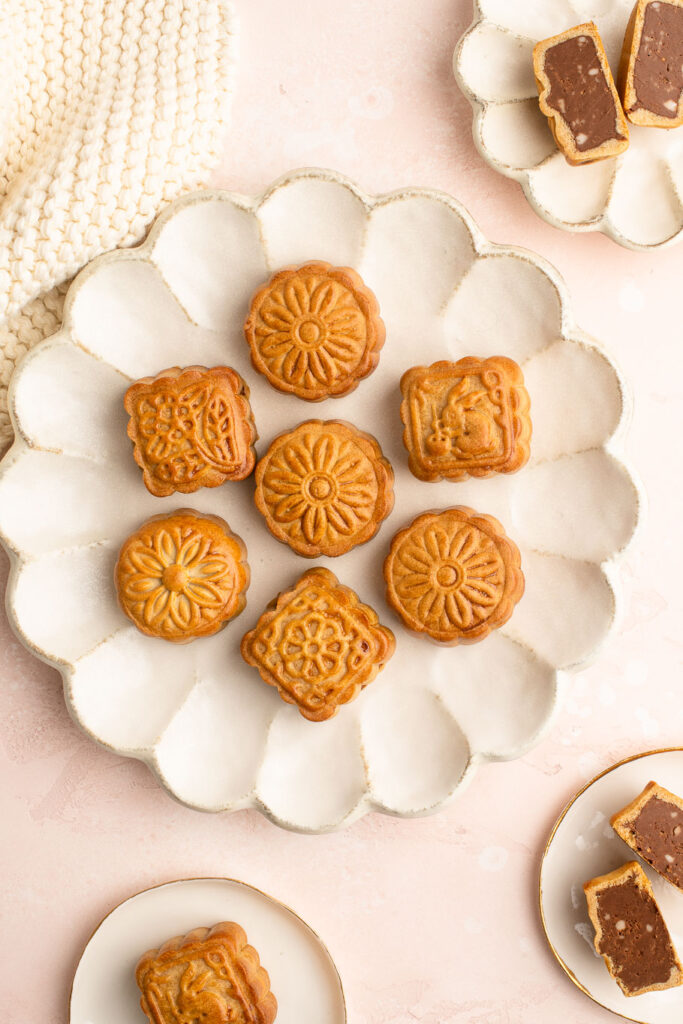
Enter my Chocolate Fudge Mooncakes! My kids loved them from the first bite, unsurprisingly! They are essentially a chocolate fudge squished into a mooncake mould, so they are quite rich and dense. These mooncakes are definitely for sharing!
I think they also provide a nice and fun alternative to a traditional Asian filling which many non-Asians would politely decline. I recommend making them alongside the traditional mooncakes so that you have a variety to offer.
Chocolate Fudge Mooncakes Recipe
This mooncake recipe is inspired by Molly Yeh’s Chocolate Hazelnut Mooncakes. I always love her spin on traditional Chinese recipes. And what a crazy coincidence that we even have the same mooncake moulds! Her recipe for mooncakes uses milk chocolate and hazelnut butter.
I’ve tweaked Molly’s recipe only slightly to instead use dark chocolate and everyday peanut butter (i.e. it contains a little sugar), because that is what we normally have in our home. I’ve tested the recipe with both smooth peanut butter and crunchy peanut butter – both work great here, use whichever you prefer!
If you opt to use all-natural peanut butter (i.e. the type with no sugar added), or even almond butter or cashew nut butter, you might want to add more icing sugar (powdered sugar) to taste. As the filling does not contain any raw egg, I suggest you taste the filling and adjust to your preference. I don’t like my cakes overly sweet, so I try to reduce where I can.
I have otherwise used my own recipe and method for the mooncake dough.
Mooncake Moulds
Pressing the mooncakes into different fancy shapes is undoubtedly the fun part of this recipe!
The mooncake moulds I use for this recipe are cheap and cheerful sets which are readily available on Amazon.
I recommend buying a set with multiple moulds so that you have a variety of patterns to use, and also a combination of square and round moulds.
If you are trying to introduce young children to mooncakes (or any Asian cake, for that matter), it helps to have fun, cartoon shapes on hand to entice them. Although, I am rather impartial to the Hello Kitty moulds for myself!
The mooncake moulds come in a few sizes – 50 g for small mooncakes (generally a good portion for 1 person), or 100 g for large mooncakes intended for sharing.
For this Chocolate Fudge Mooncake recipe, I recommend using the 50 g moulds because the filling is quite rich and dense.
You can also buy mooncake moulds in other sizes, but you will need a good maths background to calculate the ratio of dough to filling ????
How to Make Mooncakes
This mooncake recipe is a bit different to a traditional recipe for mooncakes, and it is also a bit easier.
For these Chocolate Fudge Mooncakes, you will need to do the following:
- Make the lye water (if necessary)
- Make the chocolate fudge filling
- Make the dough
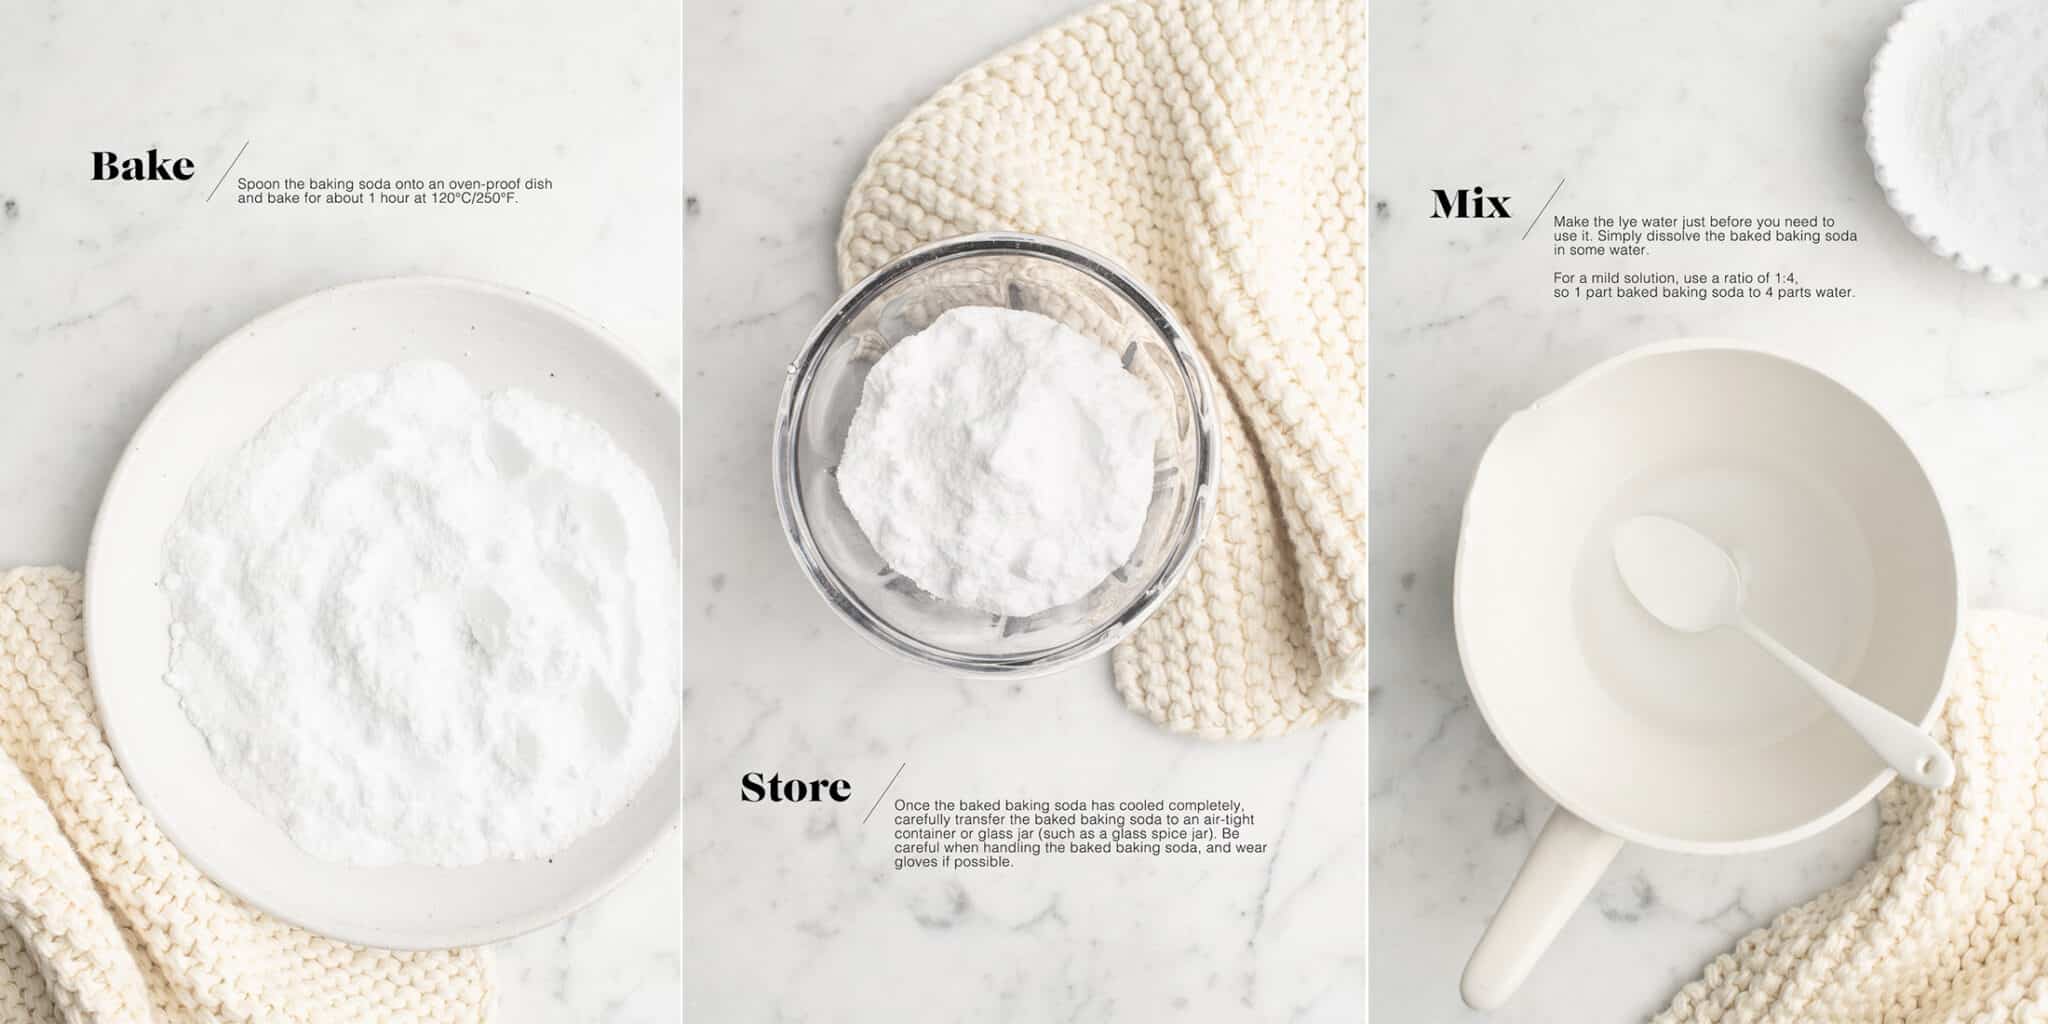
How to Make Lye Water
Lye water is an alkaline water used in some recipes to help with texture or colour. For example, lye water gives pretzels their signature dark brown colour. For mooncakes, a small amount of lye water is used to give the dough a deep, golden colour.
Lye water is readily available in Asian grocery stores in some countries, but not in others. Due to its potency and irritant factor, lye water is even banned in some countries.
If you are unable to buy lye water, please see my recipe on how to make Lye Water with step-by-step photos.
How to Make the Chocolate Fudge Filling
Compared to a traditional Asian filling for mooncakes, this chocolate fudge filling is super easy!
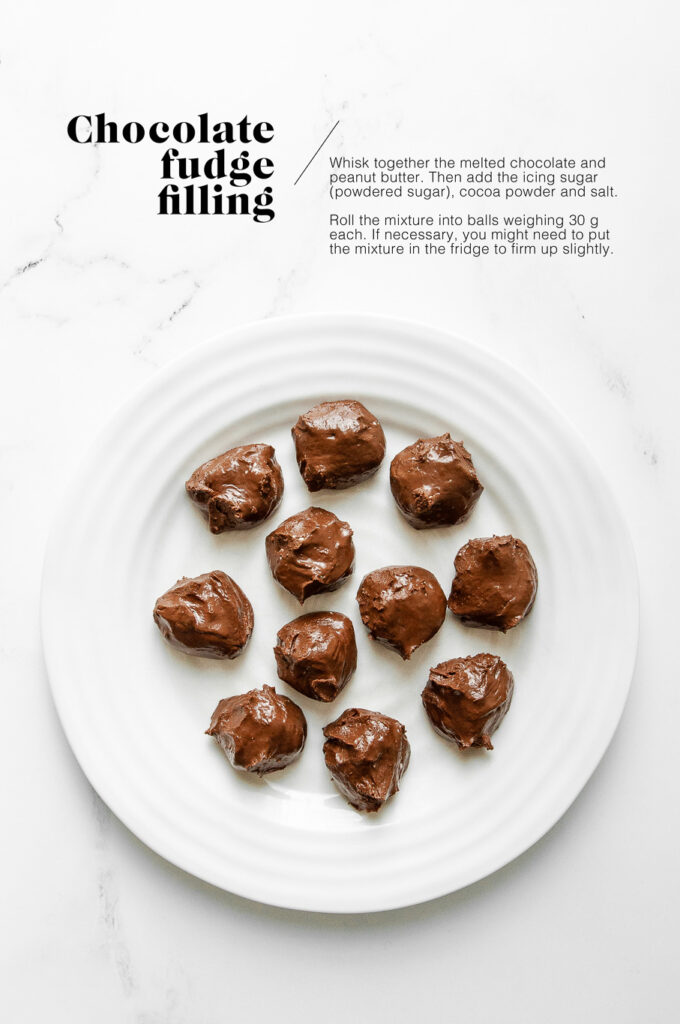
Simply melt the chocolate in a bain-marie (or in a heatproof bowl over a pan of simmering water), whisk in the peanut butter, then add the icing sugar (powdered sugar) and cocoa powder.
Depending on the type of peanut butter that you are using, the consistency of the mixture might vary, especially since the consistency of peanut butter itself varies between brands.
Ultimately, you need a mixture which is thick but soft enough to roll into little balls. You may need to put the mixture into the fridge for 5-10 minutes for the mixture to firm up sufficiently before you cover them with the dough.
Additionally, once you have rolled the filling into balls, if the balls feel very soft and don’t hold their shape, i.e. they are sticky and floppy (like in my photo below), you may need to stick them in the fridge to firm up slightly.
However, do not leave them in the fridge for too long to become very cold and solid. Otherwise, you won’t be able to cover them with the dough and press them with the mooncake mould. You just want the filling to be firm (and cold) enough so they are not so sticky, and you can cover them easily with the dough.
My advice is to just try and wrap one piece of filling in the dough, and you will get the hang of how soft or firm the filling needs to be. And if the filling is too soft and melds with the dough, don’t fret. Press them in the mould anyway and bake them – they will still taste great!
How to Make Mooncake Dough
Please see full recipe instructions in the recipe card below.
This dough is fairly interesting in that it uses golden syrup for both moisture and sweetness. I don’t think you can substitute the golden syrup for another type of syrup, nor is it worthwhile if you want to create a mooncake which is both authentic in taste and texture.
I use Lyle’s Golden Syrup, which is commonly used in British and Australian baking recipes.
When making the mooncake dough, you want a mixture which is fairly soft and pliable. If the mixture looks too dry and crumbly, add a dash of water to try and bring the dough together. Otherwise, a dry dough will be difficult to roll out later to stretch and cover the filling.
When you roll out the dough, it should feel both sticky and oily.

How to Shape the Mooncakes
Please see full recipe instructions in the recipe card below.
For these Chocolate Fudge Mooncakes, I recommend using the 50 g moulds, which are generally the smallest you can buy. These Chocolate Fudge Mooncakes are very dense and filling, and I think a 50 g mould gives a good ratio of dough to filling.
Depending on the consistency of your dough, you may need to dust your mould with some flour to prevent the dough from sticking.
It may take you a few attempts to know how much pressure to apply and when to release the mould, but you should get the hang of it pretty quickly.

How to Bake the Mooncakes
Please see full instructions in the recipe card below.
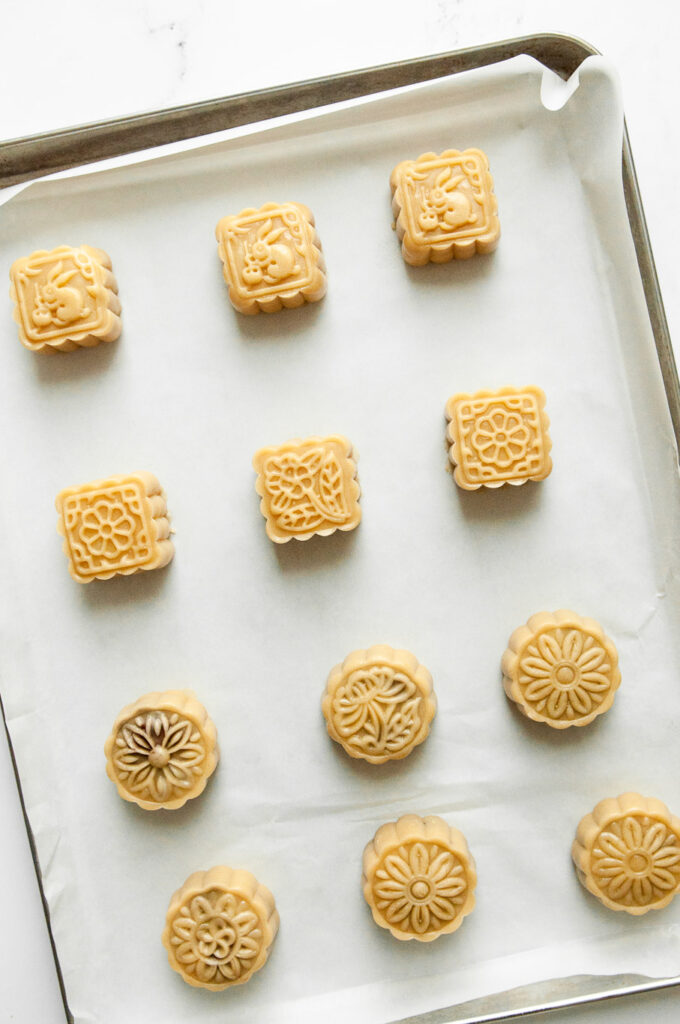
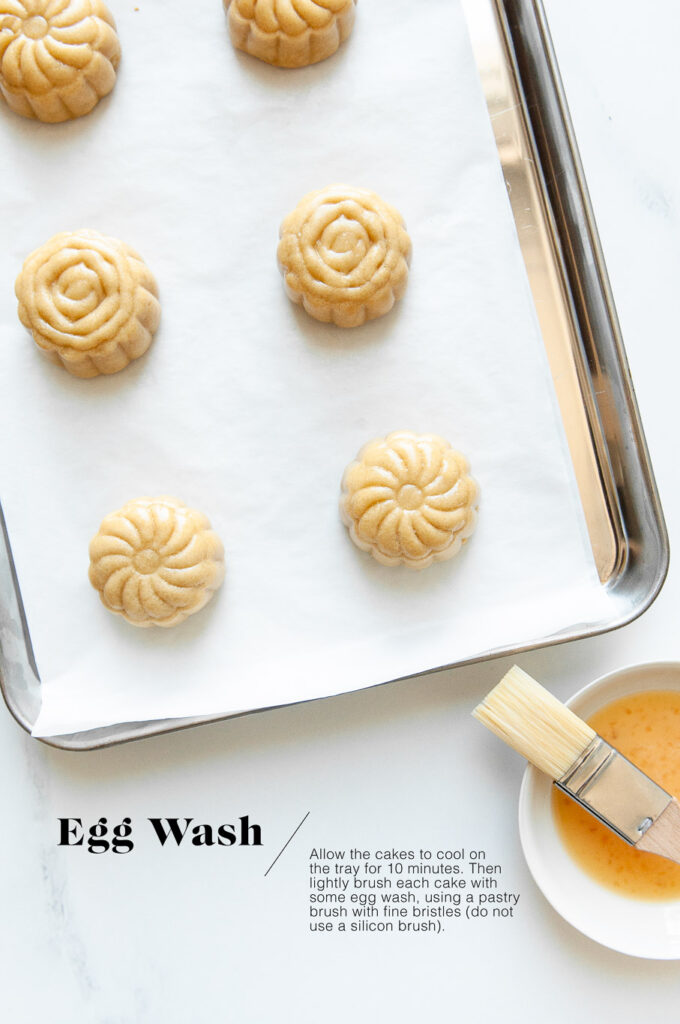
Mooncakes need to be baked twice. The first bake is mostly to set the pattern before applying any egg wash. Otherwise, applying the egg wash first might prevent the patterns from staying in place.
After the first bake, you need to let the cakes cool slightly before applying the egg wash. If you apply the egg wash too soon, the egg might coagulate on the cakes and leave spots on the surface.
The egg wash should be brushed only very lightly on the cakes – you want just enough to moisten the dough and to help the cakes brown evenly. I recommend using a pastry brush with fine (natural) bristles which is better at applying the egg wash over the intricate patterns; a silicone brush generally picks up too much egg wash.
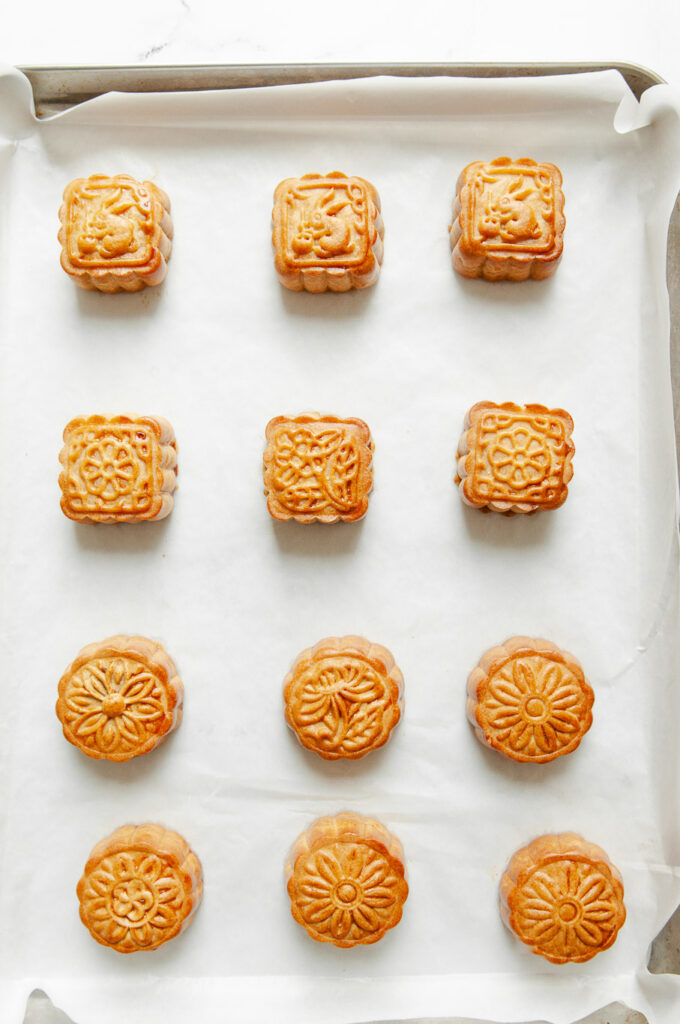
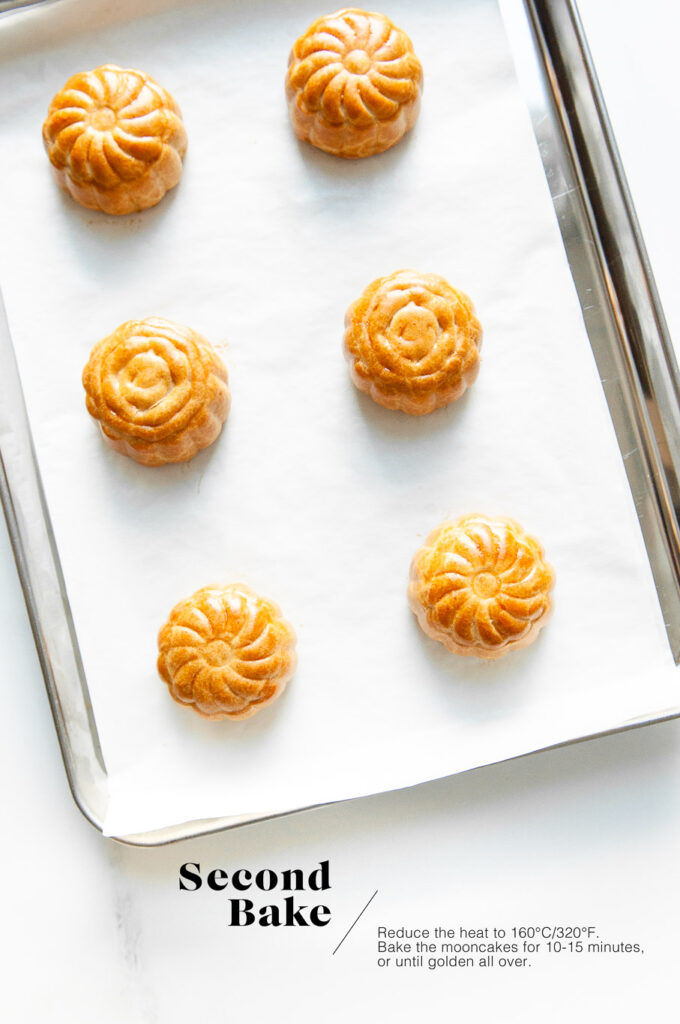
The second bake is to fully cook the mooncakes until they are golden brown all over.
Tips for Making Mooncakes
Making mooncakes is an art form, and this is a recipe which requires a lot of patience and a bit of practice. It took me several attempts before I got the hang of it and understood how the texture and consistency of both the dough and filling should be.
My tips for making mooncakes are:
- Start at least the day before. None of the components of mooncakes are particularly difficult, but they all take a bit of time. Starting everything the day before will make you feel less stressed and rushed when it comes to making the actual cakes.
- Use a digital kitchen scale. Baking is culinary science, and science requires precision. When it comes to making mooncakes and ensuring that each ball of filling and dough is exactly the right size so that it can fit into the moulds, a digital kitchen scale will make life much easier. It will also help to ensure that your dough is made with the right ratio of liquid to flour.
- Experiment with different mooncake moulds. You can find many cheap and cheerful mooncake moulds on Amazon. Some moulds look very beautiful but they don’t keep their defined lines once baked. I have a few fun moulds for the kids, including some Hello Kitty shapes, which I find to be too detailed to keep their form during baking. This could be due to a variety of reasons, but don’t be too disappointed if the cakes end up looking like little smooth buns – they will still taste great!
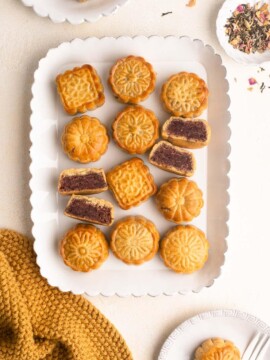
- Make a variety of fillings. If you have time, make a variety of fillings and use the same mould for each type of filling, so that you know what is inside. Not everyone likes salted egg yolks (especially kids), so I generally only make half a batch with salted egg yolks inside. Lotus seed paste is my favourite filling, but I also love red bean paste and chestnut paste. There are also many “modern” fillings that you can try, such as green tea paste and chocolate fudge.
- Use fun moulds for kids. Indulge the kids and use fun cartoon or animal-shaped mooncake moulds to entice them to try the mooncakes. Big kids (aka adults!) love the cute cartoon moulds too!
- Make a large batch. Given the time commitment required for making mooncakes, you may as well make 1-2 batches – they make great gifts for friends and family!
- Practice makes perfect. Like with most things in life, once you have made mooncakes once or twice, the process becomes less daunting. I find making mooncakes to be a bit like making specially stamped cookies.

Chocolate Fudge Mooncakes
Ingredients
For the Chocolate Fudge Filling
- 150 g (5 oz) dark chocolate, 70% cocoa
- 150 g (½ cup) smooth peanut butter, or crunchy peanut butter, see Kitchen Notes
- 35 g (¼ cup) cocoa powder
- 100 g (¾ cup) icing sugar, (powdered sugar)
- 1 pinch fine salt
For the Mooncake Dough
- 150 g (5 oz) golden syrup
- 50 g (3 tablespoons plus 2 teaspoons) sunflower oil, or another flavourless oil
- 1/2 teaspoon food-grade lye water
- 225 g (1 ½ cups) plain flour, (all-purpose flour)
For the Egg Wash
- 1 egg
- 1 tablespoon water
Instructions
For the Chocolate Fudge Filling (this step requires approx 30 mins)
- Melt the chocolate in a bain-marie (or a heatproof bowl over a pan of simmering water).
- Whisk in the peanut butter.
- Take the pan or bowl off the heat.
- Stir in the icing sugar (powdered sugar), cocoa powder and salt.
- The mixture should thicken considerably and look like a stiff and sticky cookie dough. If necessary, let the mixture cool slightly (whether at room temperature or in the fridge), so that it is firm enough to work with.
- Divide the filling into about 12 portions, each weighing 30 g.
- Roll each portion of dough into a smooth ball.
- If the mixture is too soft and/or sticky to work with, put it back in the fridge for 5-10 minutes to firm up sufficiently.
For the Mooncake Dough (this step requires approx. 45 mins)
- In a large mixing bowl, whisk together the golden syrup, oil and lye water.
- Add the flour.
- Mix everything together until a dough forms.
- Lightly knead the dough until you have a soft and smooth ball of dough. If the dough is too crumbly and doesn’t come together well, add some water.
- Wrap the dough in some cling film.
- Leave the dough to rest at room temperature for at least 30 minutes.
To Prepare the Mooncake Dough
- At this stage, the dough should feel slightly oily and sticky.
- Portion the dough using a digital kitchen scale. You will need as many pieces of dough as you have balls of filling.
- Each portion of dough should weigh 20 g.
- Roll each piece of dough into a smooth ball.
- You will have leftover dough in this recipe.
To Assemble the Mooncakes
- Line a large baking tray with baking paper.
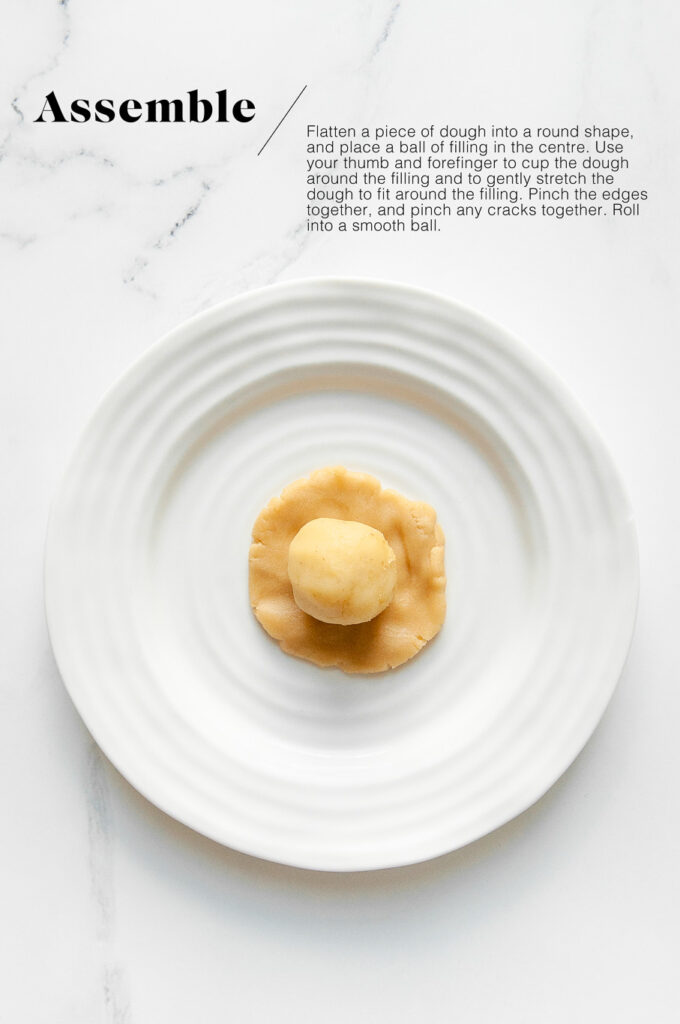
- Flatten a piece of Mooncake Dough into a thin round shape which is just large enough to encase the filling.
- Bring the edges of the dough up around the filling, cupping the mixture between your thumb and forefinger as you do so.
- Gently pinch the dough until it stretches to completely cover the filling.
- Pinch any cracks together, or even add a bit of extra dough to patch up any cracks if necessary.
- Roll the mixture into a smooth ball.
- Place the balls of filled dough onto the lined baking tray.
To Shape the Mooncakes
- Prepare the mooncake moulds by affixing your desired stamp to the plunger.
- It may be wise to lightly dust the moulds with some flour to stop the cakes from sticking to the stamps. But I generally find that the dough does not stick, especially if you are using the plastic mooncake moulds like I have.
- Place one ball into the mould. For square moulds, I recommend gently pushing the ball of dough into a squarish-shape with your fingers before inserting it into the mould.
- Place the plunger directly onto the baking tray, and press the plunger down with some gentle pressure. If you press down too hard, you might flatten the cakes too much.
- Gently release the mould from the cake.
- Repeat with the remaining balls of filled dough.
- The cakes do not spread as they bake, but I would still recommend spacing them apart so that they bake evenly.
To Bake the Mooncakes
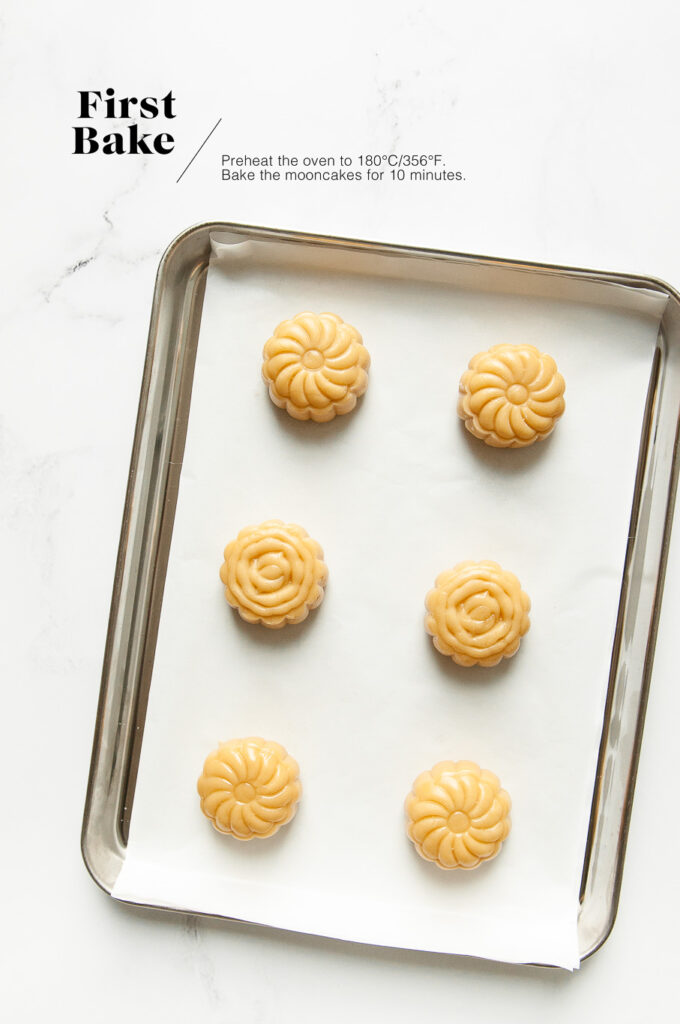
- Preheat the oven to 180°C/356°F (without fan).
- Bake the mooncakes for 10 minutes.
- Remove the baking tray from the oven and let the cakes cool for 10 minutes.
- Reduce the oven temperature to 160°F/320°F (without fan).
- Meanwhile, make the Egg Wash by whisking the egg with some water in a small bowl.
- Lightly brush the mooncakes with the Egg Wash, using a pastry brush with fine bristles (a silicon brush picks up too much egg wash for this task). Try to avoid putting too much Egg Wash onto the intricate patterns on the surface. If you have too much Egg Wash on the cakes, use some kitchen paper to blot the cakes.
- Return the baking tray to the oven.
- Continue baking the mooncakes for 10-15 minutes, or until they are golden brown all over.
- Let the mooncakes cool completely on the baking tray, which will allow them to develop a crisp bottom.
To Store the Mooncakes
- Store the mooncakes in an air-tight container at room temperature for up to 1 week.
- The mooncakes are typically served after 1-2 days when the dough has softened slightly and the patterns become more settled and defined. However, I recommend trying at least one while it is still fresh and the dough is somewhat crispy.
- The mooncakes can also be stored in an air-tight container in the fridge. Bring the cakes to room temperature before serving.
Kitchen Notes
- RECIPE CREDIT
This recipe is adapted from Molly Yeh’s Chocolate Hazelnut Mooncakes. - OVEN TEMPERATURES
All recipes on this website state temperatures for a regular oven (i.e. a conventional oven without fan). If you have a convection oven with a fan, please consult the manufacturer’s handbook on how to adjust the temperature and baking time accordingly. - CONVERSIONS
To convert from cups to grams, and vice-versa, please see this handy Conversion Chart for Basic Ingredients.


Wow great instructions! I can’t wait to try and make these mooncakes. Could you please share the link to your molds?
Hi Kirsten,
Sorry, my links are not working. I bought the molds from Amazon. I will update my post soon to show the link!
Not your usual mooncakes but they were quite delicious. My children don’t like Asian cakes at all so I liked your idea of making a chocolate version. I should also get the cute mooncake molds you have used – they are so cute!
Your mooncakes look beautiful! I rolled the dough too thinly for most of my mooncakes, so you could see the chocolate filling. But they still baked up ok and tasted really delicious.
Omg I can’t wait to try and make these!
This recipe is a keeper. My mooncakes were baked to perfection and this chocolate filling is addictive.
Hi Gracie,
Thank you for your lovely comment!
Beautiful mooncakes
Hi Silvia,
Thank you!
10/10
Thank you!
These mooncakes are absolutely delightful! It took a while to work out the right texture and temperature before rolling the chocolate filling, but I got it after a bit of trial and error. The mooncakes taste wonderful!
Hi Kimmy,
Thank you for your feedback! Yes, I also needed a few attempts before I knew how soft the filling should be in order to roll it. Glad you managed in the end too 🙂
Fantastic recipe, thank you!
Thank you, Olivia!
I made a batch yesterday and they were so delicious! I will be making another batch to take to my family this weekend 🙂
Hi Jennifer,
That’s great to hear!
Awesome recipe and great instructions. Very helpful!
Thank you, Robyn!
First batch was such a huge success I will be making more today!
Hi Jonny,
That’s great to hear! 🙂
These were so yummy! I had my doubts about a chocolate mooncake but these were very good. I will be making them again this weekend.
Hi Nora,
They are a new take on mooncakes – my kids love them!
I made a test batch today and half of them disappeared instantly!! Thank you for the detailed and helpful tips!
Hi Emma,
You’re welcome!
Brilliant recipe. I will be making this every year!
Hi Tina,
So glad you enjoyed this recipe!
I love your website and your recipes! The photos are so clear and helpful. My mooncakes turned out perfectly. I can’t wait to eat them later today!
Hi Audrey,
Thank you! I hope you will enjoy these mooncakes 🙂
I love how much work you put into your recipes. The photos are always stunning and, most importantly, the recipes are always amazing. I’ve made your bao buns countless times and now I can add your mooncake recipe to that list too. The family loved them!
Hi Lucy,
Thank you for your lovely comment!
Can I substitute milk powder for the powdered sugar? I believe the powdered sugar is to form it into a paste and sweeten, but I’m worried the filling will taste too sweet with the amount of powdered sugar called for. I would prefer something creamier, decadent if you will. Also, thank you for making this recipe. I’m not a fan of red beans for desert and I don’t know where to find lotus paste locally so this is a life saver. I got my molds yesterday and I’m pumped to make the cookies. I’m glad I found your recipe, and a chocolate fudge that doesn’t have eggs.
Hi Robin,
I’m not sure about substituting the powdered sugar for milk powder – this will change the flavour and texture of the fudge.
You can definitely start by adding only half the powdered sugar (or less) in the recipe to taste for sweetness. You can also use a darker chocolate (maybe with 85% cocoa), as well as a sugar-free peanut butter. You will have to experiment a little to produce the level of sweetness that you like.
I also prefer my desserts to be not too sweet, and this recipe is not overly sweet for my tastes, mostly because I use 70% chocolate in this recipe, and the peanut butter I use is very low in sugar.
I hope you will enjoy this recipe!
Hi, is there something else I could substitute the peanut butter to make them nut free (taking to school)?
Hi Michelle,
Sorry, this particular recipe uses peanut butter or a similar nut-based paste. Perhaps you would like to try a red bean or lotus seed filling?
Quick question, if you see this, does it make a difference in salt used? Iodized vs sea salt is my main thought.
hello, i am a teacher, and i have talked to my students about chang’e and they get very exited of doing mooncakes, so i was searching for a recipe without red beans paste for them, and them i found this one that looks realy good, but in my country dont have liy water, so i was thinking of doing without it, it is a good option, if no what can i do? tank you.
Hi Amelia,
I have a recipe for making homemade lye water which is very easy (you just need baking soda and water). Otherwise, you can leave out the lye water. The mooncakes will just not look as golden, but they will still taste delicious. I hope you and the students will enjoy this recipe!