
Korean Fried Chicken Bao Buns
Give me a bao bun over a sandwich any day! My family are big fans of bao buns too, so I am always finding new ways to serve them, although this particular recipe is mostly for the adults 😉
If you love the fiery heat of Korean Fried Chicken, you will love them stuffed into a freshly steamed bao bun for an instant snack (or meal, if you choose to eat many of them, which I highly recommend!).
Homemade Korean Fried Chicken
I love all types of fried chicken, and when I am in the mood for something with a spicy kick, I love to make Korean Fried Chicken to serve simply with some steamed rice.
If time permits, I will make a fresh batch of homemade Steamed Bao Buns to serve alongside. I make bread (and bao buns) so often these days that it is almost a part of my regular cooking routine; you just need to plan well so that you have the time to proof and shape the dough when necessary. This helps if you happen to work from home.
But frozen bao buns work too, if you are so lucky to live near an Asian grocer which stocks them.
How to Make Korean Fried Chicken Bao Buns
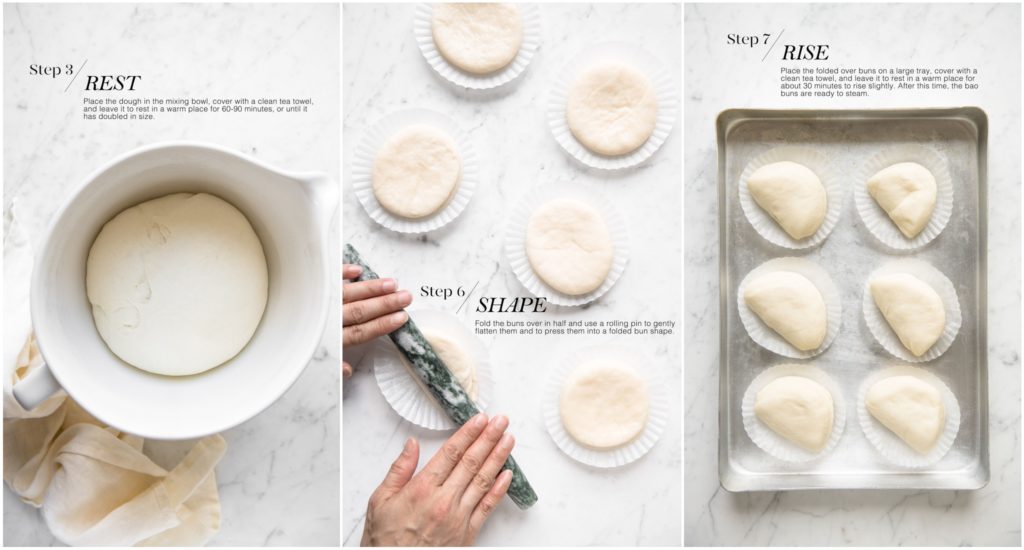
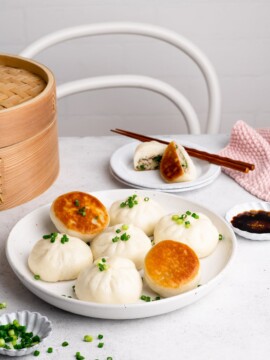
How to Make Steamed Bao Buns
Whilst you could always use frozen bao buns from your Asian grocer, I promise you that these homemade bao buns will taste infinitely better. Making bao buns is very similar to making bread, but instead of baking the buns, you will instead steam them.
Depending on whether you plan to serve them as a dainty canapé or as a more substantial meal, shape the buns as big or as small as you like.
To make your own bao buns, please see my recipe for Steamed Bao Buns.
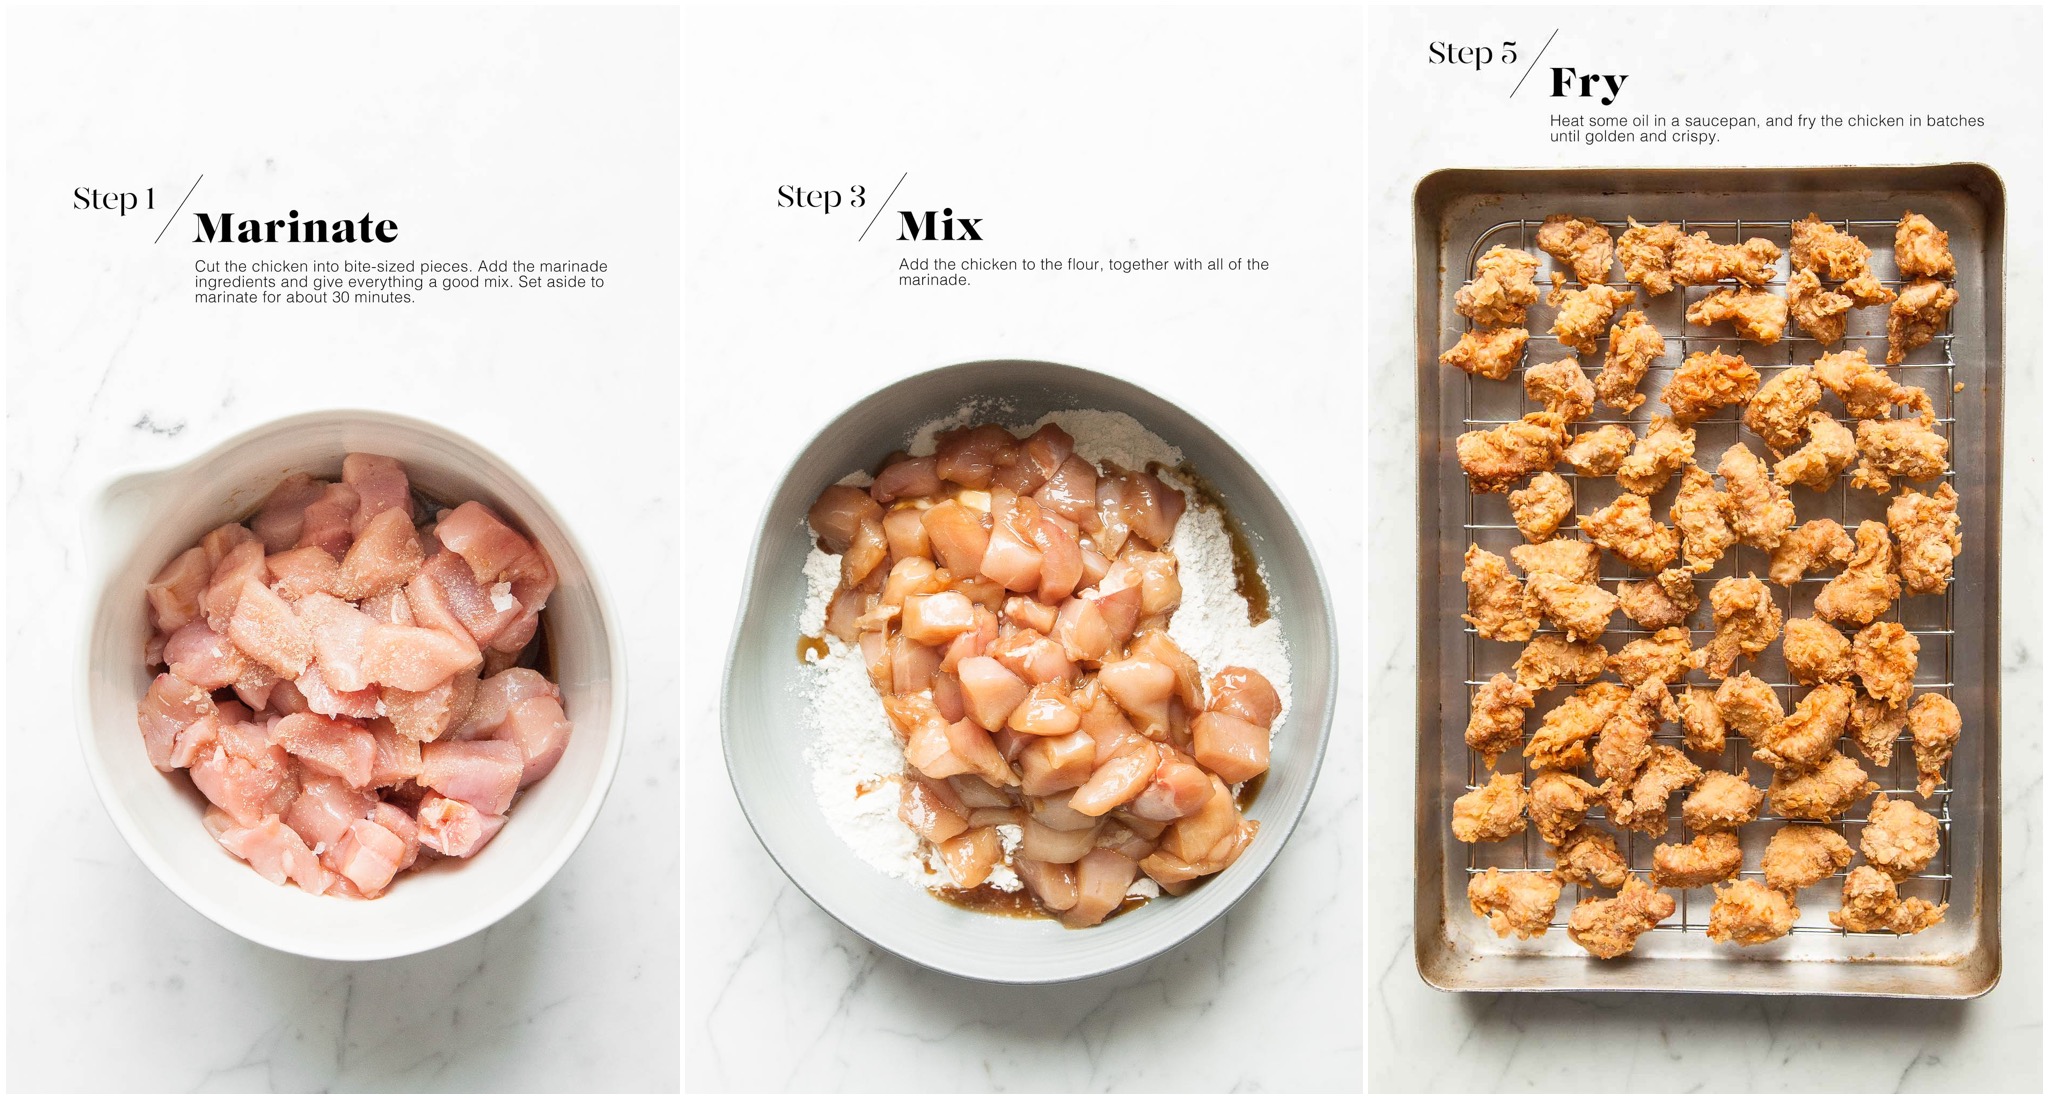
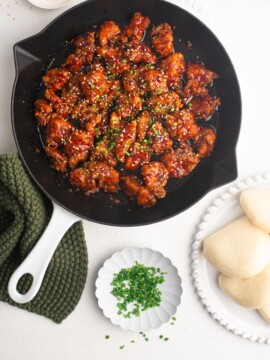
How to Make Korean Fried Chicken
To make Korean Fried Chicken, I start with my recipe for Japanese Fried Chicken to create nugget-sized pieces of crispy fried chicken. Although I call it “Japanese” Fried Chicken, it is actually a great recipe for fried chicken which you can use and adapt for any Asian cuisine.
For these bao buns, I like to use boneless and skinless chicken thigh which are more tender and juicy, and I cut them into pieces large enough to fit into the bao buns. But chicken breasts work perfectly fine too, and you can make the pieces as big or as small as you like.
To transform the fried chicken pieces into Korean Fried Chicken, follow the recipe for my spicy glaze in my recipe for Korean Fried Chicken.
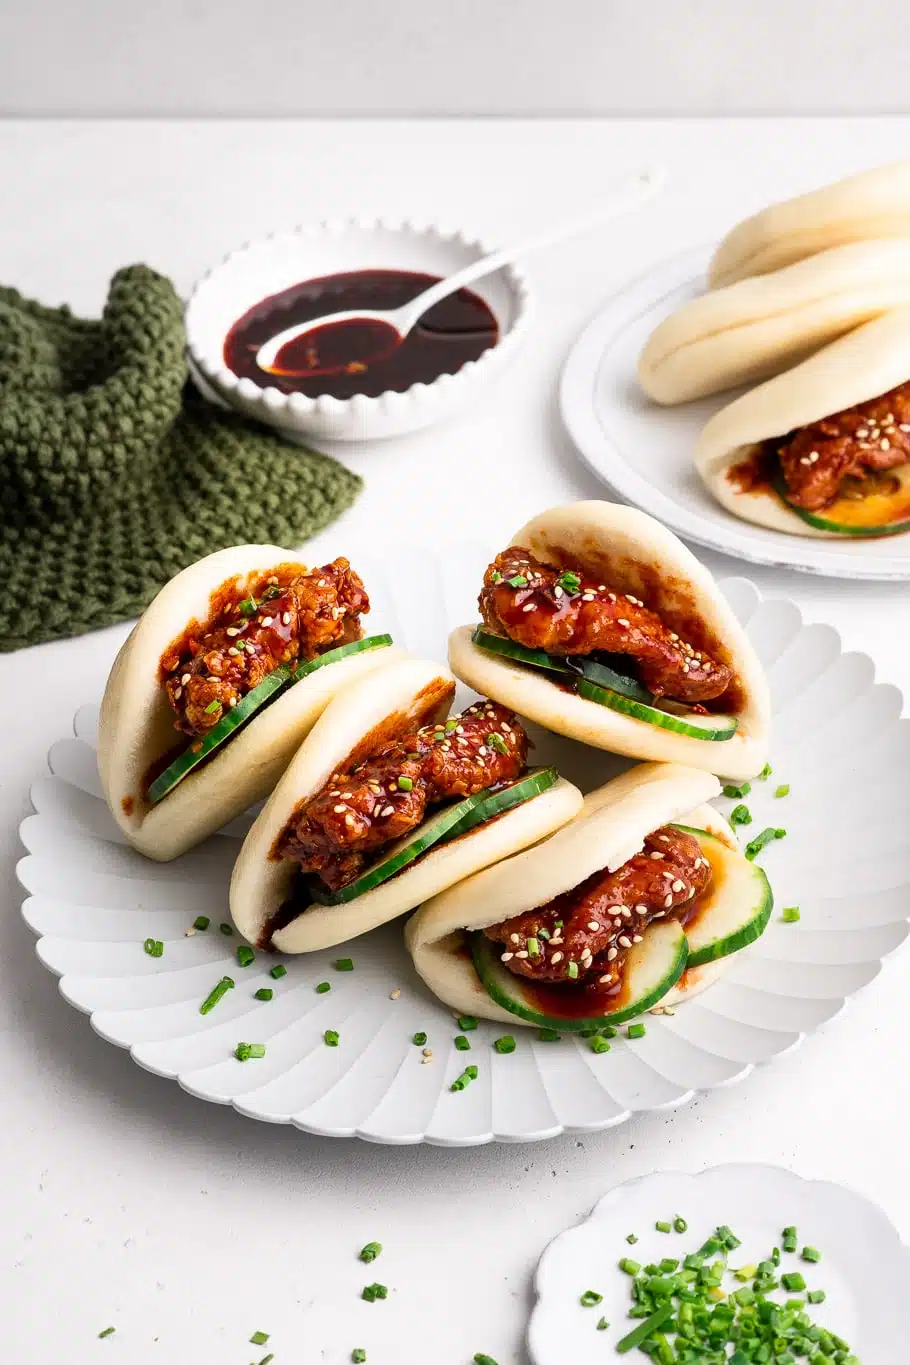
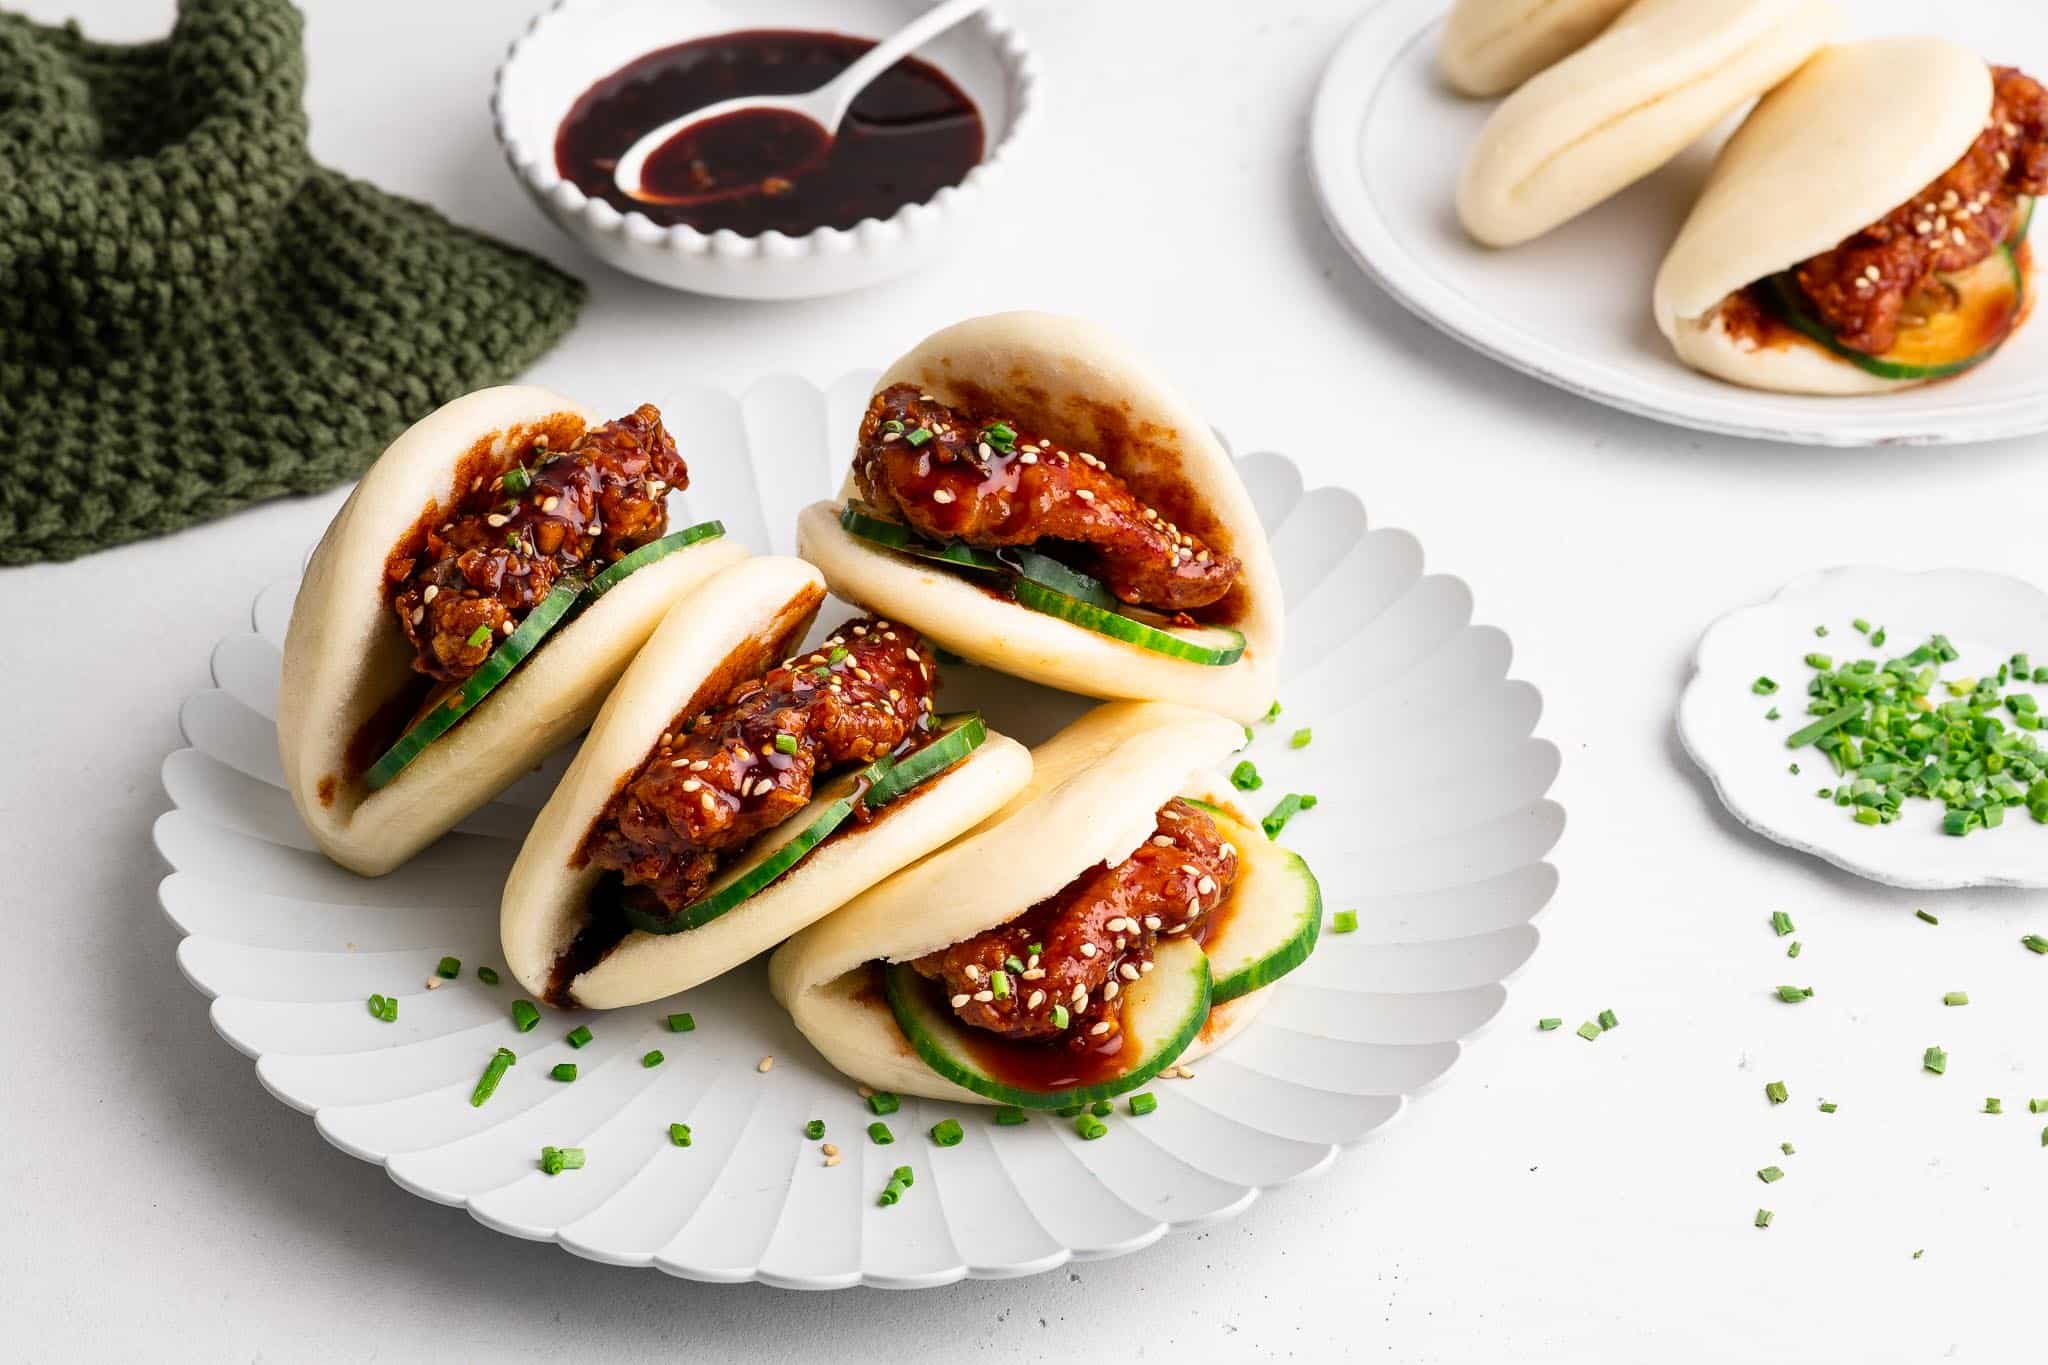
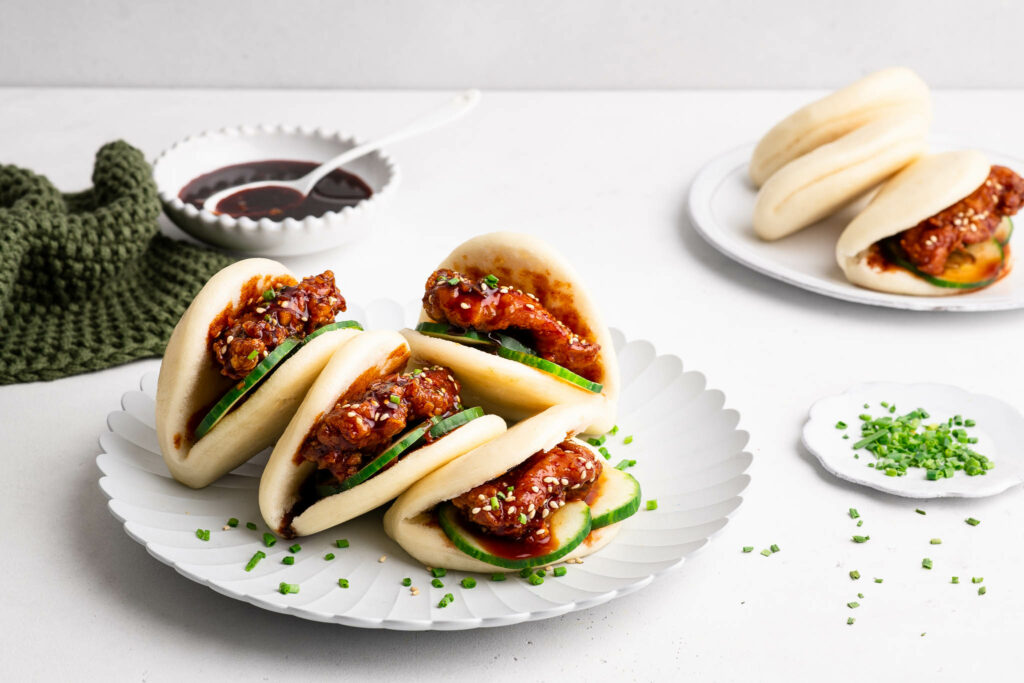
How to Assemble the Korean Fried Chicken Bao Buns
To assemble the Korean Fried Chicken Bao Buns, spread some of the reserved glaze onto the buns, add some freshly sliced cucumber and top with your Korean Fried Chicken. Serve immediately.

How to Serve Korean Fried Chicken Bao Buns
This is a fun dish to serve family-style at the table and to let everyone assemble the bao buns themselves.
But if you are serving these as canapés or appetisers at a party, definitely make them ahead of time, but not too far ahead; you don’t want the bao buns to go soggy from the sauce, and I find that these buns taste best when everything is still warm or hot.
I like to use fresh cucumbers here, rather than pickled cucumbers like you would find in my Sticky Pork Bao Buns. As the chicken is quite spicy, the fresh cucumber provides a cooling contrast, as well as some crunch for texture.

Korean Fried Chicken Bao Buns
Ingredients
For the Steamed Bao Buns
- 300 g (2 cups) plain flour, (all-purpose flour) or bleached flour
- 125 g (1 cup) cornflour, (US: cornstarch)
- 60 g (5 tablespoons) caster sugar, (superfine sugar)
- 3 ½ g (1 teaspoon) instant dried yeast, see Kitchen Notes
- 12 g (2 ½ teaspoons) baking powder
- 180 ml (¾ cup) warm water
- 60 ml (¼ cup) vegetable oil, plus extra
For the Chicken Marinade
- 700 g (1 ½ lb) chicken breasts, or chicken thighs
- ½ teaspoon sea salt
- ½ teaspoon white pepper, freshly cracked
- 30 ml (2 tablespoons) soy sauce
- 15 ml (1 tablespoon) Shaoxing cooking wine
- 1 egg white
For the Fried Chicken
- 300 g (2 cups) plain flour, (all-purpose flour)
- vegetable oil , for shallow frying
For the Spicy Sauce
- 125 ml (½ cup) soy sauce
- 4 tablespoons gochujang
- 80 g (½ cup) light muscovado sugar, or light brown sugar
- 3-4 tablespoons honey, or to taste
- 4 teaspoons garlic, finely chopped, or to taste
To Serve
- cucumber, thinly sliced
- spring onions, (scallions) or chives, finely chopped
- toasted sesame seeds, for sprinkling
Instructions
INSTRUCTIONS FOR STEAMED BAO BUNS
(Please also see my recipe for Steamed Bao Buns with step-by-step photos)
To prepare the bao buns
- Measure all of the dry ingredients into a large mixing bowl or the bowl of an electric stand-mixer (if using).
- Measure the warm water and oil into a measuring jug. The water needs to be a bit more than lukewarm to help activate the yeast, but it shouldn’t be boiling hot.
- Using the dough hook on medium speed, mixing the liquid ingredients into the dry ingredients. Depending on the type of flour which you have used, you might need more or less liquid that than stated in the recipe.
- Once you have a sticky dough, continue kneading the dough on medium speed until it becomes soft and smooth to touch. This should take about 10 minutes using the stand-mixer on medium speed, or about 5 minutes by hand.
- Once the dough is soft and smooth, I recommend kneading it by hand for a few more minutes on the kitchen benchtop.
- Place the ball of dough back into the (clean) mixing bowl.
- Cover the bowl with some cling film or a re-usable bowl cover.
- Place the bowl somewhere warm for about 60 to 90 minutes for the dough to rise and double in size.
To shape the bao buns
- Once the dough has doubled in size, punch it back and knead it by hand for about 5 minutes to release any air bubbles in the dough.
- Then roll out the dough until it is about 1 cm in height.
- Use your hands to rub some oil onto the surface of the dough.
- Use an 8 cm (3 inch) cookie cutter to cut out rounds from the dough.
- Re-roll the dough as needed.
- Place these rounds onto a small sheet of baking paper – I like to use plain white cupcake wrappers which I flatten with a rolling pin.
- Fold over each round and then use a rolling pin to gently flatten the dough to form the bun shape.
- Place all of the shaped buns onto a large tray, cover with a tea towel, and place in a warm place for about 30 minutes for the buns to rise again. After this time, the bao buns should have puffed up slightly.
To steam the bao buns
- Meanwhile, prepare the steamer on the stove (see Kitchen Notes below).
- Steam the buns in batches for 10 to 12 minutes, or until they are puffy and soft, and cooked all the way through.
- Serve the buns immediately.
INSTRUCTIONS FOR THE KOREAN FRIED CHICKEN
(Please also see my recipe for Korean Fried Chicken with step-by-step photos)
For the Marinade
- Cut the chicken into pieces large enough to fit the bao buns. Alternatively, cut them into 2 cm (1 inch) cubes.
- Place the chicken into a medium-sized bowl.
- Add the marinade ingredients.
- Mix everything together until the chicken is well-combined in the marinade.
- Set aside to marinate for at least 30 minutes.
For the Fried Chicken
- Heat a large saucepan with enough vegetable oil to about 2 cm (1 inch) depth.
- Place the flour into a large bowl or baking tray.
- Pour the chicken, together with all of the marinade, onto the flour.
- Use your hands to coat the chicken in the flour. The liquid in the marinade will mix with the flour to form a light batter.
- Press the flour into the chicken to help form a craggy coating on the chicken. It is this craggy coating which will make the chicken crispy and crunchy.
- The oil is ready when it reaches 165°C or 325°F, or when a wooden chopstick inserted in the oil creates lots of small bubbles.
- Cook the chicken in batches until golden in colour.
- Drain the chicken pieces on kitchen paper or on a wire rack.
For the Spicy Sauce
- Whisk all of the ingredients in a large skillet or saucepan over medium-high heat.
- Simmer the sauce gently until it has thickened slightly and starts to look syrupy.
- Once the sauce has thickened to your liking, take the pan off the heat.
- Taste for seasoning. Gochujang varies in saltiness and spice, so you may need to adjust the flavours. If the sauce tastes too strong, dilute it with some water and continue simmering until it thickens again.
- This recipe makes a lot of sauce so there is enough to drizzle over some steamed rice or vegetables.
To Make the Korean Fried Chicken
- Add the Fried Chicken pieces to the Spicy Sauce, but reserve some of the sauce for the bao buns.
- Use a spoon to quickly toss the chicken pieces in the sauce.
To Assemble the Korean Fried Chicken Bao Buns
- Split open a bao bun.
- Spread some of the Spicy Sauce inside the bao bun.
- Add the fried chicken and some cucumber, and garnish with spring onions (scallions) and sesame seeds.
- Serve immediately.
Kitchen Notes
- DIFFERENT TYPES OF YEAST
* Please note that there is a difference between instant yeast (also called instant dried yeast or fast-action dried yeast) and dried yeast (also called active dry yeast). If you are not sure what type of yeast you have, please check the packaging for instructions on how to use the yeast.
* With instant yeast, you can add it directly to the flour mixture without having to activate it first.
* If you do not have instant yeast, I would suggest using the same amount of dried yeast. In which case, add the dried yeast to the warm water and set it aside for about 5 minutes until it is frothy. Add this yeast mixture, along with the vegetable oil, to the dry ingredients in the recipe above. - WHAT TYPE OF FLOUR TO USE
* Plain flour (all-purpose flour) works well in this recipe as the cornflour (cornstarch) helps to give the buns a light and fluffy texture. However, the resulting buns will be a pale yellow in colour.
* For snowy white buns like those sold in Chinese restaurants, you can use bleached flour found in Asian grocery stores. - HOW TO STEAM BAO BUNS
* The steamer basket (whether bamboo or otherwise) should sit directly on top of a saucepan of the same dimension.
* Fill the saucepan with boiling water until about one-third full.
* Place the steamer basket on top of the saucepan.
* Place the bao buns in the steamer basket, leaving a bit of room for each to rise and puff up during cooking.
* Place the lid on top of the steamer basket.
* Steam over low-medium heat for 10 to 12 minutes. - HOW TO MAKE BAO BUNS WITH A STEAM OVEN
* First Proof: Cover the bowl with some cling film or a re-usable bowl cover. Proof the dough in the steam oven/combi-steam oven at 40°C/104°F for about 1.5 hours, or until the dough has doubled in size.
* Second Proof: Once you have shaped the bao buns and placed them onto a small sheet of baking paper each, place them onto a large tray that will fit inside your steam oven/combi-steam oven. For my steam oven, I can fit a large sheet pan, which will comfortably fit 12 bao buns. There is no need to cover the buns. Proof the shaped bao buns at 40°C/104°F for about 30 minutes, or until the buns have puffed up slightly.
* Steaming the Bao Buns: Remove the tray of bao buns from the steam oven/combi-steam oven. Increase the temperature to 100°C/212°F. Once the steam oven/combi-steam oven has come to temperature, place the tray of bao buns back inside and steam them for 10-12 minutes. - HOW TO FREEZE BAO BUNS
Any leftover buns can be frozen in zip-lock bags for 1-2 months. Reheat the frozen steamed buns in a stovetop steamer for about 5 minutes, or until they are warmed all the way through. - CONVERSIONS
To convert from cups to grams, and vice-versa, please see this handy Conversion Chart for Basic Ingredients.


The Korean fried chicken was really delicious. We used frozen bao buns but will try to make them from scratch next time!
This recipe is a keeper. My family really loved it!
Wow this was sooo delicious! I even made the bao buns from scratch and they were the best I have ever tasted. I won’t be buying frozen bao buns anymore. Such an awesome recipe!
Great recipe for Korean fried chicken!
Very yummy! Great easy recipe for Korean fried chicken. The family loved it!
My daughter gave this recipe 10/10! Absolutely delicious.
Amazing recipe! I made the Korean Fried Chicken for dinner the other night and used leftovers to make bao buns last night. Soooo good!
Delicious recipe!