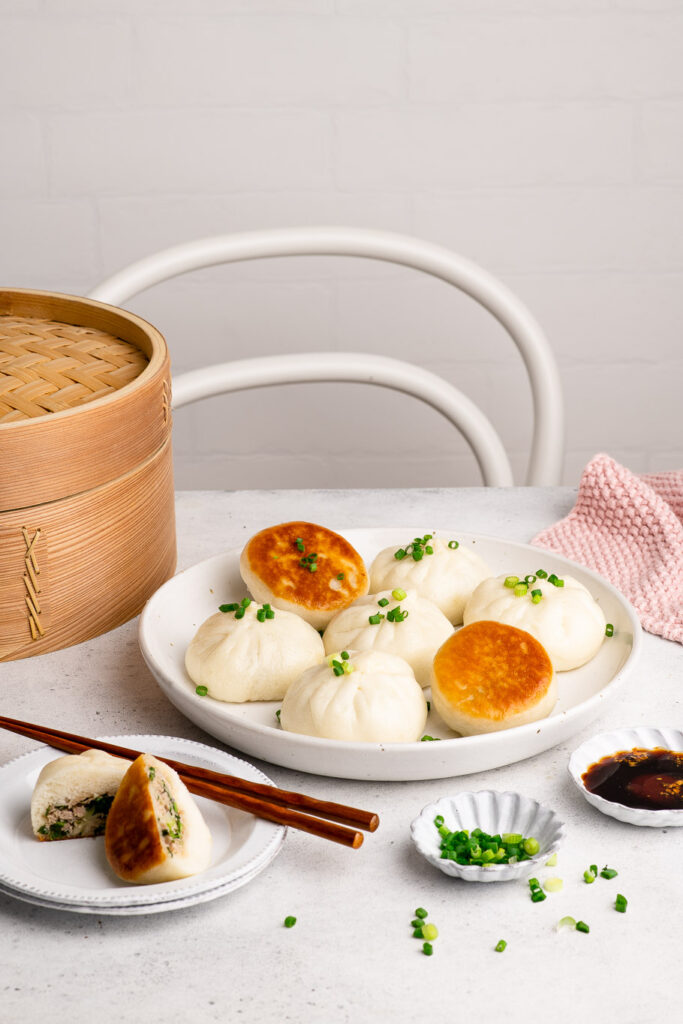
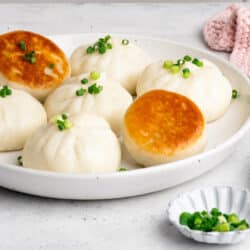
Crispy Pan-Fried Pork Buns
A few years ago, a small Japanese festival was held in our neighbourhood, much to my delight, as well as for my sushi-loving kids. I spontaneously announced a break from the kitchen that weekend and we happily ate tasty Japanese food non-stop for lunch and dinner both days. I was rather sad when the festival came to an end!
One food truck which I kept returning to was from Wesley’s Kitchen. They served a variety of Japanese and Chinese dishes, and one dish which was particularly memorable for me were the Pan-Fried Pork Buns, or Shanghai Bao. Though strictly not Japanese, these crispy Chinese-style dumplings were served alongside the more familiar Japanese gyozas.
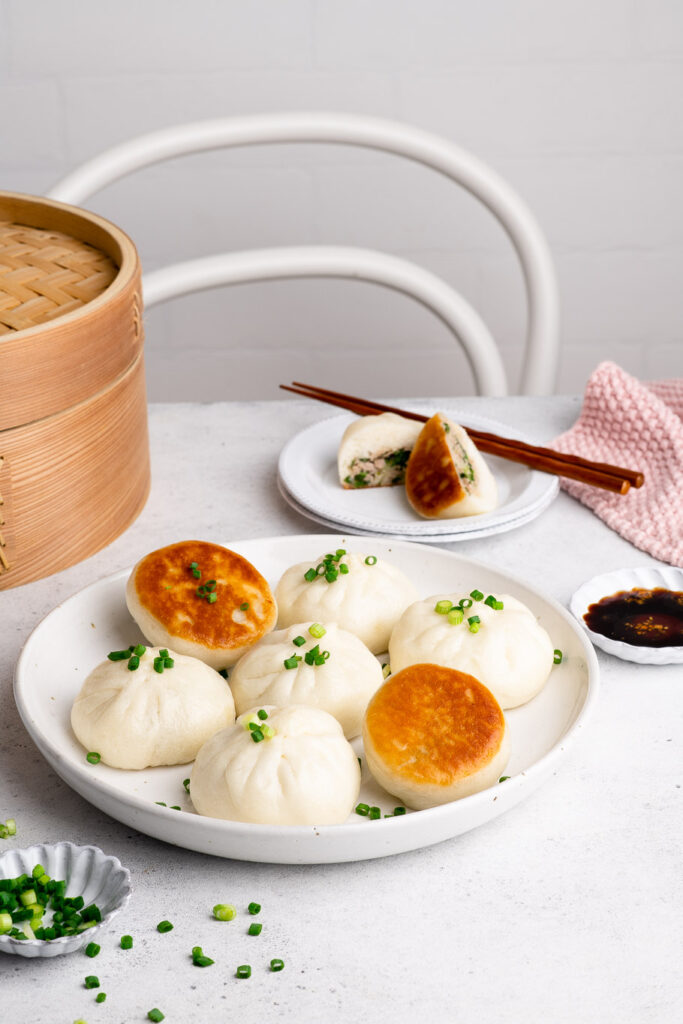
At first, they looked like any regular dumpling to me, except with a crispy bottom like you might find on a Potsticker Dumpling. But the moment I bit into the dumpling, I was pleasantly surprised that it was in fact a mini bao bun. I had never tasted such a small bao bun before, and not one which had been pan-fried to give it a crispy bottom. I was in love.
What are Shanghai Pan-Fried Pork Buns?
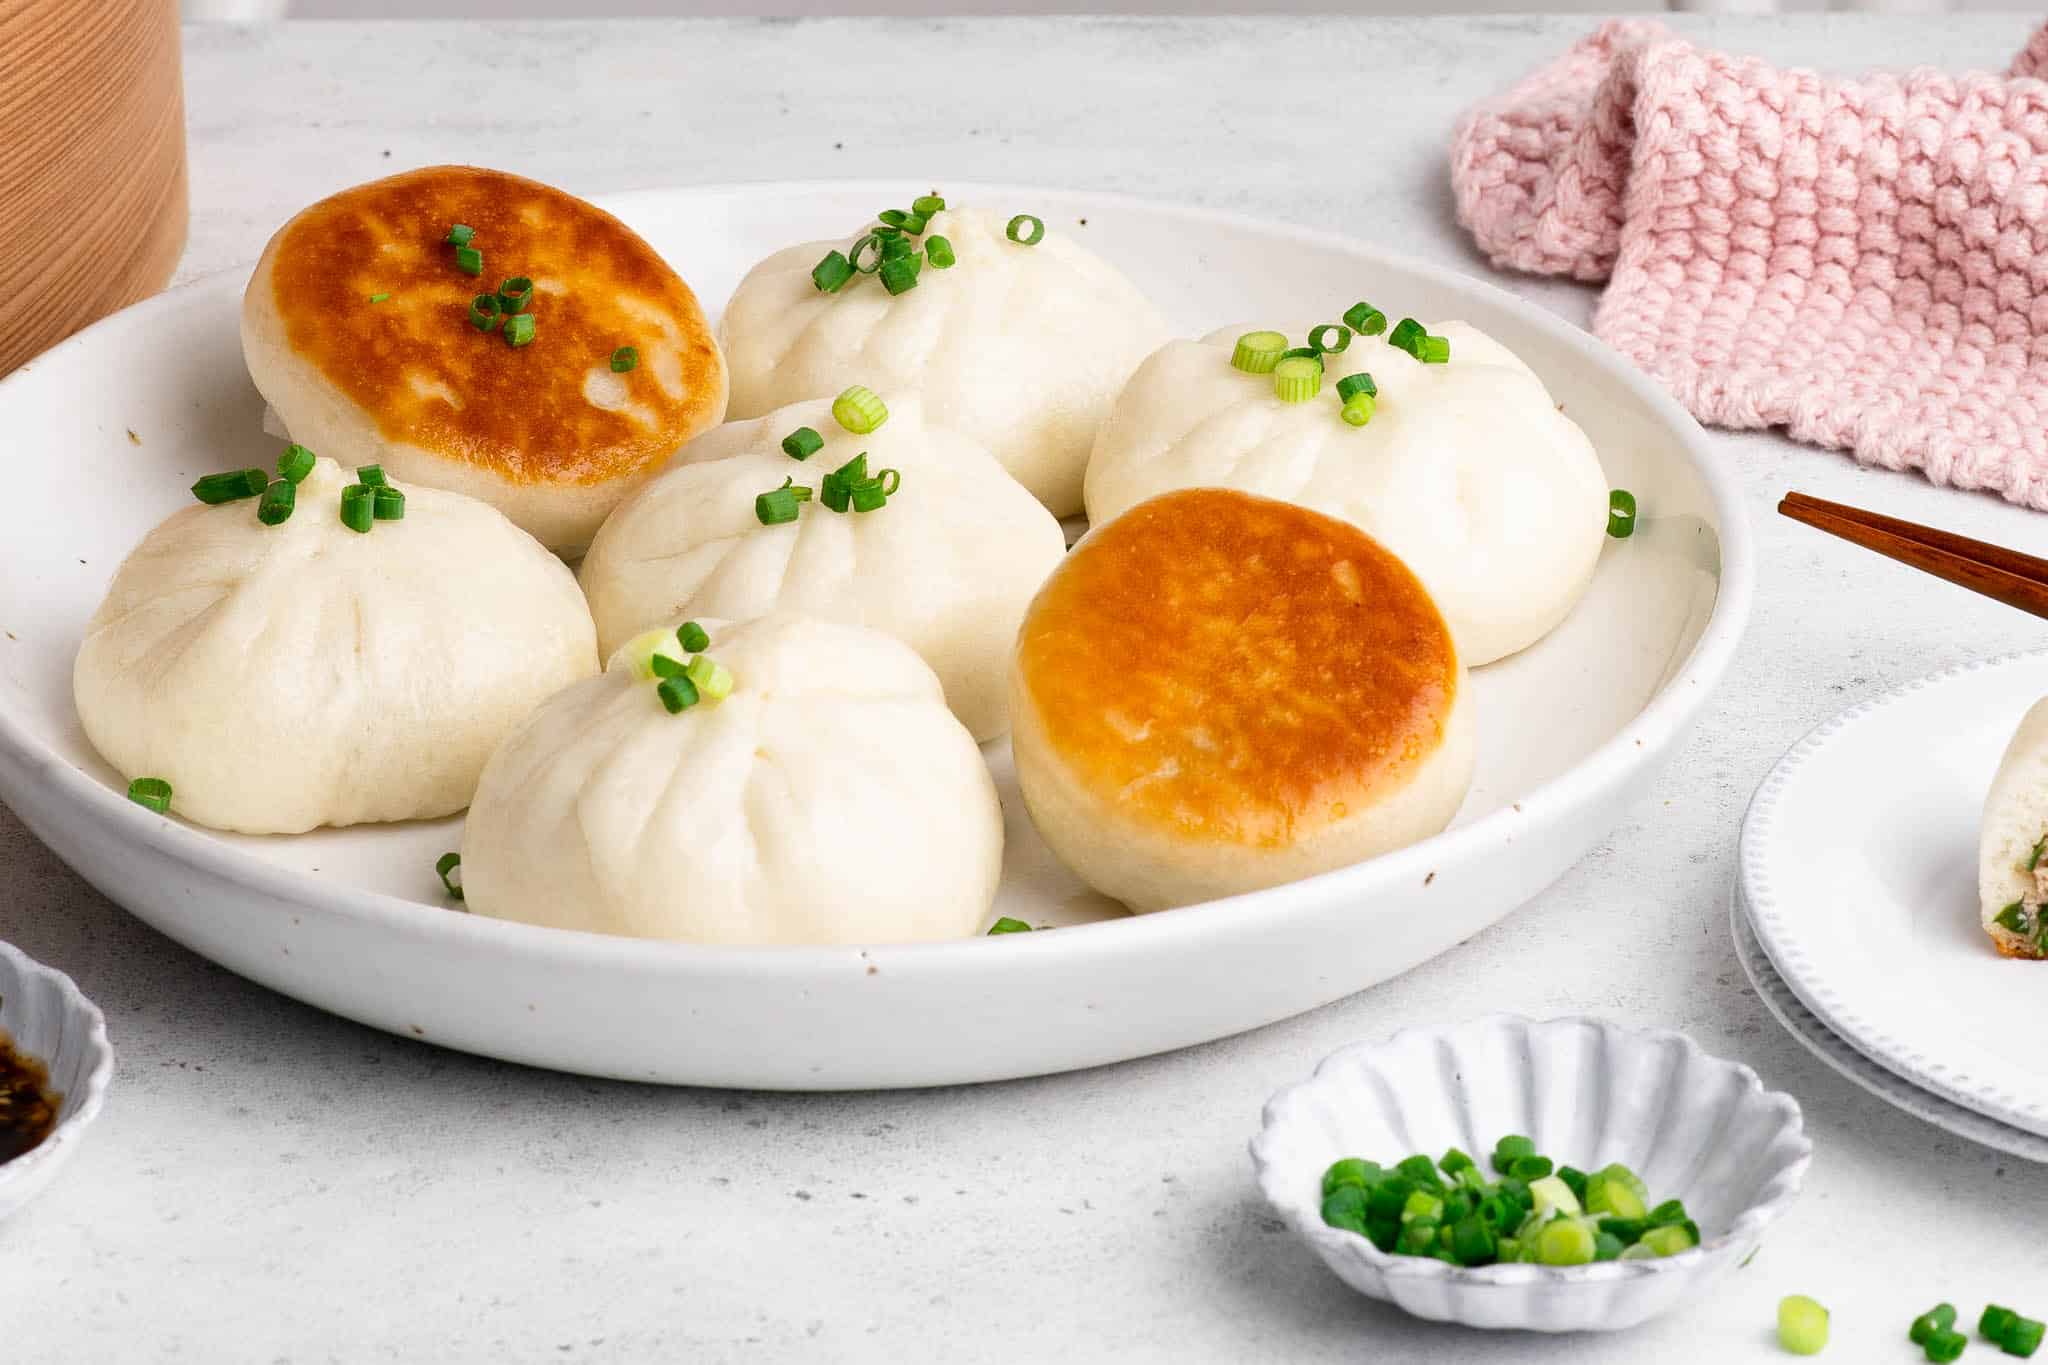
Shanghai Pan-Fried Pork Buns are dumplings made using a bao bun dough, filled with a savoury mixture of pork, and pan-fried to give it a crispy bottom. They are typically smaller than your average filled bao buns (such as a Steamed BBQ Pork Bun) – think mini bao buns which are the size of Chinese soup dumplings.
They are absolutely delicious to eat, and can be more filling than your traditional dumplings because of the yeasted dough wrapper.
Pan-Fried Pork Bun Recipe
My recipe for Pan-Fried Pork Buns starts with my easy and foolproof recipe for Steamed Bao Buns.
The filling is very similar to that used for my Pork & Vegetable Potstickers.
Once you have shaped and assembled the buns, I like to proof the buns again to ensure that the buns are as soft and fluffy as possible. Some other recipes for Pan-Fried Pork Buns skip this second proofing, which you can also do, but the buns will not be as fluffy.
Also, in contrast to other similar recipes, I like to steam the buns first to cook them through. Steaming the buns will also help with the fluffy texture.
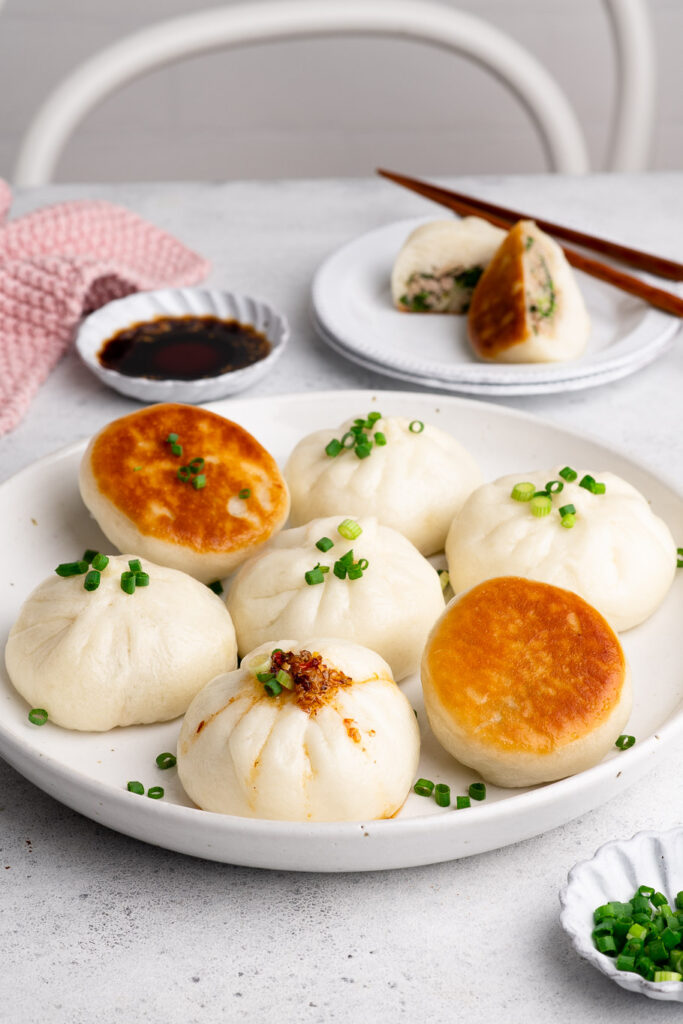
Once the buns have been steamed, the final step is to pan-fry them in some oil to give the buns a crispy bottom.
Traditional Recipe for Pan-Fried Pork Buns
A traditional recipe for Pan-Fried Pork Buns will require you to cook the buns using the same method as for potstickers, i.e. pan-fry the un-cooked buns to get a crispy bottom, then add water to the pan to steam the buns.
The buns are also tightly nestled together in the pan, so that they stick together as they steam and rise.
Although this method is more traditional and actually easier than my own recipe below, I rather think it is worth the extra effort to make the buns as fluffy as possible. But if you are pushed for time, you can absolutely make these buns the traditional way.
How to Make Pan-Fried Pork Buns
Step 1
Start by making the bao bun dough. You can find my recipe for Steamed Bao Buns with step-by-step photos here.
Step 2
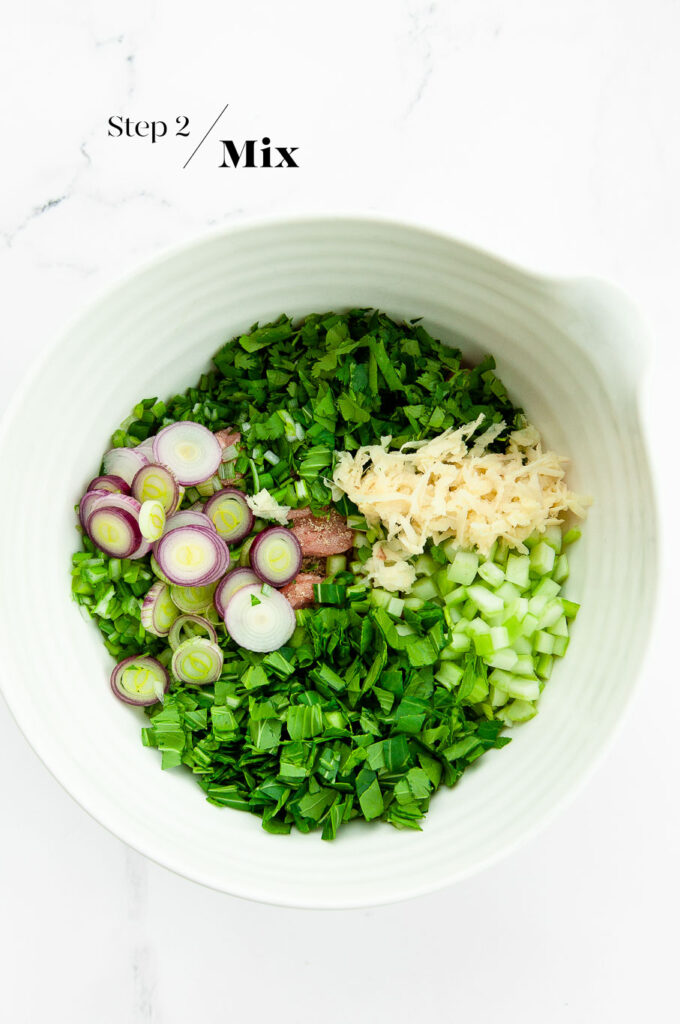
While the bao bun dough is proving, make the filling. Simply place all of the ingredients into a large mixing bowl, and use chopsticks to mix everything together in a clock-wise direction until everything is well combined and the mixture has a paste-like consistency.
Step 3
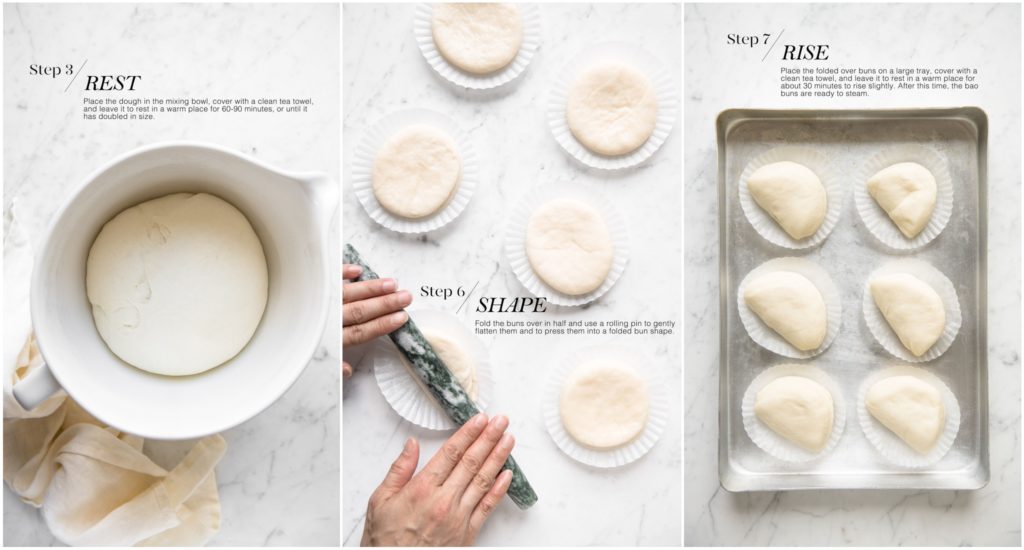
When the dough has doubled in size, gently remove it from the bowl. Use a rolling pin to gently roll it into a large rectangular shape. Roll up the dough into a long cylinder. Use a sharp knife to divide the dough into 20 pieces.
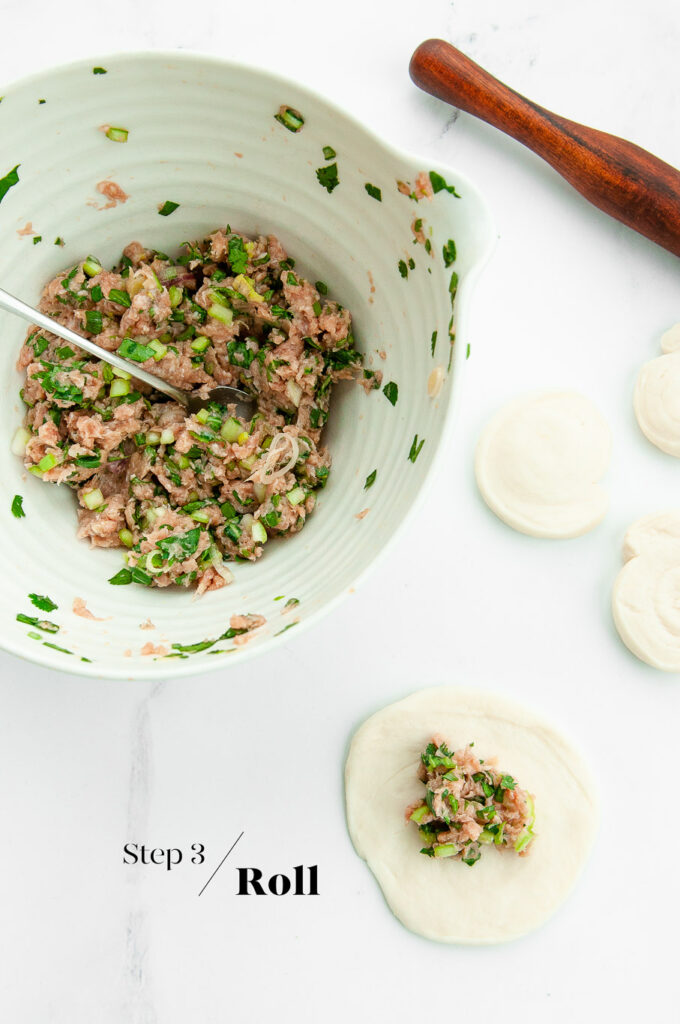
Use a small rolling pin to gently roll out a piece of dough until it is about 10cm/4 inches in diameter. Ideally, the edges of the dough should be thinner than the centre, which will make pleating the buns easier.
Place 2 tablespoons of filling into the centre of the dough and pleat the edges of the dough together. Once all of the edges have been pleated together, pinch and twist the edges to seal the bun.
Step 4
Place the buns onto a large baking sheet lined with baking paper. Repeat with the remaining pieces of dough.
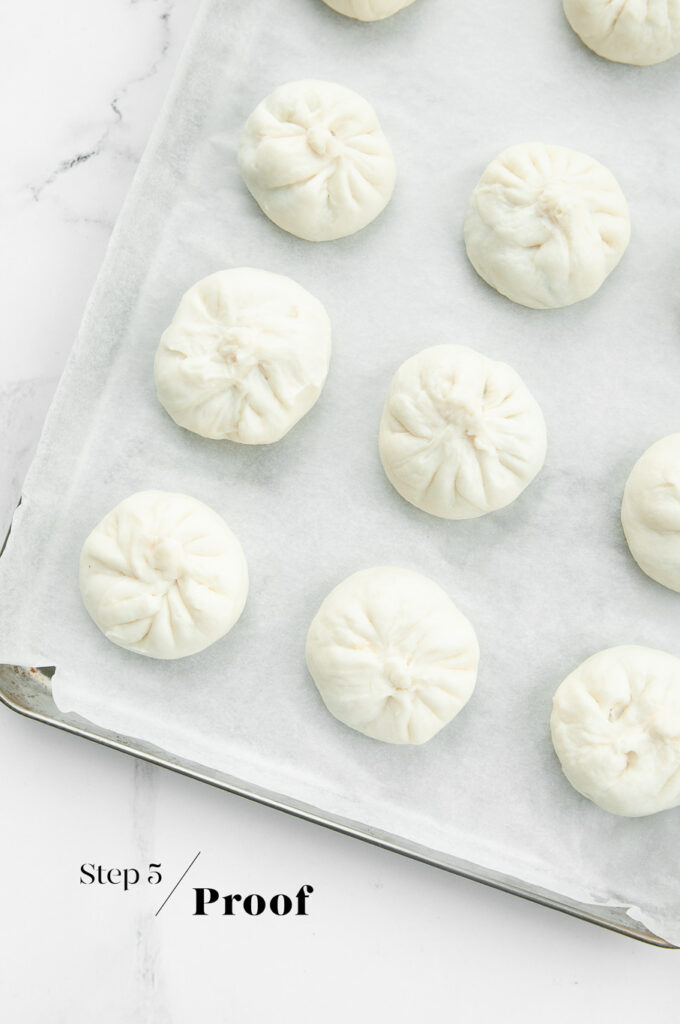
Step 5
Once all of the buns have been shaped, place them somewhere warm for about 30 minutes, or until they have puffed up slightly.

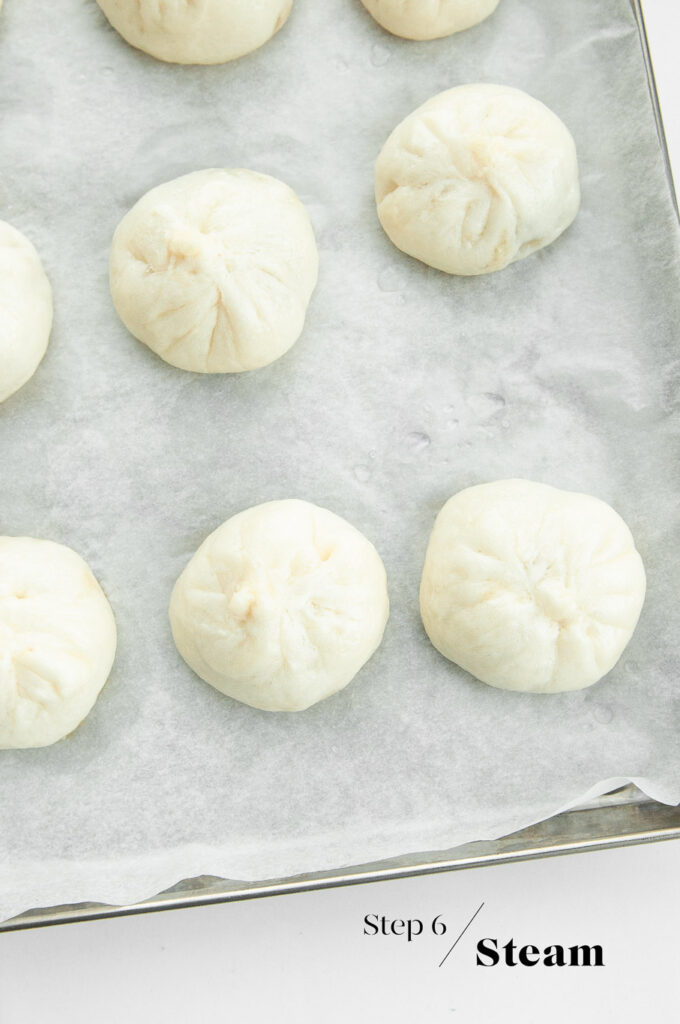
Step 6
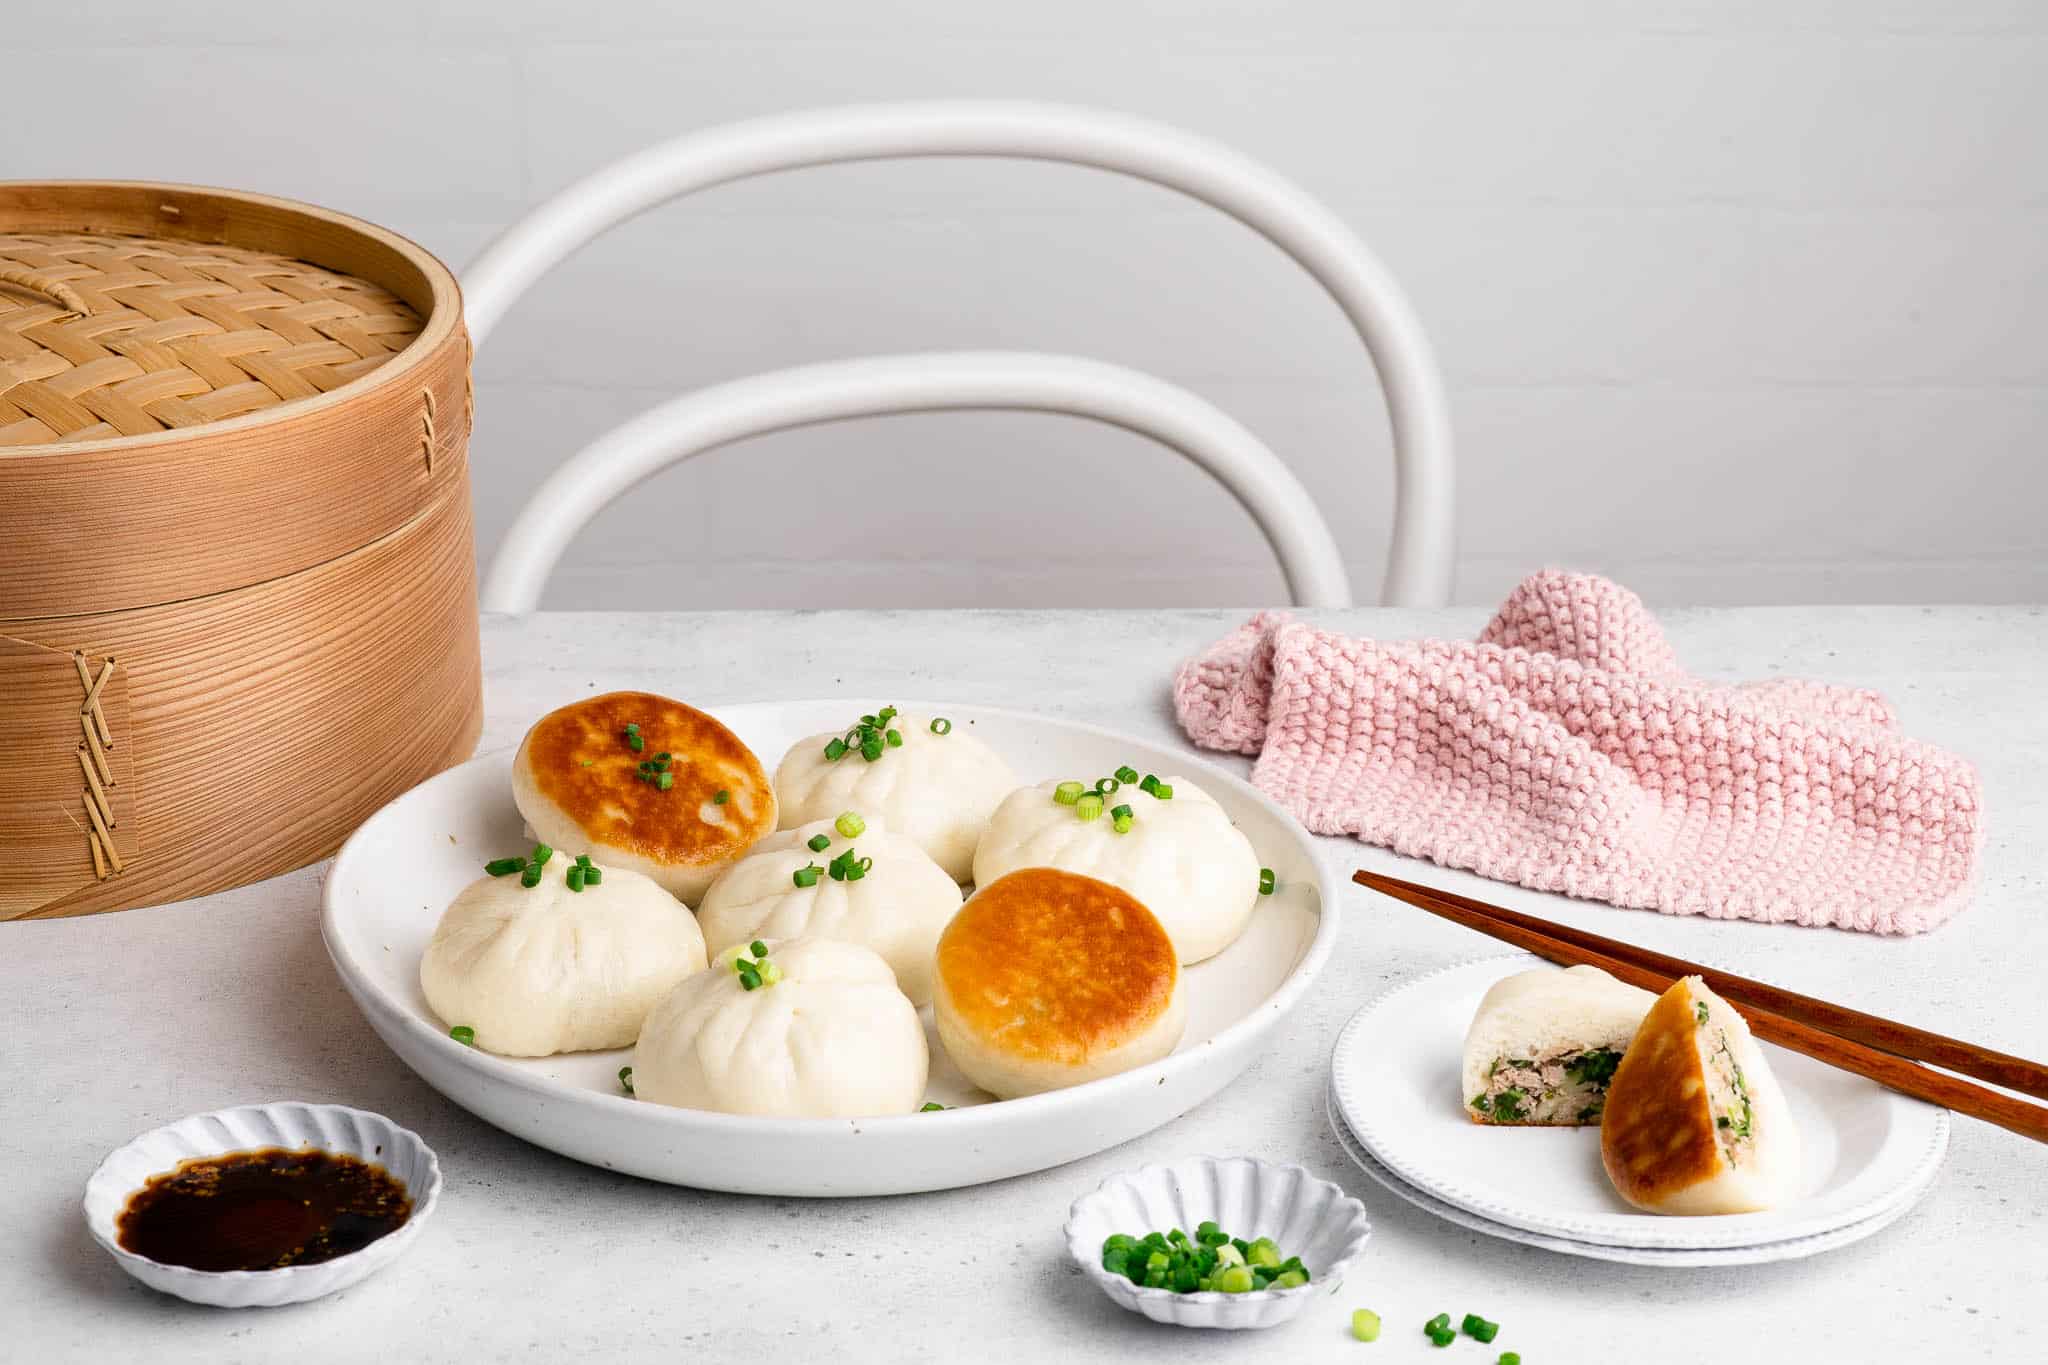
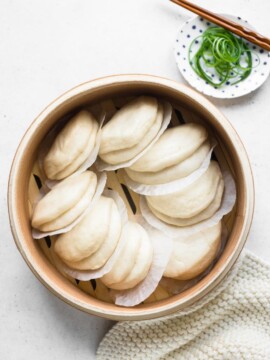
Steam the buns for 10 minutes, either on the stove in a bamboo steamer or in a steam oven at 100°C/210°F.
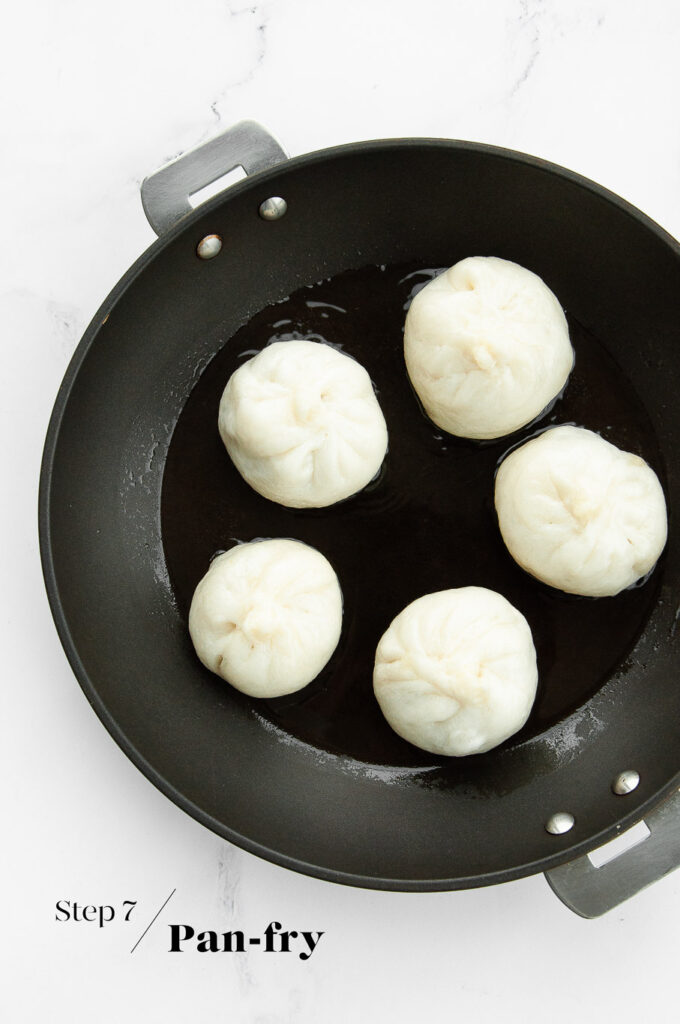
Step 7
Heat some vegetable oil a non-stick pan over medium-high heat. Place the buns in the pan with the pleat-side up, and cook until the bottoms are golden and crispy. Serve immediately.
Tips for Making Pan-Fried Pork Buns
- Make the buns large or small. The recipe below makes 20 snack-sized buns (3-4 buns per adult is a decent portion). To make the more traditional dumpling-sized buns, divide the dough into 40 pieces to make smaller buns.
- Customise the filling. Substitute the pork for chicken, or use cabbage in place of bok choy. If you prefer more meat, reduce the amount of vegetables. You can also add finely diced carrots, shitake mushrooms, or other vegetables of your choice.
- Pan fry the buns just before serving. This will ensure that the buns are served piping hot and crisp.
How to Freeze the Pork Buns
This recipes makes 20 medium-sized pork buns, or 40 small pork buns. I recommend steaming all of the buns as per the recipe below. However, do not pan-fry the buns which you want to freeze.
You can freeze the cooked buns in ziplock freezer bags or in vacuum-sealed plastic bags.
Defrost the frozen buns overnight in the fridge, or you can steam or microwave them until they have defrosted and are warmed through.
Crispy Pan-Fried Pork Buns
Ingredients
For the Bao Bun Dough
- 1 quantity Steamed Bao Bun dough
For the Pork Filling
- 400 g (14 oz) minced pork, (ground pork)
- 1 tablespoon Shaoxing cooking wine
- 1 tablespoon soy sauce
- 2 teaspoons sesame oil
- 1 teaspoon sugar
- 1 teaspoon fine salt
- ½ teaspoon MSG, or chicken stock cube powder, optional
- ½ teaspoon white pepper, freshly cracked
- 2 tablespoons ginger, grated
- 1 bok choy, finely chopped
- 1 large handful coriander, (cilantro) finely chopped
- 1 large handful spring onions, (scallions) finely chopped
To Serve
- vegetable oil
- spring onions, (scallions) or chives, finely chopped for garnish
- soy sauce
- chilli oil
Instructions
To Make the Bao Bun Dough
- Make the Bao Bun dough as per my recipe for Steamed Bao Buns with step-by-step photos.
To Make the Pork Filling
- Place all of the ingredients into a large mixing bowl.
- Using chopsticks, mix everything together in a clockwise direction until everything is well combined and the mixture looks like a paste.
To Prepare the Bao Bun Dough
- Once the dough has doubled in size, remove the dough gently to the kitchen counter.
- Use a rolling pin to roll out the dough into a large rectangle.
- Roll the dough into a long cylinder.
- Divide the dough into 20 pieces.
To Shape the Pork Buns
- Line a large sheet pan with baking paper.
- Take a piece of dough and use a small rolling pin to roll it into a circle measuring approximately 10 cm/4 inches in diameter. If possible, try to roll it so that the edges are thinner than the centre.
- Place 2 tablespoons of filling into the centre.
- Pleat the edges of the dough together and seal the buns.
- Place the buns onto the lined sheet pan.
- Repeat the above steps with the remaining pieces of dough and filling.
To Proof the Pork Buns
- Place the pork buns somewhere warm for about 30 minutes, or until they have puffed up slightly.
To Cook the Pork Buns
- Steam the pork buns for 10 minutes, either in a bamboo steamer over a pot of simmering water, or in a steam oven at 100°C/210°F.
- Heat some vegetable oil in a large non-stick frying pan over medium-high heat.
- Place the buns into the pan with the pleat-side up.
- Cook until the bottom of the buns are nicely golden.
- Serve immediately.
Kitchen Notes
- DIFFERENT TYPES OF YEAST
Please note that there is a difference between instant yeast (also called instant dried yeast or fast-action dried yeast) and dried yeast (also called active dry yeast). If you are not sure what type of yeast you have, please check the packaging for instructions on how to use the yeast.
* With instant yeast, you can add it directly to the flour mixture without having to activate it first.
* With dried yeast, you will need to activate it first (usually in some warm liquid). - WHAT TYPE OF FLOUR TO USE
* Plain flour (all-purpose flour) works well in this recipe as the cornflour (US: cornstarch) helps to give the buns a light and fluffy texture. However, the resulting buns will be a pale yellow in colour.
* For snowy white buns like those sold in Chinese restaurants, you can use bleached flour found in Asian grocery stores. - HOW TO STEAM BAO BUNS
* The steamer basket (whether bamboo or otherwise) should sit directly on top of a saucepan of the same dimension.
* Fill the saucepan with boiling water until about one-third full.
* Place the steamer basket on top of the saucepan.
* Place the bao buns in the steamer basket, leaving a bit of room for each to rise and puff up during cooking.
* Place the lid on top of the steamer basket.
* Steam over low-medium heat for 10 minutes. - HOW TO MAKE BAO BUNS WITH A STEAM OVEN
* First Proof: Cover the bowl with some cling film or a re-usable bowl cover. Proof the dough in the steam oven/combi-steam oven at 40°C/104°F for about 1.5 hours, or until the dough has doubled in size.
* Second Proof: Once you have shaped the bao buns, place them onto a large tray (lined with baking paper) that will fit inside your steam oven/combi-steam oven. For my steam oven, I can fit a large sheet pan, which will comfortably fit 12 bao buns. There is no need to cover the buns. Proof the shaped bao buns at 40°C/104°F for about 30 minutes, or until the buns have puffed up slightly.
* Steaming the Bao Buns: Remove the tray of bao buns from the steam oven/combi-steam oven. Increase the temperature to 100°C/212°F. Once the steam oven/combi-steam oven has come to temperature, place the tray of bao buns back inside and steam them for 10 minutes. - HOW TO FREEZE BAO BUNS
Any leftover steamed buns can be frozen in zip-lock bags for 1-2 months. Reheat the frozen steamed buns in a steamer or steam oven for about 10 minutes, or until they are warmed all the way through. - OVEN & STOVE TEMPERATURES
All recipes on this website have been tested on an induction stove and/or with a conventional oven (i.e. an oven without fan). All recipes on this website use temperatures for a conventional oven, unless otherwise mentioned. Convection ovens (i.e. fan-forced ovens) are typically 20°C/70°F hotter than conventional ovens, but please check your manufacturer’s handbook. - CONVERSIONS
To convert from cups to grams, and vice-versa, please see this handy Conversion Chart for Basic Ingredients.


Looks delicious! I would love to try these, quick question, where do you buy Shaoxing wine in Switzerland? Thanks!
Hi Rebecca,
Thank you! You can find Shaoxing wine at most Asian grocers, and also in the food hall at both Globus and Jelmoli. But a dry sherry works as a good substitute, as well as Japanese cooking sake (which you can find at Coop). Hope you will enjoy this recipe!
Loved this recipe! I will need to work on my pleating skills but regardless they were delicious! Will make again. Thank you!
So glad you enjoyed this recipe!
These buns were so delicious! I also need to work on my pleating as some of my buns opened up during steaming, but they still tasted great. I can’t wait to make these again. Definitely a crowd pleaser!
Turned out quite good. This was my 4th attempt making them, first time for your recipe/method. Other attempts did the pan sear pan first/boil/steam method. Didn’t like the texture. These turned out much better. This recipe did make my pleats come apart some so they aren’t as pretty as yours. But I’m still very happy with it. I’ll probably just add some chili peppers, leave out 1tbsp of sugar and make them a hair smaller only
Hi Andy,
That’s great to hear that you enjoyed this recipe! I’ve also made these buns using different methods, and the one I have published here produces the best results, I think 🙂 I’m glad you agree! My pleats also used to come apart in my early attempts – you just need to pinch them really tightly to seal 🙂
I would love to make these buns. What can be substituted for the Chinese Shaoxing wine? It is not sold in any of the local stores in my area and it would have to be ordered online. Besides that, I probably wouldn’t be using it very often and it would go bad. Thanks.
Hi Mike,
The Chinese Shaoxing wine is used in this recipe to add liquid and a slight hint of floral flavour to the meat mixture. You can substitute the Chinese Shaoxing wine for dry sherry or Japanese mirin. But as you only need 1 tablespoon for this recipe, you could also leave it out and simply substitute with water. With all of the other ingredients, you won’t notice its absence 😉 Hope you will enjoy this recipe!