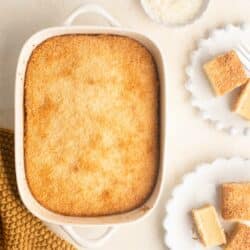
Butter Mochi Cake
Mochi is currently having its time in the limelight, which makes me very happy because I love it in all its variations. I grew up eating Vietnamese and Chinese-style mochi, and a recent discovery for me is this Hawaiian Butter Mochi Cake.
What is Mochi?
Mochi is the Japanese name for a cake made from glutinous rice flour, which gives the cakes their signature soft and chewy texture.
Traditional mochi cakes are small dumplings which contain a filling of red bean paste, but the variety of fillings are endless, ranging from traditional Asian flavours such as sesame or peanuts to more Western flavours of ice-cream or sorbet.
Similar cakes are also made in Chinese and Vietnamese cuisine, although many people have adopted the Japanese name, “mochi”, for these desserts also. I prefer to use “mochi” if the dessert is more Japanese oriented.
What is a Butter Mochi Cake?
Butter Mochi Cake is a specialty to Hawaii, where the locals adapted the traditional mochi recipe by adding butter and then baking the batter to produce something more akin to a western-style cake.
This recipe uses coconut milk which is common in many Asian desserts. The batter is sprinkled with coconut just before baking, which will toast as the cake bakes, giving it a wonderful aroma and texture to the cake.
The result is something similar in taste and texture to – I think – a Vietnamese Cassava Cake, except it is more soft and chewy in texture, and it is super easy to make!
If you love mochi desserts but don’t have time to form individual dumplings, this Butter Mochi Cake is a more hands-off affair with equally delicious results.
Butter Mochi Cake Recipe
This recipe for Butter Mochi Cake couldn’t be easier. It starts out like any other cake: whisk the eggs and sugar, add the liquid ingredients, then add the dry ingredients.
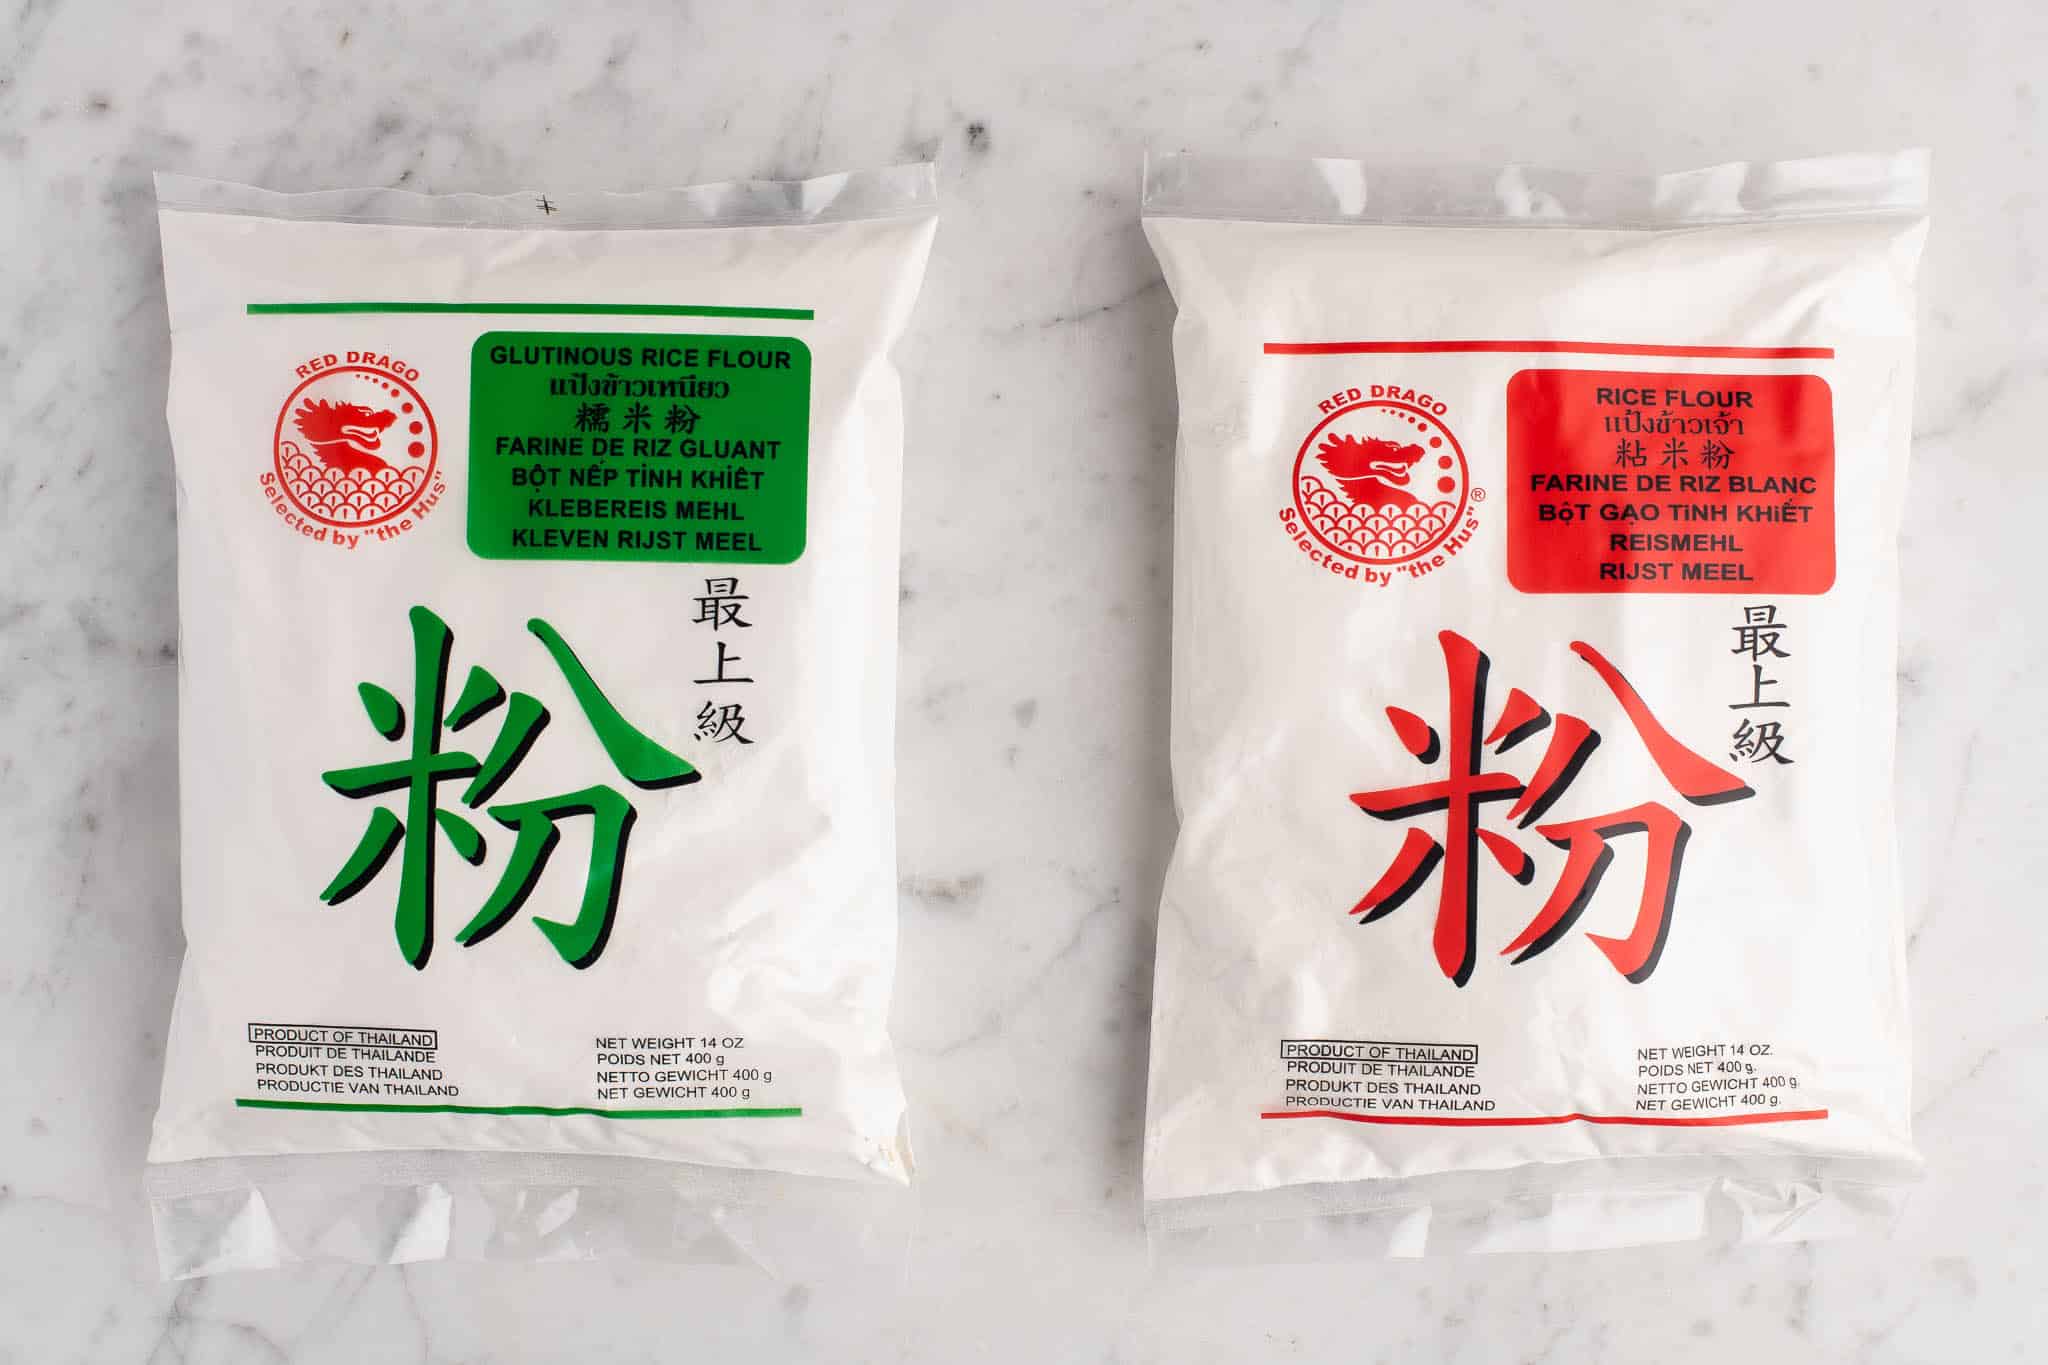
The key ingredient for any mochi recipe is glutinous rice flour. I recommend buying it from your local Asian grocer as the brands they stock are very finely milled, and which you need to produce the right texture in your mochi cakes.

What is Glutinous Rice Flour?
Glutinous rice flour is milled from sweet rice grains, hence it is sometimes labelled as sweet rice flour. However, glutinous rice flour is not sweet in flavour.
Also, contrary to the use of “glutinous” in its name, glutinous rice flour does not contain gluten. Glutinous rice flour is gluten-free. This means that Butter Mochi Cake is gluten-free.
The term “glutinous” refers to the thick and sticky consistency of the rice flour when it is cooked.
When buying glutinous rice flour, be careful that you are not buying rice flour. Both products look the same, but when cooked, they behave very differently.
Most Asian grocers will stock glutinous rice flour and rice flour side-by-side. One trick which seems to work for most Asian brands is that glutinous rice flour has green packaging, whereas rice flour has red packaging.
How to Make Butter Mochi Cake
This recipe for Butter Mochi Cake is one of the easiest recipes I know, yet the results are extremely delicious. I think it would be a great cake to make for a pot-luck dinner, or anytime you need a gluten-free dessert option. If you also need to make it dairy-free, substitute the butter for margarine or another plant-based alternative.
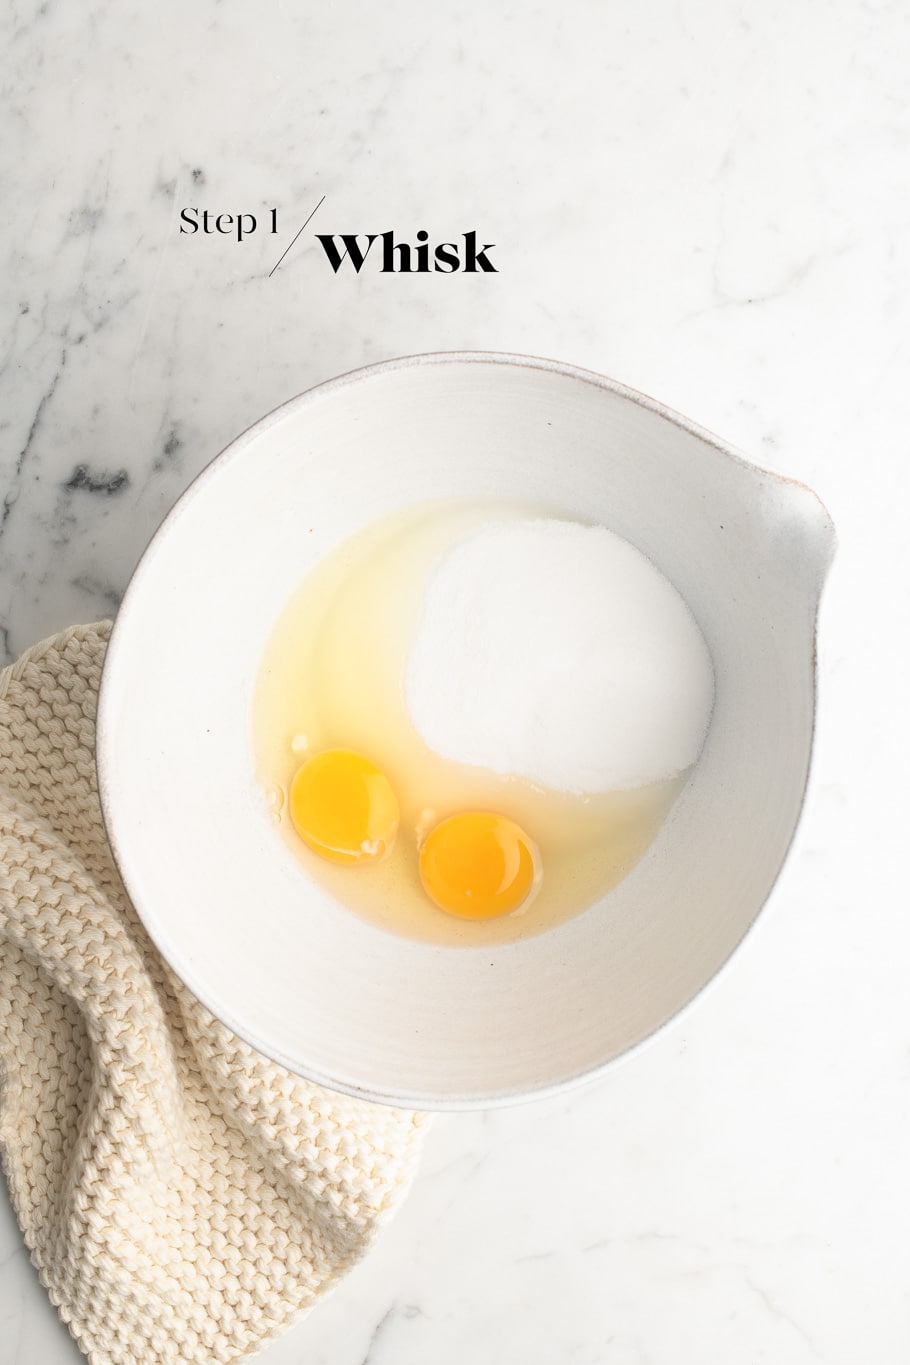
Step 1
Whisk the eggs and sugar until the mixture is light and pale.
Step 2
Add the melted butter, coconut milk and vanilla. Whisk to combine.

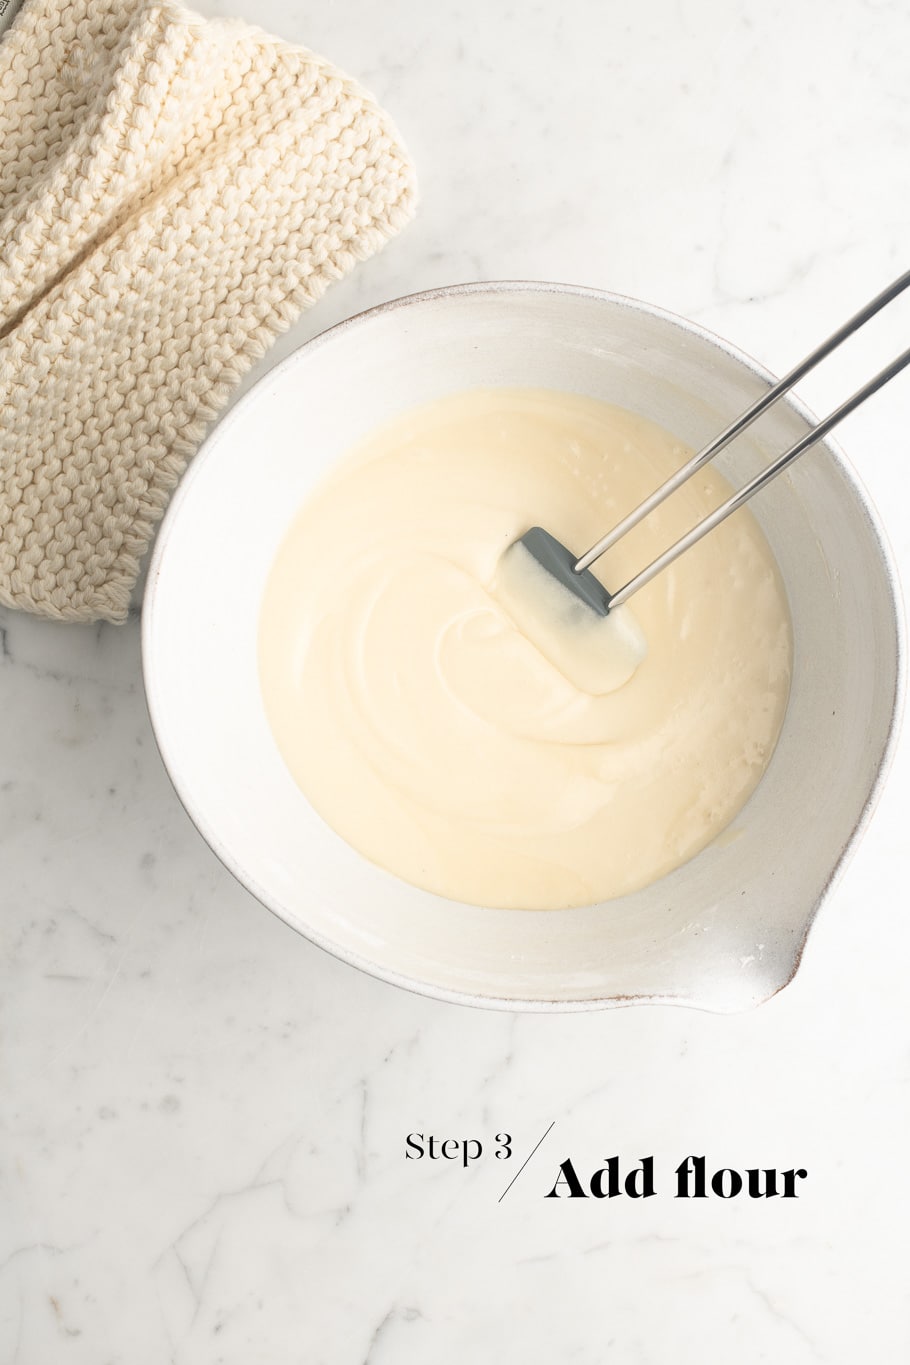
Step 3
Add the glutinous rice flour and salt. Whisk until you have a thick and smooth batter.
Step 4
Generously grease a baking dish with some butter. For this recipe, I like to use a ceramic dish which will look nice for serving.
For this recipe, I used a dish which measures 16 x 21 cm/6 x 8 inches. To double the recipe, use a dish which measures 30 x 40 cm/12 x 16 inches.
Pour the batter into the dish, and use an off-set spatula to evenly spread the batter. Tap the dish a few times on the bench top to remove any air bubbles.

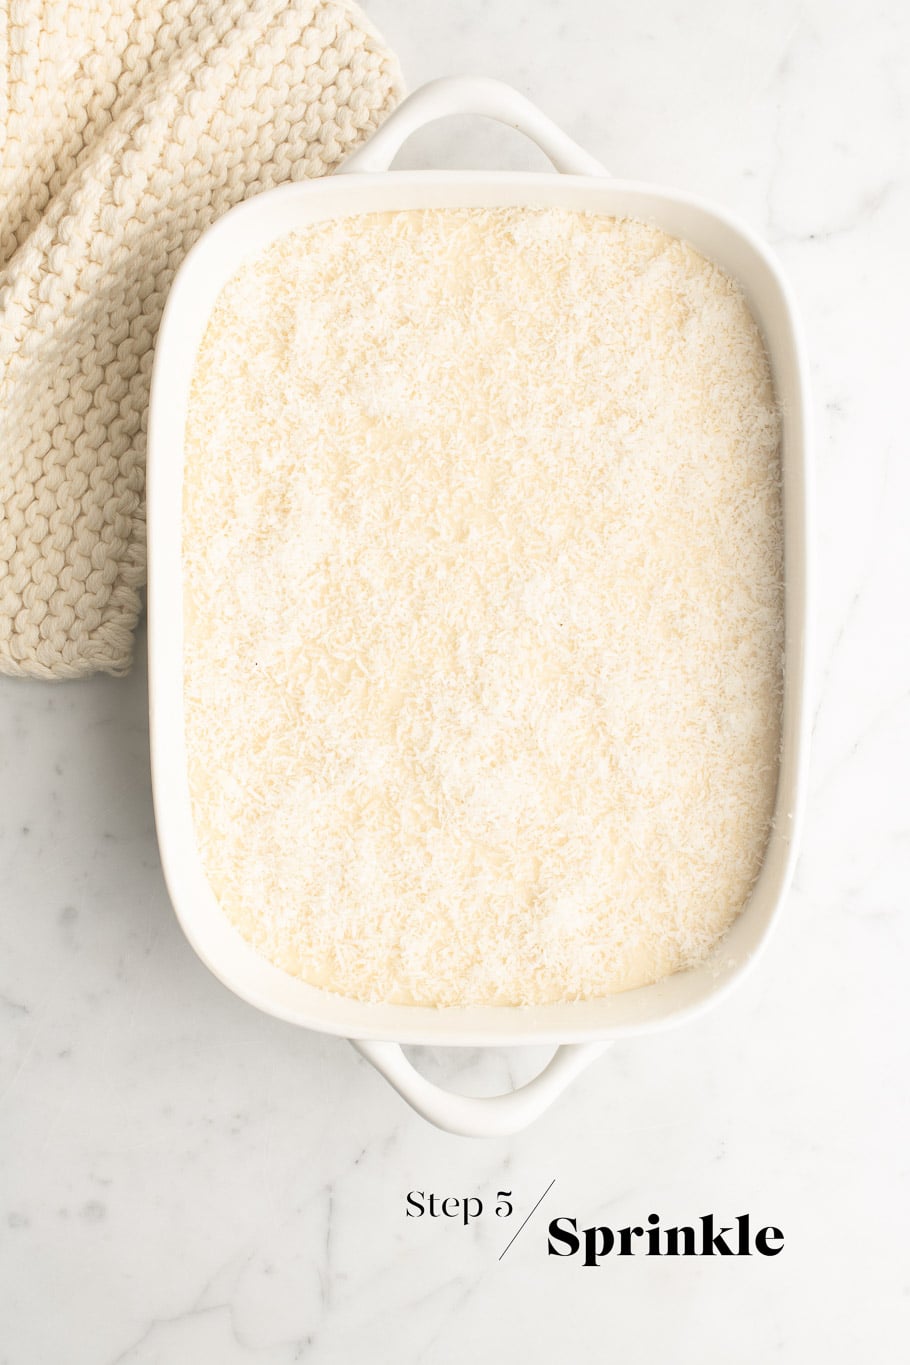
Step 5
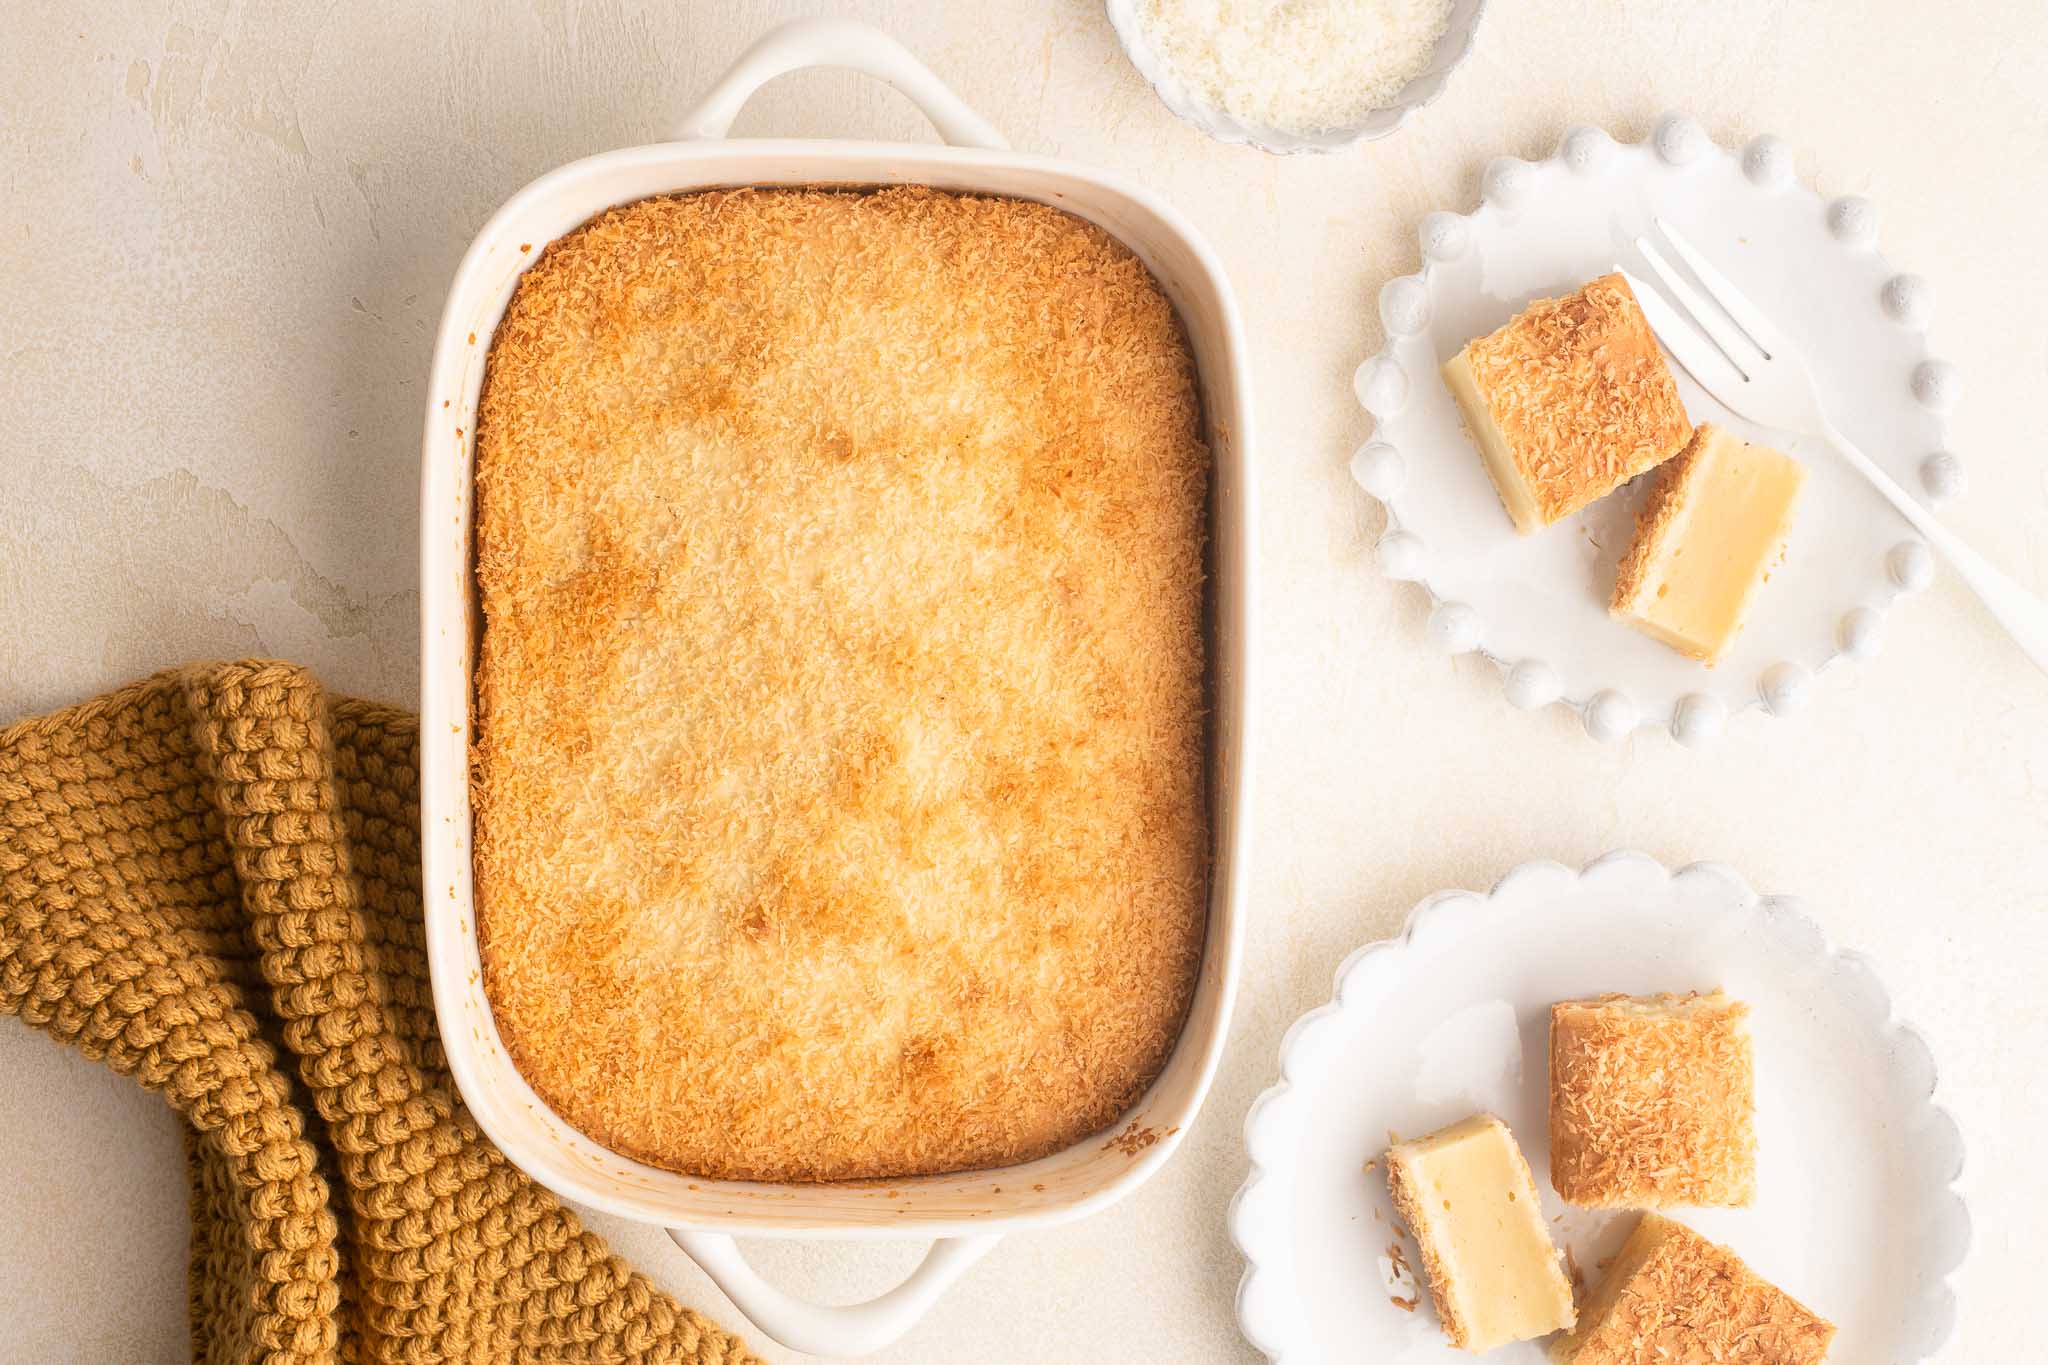
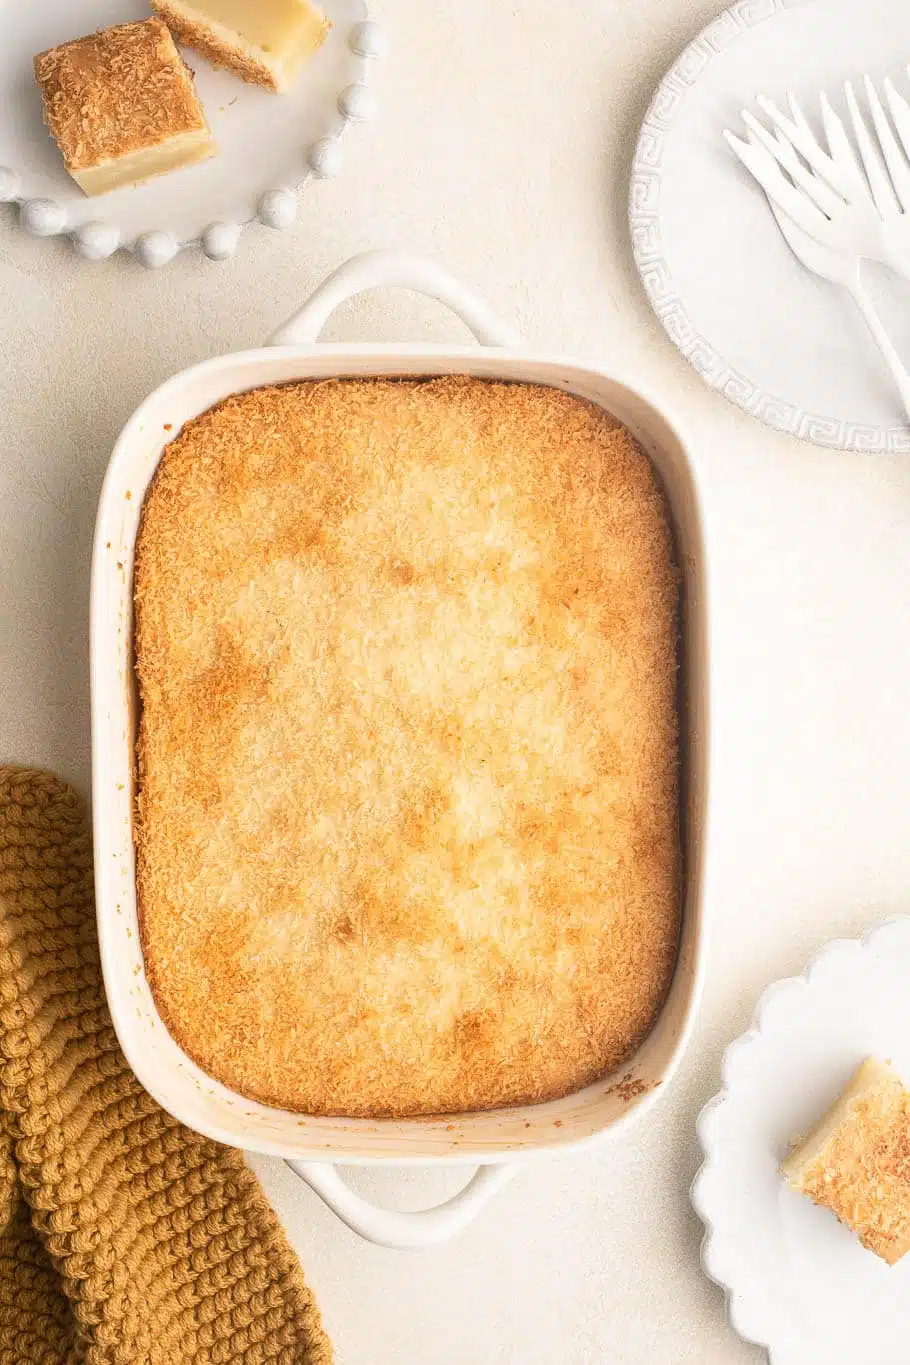
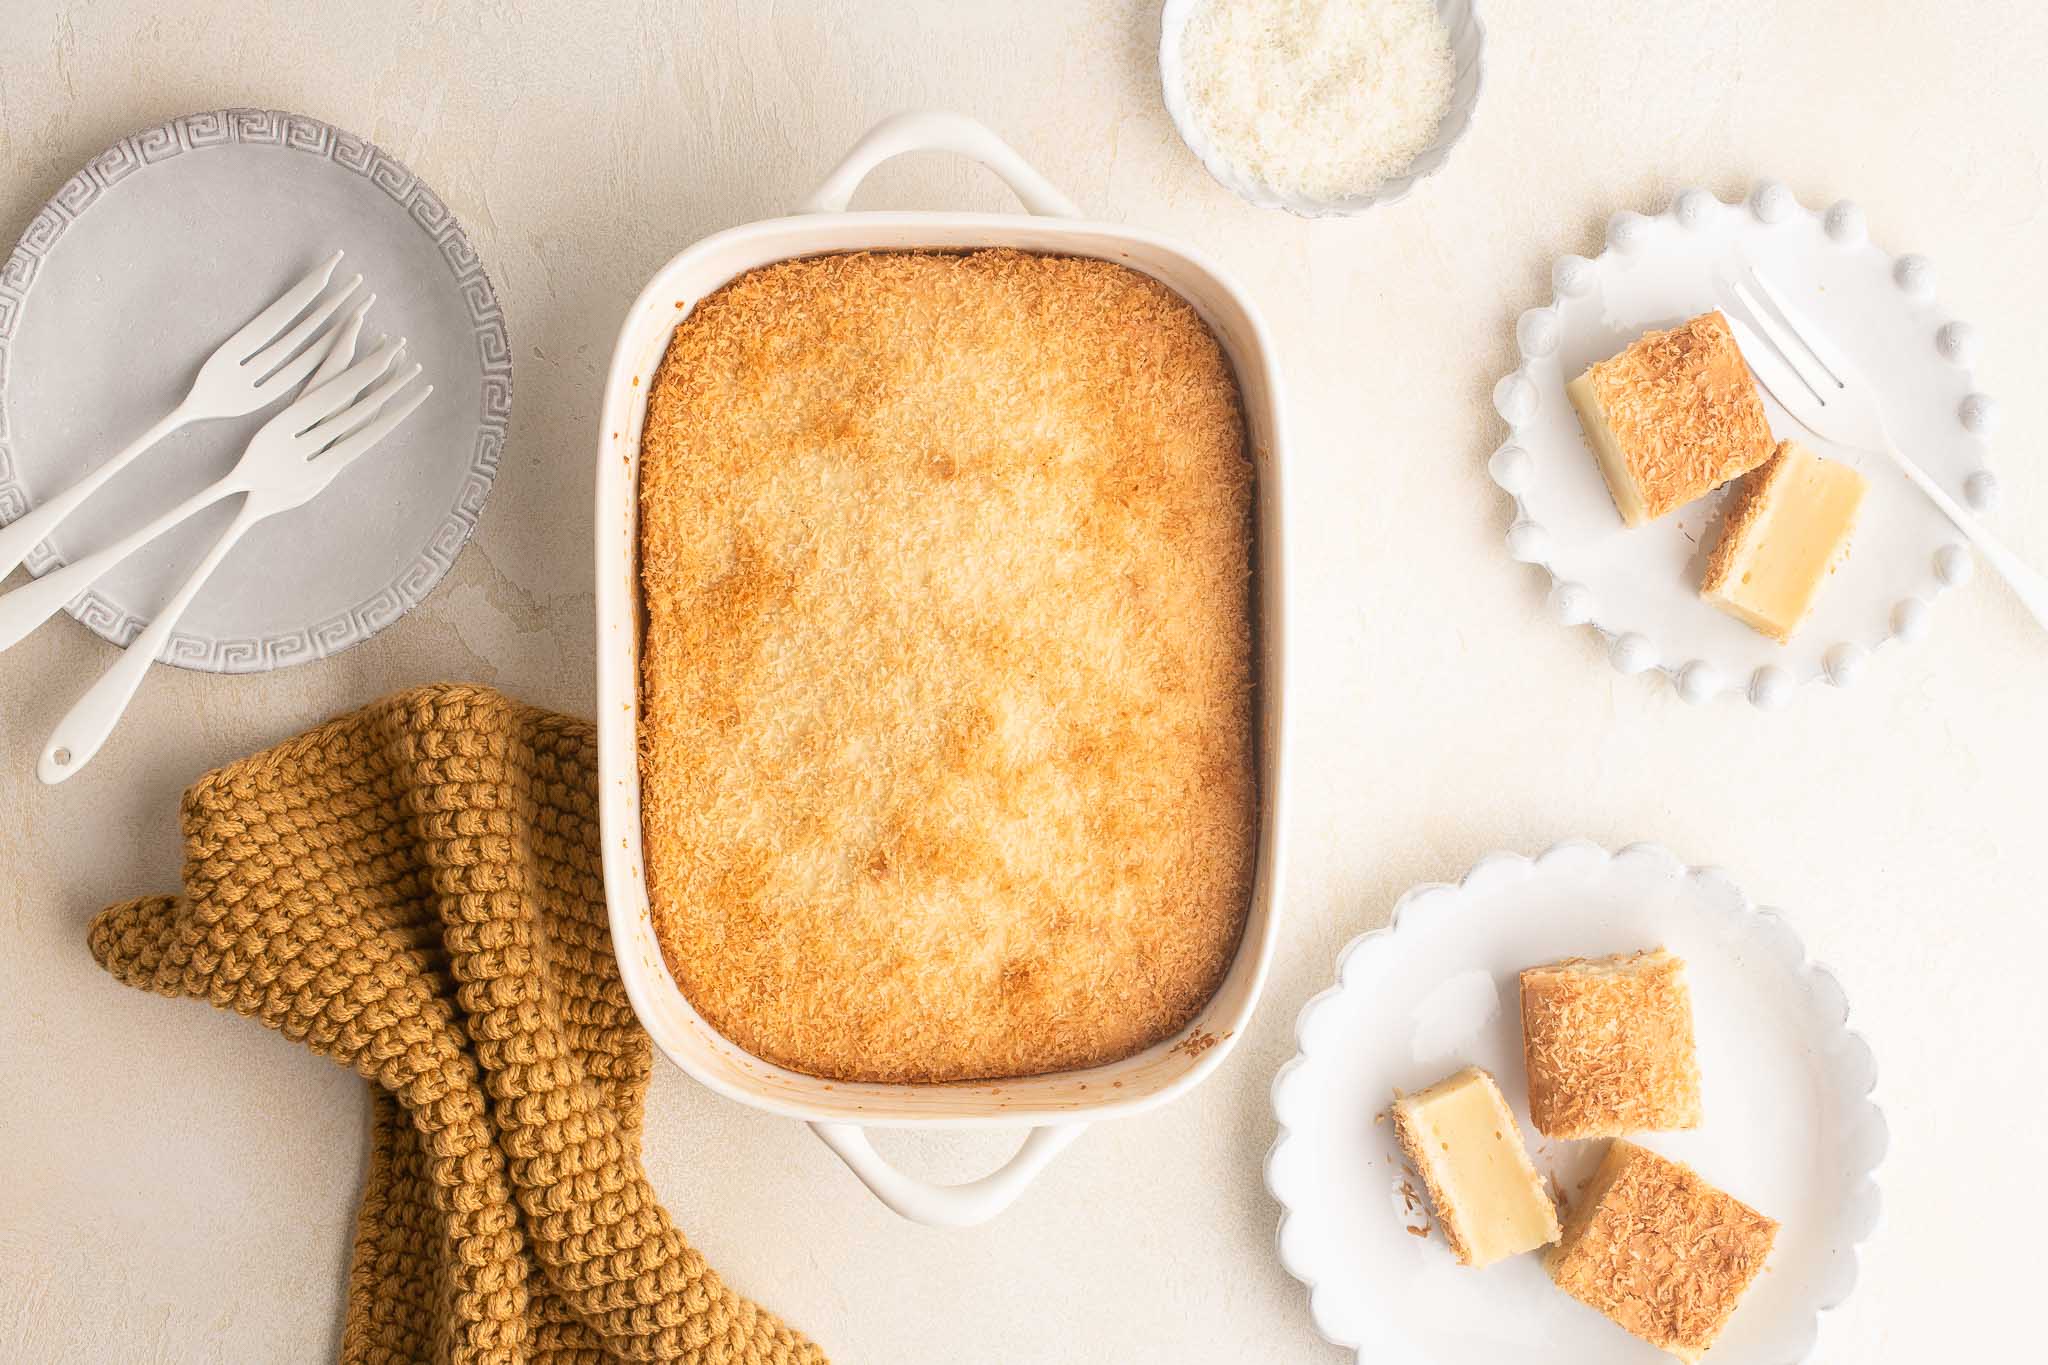
Sprinkle the top of the batter generously and evenly with dessicated coconut.
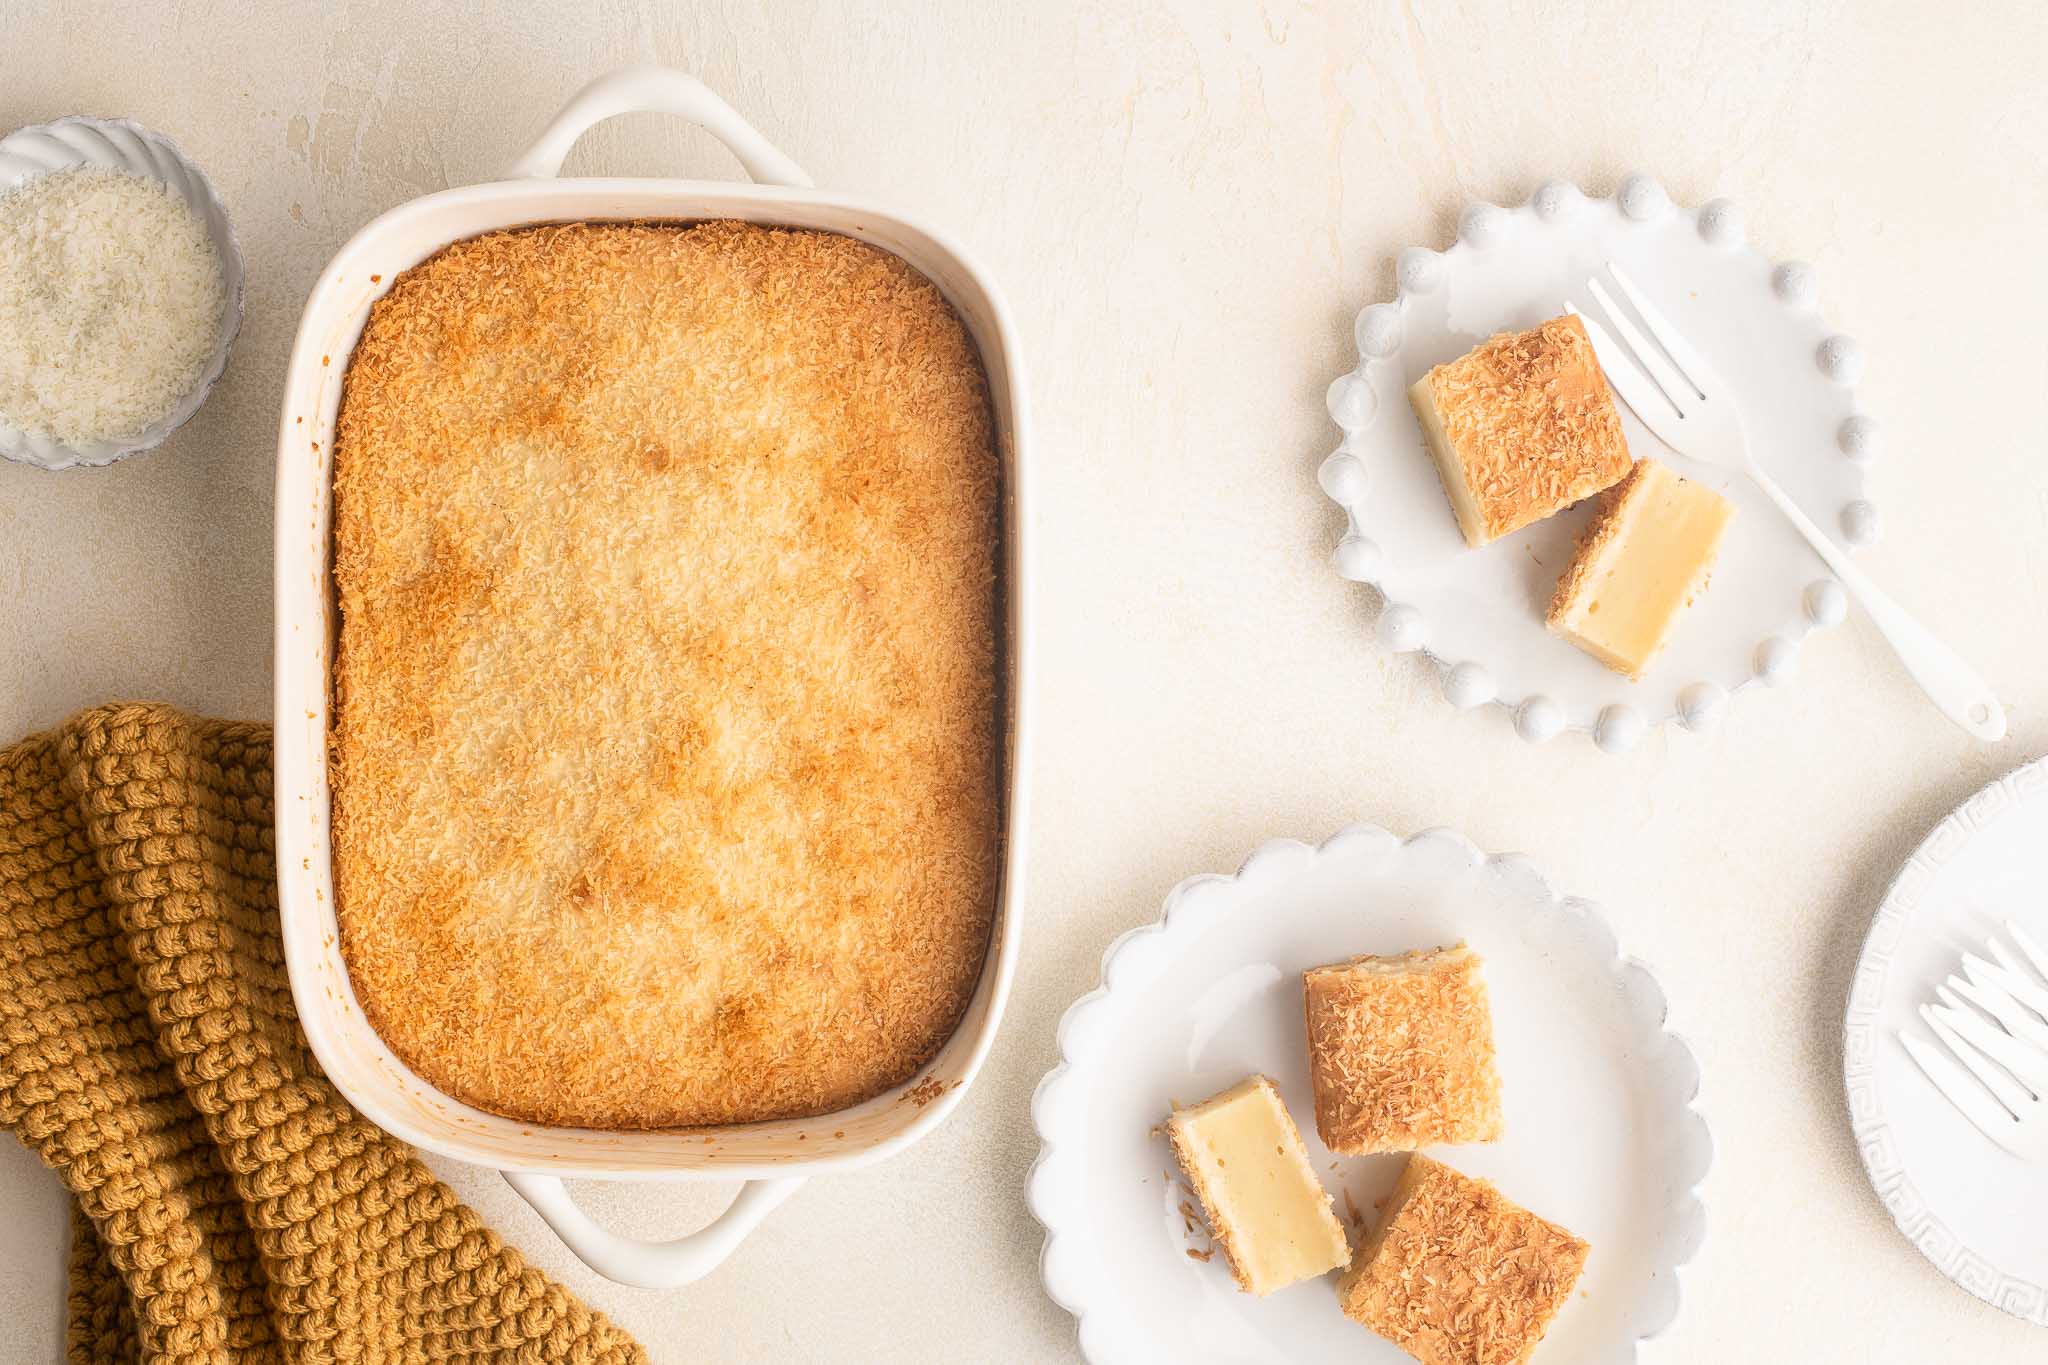
Step 6
Bake for about 35-40 minutes, or until the cake is lightly golden. The cake will rise and crack a little upon baking, but it will settle as it cools.
Let the cake cool in the baking dish for at least 30 minutes before slicing and serving.

Leftover Butter Mochi Cake
Any leftover Butter Mochi Cake can be kept in the fridge for a few days, or individually wrapped in the freezer. They should be reheated before serving so that they have the right soft texture.
To reheat, I like to microwave the slices until they are just warmed through. They should taste like they were just freshly baked.
Butter Mochi Cake
Ingredients
- 1 tablespoon unsalted butter, for greasing
- 2 eggs
- 220 g (1 cup) caster sugar, (superfine sugar)
- 25 g (1 ½ tablespoons) unsalted butter, melted and cooled
- 400 ml (1 ½ cup plus 1 tablespoon) coconut milk
- 1 teaspoon vanilla extract
- 225 g (8 oz) glutinous rice flour, also called sweet rice flour or Mochiko flour
- 3 g (½ teaspoon) fine salt
- 4 tablespoons dessicated coconut, for sprinkling
Instructions
- Preheat the oven to 180°C/350°F (without fan).
- Generously grease a ceramic baking dish measuring 16 x 21 cm/6 x 8 inches.
- In a large mixing bowl, whisk together the eggs and sugar until the mixture is a pale yellow.
- Add the melted butter, coconut milk, vanilla extract.
- Whisk to combine.
- Slowly whisk in the glutinous rice flour and salt.
- Keep whisking until you have a thick and smooth batter. You don’t have to worry about over-mixing because this batter does not contain any gluten.
- Pour the batter into the greased baking dish.
- Tap the baking dish on the bench top a few times to bring any air bubbles to the surface.
- Generously sprinkle the dessicated coconut over the batter, making sure you sprinkle along the edges as well.
- Bake the cake for about 35-40 minutes, or until the cake is lightly golden all over. If the cake is browning too quickly, cover the cake loosely with a sheet of foil for the remaining baking time. The cake should puff up slightly during baking, which will indicate that it is cooked all the way through. Upon cooling, the cake will settle a little.
- Place the baking dish on a wire rack and allow the cake to cool (in the baking dish) for at least 30 minutes.
- Use a sharp knife to slice the cake and serve immediately.
Kitchen Notes
- DOUBLE THE RECIPE
You can double this recipe to make a bigger serving for large gatherings. I recommend using a baking dish measuring approximately 30 x 40 cm/12 x 16 inches. Bake for 50-60 minutes, or until lightly golden. - MAKE IT DAIRY-FREE
Substitute the butter for margarine or another plant-based alternative to make the cake dairy-free. - STORING LEFTOVER MOCHI CAKE
Leftovers can be kept in the fridge for several days, or individually wrapped in the freezer. I like to freeze two slices at a time in a vacuum-sealed bag or ziplock freezer bag. - REHEATING LEFTOVER MOCHI CAKE
Leftover mochi cake tastes best when it is reheated. Reheat them in the microwave until they are just warmed through (about 15-20 seconds). - OVEN & STOVE TEMPERATURES
All recipes on this website have been tested on an induction stove and/or with a conventional oven (i.e. an oven without fan). All recipes on this website use temperatures for a conventional oven, unless otherwise mentioned. Convection ovens (i.e. fan-forced ovens) are typically 20°C/70°F hotter than conventional ovens, but please check your manufacturer’s handbook. - CONVERSIONS
To convert from cups to grams, and vice-versa, please see this handy Conversion Chart for Basic Ingredients.


Oh this was so delicious! And so unbelievably easy! I will definitely be making this again.
Hi Thanh, just want to clarify the sugar amount is 4 cups? Is it a lot ?
Hi Ly,
Thanks for pointing it out to me! I have just corrected the recipe above which should now show the correct quantities. I was updating the recipe yesterday and you may have seen the recipe change during this time. Sorry about that!
Delicious! I will definitely make this again!
Can you also add coconut to the batter? If so, how much?
Hi Monique,
Yes, you can certainly add some dessicated coconut to the batter for more coconut flavour, as well some texture. I would add about 1/4 cup dessicated coconut to the batter. Hope you will enjoy this recipe!
Great recipe! We travelled to Hawaii about 5 years ago where I first tried this mochi cake. This recipe tasted much nicer, and especially when still fresh and warm!
Highly recommend this recipe. It was delicious 🙂
Butter mochi is one of my favorite cakes and this is a great recipe.
when do you add the salt?
Hi Clair,
The salt should be added with the glutinous rice flour. Hope you will enjoy this recipe!
You have a wrong spelling on your site. It’s ‘desiccated’, not ‘dessicated’ 😉
The cake looks delicious and I will try it!
Do you think it would work to substitute the coconut milk with oat milk?
Hi Jasmin,
Yes, I think you could use oat milk but it will change the flavour of the mochi cake somewhat. Hope you will enjoy this recipe!
Hello! I just wanted to thank you for the recipe! It has become an absolute staple in our household, I must have made it ten times by now 😃 It’s so easy and the consistency is so great, we love it.
Hi Antonia,
That’s so wonderful to hear! It’s one of my favourite recipes to make at home too, especially since it is so easy and pretty much foolproof. So glad you enjoy it too!