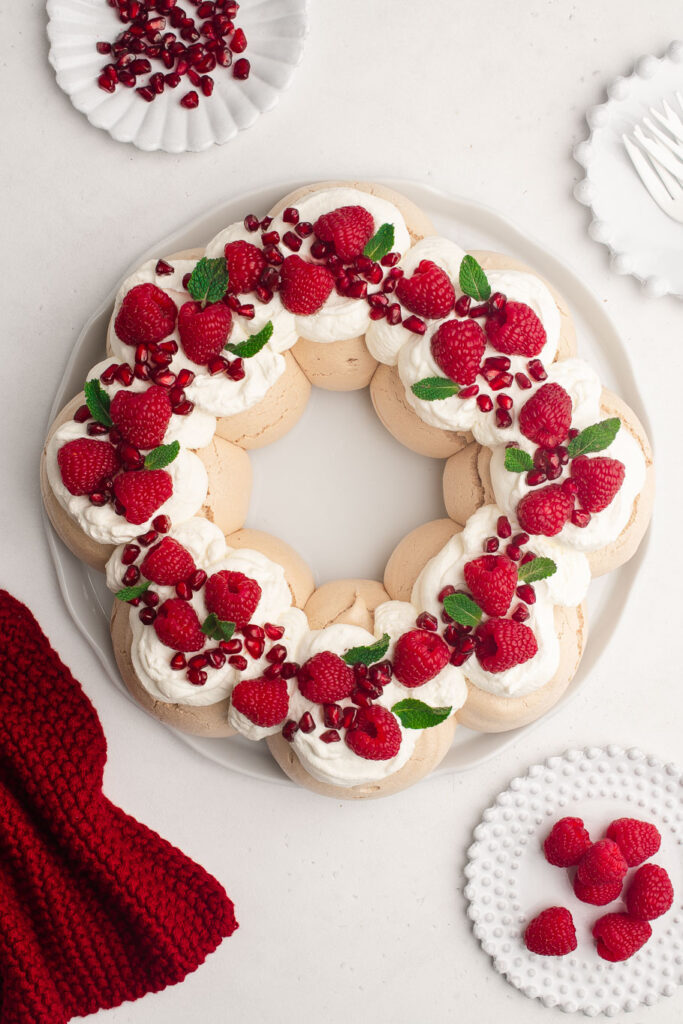
Pavlova Wreath
If you are a regular here on my blog, you may have noticed several pavlova recipes. They are possibly my favourite dessert to make because they are so easy to prepare, you can make them ahead of time, there are a million ways to decorate them, and they always taste delicious.
And as pavlovas grace many tables in Australia during the Christmas season, it makes complete sense to transform this wonderful dessert into a Pavlova Wreath, something which is surprisingly easy and will wow your guests every time.
Pavlova Wreath Recipe
My Pavlova Wreath recipe uses the same recipe as for my Classic Pavlova for 4 to 6 people.
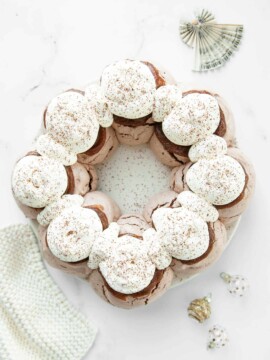
The pavlova mixture is then piped into a wreath shape (you can also use a large spoon) and baked for a slightly shorter time because you are essentially baking 8 small conjoining meringues instead of one very large meringue.
How to Make a Pavlova Wreath
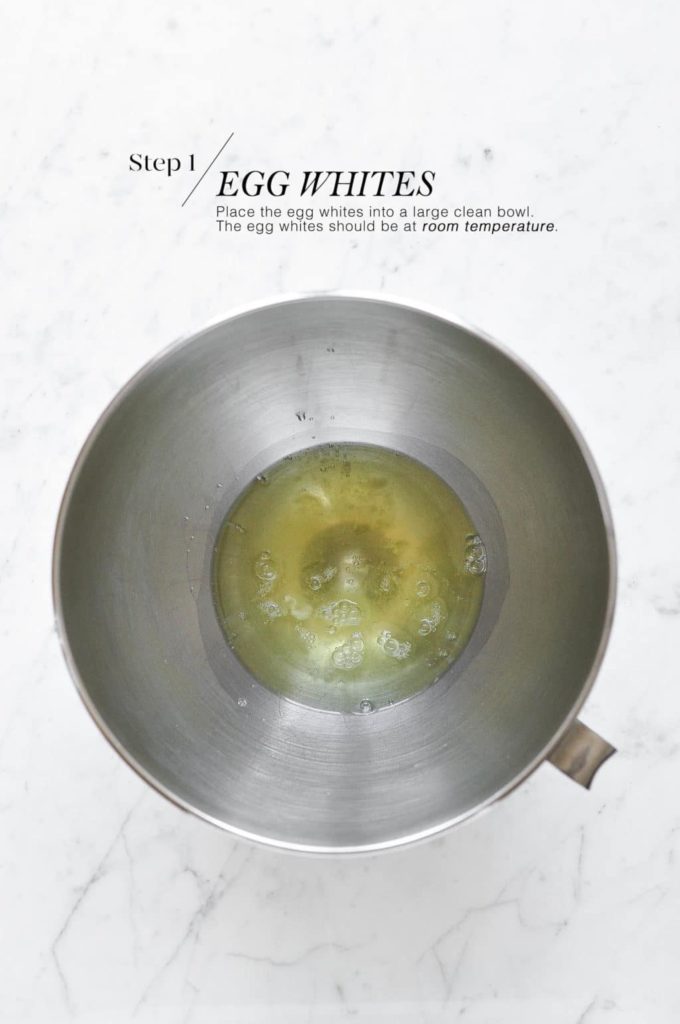
Step 1
Unless you really want to have a heavy duty upper arm workout, an electric stand mixer or an electric hand-held beater is an essential equipment when making a pavlova.
Place the egg whites into a large, clean bowl that is free from any grease.
To ensure that the egg whites whip up nicely, make sure that they are at room temperature.
Step 2
Whisk the egg whites until they have tripled in volume and form soft peaks when you lift the beaters.
Soft peaks mean that, when you lift the beaters, the mixture forms a peak which falls over or which does not stand.
At this stage, the beaten egg whites should look very soft and foamy.

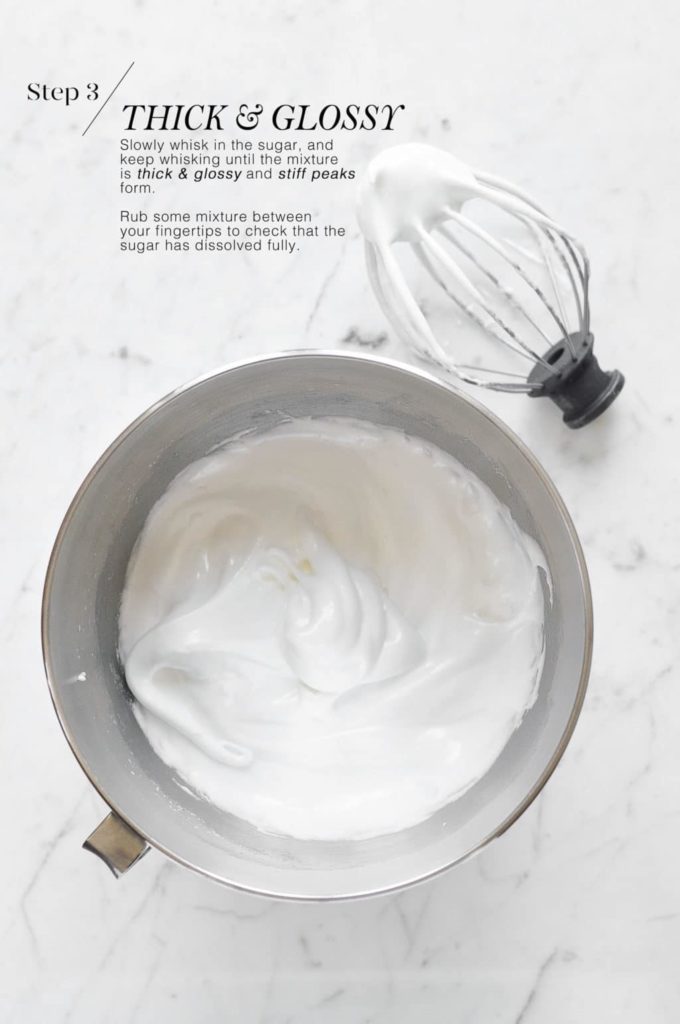
Step 3
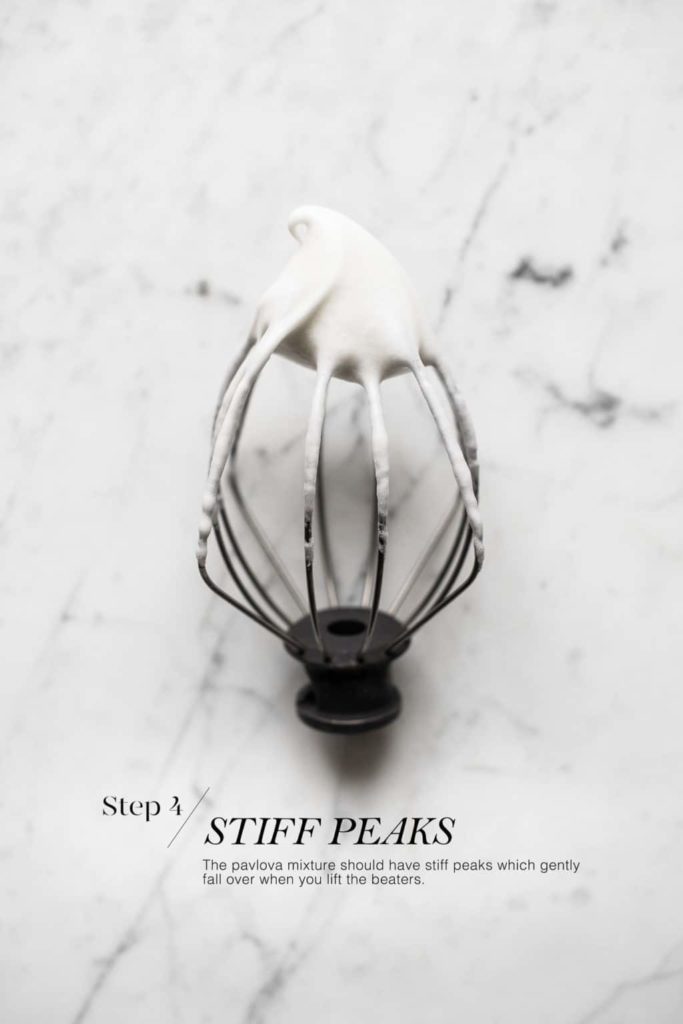
Next, add the sugar, one spoon at a time, until the egg whites transform into a thick and glossy mixture, and stiff peaks form when you lift the beaters.
Stiff peaks mean that, when you lift the beaters, the mixture forms a peak which holds its shape.
It is important to make sure that the sugar has been completely dissolved in the egg white mixture, but it is also important to not over-beat the mixture once you start adding the sugar.
To test that the sugar has been completely dissolved, simply rub a bit of mixture in between your finger tips.
Step 4
Add the cornflour, vinegar and vanilla. A few rotations of the stand mixer should be enough to mix in these ingredients.
The resulting pavlova mixture should be thick and firm, and it should hold its shape when you start piling it on the baking tray.
If the pavlova mixture is soft and runny, and you are unable to shape it into a high pavlova because the mixture keeps sliding, it means that you may have overbeaten the eggwhites or that you added the sugar too soon. Please see the FAQs here.
Transfer the pavlova mixture to a large disposable piping bag and cut a tip about 1 cm/0.5 inch wide.
Step 5
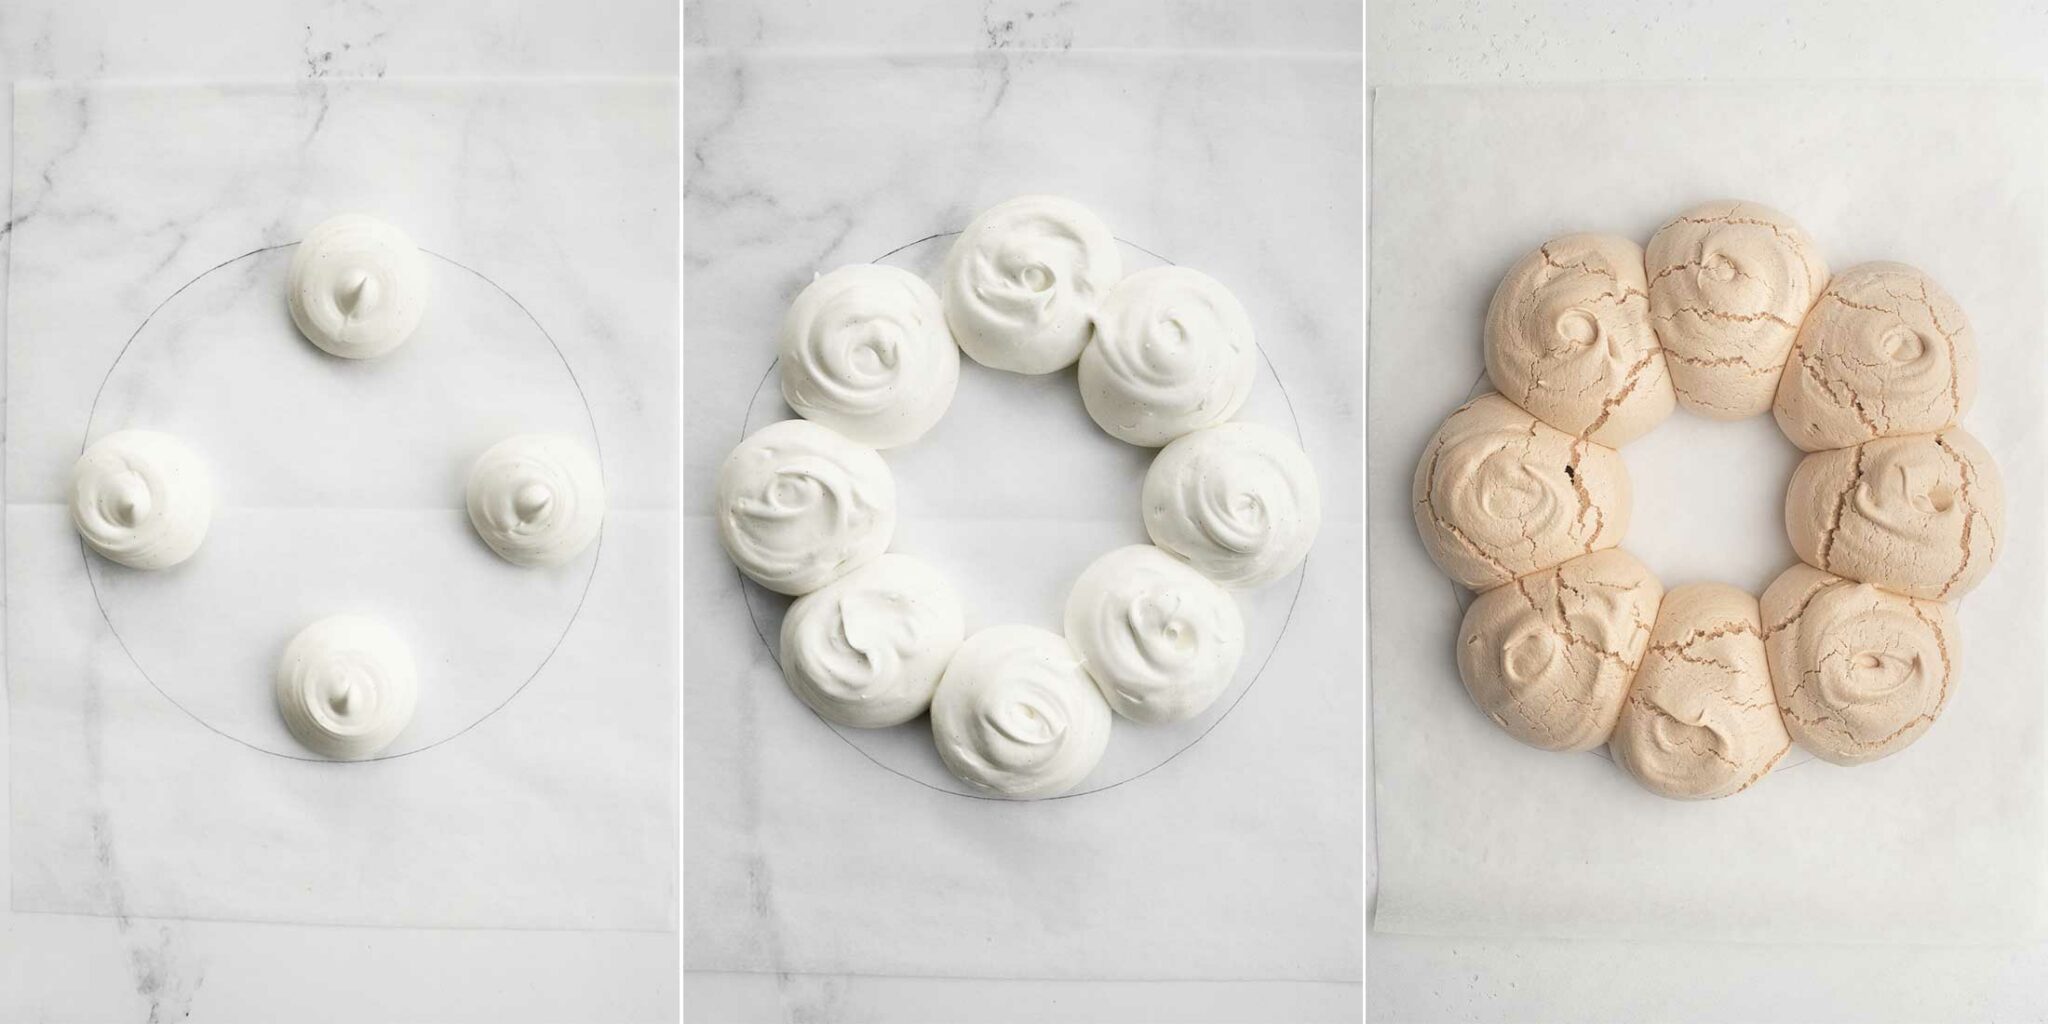
Draw a 25 cm/10 inch circle on a large sheet of baking paper. Turn the paper over so that the ink is not touching the pavlova.
Pipe 8 large rounds within the circle. I like to do this by imagining a clock and piping 4 rounds at 12:00, 3:00, 6:00 and 9:00. Then pipe the remaining 4 rounds in between.
Try to make each round roughly the same size by piping more mixture into the centre of any existing round.
If you don’t have a piping bag, simply use a large spoon (such as a serving spoon) to make large dollops.
Keep in mind that, as the pavlova bakes, it will expand slightly, so the resulting pavlova wreath will be slightly wider than 25 cm/10 inches.
Step 6
Place the pavlova wreath into the oven at 180°C/350°F (without fan).
Immediately turn down the temperature to 150°C/300°F.
Let the pavlova bake for 45 minutes, and do not open the oven door during this time.
After the baking time, turn off the oven, and leave the pavlova to cool inside the closed oven for at least 2-3 hours.
Step 7
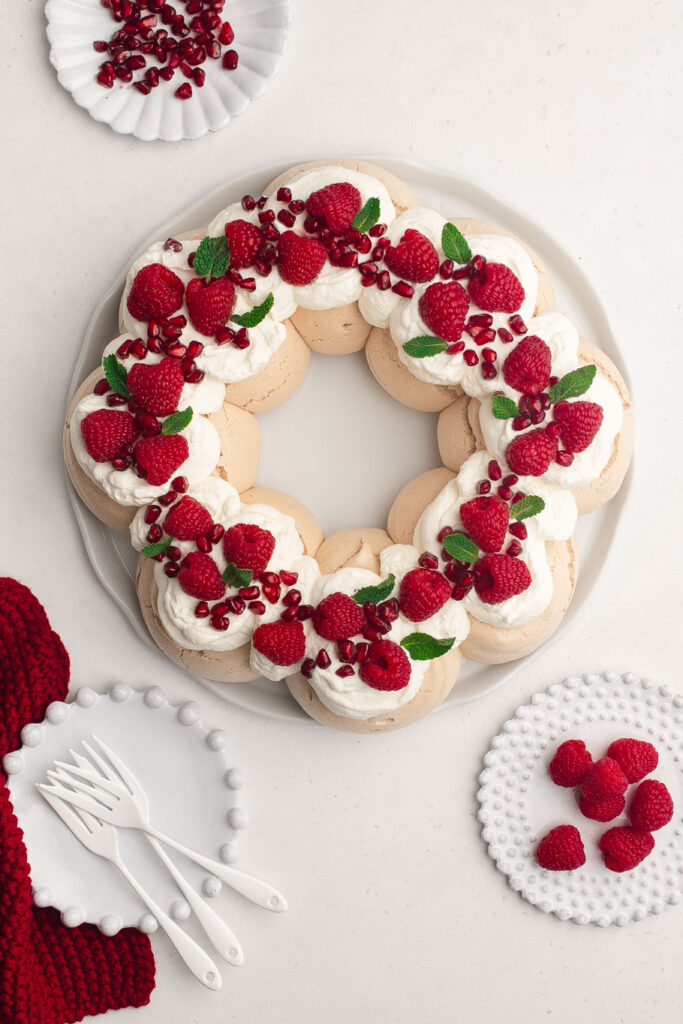
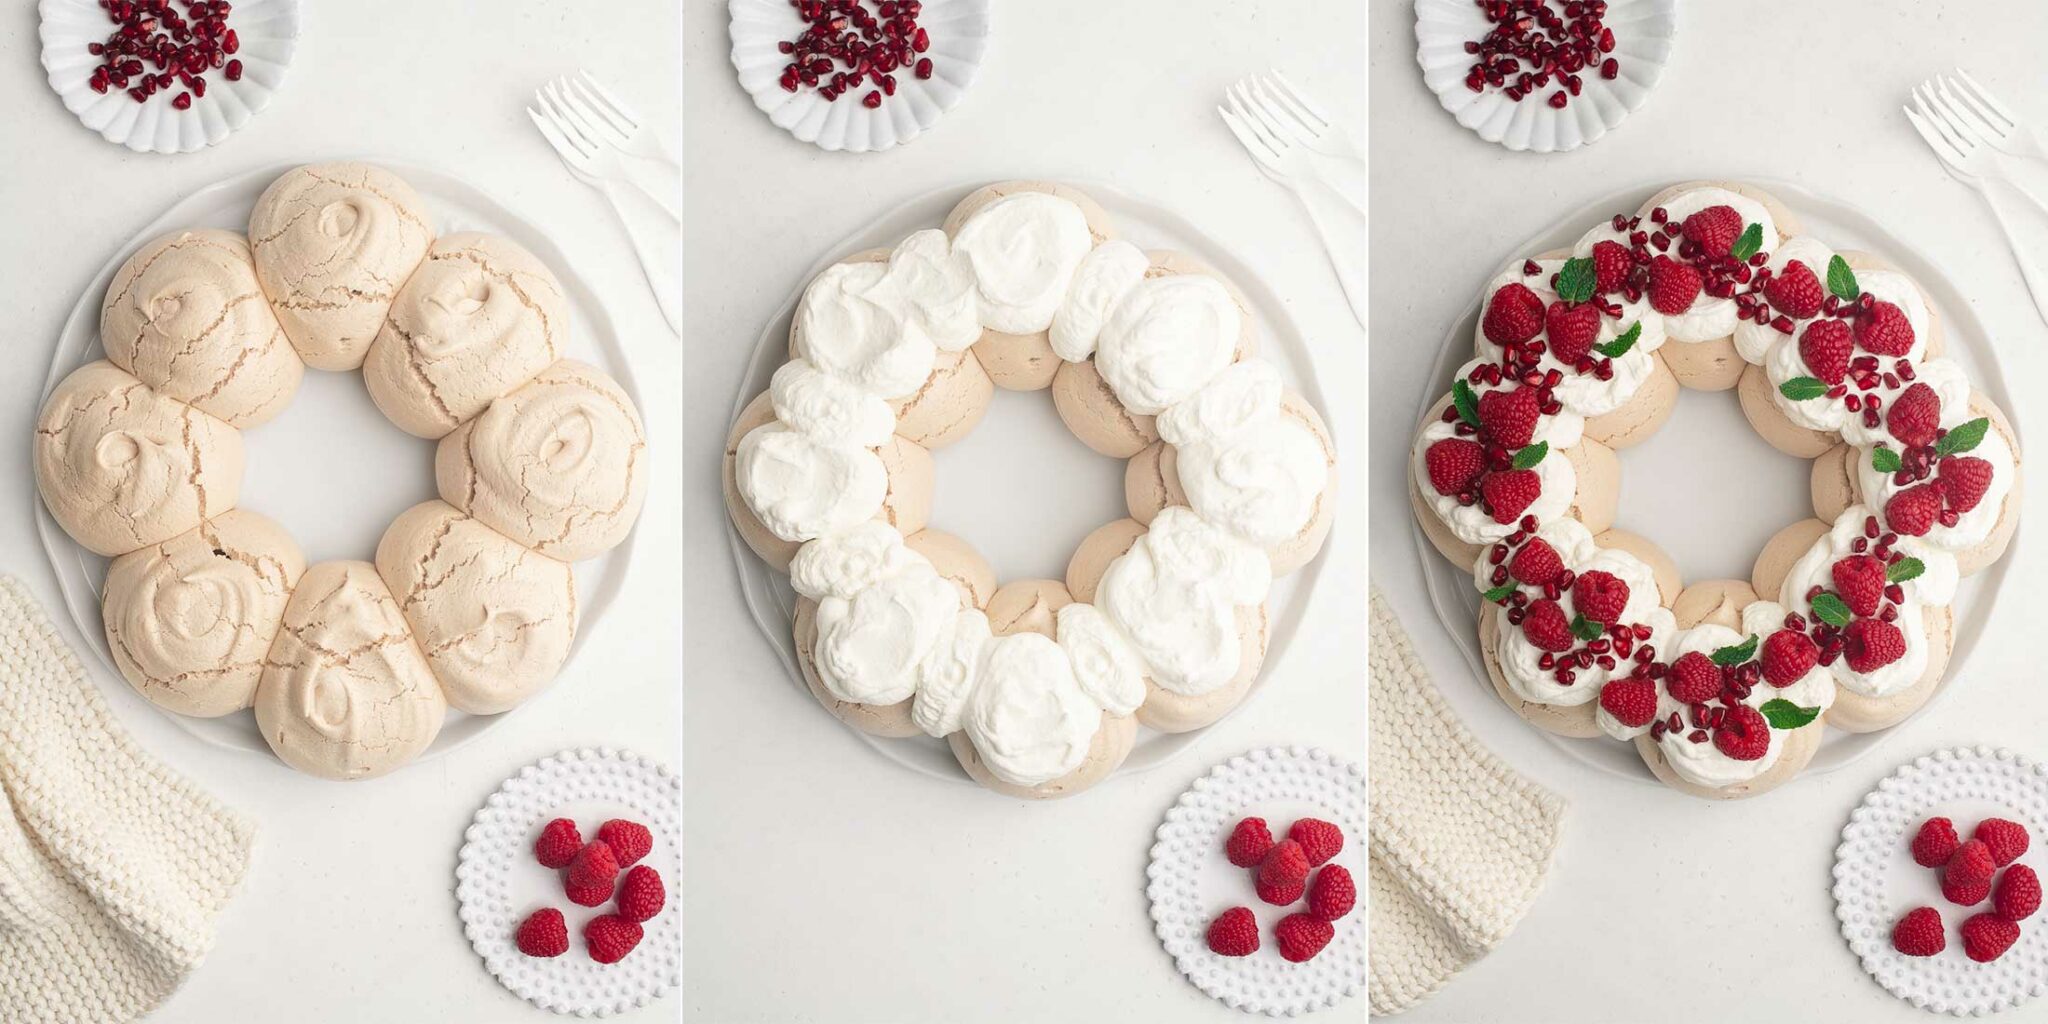
Decorate the pavlova just before serving.
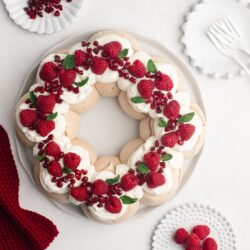
Whip the cream until it is thick with soft peaks. Dollop the cream on top of the pavlova, either using a large piping bag or with a large spoon. Decorate with fruit and berries of your choice.
Pavlova Wreath Toppings
Like for most pavlovas, you should use fruit and berries which are slightly tart to offset the sweetness of the pavlova and the richness of the cream.
At Christmas, I think it is nice to use a mix of red and green colours. My suggestions include:
- Raspberries
- Redcurrants
- Pomegranate seeds
- Strawberries
- Mint or lemon balm (to add some green colour for that festive vibe)
However, feel free to use any of your favourite pavlova toppings! Passionfruit remains my all-time favourite 🙂
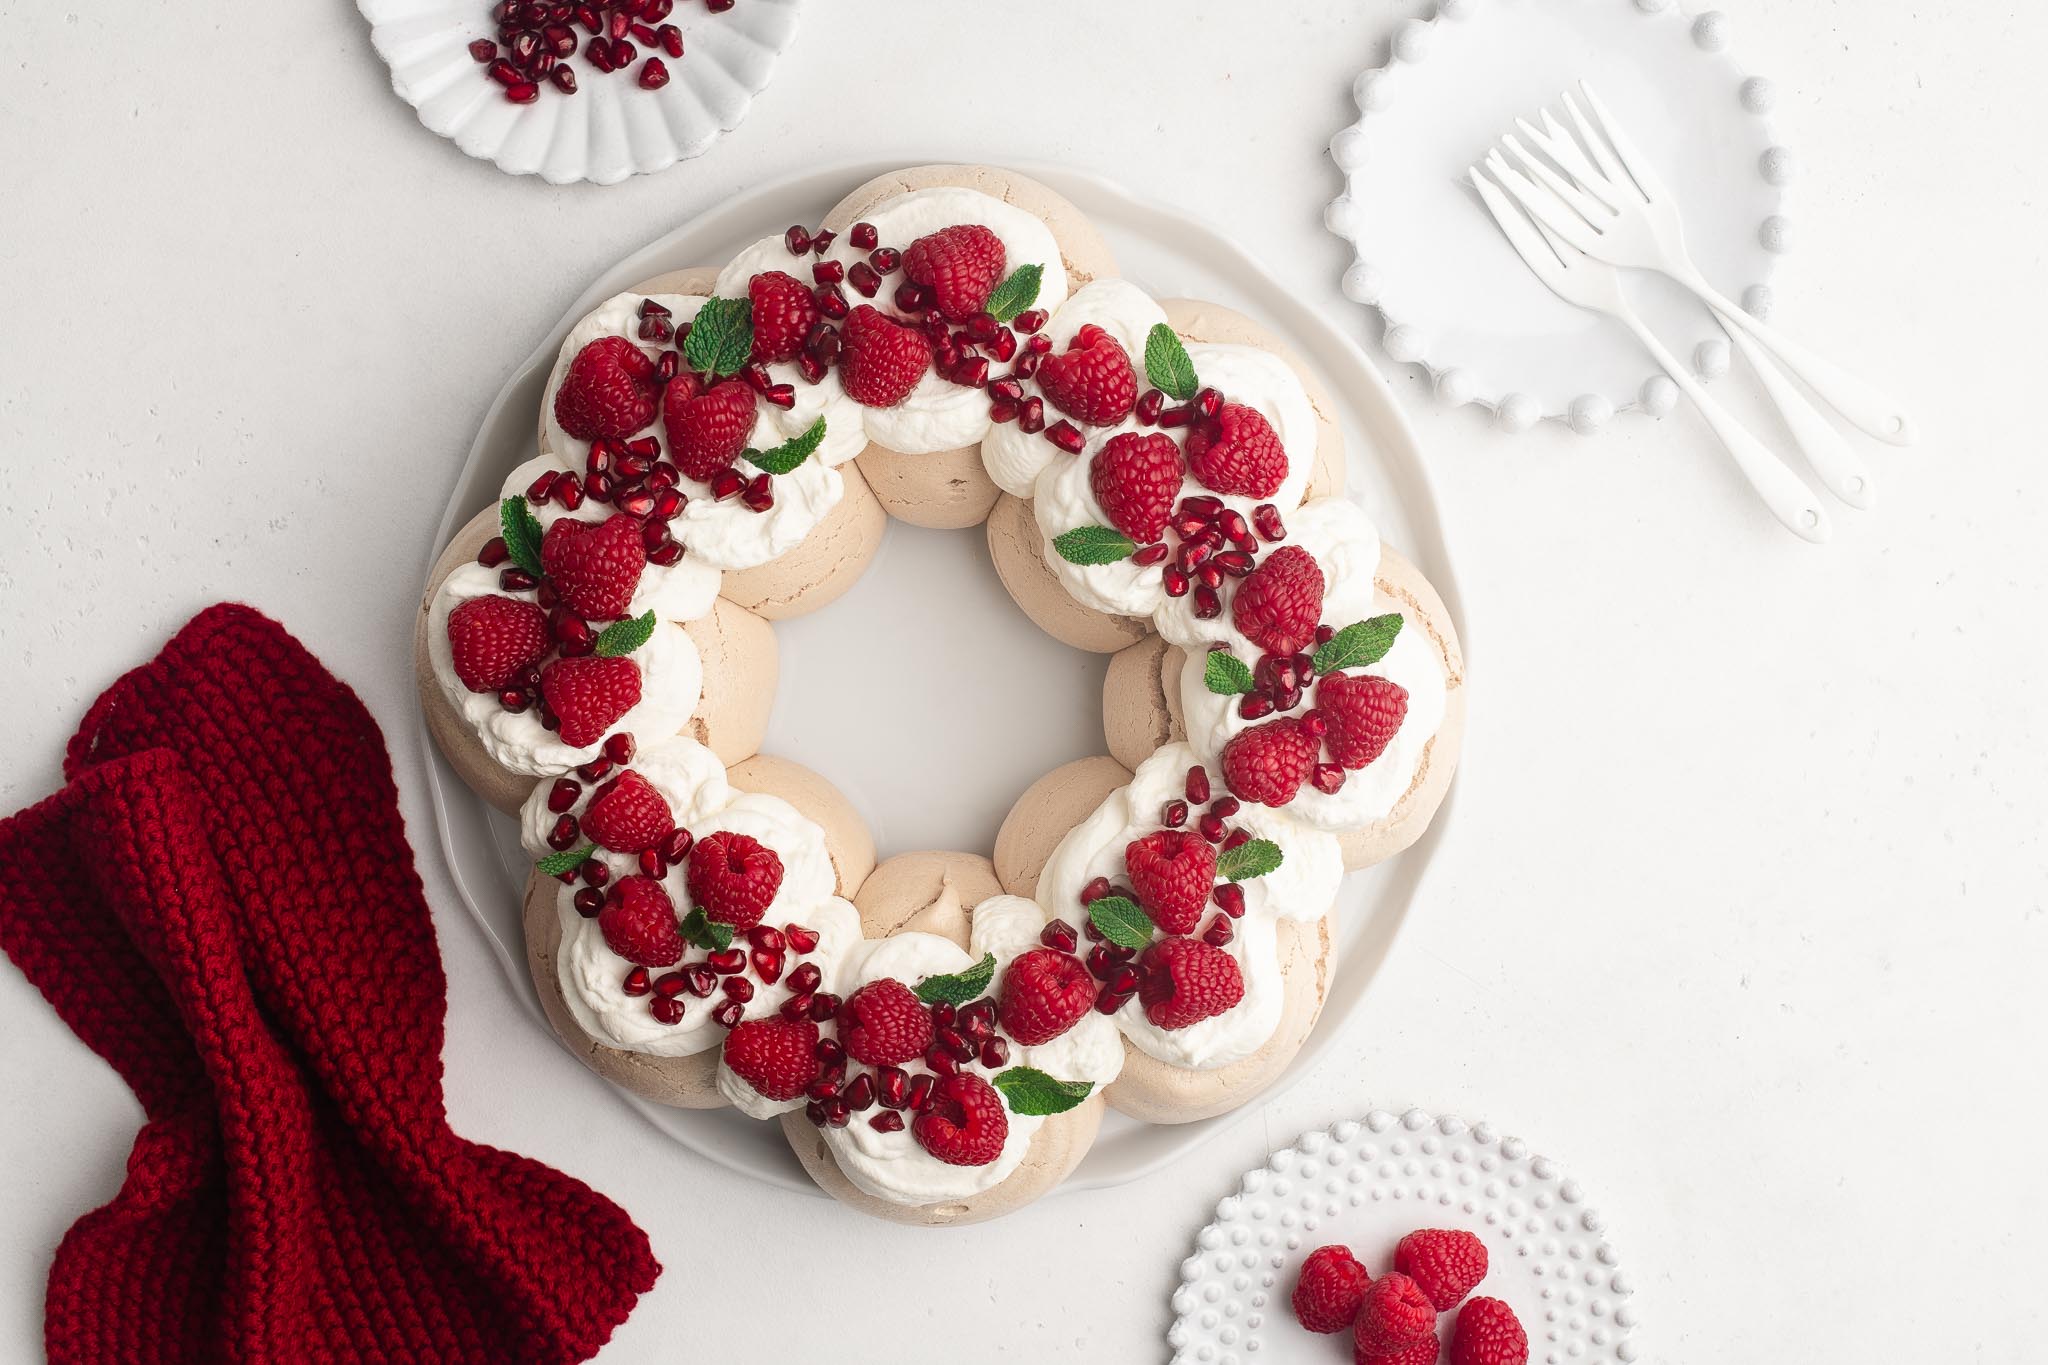
Christmas Pavlova Wreath
Ingredients
For the pavlova
- 4 egg whites
- 240 g (1 cup plus 1 tablespoon) caster sugar , (superfine sugar)
- 2 teaspoons cornflour, (US: cornstarch)
- 1 ¼ teaspoon white wine vinegar
- 1 ¼ teaspoon vanilla extract
For the topping
- 300 ml (1 ¼ cup) double cream, (heavy whipping cream)
- raspberries
- pomengranate seeds
- mint or lemon balm leaves
Instructions
To make the pavlova
- Preheat the oven to 180°C/350°F (without fan).
- Using a standmixer or electric beaters, whisk the egg whites in a large, clean bowl until they have tripled in volume and soft peaks form.
- Turn the speed down to low and slowly add the caster sugar, one spoon at a time until the sugar is well incorporated. As you add the sugar, the mixture will start to become thick and glossy, and stiff peaks will form when you lift the beaters.
- Remember to scrape down the sides of the bowl.
- Rub a bit of the mixture between your fingertips to test if the sugar has been fully dissolved; if you don’t feel any grains of sugar, move onto the next step.
- Add the cornflour, white wine vinegar, and vanilla extract. I do this on low speed with the stand mixer for only 2 to 3 rotations (about 1 second).
To shape the pavlova
- Line a baking tray with baking paper.
- Draw a circle on the baking paper measuring 25 cm/10 inches, and then turn the paper over so that the ink does not touch the pavlova.
- Transfer the pavlova mixture to a large piping bag with a large nozzle (or cut a 1 cm tip from a disposable piping bag). Alternatively, use a large spoon to dollop the mixture.
- Pipe 8 large rounds within the circle. I like to do this by imagining a clock and piping 4 rounds at 12:00, 3:00, 6:00 and 9:00. Then pipe the remaining 4 rounds in between.
- Ensure that each round is roughly the same size by squeezing additional mixture in the centre of each round as needed.
To bake the pavlova
- Place the pavlova wreath in the oven and immediately turn the temperature down to 150°C/300°F (without fan).
- Bake for 45 minutes. Do not open the oven door during this time.
- After 45 minutes, turn off the oven and leave the oven door closed so the pavlova can cool down completely. You should leave the pavlova in the oven for at least 2-3 hours to dry out.
To decorate the pavlova
- The pavlova should be decorated only just before serving.
- Whip the double cream until it is thick and soft.
- Spread the cream over the top of the pavlova.
- Decorate with fruit and berries of your choice.
Kitchen Notes
- MAKE IT IN ADVANCE
I recommend making the pavlova the night before serving, or in the morning if you plan on serving it later in the evening. This will give the pavlova plenty of time to cool and dry in the oven for the perfect crisp meringue shell and slightly chewy centre. You could even make the pavlova 1-2 days in advance and keep it in an air-tight container. - DECORATE AT THE LAST MINUTE
Although I recommend baking the pavlova in advance, you should only decorate the pavlova at the last minute. Once the cream is placed on the pavlova, it will start to soften the pavlova and add weight, and your pavlova might collapse soon after. - OVEN TEMPERATURES All recipes on this website state temperatures for a regular oven (i.e. a conventional oven without fan). If you have a convection oven with a fan, please consult the manufacturer’s handbook on how to adjust the temperature and baking time accordingly.
- CONVERSIONS To convert from cups to grams, and vice-versa, please see this handy Conversion Chart for Basic Ingredients.


This is an excellent recipe! I make your regular pavlova often but this wreath is a nice change for something a bit special. Thank you!
Beautiful!
I didn’t have a large piping bag so I just did big dollops with a large serving spoon. Once you cover the pavlova with cream, you can’t tell anyway. So it worked out great!!
Worked perfectly!
Corn flour – do you really mean flour, or corn starch? I’m in the US.
Hi Beth,
If you are in the US, please use cornstarch. Hope you will enjoy this recipe!