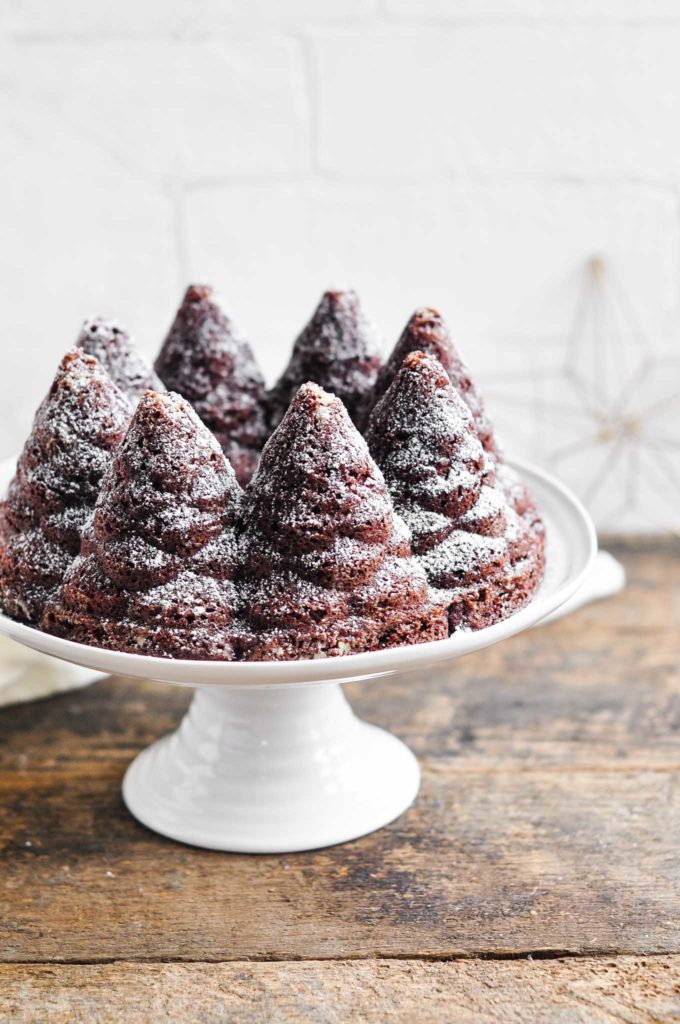
Christmas Tree Bundt Pan
In between all of the preparations for Christmas Day, not to mention the last minute shopping and gift-wrapping, I snuck in some time to use my Christmas tree bundt pan once more this year, thus making me feel a tiny bit more justified in purchasing this seasonal piece of kitchenware.
And I’m so glad I did. With all of the friends, family and neighbours popping by unexpectedly, it was perfect to have such a festive cake on standby to serve with a hot cup of tea or coffee.
Nordic Ware Bundt Pan
One cake pan which always stands out at Christmas is the popular Nordic Ware Holiday Bundt Tree Pan (or Nordic Ware Christmas Tree Pan) or the very similar Nordic Ware Pine Forest Bundt Pan. The former has trees of the same size, whereas the latter has different-sized trees.
I own a very similar cake tin from Betty Bossi, a local Swiss company which sells their cake pan at a fraction of the cost.
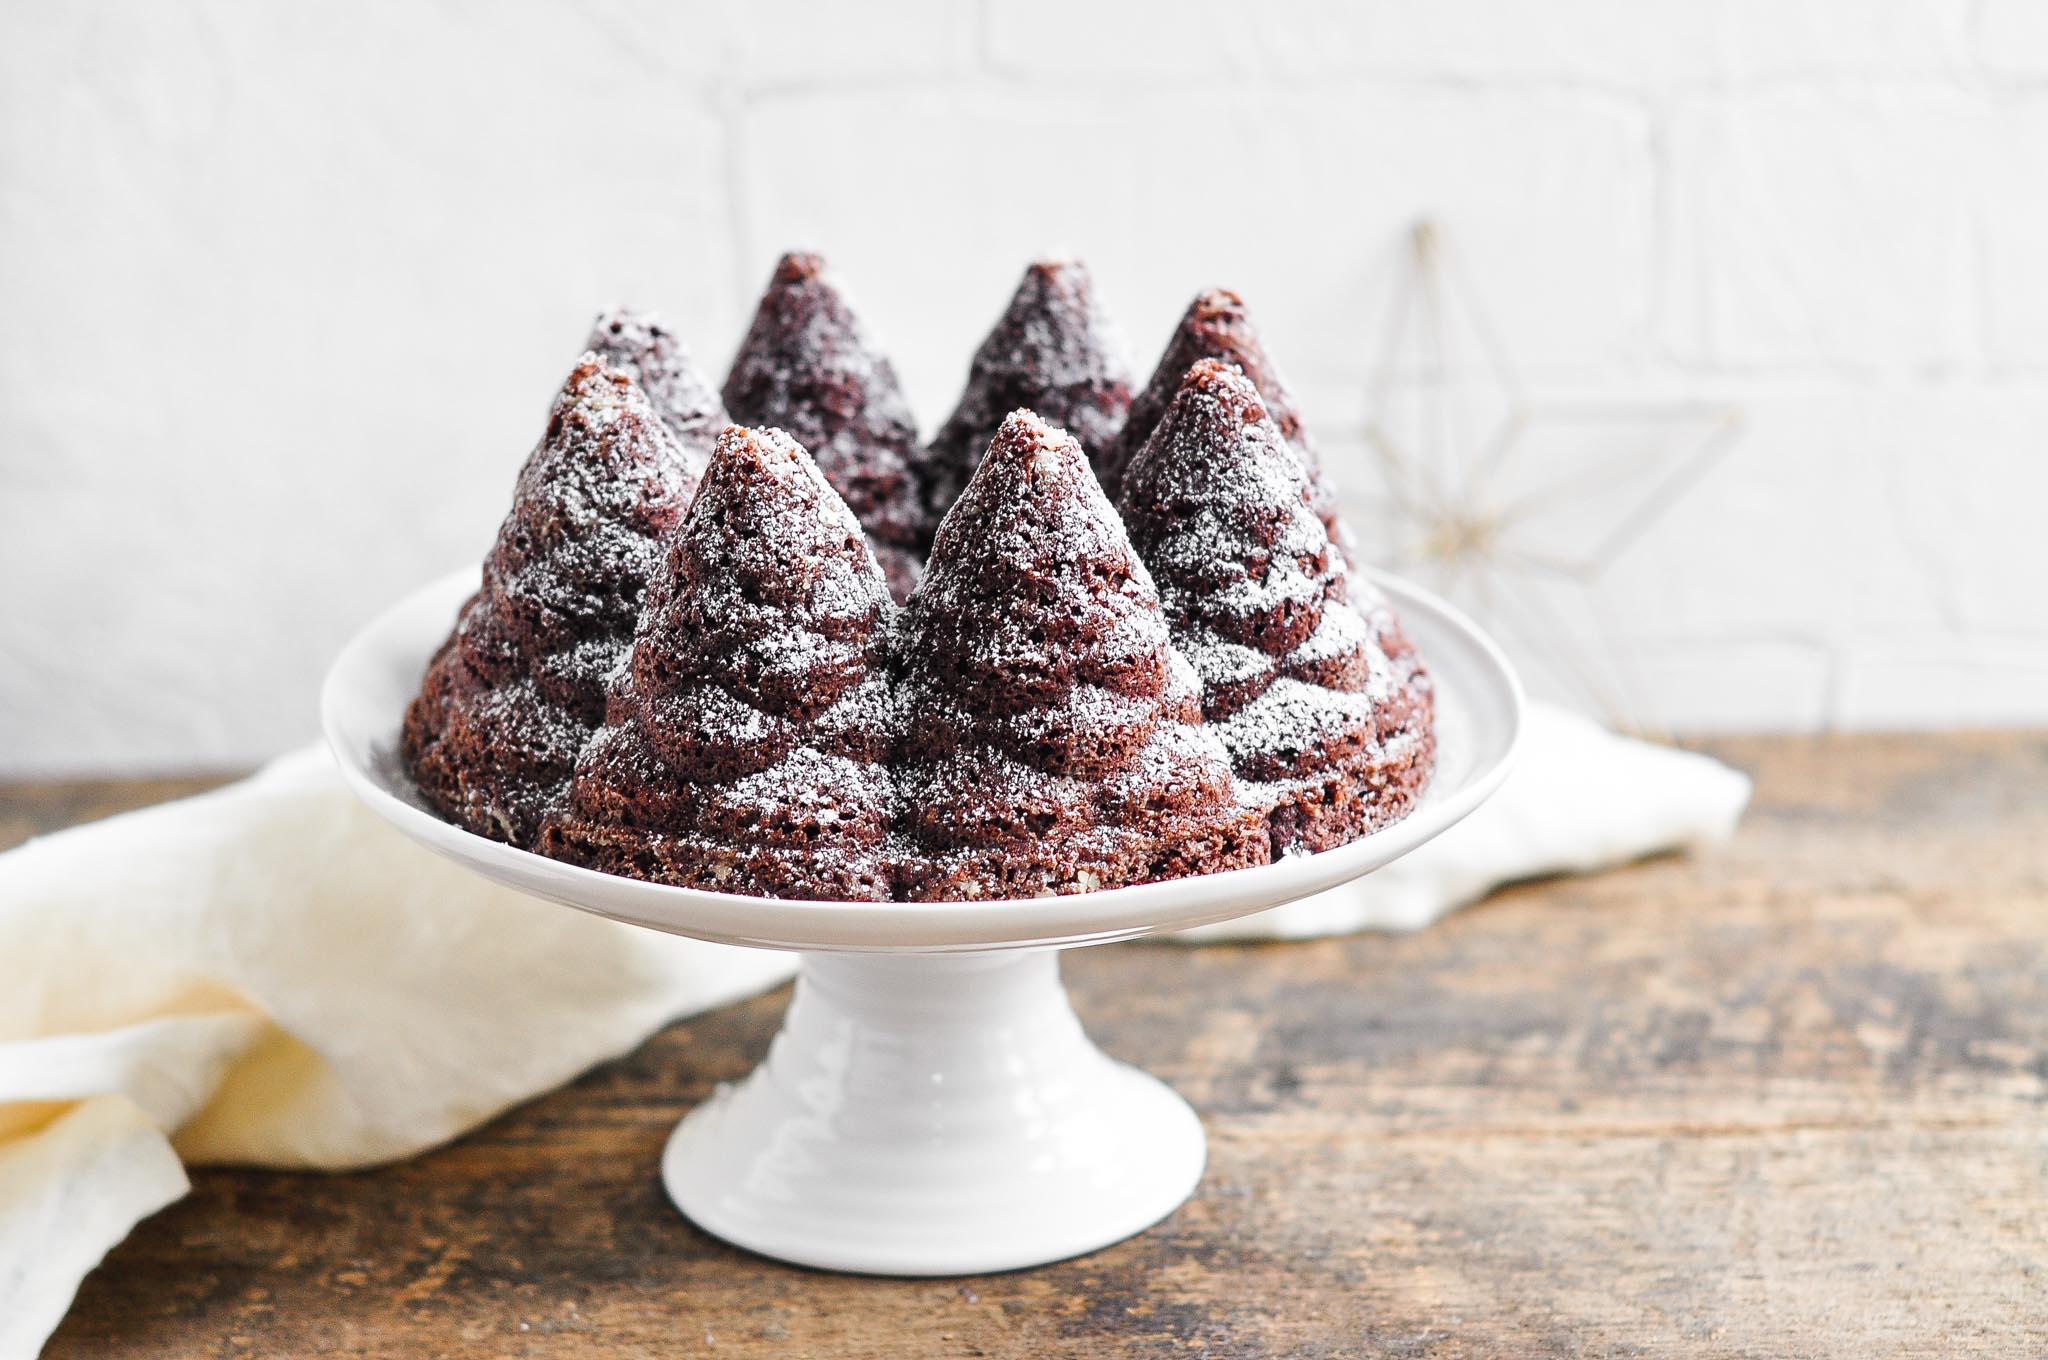
Chocolate Gingerbread Cake
The cake batter for this Chocolate Gingerbread Bundt Cake is essentially that from my Easy Chocolate Cake with some added mixed spice.
If you have a food processor, the batter takes mere moments to make, freeing you up for other important things at this time of the year, such as spending quality time with your family.
In our home, it means closing all of the blinds and curtains for impromptu discos with the children, courtesy of their new spinning disco ball from Santa!
Chocolate Gingerbread Bundt Cake
Ingredients
- 200 g (2 sticks) unsalted butter, softened
- 200 g (1 cup) caster sugar, (superfine sugar)
- 200 g (1 ½ cups) plain flour, (all-purpose flour)
- 40 g (⅓ cup) cocoa powder
- ¾ teaspoon baking powder
- ¼ teaspoon baking soda
- ½ teaspoon fine salt
- 2 teaspoons mixed spice
- 170 g (⅔ cup) sour cream or crème frâiche
- 2 eggs
- 1 ½ teaspoons vanilla extract
- icing sugar, (powdered sugar) for dusting
Instructions
To Make the Chocolate Cake
- Preheat the oven to 180°C (350°F) (without fan).
- Generously grease a bundt cake pan with a least 2 litre (8 cup) capacity with vegetable oil or non-stick baking spray. Lightly flour the bundt cake pan and shake out the excess flour.
- Place all of the ingredients into the bowl of a food processor and blitz until the mixture is well-combined. The batter should be thick and smooth.
Alternatively, if you do not have a food processor:
- Cream the butter and sugar in the bowl of a stand mixer with the flat paddle attachment.
- Slowly beat in the flour, cocoa, sugar, baking powder, baking soda, salt and mixed spice.
- Beat on low speed until all of the ingredients are incorporated.
- In a small bowl or jug, lightly whisk together the sour cream, eggs and vanilla.
- Slowly add the wet ingredients to the mixer, and beat until the batter is thoroughly mixed
To Bake the Chocolate Cake
- Pour the batter into the prepared bundt cake pan, and give it a few taps on the kitchen counter to make sure the batter has settled into all of the grooves of the cake pan.
- Bake for 45-55 minutes, or until a skewer inserted in the middle comes out clean.
- Leave the cake to cool in the tin, on a wire rack, for about 10 minutes before carefully inverting the cake onto another wire rack to cool completely.
- Dust with icing sugar (powdered sugar) before serving.
Kitchen Notes
- CAKE PAN SIZE
The cake pan I have used in the accompanying photos has a capacity of 2.25 litres/9 cups. If you are using the Nordic Ware Holiday Bundt Tree Pan or Nordic Ware Pine Forest Bundt Pan, they also have a 2.25 litre/9 cup capacity. - INGREDIENTS AT ROOM TEMPERATURE
As for all cakes, make sure all of your ingredients, including the eggs and milk, are at room temperature before using. - OVEN TEMPERATURES
All recipes on this website state temperatures for a regular oven (i.e. a conventional oven without fan). If you have a convection oven with a fan, please consult the manufacturer’s handbook on how to adjust the temperature and baking time accordingly. - CONVERSIONS
To convert from cups to grams, and vice-versa, please see this handy Conversion Chart for Basic Ingredients.
Did you make this recipe?
Please leave a comment below and share your photos by tagging @eatlittlebird on social media and using #eatlittlebirdUpdate
This recipe was first published on 26 December 2017. It has been updated with new photos and more comprehensive recipe notes.

I have this very pan, but have had very little luck getting a cake out in one piece! Would love your suggestions on making it out successfully. Thanks!
Oh I’ve had my fair share of cakes getting stuck to bundt pans too!! What works best for me is to use a non-stick baking spray to liberally grease the bundt pan, followed by a light dusting of flour for extra assurance that the cake will come out in one piece. Since I started using this two-step method, all of my cakes have slipped out of the bundt pans with no problem at all!
I love this cake tin! Bookmarking this recipe for Christmas ?
very very delicious! Perfectly! Thanks for the recipe! I want to try it!
This is a very good cake but the mixed spice you have linked is no longer available. Here is a recipe for it so people can still make your cake… This makes much more than you need for this cake but it will give you the proportions, so you can adjust accordingly.
4 teaspoons Ground Cinnamon
4 teaspoons Ground Coriander
1/2 teaspoon Caraway
1/2 teaspoon Ground Nutmeg
1/4 teaspoon Ground Cloves
1/4 teaspoon Ground Ginger
Just excellent! A very delicious and simple cake and it looks so beautiful!