
Chinese Turnip Cake
With Chinese New Year around the corner, I’m already thinking ahead to our lunch menu. I typically make the same spread every year, mostly because my family expect the same dishes, but also because there is always something for everyone.
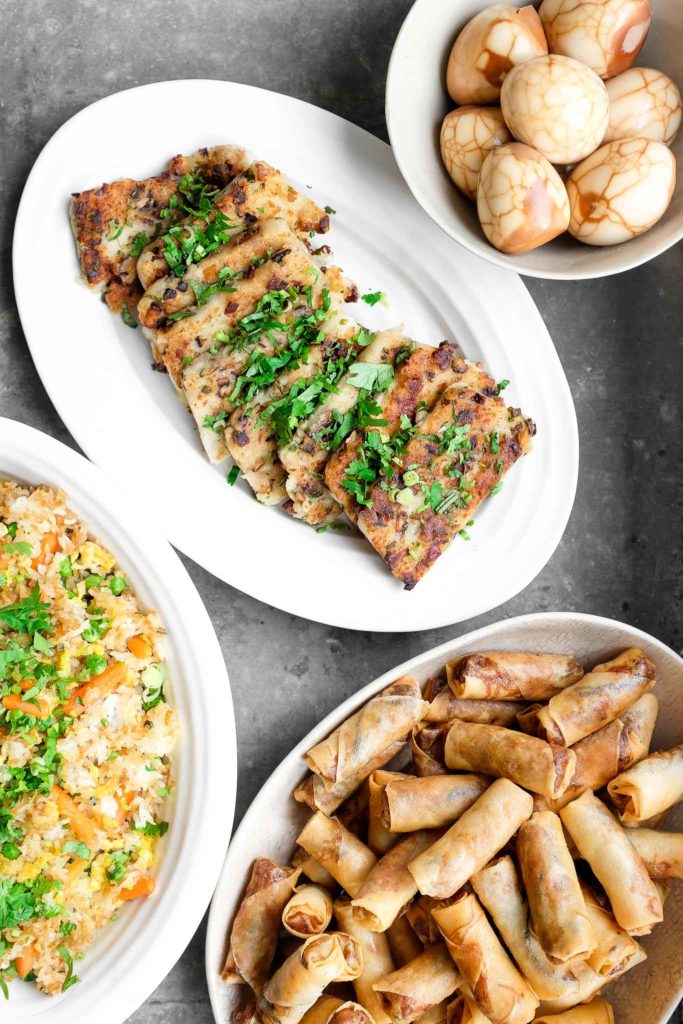
My Chinese New Year menu often includes spring rolls (or “egg rolls”), fried rice, Chinese Tea Eggs, as well as these Chinese Turnip Cakes, or Daikon Radish Cake. The latter is a dish you might be familiar with if you are a fan of Dim Sum.
Dim Sum
As a child, I recall many Sunday mornings eating Dim Sum with my mum in Sydney’s Cabramatta. We would always order far too many dishes for just the two of us.
I loved the pork and shrimp dumplings (Siu Mai) as well as the BBQ pork steamed buns, and my mother always, always ordered a serve of braised chicken feet for herself. I never understood her love for that dish (I still don’t!), but I know that it was a dish which took her to her happy place.
And because we would have always eaten too much but would be still greedy for dessert, we often left with a serve of Chinese egg custard tarts to enjoy at home later.
Daikon Radish Cake
One dish which we would order from time to time were Chinese Turnip Cakes (which we call Daikon Radish Cake or Banh Bot Chien at home).
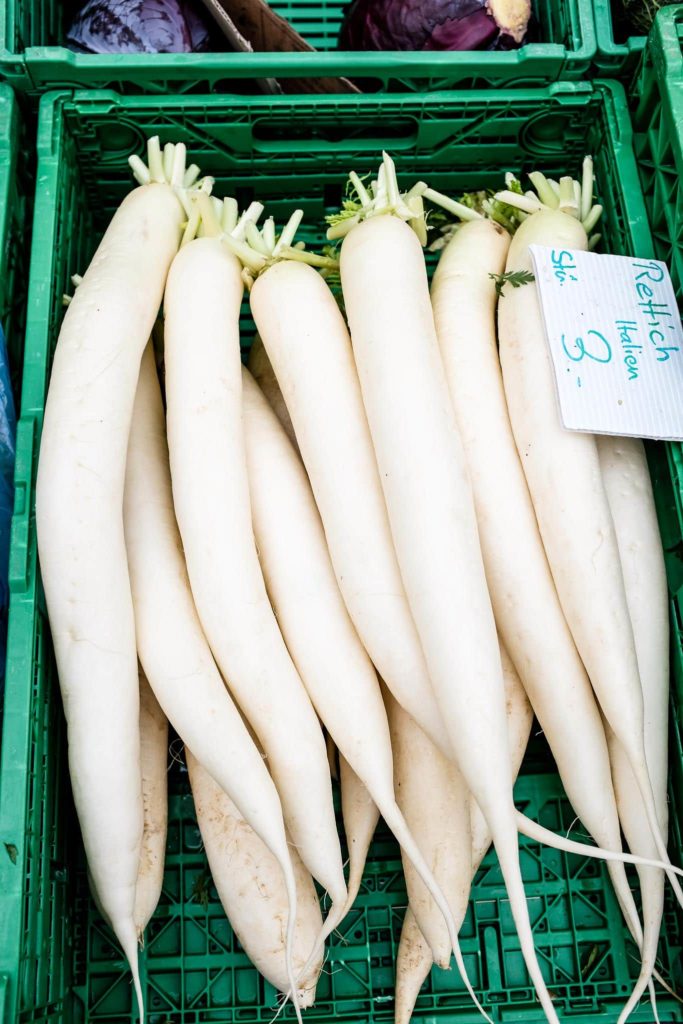
One day, after spotting some beautiful-looking daikon radishes at the farmers’ market and wondering what I could do with them, other than adding them to my son’s favourite Chicken Pho or to our regular Vietnamese Beef & Carrot Stew, I decided to give these Chinese Turnip Cakes a try. And since then, I have been addicted.
Turnip Cake Recipe
Most turnip cake recipes I have tried include dried shrimps but, as I am not a fan of the pungency of dried shrimps, I choose to omit them from my recipe.
I also like add lots of chopped spring onions (scallions) and coriander (cilantro) to make the cakes fresher tasting.
How to Make Turnip Cakes
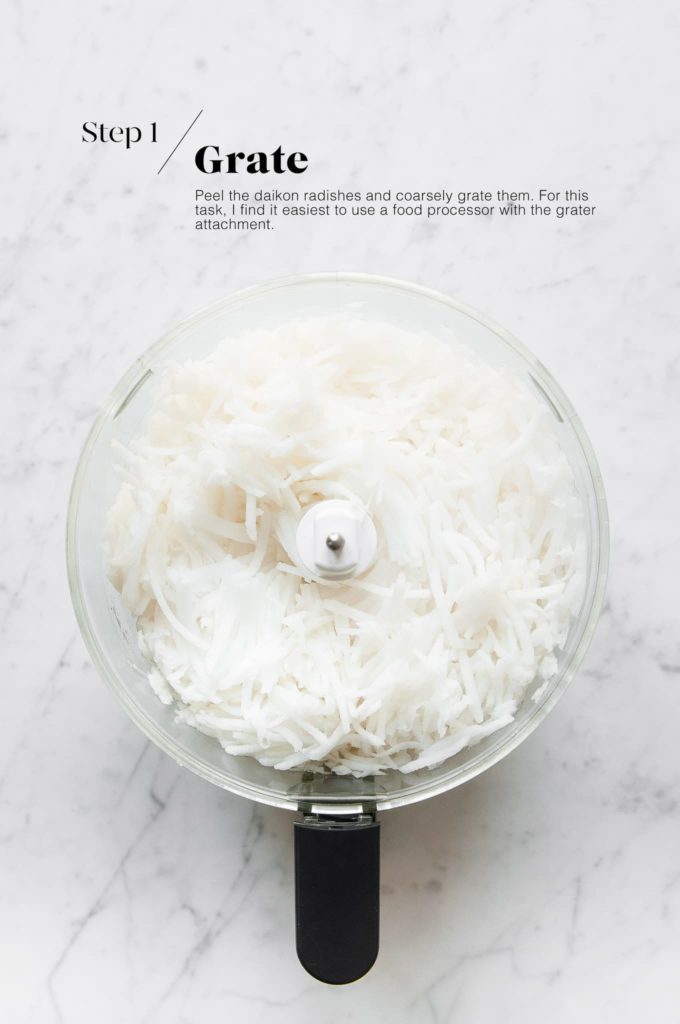
Step 1
Peel the daikon radishes and coarsely grate them. If you have a food processor, I find it quicker and easier to use this machine for this task with the grater attachment.
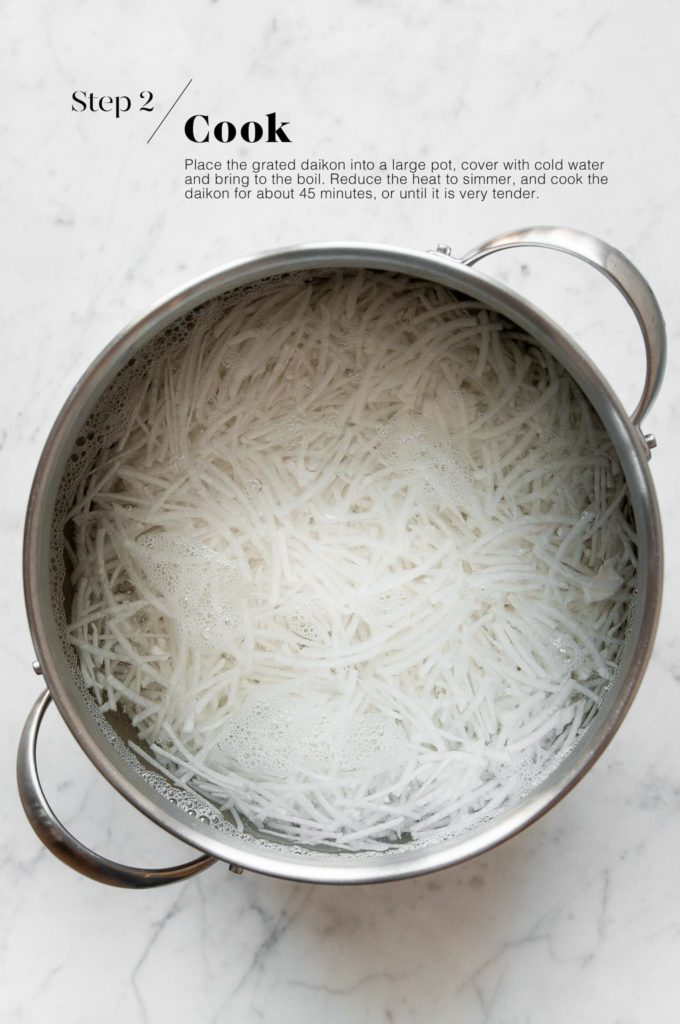
Step 2
Place the grated daikon radishes into a large pot and cover with cold water.
Bring the pot to a boil and simmer gently for about 45 minutes, or until the daikon is very tender.
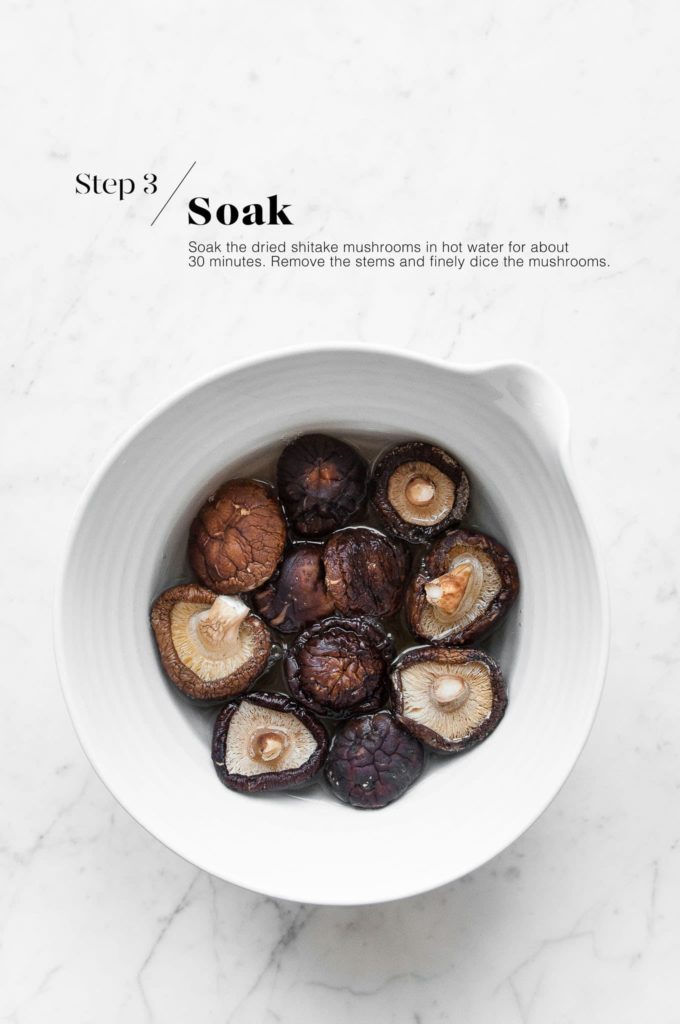
Step 3
Meanwhile, soak the dried shitake mushrooms in some hot water for about 30 minutes, until they have softened.
Drain the mushrooms and squeeze out the excess water. Finely dice the mushrooms and set aside.
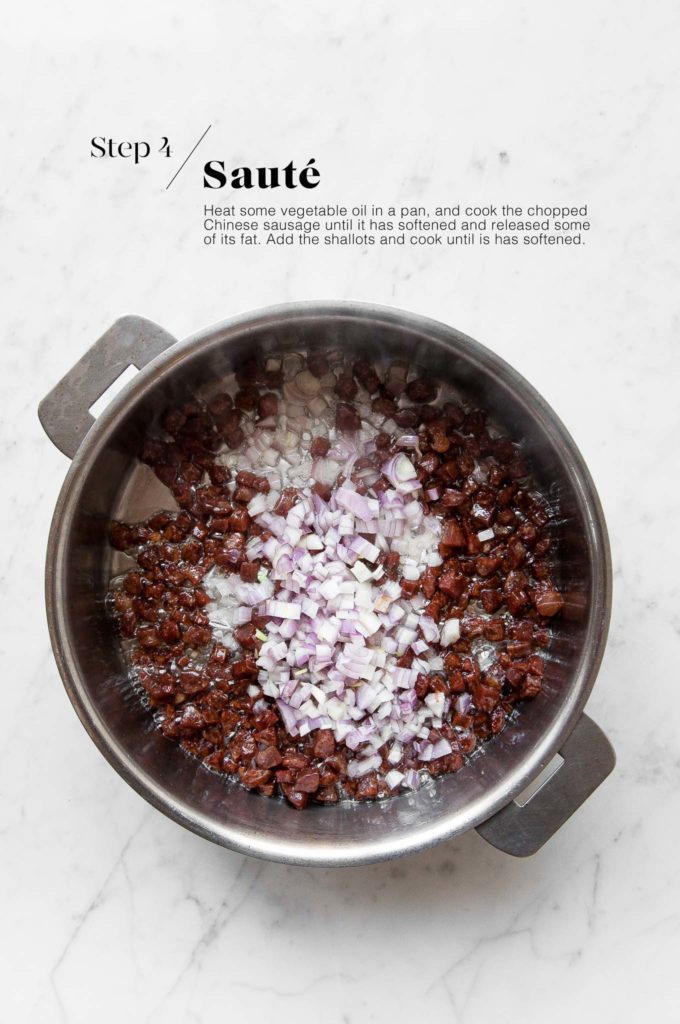
Step 4
Also while the daikon is cooking, prepare and cook the Chinese sausages. Heat some oil in a large frying pan over medium heat.
Cook the chopped Chinese sausages for about 5 minutes, or until they have softened and released some of their fat.
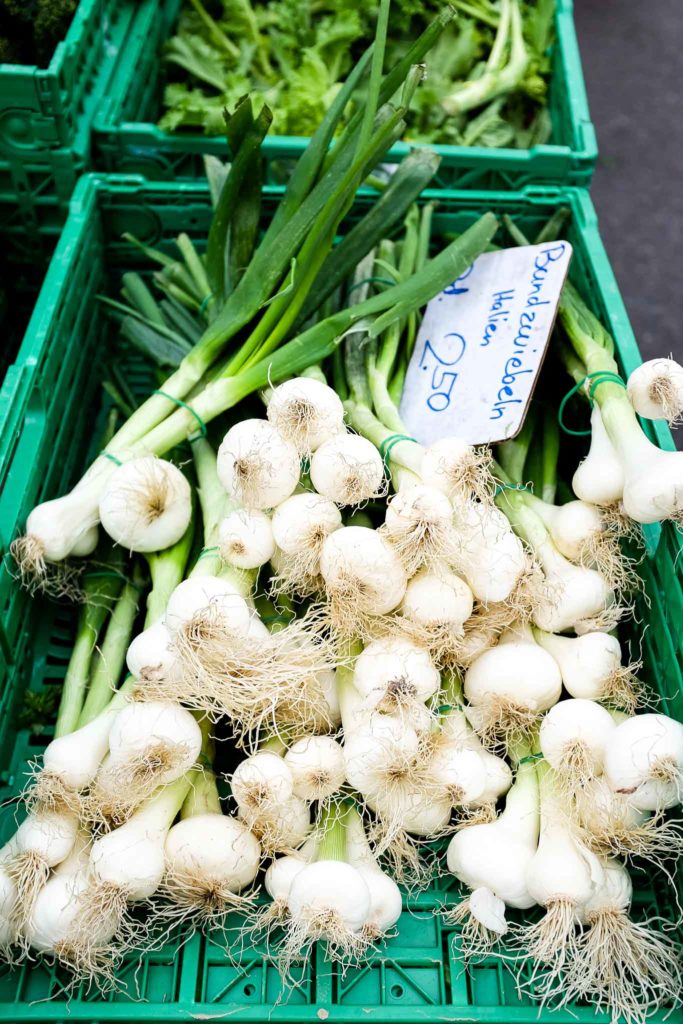
Add the chopped shallots, and cook for about 1 minute, or until the shallots have softened slightly.
Remove the pan from the heat and set aside to cool.
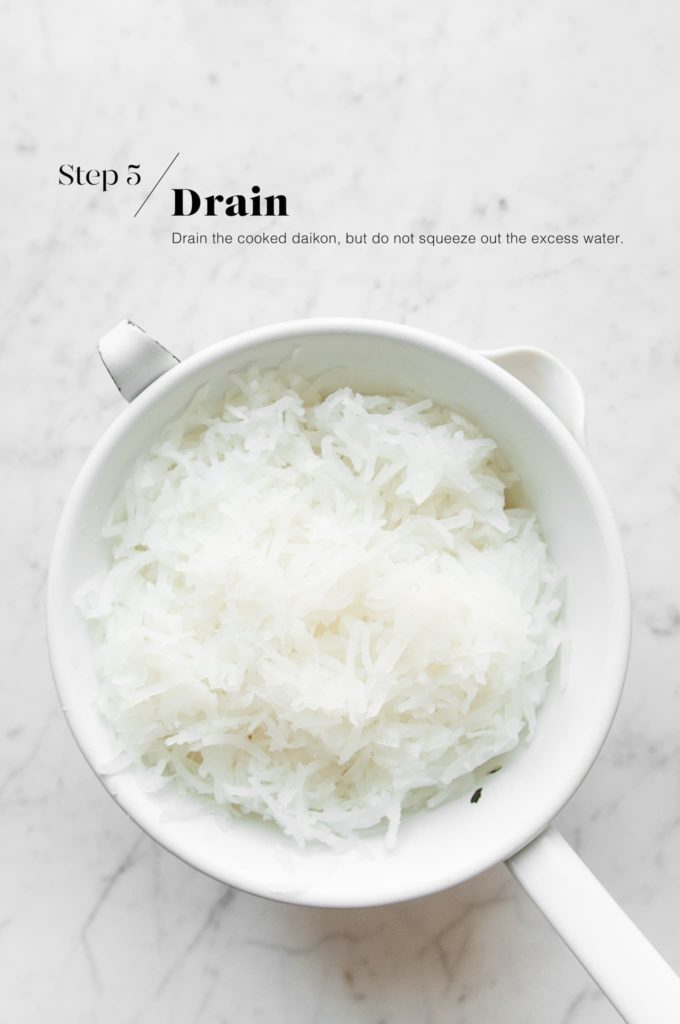
Step 5
Once the daikon is cooked, drain the daikon, but do not squeeze out any liquid.
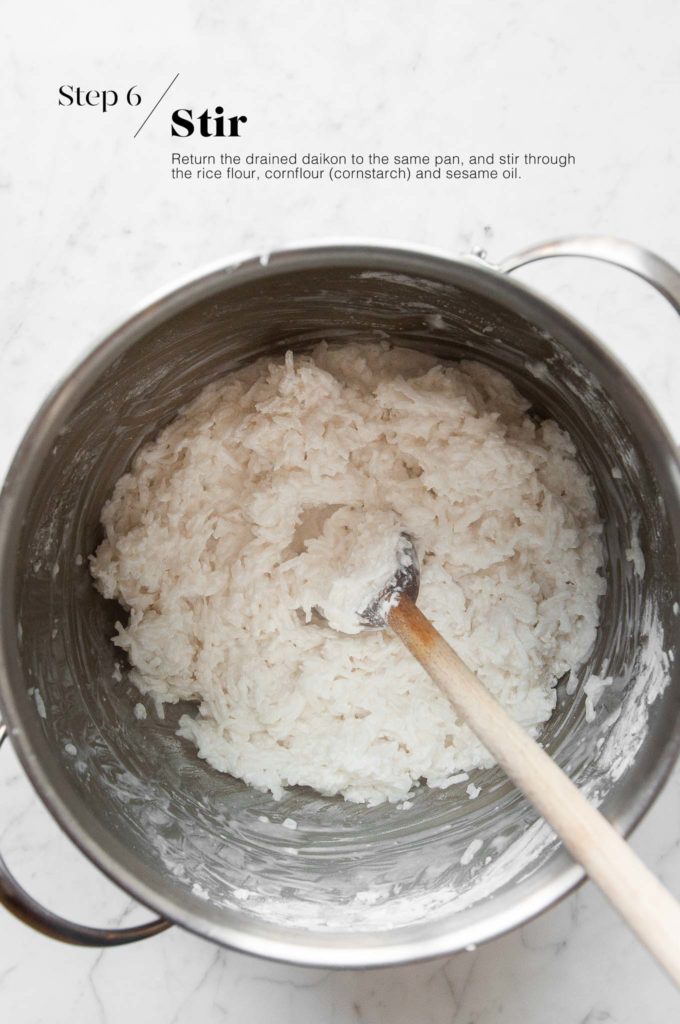
Step 6
Return the cooked daikon to the same pot, which should still be hot.
Add the rice flour, cornflour (cornstarch) and sesame oil. Mix well with a wooden spoon.
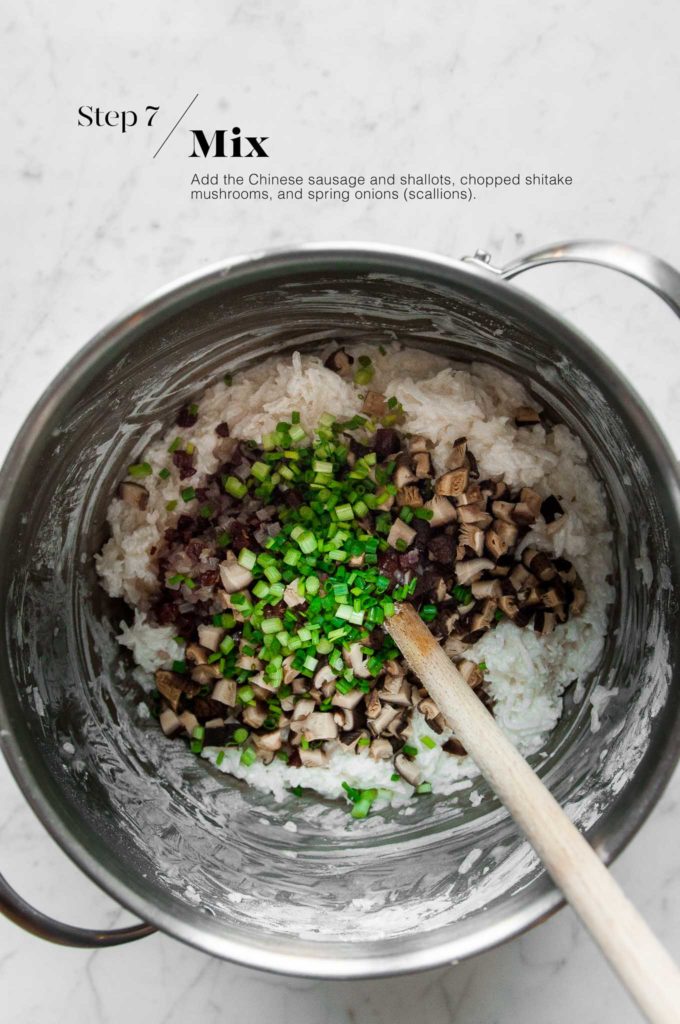
Step 7
Add the Chinese sausage and shallot mixture, together with the chopped mushrooms and the spring onions (scallions). Season with salt and pepper.
Mix everything together to combine.
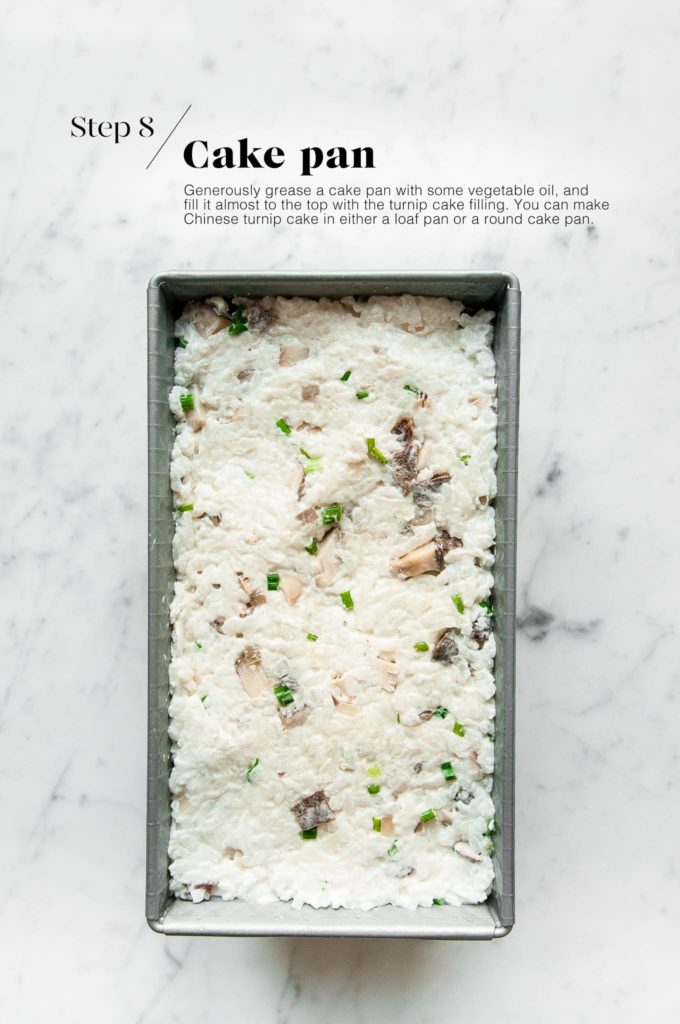
Step 8
Generously grease a cake pan of your choice with some vegetable oil. I like to use either a 21 x 11 cm(8 x 4 inch) loaf pan or 20 cm (8 inch) round cake pan.
Pour the mixture into the cake pan.
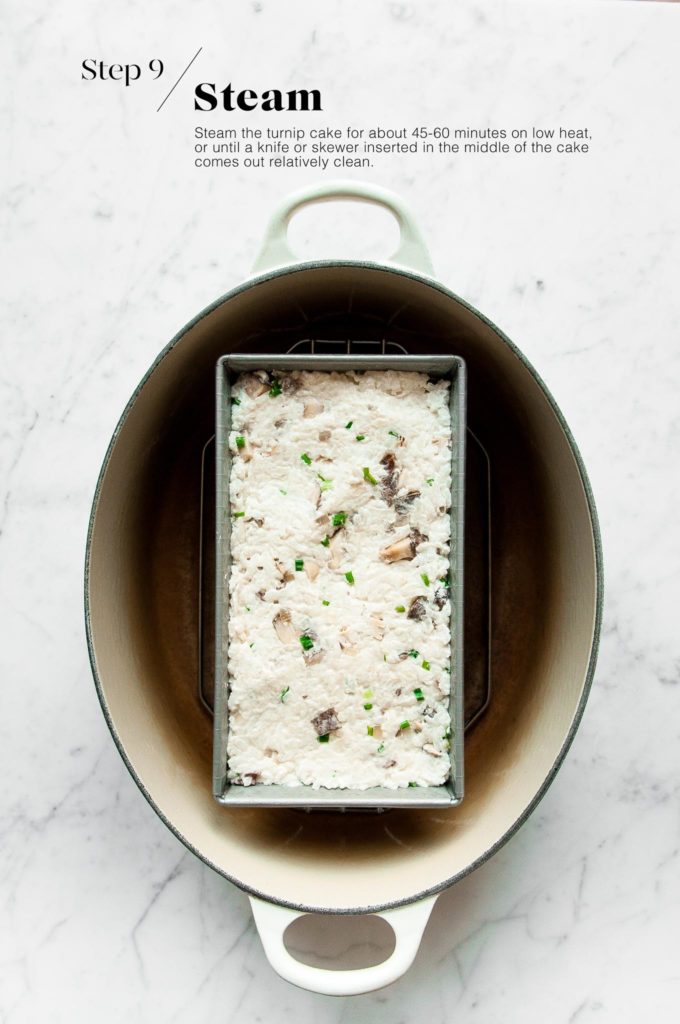
Step 9
Steam the turnip cake for 45-60 minutes, or until the cake is set and a skewer inserted in the middle comes out clean.
If using a loaf pan, I steam the cake in an oval-shaped Dutch oven with a wire rack on the bottom of the pan. I also tightly wrap the loaf pan in some foil (not shown in photo) to prevent any water from getting inside the pan. Pour some water into the pan until it comes halfway up the sides of the cake pan.
If using a round cake pan, I steam the cake in a couscousier, a bamboo steamer, or a stainless steel Chinese steamer.
Once cooked, leave the turnip cake to cool completely, and then leave it in the fridge for 1-2 hours to set.
Step 10
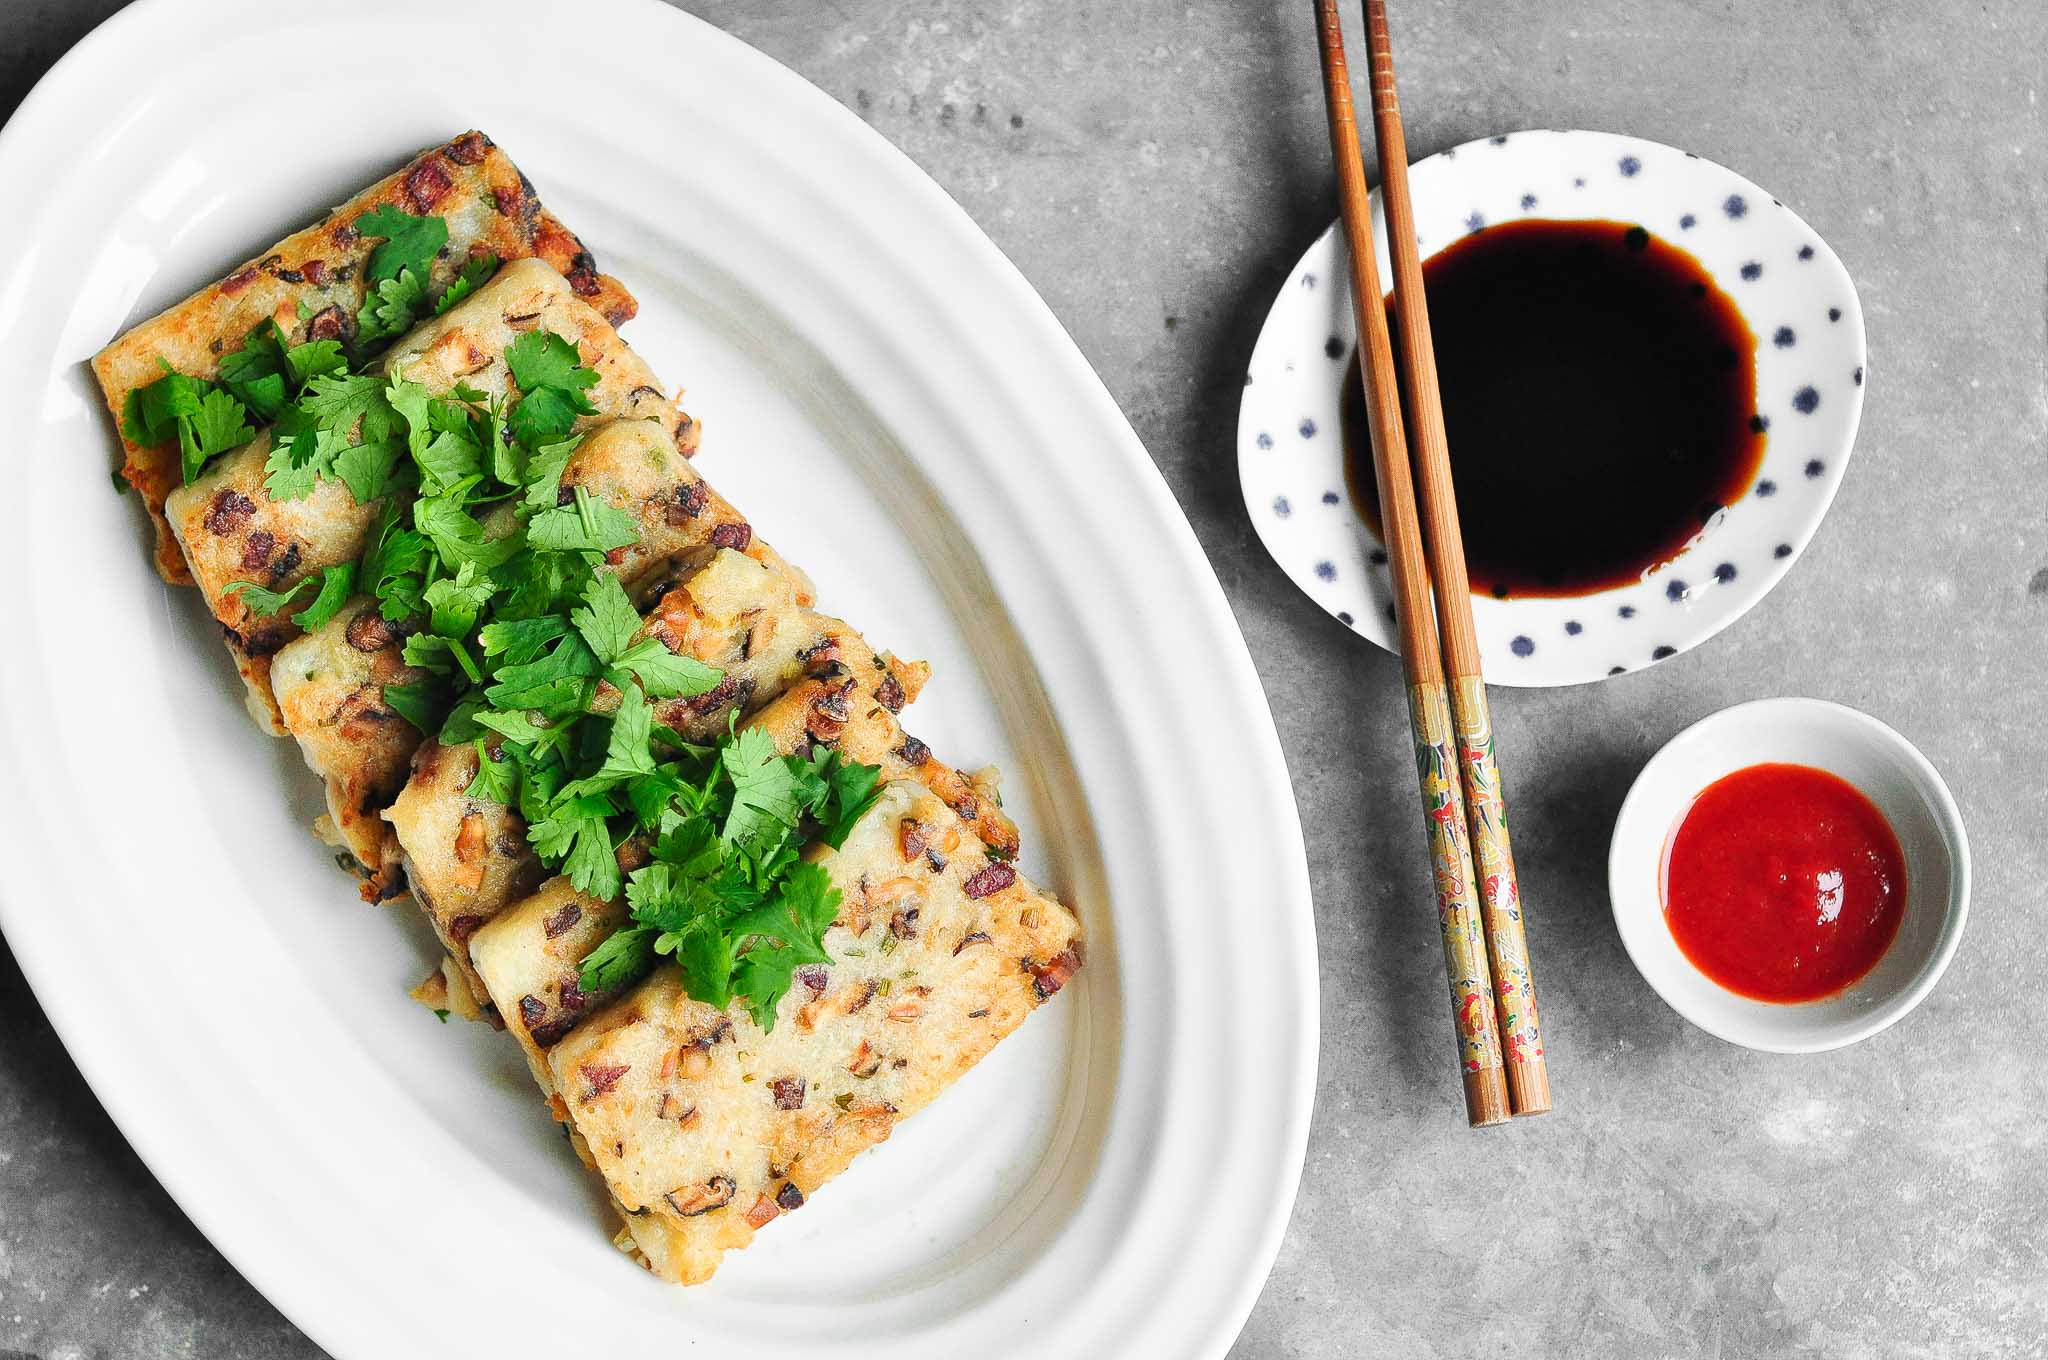
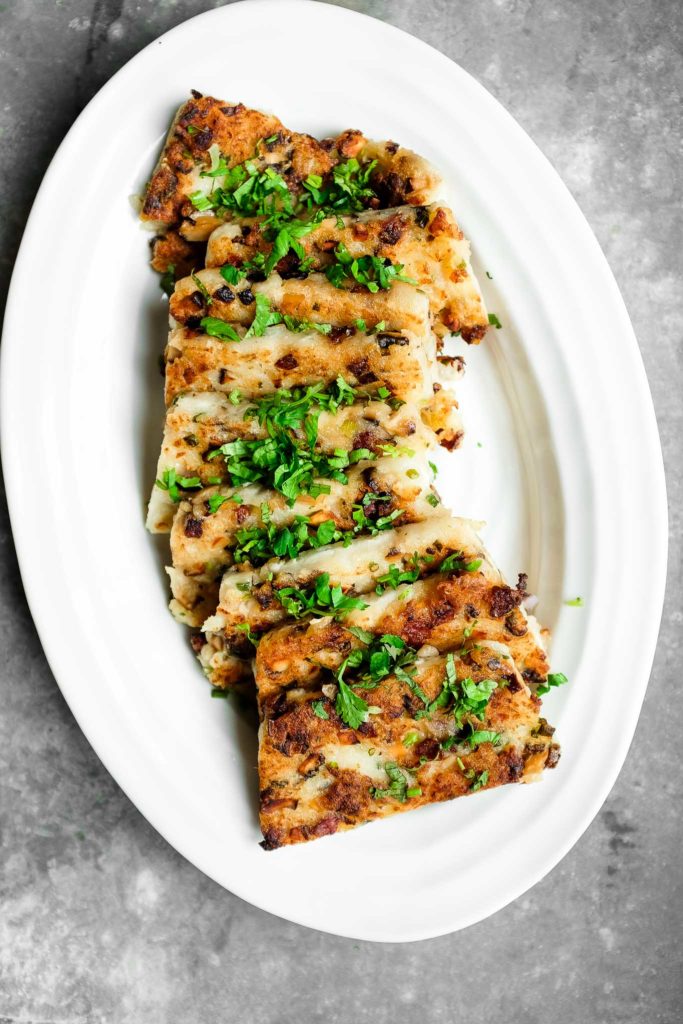
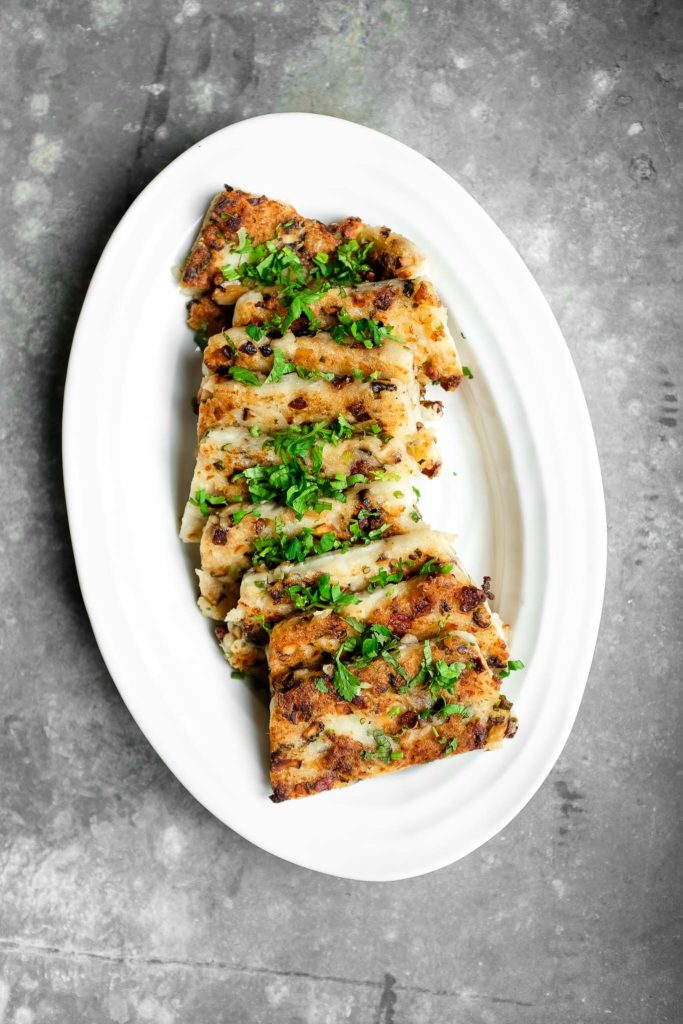
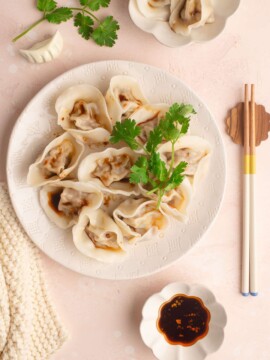
To serve the Chinese Turnip Cake, unmould the cake and cut it into thick slices.
Heat some vegetable oil in a non-stick frying pan over medium-high heat, and cook the slices on each side until lightly golden.
How to Serve Turnip Cakes
And whilst a lot of people are happy to eat these cakes just freshly steamed, I prefer to go one step further and to pan-fry them until they have a crispy coating which contrasts beautifully with the soft, creamy interior.
A dipping sauce made of soy sauce mixed with Sriracha or Homemade Chilli Oil is obligatory.

Chinese Turnip Cake
Ingredients
For the Chinese Turnip Cake
- 1 kg (2 lb) daikon radishes
- 6-8 dried shitake mushrooms
- 1 tablespoon vegetable oil
- 2 Chinese sausages, finely diced
- 2 shallots, finely chopped
- 180 g (1 ⅔ cups) rice flour
- 3 tablespoons cornflour, (US: cornstarch)
- 1 tablespoon sesame oil
- 2 tablespoons spring onions, (scallions) finely sliced
- 1 teaspoon sea salt
- white pepper, freshly cracked
To Serve
- soy sauce
- Sriracha, Homemade Chilli Oil or hot chilli sauce
- coriander, (cilantro) finely chopped
Instructions
To make the Chinese Turnip Cake
- Soak the dried shiitake mushrooms in hot water for 30 minutes until they have softened.
- Drain the mushrooms and gently squeeze out any excess water.
- Finely dice the mushrooms and set aside.
- Peel the daikon radishes and coarsely grate them. I do this using a food processor with the grater attachment.
- Place the grated daikon radishes into a large pot and cover with cold water.
- Bring the pot to a boil, and then reduce the heat to a gentle simmer.
- Cook the radishes for about 45 minutes until they are very tender.
- Whilst the radishes are cooking, heat the vegetable oil in a saucepan.
- Cook the Chinese sausages for about 5 minutes until they have softened and have released some of their fat.
- Add the chopped shallots and cook until the shallots have softened.
- Take the pan off the heat and allow to cool.
- Drain the radishes but do not squeeze out any liquid.
- Return the cooked radishes to the pot.
- Add the rice flour, cornflour, and sesame oil to the radishes.
- Mix well with a wooden spoon.
- Add the shallots and Chinese sausage mixture to the radishes, together with the spring onions (scallions) and shiitake mushrooms.
- Season with salt and pepper.
- Mix until everything is well combined.
To cook the Chinese Turnip Cake
- To steam the turnip cake, you can either use a 21 x 11 cm (8 x 4 inch) loaf pan or 20 cm (8 inch) round cake pan. Generously grease the cake pan of your choice with some oil.
- Pour the mixture into the cake pan.
- Steam the cake for 45 mins to 1 hour on low heat (the water should only be lightly simmering), until the cake is set and a skewer inserted in the centre comes out clean (see Kitchen Notes).
- Once cooked, leave the turnip cake to cool completely, and then refrigerate for at least a 1-2 hours to set.
To serve
- Heat some vegetable oil in a non-stick frying pan over medium-high heat.
- Unmould the turnip cake and cut into thick slices.
- Fry the slices in batches until they are lightly golden on each side. I like to cook them until they have a nice, golden and crispy crust, but some people prefer to keep the cake soft in texture.
- Sprinkle the turnip cake with freshly chopped coriander (cilantro), and serve with soy sauce and Sriracha or Homemade Chilli Oil.
Kitchen Notes
- COOKING TIME
Depending on what shape or size cake pan you are using, you may have to adjust the steaming time accordingly. - TIPS FOR STEAMING
* If using a loaf pan, I steam the cake in an oval-shaped Dutch oven with a wire rack on the bottom of the pan. I also tightly wrap the loaf pan in some foil (not shown in photo) to prevent any water from getting inside the pan. Pour boiling water into the pan until it comes halfway up the sides of the cake pan.
* If using a round cake pan, I steam the cake in a couscousier, a bamboo steamer, or a stainless steel Chinese steamer.
* If you are using a steam oven, steam at 100°C/212°F for 30-45 minutes, or until a skewer inserted in the centre comes out clean. - OVEN & STOVE TEMPERATURES
All recipes on this website have been tested on an induction stove and/or with a conventional oven (i.e. an oven without fan). All recipes on this website use temperatures for a conventional oven, unless otherwise mentioned. Convection ovens (i.e. fan-forced ovens) are typically 20°C/70°F hotter than conventional ovens, but please check your manufacturer’s handbook. - CONVERSIONS
To convert from cups to grams, and vice-versa, please see this handy Conversion Chart for Basic Ingredients.
Did you make this recipe?
Please leave a comment below and share your photos by tagging @eatlittlebird on social media and using #eatlittlebirdUpdate
This recipe was first published on 10 January 2017. It has been updated with new photos and more comprehensive recipe notes.

Beautiful! This is one of my favorite items to order in dim sum restaurants. I love the chewy texture 🙂
Me too! I’m so glad you also love this dish. I can’t wait to make it again for our Chinese New Year feast next week 🙂
Wow, I haven’t heard of this dish – but it looks really good! I love to learn about new cuisine, and your pictures are drool-worthy!
Thanks, Kylee! I think most people would only be familiar with this dish if they eat dim sum at Chinese restaurants, and probably with a Chinese friend! I’m always surprised when my western friends enjoy this dish as I think it is typically quite Chinese. But the texture and taste is interesting 🙂
These are better than any Chinese takeout, I love homemade food always, this one sounds delicious.
It’s one of my favourite Chinese dishes! Now that I have made it several times, it doesn’t seem so complicated. Just takes a few steps, plus I can make a few batches to keep in the fridge for a quick dinner during the week 🙂
I’m curious to try a savory vegetable cake, especially with all those ingredients!
I suppose it’s an interesting way to cook daikon radishes, but the children love it, which is a winner 🙂
These sound really good and I’ve been looking for ways to use daikon radishes!
I used to only use daikon radishes in Asian soups and stews, but this cake is definitely a different way of using them!
OMG I love Dim Sum! Anyway – your turnip cake just sounds so amazing…and authentic! I want to venture out and try this one! Your pictures look so appetizing! I’ll have to try this one!!
Thanks, Amanda! My version doesn’t contain dried shrimps, so it is not as pungent the ones you may have tried in Chinese restaurants. But it’s still delicious 🙂
I´m a huge fan of savory cakes and tarts, and this one sounds just wonderful. I´ve never tried! Could you please tell me what Chinese sausages are – depending on seasoning and meat type, I´d probably have to replace them for another variety I can find here. Merci et bon weekend!!
Chinese sausages are dried raw sausages, most commonly made with pork meat. I think it’s quite similar in taste and texture to French saucisson sec, especially the mini saucisson sec. My (French) husband disagrees, but I think he’s biased 😉 Chinese sausages are commonly available at most Chinese/Vietnamese grocery stores (such as in the 13th arrondissement in Paris), and you should find them in the refrigerated section. Although they are dried, they are raw, so you will need to cook them before eating. You can simply fry them in some oil like normal sausages until they have browned, or a healther way is to steam them. Hope this helps!
Yum! These sound delicious! I always see these radish’s in the shops and never know what to do with them. Will have to source some Chinese sausages from the asian grocers next time I’m there.
I also agree with you about shrimp paste… its a stinky ingredient and I can never seem to wrap it in enough layers of clingfilm and containers to contain it 🙂
Ha ha! I wrap the shrimp paste in clingfilm and then put it into a ziplock bag, but I swear I can still smell it every time I open the fridge 😉
This looks like something I would love Thanh. I think I’m going to have to to try it, would it work with turnips if I can’t get daikon?
I’m not entirely sure as I have never tried this recipe with turnips. I’m tempted to say it would work because I often use turnips and daikon interchangeably when making soups and stews. But as this is a “Chinese” turnip cake, I try to use daikon to make it as authentic as possible. My guess is, if daikon is readily available in Switzerland, you should definitely be able to find it near you! 😉
I have made this the authentic way, with homemade shrimp paste, homemade Chinese sausage and steamed it in the instant pot. We enjoy this both chewy and crispy. I want to try this your way. I love ???? this cake. I love daikon radish. But your version sounds so very good too with the mushrooms thank you for sharing
I would be curious to know how this can be made in the Instant Pot and how much quicker it would be. I’m going to try it! Thanks for the idea! 🙂 I can’t wait to make this Chinese Turnip Cake again – it’s one of my favourite dishes. I ought to try it with shrimp paste but it is often too salty and pungent for me, even though I do love it still when I order it from Chinese restaurants.
Love this recipe! Looks yummy! I am going to make this!
love this recipe, it turned out just like I had hoped!
That’s great to hear! Thank you 🙂
Hi, at what stage do you add the mushrooms. They are not mentioned other than in step 1 ? Thanks Greg
Hi Greg,
My apologies! You should add the mushrooms when mixing all of the ingredients together. I have updated the recipe to reflect this. I hope you will enjoy this recipe.
I substituted shiitake mushrooms for fresh button mushrooms due to what I had in the pantry. Its now 6.00am in the morning, a slice of turnip cake is frying on the hotplate after a night setting in the fridge. The anticipation is amazing as I normally don’t eat this early in the morning. Golden brown. Yummm… Added ketchup manis on top which has added a salty sweetness to this dish. Ok, that makes my second dish from your extensive menu. So far both have scored very highly. Not sure what I’ll try next but I’m confident I’m going to be happy indeed. Thanks Greg
That’s wonderful to hear that you enjoyed this recipe! I often make a double batch as I can eat these cakes almost every day 🙂 So glad you are enjoying the recipes here!
Hello, do you think this recipe would work without the sausage? Maybe I could substitute a vegan alternative?
Yes, of course you could leave out the Chinese sausage. It is there for both flavour and texture, but it should be just as delicious with just the mushrooms. Hope you will enjoy this recipe!
Thank you. I’ll let you know how it turns out without The Chinese sausages.
Such an easy recipe with great outcome. Now it’s my go-to party and potluck dish. Family and friends love it!
Hi Alice,
Thank you for your feedback! This is one of my favourite recipes too 🙂
Very delicious recipe!
Hi Nara,
Thank you! So glad you enjoyed this recipe.