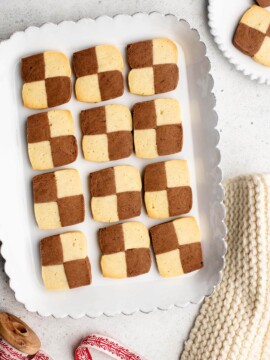
French Sablé Cookies
My husband’s late great-aunt used to always make a huge batch of sablé cookies whenever our kids would visit her. It is such a fond memory for them that, whenever we talk about their Marraine, the conversation would inevitably lead to her Tupperware box of animal-shaped sablés. We think of her whenever we make sablés using her recipe, especially at Christmas time when our home becomes a mini cookie factory.

What Are Sablé Cookies?
Sablés are French butter cookies or shortbread. Sablé means “sand” or “sandy” in French, which refers to the crumbly and melt-in-your-mouth texture of these cookies when you eat them.
French Sablés (which is spelt with the s at the end of the word, whereas the English spelling omits this last s) are traditionally plain butter biscuits. However, these days, it is common to find bakeries and pâtisseries selling sablé with different flavours.

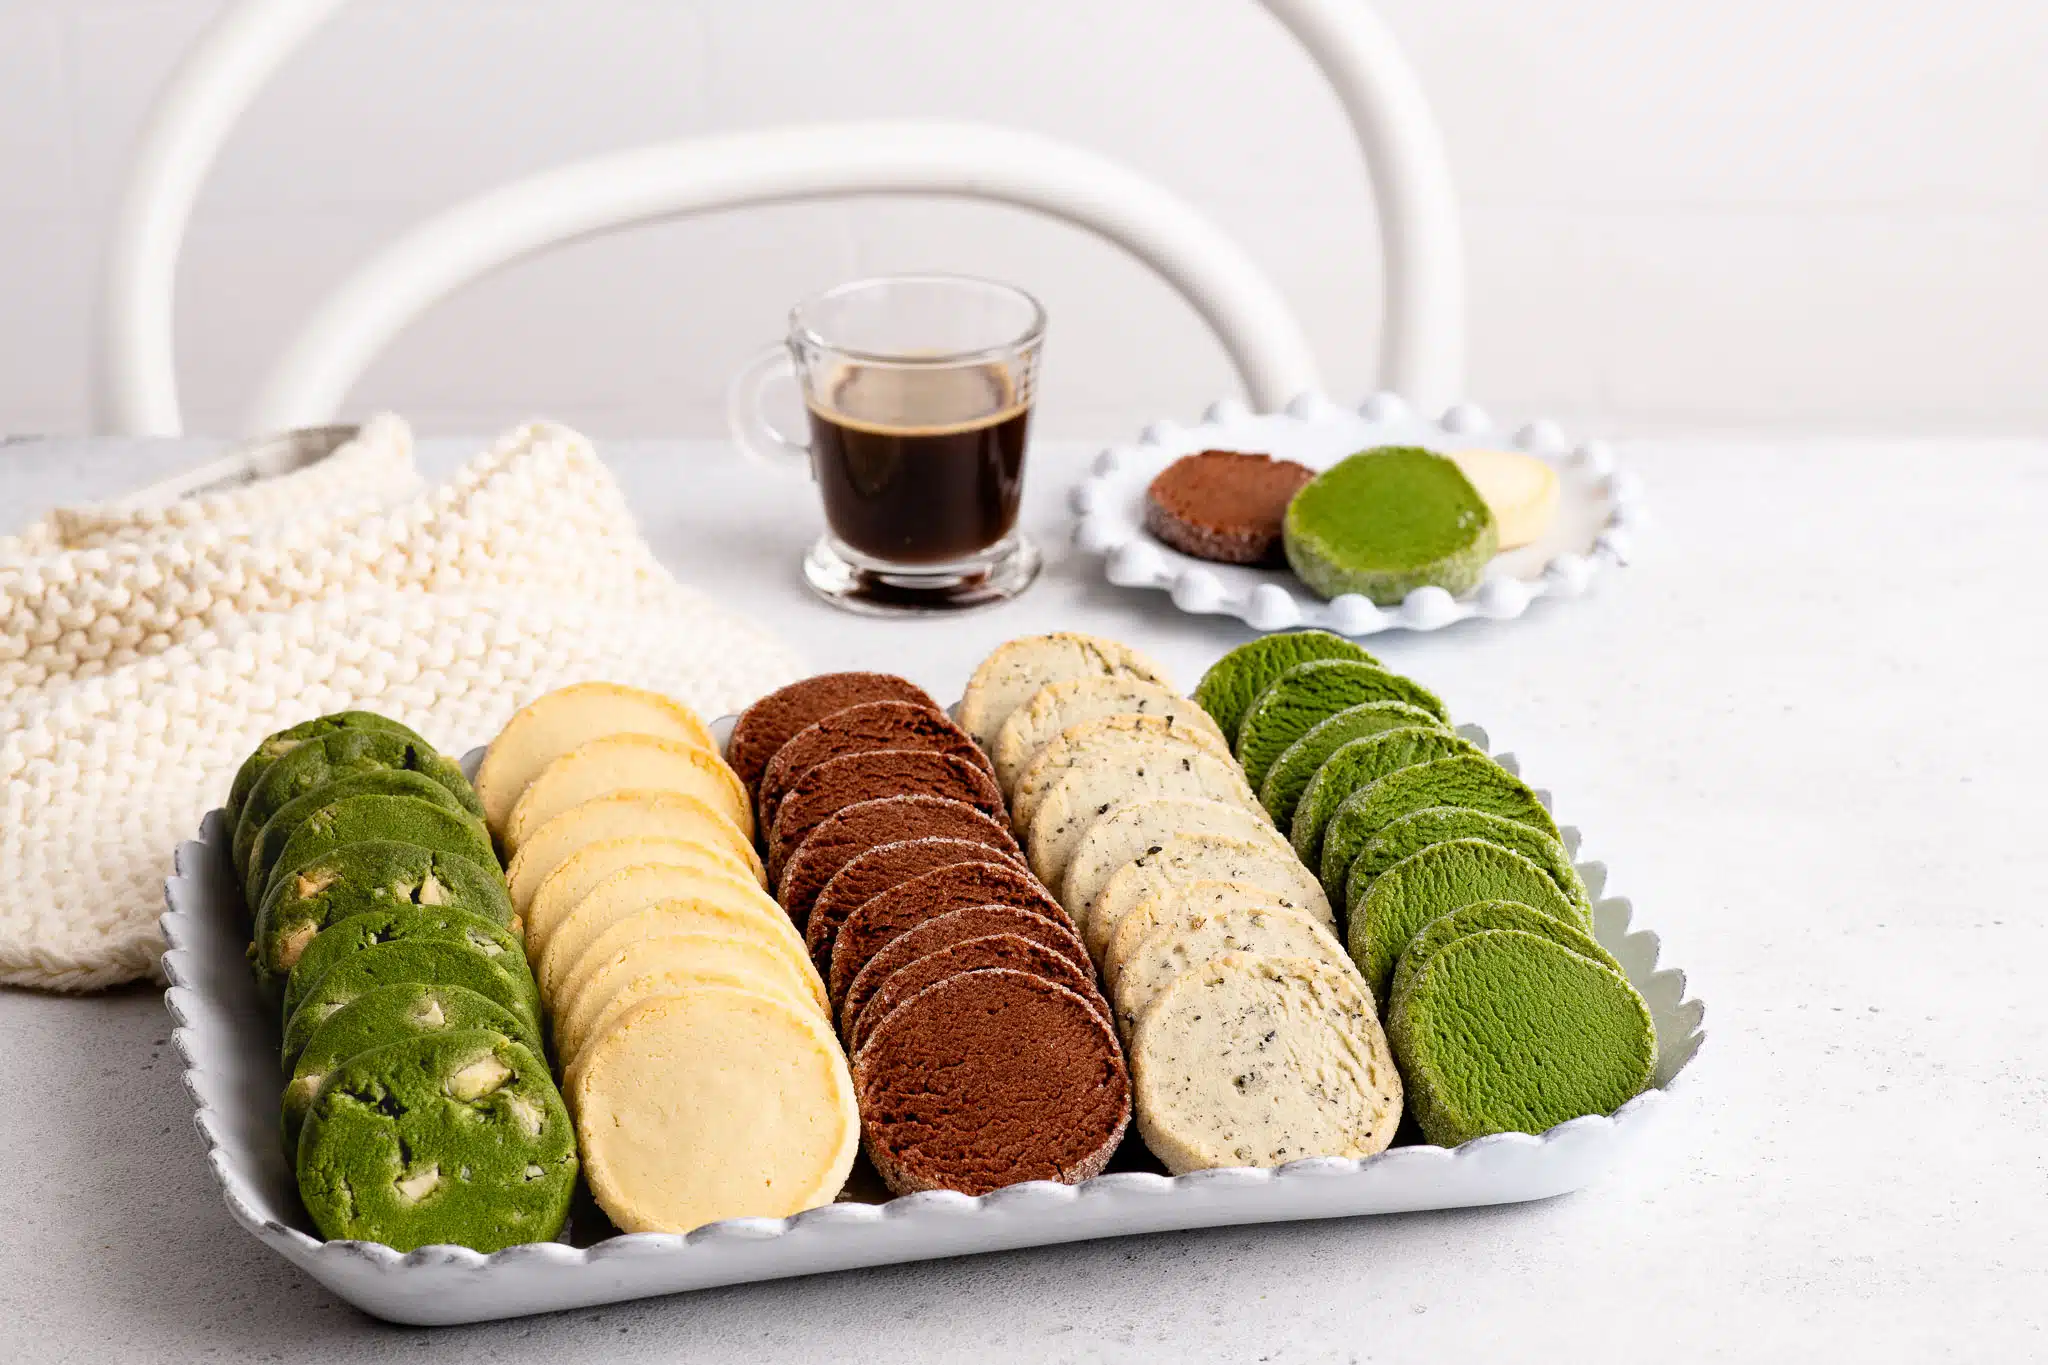
Diamond Sablé Cookies
On a recent trip to Japan, I was surprised to find how popular French cakes and biscuits were there. In fact, many bakeries and gift shops sold sablé cookies in beautiful collector tins which is not so common in France itself. One flavour which I fell in love with was matcha; I love how well matcha cookies go with coffee or tea (especially the latter), and even how well it tastes alongside chocolate!
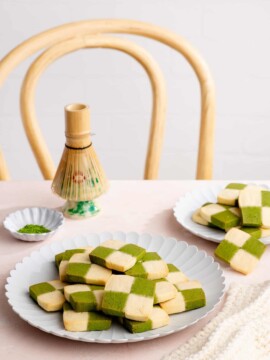
One variation which is very popular in Japan are Diamond Sablé Cookies (Sablés diamant). These are sablé cookies which have been rolled in sugar so that the edges become caramelised and glisten like diamonds. My recipe below uses this technique because I love the extra sweetness and crunch from the sugar.
Recipe for Sablé Cookies
In my husband’s family, they make sablés by rolling out the dough and cutting shapes with cookie cutters. My kids really treasure this pastime, and they associate animal-shaped sablé cookies with holidays in France.
So whenever I make sablés at home, I employ a different technique so that I don’t interfere with my kids’ memories of the “traditional” French sablés. I like to make sablé cookies like slice and bake cookies, i.e. I roll the cookie dough into a log before cutting thick slices and baking them as simple, round cookies. The advantage of this method is that you can make a lot of cookies in little time, which is great at Christmas when we like to give cookie boxes or cookie packets as gifts.

Different Flavours of Sablé Cookies
Below, I have shared the recipe for some of my favourite sablé cookie flavours, but there are so many more! I will share more sablé recipes soon 🙂
Some of my favourite flavours for sablé cookies include:
- Chocolate – simply add cocoa powder to make chocolate cookies. Add dark chocolate chips or finely chopped chocolate to make them extra chocolatey. Add flaked almonds or pecans for something nutty.
- Matcha – this is a classic Japanese flavour which I am in love with. As matcha powder can be quite bitter, I recommend adding extra sugar. You can also add white chocolate chips, dark chocolate chips, or flaked almonds.
- Black Sesame – this is a classic Chinese flavour which works well as part of an Asian meal.
- Lemon – add some fresh lemon zest and use lemon juice instead of water.
- Cranberries or Dried Sour Cherries – I love the sharp tang of these dried fruits against the sweet biscuit. Add fresh orange zest to complement the dried fruit.
- Black Tea – finely grind or crush some black tea leaves for a fragrant biscuit. I love using Earl Grey French Blue from Mariages Frères. Jasmine tea works well as an Asian flavour.
How to Make Diamond Sablé Cookies
I have written the recipe below to produce four different flavours of sablé cookies. You can, of course, adjust the recipe to make as many, or as little, flavours as you like.
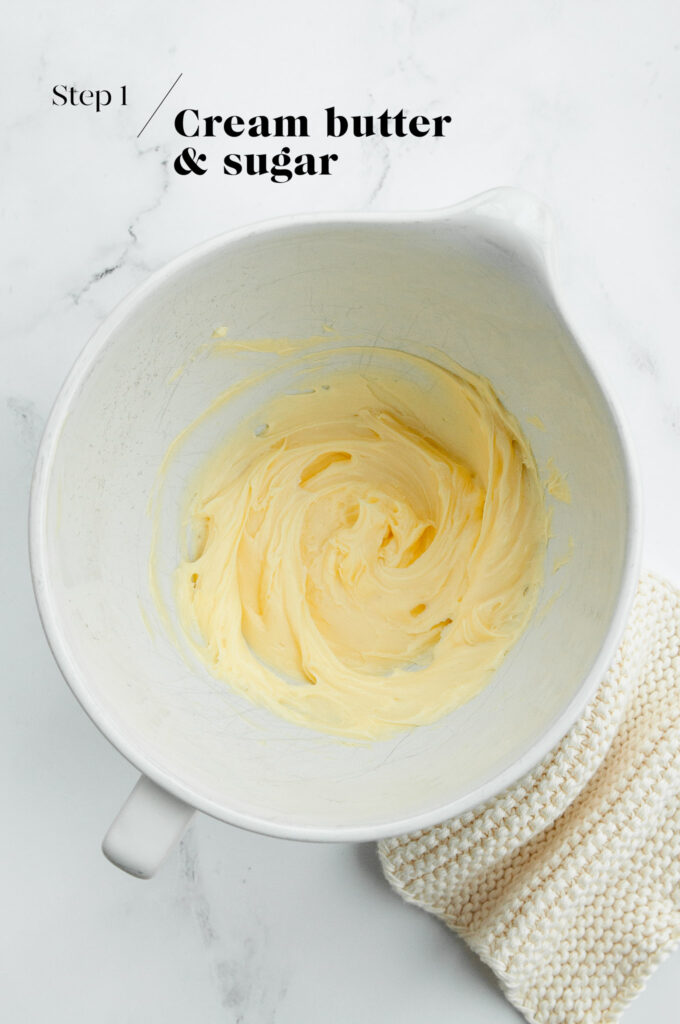
Step 1
Cream the butter, salt and sugar until the mixture is light and fluffy.
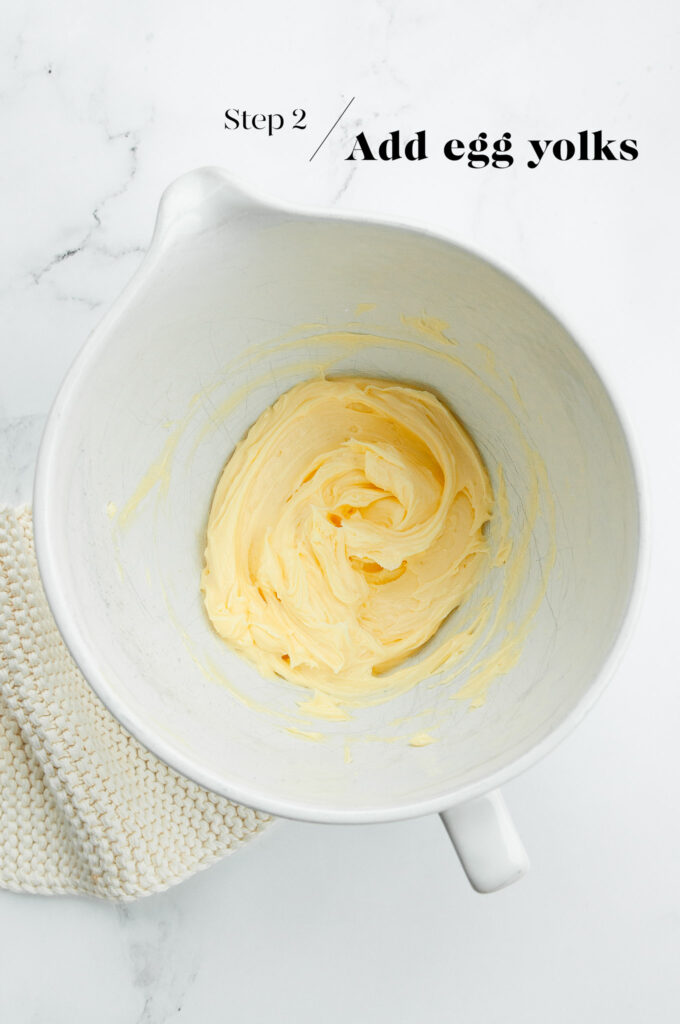
Step 2
Add the egg yolks, and continue mixing until everything is well combined.
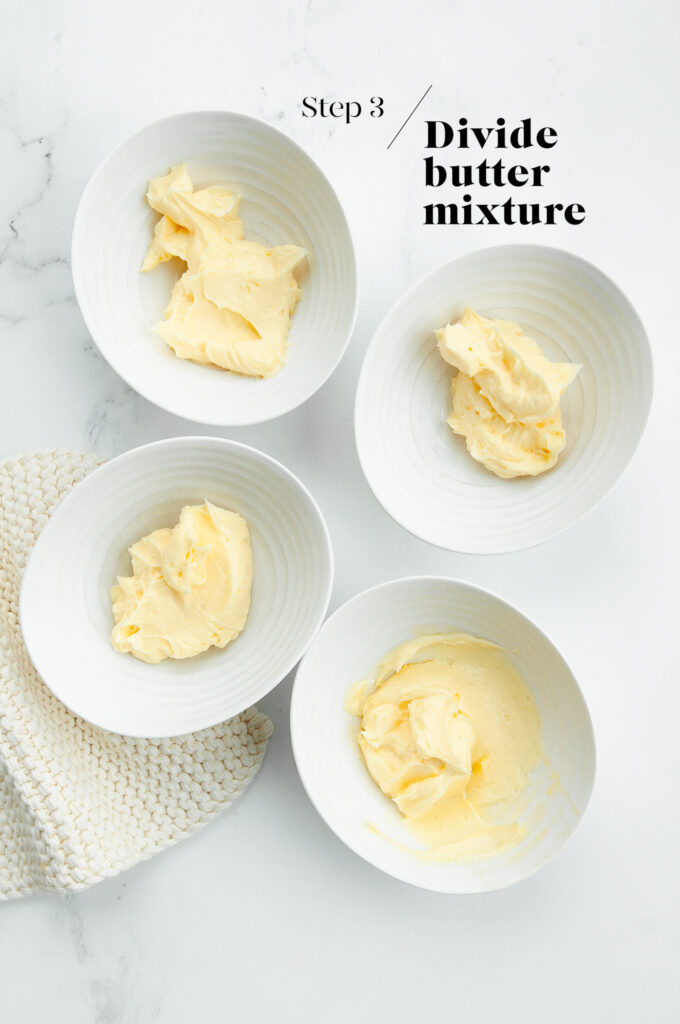
Step 3
Divide the butter mixture into 4 small bowls. To do this evenly, weigh the full mixture in a clean bowl, and then divide this number by 4.
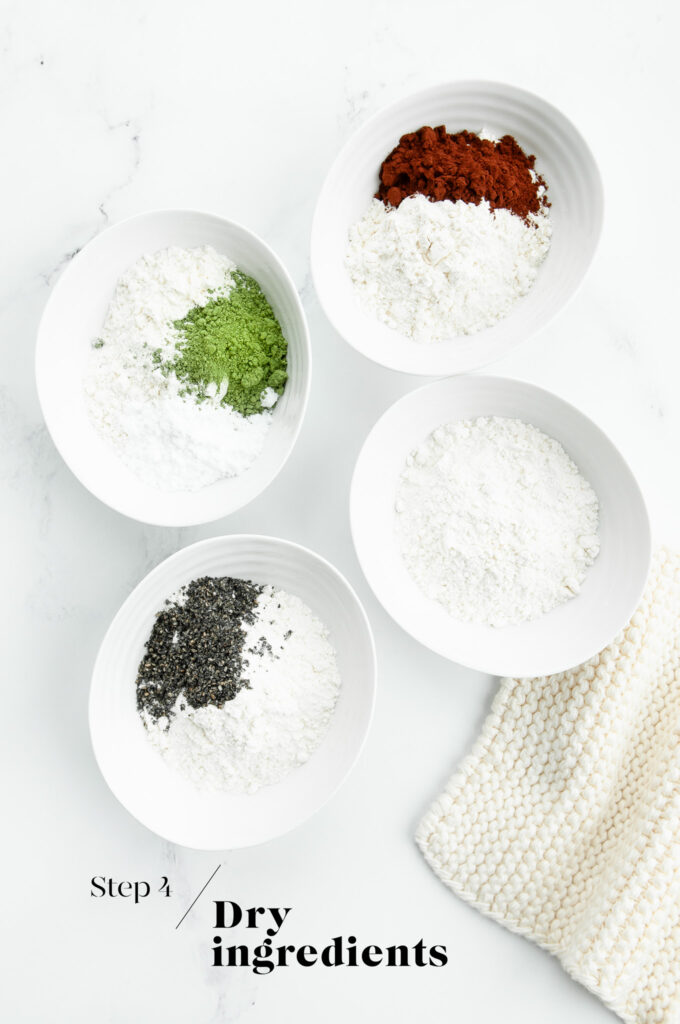
Step 4
Measure the dry ingredients for each of the different flavours into 4 small bowls.
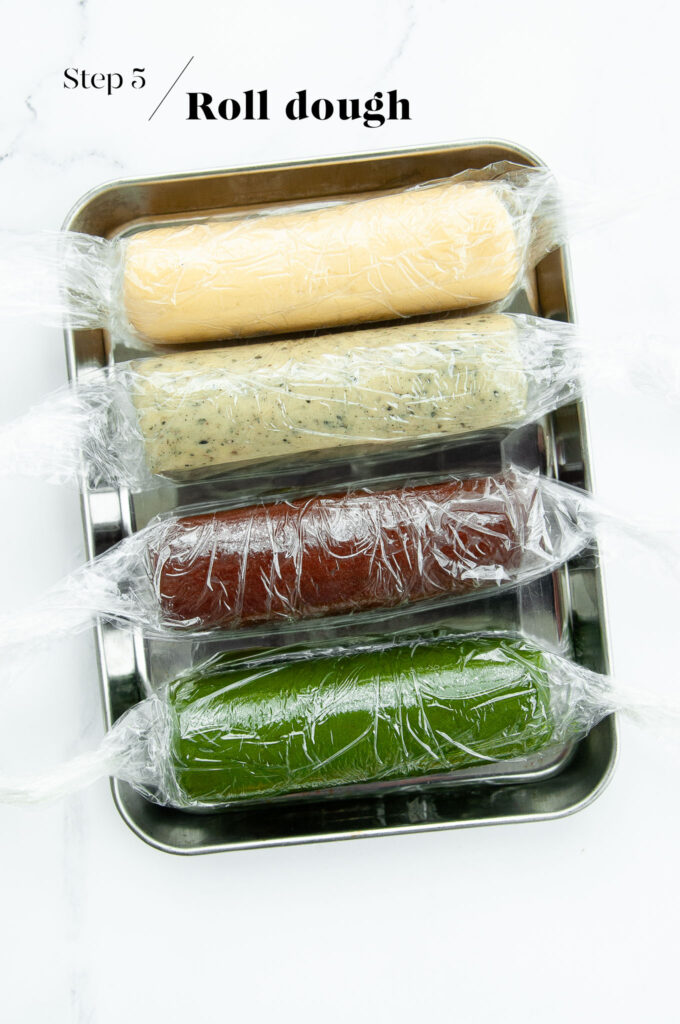
Step 5
To make the cookie dough, place the butter mixture into a mixing bowl, and add the dry ingredients. Mix until everything is combined and the mixture resembles crumbly wet sand. Add enough cold water until the mixture comes together in a soft dough.
Transfer the dough to the kitchen bench and knead gently to produce a soft dough with no air pockets. Shape the dough into a log with a width of 3-4 cm (or larger, if you like).
NOTE: the cookies in the photos are 4 cm wide, so the cookie dough logs were approximately 13 cm long, which produced 13 x 1 cm cookies from each log.
Repeat the above steps to make the other flavours. Make sure you use a clean bowl and utensils each time. I recommend starting with vanilla so that you don’t need to clean the bowl for the next flavour 😉
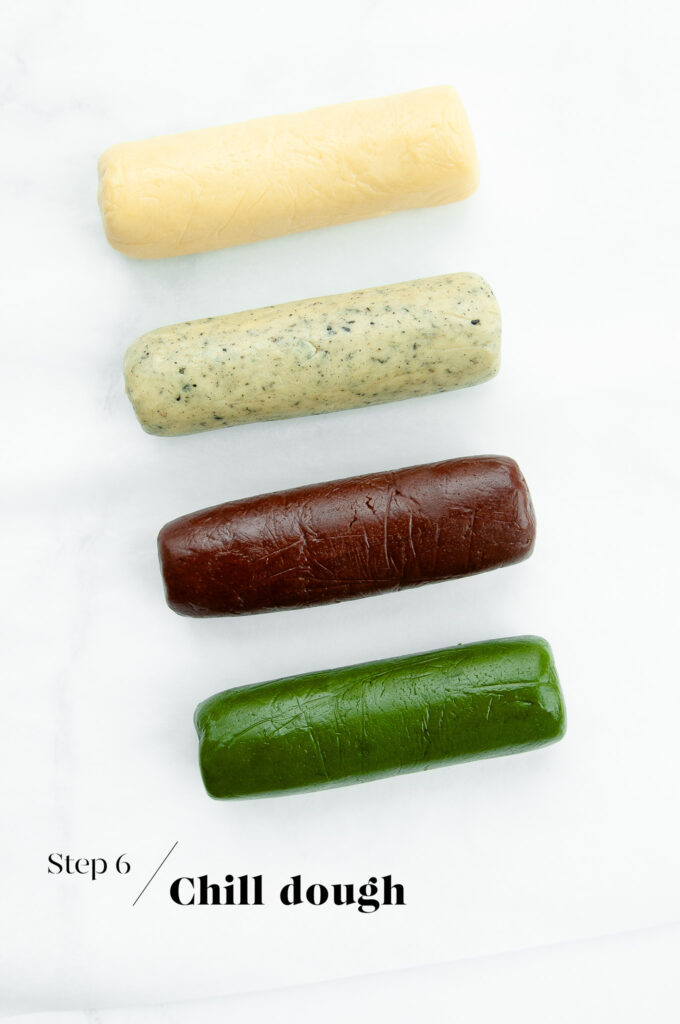
Step 6
Wrap the cookie dough log in plastic wrap, and place it in the fridge for 1-2 hours to firm up. Alternatively, you can freeze the dough at this stage to use at a later time.
Step 7 – optional
Wet some sheets of kitchen paper.
Roll the cookie dough log on the wet kitchen paper to moisten the outside of the log.
Step 8 – optional
Pour some granulated sugar or demerera sugar onto a tray which is large enough to fit the cookie dough log.
Roll the cookie dough log in the sugar, making sure that it is generously coated all over.
Step 9
To make evenly-sized cookies, use a ruler to mark the dough in 1 cm increments, or however thin or thick you want to make the cookies. Alternatively, you can also eyeball the measurements.
Use a sharp knife to slice the cookie dough.
If you are using chopped nuts or chocolate chips, sometimes it is hard to get a clean slice. If the cookie slices fall apart as you cut them, simply squish the dough back together in a round shape.
Step 10
Arrange the sliced cookie dough on a large baking tray lined with baking paper.
Preheat the oven to 180°C/356°F (without fan). Place a metal tray on the middle shelf of the oven.
Place the baking tray on the pre-heated metal tray in the oven, and bake the cookies for 15-18 minutes, or until the cookies are lightly golden. The baking time will vary depending on the size and thickness of your cookies, as well as your oven.
Note for matcha cookies: the matcha cookies will lose their vivid green colour the longer you bake them. If you want to retain their green colour, bake them just until the edges turn slightly golden.
Remove the baking tray from the oven, and leave the cookies on the hot tray for a further 5-10 minutes to firm up. Cool the cookies on a wire rack.

Tips For Making Different Sablé Cookies
The recipe below produces four different flavours of sablé cookies. You can adjust the recipe to make just one flavour, or more of one flavour. I have devised the recipe so that you can easily scale up ingredients.
For example, if you want to make 1 batch of vanilla cookies and 3 batches of chocolate cookies, simply triple the quantities of the ingredients needed to make chocolate cookies.
I used to like to only make one flavour at a time, but since I discovered how easy it was to make additional flavours, and how fun it was to produce a choice of flavours whenever we had guests, I now make at least two flavours at a time (usually vanilla and chocolate).
Depending on how much time I have, I sometimes halve the recipe below to make a decent amount of cookies for an afternoon tea with friends. At other times, I might even double the recipe to make extra dough to store in the freezer.
In fact, if your kids regularly come home with some of their school friends for a spontaneous playdate, it helps to have a few logs of cookie dough in the freezer so that you can whip up some homemade cookies at short notice and feel like a supermum in the process. (At other times, I keep several packets of store-bought cookies in the pantry for the same reason 🙂 )
Freezing Cookie Dough
Once you have shaped and rolled the cookie dough, it can be stored in the freezer for up to 2 months (I keep it for longer). I wrap the cookie dough log in plastic wrap, and then store it in a large zip-lock freezer bag to keep as much air out as possible.
Once you are ready to use the cookie dough, either thaw it overnight in the fridge or on the kitchen bench at room temperature. Once the dough is soft enough to slice through, you can proceed with the rest of the recipe.

French Sablé Cookies
Ingredients
For the Sablé Cookie Base (to make 4 different flavours)
- 200 g (2 sticks minus 1 tablespoon) unsalted butter, softened
- 3 g (½ teaspoon) fine salt
- 100 g (¾ cup) icing sugar, (powdered sugar)
- 2 egg yolks
- granulated sugar, or demerera sugar, for rolling, optional
Vanilla Sablé
- ¼ of the Sablé Cookie Base
- 100 g (⅔ cup) plain flour, (all-purpose flour)
- 1 teaspoon vanilla extract
- ½ to 1 tablespoon cold water
Chocolate Sablé
- ¼ of the Sablé Cookie Base
- 100 g (⅔ cup) plain flour, (all-purpose flour)
- 5 g (1 tablespoon) cocoa powder
- 1 teaspoon vanilla extract
- ½ to 1 tablespoon cold water
Black Sesame Sablé
- ¼ of the Sablé Cookie Base
- 100 g (⅔ cup) plain flour, (all-purpose flour)
- 2 teaspoons black sesame powder
- ½ to 1 tablespoon cold water
Matcha Sablé
- ¼ of the Sablé Cookie Base
- 100 g (⅔ cup) plain flour, (all-purpose flour)
- 10 g (2 teaspoons) matcha powder
- 10 g (1 tablespoon) icing sugar, (powdered sugar)
- 50 g white chocolate chips, optional
- ½ to 1 tablespoon cold water
Instructions
To Make the Sablé Cookie Base
- Place the butter, salt and icing sugar (powdered sugar) into a large bowl.
- Cream the ingredients together until the mixture is light and fluffy. If you are using an electric stand mixer, use the flat-paddle attachment.
- Add the egg yolks.
- Beat to combine well.
- Weigh the mixture in a clean bowl.
- Divide the mixture by 4 into separate small bowls.
To Make the Different Sablé Cookie Flavours
- Measure the additional ingredients for the different cookie flavours into separate small bowls.
To Make the Sablé Cookie Dough
- Place one portion of the Sablé Cookie Base into the mixing bowl.
- Add the additional ingredients for one of the cookie flavours (e.g. all of the ingredients to make Vanilla Sablé).
- Beat the mixture together until the dry ingredients are mixed into the Sablé Cookie Base. The mixture should resemble wet sand.
- Add just enough water to bring the mixture together into a soft dough.
- Remove the mixture to the kitchen bench.
- Knead the dough lightly so that all of the ingredients are well-combined and there are no air-pockets in the dough.
- Shape the dough into a small log, about 3-4 cm in width. In these accompanying photos, I have made 4 cm wide cookies, so the logs are about 13 cm in length.
- Wrap the log of dough in some plastic wrap.
- Place the dough in the fridge for 1-2 hours to firm up.
- Repeat the above steps to make the other cookie flavours. Use a clean mixing bowl and utensils for each flavour.
To Coat the Sablé Cookies in Sugar – Optional
- Once the cookie dough log has firmed up, unwrap it and transfer it to a cutting board.
- Pour the sugar onto a tray which is large enough to fit the cookie dough log lengthwise.
- Wet a large sheet of kitchen paper with cold water.
- Roll the cookie dough log on the wet kitchen paper to moisten the outside of the log.
- Then roll the cookie dough log in the sugar. Ensure that it is generously and evenly coated in the sugar.
To Slice the Sablé Cookies
- If you want even-sized cookies, use a ruler to mark the width of each cookie (about 1 cm thick). Otherwise, you can eye-ball it and cut as you please.
- Use a sharp knife to slice the cookie dough.
- Place a sheet of baking paper on a large baking tray.
- Arrange the cookie slices on the baking tray. The cookies do not spread very much upon baking, but space them apart to allow them to bake evenly.
To Bake the Sablé Cookies
- Preheat the oven to 180°C/356°F (without fan).
- Preheat a metal tray on the middle shelf in the oven.
- Place the tray of cookies on the preheated metal tray.
- Bake the cookies for 15-18 minutes, or until the cookies are lightly golden.
- Remove the tray from the oven.
- Leave the cookies on the hot tray for about 5-10 minutes to firm up.
- Remove the cookies to a wire rack to cool completely.
Kitchen Notes
- BAKING TIME FOR MATCHA COOKIES
The matcha cookies will lose their vivid green colour the longer you bake them. If you want to retain their green colour, bake them just until the edges turn slightly golden. - OVEN TEMPERATURES
All recipes on this website state temperatures for a regular oven (i.e. a conventional oven without fan). If you have a convection oven with a fan, please consult the manufacturer’s handbook on how to adjust the temperature and baking time accordingly. - CONVERSIONS
To convert from cups to grams, and vice-versa, please see this handy Conversion Chart for Basic Ingredients.


I was looking for a recipe for matcha cookies and these turned out perfectly! I will be adding these to my Christmas cookie boxes later this year 🙂
I love that you can easily make different flavors from one dough. Fantastic idea!
This is my third time using this recipe and honestly it is so easy!! I previously made just vanilla and chocolate cookies, then I made a batch with chocolate chip. I finally found matcha for baking so today I made vanilla, chocolate, funfetti and matcha. I love using your recipe. Thank you so much!
Hi Emily,
So glad to hear that you love this recipe! I think it’s fun to make different flavours from the one batch of dough 🙂
Can I roll them can cut them with a cookie cutter instead? Or do you have any recipe that can use the cookies cutter? Thank you in advance
Hi Iris,
Yes, of course! You can roll the dough between two sheets of baking paper and leave to chill in the fridge until firm enough to cut out shapes with a cookie cutter (about 30 mins). This is what I do when the kids want to cut out shapes. Hope you will enjoy the recipe!
I finally got around to trying this recipe and it was much easier than I expected. In fact, I will even double the recipe next time to make more cookies to give away! Fantastic way to make different flavors from one dough. I didn’t have matcha powder this time so I made one batch with chocolate chips and another with funfetti sprinkles. Thanks for your instructions!
Hi Linda,
Thanks for your feedback! Oh funfetti cookies sounds like a great idea! I’m going to try that too for Christmas 🙂
How can I make funfetti cookies using this recipe? How much sprinkles should I add to 1/4 of the cookie base? Thanks!
Hi Jane,
I would add about 1/2 cup of sprinkles, or what the Americans call “jimmies” (the long sprinkles), to 1/4 of the cookie dough base. Hope you will enjoy this recipe!
I made this last minute tonight before a spring barbecue. I actually used only the base recipe and instead of the listed flavors, I added lavender flowers. This recipe is spectacular. I’ve made sablés before, but I’m moving, so my go-to recipe was packed. This was far and away not only one of the best that I’ve made, but I think some of the best that I’ve ever eaten. Granted, it’s mostly butter, but I’m so intrigued that I think I will be giving other recipes a try very soon! Thank you, little bird!
Hi Kiki,
So glad you enjoyed this sablé recipe! The addition of lavender sounds beautiful. There are so many different ways you can play with the flavours in this recipe. I’m so glad it worked for you!