What are Salted Egg Yolks?
Salted egg yolks are a popular ingredient in Asian cooking, particularly in Asian cakes and desserts, like Mooncakes.
In the same way that salt is often added to counter the sweetness of a cake or dessert (think salted caramel sauce), salted egg yolks bring a similar salty hit.
It might sound strange to add a salted egg yolk to a sweet cake, but once the yolks have been cured in salt, they don’t taste eggy at all. The cured egg yolks are also bright orange in colour, so they also provide a nice contrast in colour with whatever they are baked with.

What Type of Eggs to Use
Many Asian cakes are prized for their use of salted egg yolks – sometimes a Mooncake might contain 2 egg yolks for extra luxuriousness! Sometimes, duck egg yolks are used.
Duck egg yolks are larger than chicken egg yolks, and also more vibrant in colour.
However, because duck eggs are not widely available like chicken eggs, the latter is perfectly fine to use wherever salted egg yolks are called for.

Salted Egg Yolks Recipe
There are different ways of making salted egg yolks. I mainly only use salted egg yolks when making homemade Mooncakes, so my recipe for salted egg yolks is with such homemade Mooncakes in mind.
My homemade Mooncakes are typically made with a Lotus Seed Paste, which is also homemade and less sweet than what you can buy at the Asian grocer. Hence, I cure my salted egg yolks for only 1 day (actually, just overnight), which I think makes the egg yolks salty enough for my homemade Mooncakes.
If I were to use a sweeter filling, I would probably cure the yolks for longer (you can cure them for up to 5 days in the fridge), but it’s all about finding the right balance for you.
There have been times when I have bitten into a Mooncake and found the salted egg yolk to be far too salty for my liking. But tastes can vary, so it might be worth experimenting if you have the time.
But it’s worth knowing that curing the yolks for just 8 hours will be long enough to give it some salty flavour.
How to Make Salted Egg Yolks
Depending on how salty you like your salted egg yolks, you should start this recipe at least the day before you plan to use them, or up to 5 days if you want a fairly intense and salty egg yolk.
Step 1
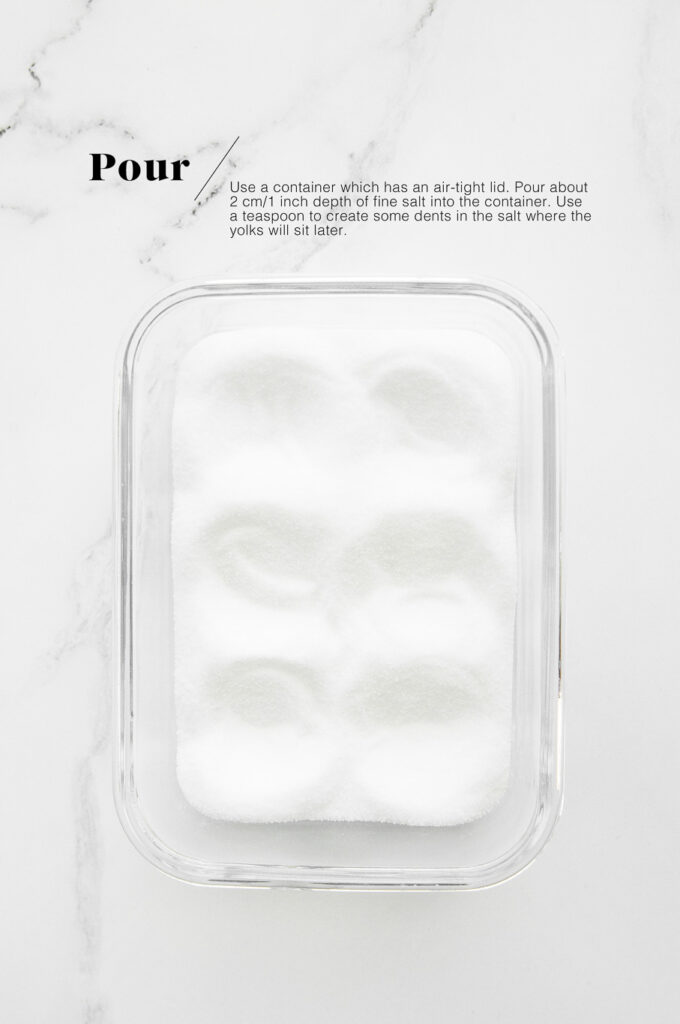
To make salted egg yolks, you will need good-quality egg yolks and lots of fine salt. How much salt you need will depend on how many yolks you plan to cure, and how big your container is.
For these photos, I used 6 egg yolks in a glass rectangular container, which required approximately 1 kg/2 lb fine salt.
The salt I used here is fine table salt, i.e. the cheap supermarket variety. You can also use fine sea salt, but this is generally more expensive. Once you have finished curing the yolks, you will need to discard the salt.
NOTE: coarse salt will not work in this recipe, as any large salt flake with sharp edges may pierce the yolks.
Step 2
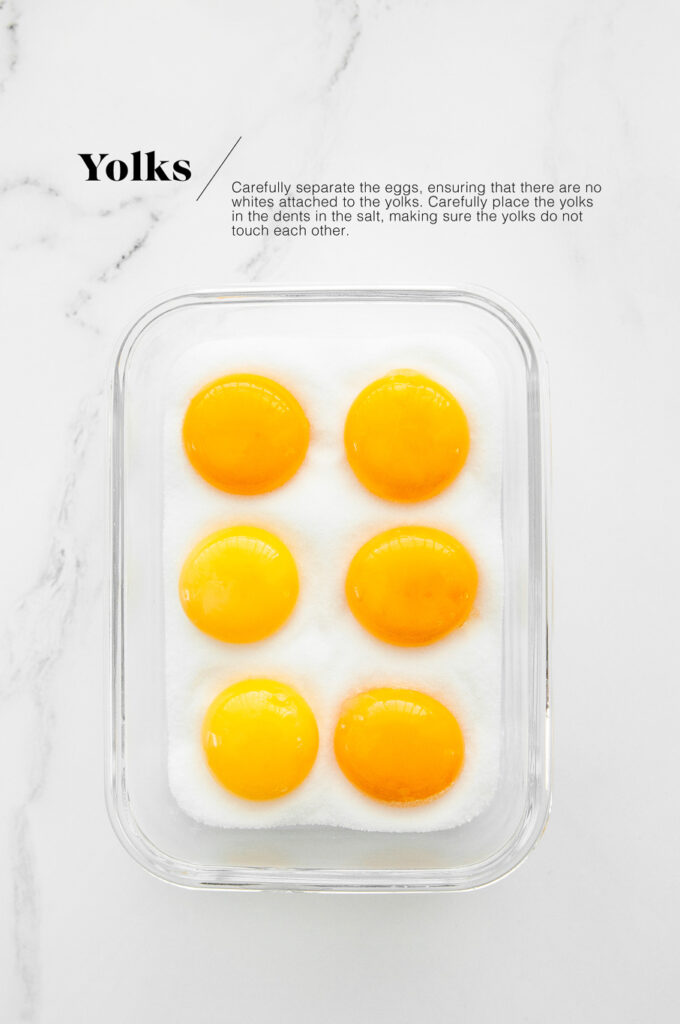
Carefully separate the eggs, ensuring that there are no whites attached to the yolks. Place the yolks in the dents in the salt.
I have always found it easiest to separate eggs Nigella’s way, i.e. to use your fingers to separate the yolks from the whites, rather than to use the egg shells. When using egg shells, there is always the risk of a sharp edge on the shell piercing the yolk. But using your fingers to let the egg whites stream through has almost zero risk of failure.
When separating eggs, I usually have several small bowls ready to collect the egg whites, usually two at a time. I like to freeze the egg whites in pairs to use later in recipes like Pavlova, Friands or Angel Food Cake.
Step 3
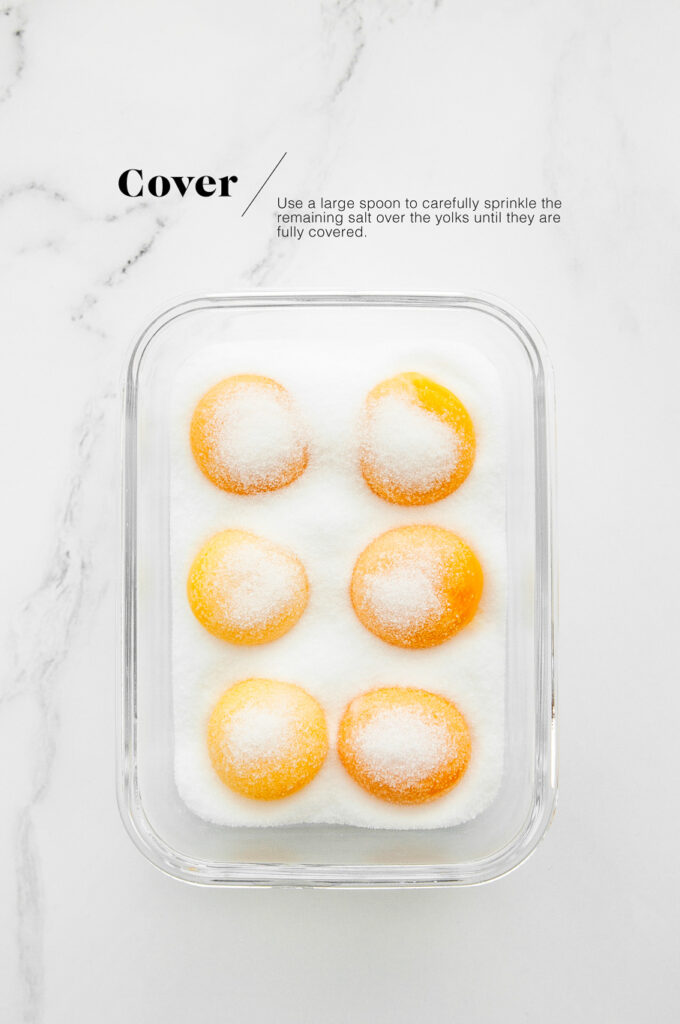
Use a large spoon to carefully sprinkle the remaining salt over the yolks until they are fully covered.
Step 4
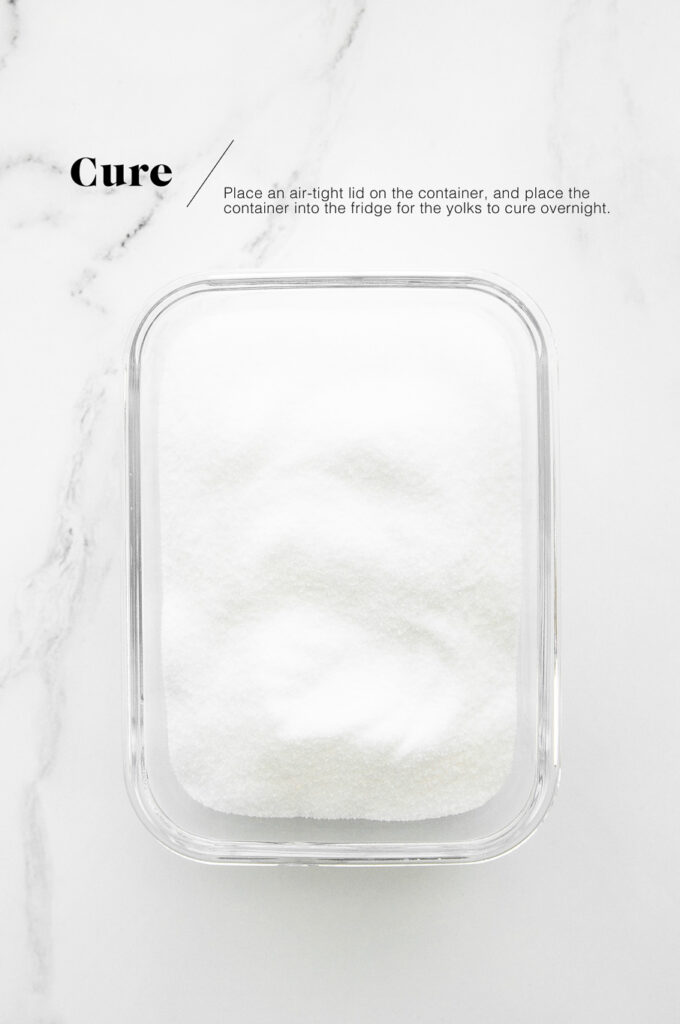
Place an air-tight lid on the container, and place the container into the fridge for yolks to cure.
I generally cure the yolks overnight, or for about 8 to 12 hours. For me, this creates a salted egg yolk which has the right level of saltiness which I like in my Mooncakes.
However, for a more intensely flavoured yolk, you can cure the yolks for up to 5 days.
Step 5
After the yolks have cured in the salt for the desired time, carefully remove them from the salt, one at a time. The yolks should feel firm and sticky.
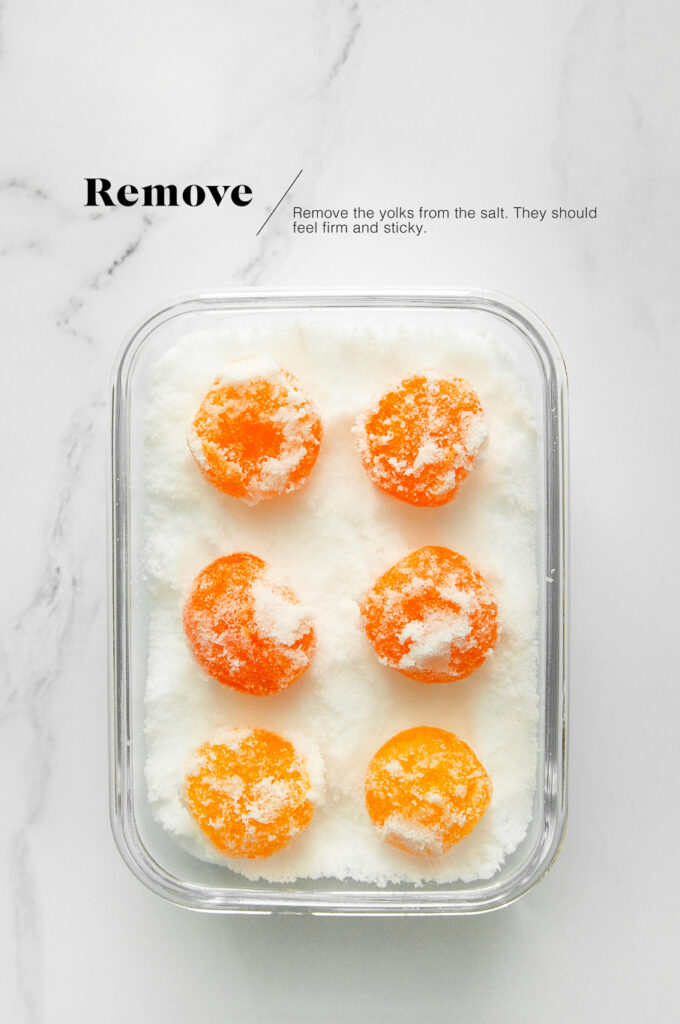
Step 6
Rinse each yolk gently under some cold water to remove the salt.
Pat the salted egg yolks gently with kitchen paper to dry them. The yolks will now look a bit like shiny dried apricots.
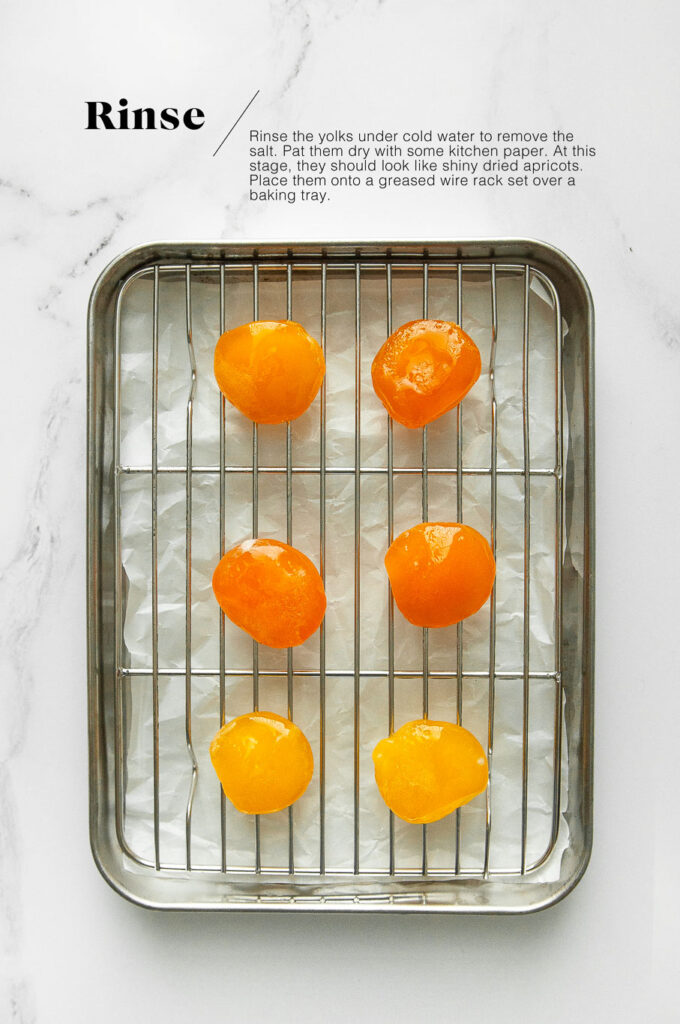
Step 7
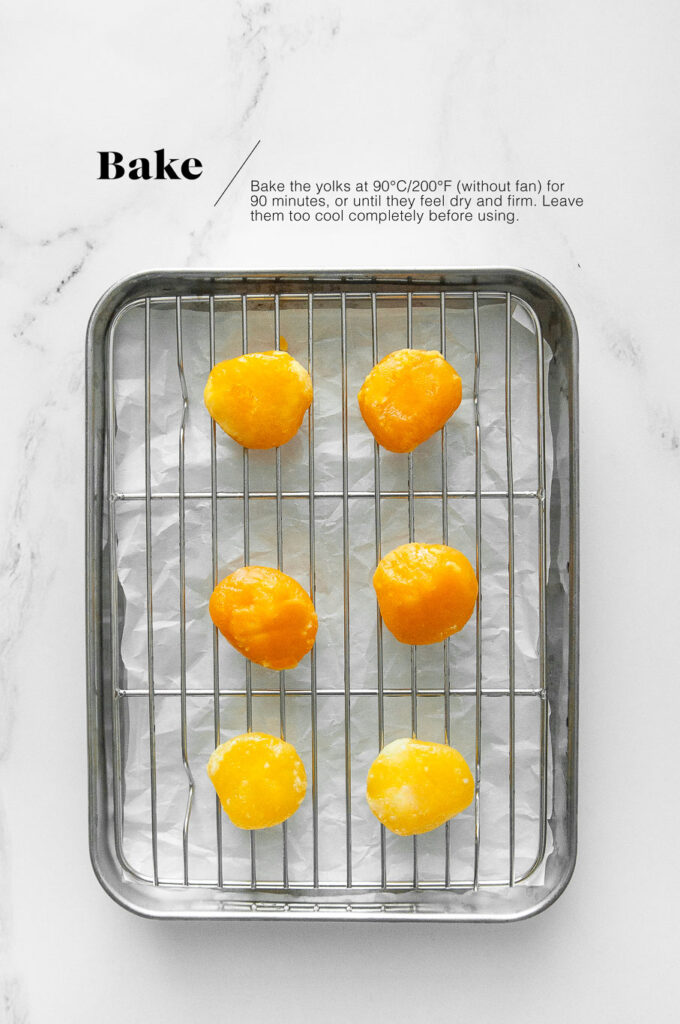
Preheat the oven to 90°C/200°F (without fan).
Generously grease a small wire rack, and place the wire onto a baking tray.
Bake the yolks for 90 minutes, or until they are dried and firm to the touch.
Let the yolks cool completely before using.
The salted egg yolks can be kept in a small air-tight container for up to 3 months.
Recipes Using Salted Egg Yolks
Recipes using Salted Egg Yolks include:
Mooncakes with Lotus Seed Paste and Salted Egg Yolks

Salted Egg Yolks
Ingredients
- lots of fine salt
- 6 egg yolks, or as many as you want to make
Instructions
To cure the egg yolks
- For this recipe, I like to use a rectangular glass container with an air-tight lid.
- Pour about 2 cm/1 inch depth of salt into the container.
- Use a teaspoon to create some dents in the salt where the egg yolks can sit.
- Carefully separate the yolks from the egg whites, making sure there is no white attached to the yolks. (Do not discard the egg whites. Freeze them in pairs in zip-lock freezer bags for recipes like Pavlova, Friands or Angel Food Cake).
- Carefully place the yolks into the dents in the salt, taking care that there is enough space between the yolks and that they do not touch each other.
- Use a tablespoon to gently sprinkle the remaining salt over the yolks until they are completely covered.
- Place the lid onto the container, and place the container in the fridge for at least 8 hours, or overnight.
To bake the egg yolks
- Preheat the oven to 90°C/200°F.
- Carefully remove the yolks from the salt. By this stage, the yolks should be somewhat firm and sticky.
- Rinse the yolks gently with cold water, and place them on some kitchen paper to dry. At this stage, the yolks will look a bit like shiny dried apricots.
- Generously oil a wire rack and place it on a baking tray lined with baking paper.
- Place the yolks onto the wire racks.
- Bake for about 90 minutes, or until the yolks have dried and are firm to the touch.
- Let the yolks cool completely.
- The cured yolks can be kept in an air-tight container in the fridge for up to 3 months.
Kitchen Notes
- OVEN TEMPERATURES
All recipes on this website state temperatures for a regular oven (i.e. a conventional oven without fan). If you have a convection oven with a fan, please consult the manufacturer’s handbook on how to adjust the temperature and baking time accordingly. - CONVERSIONS
To convert from cups to grams, and vice-versa, please see this handy Conversion Chart for Basic Ingredients.

Great instructions! Thank you!
Very easy recipe and the salted egg yolks were not too salty.
Excellent recipe! The egg yolks tasted perfect.
Easy recipe and the salted egg yolks tasted wonderful.
Hi Jennifer,
Thank you for your feedback 🙂
I had no idea they would be so easy to make, and they taste so much better than the frozen ones.
Hi Amy,
Yes, they definitely taste better than frozen ones!
Can you reuse the salt to make more?
Hi Michelle,
I’m not so sure. I know it seems like a waste to throw away the salt, but as some of the salt is in contact with raw egg, I’m not sure if it is safe to re-use in another batch. I would prefer to err on the side of caution and to therefore discard the salt after each use. If anyone else can help on this point, I would also welcome their advice 🙂
Is it necessary to bake them after salting?
I think the salt could be reused if you bake it along with the egg yolks in a separate pan to sterilize it. Any large chunks can be sieved out to be used in other seasoning purposes.
My egg yolks keep melting while they are baking….. what am I doing wrong?
Hi Brandy,
Perhaps you are confusing the temperatures in celsius and fahrenheit?
this food is very delicious thank you for making this delicious recipe
Great recipe for salted egg yolks!
Hi Vera,
Thank you!
Can you use a dehydrator to “cure-Bake” the yolks?
Hi Anne,
Good question! I think it should be fine to use a dehydrator to bake the yolks, provided that you can set it to 90°C/200°F. Otherwise, if it does not go that high, you might need to bake the yolks at a lower temperature but for longer.
It would also make more sense to use the dehydrator for something like salted egg yolks because you don’t need a huge oven to bake these tiny yolks. Alternatively, a toaster oven or similar should also be fine. I have a dehydrator which I use for other things, but I have also thought of using it next time for salted egg yolks. I will update my recipe once I test it myself, but I happen to think it is fine, depending on the heat settings of your dehydrator.