Easter Egg Nest Cake
I love to bake a flourless chocolate cake when we have guests over, and this Easter Egg Nest Cake is an extra chocolatey version which is perfect at Easter time if you are entertaining family and friends. It’s also a great way to use up some of the many Easter eggs at this time of the year!
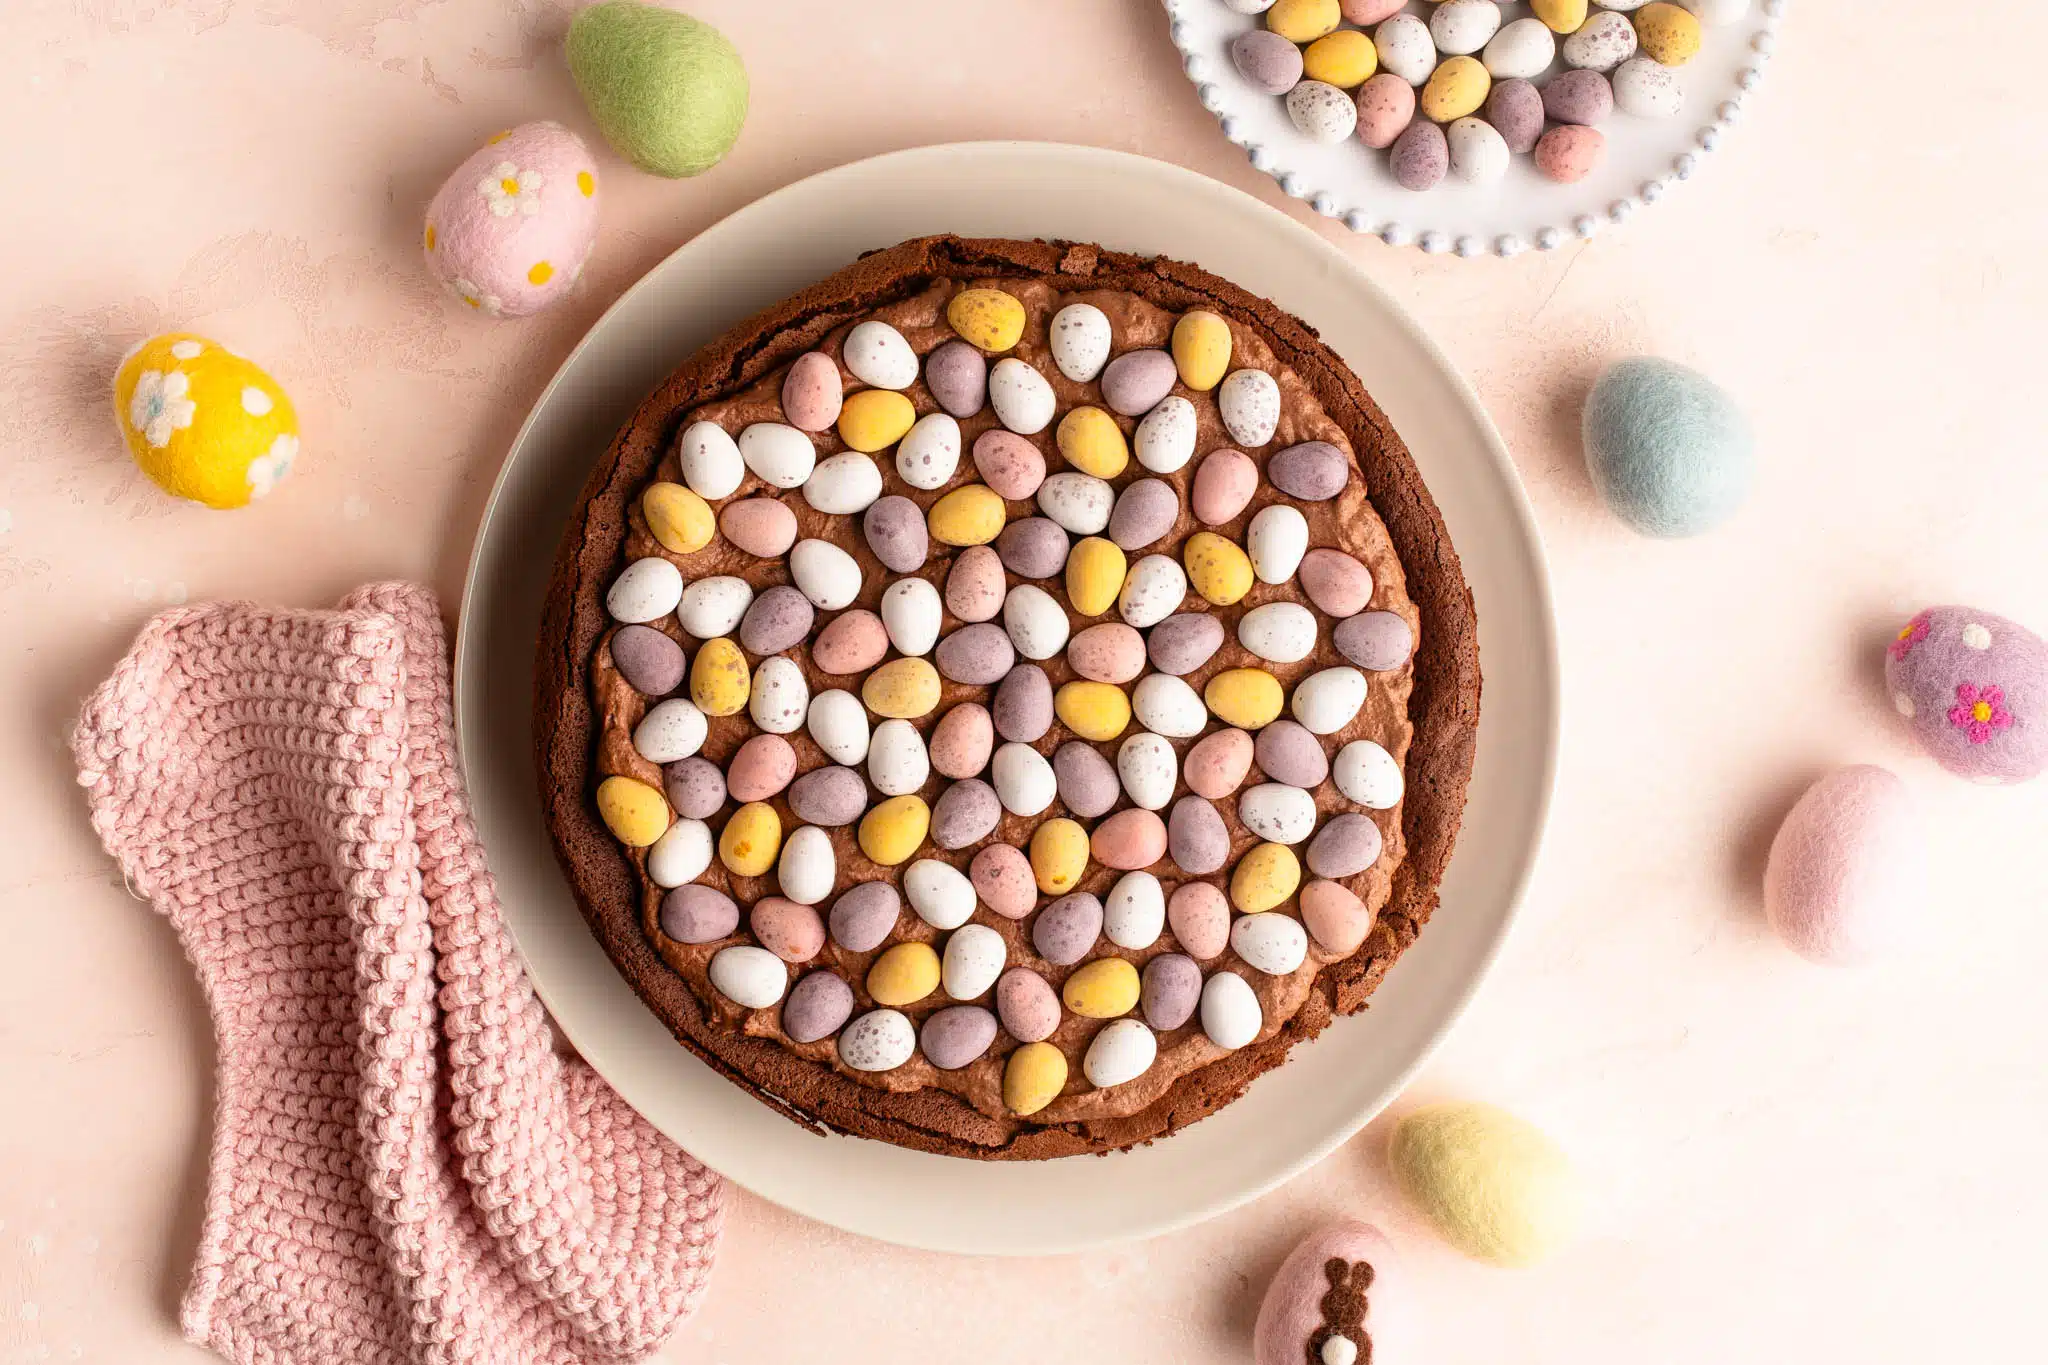
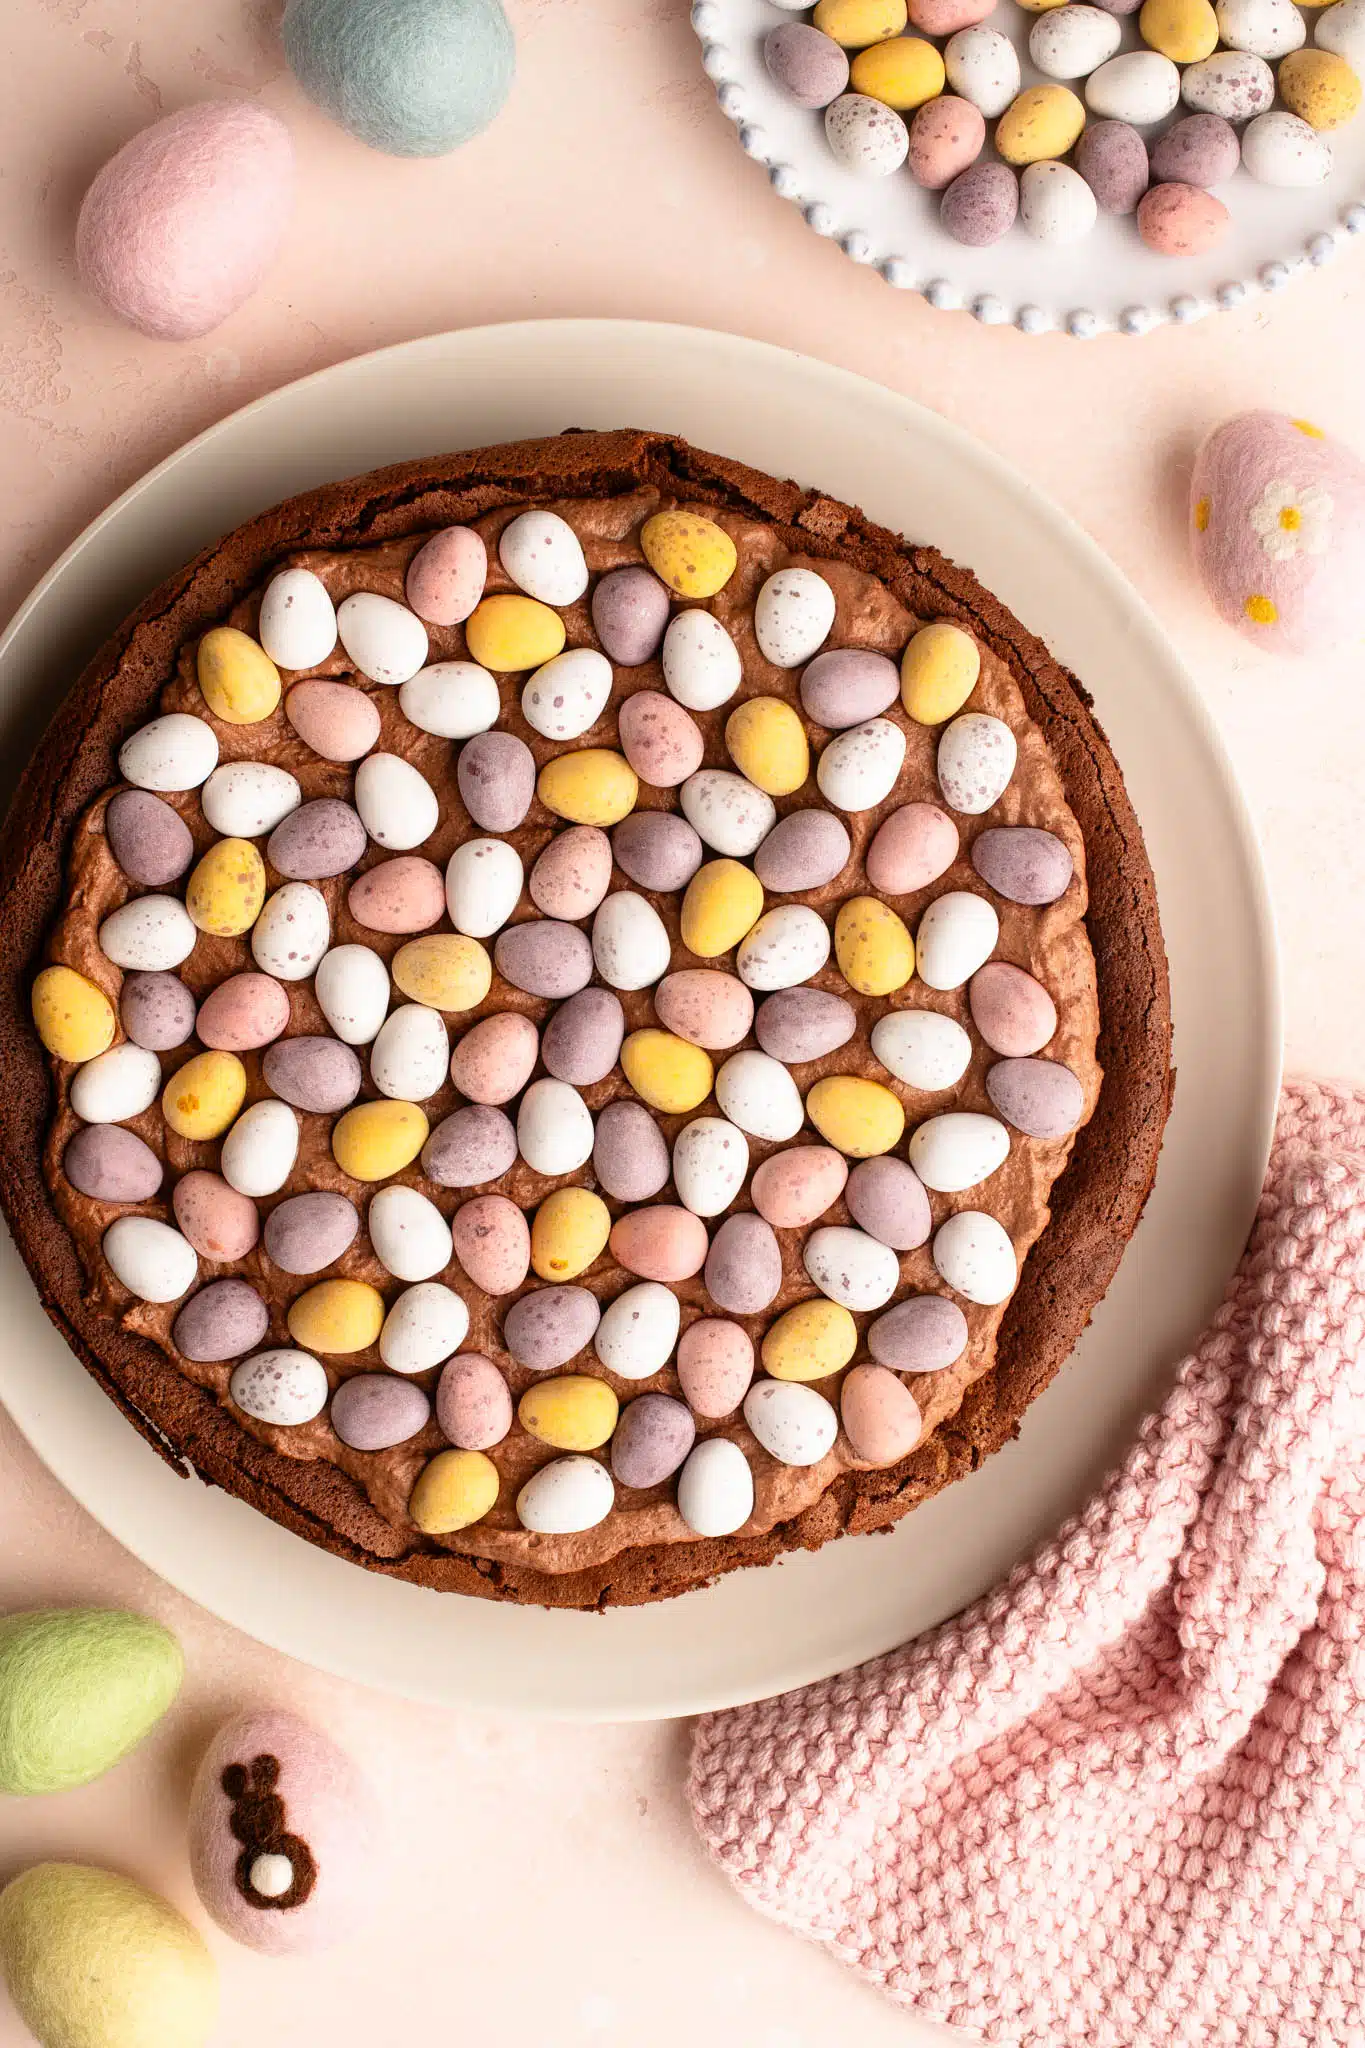
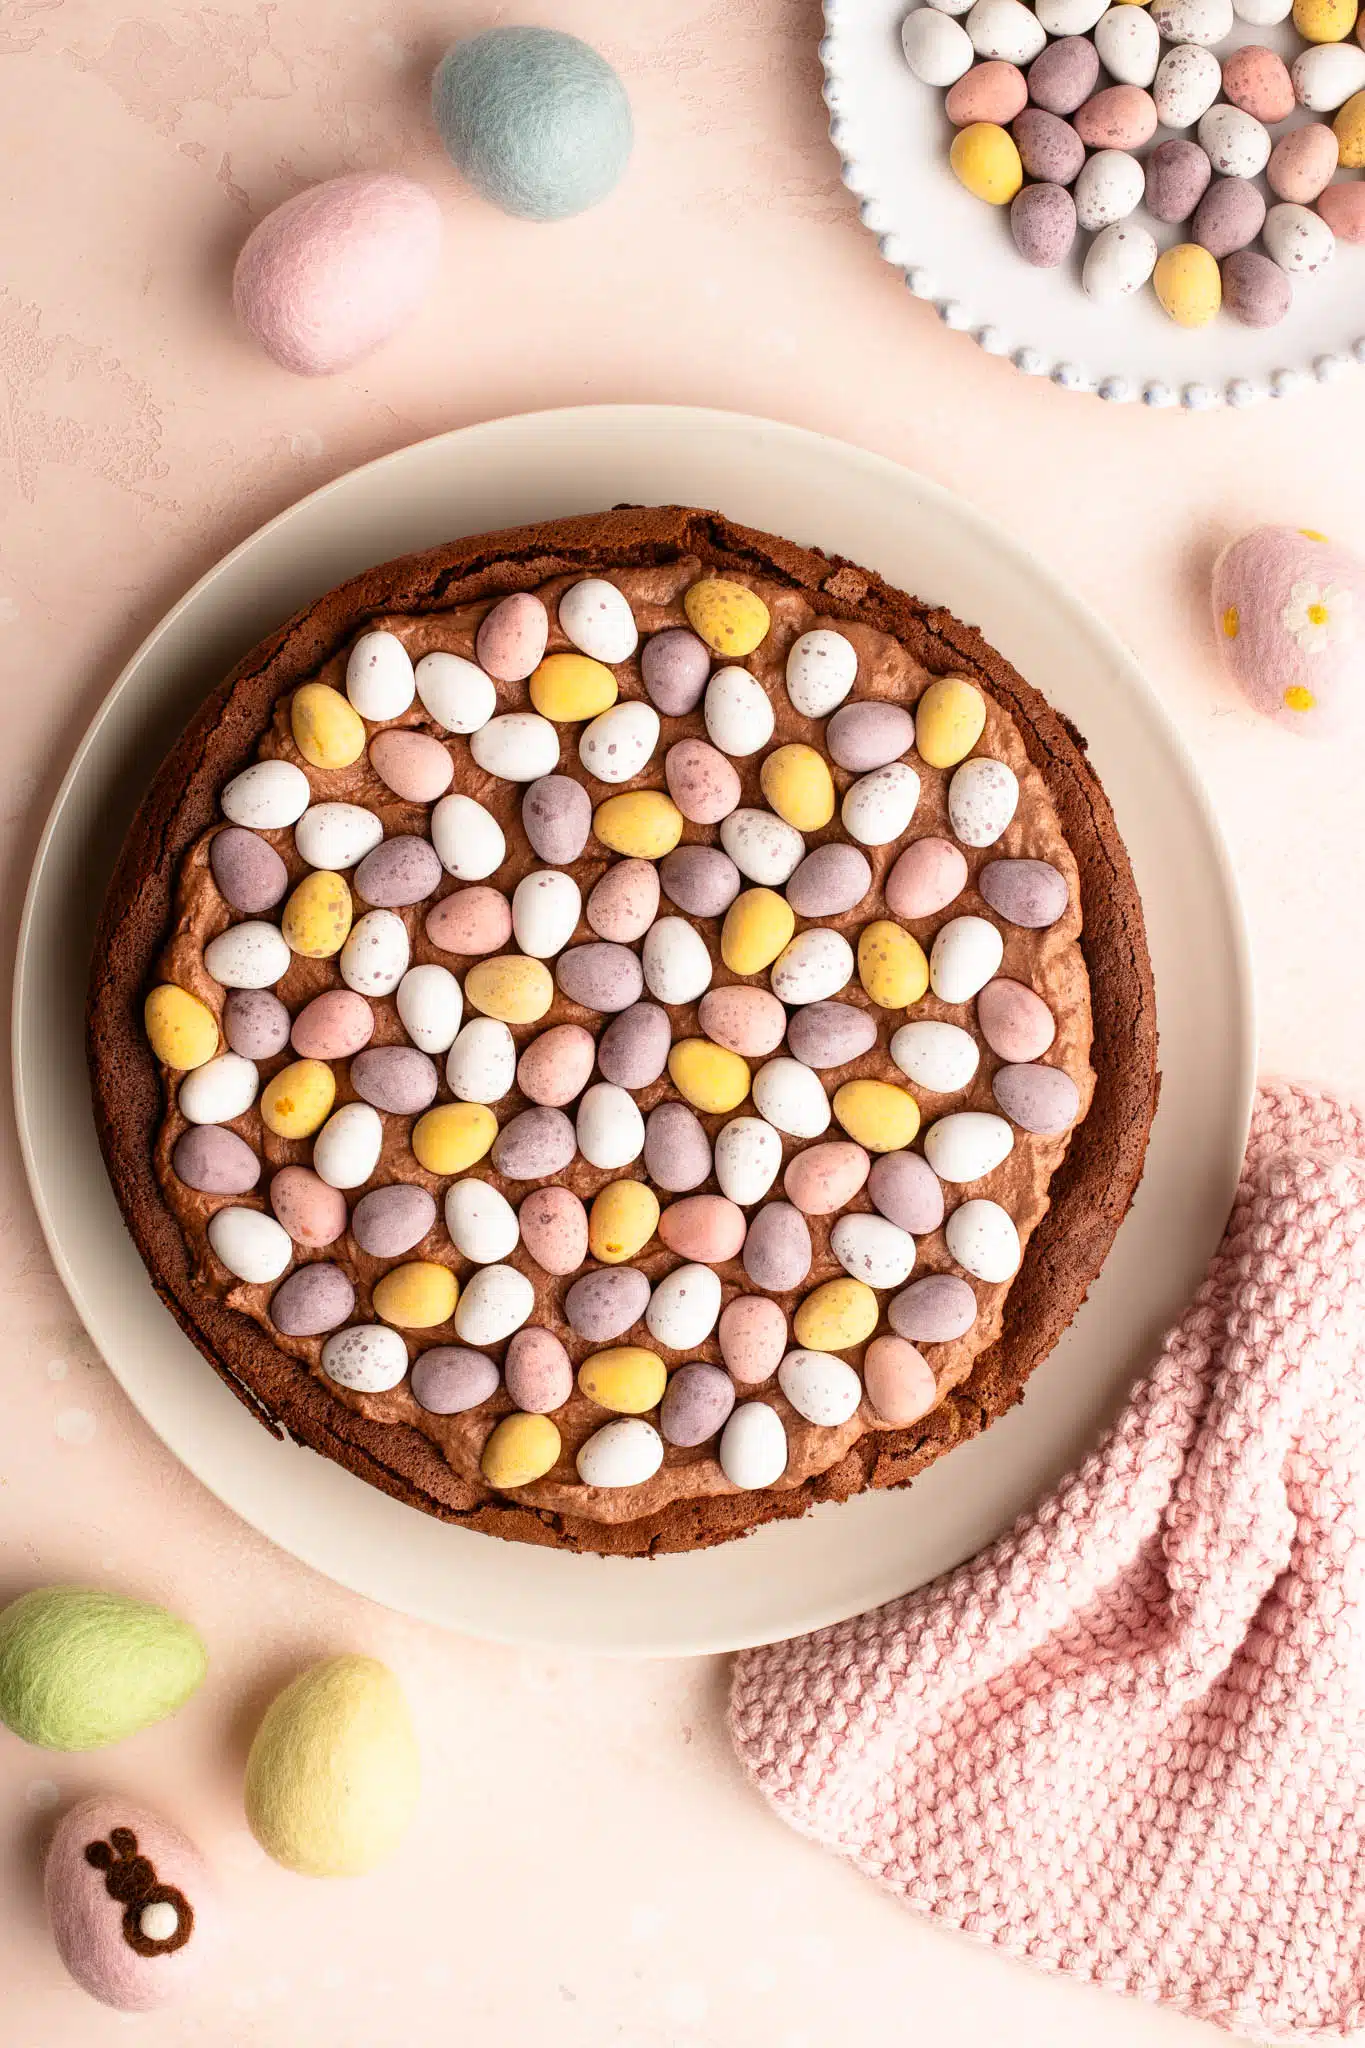
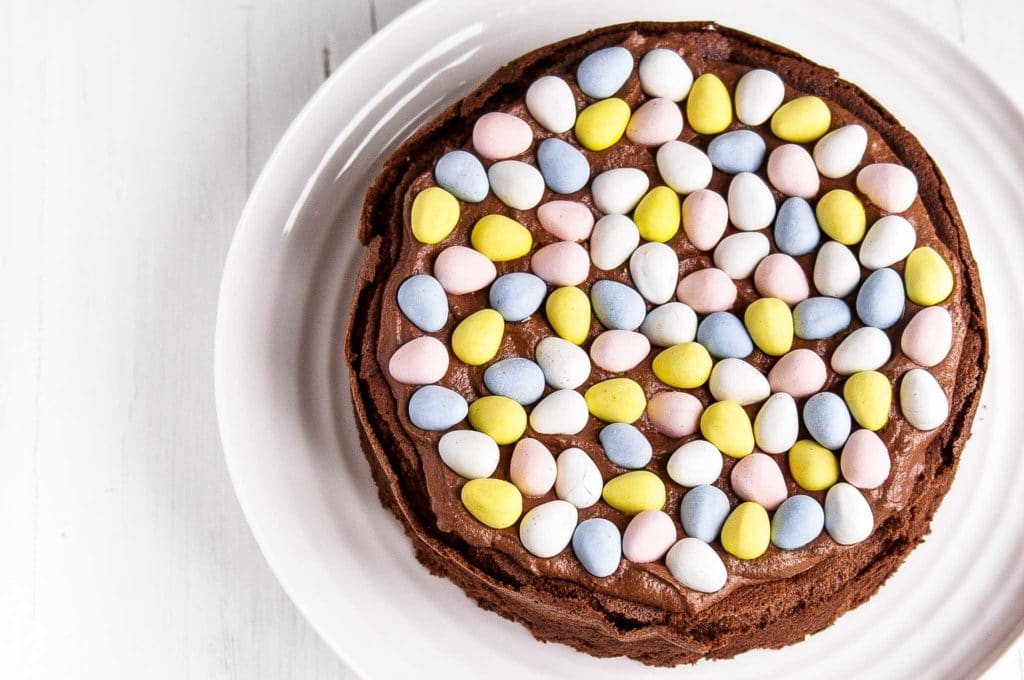
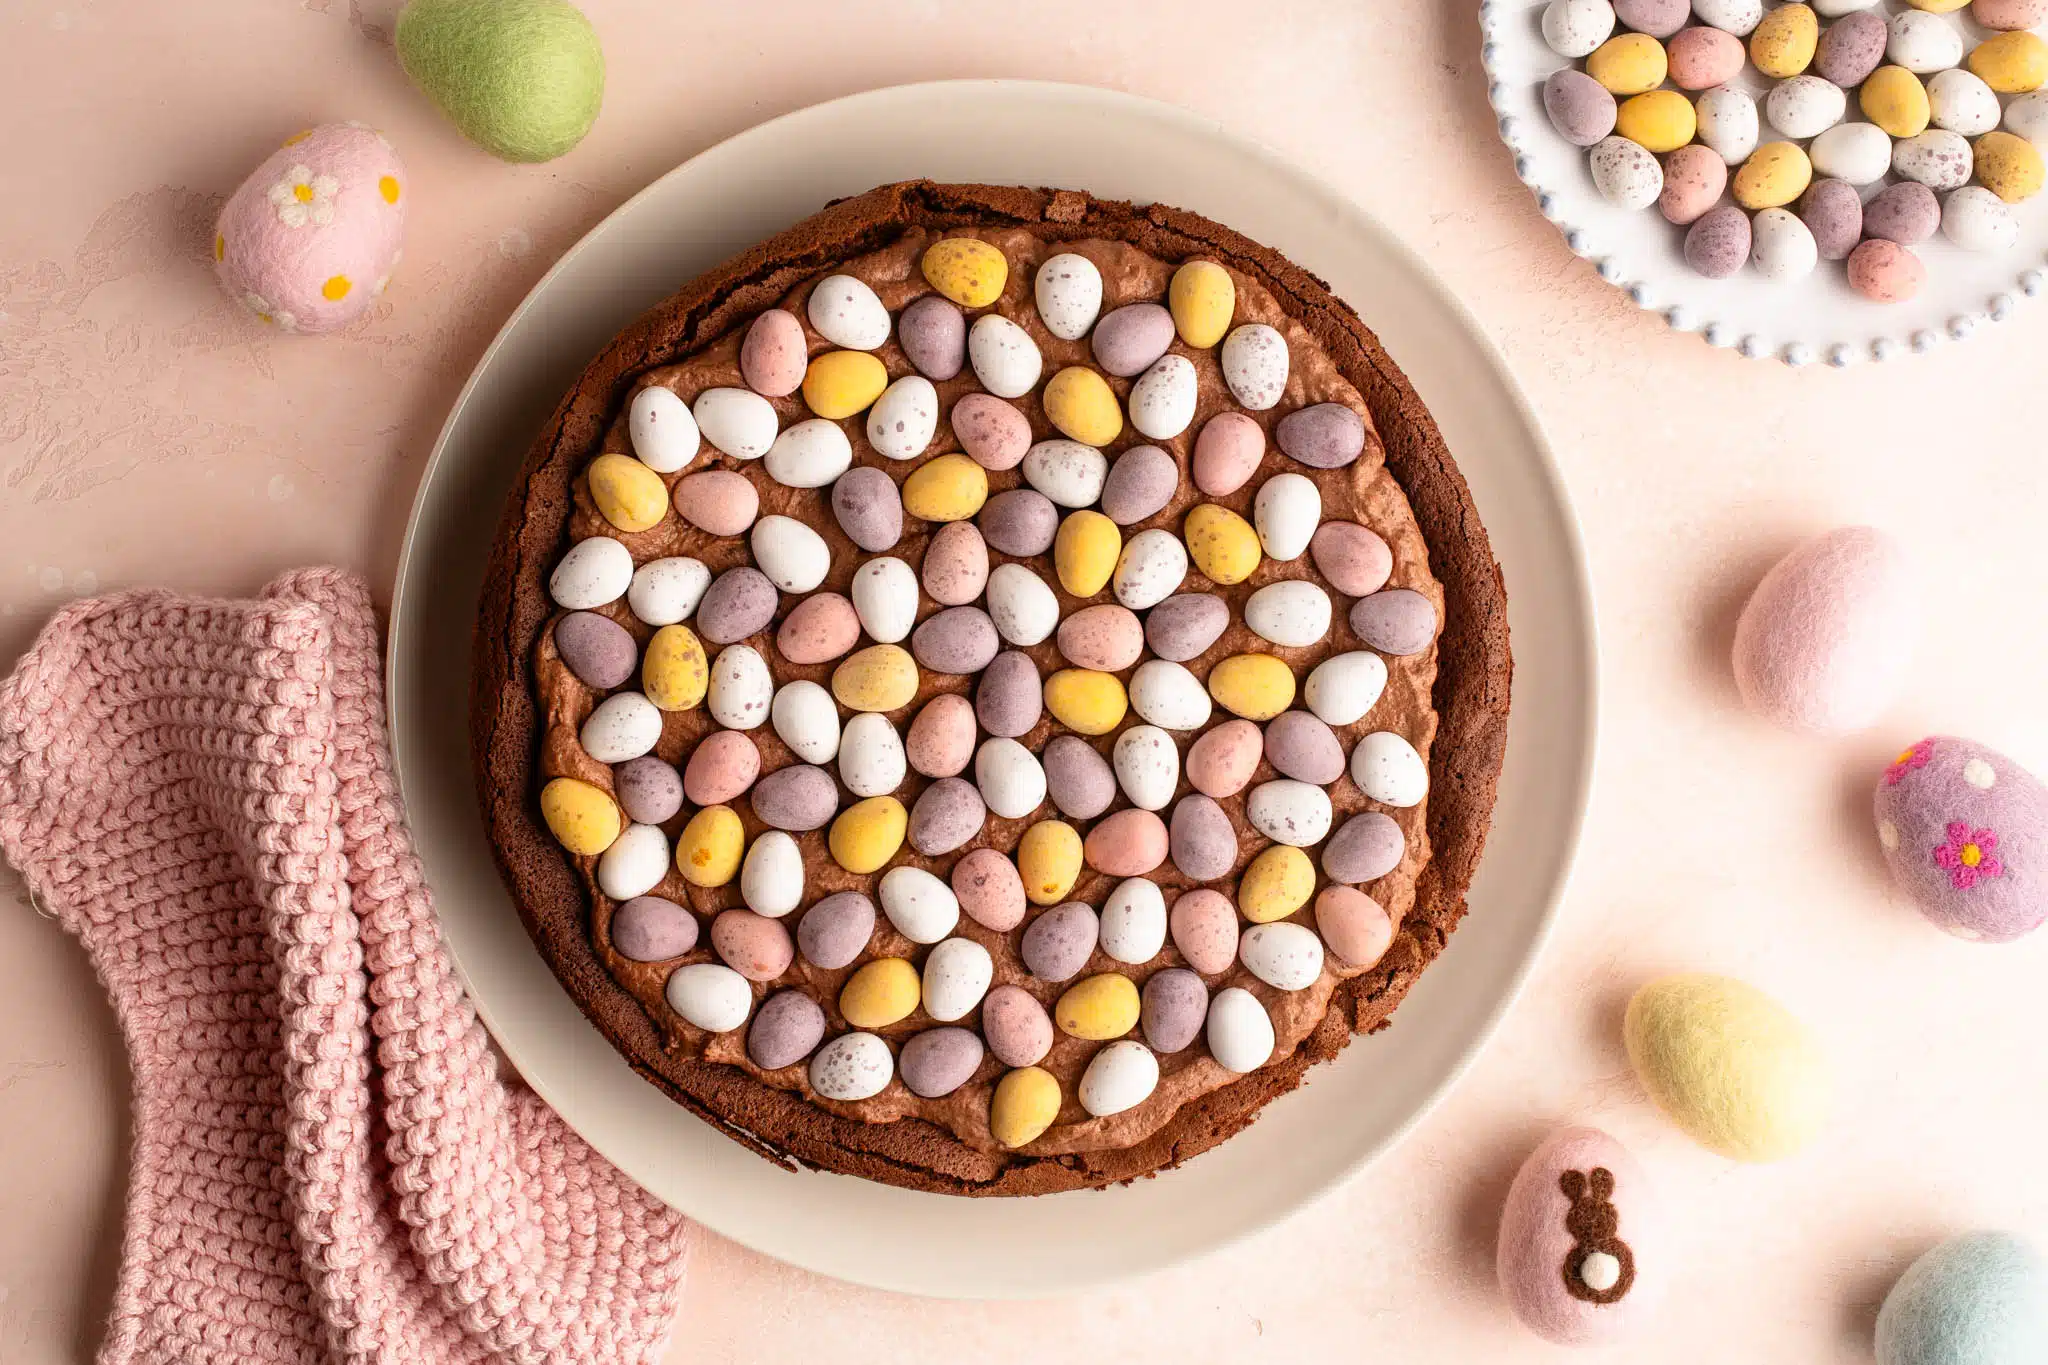
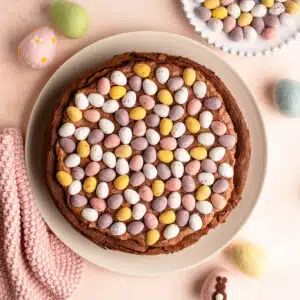
What is particularly beautiful about this Easter Egg Nest Cake are the pretty pastel colours, thanks to the sugar-coated chocolate Easter eggs.
What is an Easter Egg Nest Cake?
This Easter Egg Nest Cake is a flourless chocolate cake, topped with a whipped chocolate cream and decorated with sugar-coated chocolate Easter eggs.
Easter Egg Nest Cake Recipe
The recipe for this Easter Egg Nest Cake is a variation of the Flourless Chocolate Cake here on my website, and the recipes for both are adapted from Nigella Lawson.
I make this Flourless Chocolate Cake quite often when we have guests because:
- It’s a fairly easy and foolproof recipe;
- You can decorate it in many ways. Leave it plain with whipped cream for an elegant dessert, or top with raspberries and/or blackberries if they are in season.
- Kids and adults enjoy this cake!
Gluten-Free Easter Cake
Whether you are making the original or Easter version, this is the perfect cake to make for anyone who has a gluten intolerance as it does not contain any flour. Hence, this Easter cake recipe is gluten-free.
The absence of flour also guarantees that the cake will be tender and moist within, rich with chocolate flavour.
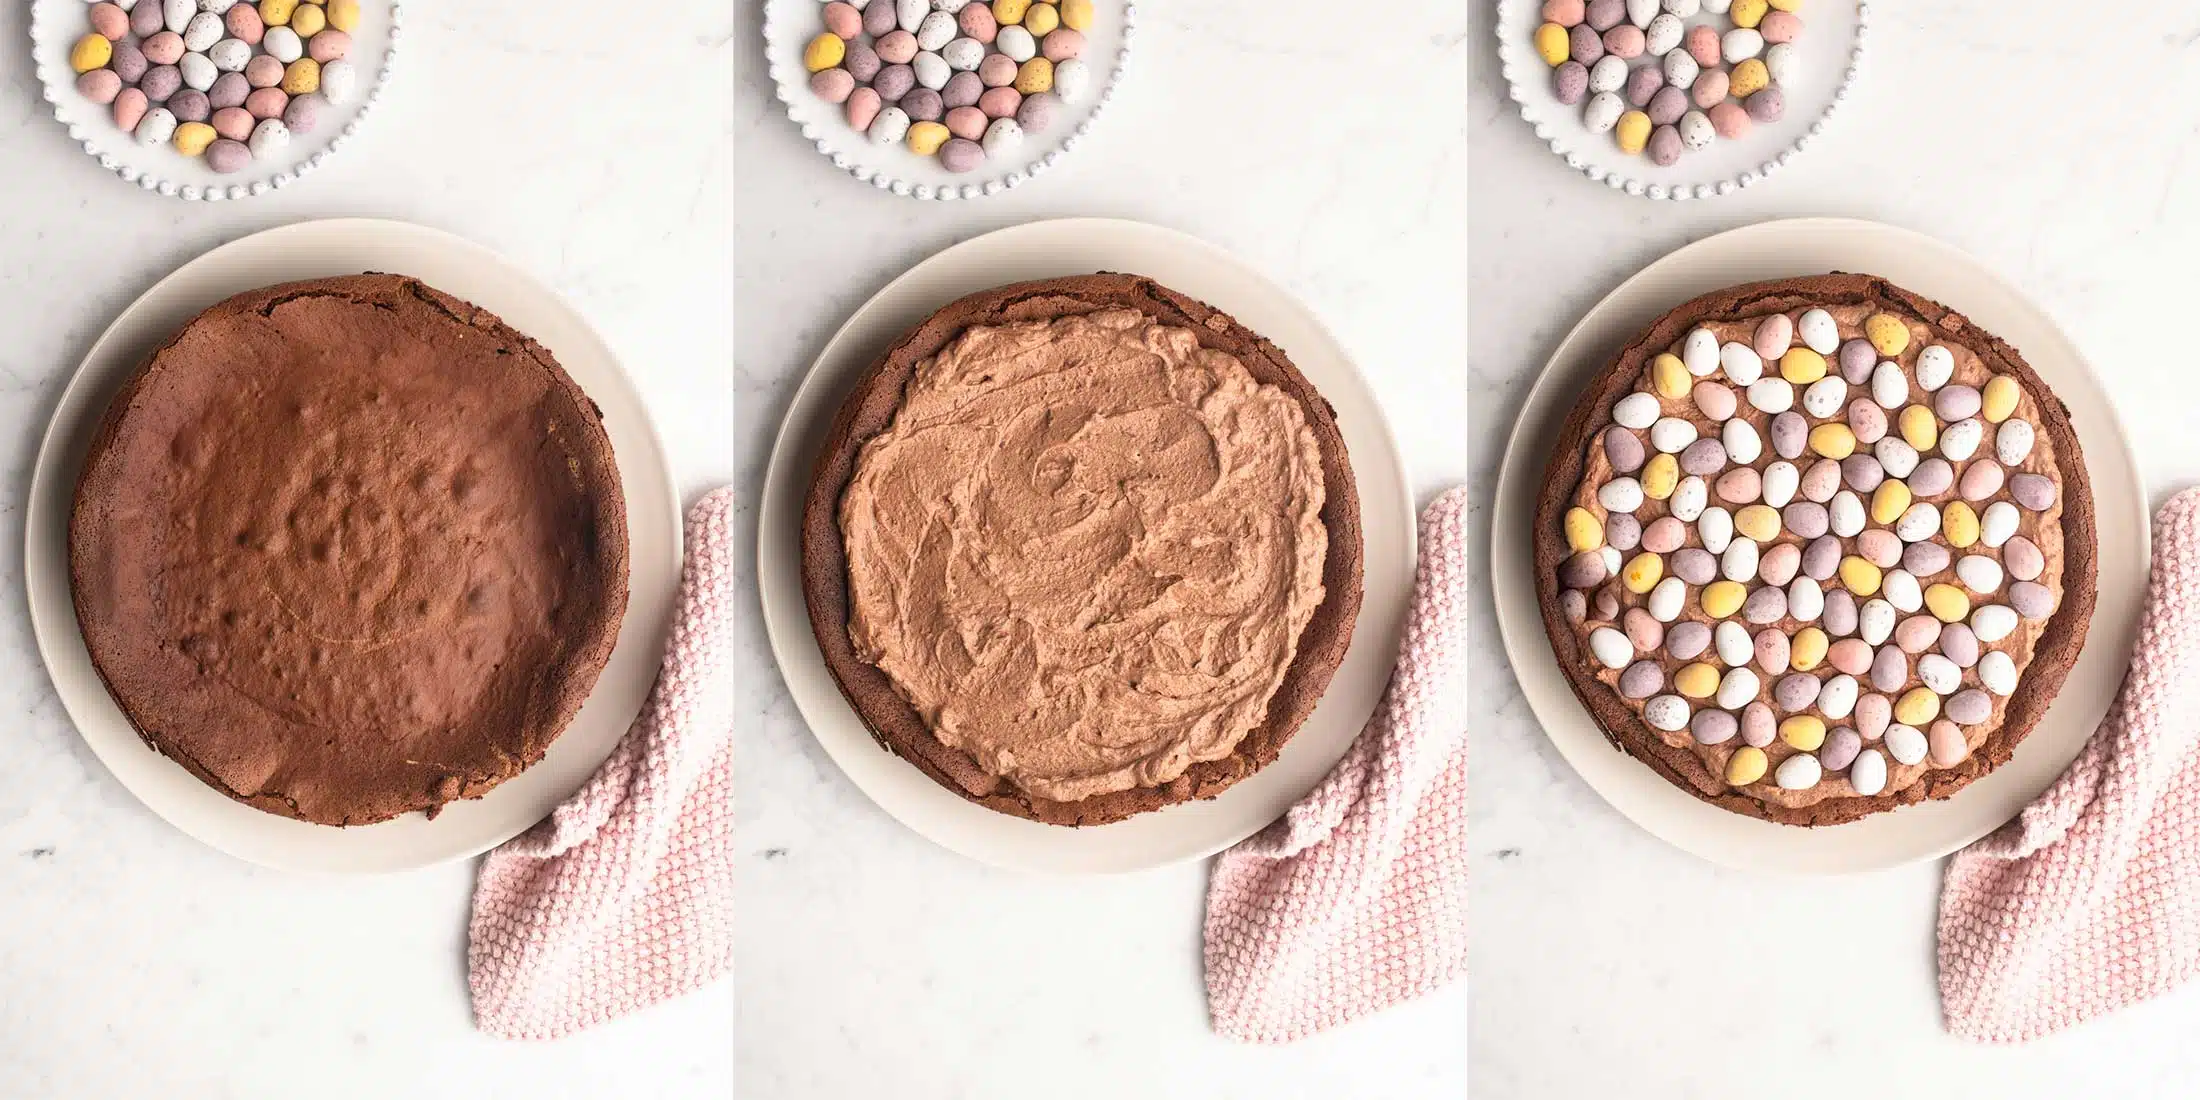
How to Make Easter Egg Nest Cake
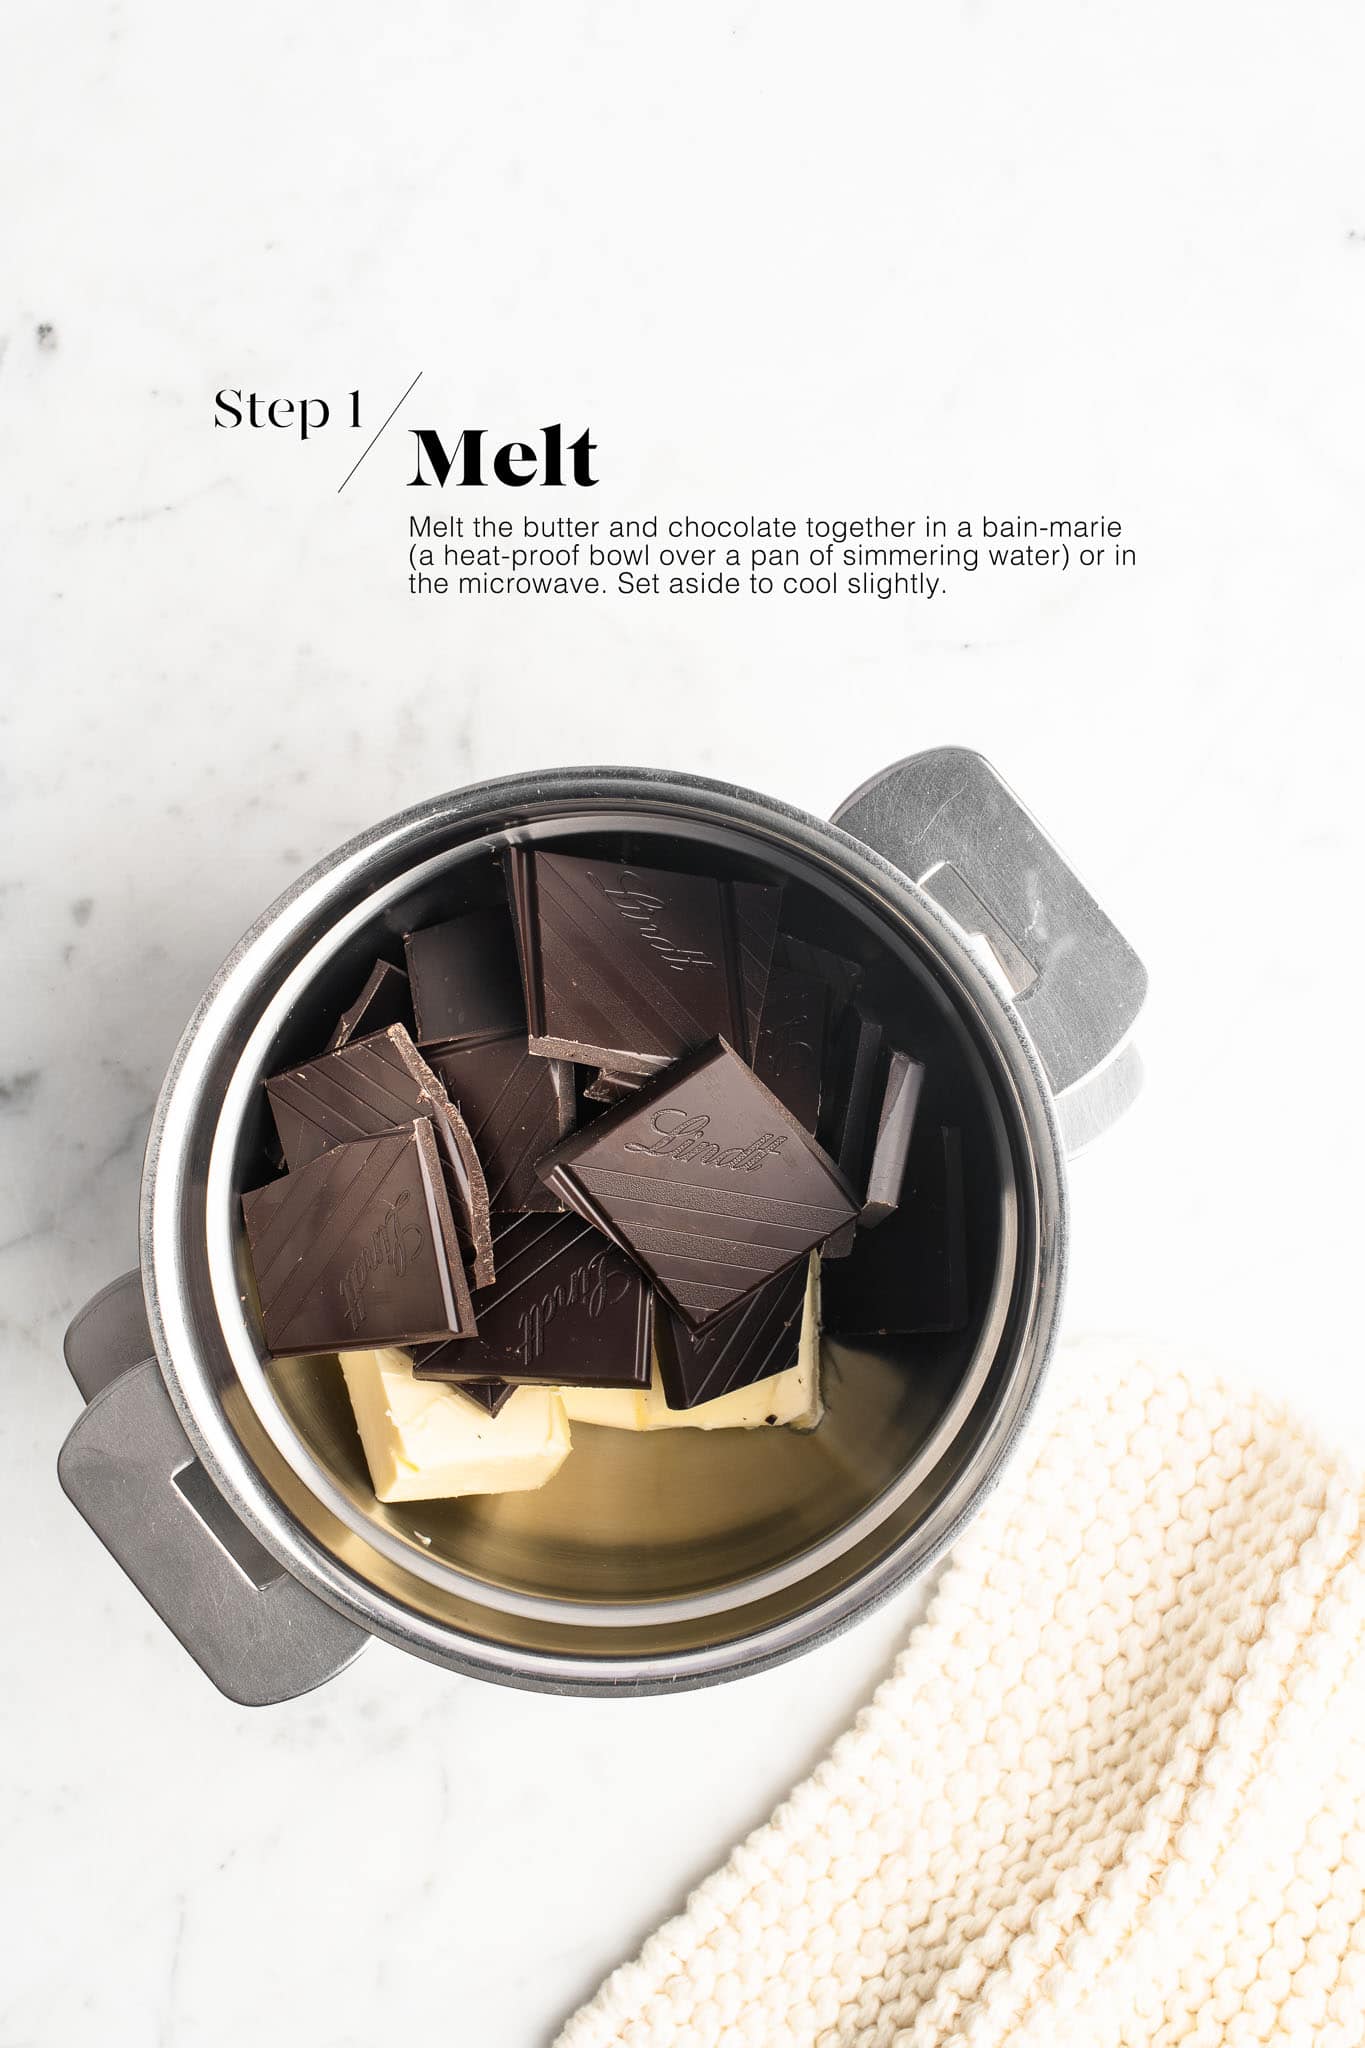
Step 1
Melt the butter and chocolate in a bain-marie (a heatproof bowl over a pan of simmering water), or on low power in the microwave. Set it aside to cool slightly.
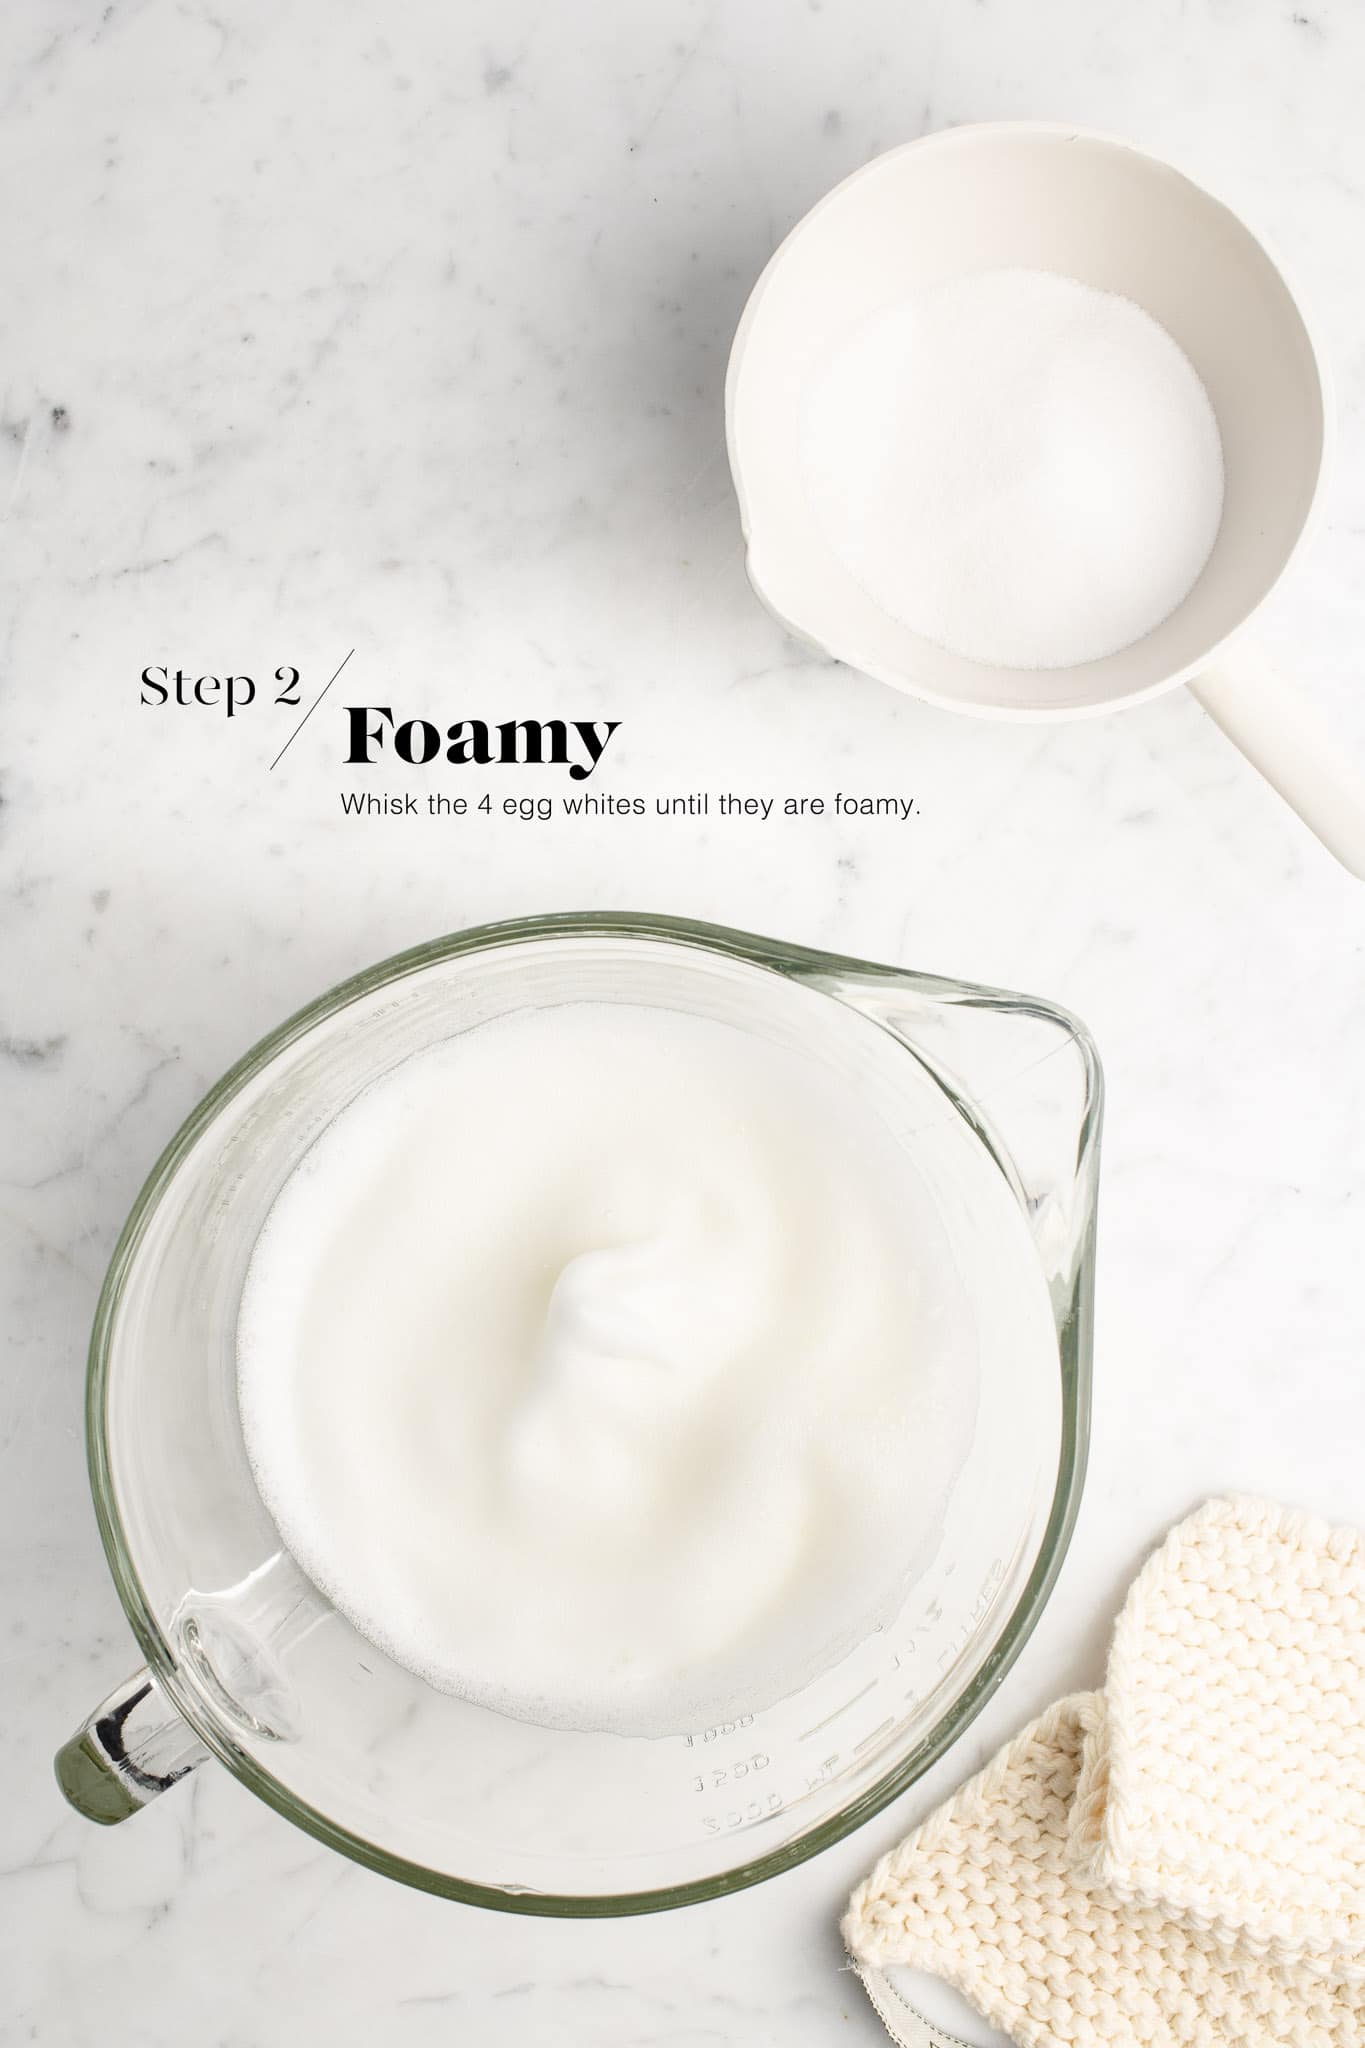
Step 2
Separate 4 eggs into two large mixing bowls. Whisk the 4 egg whites until they are foamy.
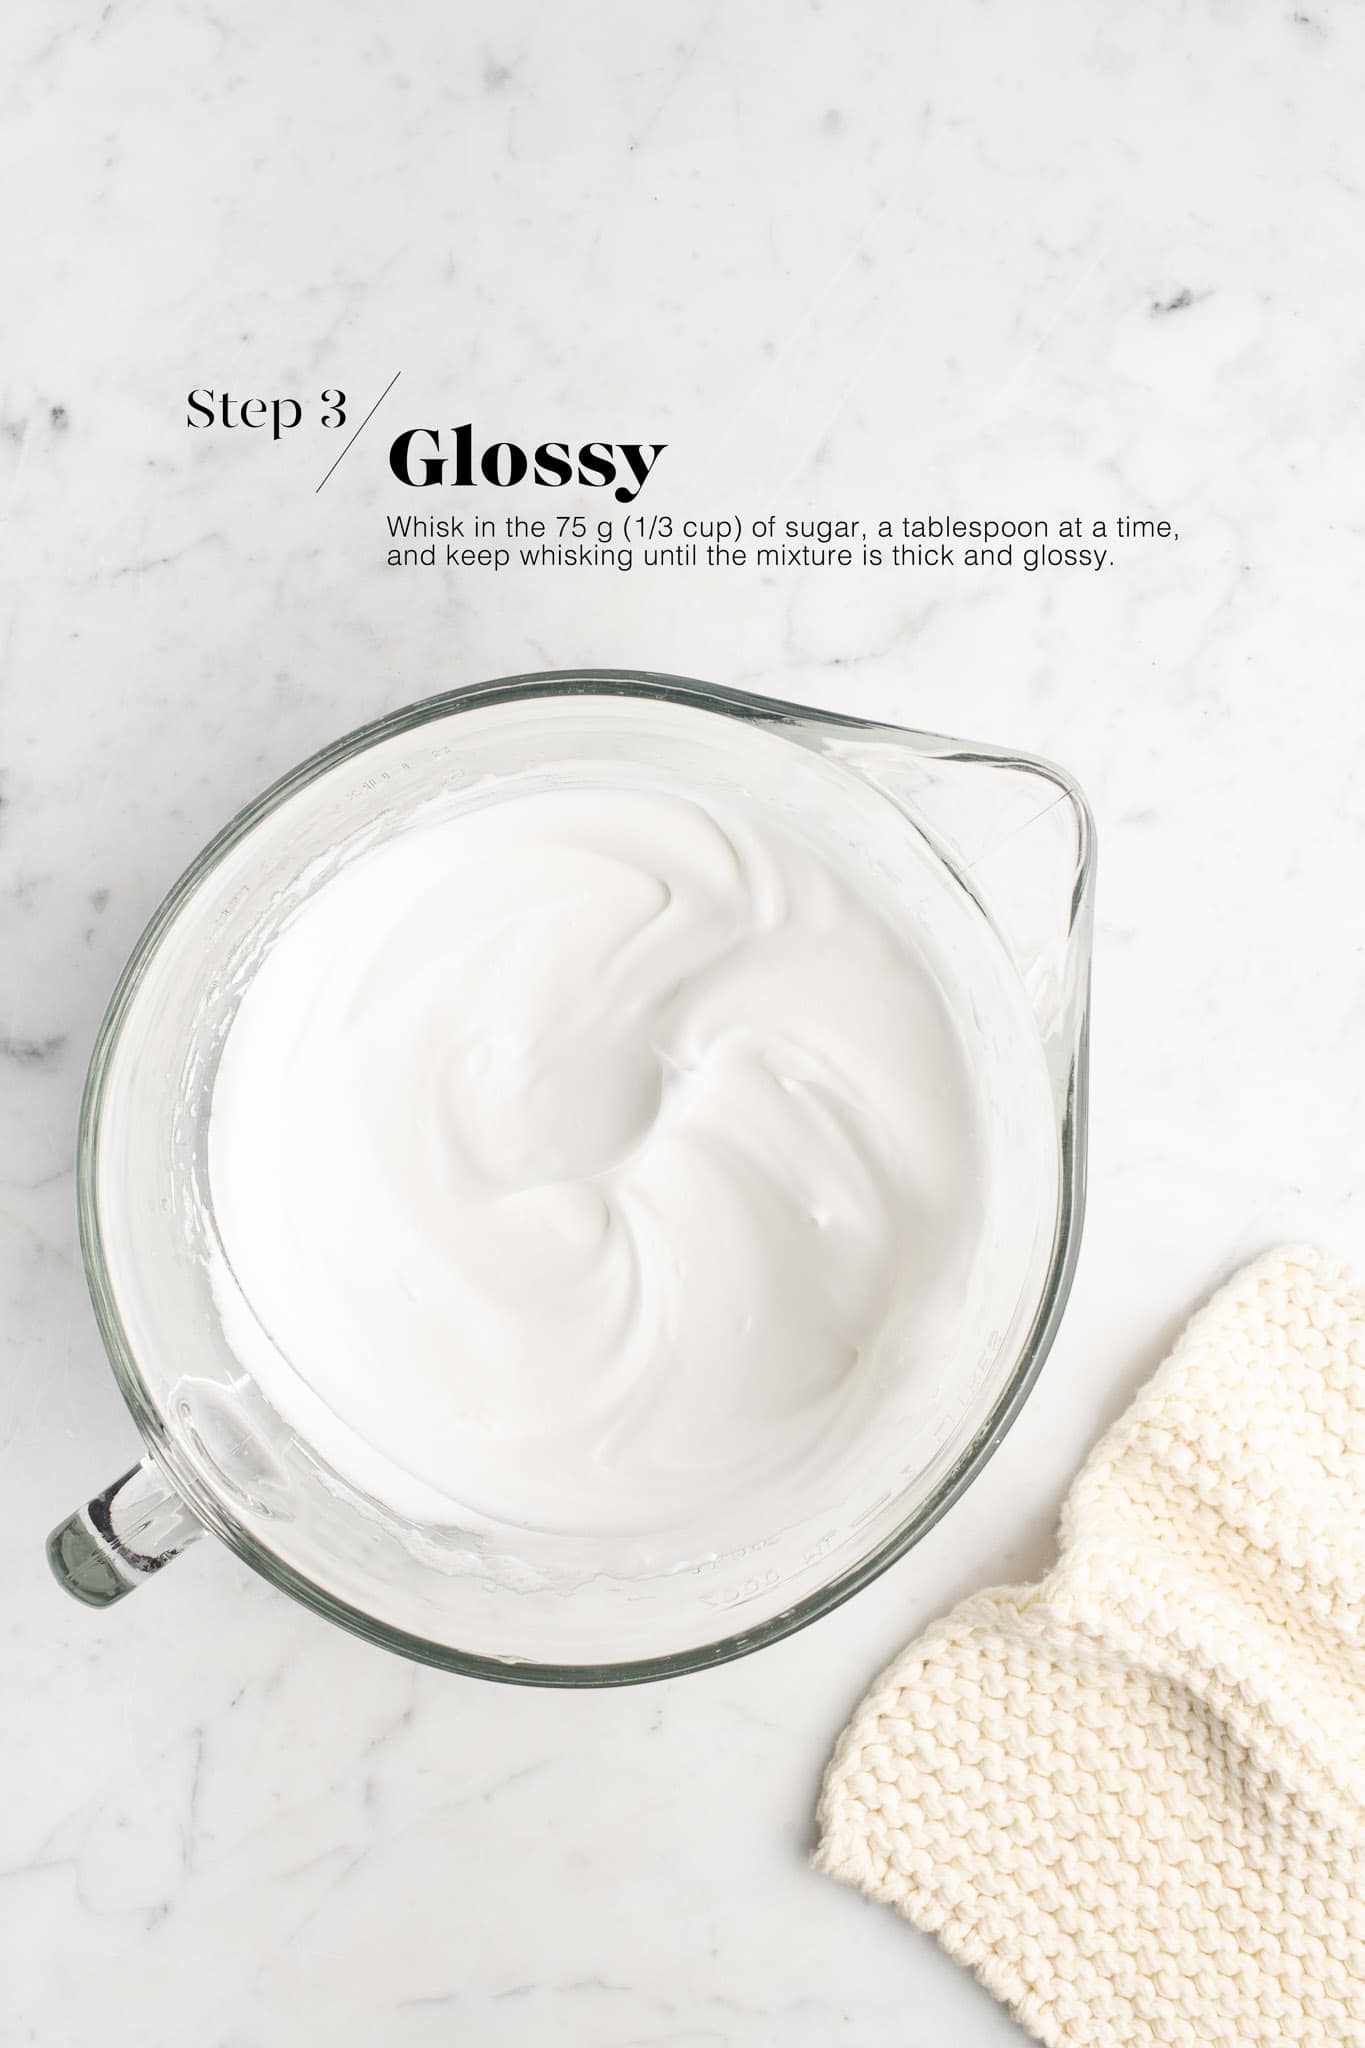
Step 3
To the egg whites, whisk in the 75 g (1/3 cup) of sugar gradually, until the mixture is thick and glossy.
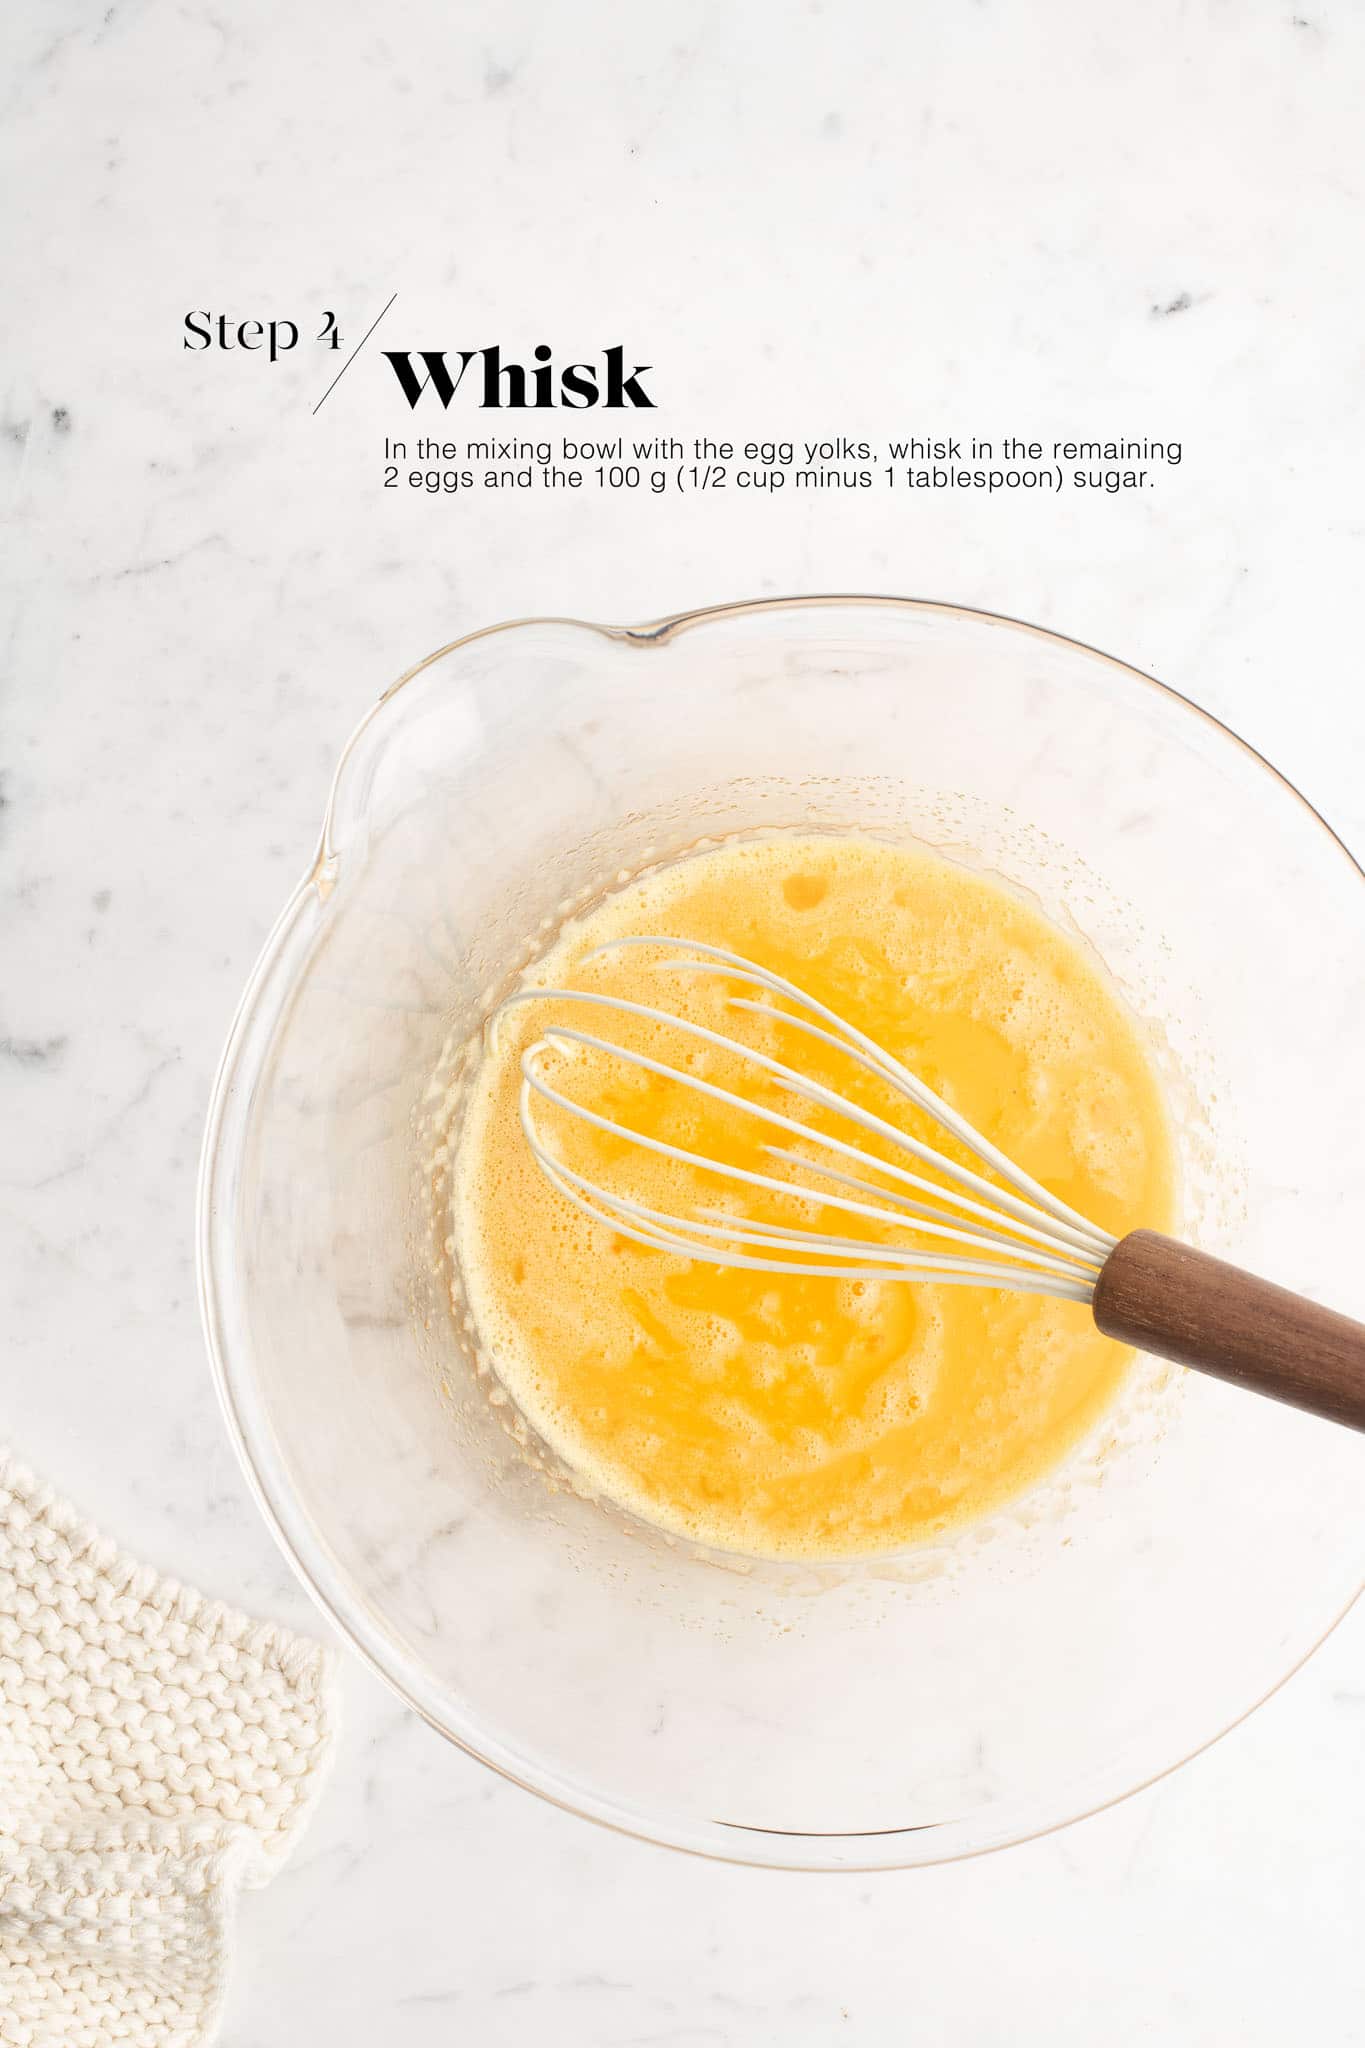
Step 4
In the mixing bowl with the egg yolks, whisk in the remaining 2 eggs, together with the 100 g (1/2 cup) of sugar.
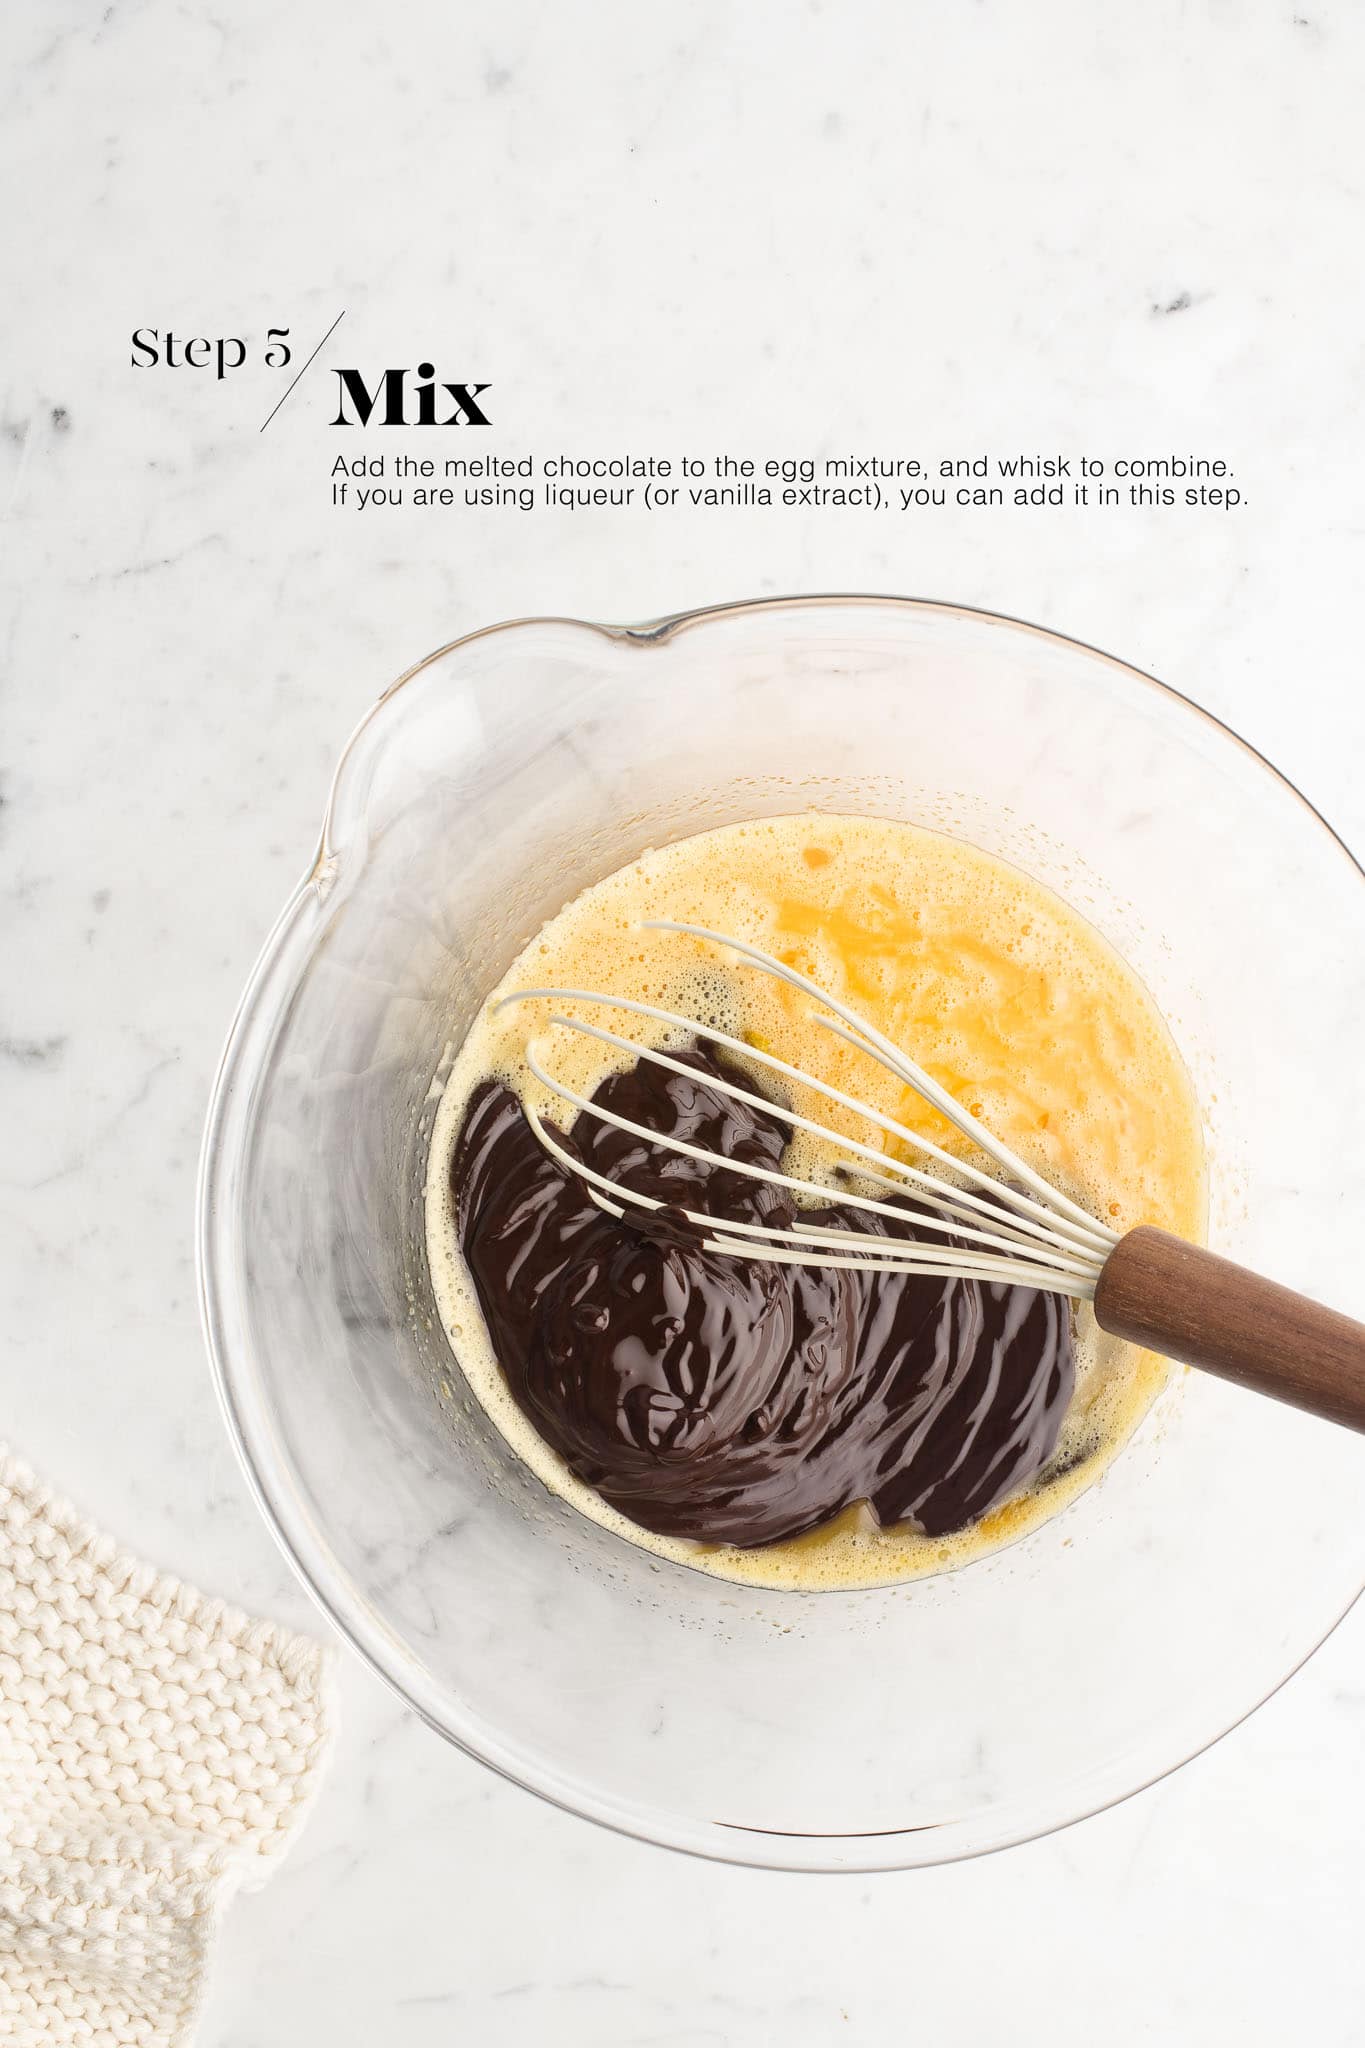
Step 5
Add the cooled, melted chocolate to the egg mixture, together with the vanilla extract.
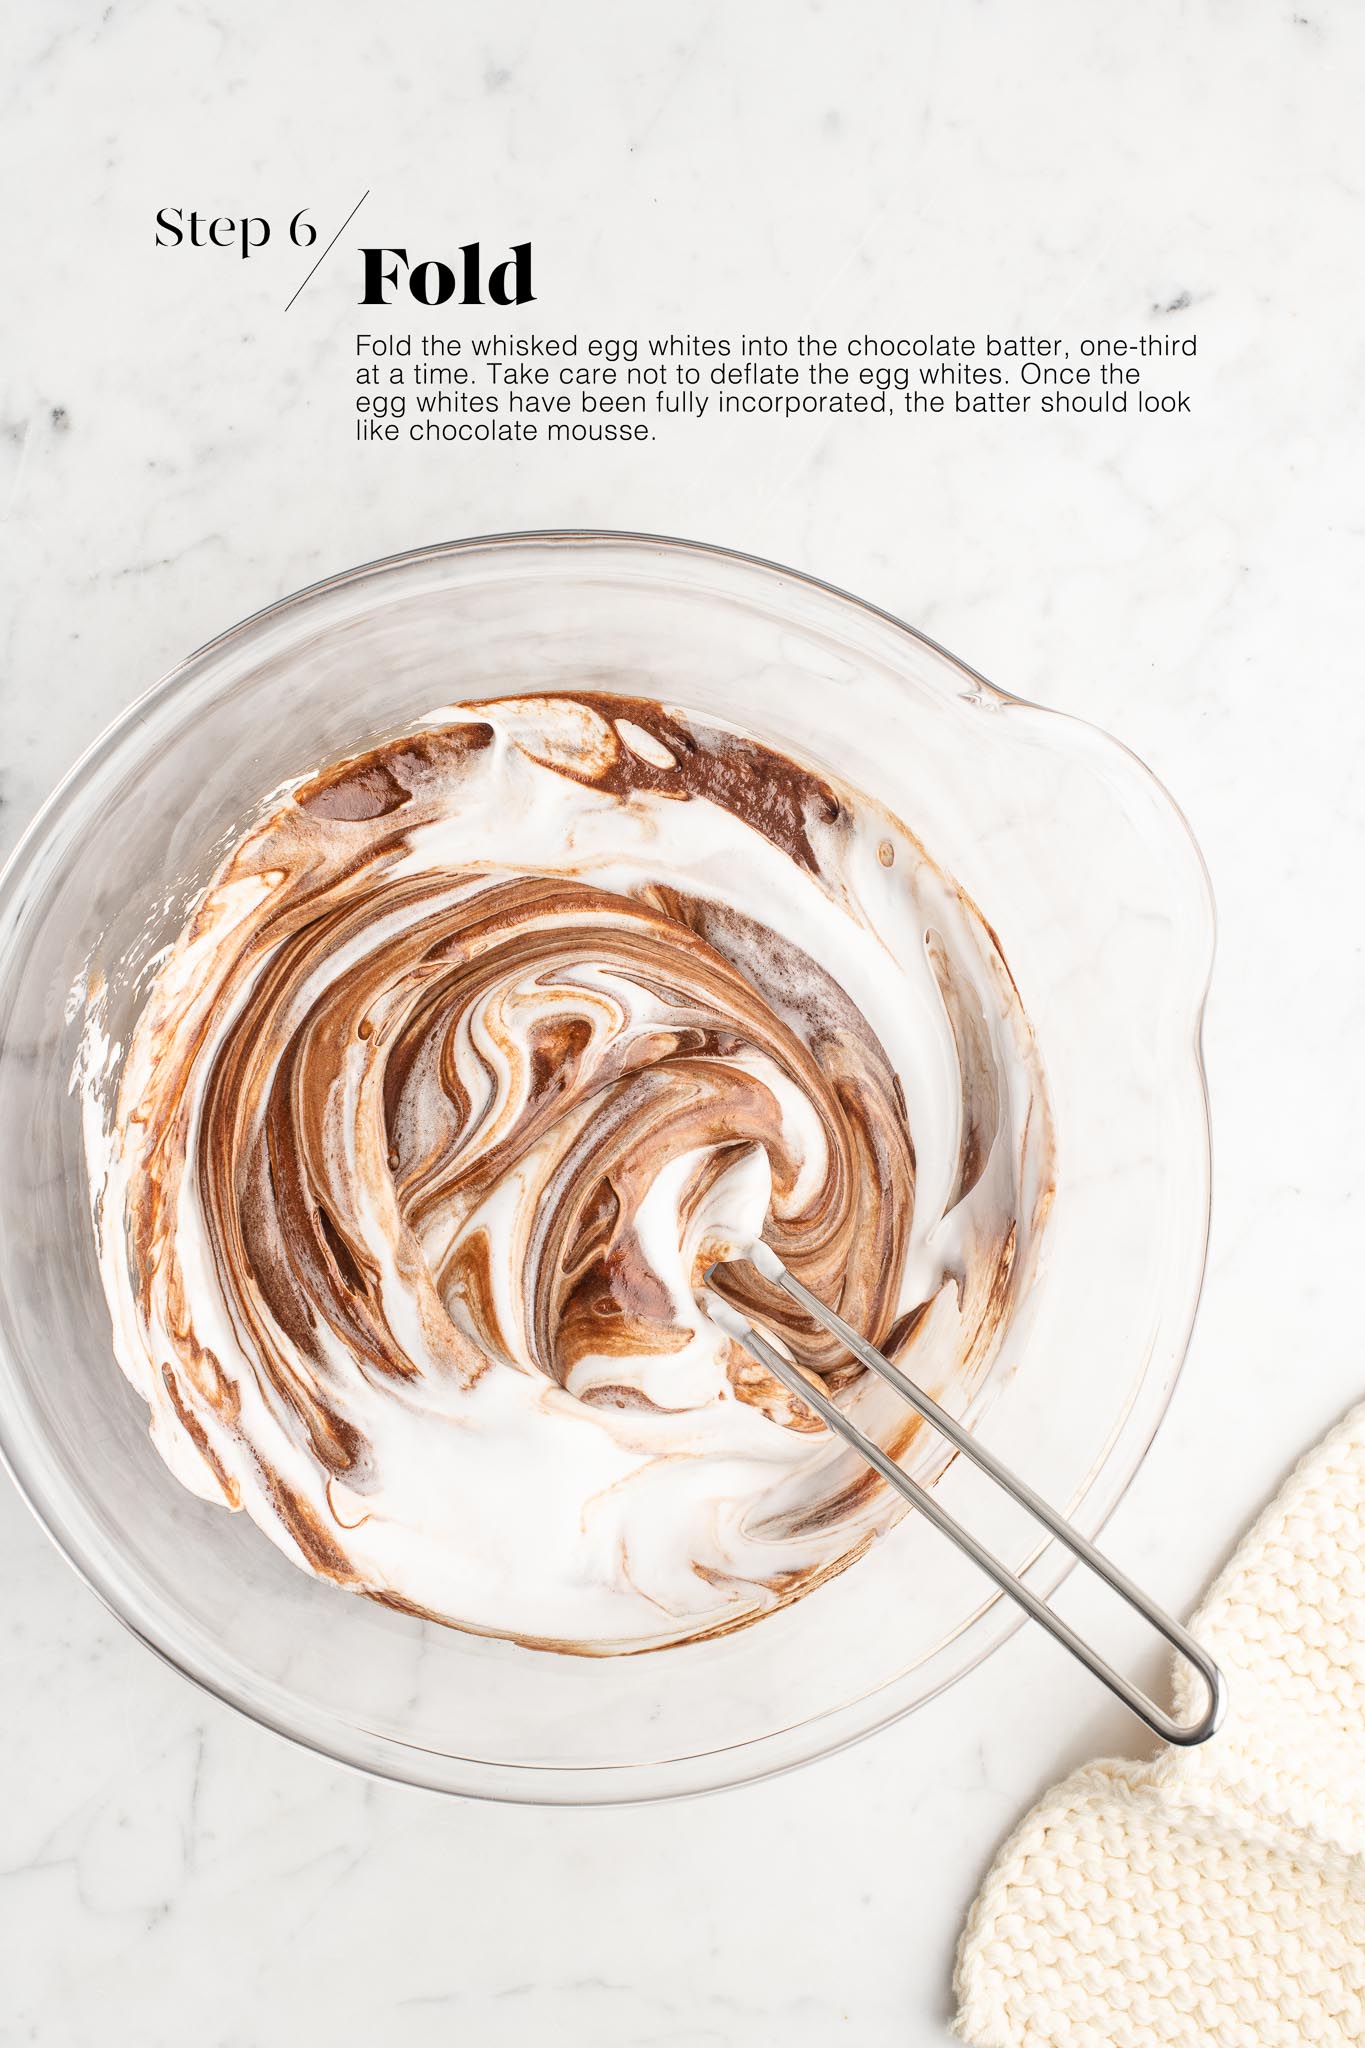
Step 6
Fold in the egg whites, one-third at a time, taking care not to deflate the mixture. Once you have added all of the egg whites, the mixture should look like chocolate mousse.
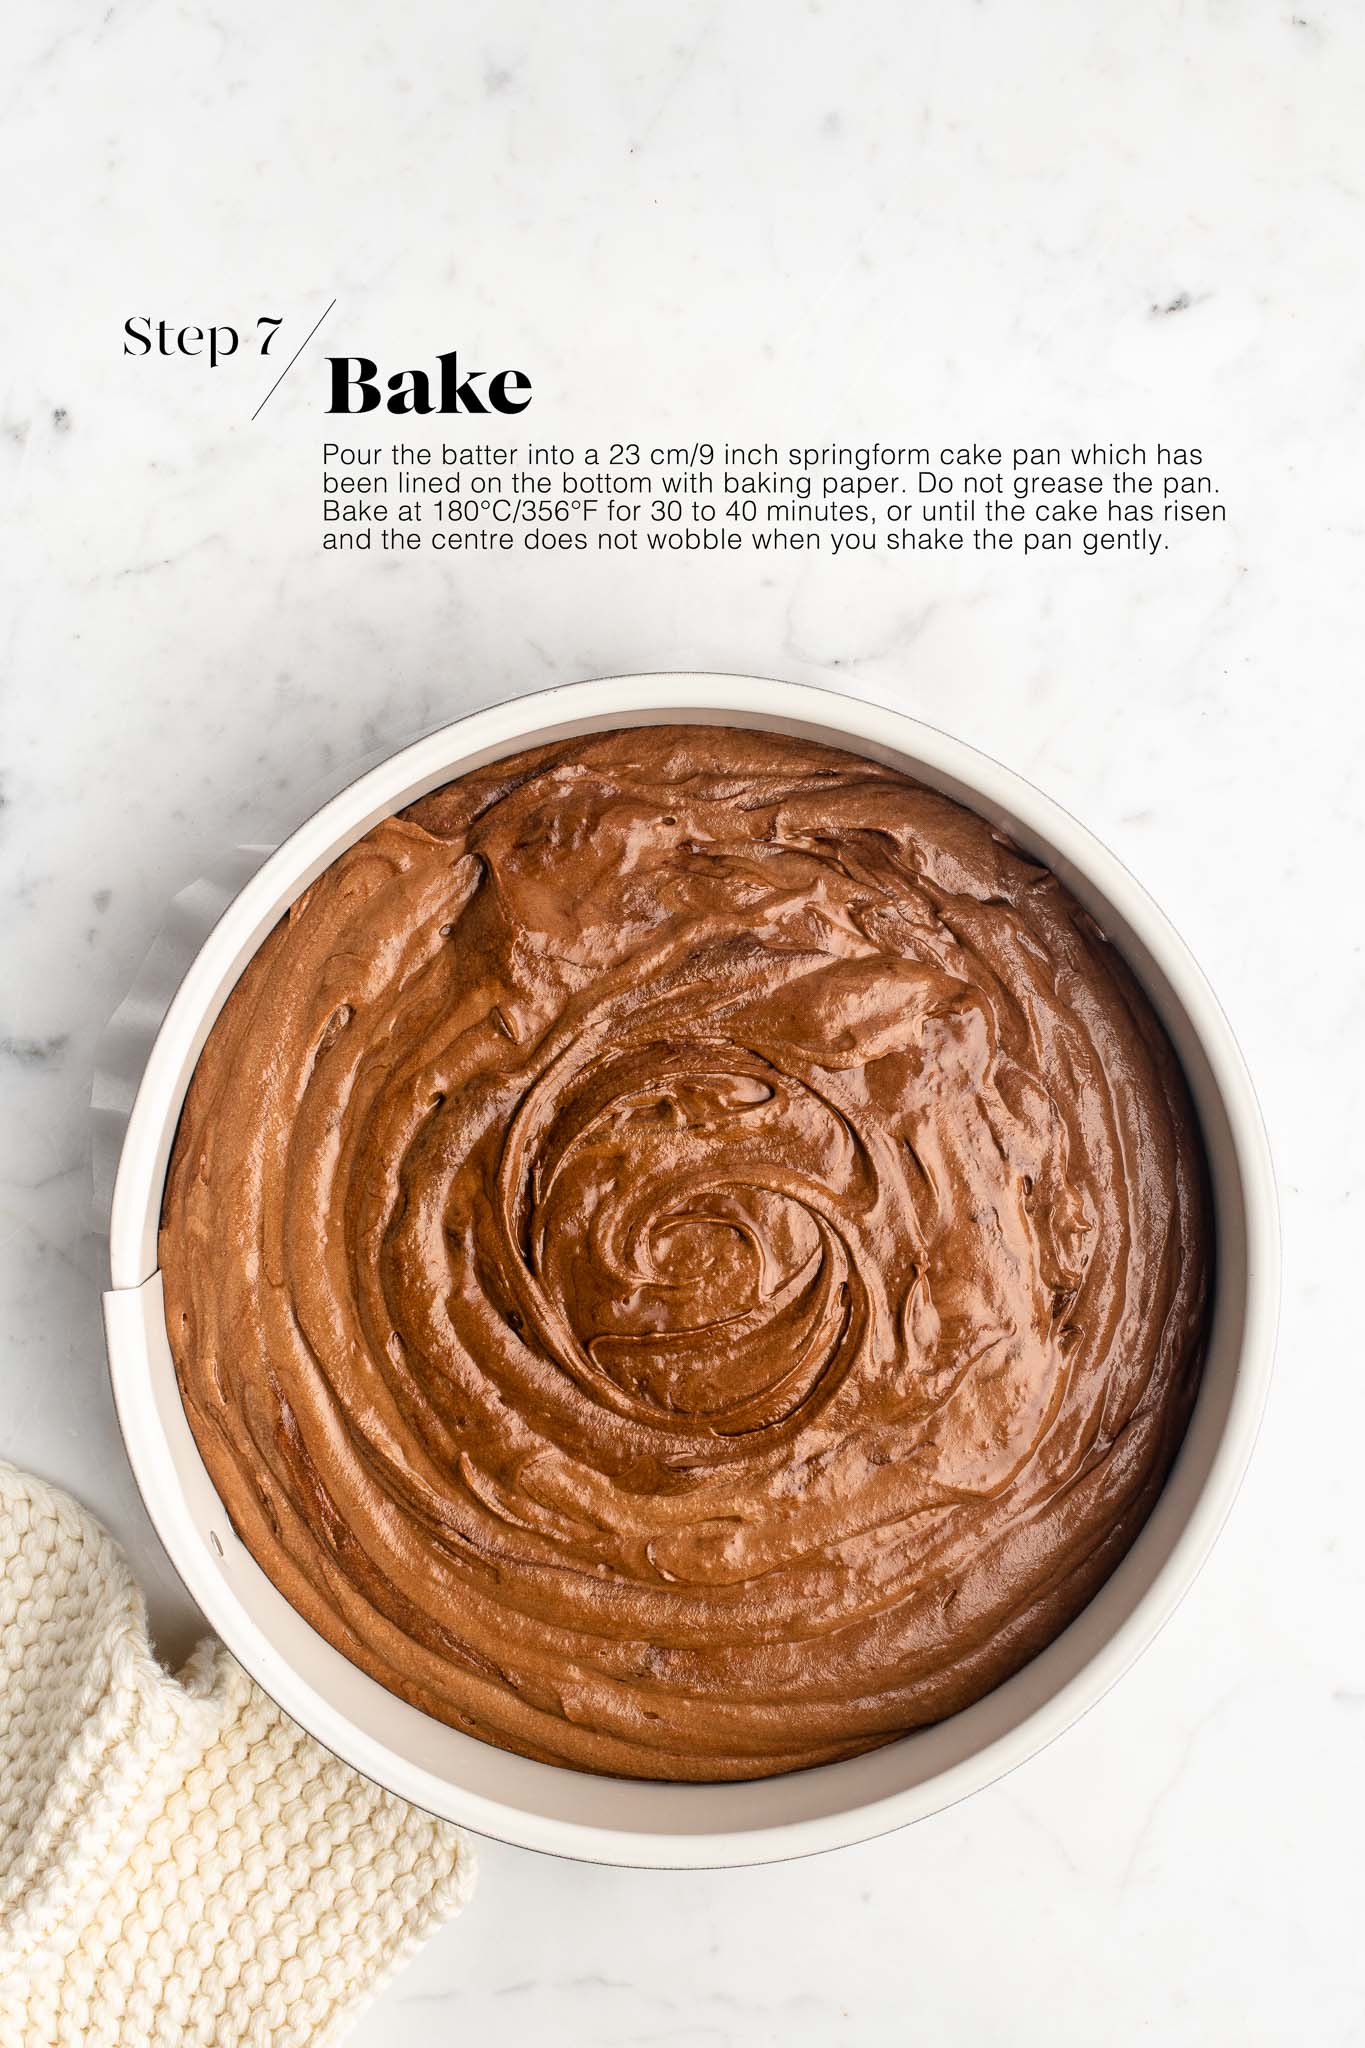
Step 7
Pour the batter into a 23 cm/9 inch springform cake pan which has been lined with baking paper (but do not grease the pan).
Bake the cake at 180°C/356°F for 30 to 40 minutes, or until the cake has fully risen and the centre of the cake does not wobble when you shake the pan gently. I don’t recommend testing the cake with a skewer because it will leave a visible hole in the centre of the cake, but this is fine if you plan to cover the cake later.
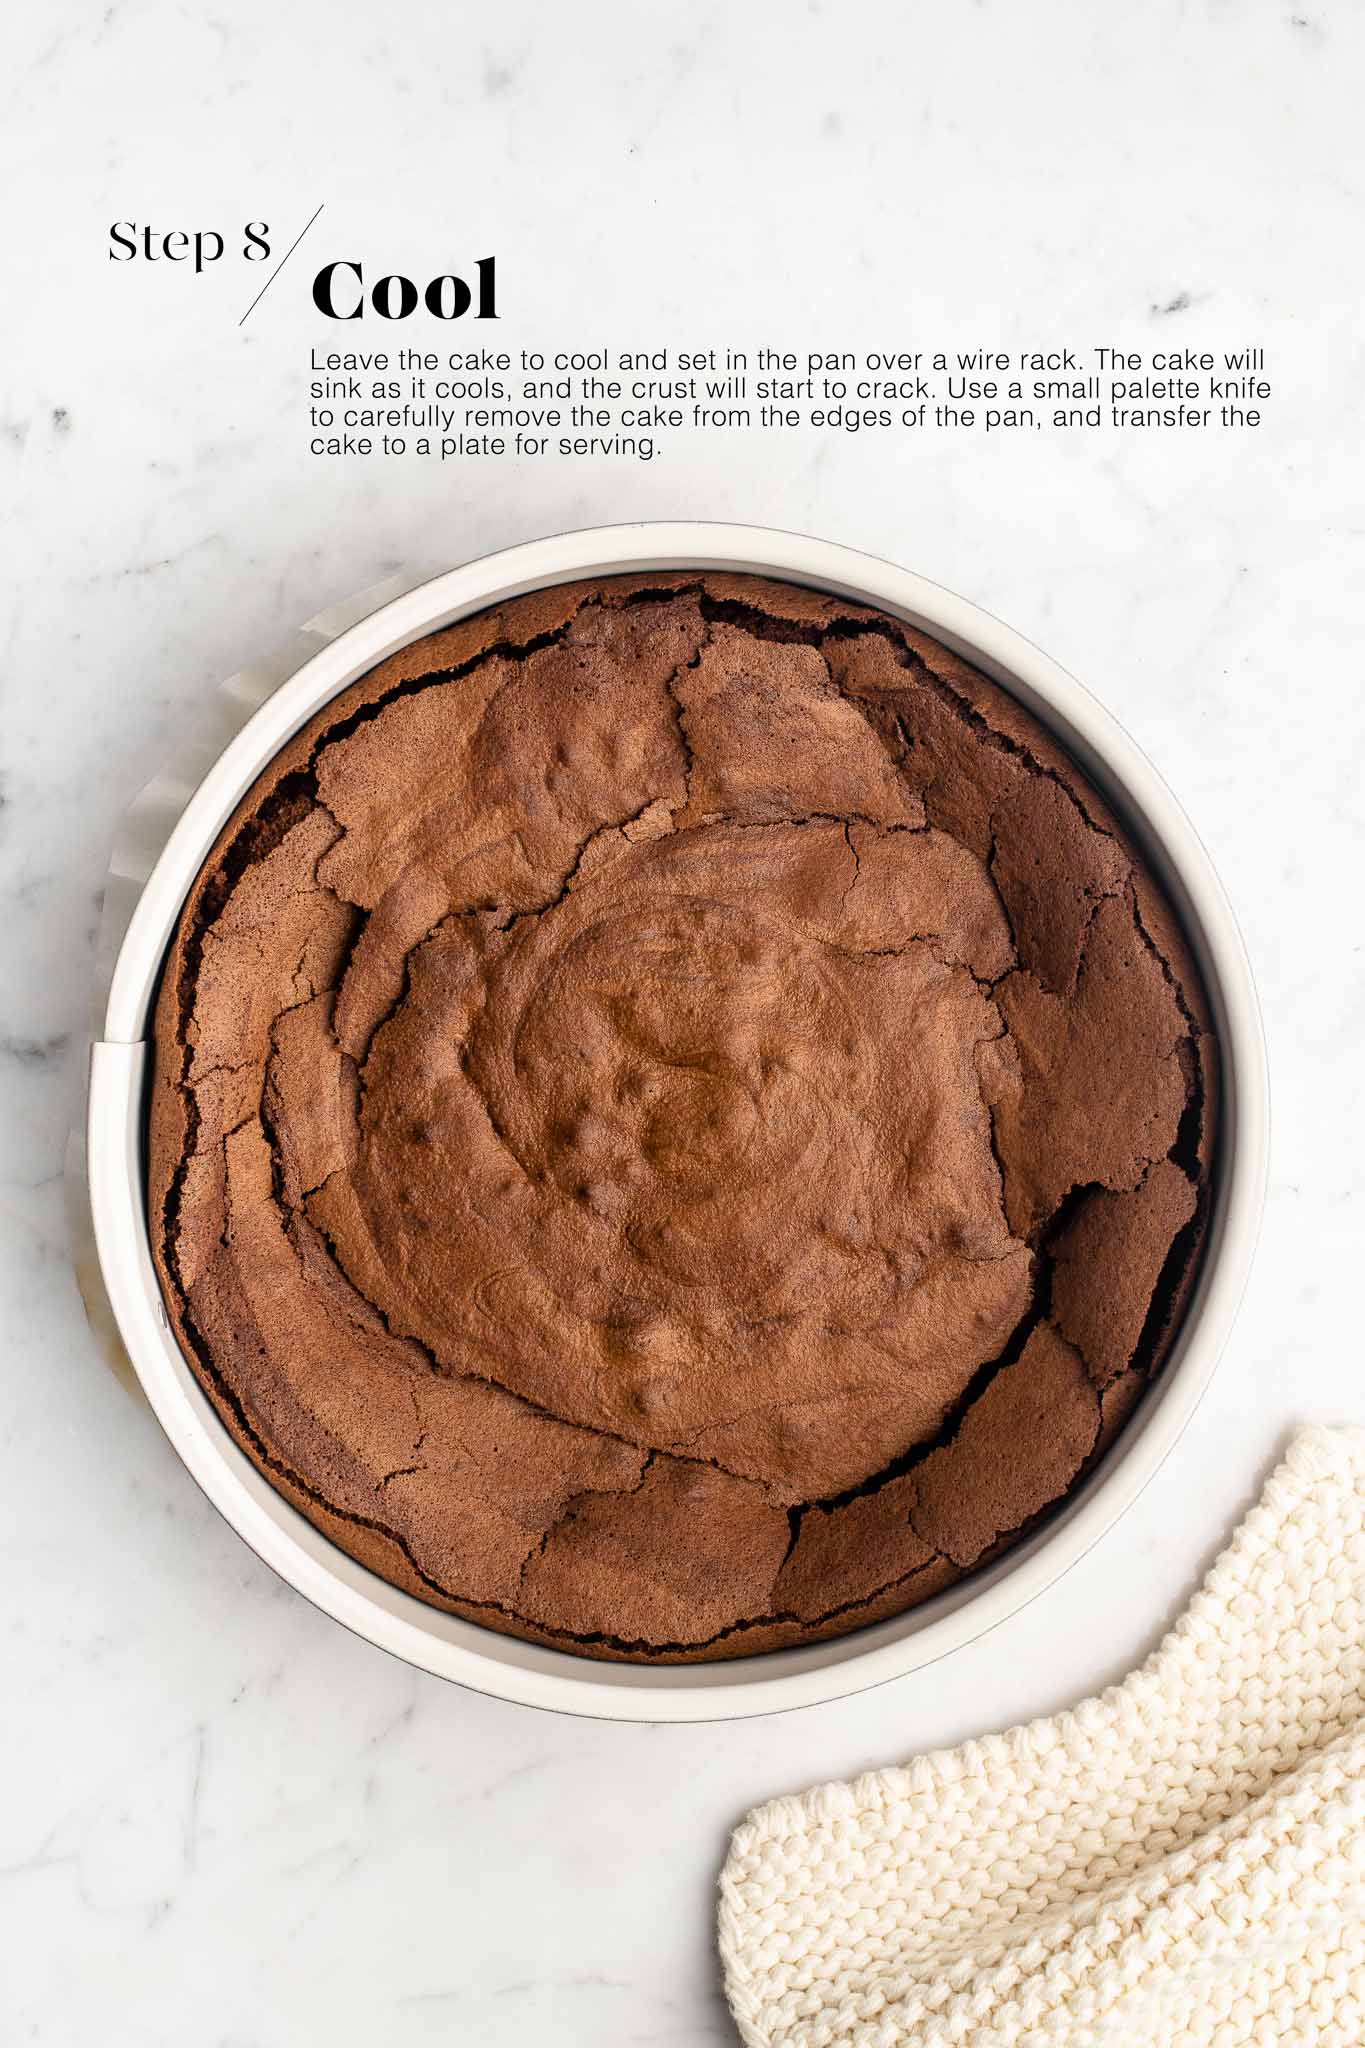
Step 8
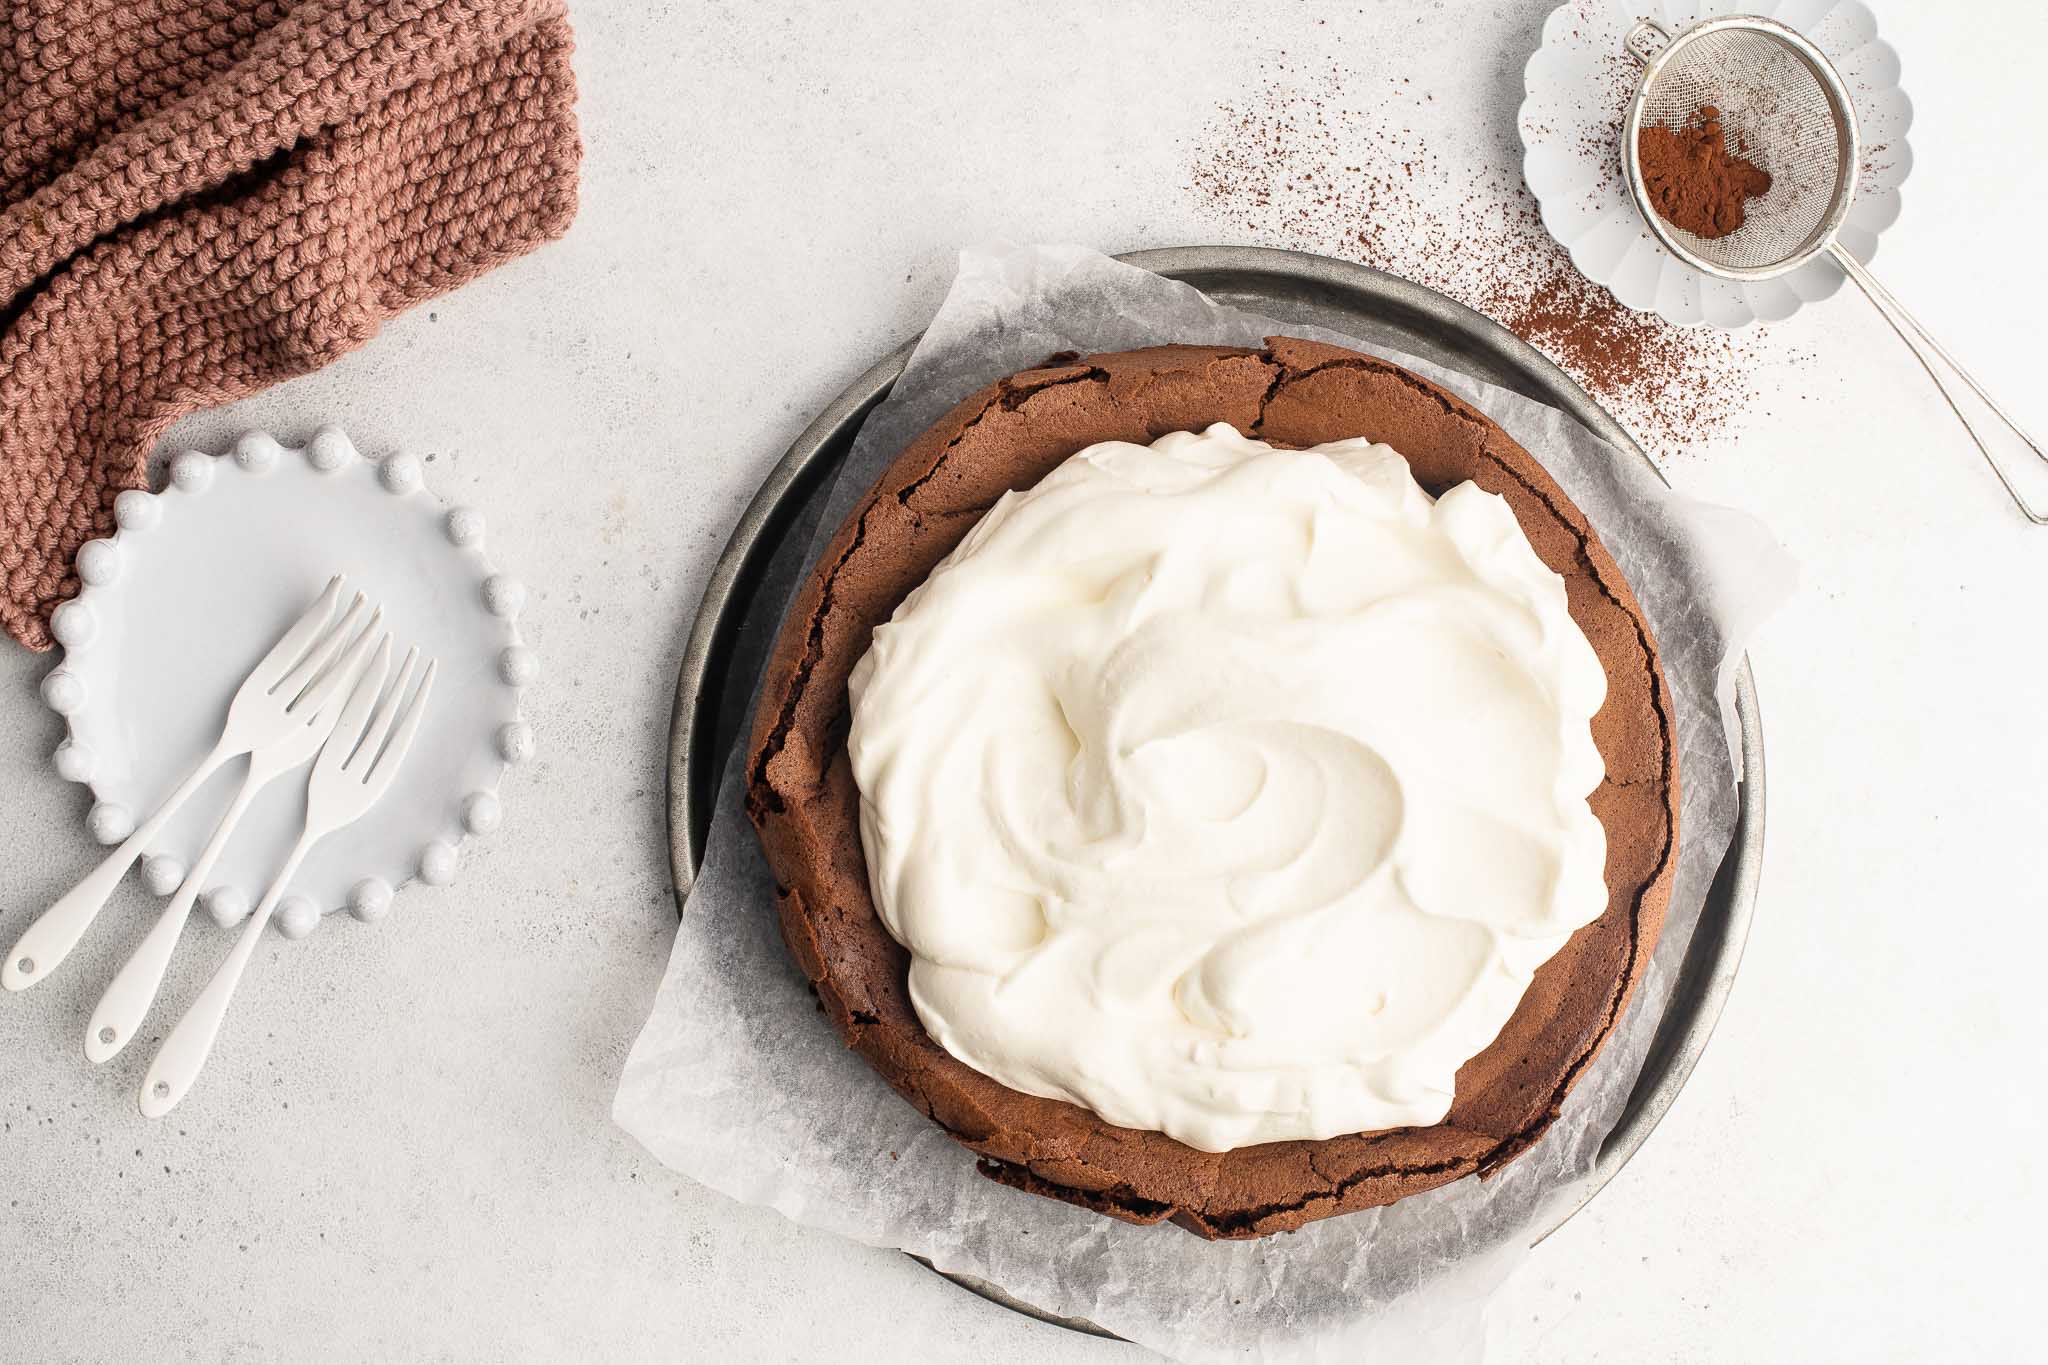
Leave the cake to cool and set in the cake pan over a wire rack. The cake will start to sink as it cools, and the crust will also crack.
Use a small palette knife to carefully remove the cake from the edges of the pan. Transfer the cake to a plate for serving.
Sugar-Coated Easter Eggs
When I first made this cake, which was many years ago, I was living in the US at the time. The Cadbury’s Mini Eggs in the US are a mix of blue, pink, yellow and white eggs, as shown in the photo below.
However, the Cadbury’s Mini Eggs in the UK are a speckled pink, purple, yellow and white, and are also generally more muted in colour (shown in the main photos here).
If you can’t find the same sugar-coated Easter eggs where you live, you could try using other types of locally produced Easter eggs, such as marzipan-coated chocolate eggs or praline-coated eggs, to name a few. Otherwise, some raspberries or chopped strawberries would look just as welcoming.
Tips For Making Easter Egg Nest Cake
- Best quality chocolate. Both the cake and frosting uses a lot of chocolate, and I recommend using a high quality chocolate for this recipe. This doesn’t mean buying the most expensive chocolate – look for chocolate with 60-70% cocoa content.
- Make it ahead of time. This Easter cake happens to be perfect for entertaining as it can be made the night before serving, remaining moist and even improving during this time.
- Room temperature ingredients. When making the chocolate cream, make sure that the melted chocolate has not cooled too much, otherwise it will seize upon making contact with the cream and will not incorporate properly.
- Keep leftovers in the fridge. Owing to the cream topping, you should keep any leftover cake in the fridge.
Easter Egg Nest Cake
Ingredients
For the Chocolate Cake
- 250 g (8 oz) dark chocolate, 60-70% cocoa
- 125 g (1 stick plus 1 tablespoon) unsalted butter
- 6 eggs, separated
- 100 g (½ cup) caster sugar, (superfine sugar)
- 75 g (⅓ cup) caster sugar, (superfine sugar)
- 1 teaspoon vanilla extract
For the Chocolate Frosting
- 125 g (4 oz) dark chocolate, 60-70% cocoa
- 250 ml (1 cup) double cream, (heavy cream)
- 1 teaspoon vanilla extract
- 300 g (10 oz) sugar-coated chocolate eggs
Instructions
For the Chocolate Cake
- Preheat the oven to 180°C/350°F (without fan).
- Line the bottom of a 9 inch/23 cm springform cake tin with baking paper, but do not grease the sides of the tin.
- Melt the chocolate with the butter in a bain-marie (or a heatproof bowl over a pan of simmering water). If you have an induction stove, you can melt the chocolate and butter directly in a small saucepan over low heat. Set aside to cool slightly.
- Whisk 4 egg whites (keep the eggs yolks for later) until firm, then gradually add 100 g (1/2 cup) of sugar and whisk until the egg whites are glossy and have firm peaks.
- In a separate bowl, whisk 2 whole eggs with the reserved egg yolks, together with the remaining 75 g (1/3 cup) sugar.
- Fold in the vanilla extract and melted chocolate.
- Add a spoonful of the whisked egg white mixture and mix briskly.
- Then fold in the remaining egg white mixture, about one-third at a time.
- Pour the mixture into the cake tin and bake for 30-40 minutes, or until the cake is no longer wobbly in the centre.
- Use a small palette knife or similar to carefully run along the outside edge of the cake, to prevent it from sticking to the sides of the pan. As the cake cools, it will sink in the middle, and if the cake is stuck to the sides of the pan, the top of the cake may crack. This is nothing to worry about anyway because you will be covering the cake later with frosting.
- After 10 minutes, release the cake from the springform pan, but leave the cake on the wire rack to cool completely.
- Once the cake has cooled completely, remove the springform pan.
- Use a cake lifter or similar tool to carefully remove the cake from the baking paper, and place it onto a large plate or cake platter.
For the Chocolate Frosting
- Melt the chocolate in a bain-marie (or a heat-proof bowl over a pan of simmering water). If you have an induction stove, you can melt the chocolate directly in a small saucepan over low heat.
- While the chocolate is cooling, whip the cream until it is firm but not stiff – it should be soft enough to spread.
- Fold in the vanilla extract and melted chocolate.
- Spread the chocolate cream evenly over the cake.
- Decorate with the sugar-coated chocolate eggs.
Kitchen Notes
- MAKE-AHEAD TIPS
I often make the cake the night before serving and leave it (unfrosted) on the counter overnight. The cake will sink in the middle and crack as it cools. - STORAGE
Due to the cream in the chocolate frosting, any leftover cake should be kept in the fridge. - RECIPE CREDIT
This recipe has been adapted from Feast by Nigella Lawson. - OVEN TEMPERATURES
All recipes on this website state temperatures for a regular oven (i.e. a conventional oven without fan). If you have a convection oven with a fan, please consult the manufacturer’s handbook on how to adjust the temperature and baking time accordingly. - CONVERSIONS
To convert from cups to grams, and vice-versa, please see this handy Conversion Chart for Basic Ingredients.
Did you make this recipe?
Please leave a comment below and share your photos by tagging @eatlittlebird on social media and using #eatlittlebirdUpdate
This recipe was first published on 9 April 2012. It has been updated with more comprehensive recipe notes and new photos.


Ahhhh, just when (sadly) Easter is winding to a close, Easter Monday is nearly over, and our eggs and hxb have been greedily enjoyed you post this and give me just the extra easter boost I need, how lovely and kind you are!! Now you say that you make this cake when you have guests, can I hope you’ve had a lovely friend filled easter with people to share this gorgeous decadence with? I do hope so and if you have they’re lucky lucky people.,
I’ve not made this cake yet but you inspired me with the raspberry or strawberry idea. We have a big dinner coming up for parents and their friends and I’ve been tossing ideas back and forth for dessert (being so near bakewell i was thinking Nigella’s cranberry bakewell tart from HTE) but suddenly I’m thinking proudly presenting this beauty ablaze with berries, so beautiful.
Another beautiful inspiring post and not least because of your stunning photos.
Julia, you are so lovely 🙂 I made this cake yesterday for when we had some friends over for afternoon tea. I think I’m guilty of overloading their little boy with too much chocolate – he was possibly on a sugar high by the time they left our place! Our friends really enjoyed this cake and I made sure they took a few slices home with them 🙂
I’m surprised that you’ve never made this cake! I think you will love it – it’s easy to prepare and always impresses. I’ve made the Chocolate Cloud Cake a few times and have decorated it with raspberries on top of the whipped cream. But raspberries with chocolate cream would be even more decadent! Please let me know what you end up making … I’m curious about the Cranberry Bakewell Tart because that’s something I’ve always wanted to try but have never made.
I hope you have had a lovely Easter this year – I know from your FB page that you have certainly been eating well 🙂
Hi,
WOW! What a cake! Looks irresistable! 😛
I just wanted to let you know that I nominated you for the versatile blogger award. Check out my post to nominate the bloggers that you follow and enjoy. Take care
Johanna
http://www.meandmysweets.blogspot.com
Oh thank you, Johanna! That is so sweet of you to pass this award to me 🙂 Tack så mycket!
What a gorgeous Easter cake! I love the egg topping, such a gorgeous way to decorate it. I love the raspberry idea too. I have yet to try Nigella’s Cloud Cake, but I will soon thanks to your recommendation. I always adore Nigella’s recipes, especially anything chocolate.
Happy belated Easter!
Happy belated to Easter to you, also!I love this Easter version mainly because of the Easter egg decoration, but I have to admit that it makes slicing the cake a bit difficult, LOL! Nigella’s Chocolate Cloud Cake remains one of my most repeated recipes and I hope you will get a chance to try it soon 🙂
I love this cake Thanh, and all it’s variations! I’ve made one laced with Chambord and decorated with raspberries and more Chambord whipped into the cream, one with pears, a coffee one. Gawd I lurve Nigella’s cloud cakes! Genius recipe made to tweak & personalise. Your eggies look positively psychedelic in this piccie too – American ones must have more food colouring than ours which are much paler pastels!
Wow, you really have experimented a lot with this cake! I have to say that I have also changed the liqueur here and there, depending on what dishes I had served beforehand. I’m glad that you’ve also tried it with raspberries – it’s such a classic combination with chocolate.
And I didn’t notice that the eggs were brighter in colour! I’ve just looked at photos of the same cake I made last Easter using eggs which I bought in the UK and the pink is much paler … These Cadbury’s Easter eggs are made in the US by Hershey’s under licence, something which I quickly identified upon eating them as I find Hershey’s chocolate has a distinct taste and sweetness.
This is so cute!!!
HAppy Easter!
Thanks, manu! Happy belated Easter to you as well!
That is one cake i can have to myself! and can be made ahead?! done!
This cake can absolutely be made ahead of time, and be even better for it 🙂
Great looking cake. Shame Easter is over, but then again …
Well I only managed to sneak this cake into Easter … I missed out on making hot cross buns and all the rest. But as you say … 😉
Happy Easter. The cake looks so beautiful.
Absolutely perfect. I love those little mini eggs, although highly addictive.
Oh I agree but, luckily, we only indulge once a year at Easter 🙂 Now if only I could find sugar-coated dark chocolate eggs …
I made this yesterday for a lunch today.
It was amazing and one of the best chocolate cakes I had. I made the original Nigella cloud cake recipe with Cointreau and orange in the base, followed by the above for the topping layer adding a further dash of Cointreau rather than vanilla to the topping. I made a layer of white chocolate curls in the nest and added milk chocolate easter eggs.
Hi Rachelle,
Thank you for your comment. I love how you decorated this cake – white chocolate curls with milk chocolate eggs sounds so lovely! As the sugar-coated eggs are hard to come by where I live, I think your idea is a beautiful alternative. Thanks for sharing!
One of my favourite recipes from Nigella!
Oh my gosh I need to try ASAP! This is delicious. Thanks for the recipe!
This is the cake that keeps giving! The best gluten free chocolate cake at anytime of the year! For birthdays I just whip plain double cream and top it with raspberries and for Easter, when I stopped in London I bought some Cadbury candied eggs two months ahead of Easter for the very purpose of making this cake! Thank you Thanh for the recipe! I miss your chocolate birthday cakes!
Thanks, Pammy! So glad you have enjoyed this recipe xxx
Beautiful cake for Easter!
I made this cake for my colleagues today and it was devoured instantly. Such a beautiful looking cake and so delicious!
Love this Nigella recipe! I try to make it every Easter too, even though there is always so much chocolate at this time of the year. But it’s such a beautiful cake to look at and eat.
Love this recipe!
I make this cake every Easter, although it was hard to find the sugar-coated eggs this year. I started to panic! But all good now 🙂 Can’t wait to make this cake again today.