Piñata Cake
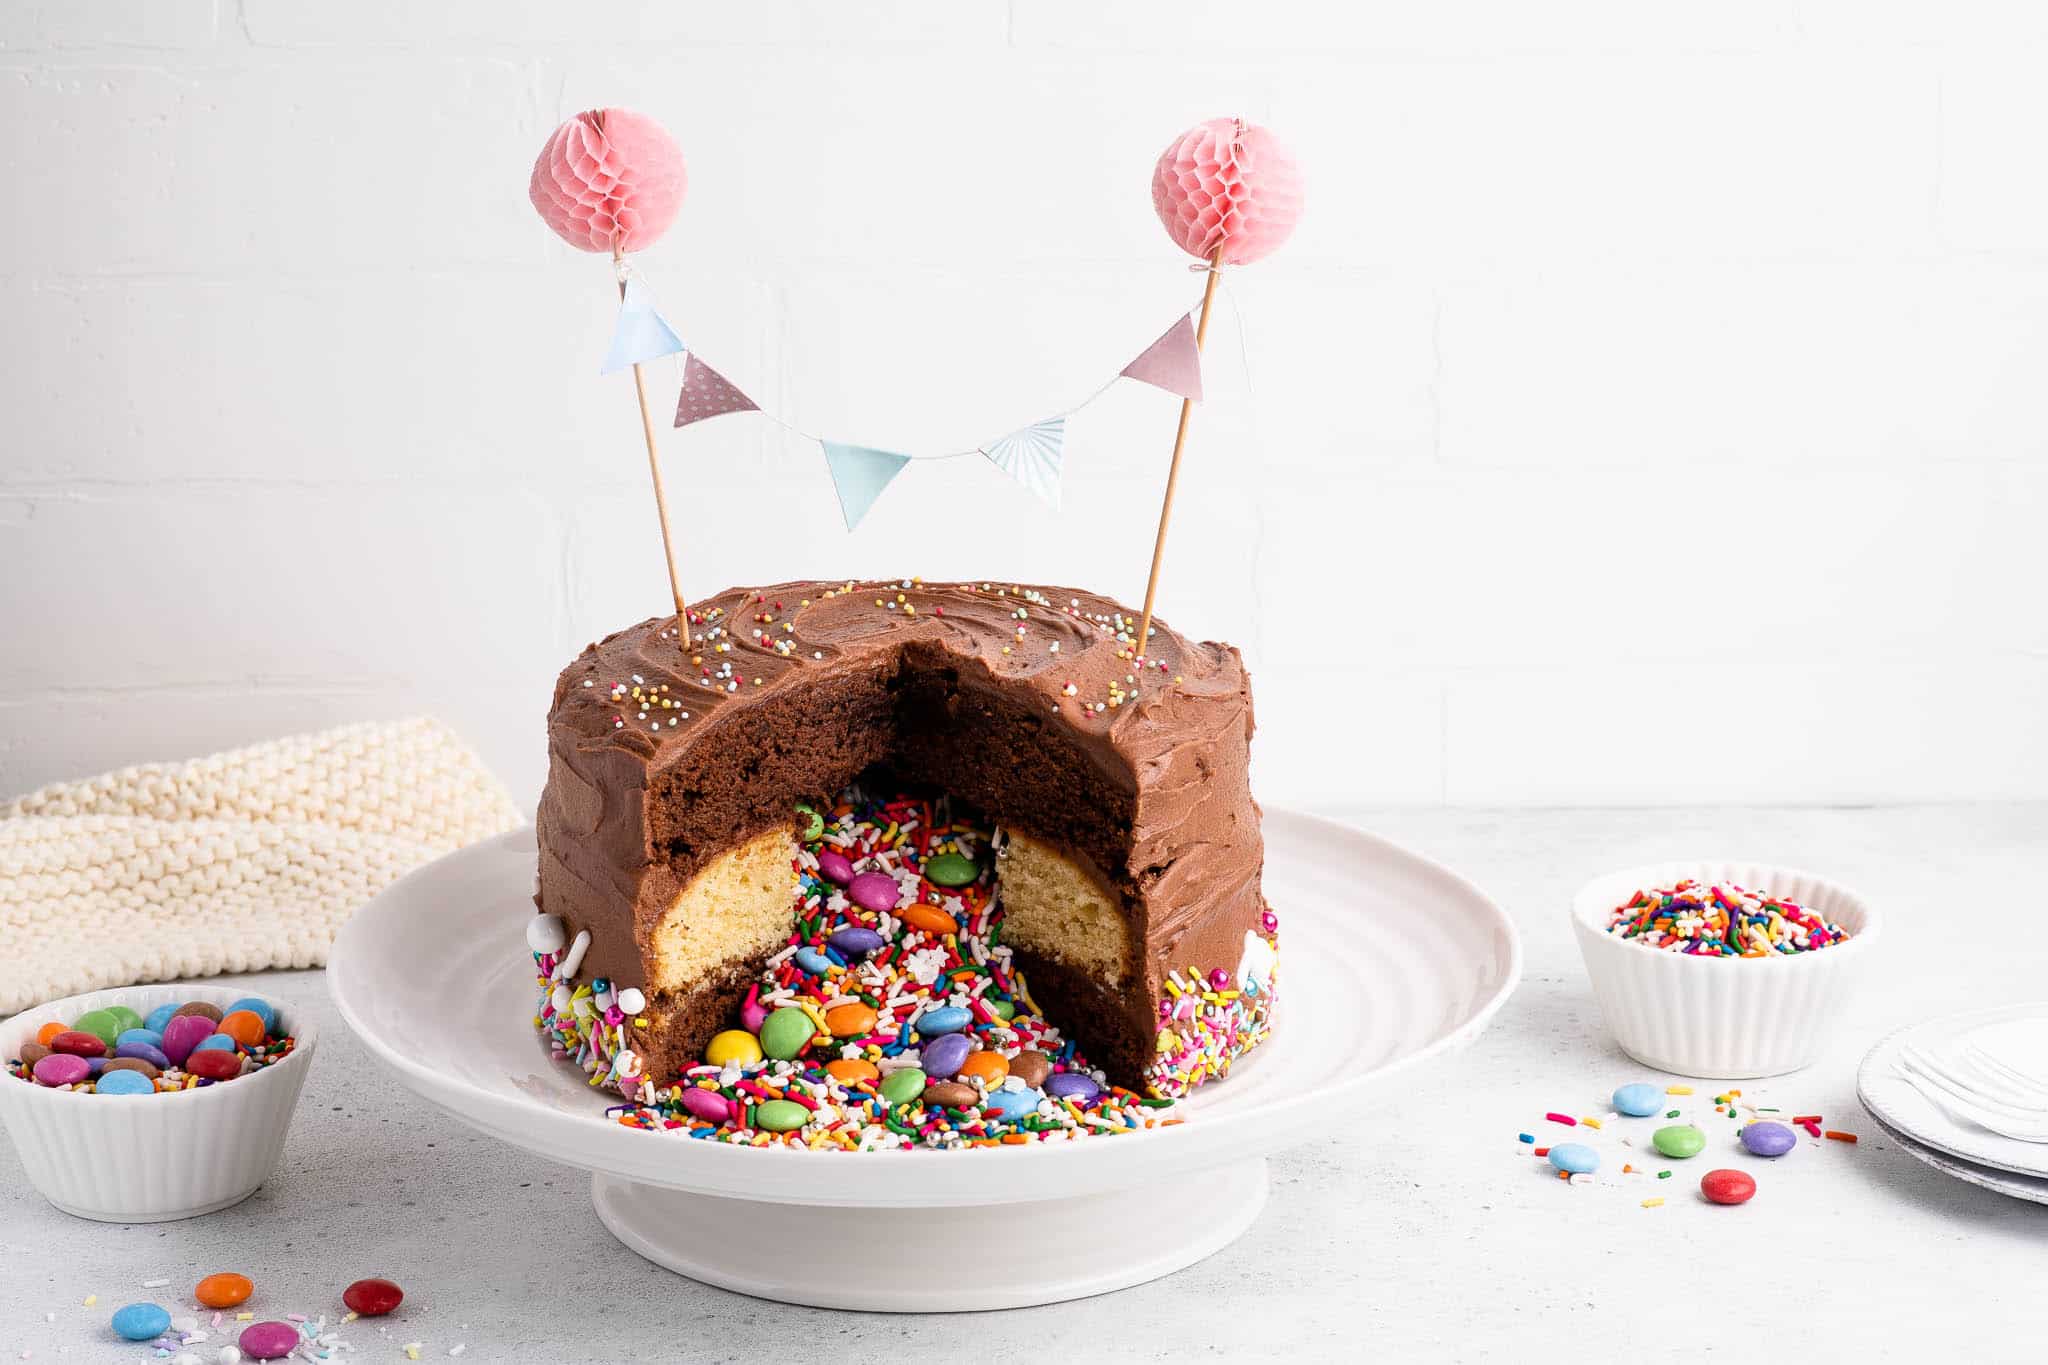
If you are looking for a fun birthday cake with major wow factor, this Piñata Cake is the recipe you need! In fact, now that I have made it several years in a row for both of my kids’ birthdays, I can’t imagine a birthday party without this Piñata Cake. Who can resist a cake filled with candies and sprinkles?!
What is a Piñata Cake?
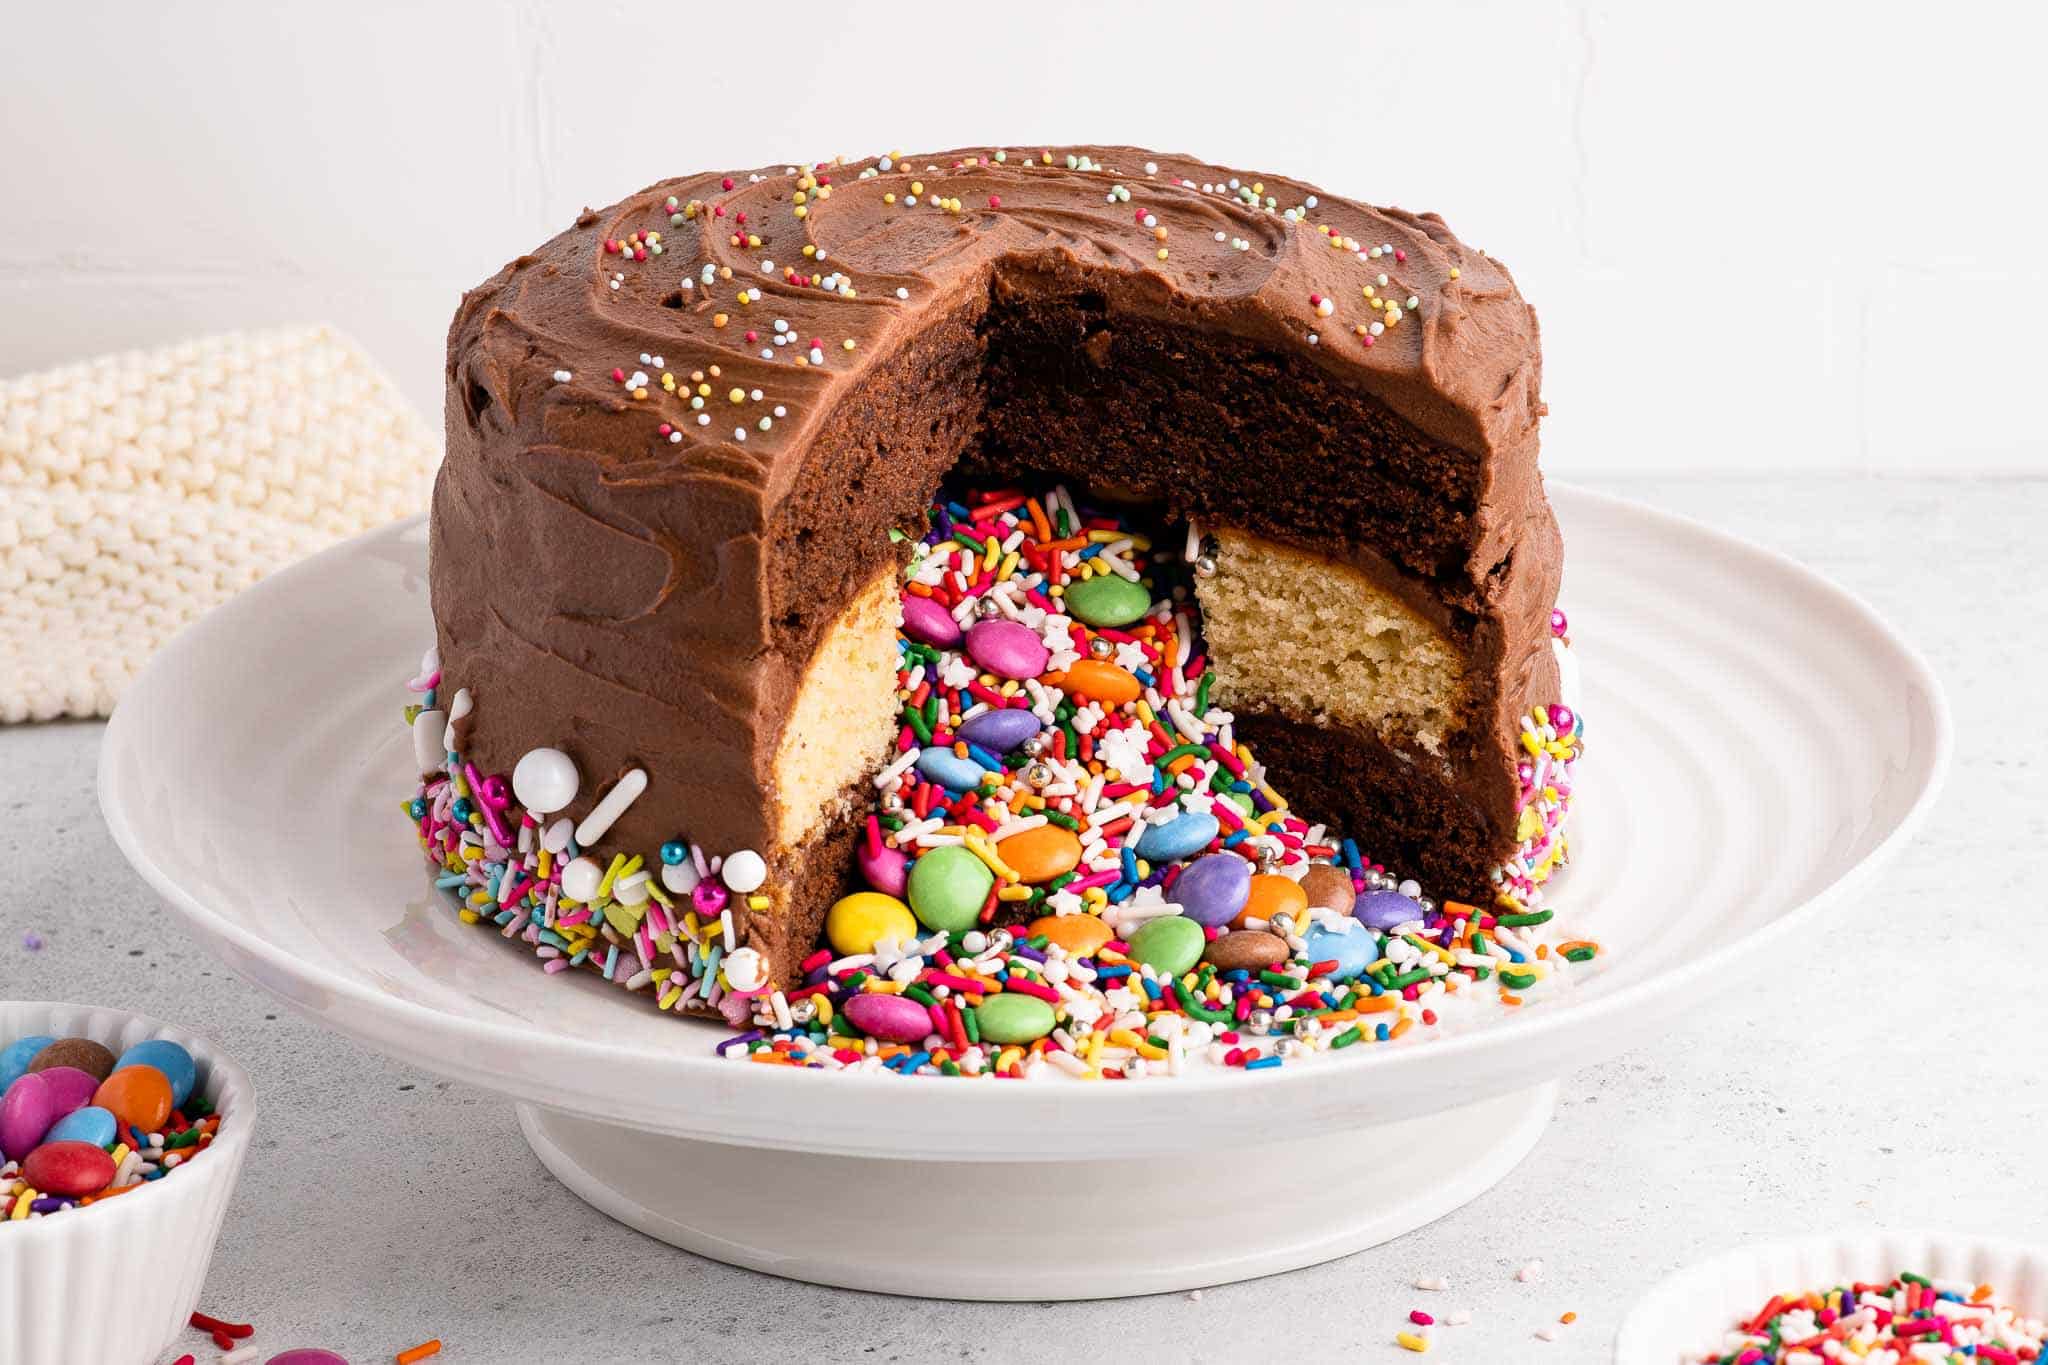
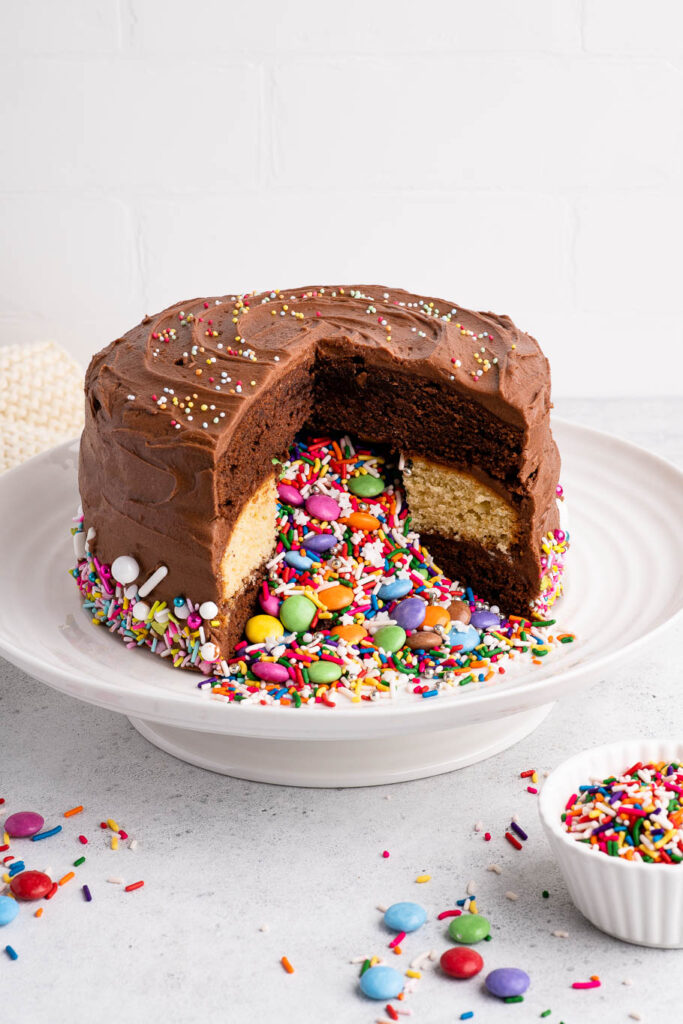
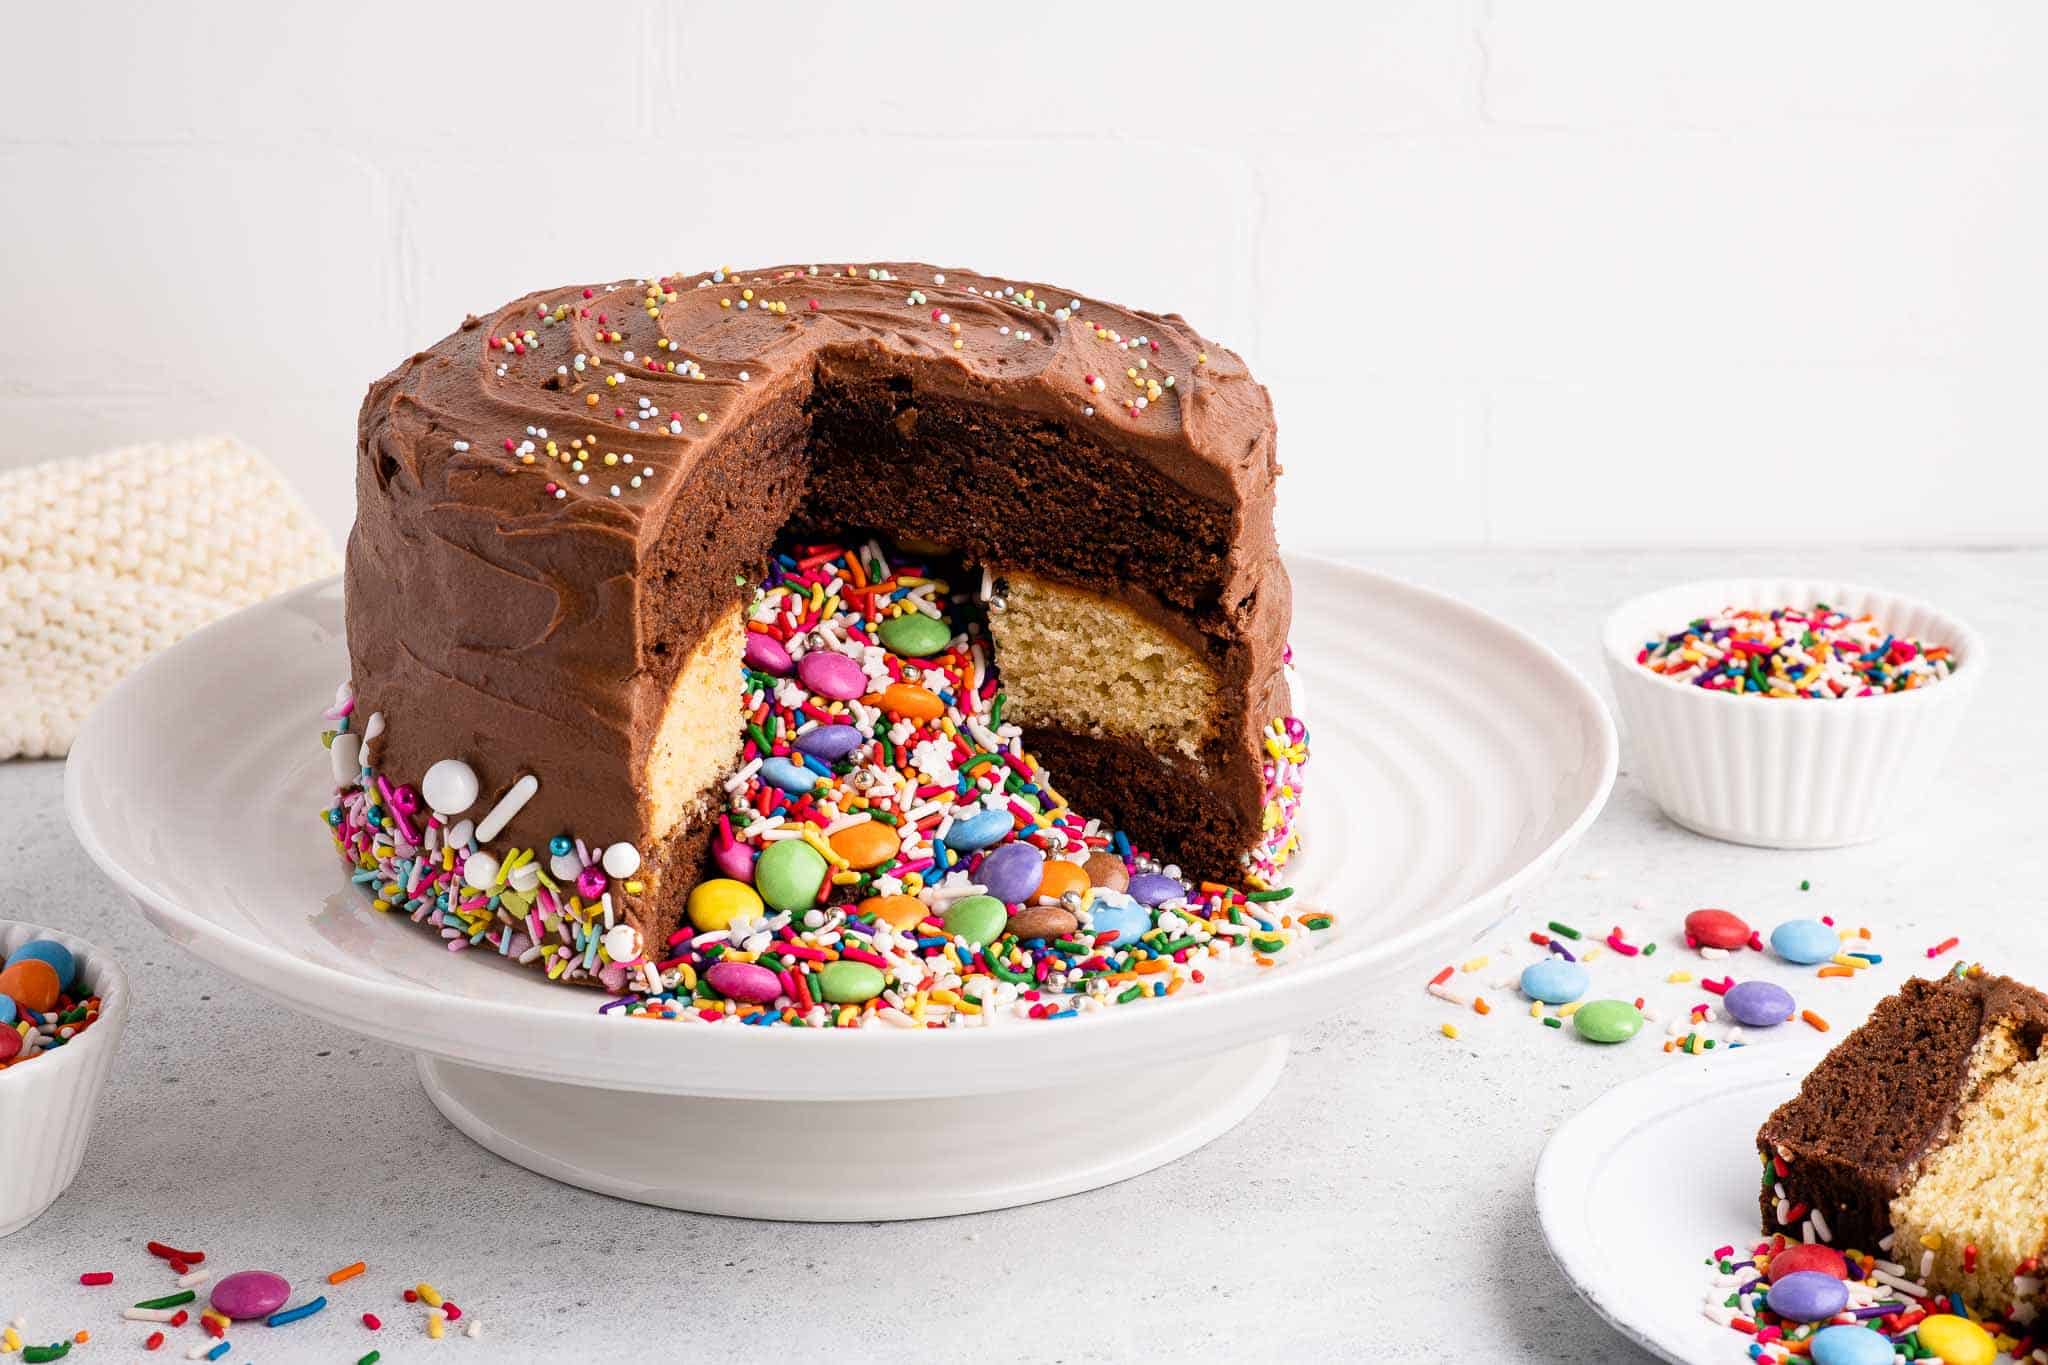
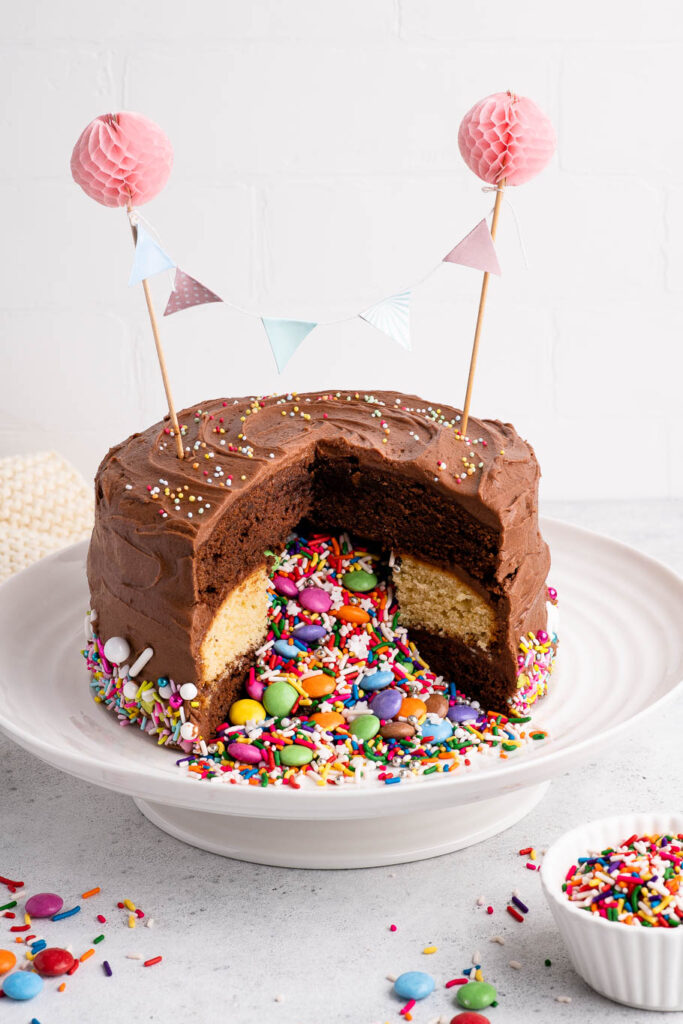
A Piñata Cake is a layered cake filled with colourful candies and sprinkles, and when you cut the cake open, the filling will spill out of the cavity of the cake like a burst piñata.
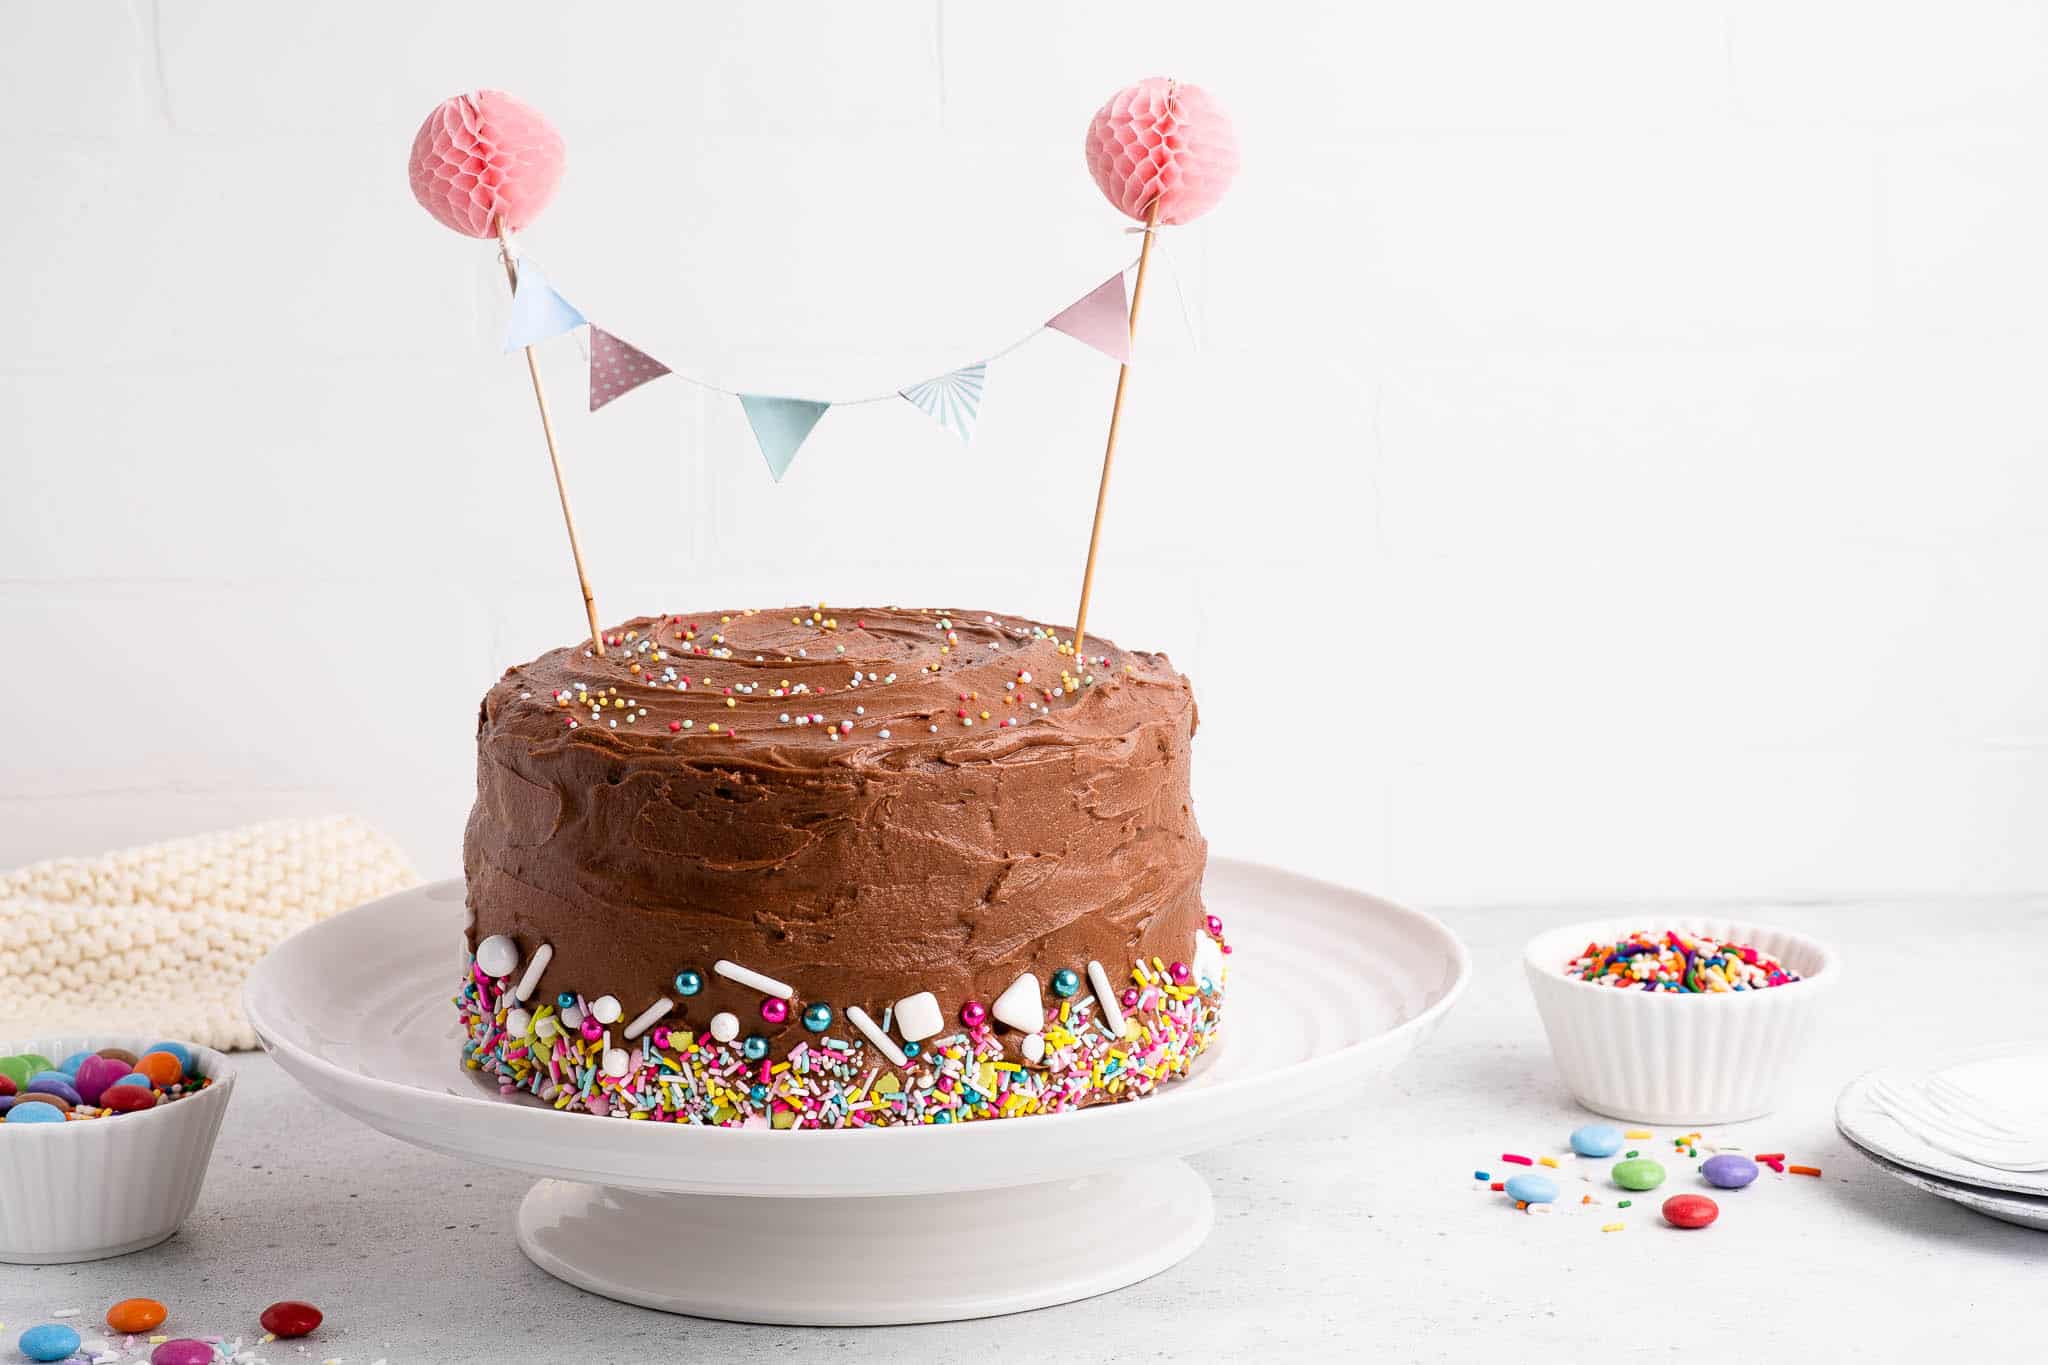
It’s a fun cake to make for birthday parties because, at first glance, it looks like any regular birthday cake, and nobody will know about the surprise filling until you cut into the cake!
Birthday Piñata Cake
I first became aware of the concept of Piñata Cakes when I saw Poh Ling Yeow make her Magic Rainbow Piñata Birthday Cake on an episode of her TV show. I absolutely loved the idea and couldn’t wait to try it myself.
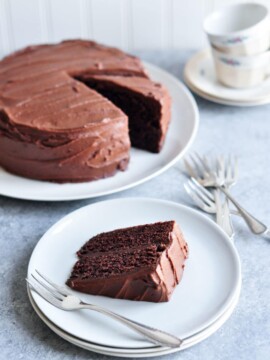
As my talent does not lie in novelty fondant cakes and cake decorating in general, I prefer to make a plain iced cake for birthdays and celebrations, such as this Sour-Cream Chocolate Cake or this even easier Easy Chocolate Cake. Both of these recipes are adapted from Nigella Lawson, and they are foolproof recipes which I have been using for nearly two decades.
A few years ago, I decided to surprise my daughter by transforming my usual birthday cake recipe into a Piñata Cake. The look on her face when we removed the first slice was priceless! Since then, this Piñata Cake has been a staple for our childrens’ birthday parties.
Don’t worry too much about the sugar content here … I think of it as a “special occasion cake” 😉 The kids usually get excited when they see all of the sprinkles and lollies, and some may even ask for a scoop of the sprinkles with their slice of cake. But few actually eat a lot of the candy. That has been our experience, anyway!
Easy Piñata Cake
If you are already familiar with making a layered cake, making a Piñata Cake requires just a few more simple steps.
In fact, you can apply the steps below to transform any layer cake into a Piñata Cake.
Piñata Cake Recipe
My recipe for Piñata Cake is adapted from Nigella Lawson’s recipe for Sour-Cream Chocolate Cake, which is one of my go-to recipes for birthday cakes.
As a Piñata Cake should have at least 3 layers, I have also made a vanilla cake for the middle layer to give some contrast in colour, as well as taste.
What is great about this Piñata Cake recipe is that you can make the batter in a food processor, so the cakes are quick and easy to make.
You can fill the Piñata Cake with whatever lollies and candy you like, although I recommend using something which your kids like to eat. I like to use a mix of Smarties, sprinkles and jimmies; the combination of big and small will help with the “spill effect” when you cut into the cake.
How to Make a Piñata Cake
Step 1
Make the cake layers.
I recommend that you start with the vanilla cake so that you can use the same bowl later to make the chocolate cake layers.
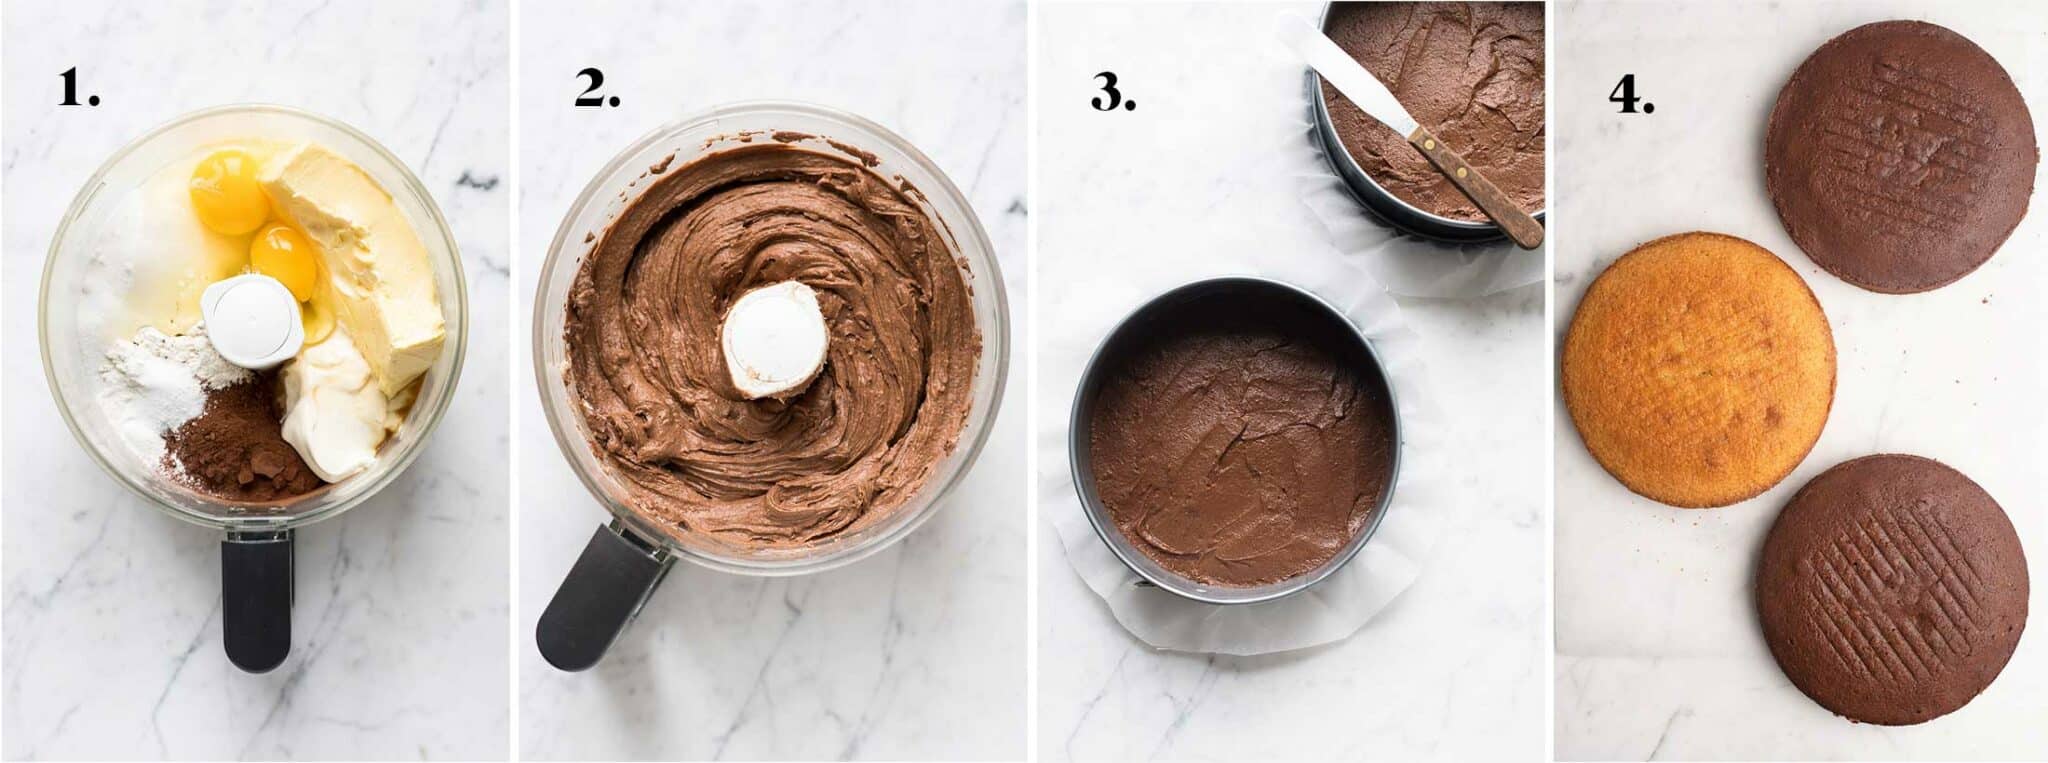
For the vanilla cake layer, simply place all of the ingredients into the bowl of a food processor and blitz. Transfer the batter to a buttered and lined cake pan, and bake for 25-30 minutes, or until a skewer inserted in the centre comes out clean.
For the chocolate cake layers, repeat the same steps as for the vanilla cake, except that you will need to split the cake batter between two cake pans.
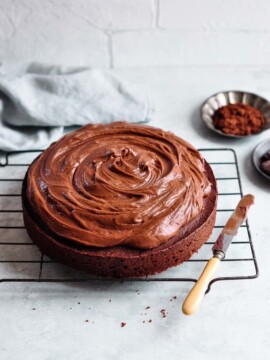
Once the cakes are cooked, let them cool in the pan on a wire rack for about 10 minutes. Then carefully remove the cakes from the pan and invert them onto a wire rack to cool completely. By inverting the cakes, this allows the top of the cakes to flatten as they cool.
If you are a perfectionist, you can use a serrated knife to level the cakes once they have cooled completely. As I only ever make this Piñata Cake for kids’ birthday parties, no one will ever notice if the layers are not exactly 180° flat 😉
Step 2
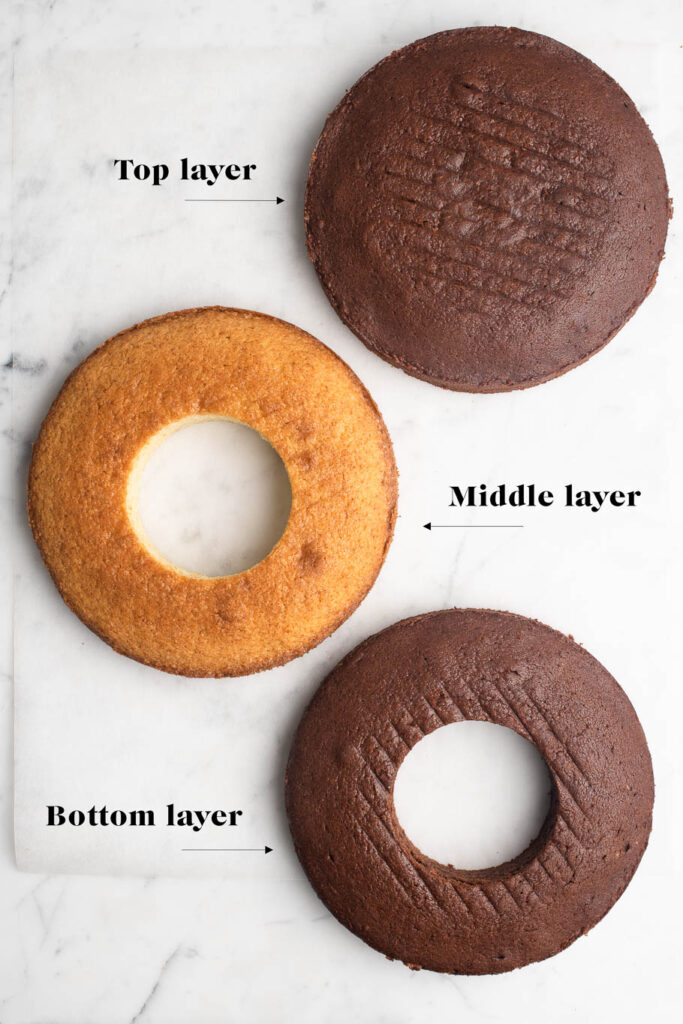
Set the top layer aside.
For the middle layer and bottom layer, use a round cookie cutter or similar to cut out the centre of the cake. I use a cutter which is 8 cm/3.5 inches in diameter.
Don’t throw away the cut out cakes! I use any leftover frosting to make a mini layered cake, intended for myself to eat alone in private later, but my kids have since discovered my “secret cake” ????
Step 3
To assemble the Piñata Cake:
- Set aside the top layer.
- Cut out 4 thick strips of baking paper and place them onto a large cake plate or cake stand.
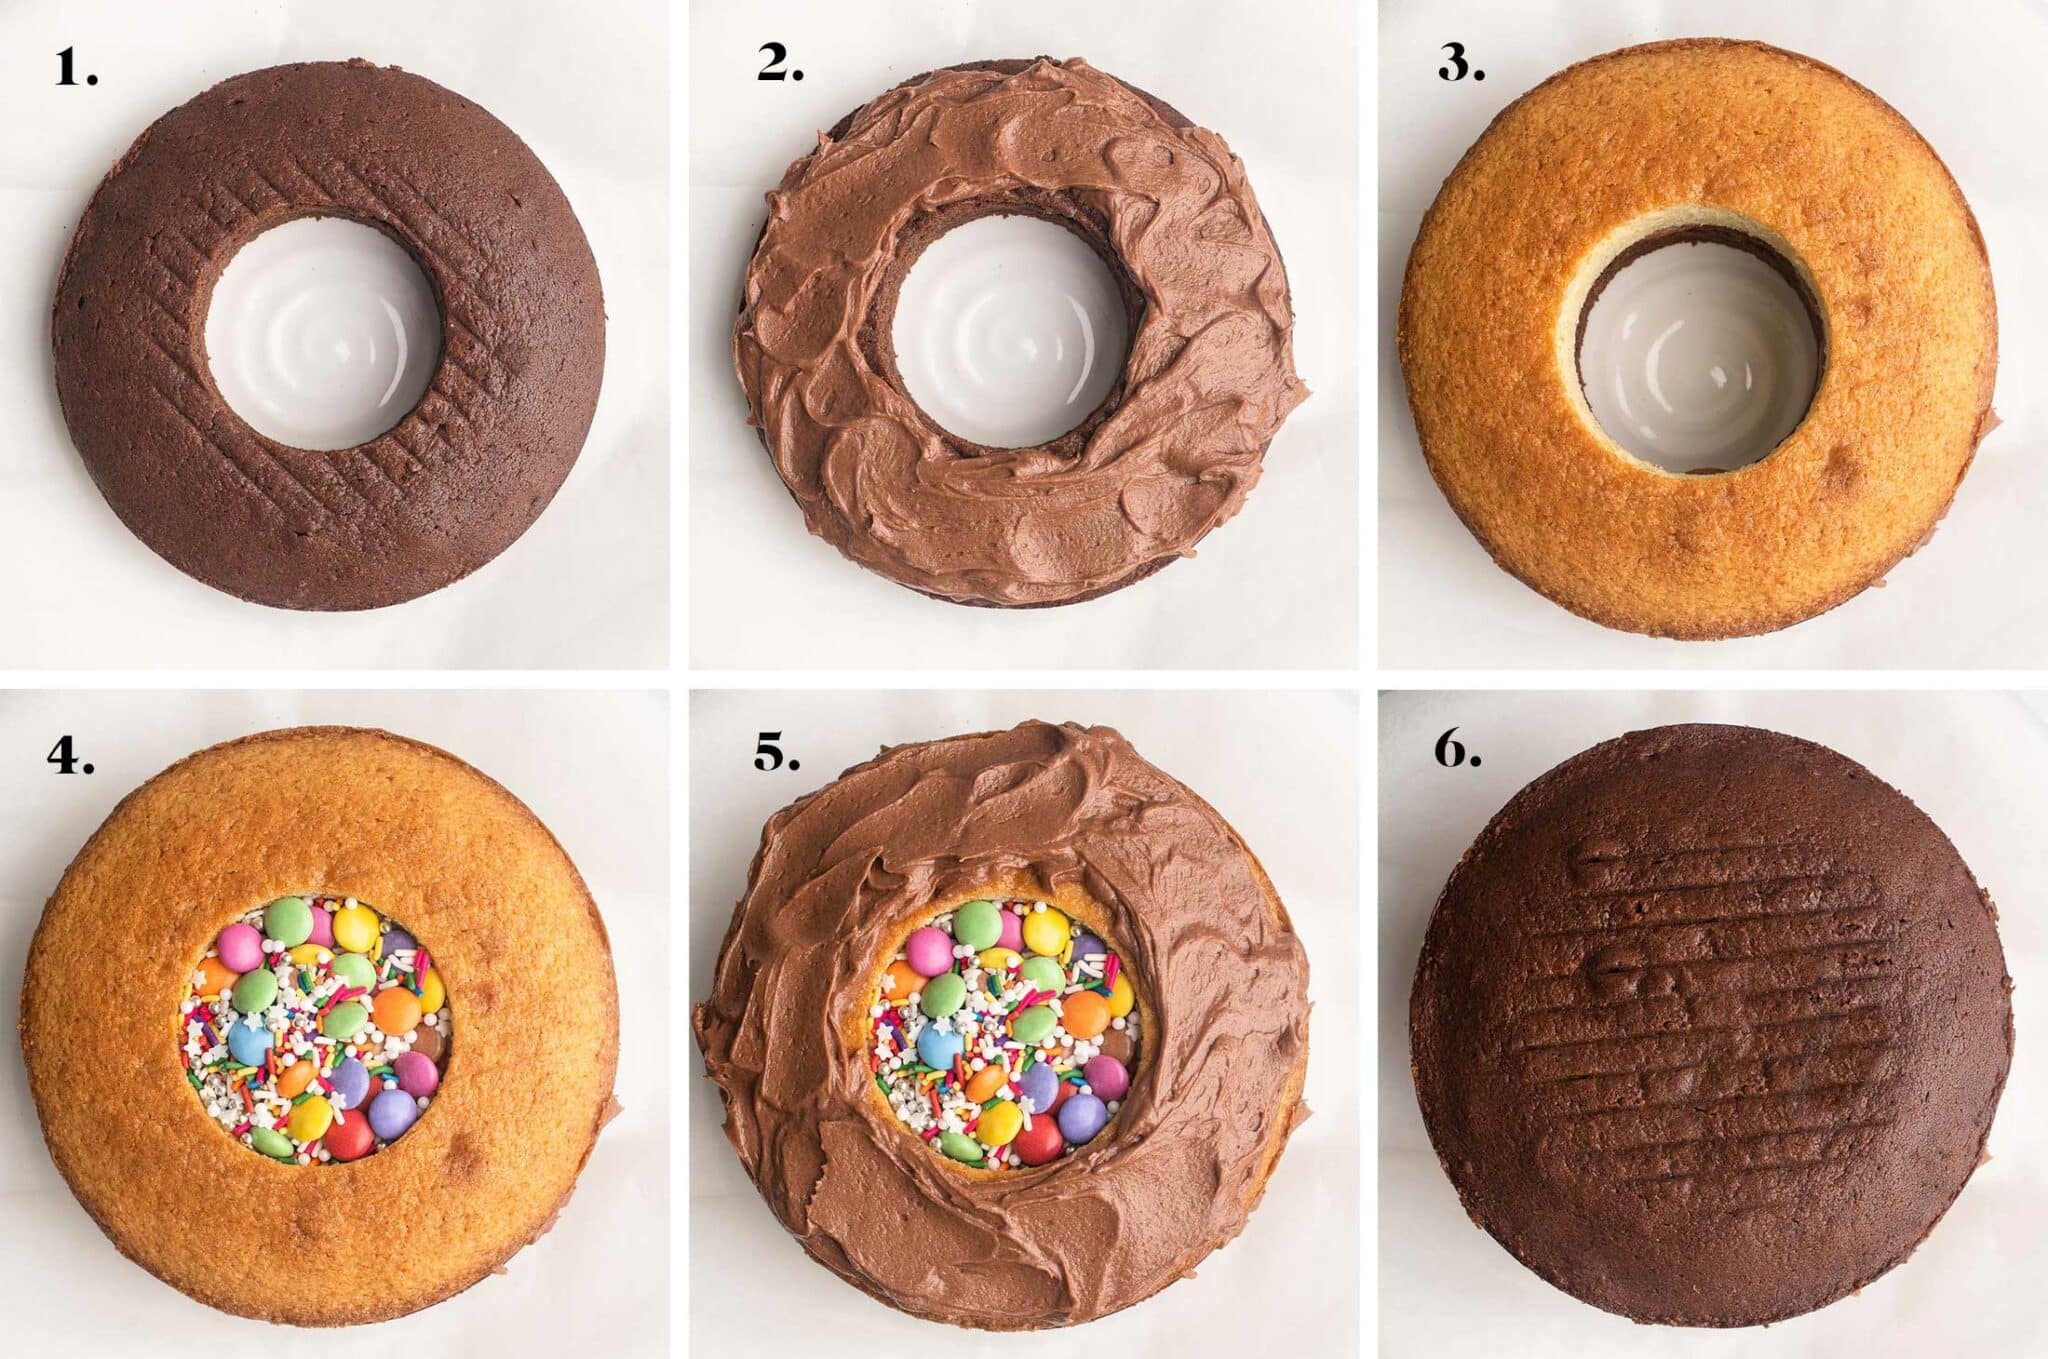
- Place the bottom layer onto the cake stand, on top of the 4 strips of baking paper. The baking paper is to keep the cake stand clean when you frost the cake later. (See Image 1)
- Spread a thin layer of frosting on top of the bottom layer. (See Image 2)
- Place the middle layer on top. (See Image 3)
- Fill the cavity with candies or lollies of your choice. (See Image 4)
- Spread a thin layer of frosting on top of the middle layer. (See Image 5)
- Place the top layer on top. (See Image 6)
- Frost the top and sides of the cake. Decorate the frosted cake as you wish.
- Remove the strips of baking paper. Your Piñata Cake is finished!
Tips for Making Piñata Cake
- Make the vanilla cake first. Once you have made the vanilla cake, save on washing up by making the chocolate cake batter in the same bowl.
- Make the cake layers the night before. The cakes keep well uncovered and overnight in a cool place in the kitchen. Letting them cool completely will also make them easier to handle when you are icing the cakes.
- Choose small lollies or candy for the filling. The filling will “spill” better if the lollies are not too big. Also, using small lollies mean you can use more, which will add to the “wow effect”. I like to use a variety of Smarties, sprinkles and jimmies.
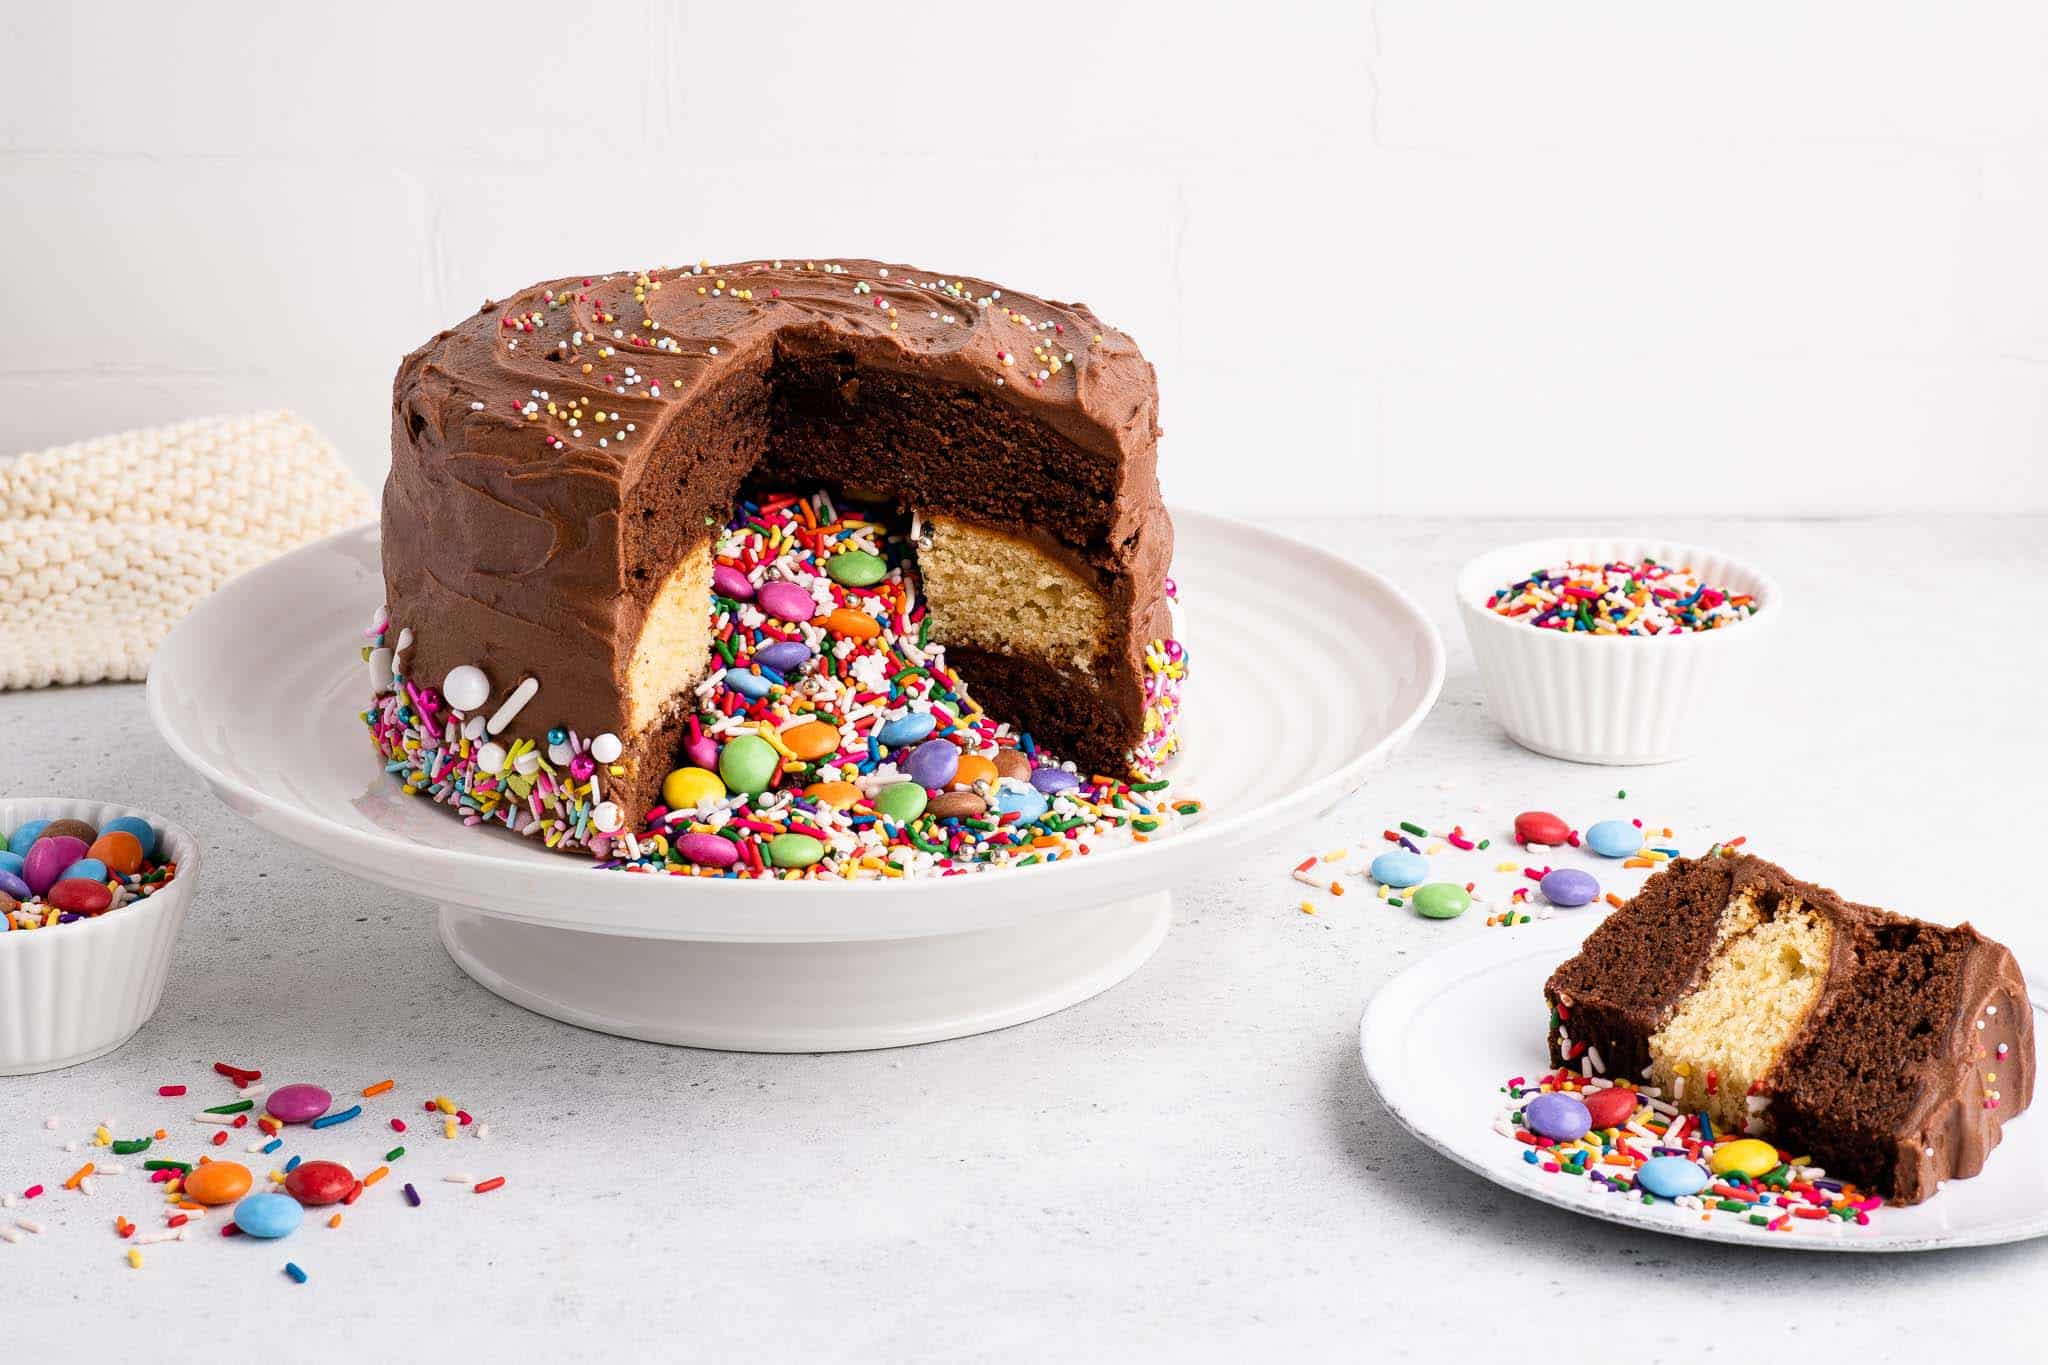
- Cut a big first slice. For maximum “wow effect”, make the first slice a big one so that more of the filling can be revealed as a surprise. I generally cut a large wedge a bit less than 1/4 of the cake.
Piñata Cake Filling
You can usually find everything you need for the Piñata Cake filling in the cake decorating and/or confectionary aisle of your supermarket. Some ideas include:
- Smarties or M&Ms
- Different types of sprinkles. Ready-made sprinkle mixes are great to use here.
- Rainbow jimmies. Jimmies are sprinkles but cylindrical in shape.
- Maltesers
- Chocolate Freckles
- Metallic sprinkle rods
- Dragees, sprinkle balls or sugar pearls
Birthday Piñata Cake
Ingredients
For the vanilla cake layer
- 100 g (1 stick) unsalted butter, softened
- 100 g (½ cup) caster sugar, (superfine sugar)
- 120 g (⅔ cup plus 3 tablespoons) plain flour , (all-purpose flour)
- 1/2 teaspoon baking powder
- 1/8 teaspoon baking soda
- 1/4 teaspoon fine salt
- 85 g (3 oz) sour cream, or crème frâiche
- 1 egg
- 1 teaspoon vanilla extract
For the chocolate cake layers
- 200 g (2 sticks) unsalted butter, softened
- 200 g (1 cup) caster sugar, (superfine sugar)
- 200 g (1 ⅓ cup) plain flour, (all-purpose flour)
- 40 g (⅓ cup) cocoa powder
- 3/4 teaspoon baking powder
- 1/4 teaspoon baking soda
- 1/2 teaspoon fine salt
- 170 g (⅔ cup) sour cream, or crème fraîche
- 2 eggs
- 1 1/2 teaspoons vanilla extract
For the chocolate frosting
- 80 g (3 oz) milk chocolate, 42% cocoa
- 80 g (3 oz) dark chocolate, 70% cocoa
- 75 g (¾ stick) unsalted butter
- 150 g (½ cup) sour cream, or crème fraîche
- 1 teaspoon vanilla extract
- 1 teaspoon golden syrup, optional
- 300 g (2 ¼ cups) icing sugar, (powdered sugar) sifted
For the Piñata Cake filling
Instructions
Make sure all of the ingredients are at room temperature before starting.
For the vanilla cake layer
- Preheat the oven to 180°C (350°F) (without fan).
- Line the bottom of a 20cm (8 inch) round cake pan with baking paper and grease the sides with butter.
- Place all of the ingredients into the bowl of a food processor and blitz until the mixture is well-combined. The batter should be thick and smooth.
Alternatively, if you do not have a food processor:
- Cream the butter and sugar in the bowl of a stand mixer with the flat paddle attachment.
- Slowly beat in the flour, sugar, baking powder, baking soda and salt.
- Beat on low speed until all of the ingredients are incorporated.
- In a small bowl or jug, lightly whisk together the sour cream, eggs and vanilla.
- Slowly add the wet ingredients to the mixer, and beat until the batter is thoroughly mixed.
- Pour the batter into the prepared cake pan.
- Bake for 25-30 minutes, or until a skewer inserted in the middle comes out clean.
- Place the cake pan on a wire rack and let the cake cool in the pan for about 10 minutes, before removing it to a wire rack to cool completely. I like to cool the cake with the bottom facing up, so that the top of the cake can flatten as it cools.
For the chocolate cake layers
- Preheat the oven to 180°C (350°F) (without fan).
- Line the bottom of 2 x 20cm (8 inch) round cake pans with baking paper and grease the sides with butter.
- Place all of the ingredients into the bowl of a food processor and blitz until the mixture is well-combined. The batter should be thick and smooth.
Alternatively, if you do not have a food processor:
- Cream the butter and sugar in the bowl of a stand mixer with the flat paddle attachment.
- Slowly beat in the flour, cocoa, sugar, baking powder, baking soda and salt.
- Beat on low speed until all of the ingredients are incorporated.
- In a small bowl or jug, lightly whisk together the sour cream, eggs and vanilla.
- Slowly add the wet ingredients to the mixer, and beat until the batter is thoroughly mixed.
- Pour the batter evenly into both prepared cake pans. I generally find that the weighed batter for each cake is approximately 430 g.
- Bake for 25-30 minutes, or until a skewer inserted in the middle comes out clean.
- Place the cake pans on a wire rack and let the cakes cool in the pan for about 10 minutes, before removing them to a wire rack to cool completely. I like to cool the cakes with the bottom facing up, so that the top of the cakes can flatten as they cool.
For the sour cream chocolate frosting
- To make the frosting, melt the chocolate and butter in a bain-marie or a bowl over a pan of simmering water, taking care not to let the bowl come into contact with the water. If you have an induction stove, you can melt the chocolate and butter directly in a saucepan over low heat.
- Once the chocolate has melted, take the bowl off the heat and let it cool slightly.
- Stir in the sour cream, vanilla extract and golden syrup.
- Measure the icing sugar (powdered sugar) into the bowl of an electric stand mixer.
- Using the flat paddle attachment, slowly beat the chocolate mixture into the icing sugar (powdered sugar).
- Beat on medium speed until all of the ingredients are well incorporated.
- The frosting should be thick enough to cover the cake, but soft enough to spread easily.
To assemble the Piñata Cake
- Set aside the top layer.
- For the middle layer and bottom layer, use a round cutter measuring about 8 cm/3.5 inches to cut out the centre of the cakes.
- Cut 4 thick strips of baking paper.
- Place the strips of baking paper onto a large cake plate or cake platter.
- Place the bottom layer on top of the strips of baking paper. The baking paper is to help keep the plate clean while you are frosting the cake.
- Spread a thin layer of frosting on top of the bottom layer.
- Place the middle layer on top.
- Fill the cavity with lollies, candies and sprinkles of your choice.
- Spread a thin layer of frosting on top of the middle layer.
- Place the top layer on top.
- Frost the top and sides of the cake.
- Decorate the cake as your wish.
- Remove and discard the strips of baking paper.
Kitchen Notes
- MAKE AHEAD TIPS
I recommend making the cake layers the night before. - OVEN & STOVE TEMPERATURES
All recipes on this website have been tested on an induction stove and/or with a conventional oven (i.e. an oven without fan). All recipes on this website state temperatures for a conventional oven, unless otherwise mentioned. If you have a convection oven (i.e. an oven with a fan), please consult the manufacturer’s handbook on how to adjust the temperature and baking time accordingly. - CONVERSIONS
To convert from cups to grams, and vice-versa, please see this handy Conversion Chart for Basic Ingredients.

Thank you so much for your detailed instructions! Like you, I’ve been making Nigella’s Sour Cream Chocolate cake for many years. I loved the changes you made here to turn it into a Pinata Cake. It’s perfect!!
This piñata cake recipe is fantastic! Thanks!
Glad you enjoyed this recipe!
You mention golden syrup in the instructions but not in the ingredients. What are the quantities please ?
Hi Dan,
There is 1 teaspoon of golden syrup in the frosting, but it is optional. Many American readers are unable to find golden syrup where they live, plus it is such a small amount, that I think it can be an optional ingredient here. The golden syrup will add more sweetness to the frosting, but I find it already sweet enough even if you leave it out 🙂 Hope you will enjoy this recipe!