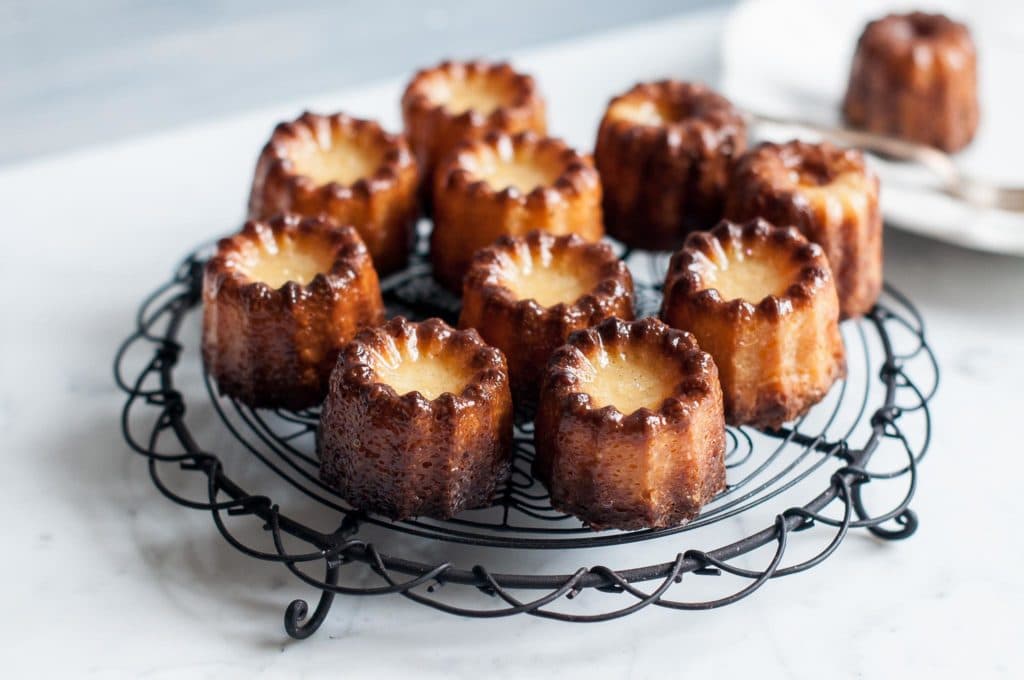
Cannelés are golden and crispy cakes with a custardy centre, flavoured with a hint of rum and/or vanilla. Recipe for Cannelés with step-by-step photos, with instructions for using copper cannelé moulds or silicone cannelé moulds. Recipe also for Mini Cannelés.
Cannelés
If you have ever travelled to France, you may have come across these little specialty cakes called cannelés (also called canelés or cannelés Bordelais).
Unlike their more successfully exported cousins, the madeleines and macarons, cannelés are not so well known outside of France. Yet within France, they are a delicacy.
What are Cannelés?
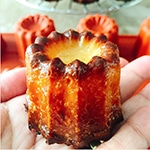
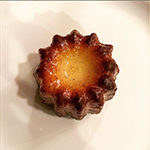
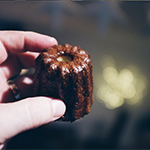
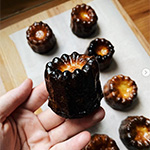
Cannelés are little scalloped cakes which have a crisp, caramelised coating with a slightly chewy and soft, custardy centre. The contrast in texture between the crunchy exterior and sweet interior make these cakes, in a word, addictive.
In France, you can find cannelés at many bakeries and pâtisserie shops, including Paul, but the best are perhaps sold by Baillardran.
Although the shop-bough cannelés are delicious, once you have tasted freshly baked and still warm cannelés, you will realise that homemade cannelés are by far the best.
Recipe for Cannelés
Some foodie friends were recently discussing recipes for cannelés, when it dawned on me that I actually owned a frightfully expensive set of copper cannelés moulds, purchased during a trip to Paris with good intentions but, 10 years later, still remained bright and shiny in their unused condition.
Although, when I first bought the moulds, I was rather dismayed to later find that recipes for cannelés were rare; none of my cookbooks on French cuisine (both in English and French) had a recipe for these cakes, whilst most online recipes were not so inviting.

Easy Cannelés
Fast forward a few years, and I was happy to find a recipe for cannelés in Rachel Khoo’s cookbook, My Little French Kitchen. Rachel Khoo claimed to have a foolproof recipe for cannelés using … cheap silicone moulds.
So when presented with the opportunity to use my long-forgotten copper cannelés moulds, I was anxious to conduct a little experiment of my own.
Despite my hesitation towards silicone cake moulds in general, I picked up a cheap silicone cannelés mould when we were in France over Christmas.
Upon arriving back in Zurich, I proceeded to attempt Rachel Khoo’s recipe for cannelés, first using the silicone moulds as per her recipe, and then with the copper moulds.
And without intending to, I suddenly fell into an addiction.
Making Cannelés with Silicone Moulds
The first batch of cannelés made using silicone moulds turned out exceedingly well.
They were crisp and caramelised on the outside, with the right amount of burnish and with the requisite soft, custardy interior. The contrast in taste and texture between the sweet, crunchy crust and squidgy inside made them moreish and plainly addictive.
Rachel Khoo’s recipe is straightforward with no fuss – no beeswax, no freezing. You do have to make the batter up to 2 days ahead of time to allow the gluten to relax and swell, but this happens to be an advantage if, for example, you plan on serving these to guests and want to get some of the preparation done in advance.
I was so surprised by how well my first batch turned out with the silicone mould that I was actually somewhat nervous to use the copper moulds, lest they turned out to be inferior and a waste of money.
Making Cannelés with Copper Moulds
But I forged ahead with my experiment, and the second batch made with copper moulds disappeared so quickly that I didn’t even have a chance to photograph them.
Nor did I get a chance with the third and fourth batch.
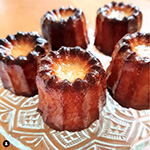
But the cannelés made using copper moulds were more crisp on the outside and tasted just as divine.
Due to the butter which is used to grease the copper moulds, this batch did have a slightly buttery aftertaste compared to the batch made using the silicone mould but, overall, it was hard to judge which was better.
As the copper cannelé moulds conduct heat much better than their silicone counterpart, the cannelés have a crispier coating and also remain crisp for longer.
However, I found (over many batches) that, if you heat the silicone mould until it is quite hot (i.e. to the point where it is almost smoking), you can achieve a similar crispy exterior.
Silicon Cannelés Moulds
Perhaps the best way to conclude is that you can absolutely make delicious cannelés using silicone moulds.
Indeed, if you plan to make a large batch, it would be more economical to use silicone moulds, rather than purchase the individual copper moulds which can cost up to $30 each.
I purchased a relatively cheap silicone mould in France by Guy Degrenne and would highly recommend this one.
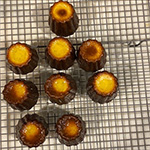
The regular-sized silicon cannelés moulds tend to have 8 holes; if they have more or less than 8 holes, the cakes will be bigger or smaller than what is usual, so you will have to adjust the baking time accordingly.
How to Make Cannelés
{For a printable recipe, please scroll down}
How to Make Mini Cannelés
To make mini cannelés, follow the same recipe and instructions below.
However, after the initial 15 minutes at 240°C/460°F, continue baking the cannelés at 190°C/375°F for 30 to 45 minutes.
The timing will vary depending on the size of your mini cannelé mould. I use a mini cannelé mould from De Buyer with a capacity of approximately 30 ml or 2.5 tablespoons per cake.
With my mini cannelé mould, I found that the cakes around the edges of the mould browned nicely after 30 minutes, but that the cakes towards the centre were still pale and needed more time in the oven.
Print
Cannelés
- Prep Time: 20 mins
- Cook Time: 1 hour 15 mins
- Total Time: 1 hour 35 minutes
- Yield: 16 cakes
- Category: Cakes
- Method: Bake
- Cuisine: French
Cannelés are golden and crispy cakes with a custardy centre, flavoured with a hint of rum and/or vanilla. Recipe for Cannelés with step-by-step photos, with instructions for using copper cannelé moulds or silicone cannelé moulds. Recipe also for Mini Cannelés.
 Print
Print Pin Recipe
 Rate
RateIngredients
- 500 ml (2 cups) full cream milk
- 50 g (1/2 stick) unsalted butter
- 1 vanilla pod
- 100 g (2/3 cup) plain flour (all-purpose flour)
- 250 g (1 3/4 cup plus 1 tablespoon) icing sugar (powdered sugar)
- 1 teaspoon fine salt
- 2 eggs
- 2 egg yolks
- 60 ml (1/4 cup) rum
Instructions
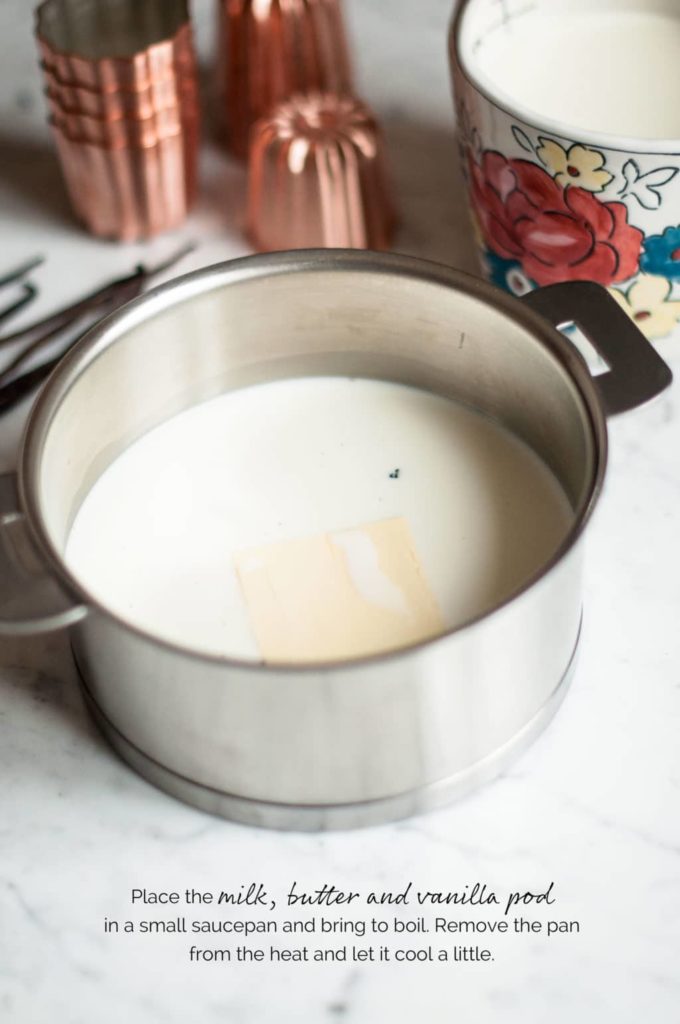
- Place the milk, butter and vanilla pod in a small saucepan and bring to the boil.
- Remove the pan from the heat and let it cool a little.
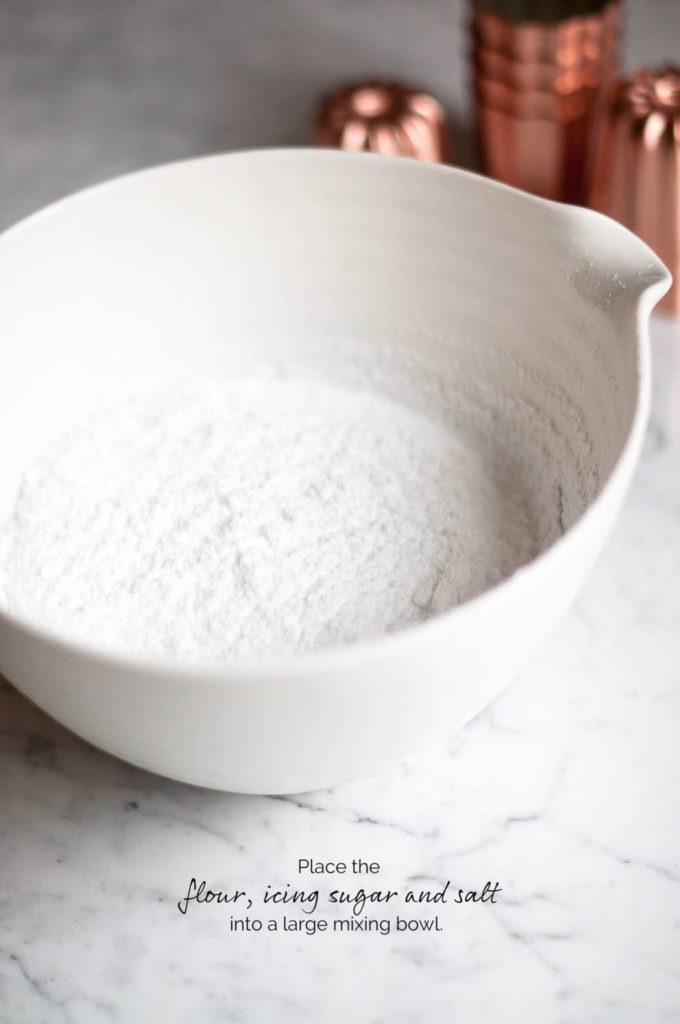
- Place the flour, icing sugar (powdered sugar) and salt into a large mixing bowl.
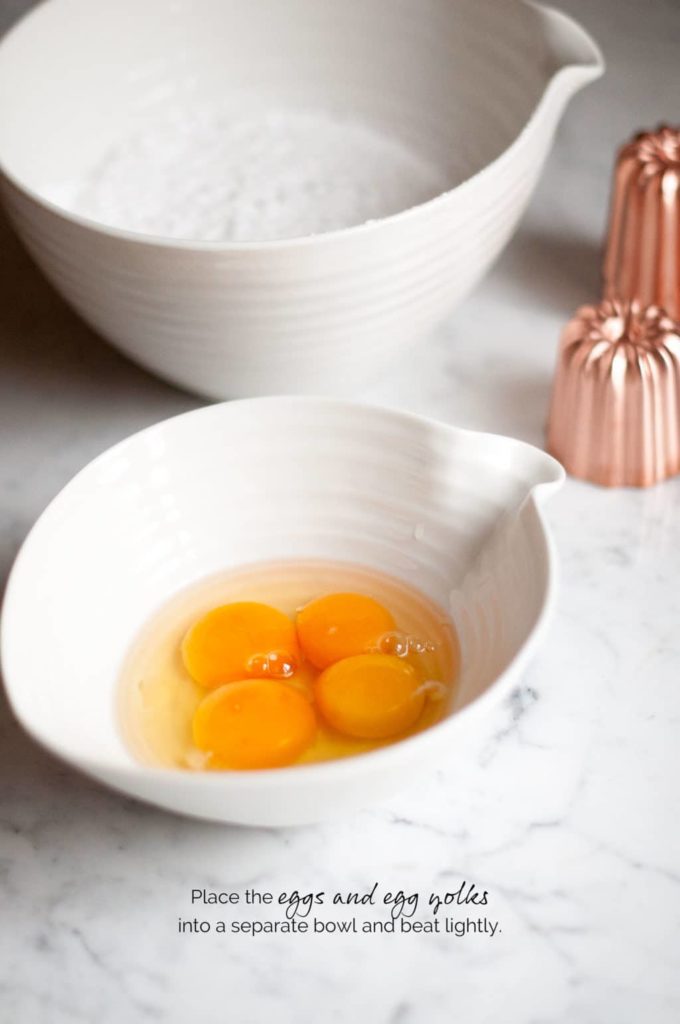
- Place the eggs and egg yolks into a separate bowl and beat lightly.
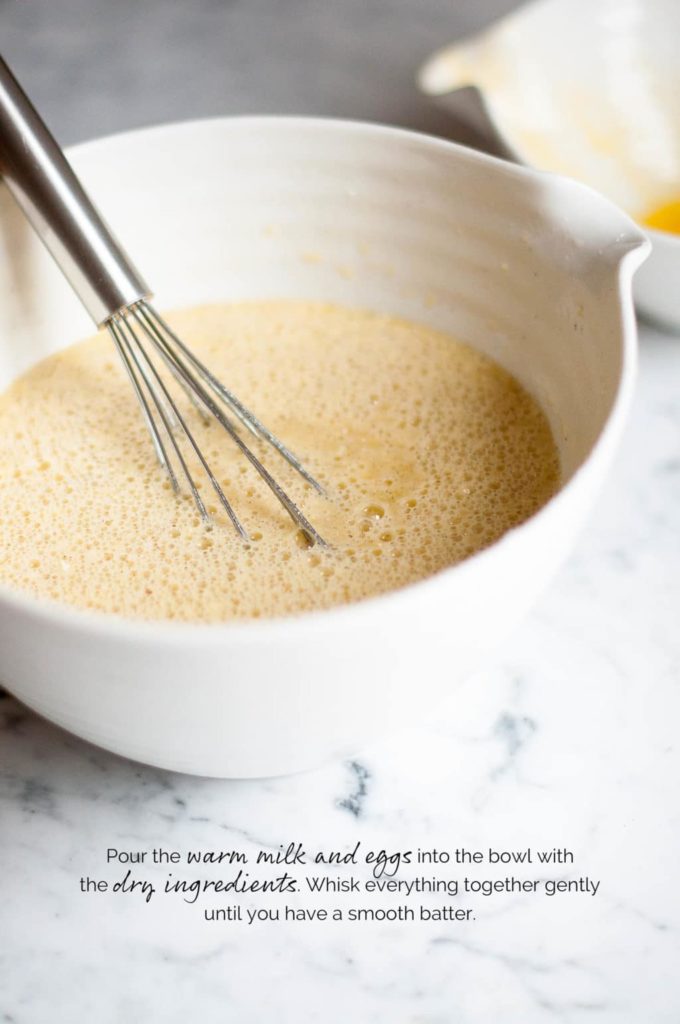
- Pour the warm milk and eggs into the bowl with the dry ingredients.
- Whisk everything together gently until you have a smooth batter.
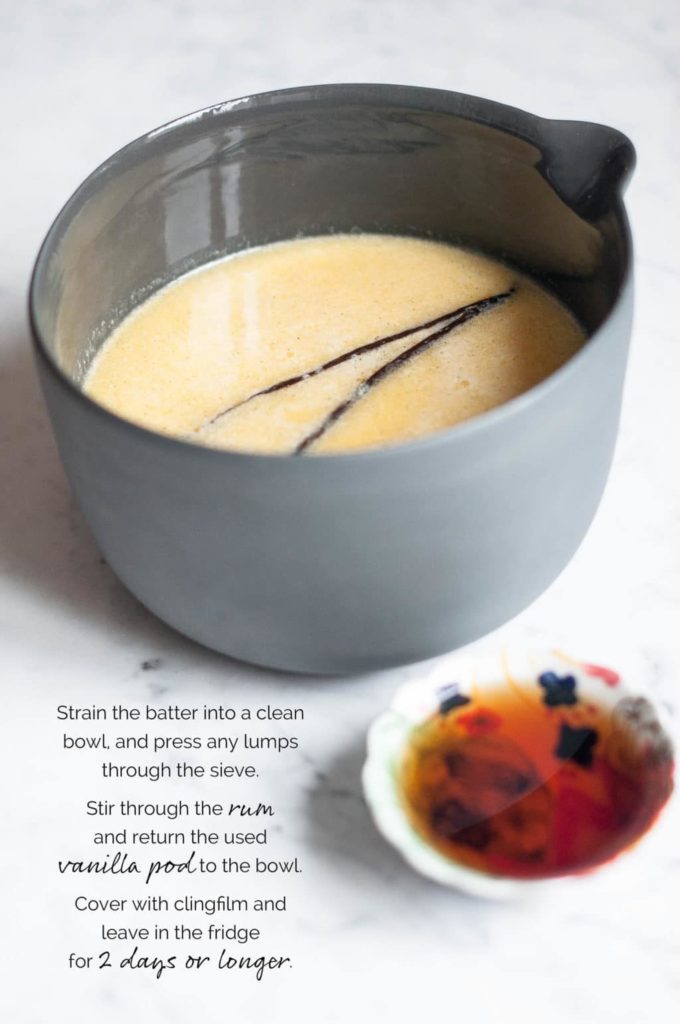
- Strain the batter into a clean bowl, and press through any lumps in the sieve.
- Stir through the rum.
- Return the used vanilla pod to the bowl.
- Cover the bowl with clingfilm and leave in the fridge for 2 days or longer to rest.
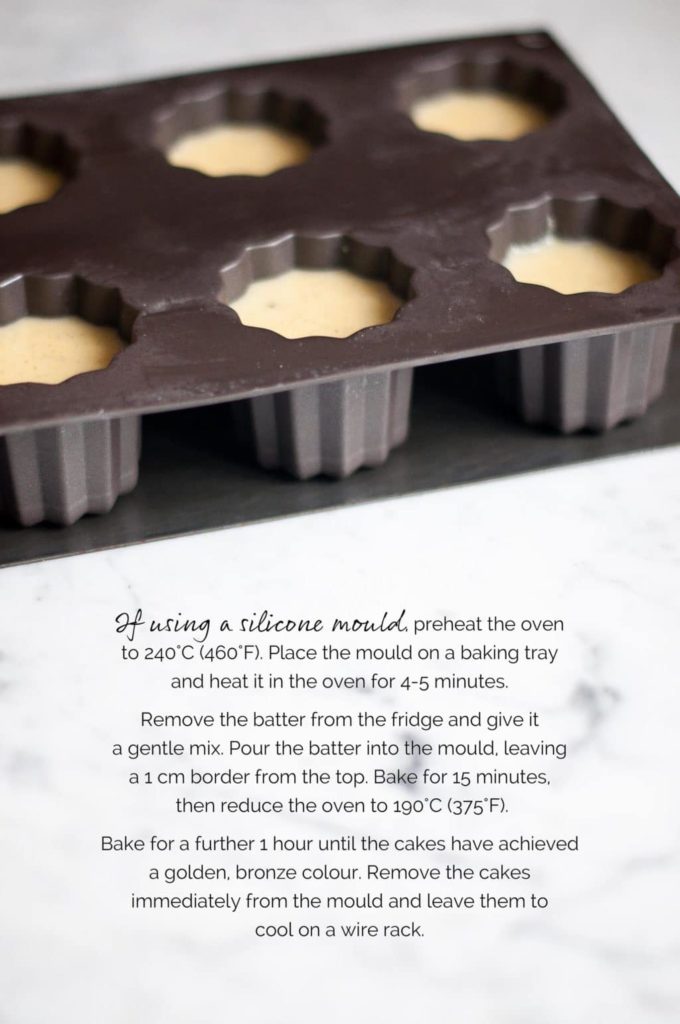
If using silicone moulds:
- Preheat the oven to 240°C (460°F) (without fan).
- Place the moulds on a baking tray and heat it in the oven for 4-5 minutes.
- Remove the batter from the fridge and give it a gentle mix.
- Pour the batter into the moulds, leaving a 1 cm border from the top.
- Bake for 15 minutes, then reduce the oven to 190°C (375°F) (without fan).
- Bake for a further 1 hour until the cakes have achieved a golden, bronze colour.
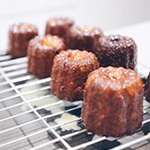
- Remove the cakes immediately from the mould and leave them to cool on a wire rack.
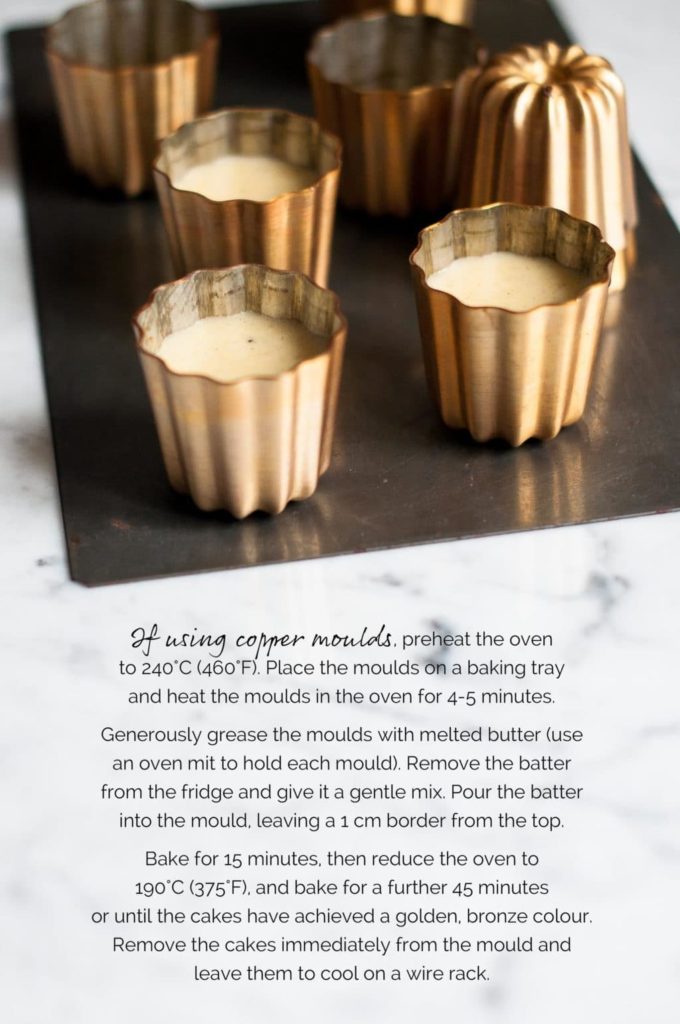
If using copper moulds:
- Preheat the oven to 240°C (460°F) (without fan).
- Place the moulds on a baking tray and heat the moulds in the oven for 4-5 minutes.
- Generously grease the moulds with melted butter (use an oven mit to hold each mould).
- Remove the batter from the fridge and give it a gentle mix.
- Pour the batter into the mould, leaving a 1 cm border from the top.
- Bake for 15 minutes, then reduce the oven to 190°C (375°F) (without fan).
- Bake for a further 45 minutes until the cakes have achieved a golden, bronze colour.
- Remove the cakes immediately from the moulds and leave them to cool on a wire rack.
Kitchen Notes
SIZE OF CANNELÉ MOULDS
The copper cannelé moulds I have used in the recipe and in the photos above are 55 mm in diameter.
HOW TO MAKE MINI CANNELÉS
* Follow the same recipe and instructions as above.
* After the initial 15 minutes at 240°C/460°F, continue baking the cannelés at 190°C/375°F for 30 to 45 minutes. The timing will vary depending on the size of your mini cannelé mould.
USING COPPER MOULDS FOR THE FIRST TIME
If you are using copper cannelés moulds for the first time, you will need to season them first. This comprehensive webpage covers all you need to know about cannelés, as well as instructions for seasoning your new copper moulds (scroll down towards the bottom of the page).
USING A WHISK
Many recipes will tell you to avoid getting too much air into the batter and, therefore, to not use a whisk. I wasn’t aware of this before conducting my experiment, and used a whisk with no detrimental effect. However, I would recommend whisking the batter only very gently. If there is too much air in your batter, the cakes risk rising like a soufflé and perhaps overspilling. During baking, the cakes will rise slightly (like a soufflé), but they should fall back down again during the baking process.
GOLDEN AND BROWN CANNELÉS
Part of the joy of these cakes is the crisp, caramelised coating. To achieve this, the cakes will need to be baked until quite brown and golden, but not so much that they are burnt. Check the colour after the specified time in the recipe and, if you need to bake them for longer, keep checking at 5 minute intervals or so.
USING A BUNDT PAN OR MUFFIN PAN
If you don’t own a copper or silicone cannelés moulds, at a pinch, you could use a non-stick mini Bundt pan or a muffin pan and follow the same instructions as for the copper moulds.
 RECIPE CREDIT
This recipe is adapted from My Little French Kitchen by Rachel Khoo
 OVEN TEMPERATURES
All recipes on this website state temperatures for a regular oven (i.e. a conventional oven without fan). If you have a convection oven with a fan, please consult the manufacturer’s handbook on how to adjust the temperature and baking time accordingly.
 CONVERSIONS
To convert from cups to grams, and vice-versa, please see this handy Conversion Chart for Basic Ingredients.
Nutrition
- Serving Size: 1
- Calories: 156
- Sugar: 13.9g
- Sodium: 169.2mg
- Fat: 5.1g
- Carbohydrates: 20.1g
- Fiber: 0.2g
- Protein: 2.9g
- Cholesterol: 56.8mg
#eatlittlebird
#eatlittlebird

Update
This recipe was first published on 18 February 2014. It has been updated with more comprehensive recipe notes.


These are so pretty!! Annnnnd loving the photos! xx
Thanks, Katrina!
I was waiting on this post and the photos don’t disappoint! I read Chez Pim’s blog post as well, and like you, was left feeling even more bewildered than before! I have a silicone mould and have been wanting to try these out a second time (the first outing was a bit of a disaster!) It’s so worth the effort though. You’ve inspired me, again! Shall be getting a batch prepped before the end of the week 🙂 Wonderful post Thanh!
Oh your first attempt wasn’t so bad! I think Rachel Khoo’s recipe is not too dissimilar to Hannah’s recipe. I’m going to try Hannah’s recipe next time, or at least up the rum content like hers 😉 And lucky you that M brought you a silicone cannelés mould when she visited – sounds like she had a big bag of goodies for you on that trip!
These look so beautiful! I am not much of a pastry cook, but I may have to find a couple molds and give these guys a try. 🙂
They look fancy and a bit complicated, but I found this recipe for cannelés to be pretty straightforward, especially if you are using a silicone mould. Good luck!
Thanh, these are just stunning – the canneles and the photographs! I’m happy to read that you had much success with the silicone moulds too, because I’ve bought silicone friand tins to make your lemon friands and was a little worried that they would be somehow inferior to the ‘proper’ tins.
Great post, Thanh!
Thank you, Anna! I don’t normally have much success with silicone moulds but have received quite a few as gifts. Actually, they tend to work much better as toys for a 1 year old, especially during periods of teething! 😉 That said, I have one Tupperware silicone tart mould which I use specifically for a Tupperware recipe and it works a treat. This cannelés mould would have to be my second successful silicone mould, so I suppose much depends on the recipe which you are using, and perhaps also the quality of the silicone mould itself.
I believe J used a silicone mould when he made the lemon drizzle friands? I hope they will work for your friands – please let me know once you’ve tried 🙂 Good luck!
Thanks Thanh, I’ll let you know once I’ve tried them 🙂 xx
Would you believe I’ve never eaten canneles, but I desperately want to now after seeing your gorgeous canneles. I wonder if I can get my hands on moulds here in Australia. Gorgeous photos Thanh!
I don’t think I ever saw cannelés in Brisbane, even at the lovely bakery at the James St Markets which used to sell Paris-Brest when I lived there. I would be curious to know if cannelés moulds are available in Australia. Maybe at a specialty store such as The Executive Chef in South Brisbane? I just checked their website which shows that they sell the silicone cannelés moulds, but that they are currently out of stock: http://www.executivechef.com.au/product/22-silicon-cannele-55x50mm-92ml-8-
I love that store … I used to spend all of my money there!
Monsieur Macaron have stalls at markets around Brisbane three days a week and they have good canneles.
Oh wow! That’s great to hear that you can find cannelés on the other side of the world in Brisbane! Makes me miss my former hometown …
I never never thought of making cannelés at home but thanks to you I think I just might. Have you tried financiers, I got a mix (chocolate, pistachios and vanilla) and couldn’t stop snacking on ’em. Well I’m guessing another trip to E. Dehillerin is due to check if they have these copper moulds., I’m guessing it’ll cost me a fortune but I’d like to have a couple. Is there a Guy Degrenne store in Printemps? Must stop by to have a look.
Another wonderful post Thanh! Bravo!
xx
Hi Rushi,
I never thought I would cook or bake certain things at home, but once you live somewhere where you don’t have access to your favourite foods, you find yourself making lots of crazy things at home!
I’ve seen these copper cannelés moulds at Dehillerin and they cost about EUR 9 each, I think. You will need 8 to make most recipes, unless you make a small batch at a time. I think Printemps and Galeries Lafayette have a good selection of items from Guy Degrenne. I think it’s a rather commonly available brand in France and I actually found my mould in a small kitchenware store in Brittany. Actually, in France, you are spoilt for choice because silicone cannelés moulds are sold in almost every kitchenware store!
And funny you should mention financiers … I have a post lined up on these lovely little cakes 😉
I can’t wait for your post on the financiers…. I’m so excited 😀
France has opened my eyes to a different world of cooking and I’m glad. I do miss the food back home but each country has their peaks… Thanks for the tip on the copper cannelés moulds, I’ll be sure to buy atleast 8.
xxx
Yes, yes, yes, Bordeaux – cannelés. To die for combo!! In fact, I’ve always wanted madeleines and cannelés pan. And when I see, they are always “together”, and as I can’t decide which to buy, I don’t buy any, or would have to buy both.
Yes, now you can call me idiot 😛
In despite of all that, I fear making cannelés. The preparation is so ‘different’ that terrifies me not to do right. Although it’s that, of course, what it make them so different in texture 😛
I supposed silicone will be very crisp, as always with silicone, and that’s another doubt I have with the bought. But still, one day I’ll fall into temptation!! But I still with be green with envy, cos your copper ones are sooooo cute!!
But, hey, I’ve mini cannelés, my best friend gave it to me this Christmas, I hope I don’t wait 10 years as you, but I don’t use it yet, I find easier using a medium pan.
Thanks for sharing, I’ll save your recipe in a good good place 😛
You have a mini cannelés pan?? I want one too! You could definitely try this recipe with your mini cannelés pan, but you will have to bake them for less time. I promise you that making cannelés is not difficult at all. It’s like making a pancake batter, but then leaving it in the fridge for a few days before filling your silicone mould, and voilà!
When I lived in Australia, I had a bigger kitchen, so buying lots of cake tins was not really a problem. But since living in Zurich, our kitchen here is tiny, tiny, and most of my cake tins are now stored in the basement!
If ever I can’t decide between two things, I just buy both 😉 It’s easier that way 😉
Coincidentally, today a friend has lent me her (two!!) cannelés molds. This weekend I have work!!!
Both are silicone, I hope I don’t damage them for not greasing them or something like that. I’ll tell you about my cannelés!! 😛
Yesterday, I read Chez Pim’s post, it’s wonderful, thanks for sharing 😛
How exciting! I hope you will enjoy this recipe 🙂 There’s no need to grease the silicone moulds. You will find that the cakes will come out very easily once they are baked. Good luck! Can’t wait to hear about the results.
Oooh I love them!! I have the silicom one and i use two recipes…i will try for sure this one. Thanks!
I would be curious to know how this recipe compares to the ones you already use. Good luck!
A very well researched article and lovely way with words: i love the following line “These little scalloped cakes have a crisp, caramelised coating with a slightly chewy and soft, custardy centre.” Very poetic. Lovely work.
Thanks, Rachel! I don’t always write about my background research when trying out new recipes, but thought it was worthwhile doing so for this particular recipe.
Ohh! I love your blog, amazing pictures and delicious desserts I would ask you a question: Where you bought the cooling rack and metal molds? Love it!
In Spain there is so pretty and I would like to buy products.
Thank you very much!
Hello,
I’m happy to hear that you are enjoying my blog 🙂
I bought the cooling rack in Australia from the Donna Hay store, but you can find it online here.
And the copper cannelés moulds are from Dehillerin in Paris. Although, you can try to find them at a specialty kitchenware store, or online at Amazon or Meilleur du Chef in France.
Hope this helps!
Recently I had been to Paris and got to eat these Canneles. These are just yummy and have no words to explain as I love any type of pudding. I am so desperate to make them .
But can you please tell me the replacement for Rum as i want to make it a non alcoholic one? Or Is it necessary to use rum?
Thank you very much for this recipe ..
I think you could leave out the rum without any effect on the recipe. Although, I’ve never tried this recipe without the rum so I can’t say for sure. The rum is there to add a certain flavour to the cake and, as it is a fairly small quantity, I think you could leave it out without any problem. I hope you will enjoy this recipe!
Thank you for your reply. I will definitely try this without using rum and let you know the result.
I make these all the time. I love them. I use the copper molds and they are perfect all the time but I didn’t know about the high heat then lowering the temperature after a few minutes. I will definitely try that next time to see any difference. I watched Pascal Rigo make them and I was totally hooked. I have 18 molds and use honey and butter to coat the molds. Thanks for sharing! I really want to see if the temp makes a difference. According to Pascal you put them in the oven and walk away for 55 minute s. It has always turned out perfect. I am new to your site and I love it!!
This looks so yummy! and I’m gonna try this on this coming Valentines day :).
and i think it well be better for me to try using several silicone products for this and make a heart shape for the molds for the perfect outcome and combination 🙂 .
Hi, my husband loves cannelés but I always thought they were too complicated to make. Thanks for the inspiration. I’ll defintely need to give them a try now! Especially since I have the silicon moulds 🙂
On another note, I love the layout if your blog! Did you do if yourself? I love your pictures and the fait that you fan write on them! 🙂
Nothing complicated at all about cannelés if you follow this recipe 😉 I would love to hear if this recipe works well for you. I make them quite often now, using both the silicone and copper moulds (so I can make more at one time) and my husband always prefers the ones made in the silicone moulds.
And thank you for your commments about my blog layout 🙂 Yes, I did do the design myself using the WordPress Thesis theme. The theme is a bit outdated but maybe one day I will get around to updating the site again!
Hello! Wow!!! Thank you for posting such detail in your process of making these BEAUTIFUL Canneles! A lovely family member of mine shipped some copper moulds from Paris for me. My first attempt in silicon worked out very well. When I tried the copper moulds I tried to continue baking until they would come out, but no luck they stuck! I’m wondering what heating the moulds prior to greasing them does? I shall try it. Would you recommend beeswax or butter to coat? Thank you again- you have a lovely site!
Hi Tara,
Sorry for my late response. I’m glad to hear that the cannelés made in the silicon mould worked out well.
I’ve never tried using beeswax to coat the copper moulds, although quite a few recipes use this. Pre-heating the copper moulds help to achieve a crisp coating on the cannelés. If you were to butter the moulds before pre-heating them, the butter might burn during that time, giving the cakes a bitter flavour on the outside. Hence, that is why this recipe suggests pre-heating the copper moulds first, and then buttering them before pouring in the batter. I haven’t had a problem yet with the cakes sticking to the copper moulds, so I hope you will give this recipe a try 🙂
Canneles are one of my favourite desserts. My local Paul (frenchbakery cafe) sells then but they cost nearly £3 each so its a pricy treat. i recently found something called a ‘Dinky Dessert Mould’ with 30 1″ moulds and seeing as ive been searching for proer moulds for years and never found any i have my batter chilling and am planning to bake your recie this afternon so fingers crossee. I have a Madeleine recipe that turns then out perfectly so
I hope this makes perfect canneles
I hope you will enjoy these cannelés! I think homemade cannelés are infinitely better than shop-bought, especially when you eat them fresh. I’ve tried the cannelés from Paul and, while they taste good, they are nowhere near as good as this recipe 😉 I plan on making a batch tomorrow … my batter has been in the fridge since yesterday 🙂
My canelles turned out to be quite liquid inside. I baked in silicone molds. Why this could happen? The crust was almost burnt. Also is it safe to heat silicone in 460?
Sorry to hear that your cannelés didn’t work out. I’ve used this recipe many times with both silicone and copper moulds and my cannelés always turn out perfectly. I wonder if your problems are caused by the type of silicone mould that you are using? Or perhaps it could be your oven?
Hi Thanh,
I Love Canele a lot. And I decided to make some at home. I have done some background research since this morning and after reading those blogs you mentioned, I found your blog. And I’m so happy that I found your recipes LOL. I’m definitely going to make them now instead of paying US $2 for a mini canele in the Bay Area California 🙂
Hope you can kindly answer my questions below:
1) the silicon mold hyperlink you posted no longer exists. And I live in the US. Can you kindly recommend any silicon molds on Amazon US? At least, should I buy an 8-canele silicon mold? and according to your recipe, it says yielding 16 caneles. So does it mean you use two sets of the 8-canele molds?
2) have you got your mini canele mold yet :)? I clicked on the link and found that it is a 28-canele mold. If you have made with those mini molds, what is the baking time? And can you kindly share the changes in the measurement of the ingredients?
Many thanks,
Yvonne
Hi Yvonne,
Thanks for letting me know about the broken link. I’ve updated the link and it should now direct you to the same silicone mould that I have. However, I think you could use any other good-quality brand, such as DeBuyer or perhaps this one on Amazon which has good reviews.
You are correct to note that the recipe makes 16 cannelés, which would be two sets of the 8-hole cannelé moulds. Given that it takes 2 days for the batter to rest, you may as well make a double batch 😉
As for the mini cannelé mould, I have indeed bought it but, oddly, I haven’t gotten around to using it yet! Thank you for reminding me, though. I will have to try it soon and report back to you with any recipe changes and baking time. I have been craving cannelés lately so you have given me the perfect excuse to bake them again soon. I will be in touch again here in the comments section and will also send you an email once I have used the mini cannelé mould.
Hope this helps!
Just made my first batch in Silicone this week and family have demanded a big pile be made for an upcoming family function. Ordered more moulds.
Found they are VERY temperature sensitive and my first set came out much better than the second because I thought I knew better than the recipe on the temps and time. I was clearly wrong.
Awesome recipe and actually quite simple once you get your head around it.
Hi Peter, thanks for your feedback! So happy to hear that the family enjoyed the cannelés. They are indeed quite simple to make. I’ve just prepared my batter tonight so I can make them again this weekend. Plus, I will also be experimenting with my mini cannelés mould. I can’t wait to eat these again 🙂
Just came across this on food gawker. What a great tutorial! I am bookmarking it. Caneles (Sorry, don’t know how to do the accent on this keyboard!) always seem mysterious to me, like, one of those things that you buy versus make 😉 Thanks for demystifying it!
Thank you! We travelled to Bordeaux late last year where cannelés are very popular, and I can assert with my whole heart that homemade is soooo much better. There are some cakes which taste great both homemade and shop-bought, but there is something special about a homemade cannelé. My son keeps asking for these so I’m hoping to make the batter tomorrow in preparation for baking over the weekend 🙂
Just tried it today and it was so yummy! Recipe wasn’t too difficult to follow – I had put off baking caneles for a long time until I read your recipe! The canele was still a bit soft inside though, although outside was nice and crispy!! Wonder if I should bake for a longer time at a lower temperature? (I was using copper moulds)
I’m glad you enjoyed this recipe! If the inside was still a bit too soft, I think you should continue baking for another 5-10 minutes at the same temperature. When using copper moulds, the cakes tend to have a slightly crispier exterior than when using silicone moulds. However, they will soften as they cool. I plan to make this again next week 🙂
So YUMMY! That sounds so flavorful! Thanks for the great recipe!
I’ve made them today and they smelled so delicious. Unfortunately I could unmold them from the silicone molds and it was a disaster. They were also still quite pudding like inside. Any suggestion ? Would love to make them again! Thanks
Hi Sophie,
Sorry to hear that you couldn’t remove them from the silicone moulds. That sounds a bit unusual as silicone is usually non-stick? My guess is that maybe you didn’t bake them for long enough as they should slip out of the moulds relatively easily. Also, the inside of the cannelé should not be wet or pudding-like. My suggestion is to bake them for longer next time, and maybe test one before removing all of them from the tray. Good luck!
Please read my notes on Pinterest with photo. It is a success for me with little tweaking on how I set up my 8 silicon moulds I bought from Dehillerin Paris. Delicious and buttery with chewy crunch outside and soft custard interior. Yummy!
That’s wonderful to hear that you enjoyed this recipe! I can’t wait to make my next batch … hopefully very soon!
Thanks for this gorgeous recipe ,mine came out perfectly???
Excellent to hear! So glad you enjoyed this recipe. I will be making some over the Christmas break 🙂
Great recipe – they were gone in moments. Gave me the courage to go for a silicon mould after months of deliberating over copper ones.
Hi Nicky,
So glad you enjoyed this recipe! Glad you bought the silicon moulds as they work perfectly in this recipe 🙂 In fact, I always make a double batch of cannelés, and it is much more cost-effective to have a double set of silicon moulds than copper ones 😉
Just made these, they came out amazing, just like the ones you get at the store. Thank you!!
Hi Jacqui,
So glad you enjoyed this recipe for cannelés!
Hi, they look amazing! If i were to omit the rum, what can i substitute it with?
Hi Zoe,
You can leave out the rum but increase the milk accordingly so that you have the same volume of liquid in the batter. Hope this helps!
I was so excited to find a recipe that accounted for using silicon instead of copper molds, as I wasn’t ready to invest in copper just yet. Sadly, I had the same issue that Sophie and Vaida mentioned – the center wasn’t cooked thru after 1 hr and 15 mins, and the caneles simply would not come out of the silicon molds! I cut around a few with a paring knife and removed them, but they were soft in the middle and fell apart. I tried letting others cool to room temp in the molds, still stuck, and still too soft in the middle. The tops were almost black, not burnt but close, but the centers were too soft.
I’ve seen other recipes mention using non-stick spray or room temp butter to coat the molds first, and yet another saying to chill the silicone molds. Guess I’ll be trying a few different methods.
Hello,
Sorry to hear that your cannelés didn’t work out. Maybe you are using larger silicon moulds than mine and, hence, they need more time in the oven? It might also be worth checking that your oven temperature is accurate.
I would definitely try using non-stick spray just before filling the silicon moulds, but the fact that the centre of your cannelés are too soft suggest that they are not being cooked for long enough and/or the oven is not hot enough.
Hope this helps and good luck for next time!
Hi, I have recently discovered caneles and used your recipe with wonderful results. I am just wondering since I am using vanilla extract instead of vanilla beans (which are way too expensive where I live) should I just add it the day I bake it? And maybe the rum too? I am to questioning this because in pudding or crème anglaise vanilla is added after cooking to be most potent I imagine so 1 to 4 days in the fridge makes me think I might loose some flavour or maybe it is like soup and the flavours get better with time.
Hi Lisa,
That’s a good question! I think it would be fine to add the vanilla extract and rum just before baking; you might be right in suggesting that their flavours would be more potent at this time. The resting time is mostly for the gluten in the flour. Good luck with your cannelés and I hope you will enjoy this recipe!
Worked perfectly first time! Crusty outside, honeycombed moist inside. Wow.
I used the CHEFMADE Canele Mold, a 12 portion ceramic non stick. I used your baking instruction for metal models. Easy and spectacular results. They just tipped right out.
I made some changes. For dry ingredients, used granular sugar and Himalayan salt but food processed fine, then added flour and food processed into a fine mix. No sieving required later. Used a whisk for mixing, not vigorous. Everything else the same.
My wife was amazed… she loved canneles from bakeries but never had one like this. Best ever. The cannele she shared with me years ago in a market was more of a cake.
Thanks for sharing!
Hi David,
Many thanks for your feedback! I’m so glad to hear that you and your wife enjoyed this cannelé recipe. I agree that the shop-bought cannelés do not compare with freshly homemade cannelés – the latter is far superior and worth every effort. Thanks for visiting!
I’ve made these 3x now. A couple of tips:
1. add dry to wet while whisking- avoids lumps
2. use grade A vanilla beans… amazing delicate vanilla, florals… wow. I tried extract but it is too one-note. Like “orange drink” from powder vs freshly-squeezed oranges. I got bulk Tahitian beans grown in Papua New Guinea off Amazon… longer, more full of seeds, more fragrant and cheaper than grocery so I can use half of one bean… one cannele at a bakery costs as much as a bean… so why not make a dozen with the best ingredients?
3. use grass-fed cow butter. I’ve tried regular and it just didn’t taste as good
4. reduce sugar by 10%… Less intense sweetness and more delicate florals, vanilla, butter… and still crispy
5. freeze them… let them thaw on a plate before serving– still crunchy and moist and delicious… way better than leaving them out even for one day (I tried both ways… but a week is the limit– after a week, they are more like cake)
Hi David,
Thanks for your tips!
Hello! I have bought a silicone moulf for caneles on holiday in France and very excited to finally try them. Your recipe looks great, dying to try it. But my oven has a maximum temperature of 230 Celsius so I wonder if it’s still possible? Also my mould is for 18 little caneles. So how much shorter should I bake them. Love to hear your thoughts on it!
Hi, I just wonder how wide your copper canelé moulds are? I’m looking to buy but see that they come in different diameters (35, 45 or 55 mm).
Hi Liz,
My copper cannelé moulds are 55 mm in diameter. I will update the recipe to show this. I hope this helps!
This was a great recipe! Easy to follow and my caneles came out great, even in my silicone moulds. Until I can purchase copper moulds, this will be my go-to recipe!
Help! I baked as you instructed but I got two problems.
They got a bit burned on the bottom (the exposed part when they are baked) and inside they were a bit too mushy. I would like them not burned on the bottom and a bit better baked inside (there was somehow a feeling of rawness). Other than that they were very tasty and crunchy on the outside.
Would you suggest baking them longer time at a lower temperature after the initial 15 minutes in high temperature?
Hi Andreas,
It sounds like you need to bake the cannelés for a bit longer so that the inside can cook for longer. It should not be mushy. If the outside is browning too much, I would suggest placing a sheet of foil loosely over the cannelés to stop them from browning further.
Ovens vary differently, and also the size of your cannelé mould will affect the cooking time. So you will just have to play around with the cooking time a bit until you get the perfect cannelés 🙂 Next time, test a cannelé to see if it is fully cooked. If not, continue to bake the rest of the batch, but cover them with foil if you think they are too brown. There is also a risk that the exterior of the cannelé might also brown too much, so you will have to do a bit of trial and error.
Hope this helps!
Is full cream milk same as whole milk? Can I use organic whole milk if I can’t find full cream milk?
Hi Beata,
Yes, full cream milk is the same as whole milk. Ideally, you should use a milk which has about 4% fat content. Hope this helps!
I can not wait to try your wonderful recipe! I have a popover pan that I’m hoping to use:) Fingers crossed it will work!
Oh my gosh! I wanted to try these and I absolutely love them. I had a non-silicone cannele pan purchased on Amazon. Crispy outside, creamy and soft inside. I’ll be making these again! They are worth the wait!
Omg these are better than the canneles you can buy in the shops! I bought a silicone cannele mould which was on sale some years ago and finally decided to give it a try when I saw your recipe. The canneles were beautifully golden on the outside and soft and chewy on the inside. I might need to buy a second mould so that I can make more at the same time.
Beautiful recipe! Thanks for the clear instructions. I used silicone mounds and they turned out perfectly.
Hi- they look delicious, I can’t wait to try your recipe! I tried making them and baked for 1hr at 190 C but they were slightly wet when they came out. Is that normal? How long do you recommend baking them
Is your measurement of grams to 2/3 cup flour correct? Is this not 80 grams?
Wow. I just made these and they are incredible! The first 5 minutes in the oven I knew they were going to be good.
Hi Ken,
So glad you enjoyed this recipe!
Hello! I love the recipe and your approach to the different molds. I recently tried a Canele and fell in love so I bought a mold. What altitude are you baking these at? I am at 6000 feet above sea level and want to know what adjustments I will need to make.
Wow the taste is amazing! I buy them every time we visit France but these are truly divine when still warm and fresh from the oven. I think I am addicted now!
This is an excellent recipe for cannelés. I bought a set of 6 copper molds on a trip to Paris last summer without even knowing how to make cannelés. A quick Google search and I’m so happy to find this easy to follow recipe. The homemade cannelés taste a thousand times better than the shop-bought ones. My only regret is not buying more copper molds! But at least I have something to look forward to the next time I visit France.
So excited to try this recipe!!!!!
I made these today and they turned out perfectly. I finally got to use the silicon mould which I bought in Paris pre-Covid. I only wish I had bought 2 or 3 moulds so I could make more at the same time. I will order some online.
Great recipe! I’ve used this recipe a few times with a silicone mould I bought from E. Dehillerin in Paris. I just ordered copper moulds from them and was wondering how this recipe would work using the traditional beeswax method (instead of butter)? Thanks!
Hi Loren,
I’ve never tried this recipe using beeswax as it is not readily available where I live. Sorry I can’t help!
Great recipe 🙂 I’d never made cannele before and these came out just about perfect first try! I’ve been gently tweaking it for my oven since but the really detailed instructions have been so helpful.
Hi Soph,
That’s wonderful to hear! So glad you enjoyed this recipe. I can’t wait to make these Cannelés again soon.
Hi. What is the weight of the amount of eggs (w/o shells) that you use? The hens I get my eggs from don’t seem to pay attention to size standards.
I first made cannale in a silicone De Buyer mold that also had metal in it. The results were ok, but using the copper molds results is a more consistent texture. I also pour a mixture of 50% butter/50% food grade beeswax into my molds, making certain the inside is coated, then pouring the excess out. This results in a nice crunch as you bite into the baked pastry after it has rested >1 hour.
Hi Diane,
I use eggs which are classified as medium/large and weigh approximately 53g without the shell. I hope this helps.
Unfortunately, I had the same issues others had with the middle tasting raw despite using the maximum cooking time. I made mini canelés with the de buyer silicone mould. I preheated and made 2 batches back to back, but they were all dark on the bottom and lighter everywhere else despite cooking for 15+45 minutes. Really gutted as I don’t know what went wrong, but will try again (and buy an oven thermometer).
Hi Emily,
So sorry to hear about that. Ovens vary greatly, and the size of cannelé moulds also very from brand to brand. I suspect that you will need to bake the cannelés for longer so they cook fully through the centre. You might have to do some trial and error concerning the timing, as well as where you place the tray in your oven. As you are making mini cannelés, it is easier to remove them one at a time to test how they have baked. Also note that my recipe is for an oven without fan, so if you have a fan oven, you will need to adjust the temperature accordingly. Good luck and I hope these cakes will turn out perfectly next time!
Hi Thanh, thank you so much for this incredible recipe and photos! I had been wanting to make cannelés for ages, but didn’t want to invest all that money in copper moulds. Inspired by your post, I bought a De Buyer silicone one for CHF 25, followed your recipe exactly and they turned out perfectly. I’m so pleased! P.S. I love your blog and also that you live in Zurich, like me. 🙂
Hoi Olivia,
Thank you so much for your lovely feedback! I’m so happy to hear that the Cannelés worked out perfectly for you. Thanks so much for popping by – it’s lovely to hear from another Zürcherin 🙂
I have great success with the Mini silicone molds. Always a hit!!
It always surprises me they need almost as much time as the regular size.
Hi Karen,
That’s great to hear! Yes, they surprisingly need a long baking time to caramelise on the outside. I’m glad you enjoy this recipe 🙂
Question, for up to how many days could you leave the batter in the fridge?
Hi Olivia,
I have left the batter in the fridge for 2-3 days with no problems. I probably wouldn’t leave it longer than that. Hope this helps!