Hot Cross Buns
For as long as I can remember, Easter has always been celebrated in my family with a batch or two of Hot Cross Buns.
This sentiment only amplified when I moved to Switzerland and discovered that these spiced buns were not as universal as the religious festival.
Easter Hot Cross Buns
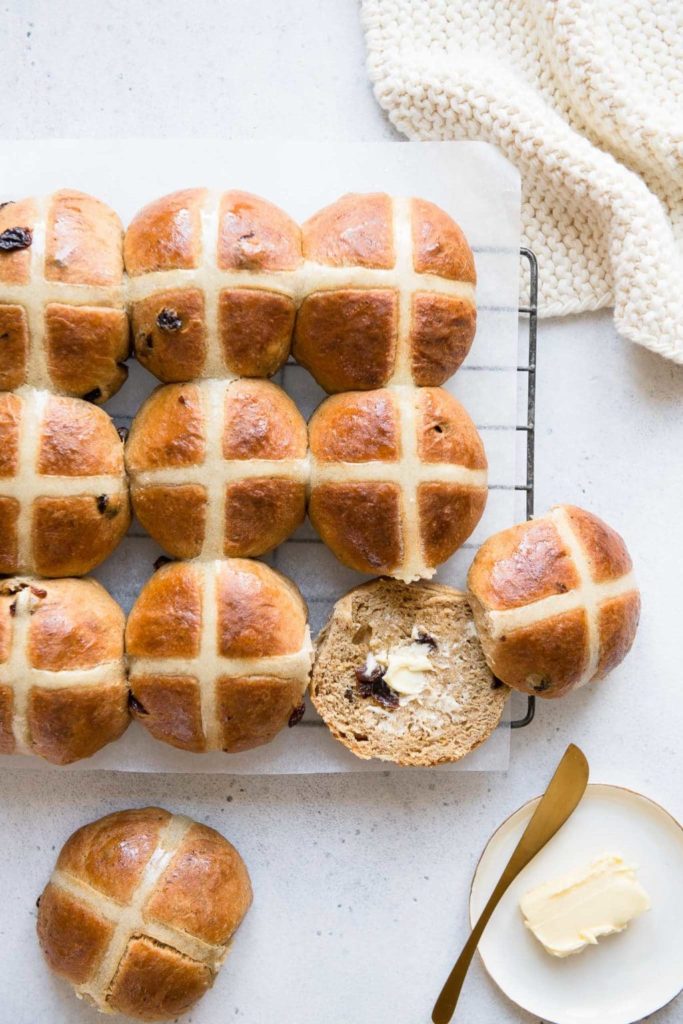
Hot Cross Buns are small, spiced yeast buns and which are traditionally eaten on Good Friday.
In Australia, bakeries start selling these buns almost as soon as the Christmas items have been removed from the shelves!
Hot Cross Bun Recipe
As has been the story of my journey in the kitchen, my craving for foods not available in my adopted home country has meant lots of opportunities to cook and bake things that I would not otherwise.
And so began my foray into the world of breads and yeast and endless experiments with different recipes for Hot Cross Buns.
The recipe for Hot Cross Buns below is a culmination of those experiments, gathered from scribbles on post-it notes containing amendments to recipes in cookbooks and cross-referencing other cookbooks, ultimately becoming, I suppose, my own recipe.
Easy Hot Cross Buns
Being a personal recipe, it responds to my expectations of a Hot Cross Bun, using a method which I find easiest for me.
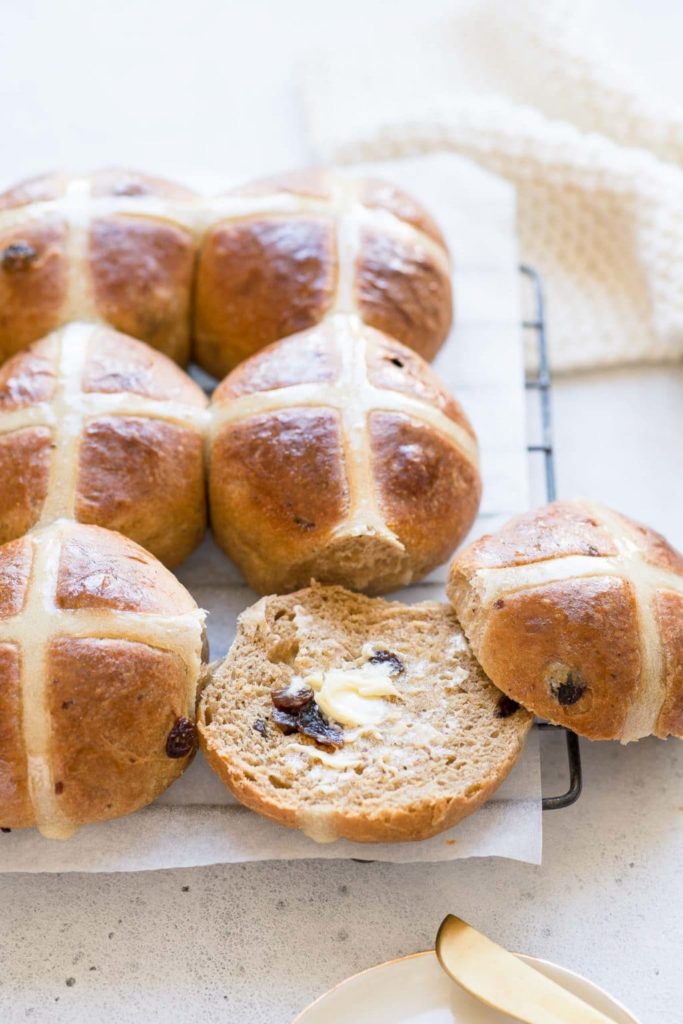
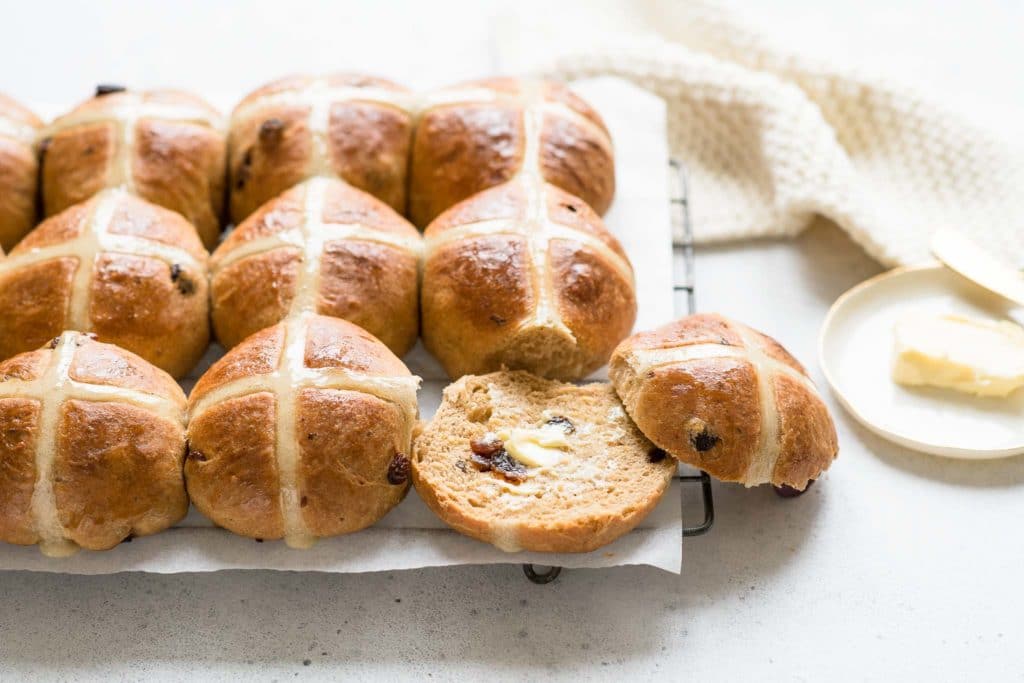
The spices have been amplified for more punch, the dried fruit content has been reduced to just raisins (and not too much, at that), and the method is in keeping with how I make most breads.
Different Types of Yeast
There are generally 3 different types of yeast that you can use in bread baking:
- Fresh yeast, which is usually sold in small cubes and found in the refrigerated section of the supermarket.
- Dried yeast, also called active dry yeast, which are sold in cans or sachets with small to large granules.
- Instant yeast, also called instant dried yeast, fast-action dried yeast, or easy blend yeast, which are sold in cans or sachets with fine granules.
Fresh yeast is easy to differentiate from dried yeast and instant yeast.
However, it is sometimes difficult to differentiate dried yeast from instant yeast, especially since they are often both called something similar, and they also look very similar.
Difference Between Dried Yeast and Instant Yeast
Dried yeast tends to have larger granules than instant yeast; instant yeast usually consists of very fine granules.
Dried yeast needs to be activated first, usually in a liquid at blood temperature, and you will know that it has activated once the liquid starts to froth. This process should take only about 5 minutes.
On the other hand, instant yeast can be added straight to the flour and does not need to be activated first.
If in doubt, check the instructions on the packaging to see if the yeast needs to be activated first. More information on the difference between dried yeast and instant yeast can also be found here.
The Hot Cross Bun recipe below uses instant yeast. But if you can only find dried yeast, please see my instructions in the Kitchen Notes below.
How to Make Hot Cross Buns
For a printable recipe, please scroll down.

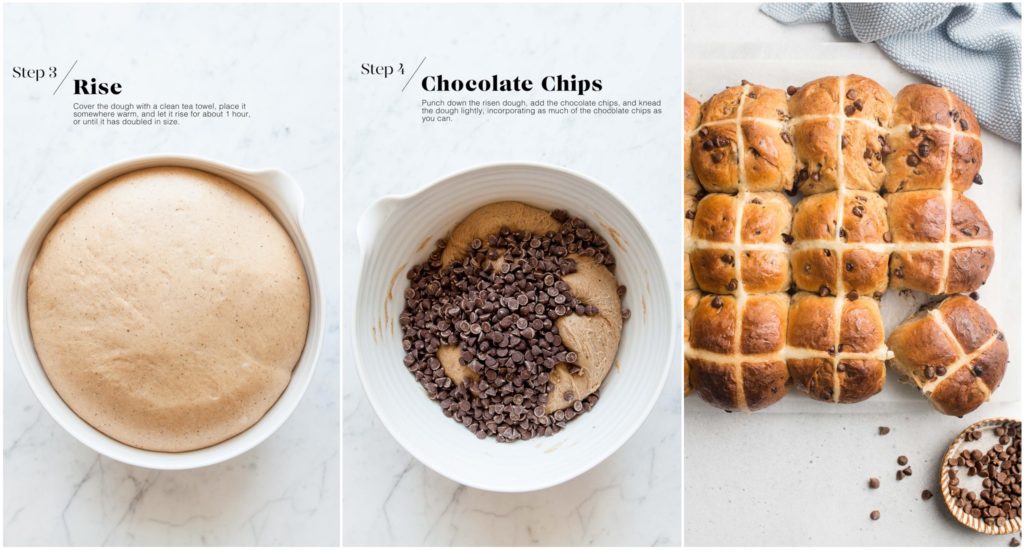
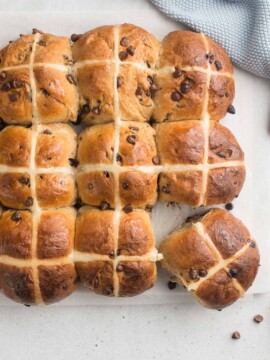
Chocolate Chip Hot Cross Buns
To make Hot Cross Buns with chocolate chips, please see my recipe with step-by-step photos here.
Tips for Making Bread Dough Ahead of Time
I love baking bread, but I don’t love getting up extra early to get started on the dough. So I typically make the dough the night before and allow it to rise slowly in the fridge overnight. The longer proofing time has the added benefit of allowing the dough to develop more flavour and a better texture. Come the morning, the dough will have at least doubled in size, and it will be ready for shaping as per the recipe.
To make the dough the night before:
- Make the dough as per the recipe.
- Place the dough into a large oiled bowl.
- Cover the bowl with plastic wrap or a reusable bowl cover.
- Place the bowl into the fridge.
- Let the dough rise overnight, or for at least 8-10 hours.
- The next morning, the dough should have at least doubled in size.
- Gently remove the dough from the bowl.
- The dough is ready for shaping and the second proof as per the recipe.
- As the dough will be cold from the fridge, the second proof may take slightly longer.

Hot Cross Buns
Ingredients
For the Hot Cross Buns
- 185 ml (¾ milk) milk
- 125 g (1 stick plus 1 tablespoon) unsalted butter
- 1 orange, zested
- 3 green cardamom pods
- 2 cloves
- 90 g (½ cup plus 1 tablespoon) light muscovado sugar, or light brown sugar
- 125 g (4 ½ oz) raisins
- 625 g (4 cups plus 3 tablespoons) white bread flour
- 7 g (2 teaspoons) instant dried yeast, see Kitchen Notes
- 1 teaspoon fine salt
- 2 teaspoons ground cinnamon
- 1 teaspoon nutmeg, freshly grated
- ½ teaspoon ground ginger
- ½ teaspoon cardamom seeds, freshly ground, optional
- 3 eggs
For the crosses
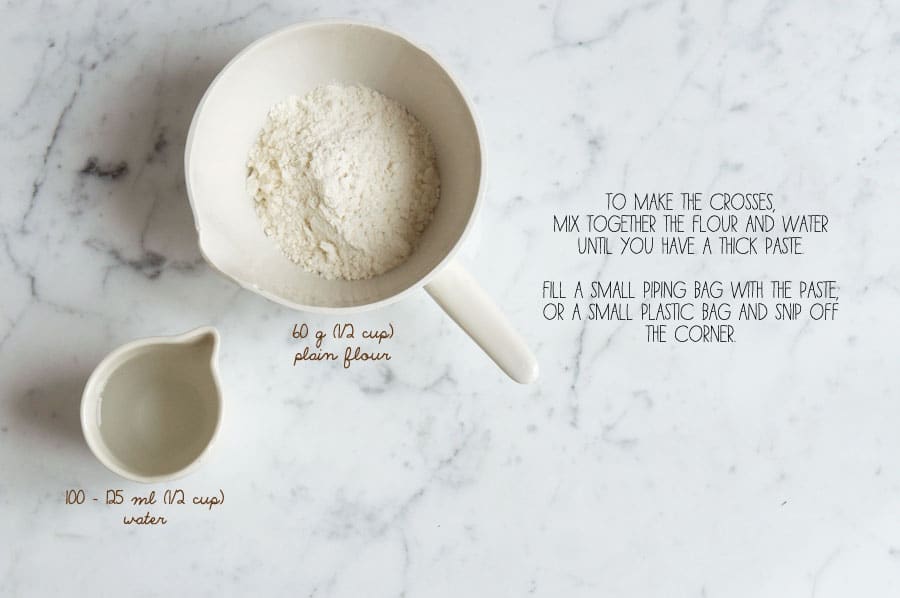
- 60 g (⅓ cup plus 1 tablespoon) plain flour, (all-purpose flour)
- 125 ml (½ cup) water
For the glaze
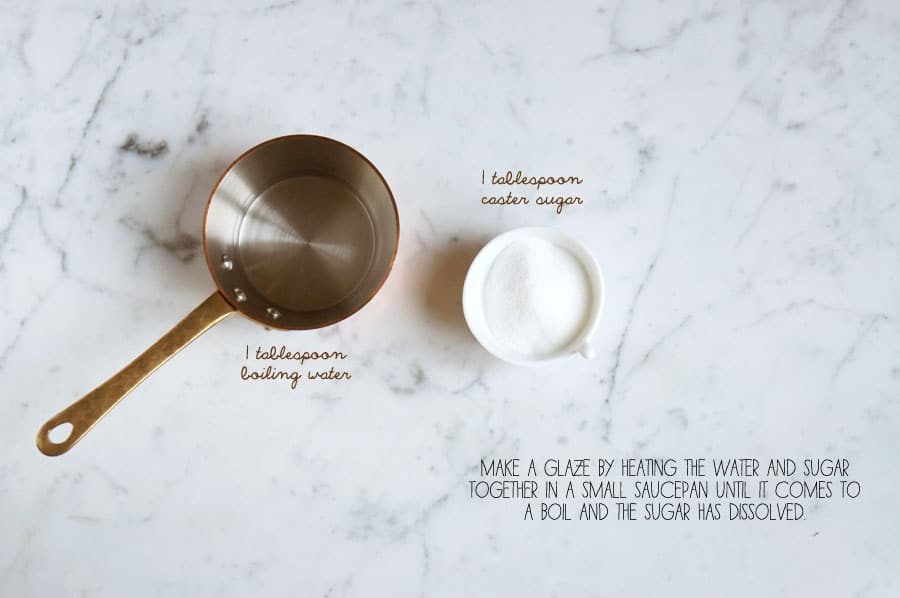
- 1 tablespoon boiling water
- 1 tablespoon caster sugar, (superfine sugar)
Instructions
Making the dough
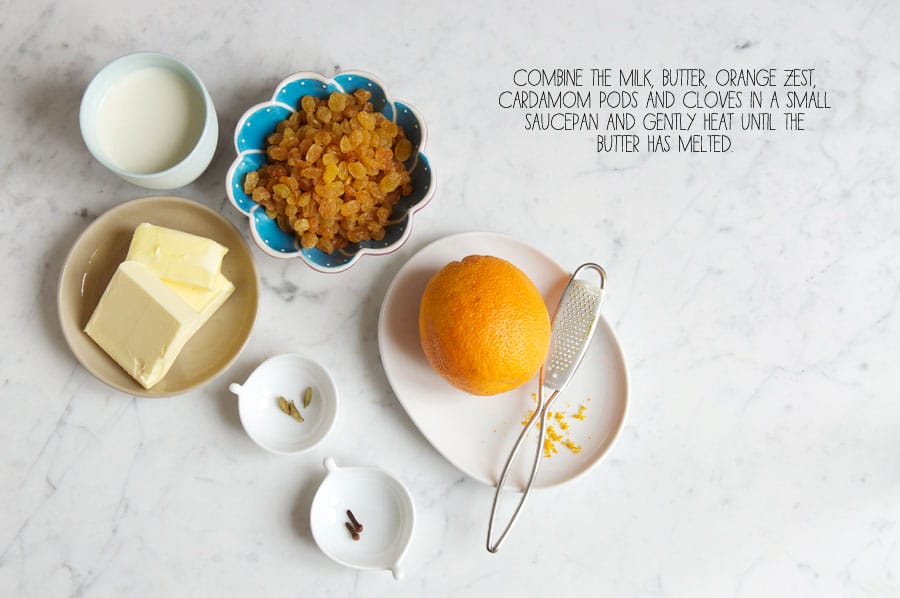
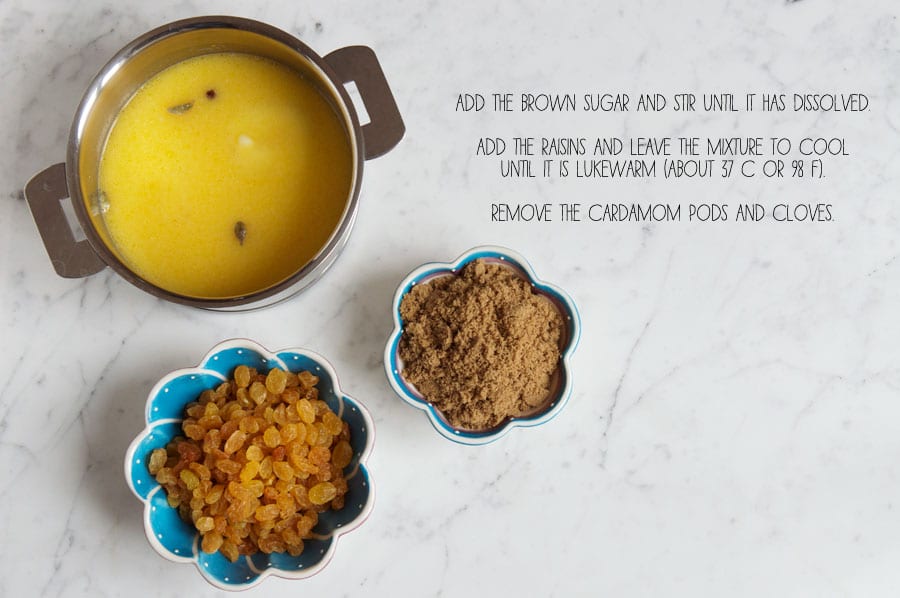
- Combine the milk, butter, orange zest, cardamom pods, cloves, brown sugar and raisins in a small saucepan and gently heat until the butter has melted and the sugar has dissolved.
- Leave the mixture to cool until it is lukewarm (about 37°C or 98°F).
- Remove and discard the cardamom pods and cloves.
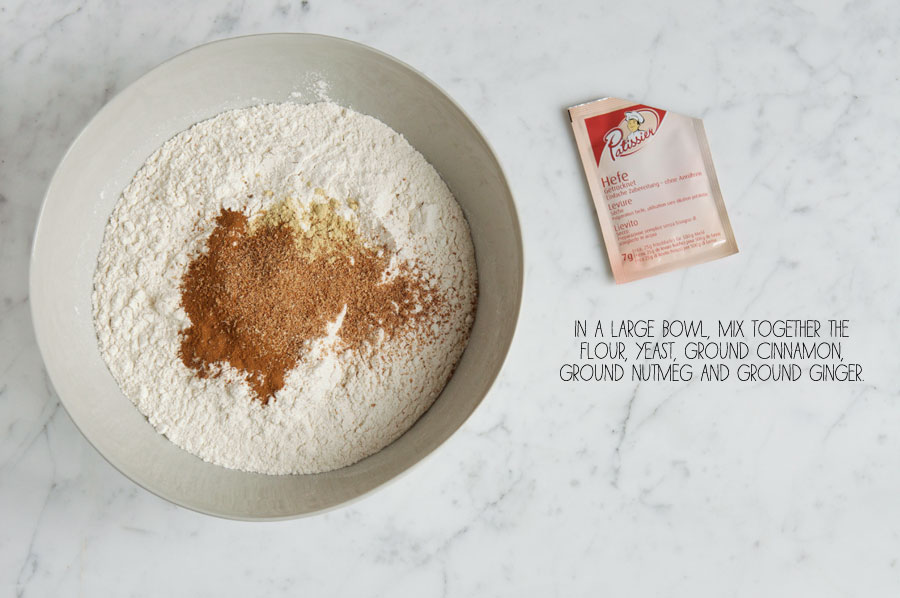
- In a large bowl, mix together the flour, yeast, salt, ground cinnamon, ground nutmeg, ground ginger, and ground cardamom seeds (if using).
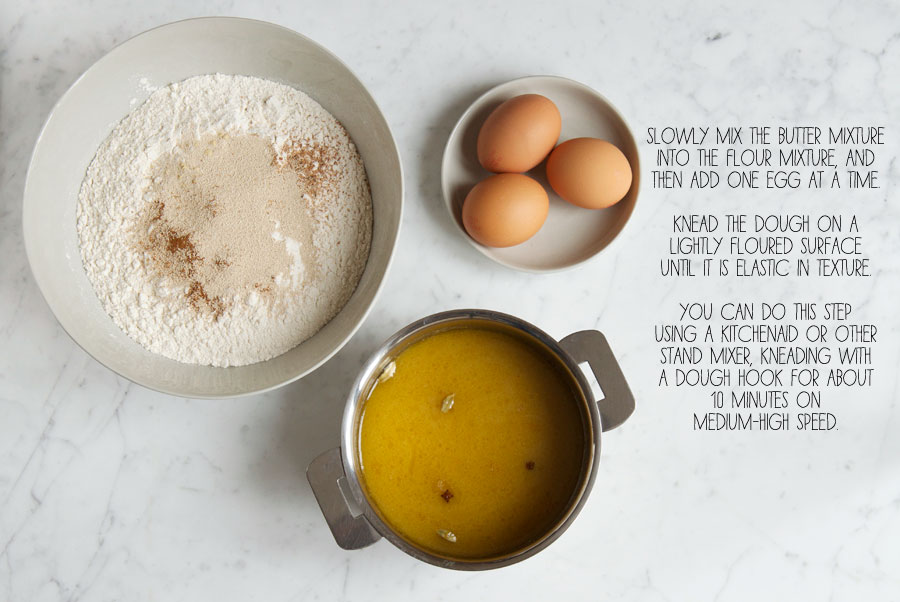
- Slowly mix the milk mixture into the flour mixture.
- Add one egg at a time.
- Knead the dough on a lightly floured surface until it is soft and elastic in texture. If you have an electric stand mixer, you can knead the dough using the dough hook for about 10-12 minutes on the lowest speed.
- If the dough is too wet, add some flour (about a tablespoon at a time) until the dough looks the right texture.
- Lightly oil a large bowl.
- Place the dough into the bowl, cover with a teatowel, and leave it to prove in a warm place for about 1 hour or until it has doubled in size.
Shaping the buns
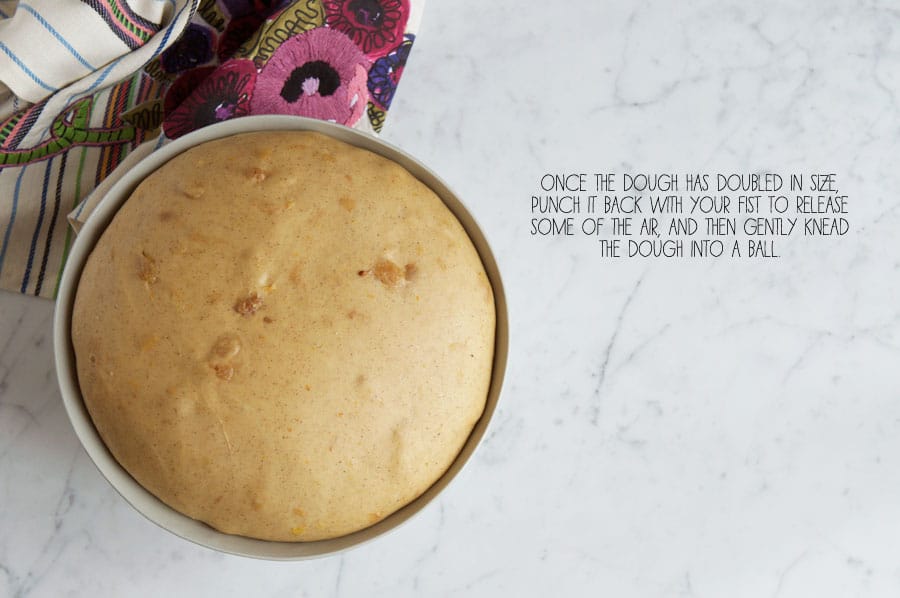
- Once the dough has doubled in size, gently remove it from the bowl.
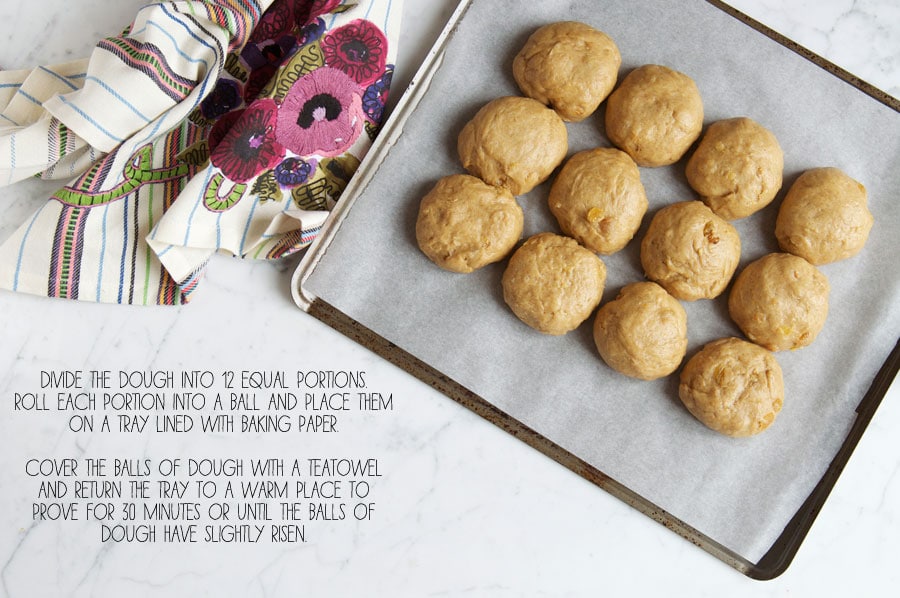
- Divide the dough into 12 equal portions. I like to weigh the whole dough, divide the weight by 12, and then weigh each portion of dough as I form them.
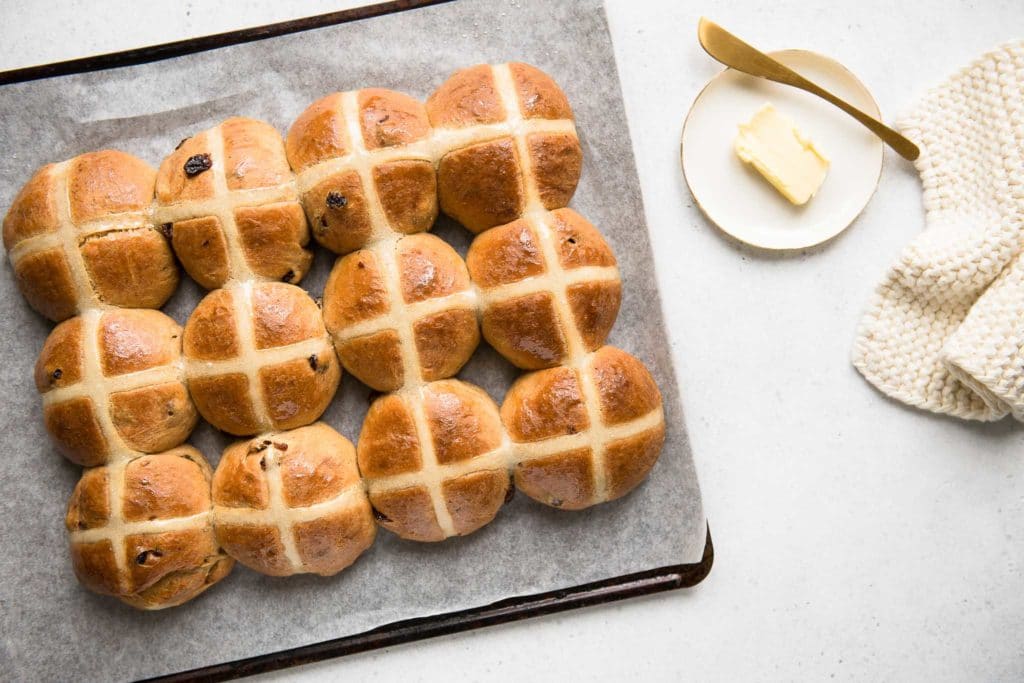
- Roll each portion of dough into a ball and place them on a tray lined with baking paper.
- Cover the balls of dough with a teatowel and return the tray to a warm place to prove for 30 minutes or until the balls of dough have slightly risen.
- Meanwhile, preheat the oven to 170°C/340°F (without fan).
Decorating the buns
- To make the crosses, mix together the flour and enough water in a small mixing bowl until you have a thick paste, but which is still runny enough to push through a piping bag.
- Fill a small piping bag with the paste.
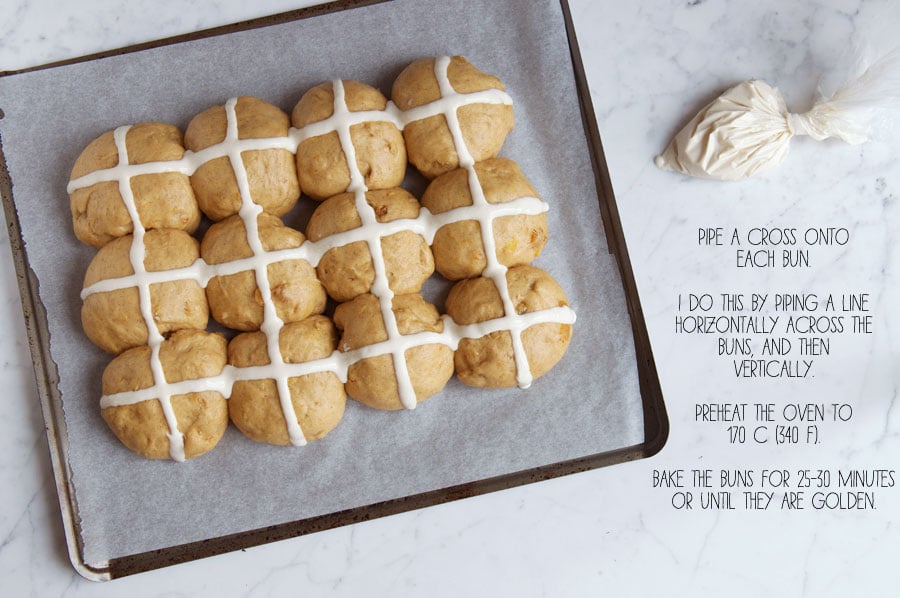
- Pipe a cross onto each bun. I do this by piping a line horizontally across all of the buns, and then vertically.
Baking the Hot Cross Buns
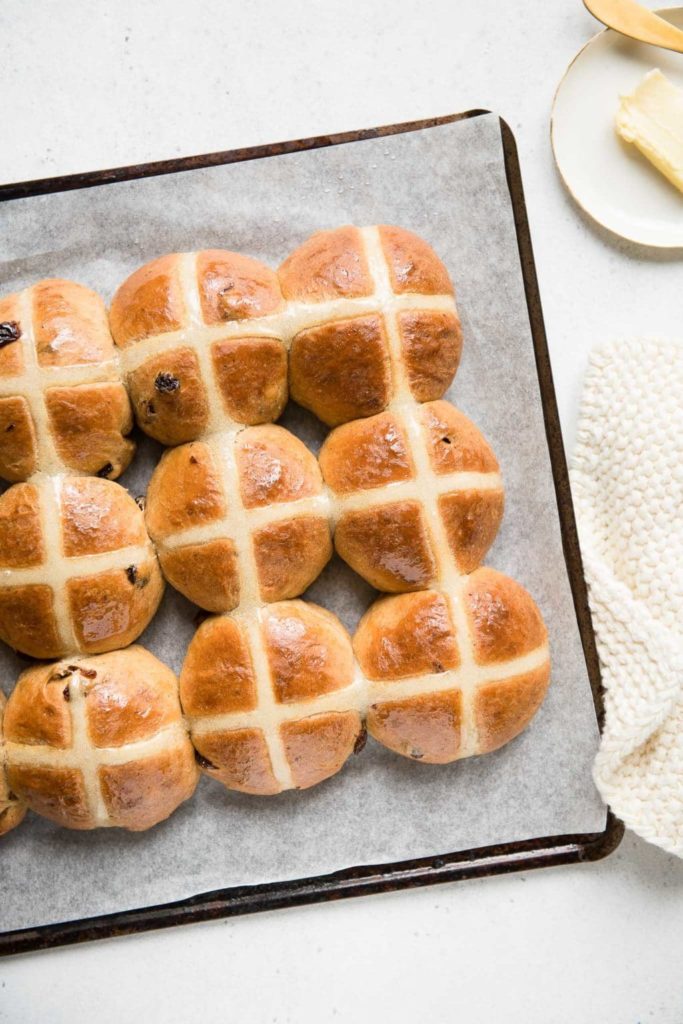
- Bake the buns for 25-30 minutes, or until they are golden.
- Meanwhile, make the glaze by heating the water and sugar together in a small saucepan until it comes to a boil and the sugar has dissolved.
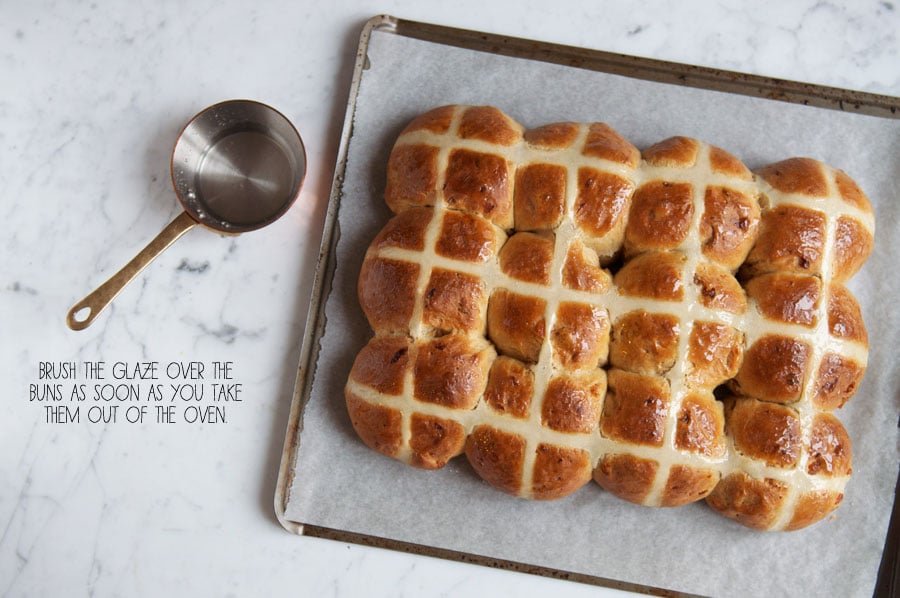
- Brush the glaze over the buns as soon as you take them out of the oven.
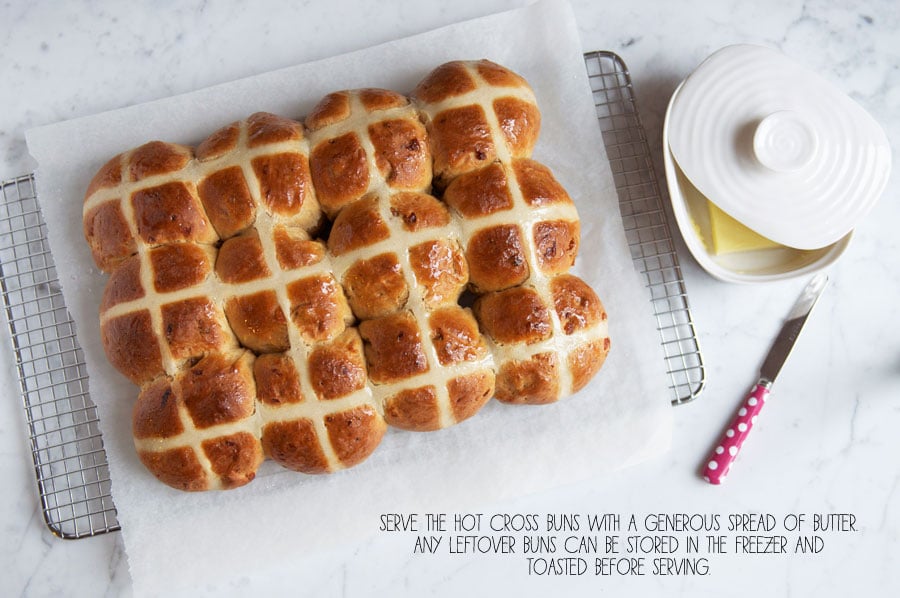
- Serve the hot cross buns with a generous spread of butter.
Kitchen Notes
- MAKE AHEAD TIPS
To start the dough the night before, make the dough as per the recipe. Place the bowl of dough (covered) in the fridge to proof overnight, or for at least 8 to 10 hours. During this time, it should have at least doubled in size. The next day, proceed with the rest of the recipe. As the dough will be cold, it may require a bit more time for the second proofing period. - DIFFERENT TYPES OF YEAST
* Please note that there is a difference between instant yeast (also called instant dried yeast or fast-action dried yeast) and dried yeast (also called active dry yeast). If you are not sure what type of yeast you have, please check the packaging for instructions on how to use the yeast.
* With instant yeast, you can add it directly to the flour mixture without having to activate it first.
* With dried yeast, you will need to activate it first (usually in some warm liquid). - DIFFERENT TYPES OF FLOUR
* Bread flour contains 11-13% protein content, which is required to develop more gluten in the dough, which in turn gives yeasted bread a nice, chewy texture.
* For Swiss readers, I use Zopfmehl (or farine pour tresse) when making bread and enriched dough. - PROOFING THE DOUGH
Dough needs a warm environment for the yeast to activate and cause the dough to rise. If you don’t have a warm place in your home, try one of the following ideas:
* In the oven with the oven light switched on (works only for some ovens).
* In the oven with a tray of boiling water on the bottom shelf.
* In the oven at a low temperature of about 25-40°C (77-104°F). - DRIED FRUIT
You can also play around with the dried fruit content, or omit it completely for just a plain spiced bun. - MAKING SMALLER BUNS FOR KIDS
This recipe produces 12 large buns. You could also divide the dough into 15 portions to produce slightly smaller buns which are more kid-friendly. - STORAGE
Hot Cross Buns are best eaten the day they are made. Any leftover hot cross buns can be stored in the freezer and toasted before serving. - OVEN TEMPERATURES
All recipes on this website state temperatures for a regular oven (i.e. a conventional oven without fan). If you have a convection oven with a fan, please consult the manufacturer’s handbook on how to adjust the temperature and baking time accordingly. - CONVERSIONS
To convert from cups to grams, and vice-versa, please see this handy Conversion Chart for Basic Ingredients.
Did you make this recipe?
Please leave a comment below and share your photos by tagging @eatlittlebird on social media and using #eatlittlebirdUpdate
This recipe was first published on 28 March 2013. It has been updated with new photos and more comprehensive recipe notes.


These look STUNNING! I love your presentation and quirky photos and illustrations – thank you for a lovely blog!
Thank you for your lovely words and for popping by 🙂
Gorgeous! I’ve never actually had a hot cruss bun, but all this talk of them is making me want to try my hand at it. I’ve heard also of piping on cream cheese crosses on the finished bun, what’s your take on that?
I hope you will have a chance to try Hot Cross Buns one day – they are really delicious! These days, there are so many different versions to be found. I’m not so sure about cream cheese crosses … I don’t think they would go very well with the spiced bun but I would still be curious to try!
These are beautiful!! I also baked hot cross buns today. . yours look so much prettier! this was my first time baking them and I followed a friend’s recipe. . I love your version!
I’m happy to hear that you made some Hot Cross Buns! I think they are a lovely tradition to have at Easter. I’m sure I will still be tweaking my recipe in years to come but, for now, I’m quite happy with this version 🙂
They look amazing! I was literally placing my first ever homemade batch into the oven when the notification of your post arrived! I hope mine turn out as well!
Hello! Lovely to see you here 🙂 I’m sure your batch turned out beautifully. Hope are are having a lovely Easter!
Ooh I like the look of these. Going to attempt with my children today!
Good luck and have fun! I’m sure the kids will love getting their hands into this sticky dough, as well as eating them 🙂
These look absolutely beautiful. Happy Easter!
Happy Easter to you also!
I love hot cross buns, especially home made ones. Unfortunately I haven’t gotten around to making any this year, but I’ve made them for past Easter celebrations. I can’t wait to see more recipes from you.
Although I guess Hot Cross Buns could be eaten at any time of the year (minus the crosses), I think they are a lovely tradition to have at Easter. This is why I try to make them every year, otherwise I couldn’t bear to wait another year! But when I was living in Australia, the bakeries sold such delicious buns that I doubt I would have made them at home if I was still living there.
Love your programme and your recipes I will try your hot cross buns. Happy easter.
Hey, I have tried making this recipe twice and each time my dough did not rise during the first prove. I followed the recipe exactly, except for 1 small change of using lemon zest instead of orange. Any ideas why it hasn’t work out for me? Thanks!
Oh dear! What type of yeast did you use? If you used dried yeast, please see my Cook’s Notes as you will need to activate the yeast in some warm liquid first. Otherwise, did you leave the dough to prove in the oven or in a warm enough place? Depending on the type of yeast and room temperature, you may need more or less proving time. I hope we can work out why your dough hasn’t risen!
Oopsy, I didn’t read the cooks notes! My yeast is active dried yeast so I guess I should have put it in warm milk beforehand. Thanks! Hopefully 3rd time lucky will work for me. They look delicious so I can’t wait to try them.
Oh at least we have identified why it hasn’t risen. If it helps, please see my recipe for Fruit Loaf as I used dried yeast there. Hope this helps and I hope you will be third time lucky! I have my fingers crossed for you. And thank you for persisting with this recipe. I really do hope you will enjoy it after all of this effort 🙂
Thanks for your help. Hot cross buns are always worth the effort 🙂
They look so perfect Thanh! Happy Easter!
Happy Easter to you and your family, Anna! xx
Your buns look great, and I’ve saved the link so I can make them next year. Wish I had seen your post a couple of weeks ago so that I could have made them in time for this Easter! I’m a Kiwi living in the Netherlands, and I’m having huge troubles finding strong white flour (bread flour) here. Do you have the same problem in Switzerland and do you have any tips on how I can get my hands on it? Thanks!
Hi Monique,
Strong white bread flour is also not sold in Switzerland, although there are many other types of “bread” flours available here for certain types of bread.
I buy my strong white bread flour online from an expat website in Switzerland called the Britshop. I think they only deliver in Switzerland but my advice would be to see if something similar exists in the Netherlands.
I will ask a Dutch friend of mine if he has any tips 🙂
Hey Monique, Dutch friend here 😉 I have the same trouble finding strong bread flour. You can buy Italian ’00’ flour online and presumably in some delis, and some mills (if you’re lucky enough to live near one) sell various types of flour. However, I’ve never had any disasters using patent tarwebloem in any bake, including loafs. Having said that, I’ve never used strong bread flour, so don’t really know if it makes much difference. Maybe I’ve been missing out all these years 😉
Joost,
Thank you so much for your helpful reply! Since I moved to Switzerland, I used normal plain flour when baking bread and found there to be little difference. Since I’ve been able to get my hands on strong white bread flour, I prefer to use it when I can because, for some reason, I feel more confident using it for breads, etc. I might need to do a proper experiment with both flours 🙂
Sofficissimi e bellissimi.. di una bontà unica..
mi piace molto anche la foto degli ingredienti, anch’io la propongo così..
Happy Easter Thanh! Awww love your hotcross buns, I baked a batch and I’m so pleased with the results. They disappeared before my very eyes 🙂
I have one tiny question, if I omit the sugar the next time I make the buns would the recipe suffer?
Hi Rushi!
Lovely to hear from you. I’ve been meaning to write to you … I’m so glad you enjoyed this recipe! I personally like the addition of sugar to give a sweeter bun; omitting the sugar would have an effect on the taste but I’m not sure about the bread itself.
Have you tried Nigella’s recipe in Feast. Her recipe contains no sugar and I found it to be bland for my tastes. But it’s all about experimenting with different recipes before you arrive at one that you like 🙂
I love chocolate and hot cross buns! so the idea of combining the two sounds delicious! The cinnamon buns here look yummy.
This recipe looks delish! As a kiwi living in the US I couldn’t believe it when I found no hot x buns on the store shelves!! How do you think this recipe would survive if it was made into a loaf (for toast) instead of buns? I read your fruit loaf recipe, but i love the spices and cinnamon in hot x buns! 🙂
Hi Laura,
Sorry for the late response … I think you could definitely use this recipe to make a fruit loaf, roughly following the steps in my recipe for Fruit Loaf. Looking at both recipes, I daresay you could get 2 loaves out of this Hot Cross Bun recipe. It’s something I’ve been thinking about doing for ages but always end up making the buns instead. I might try it myself soon (I have some bread flour which I need to use up) and report back here on the results 🙂
An extra spice kick and not too many raisins … sounds like my kind of hot cross bun. Thanks for sharing your personal recipe!
These turned out perfect. Thanks, great recipe. Simon
I’m excited to make these tomorrow! As I’m going through the recipe I noticed it doesn’t call for salt- was this an oversight? How much should I use?
Hi Rob,
There is no salt in this recipe. Some bread recipes call for salt, but I don’t think it is necessary for these hot cross buns. However, if you wish to add some salt, I would suggest adding 1/4 teaspoon of fine salt with the flour. Hope you will enjoy the recipe.
Die sehen toll aus! Super Idee!
This is a great idea for my breakfast. Looks very tasty! Thank you!
Delicious!! I made my first batch on Saturday and they were gone by dinner. They were much easier to make than I first thought. Thank you for a lovely recipe!
Excellent recipe! These hot cross buns tasted delicious and looked very beautiful too. I’m going to try and bake it into a loaf next time. Also going to try your chocolate version. Love your recipes!
Found your recipe on Pinterest and just baked a batch this morning. Very delicious!! I’ll be making these again for Easter.
Found your recipe on Pinterest too! Love the step by step photos. I added some mixed spice as well and it tasted perfect.
I’ve used your recipe several times now and they make the best hot cross buns! I added more of the spices last time but the kids like them with less. Just made another batch today!
Beautiful! These hot cross buns were nice and soft, and just the right amount of spice. Actually I would prefer more spice in my buns but these were just perfect for my family. I will definitely make these again.
I’ve made this recipe several times with great success. Do you think I could also bake the dough in a loaf pan? If so, what size loaf pan and for how long? TIA!
Amazing recipe! This was my first time making Hot Cross Buns and they turned out just like your photos. Thank you so much for such an easy to follow recipe. The buns were soft and fluffy with just the right amount of spice. So good!
Beautiful hot cross buns and very tasty! I served them straight from the oven but if I had to be honest, they tasted better toasted the next day 🙂 I will make them again this Sunday for sure.
Wow, a wonderful recipe! The buns were very delicious and so soft and tender. Thank you for sharing.
Wonderful recipe. My hot cross buns turned out beautifully, very soft and delicious.
I love this recipe. I made these buns for the second time today and doubled the spices – thanks for the hint in your IG stories! I prefer them with the extra spice 🙂
Beautiful recipe!
Absolutely delicious. Very easy to make and the buns were lovely and soft, with the right amount of spice.
I tried your hot cross bun recipe today and they turned out wonderfully.
I made these hot cross buns for brunch today and they were amazing! They were lovely and soft buns and tasted delicious. I just wish there were leftovers, ha ha!
Beautiful recipe! We all enjoyed the hot cross buns very much.
Found the recipe! My Aussie gonna love it!
Amazing recipe! My family and I loved it xx
So Easter was a bit hectic for us this year and I missed out on making hot cross buns from scratch. Nevermind! I decided to make a batch today and they were truly wonderful. Thank you for your recipe.