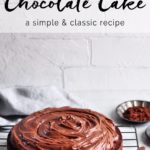
Easy Chocolate Cake
- Prep Time: 20 mins
- Cook Time: 35 mins
- Total Time: 55 minutes
- Yield: Serves 6-8
- Category: Cakes
- Method: Baking
- Cuisine: British
An easy chocolate cake recipe that is moist and delicious, perfect for birthdays and celebrations.
Ingredients
For the chocolate cake
- 200 g (2 sticks) unsalted butter, softened
- 200 g (1 cup) caster sugar (superfine sugar)
- 200 g (1 1/3 cups) plain flour (all-purpose flour)
- 40 g (1/3 cup) cocoa powder
- 3/4 teaspoon baking powder
- 1/4 teaspoon baking soda
- 1/2 teaspoon fine salt
- 150 ml or 170 g (2/3 cup) sour cream or crème fraîche
- 2 eggs
- 1 1/2 teaspoons vanilla extract or vanilla bean paste
For the chocolate frosting
- 80 g (3 oz) milk chocolate (e.g. 42% cocoa, semi-sweet chocolate)
- 80 g (3 oz) dark chocolate (e.g. 70% cocoa, bittersweet chocolate)
- 75 g (3/4 stick) unsalted butter
- 125 ml or 150 g (1/2 cup) sour cream or crème fraîche
- 1 teaspoon vanilla extract or vanilla bean paste
- 300 g (2 1/4 cups) icing sugar (powdered sugar), sifted
Instructions
Make sure all of the ingredients are at room temperature before starting.
To make the chocolate cake
- Preheat the oven to 180°C (350°F) (without fan).
- Line the bottom of a 23 cm (9 inch) round cake pan and grease the sides.
- Place all of the ingredients into the bowl of a food processor and blitz until the mixture is well-combined. The batter should be thick and smooth.
- Alternatively, if you do not have a food processor:
- Cream the butter and sugar in the bowl of a stand mixer with the flat paddle attachment.
- Slowly beat in the flour, cocoa, sugar, baking powder, baking soda and salt.
- Beat on low speed until all of the ingredients are incorporated.
- In a small bowl or jug, lightly whisk together the sour cream, eggs and vanilla.
- Slowly add the wet ingredients to the mixer, and beat until the batter is thoroughly mixed.
- Pour the batter evenly into the prepared cake pan and bake for 35-40 minutes, or until a skewer inserted in the middle comes out clean.
- Place the cake pan on a wire rack and let the cake cool in the pan for about 10 minutes, before turning it onto the wire rack to cool completely.
To make the chocolate frosting
- Melt the chocolate and butter in a bain-marie or a bowl over a pan of simmering water, taking care not to let the bowl come into contact with the water. If you have an induction stove, you can melt the chocolate and butter directly in a saucepan over low heat.
- Once the chocolate has melted, take the bowl off the heat.
- Stir in the sour cream and vanilla extract.
- Whisk the icing sugar (powdered sugar) into the chocolate mixture.
- The frosting should be thick enough to cover the cake, but soft enough to spread easily.
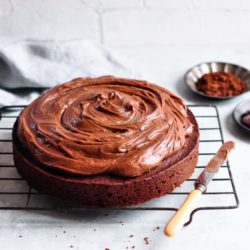
- Frost the cake as per the photo with a tall layer of frosting, or cover all sides of the cake completely with the frosting – however you like.
- Leave the cake to set for at least a few hours before serving.
Kitchen Notes
As this is one of my go-to recipes for birthday cakes, I thought it would be helpful to also provide baking times when using different sized cake pans.
12 cm (5 inch) round cake pan
Fill the pan with batter to about 2 cm from the top. You will have leftover batter from the recipe above. Bake for 20-25 minutes, or until a skewer inserted in the centre comes out clean.
16 cm (6 inch) round cake pan
Fill the pan with batter to about 2 cm from the top. You will have leftover batter from the recipe above. Bake for 25-35 minutes, or until a skewer inserted in the centre comes out clean.
20 cm (8 inch) round cake pan
The above recipe can be used to fill two cake pans of this size. Fill the pans with batter to about 2 cm from the top. Bake for about 30 minutes, or until a skewer inserted in the centre comes out clean.
23 cm (9 inch) round cake pan
The above recipe can be used to fill one cake pan of this size. To make a double-layer cake, double the above recipe and use two pans of this size. Fill the pan with batter to about 2 cm from the top. Bake for 35-40 minutes, or until a skewer inserted in the centre comes out clean.
26 cm (10 inch) round cake pan
The above recipe can be used to fill one cake pan of this size. To make a double-layer cake, double the above recipe and use two pans of this size. Fill the pan with batter. Bake for 35-40 minutes, or until a skewer inserted in the centre comes out clean.
![]() STORAGE
STORAGE
The cake keeps well for several days on a covered cake stand.
 OVEN & STOVE TEMPERATURES
All recipes on this website have been tested on an induction stove and/or with a conventional oven (i.e. an oven without fan). All recipes on this website state temperatures for a conventional oven, unless otherwise mentioned. If you have a convection oven (i.e. an oven with a fan), please consult the manufacturer’s handbook on how to adjust the temperature and baking time accordingly.
 CONVERSIONS To convert from cups to grams, and vice-versa, please see this handy Conversion Chart for Basic Ingredients.
Nutrition
- Serving Size: Nutritional info per slice
- Calories: 529
- Sugar: 43.5g
- Sodium: 325.3mg
- Fat: 30.5g
- Carbohydrates: 61.2g
- Fiber: 2.3g
- Protein: 5.6g
- Cholesterol: 94.8mg
View the recipe online: https://eatlittlebird.com/easy-chocolate-cake/