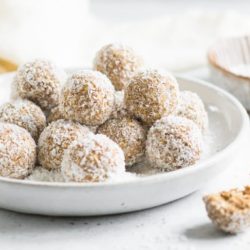
Apple Pie Bliss Balls
- Prep Time: 15 mins
- Cook Time: 0 mins
- Total Time: 15 minutes
- Yield: Makes about 25 balls
- Category: Lunch
- Method: Food Processor
- Cuisine: Australian
These Apple Pie Bliss Balls are sugar-free, nut-free and gluten-free! Perfect for school lunch boxes and for snacking.
Ingredients
- 1 large apple (I use Gala), cored and diced
- 265 g (1 1/2 cup) rolled oats
- 35 g (1/3 cup) dessicated coconut (shredded coconut), plus 3 tablespoons extra for rolling
- 6 medjool dates, deseeded
- 50 g (1 cup) dried apple
- 1 1/2 teaspoons ground cinnamon
- 1 tablespoon maple syrup (optional)
Instructions
- Place all of the ingredients, except the extra coconut, into a food processor.
- Blitz for 1-2 minutes until everything is finely chopped and comes together in a moist ball of dough.
- Roll about 1 tablespoon of the apple mixture into a small ball, and repeat until you have used all of the mixture. I like to use a small ice-cream scoop with a 15 ml (1 tablespoon ) capacity to make all of the bliss balls the same size.
- Place the extra coconut onto a small plate.
- Gently roll each bliss ball in the coconut, and then roll them again in your hands so that each bliss ball is evenly coated.
- Store the bliss balls in a covered container in the fridge
Kitchen Notes
 STORAGE TIPS
The bliss balls keep well in the fridge for several days, and they can also be frozen. Simply pop the frozen bliss balls into your child’s lunch box and it should defrost by lunch time 🙂
 RECIPE CREDIT
This recipe is adapted from Goodie Goodie Lunch Box
 CONVERSIONS
To convert from cups to grams, and vice-versa, please see this handy Conversion Chart for Basic Ingredients.
View the recipe online: https://eatlittlebird.com/apple-pie-bliss-balls/