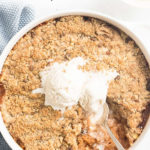
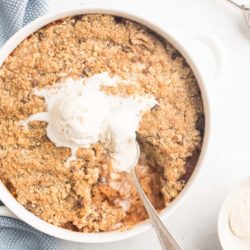
Apple Crumble
- Prep Time: 15 mins
- Cook Time: 30 mins
- Total Time: 45 minutes
- Yield: Serves 3 to 4
- Category: Desserts
- Method: Oven
- Cuisine: Australian
Easy and delicious Apple Crumble. A comforting and nostalgic dessert which everyone will love. Recipe with step-by-step photos.
Ingredients
For the apple filling
- 1 kg (2 lb) apples (see Kitchen Notes)
- 1 tablespoon butter
- 2–4 tablespoons vanilla sugar or caster sugar (superfine sugar) (or to taste)
- 1 teaspoon ground cinnamon (optional)
- juice of 1 orange
For the crumble topping
- 120 g plain flour (all-purpose flour)
- pinch of fine salt
- 100 g (1 stick) unsalted butter
- 3 tablespoons vanilla sugar or caster sugar
- 3 tablespoons light brown sugar
- 1 teaspoon ground cinnamon (optional)
For serving
- vanilla ice-cream
Instructions
For the apple filling
- Peel, core and roughly chop the apples.
- Place the chopped apples into a large saucepan.
- Add the butter, sugar, vanilla, ground cinnamon (if using) and half of the orange juice.
- Cook over medium-high heat until the apples have softened. Depending on the type of apples you have used, this can happen within 5-10 minutes, or it might take longer.
- Stir frequently and add more orange juice if the mixture looks a bit dry.
- Some apples release a lot of liquid during cooking, so if your apple mixture has a lot of liquid, keep simmering until most of the liquid has evaporated.
- Once the apples have softened to your liking, removing the pan from the heat.
- Taste to see if you need to add more sugar.
- Transfer the cooked apples to a large pie dish, about 23 cm or 9 inch in diameter.
- Set aside to cool slightly.
For the crumble topping
- Place the flour, salt and butter into a the bowl of a stand mixer with a flat-paddle attachment.
- Beat on low speed until the butter starts to form large clumps with the flour, and the mixture resembles wet sand.
- Alternatively, you can do this by hand by using your fingertips or a pastry blender to rub the butter into the flour, until you have a mixture which resembles wet sand.
- Use a fork to stir through the sugars and ground cinnamon (if using).
- The crumble topping is ready to be used as is. However, if you like to have more crunchy bits in your crumble, you can use your fingertips to squeeze bits of the mixture together to form little clumps.
To assemble
- Preheat the oven to 200°C (390 °F).
- Sprinkle the crumble topping over the apple filling.
- Bake for about 30 minutes, or until the crumble is nicely golden and the apple filling is bubbling.
- Serve warm.
Kitchen Notes
 WHICH TYPE OF APPLES TO USE
* If you like a soft and smooth apple filling, choose apples which break down upon cooking, such as Braeburn.
* If you like firm apple pieces in your apple filling, choose cooking apples which hold their shape during cooking, such as Granny Smith or Gala.
 MAKE AHEAD TIPS
*You can make both the apple filling and crumble topping ahead of time.
* The apple filling can be made up to several days in advance and kept covered in the fridge until you are ready to bake.
* The crumble topping can be made in advance and kept in the freezer in zip-lock freezer bags. There is no need to defrost the crumble – simply use straight from frozen.
* It is best to assemble the dish just before baking. If you cover the apples with the crumble topping too far in advance, the crumble will absorb a lot of the liquid from the apples, which will make the overall dish too dry.
 VARIATIONS
* Finely grate some fresh ginger into the apple filling.
* Add fresh or frozen berries to the cooked apple filling.
* Add chopped ripe stone fruits (apricots, peaches or plums) to the cooked apple filling. If they are somewhat firm, cook the stone fruits with the apples.
* Add 1 teaspoon of ground ginger to the crumble mixture.
* Add 1/2 cup to 1 cup of rolled oats to the crumble mixture.
 MAKE INDIVIDUAL APPLE CRUMBLES
Fill small ramekins or oven-proof teacups with some apple filling (about halfway), and sprinkle generously with the crumble topping. Bake at 200°C (390°F) for about 15-20 minutes, or until golden and bubbling.
 RECIPE CREDIT
This recipe is inspired by Nigella Lawson’s recipe in How to Eat.
 OVEN TEMPERATURES
All recipes on this website state temperatures for a regular oven (i.e. a conventional oven without fan). If you have a convection oven with a fan, please consult the manufacturer’s handbook on how to adjust the temperature and baking time accordingly.
 CONVERSIONS
To convert from cups to grams, and vice-versa, please see this handy Conversion Chart for Basic Ingredients.
View the recipe online: https://eatlittlebird.com/apple-crumble/